Final Project: HACHIKO - My Best Buddy
Overview
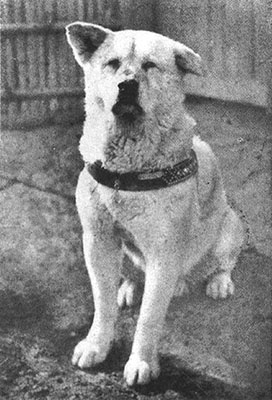
For the final project, I made HACHIKO, which is a buddy robot that could do various things for you, with you.HACHIKO is inspired by the famous Japanese dog, Hachi, which was a legendary loyal dog. What if you had a robotic buddy that acted like a well trained dog, and helped you do something, or fetched something for you? HACHIKO is the robot that could do just that.
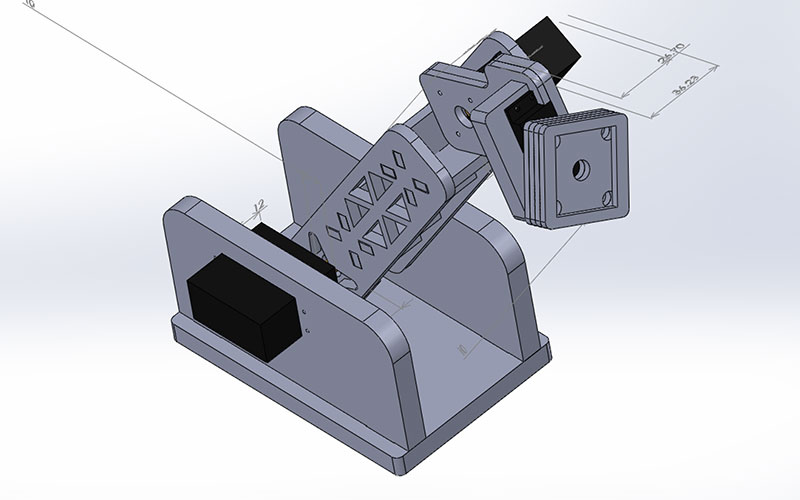
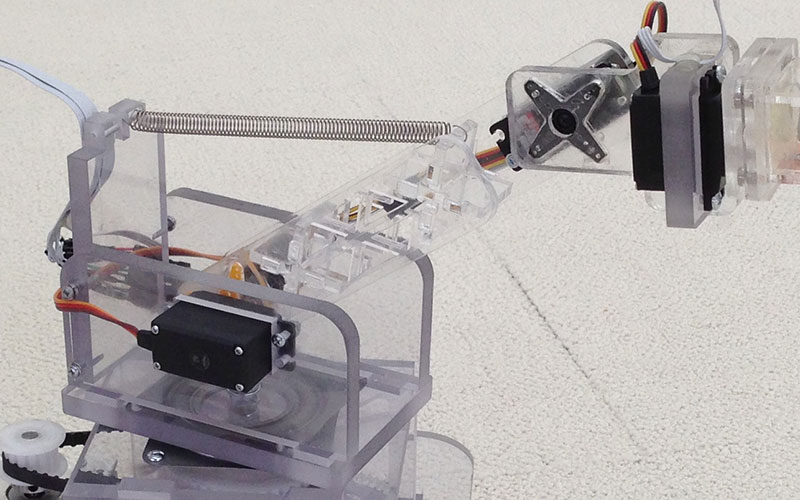
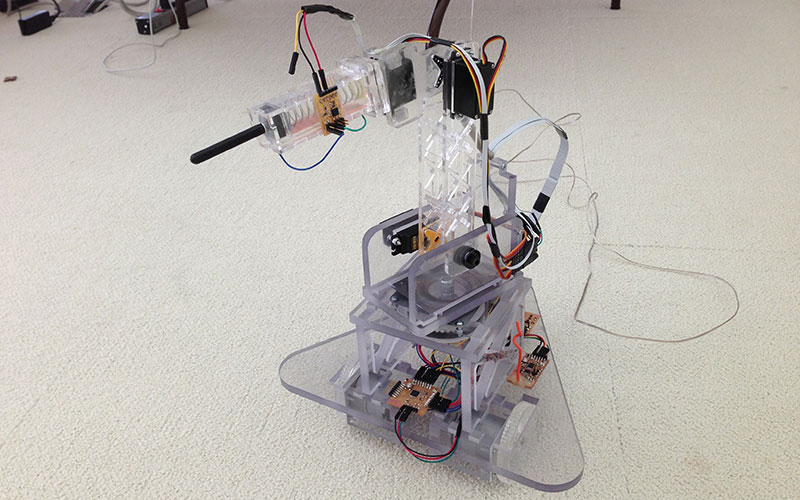
HACHIKO has a mechanical arm with a detachable head. Depending on what you want it to do, you can design, make, and attach to fulfill your needs. For example, if you want it to fetch something, you can attach a mechanical claw. If you want it to poke objects and sense its stiffness, you can attach the stiffness sensor.
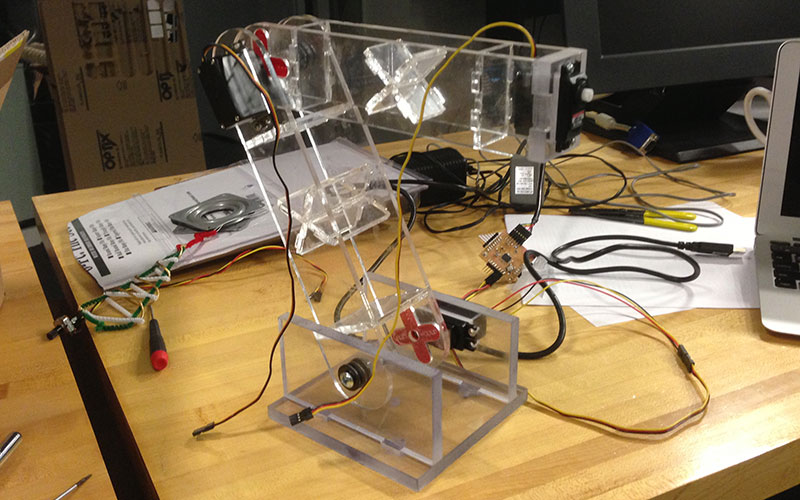
The current prototype was entirely constructed mostly with acrylic plastic. The mechanical arm has 3 joints with servo motors. The arm is fixed on a motorized swivel for rotation. The main base is equipped with 2 DC motors for maneuvering. Finally, it is has a RF module for receiving commands remotely. However, it does not have a battery, so it requires an external 12 V power source.
Revising the Robot Base
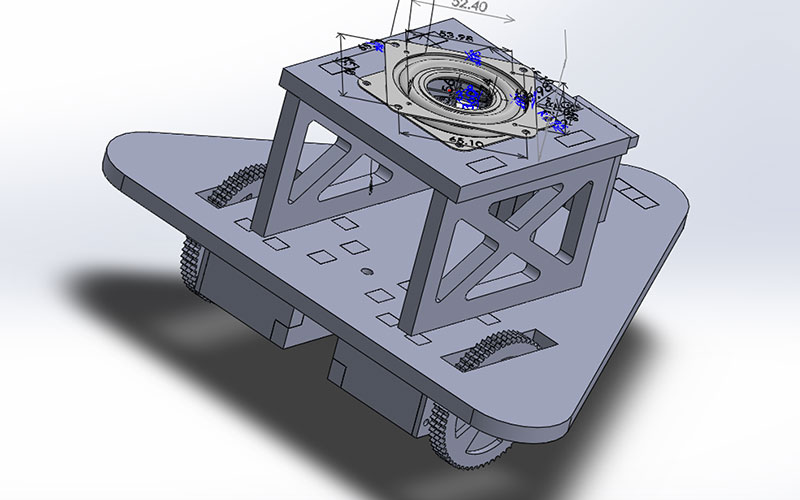
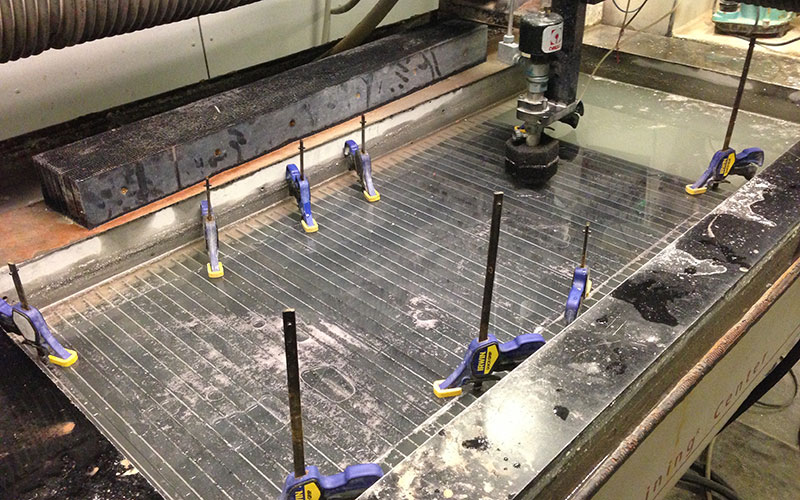
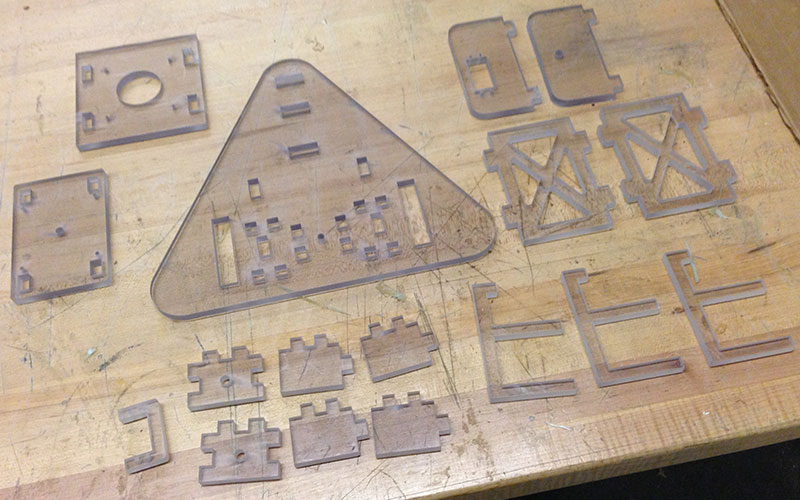
I started off by revising the the robot base. The first version was made out of wooden (MDF) material. However, it did not have a mount to hold the robotic arm in place properly. Since the MDF material did not look so good either, I decided to made the entire base (including the required mount for the arm)again with 1/2 inch clear acrylic. In order to cut the 1/2 acrylic board, I used the water jet cutter.
|
|
|

|
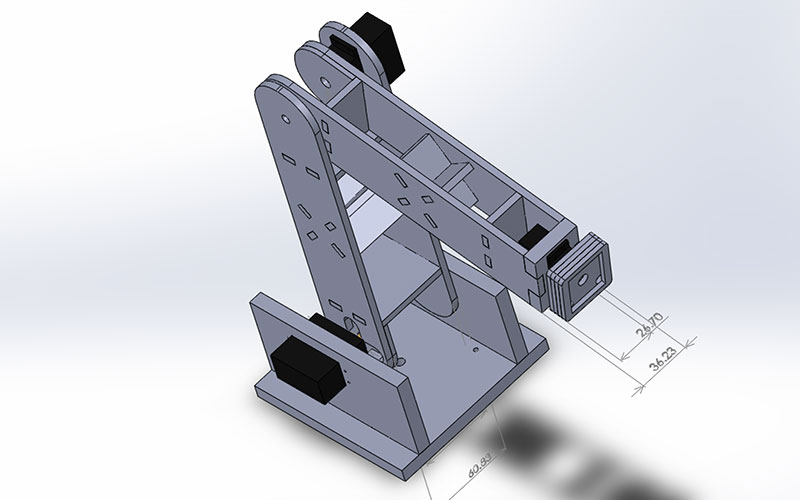
Designing the Robotic Arm
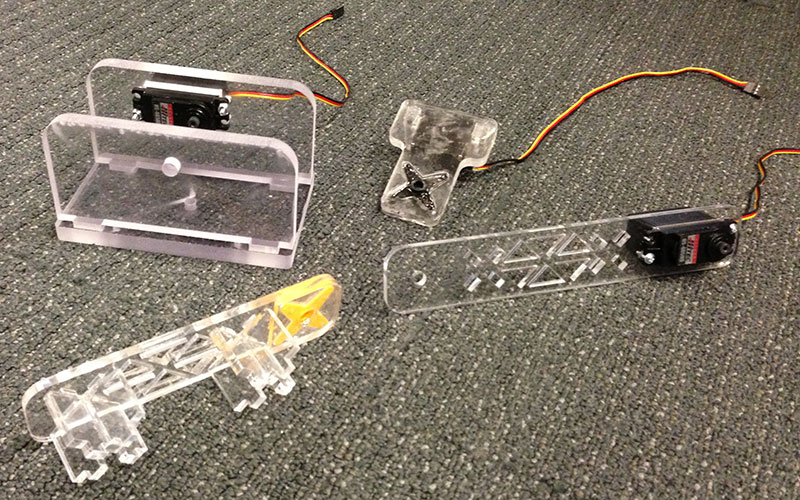
The most difficult task of the project was to designed the robotic arm. By looking through a few reference designs of robotic arms, I used Solidworks to design the arm. For the material, I decided to use clear acrylic plastic to maintain the design language. After desgining the parts, I used the laser cutter to cut out the parts from 1/8 inch acrylic and 3/8 inch acrylic.
|

|
In the first design, I found out that the arms were too heavy for the servo motors to hold its position. The servo motors I used were HS-485HB, which has a stall torque of 4.8 kg/cm. However, since it did not have enough torque to support the arm, it was permenantly damaged after several stall tests.
The optimal solution was to get a new servo motor with more torque. However, given the time constraints, I decided to quickly revise the design of the arm to match the specifications of the motor that I already had (HS-485HB). In the final design, I reduced the length of the arm, and created triangular holes to reduce the weight.
|
|
After reducing the size and weight, I still encountered stalling issues, so added a spring as a counter weight to help support the arm.
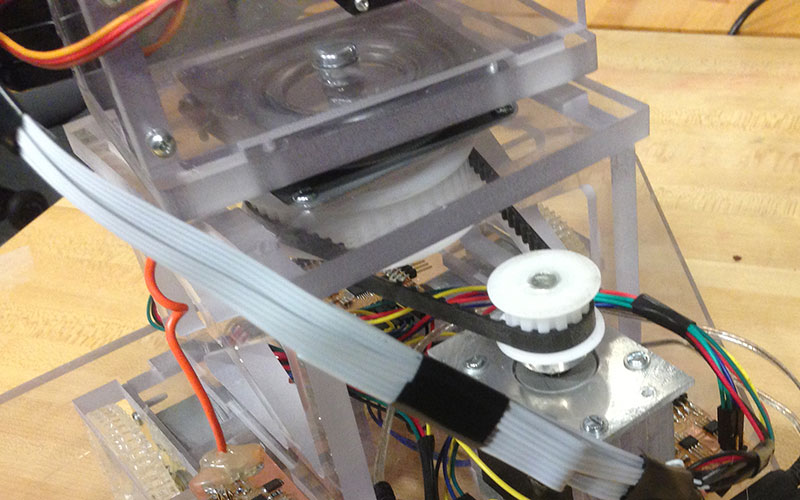
Designing the Swivel
To make the arm rotatable, I decided to add a swivel mechanism to the arm. I first attached a turntable (with ball bearing) to the arm itself. I then connected the arm to the robot base. In order to automate the swivel, I also attached a stepper motor and a pulley belt.

|
|
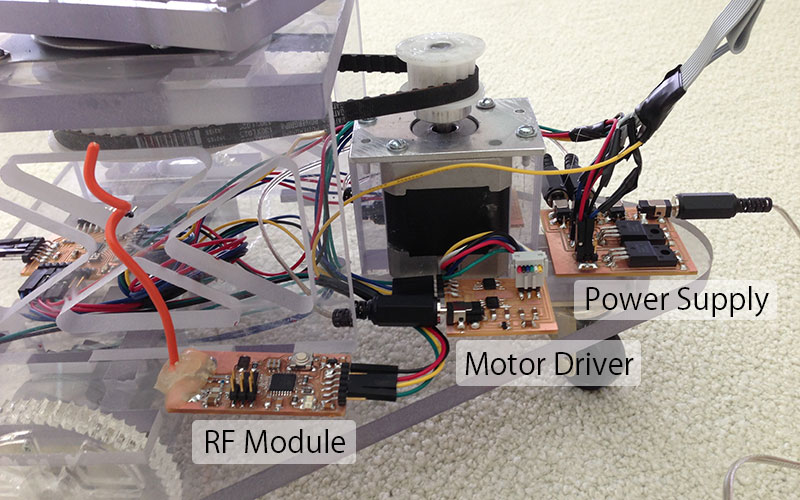
Designing the Control System
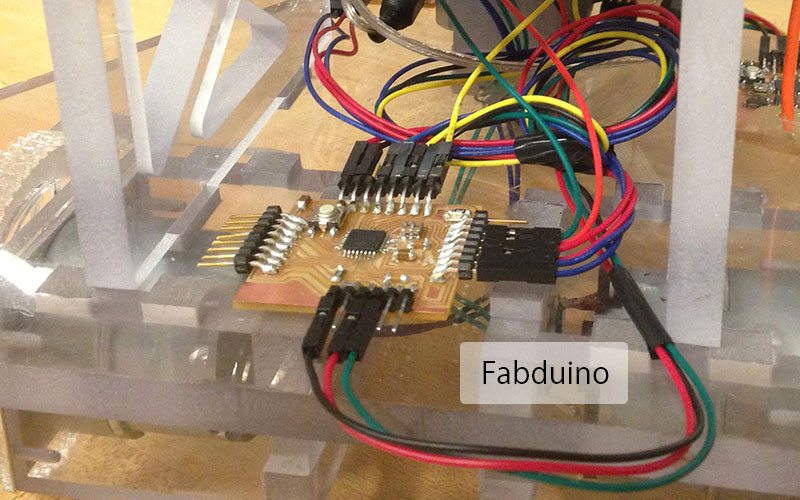
As a centralized controller unit, I decided to use Fabduino. I also decided to make use of the radio board to enable remote maneuvering of HACHI. The following diagram indicated the system architecture of the control system.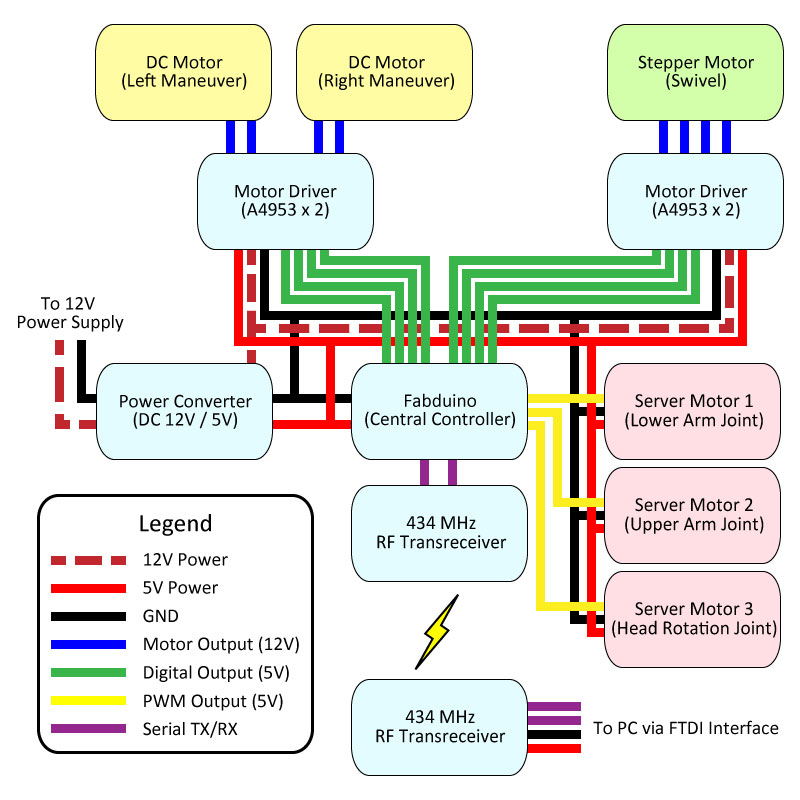
In the system, all the motors would be connected to the Fabduino. The serial interface on the Fabduino would be connected to the radio board, allowing wireless trasmission of commands from the computer. The power supply board takes a 12 V input, and creates outputs for both 12 V and 5 V DC current. The 12 V power would be used to drive the DC motors and the stepper motor, and the 5 V output would be used to power everything else.
|
|
Writing Control Software
As for the control software, I used the Aruduino IDE to program the Fabduino.
Integrating everything
The last 48 hours before the final presentation was like a full marathon, which turned out to be the most intense, yet fun part of this whole course. At first, I had thought that combining everything would be relatively simple. I found number of small errors on the design which required last minute adjustments (a.k.a. hacks) to make all the modules fit together. Just in time for the presentation, I was able to make a fully working prototype.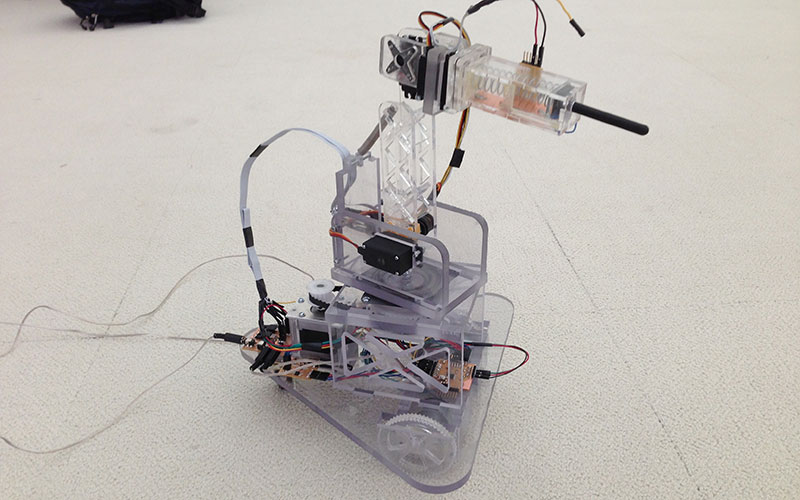

Future Work and Reflection Towards Class
As for future work, the first thing I would like do is to add a remote sensing function to the existing remote control system. As mentioned abobe, sensors may be attached to HACHI's head. Since the RF module is only be used to transmits commands from the computer to the robot, it would be optimal to have functions that enable sensor values to be trasmitted back to the computer. Other improvent ideas include enabling control from smartphones and other arbitrary devices, as well as designing many other heads for HACHI to make it do many things.Throughtout the whole class, I was able to learn so much in terms of quickly making working prototypes that demonstrates a concept. With a background in computer science, I was more or less comfortable with writing code and designing software. However, I am extremely excited to say that, I now know how to use CAD, operate CNC machines, fabricate objects using various processes all on my own.
The entire notions of digital fabrication and rapid prototyping exposed my mind to a whole new world. Although a team with diverse skill sets and expertise is always important in terms achieving large-scale goals, I feel that this class has taught me the basic things to communicate efficiently within such teams in different "languages". I would like to take the advantage of my time at the MIT Media Lab to continue developing new skills and make FUN and INTERESTING stuff!
Last, but not least, I owe a hugh thanks to Prof. Neil Gershenfeld that made this class happen. Also, there is no doubt I would have been able to learn so much without the help of John DiFrancesco, Tom Lutz, and all the TAs, as well as classmates. Thank you so much!!