
Week Six: Molding and Casting
the negative of the positive of the negative makes...you crazy.
Task
Design a 3D mold, machine it, and cast parts from it.
Result
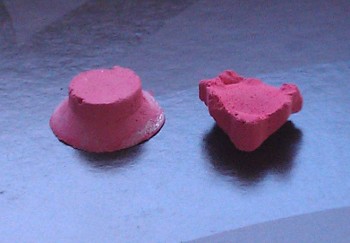
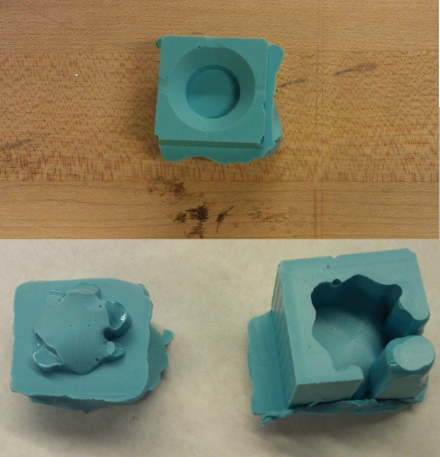
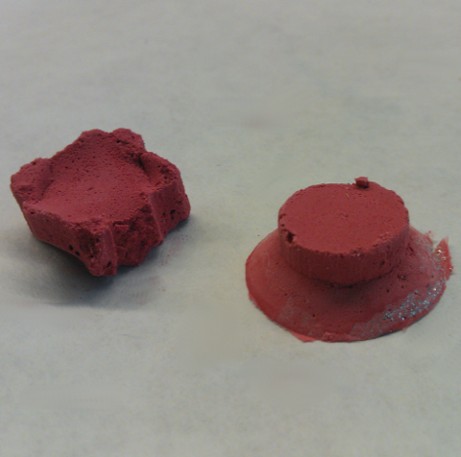
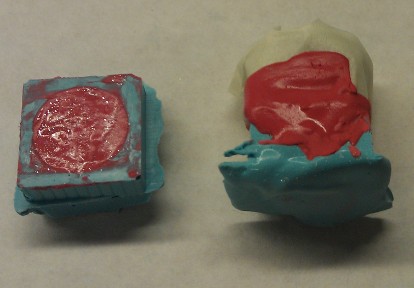
Here are my molds and the resulting casts:
Approach
Object design

I designed my mold using R and expanding on the functions I created for week 4. I also worked on methods for creating stls from spherical equations in R, though this is still in process. I created two molds: a simple one-sided mold of a stacked cone and cylinder and a more complicated two-sided "leaf-like" mold of a plane cropped along a curve. See image for desired outcomes.
Designing the two sided mold required some spatial thinking. Because I wanted the outcome to be a plane, one function piece was the negative of the other. This made the high points low and the low points high during cutting, so they would match after flipping the pieces to fit together. I maintained an x-y square based and symmetry along y=x for the height and boundary functions for simplicity. The depth of the negative cut in the wax block was shallower than the depth of the positive cut so that the resulting silicon molds would have a volume between them. I added two cylindrical volumes to the edge of the positive cut (creating holes in the negative silicon mold) to pour the Hydrostone and release air.
Machining
I created the board using the MODELA milling machine on a 3"x3"x1.5" wax block. I used the MODELA Player4 software to import my stl file and prepare it for milling. The process was:
Creating the silicon mold
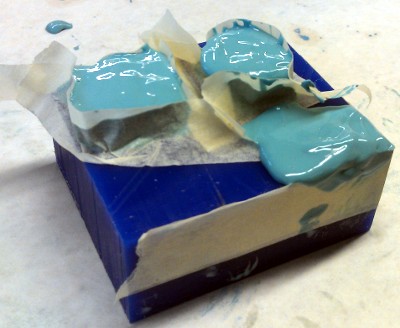
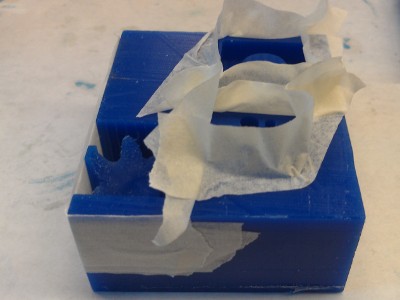
First, I fix imperfections in the wax block using tape (see Trials and Tribulations). Mix the silicone parts following the instructions on the container (100:130 part A:part B by weight). Mix until completely combined, then continue mixing for a few minutes. Try to reduce air bubbles in the material by mixing horizontally instead of folding the material. Pour the silicone onto one point on the wax block in a thin stream. Tap vigorously to ensure the silicone reaches all corners and to reduce air bubbles. Allow roughly 2 hours to dry then remove molds from wax block.
Casting in hydrostone
I mixed the hydrostone and water loosely following the instructions on the container (100:22 hydrostone:water by weight). I tried a number of things to color the material and ended up using paint and glitter glue. I counted the paint as mostly "water" in the measuring process, though I think even then my material ended up too moist. I coated the edges of the silicon mold with the glitter glue so it would be visible in the final product, poured the hydrostone into the mold, tapped vigorously, added more hydrostone, re-enforced the two-piece mold with tape, and let it dry overnight.
Trials and Tribulations
I'd hoped to add methods for spherical coordinate shape generation of stl files in R. In particular, I wanted to be able to easily draw spheres. Unfortunately, I found out that the surfaceTriangles function does not support 1->many mappings. I'm attempting to implement this using a different surface triangle generating function that may handle this better.
I tried to conserve space when milling the wax block. Unfortunately this caught up with me in a number of ways. First, my parts were slightly smaller than I would have preferred which made it difficult to pour hydrostone in the two-sided mold. Second, my two-sided positive milled just off the edge of the wax block. This was fairly repairable with tape, though the separation between the pouring hold and the air release hole was lost. Ideally I would have set the pieces further into the wax block to create a cleaner edge, though I found the tape method was a very functional fix.
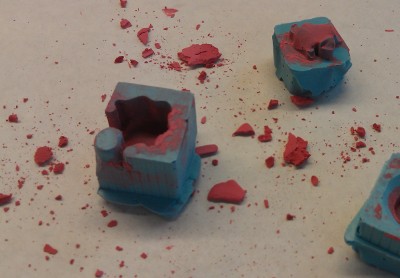
I ran into some materials problems with the silicone mold and hydrostone casts. Because the shape was small with tight corners, some sections of the wax negative didn't completely fill, leaving holes in the silicon positive. Pouring the hydrostone into the two-piece mold and removing air bubbles was also difficult due to the small size.
Coloring the hydrostone was somewhat successful, but requires further fining tuning. I tried two colors of acrylic paint as well as glitter glue and glittery nail polish (FYI CVS doesn't carry plain glitter). The yellow acrylic paint turned a fairly unpleasant mustard shade in the hydrostone. The red was a much richer tone, though it required quite a bit of paint to achieve. I tried mixing both glitter glue and glittery nail polish into the hydrostone but both were almost immediately invisible, even in high volumes. Additionally, the nail polish seemed to react with the hydrostone--the material seemed to "curdle" immediately after adding a very small amount of nail polish. To make the glitter visible, I tried applying the glitter glue as a first layer in the silicone mold. This was somewhat successful, though the glue was not particularly well integrated into the material and it seemed to increase the fragility of the mold. Overall, adding the paint and glitter seemed to throw the hydrostone:liquid ratios off (even though paint was largely counted as "water"); though the casts dried, the material remained somewhat crumbly and was not particularly structurally sound. In the future, applying color and glitter post-setting may be the best approach.