Embedded Programming
Programming with the AVR toolchain
CrossPack for AVR
CrossPack for AVR Development is a development toolchain for Atmel’s AVR MCUs running on macOS, similar to WinAVR for Windows. It consists of the GNU compiler suite avr-gcc etc., a C library avr-libc for the AVR, the avrdude code uploader (implements Atmel’s programming protocol), and several other useful utilities such as gdb for debugging with simulavr and avarice. It installs to /usr/local/CrossPack-AVR. For help type avr-help and an HTML manual opens, describing among other things how to start a projecy from scratch using Xcode.
AVR Fuse Calculator is a web-based interactive fuse value calculator for AVR devices. You choose the desired options from pop-up menus or checkboxes and it tells you the hexadecimal fuse values to be used with avrdude.
FTDI Driver
Virtual COM port (VCP) drivers cause the USB device to appear as an additional COM port available to the computer. Application software can access the USB device in the same way as it would access a standard COM port.
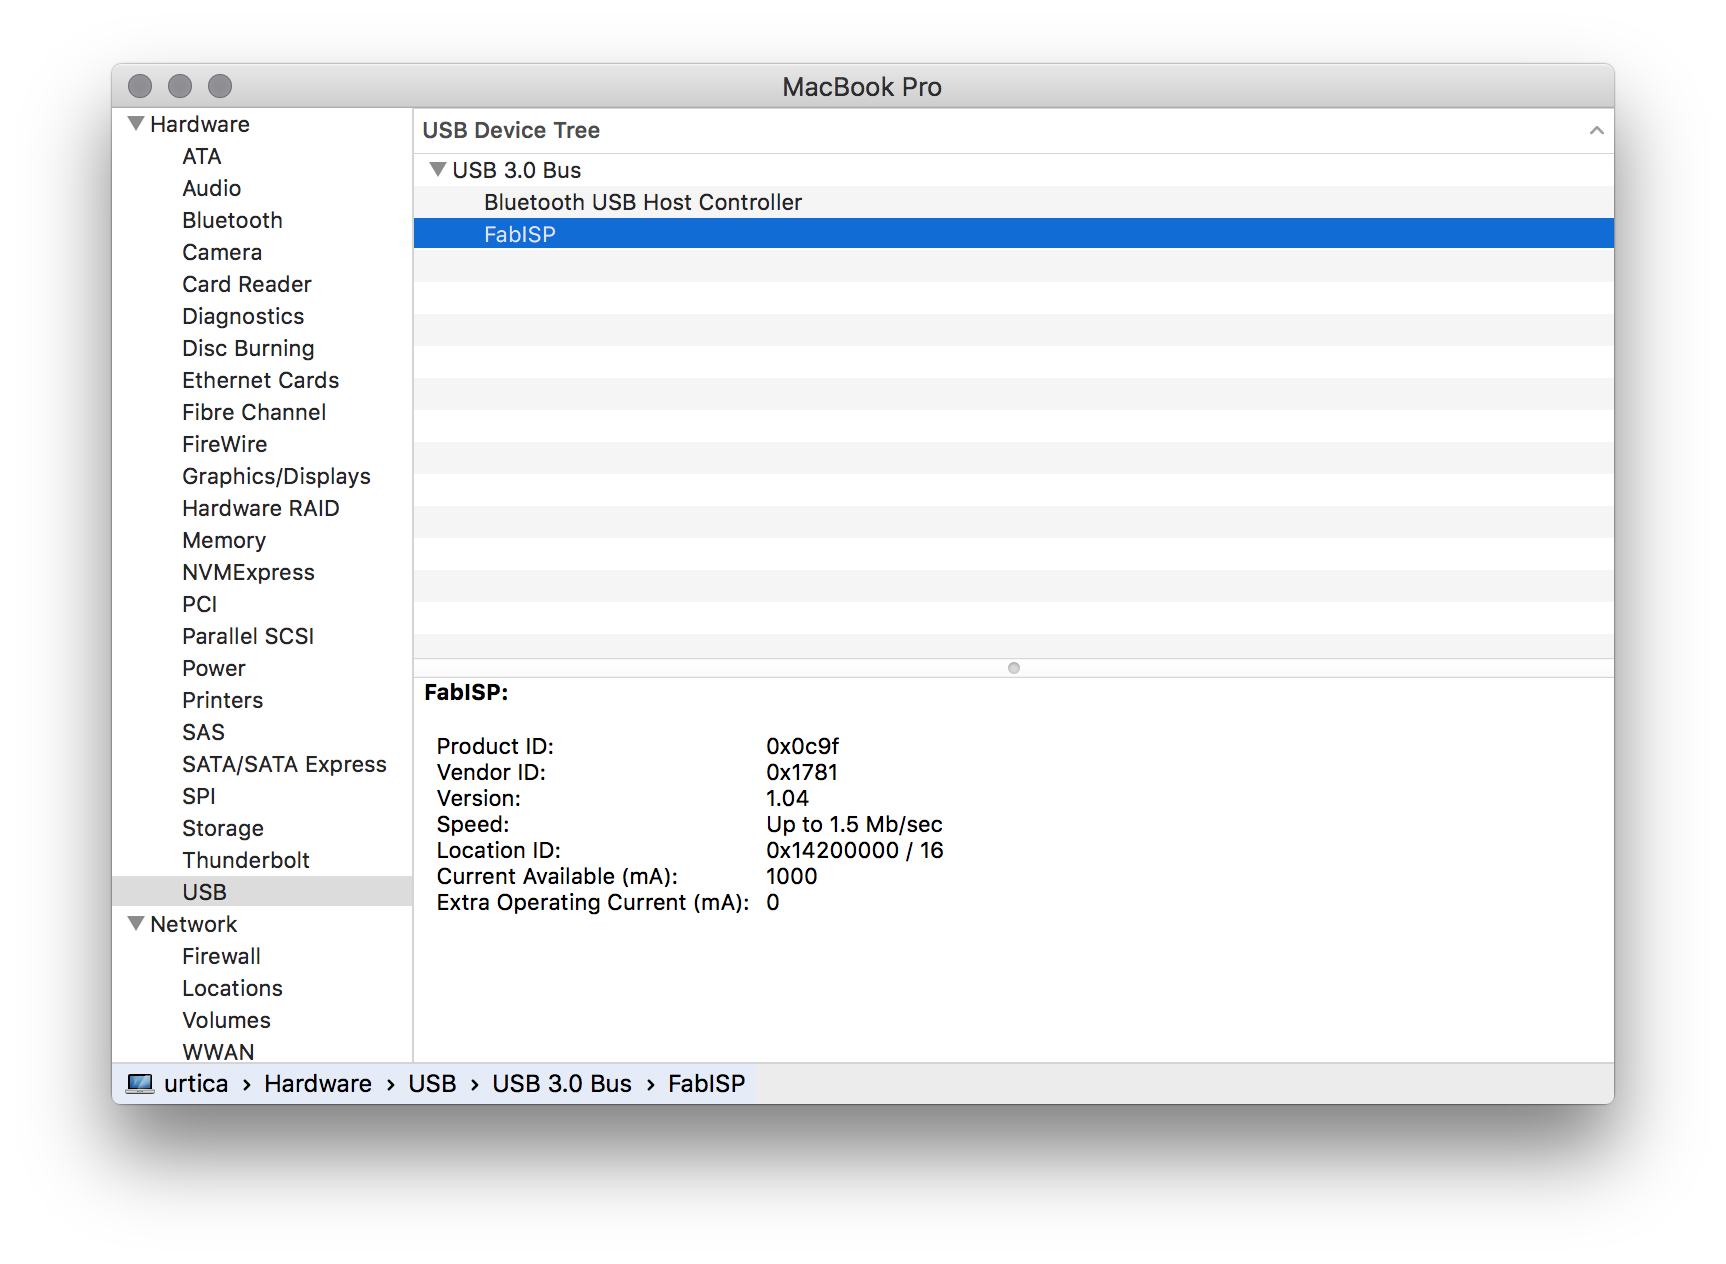
https://github.com/raphaelschaad/SystemConfig/commit/288c20189410cc3b945622c4bc8bc40f41733617 Add alias "lsusb" for macOS System Profiler Unix has a handy lsusb. On macOS, the System Profiler ( > About This Mac > Overview > System Report…)’s CLI tool is system_profiler and to list USB devices it needs the argument SPUSBDataType.
$ make -f hello.ftdi.44.echo.c.make # compile
$ make -f hello.ftdi.44.echo.c.make program-usbtiny-fuses # one time setting of configs for board
$ make -f hello.ftdi.44.echo.c.make program-usbtiny # upload code
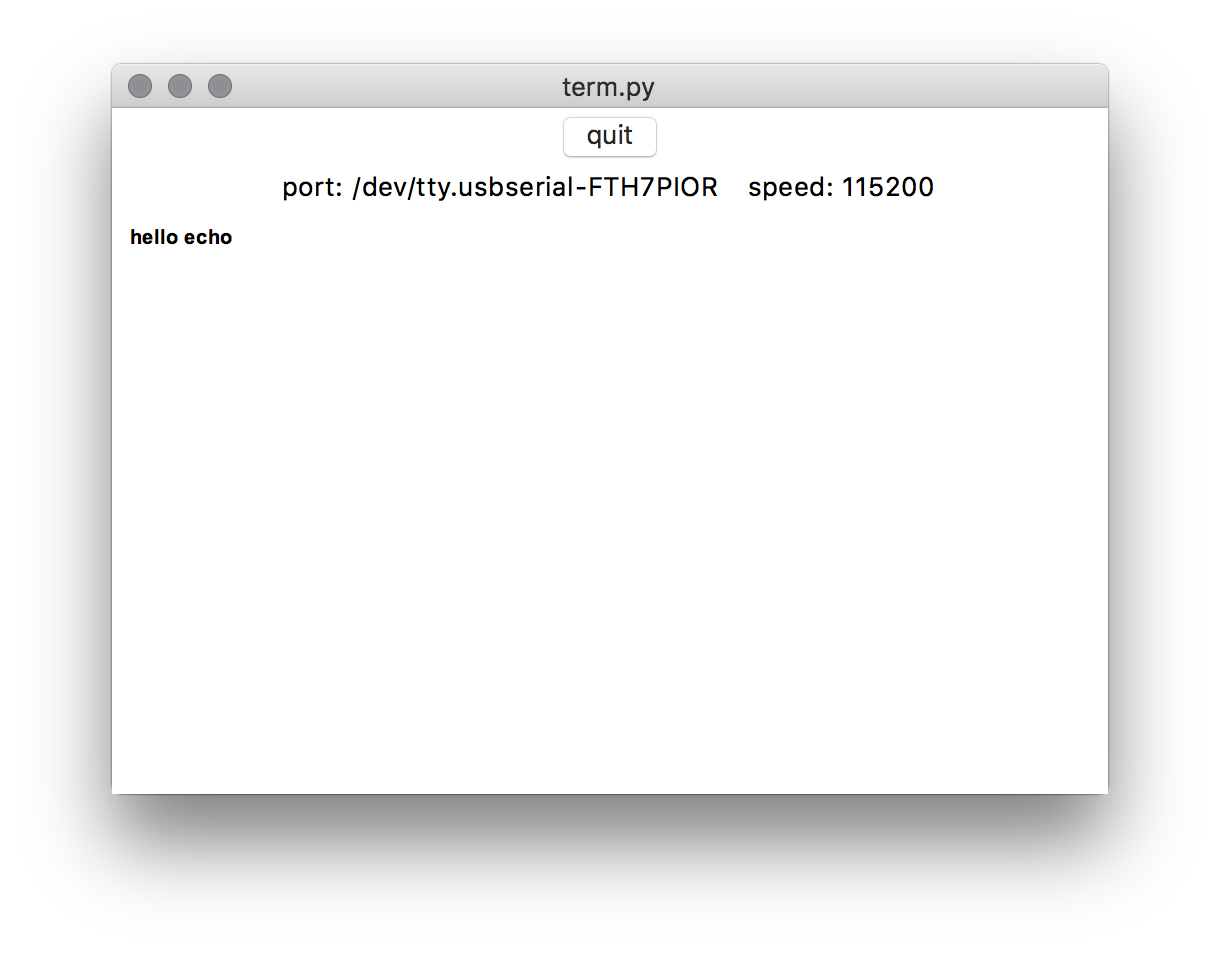
$ pip install pyserial # term.py imports `serial`
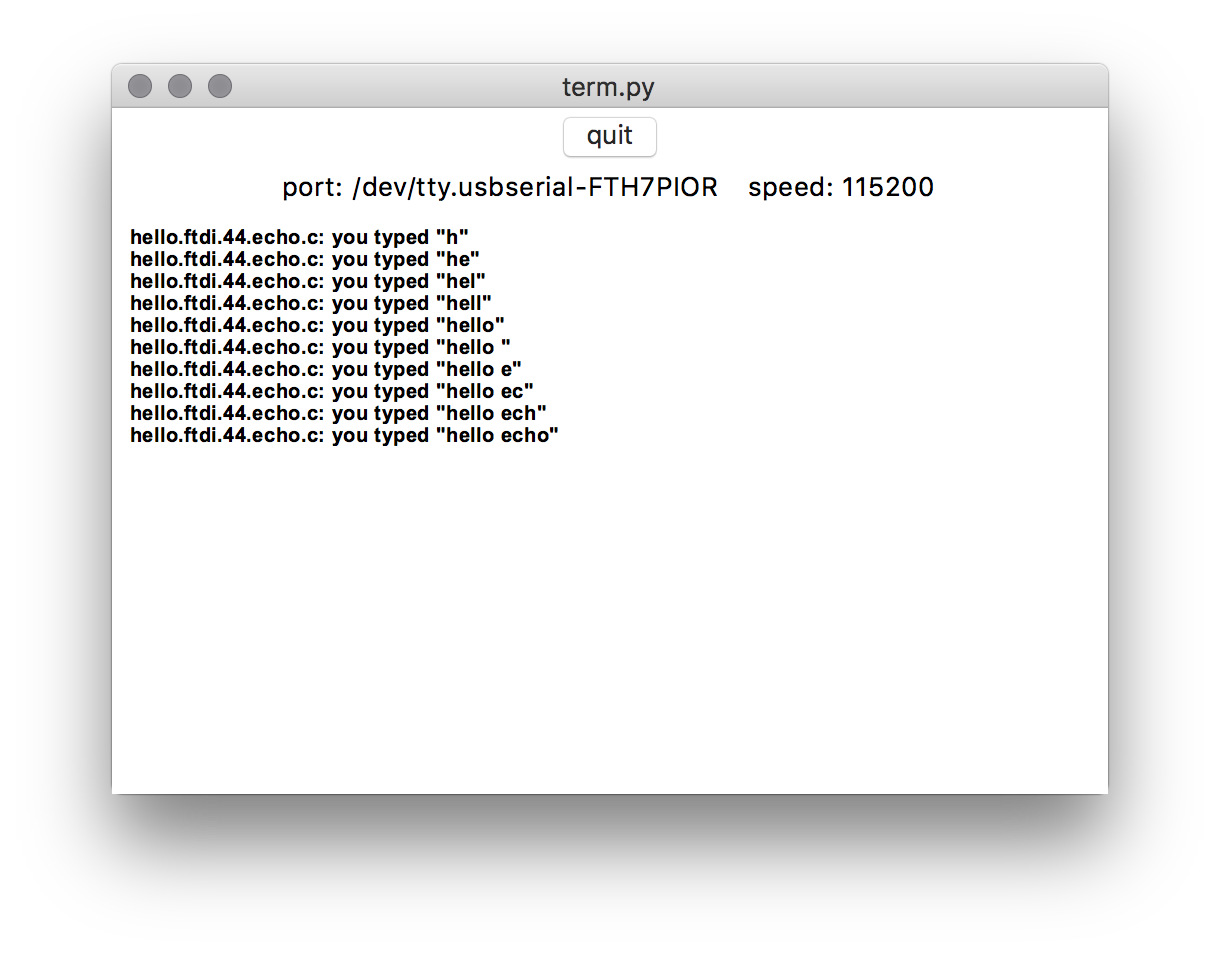
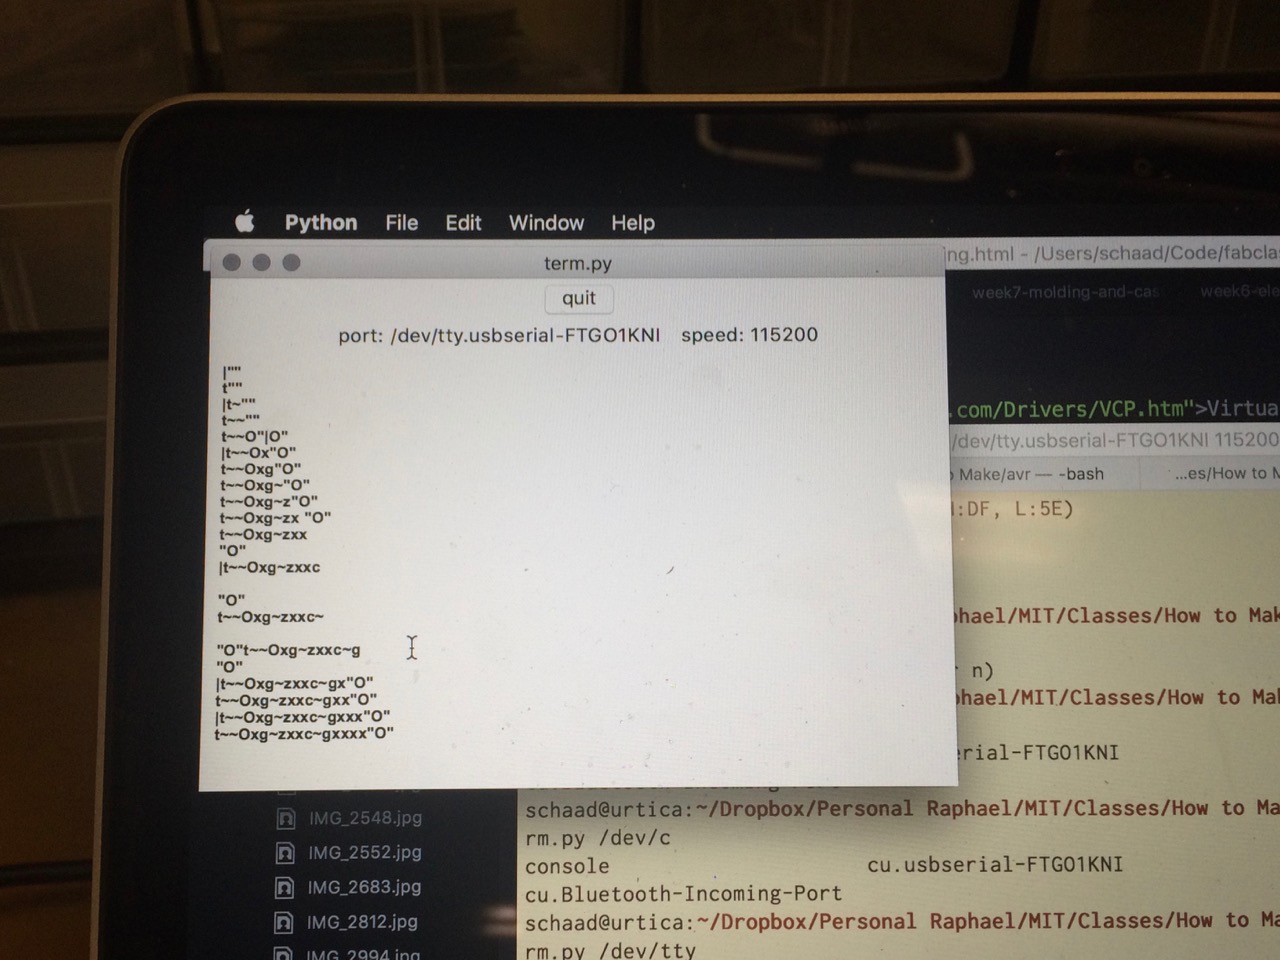
$ python term.py /dev/tty.usbserial-FTH7PIOR 115200 # use tab key after "tty." to find `serial_port` (unique persistent ID per cable); last argument is `speed`
To communicate over serial at the very basic level we can echo data to our device. In a second terminal we can simultaneously read from it:
echo x > /dev/cu.usbserial-FTH7PIOR
Note the use of “cu” instead of “dev”
cat /dev/cu.usbserial-FTH7PIOR
To have an interactive session with the device we can use the basic serial terminal GNU screen
$ screen /dev/cu.usbserial-FTH7PIOR 115200
To end the session, use control+a , control+k.
If using an Arduino, Arduino and Linux TTY is a good tutorial to interface to it via command line (vs. the Arduino IDE).
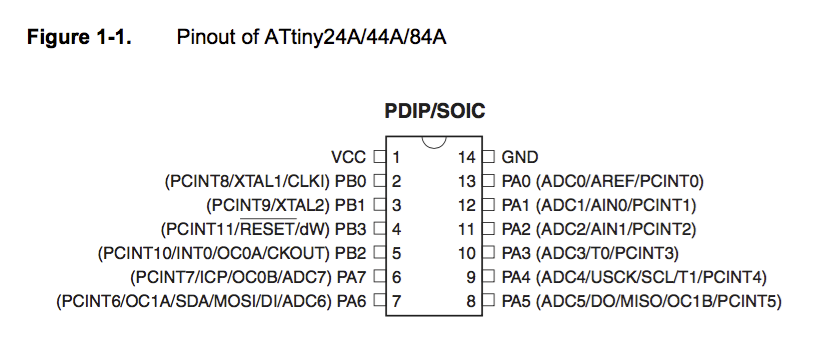
The AVR chips we use are Harvard architecture (vs. Von Neumann) RISC (vs. CISC) MCUs (vs. microprocessors, MPUs). AVRs are great because they come in tiny packages and are cheap. There’s a big family to choose from to get a great fit for every project. They’re programmable with C and the GCC compiler, and there are many online resources.
- ARM’s What is the difference between a von Neumann architecture and a Harvard architecture?
- Stanford’s risc vs. cisc comparision
- Atmel’s MCU vs. MPU article (in short: MCUs are simple self-contained “computers” in a microchip whereas MPUs need added peripherals and typically act as central processing unit (CPU) in a complex system)
Interrupts are slower than spinning "while true", but with interrupts you can do more complex flows because you’re not blocking the single thread. When using interrupts, you still have to spin empty so the program doesn’t quit.
Understanding Fuses
Understanding Clock Speed and Time
Programming with Arduino
Arduino is
- a family of programmable Atmel MCU-based boards (open source, or $10-50 to buy),
- an abstraction on top of standard C syntax and libs (an Arduino .ino – or legacy .pde – “sketch” is essentially a C program),
- a cross-platform IDE (written in Java, based on Wiring, which is based on Processing) with a bundled GCC under the hood,
- a bootloader (program in a special piece of memory that loads a program from general memory) that allows to upload new code without a hardware programmer, and
- a micro-USB port to plug into the computer, digital/analog input/output pins, a separate power jack, an ISP header, and a reset button.
It makes it easier to build interactive objects than starting from scratch, and has an engaged community building many libraries.
For us, it’s ok to use the Arduino software environment but instead of buying the boards, we can fabricate it ourselves for ~$6 in parts (look for “Fabkit”, “Fabio”, and “hello.arduino” on this week’s class page). This tutorial from a class affiliate describes how to set the Arduino software environment up to use with our AVR boards and Dan Chen also has some tips for getting the Arduino IDE working on your own board, including the links to .json files that need to be added to the Board Manager.
One step beyond that, the Raspberry Pi is a fully capable credit card-sized single-board ARM-based computer with regular peripheral connectors for ~$30, primarily with the goal to inspire children. Peripherals that are needed include a Micro USB Power Supply, an SD card to run Linux from, USB keyboard/mouse, and an HDMI monitor. There are also general purpose I/O pins for embedded needs.
TAs: Amanda Ghassaei Jonathan Bobrow
Recitation Networking and Communications
This is one of the regular weeks we’re missing this year because of the academic calendar. A recording of this year’s full lecture is on YouTube. The assignment would have been to design and build a wired or wireless network connecting at least two processors. Thrasyvoulos Karydis is a contact for Bluetooth, Tomer Weller for WiFi, Dan Kun-yi Chen for ISM radios, and Eric VanWyk for wired protocols.
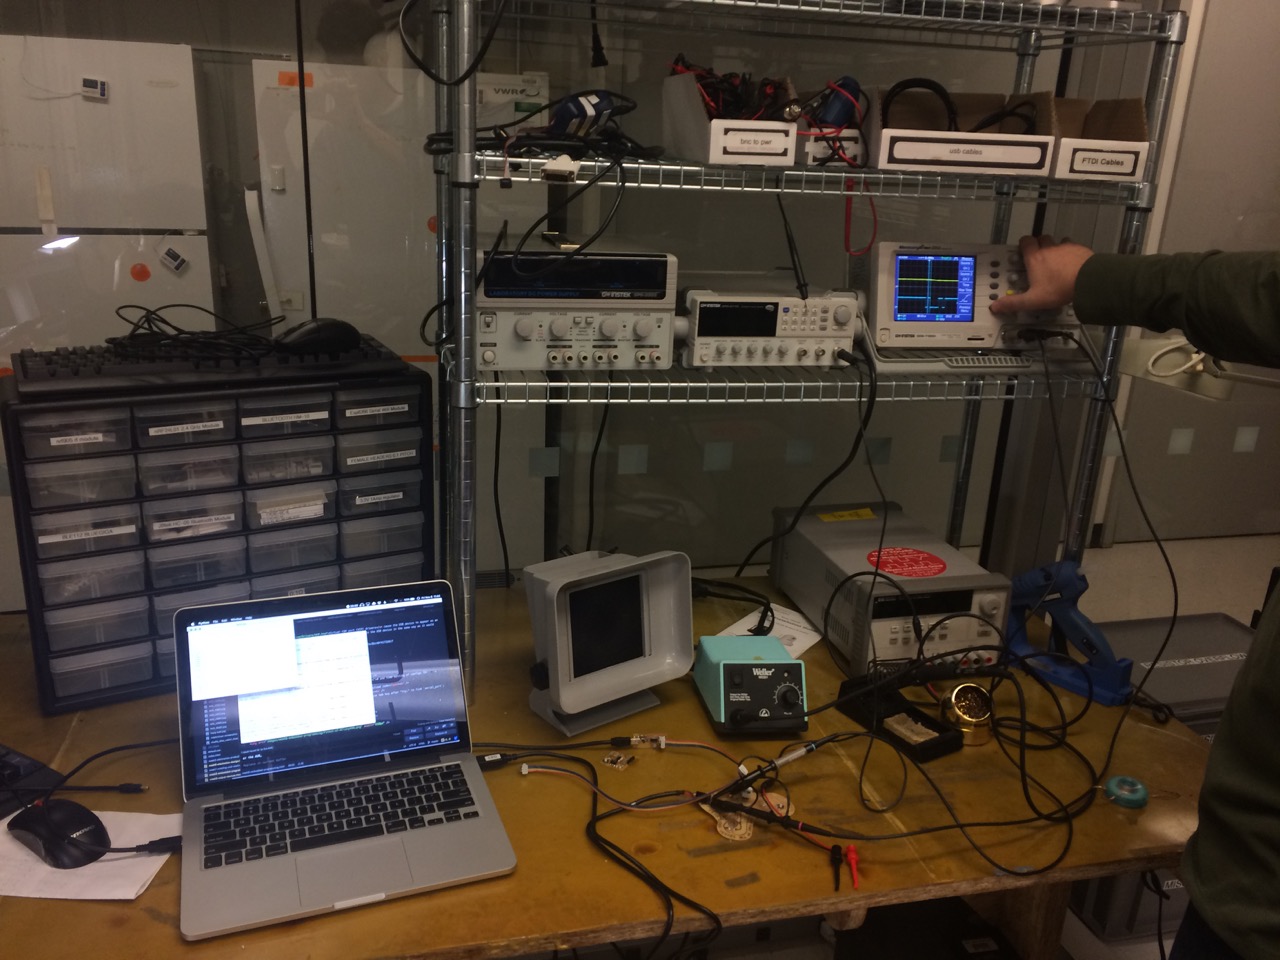
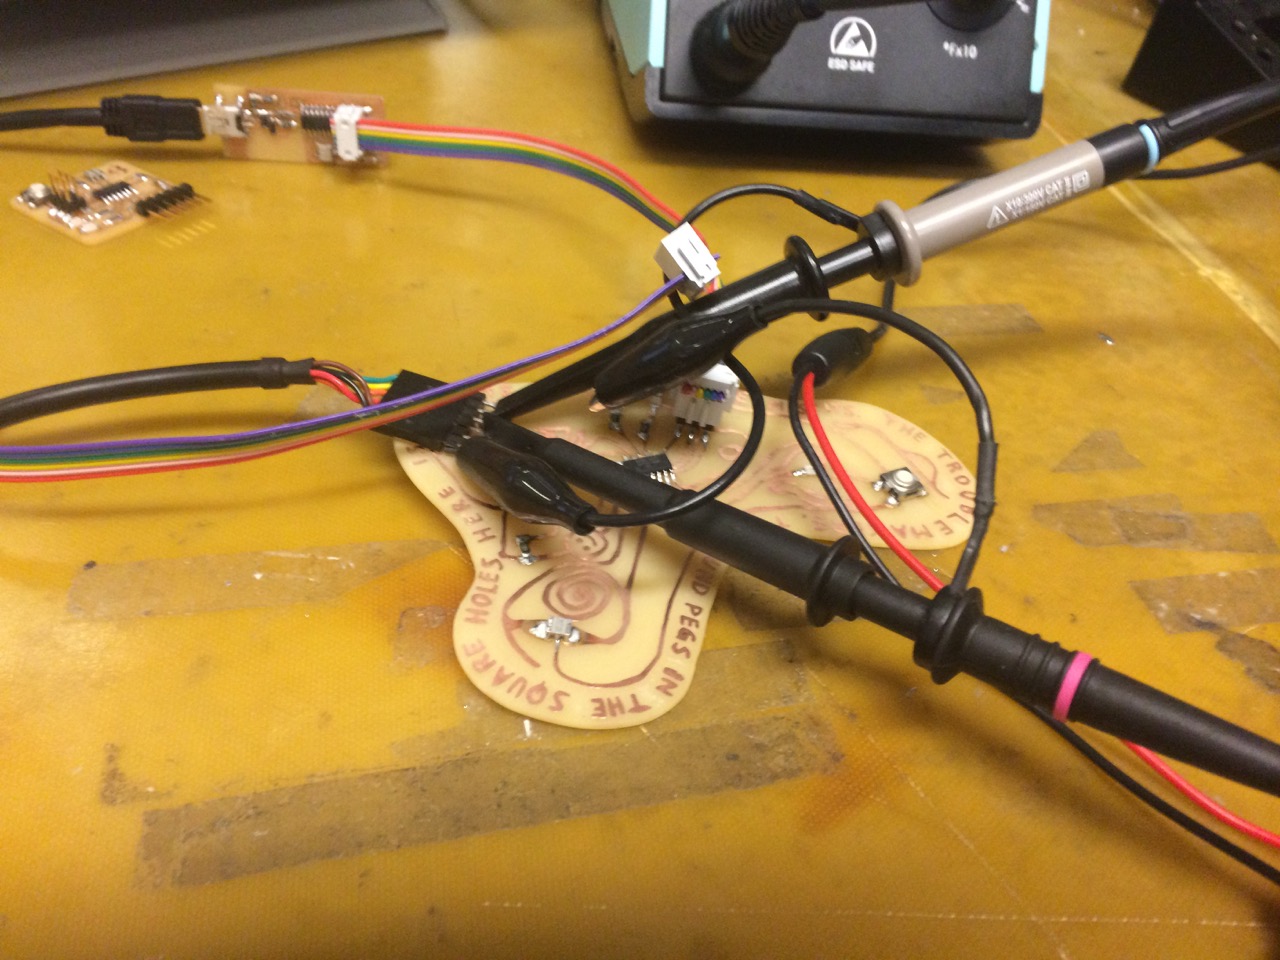
Debugging with an Oscilloscope
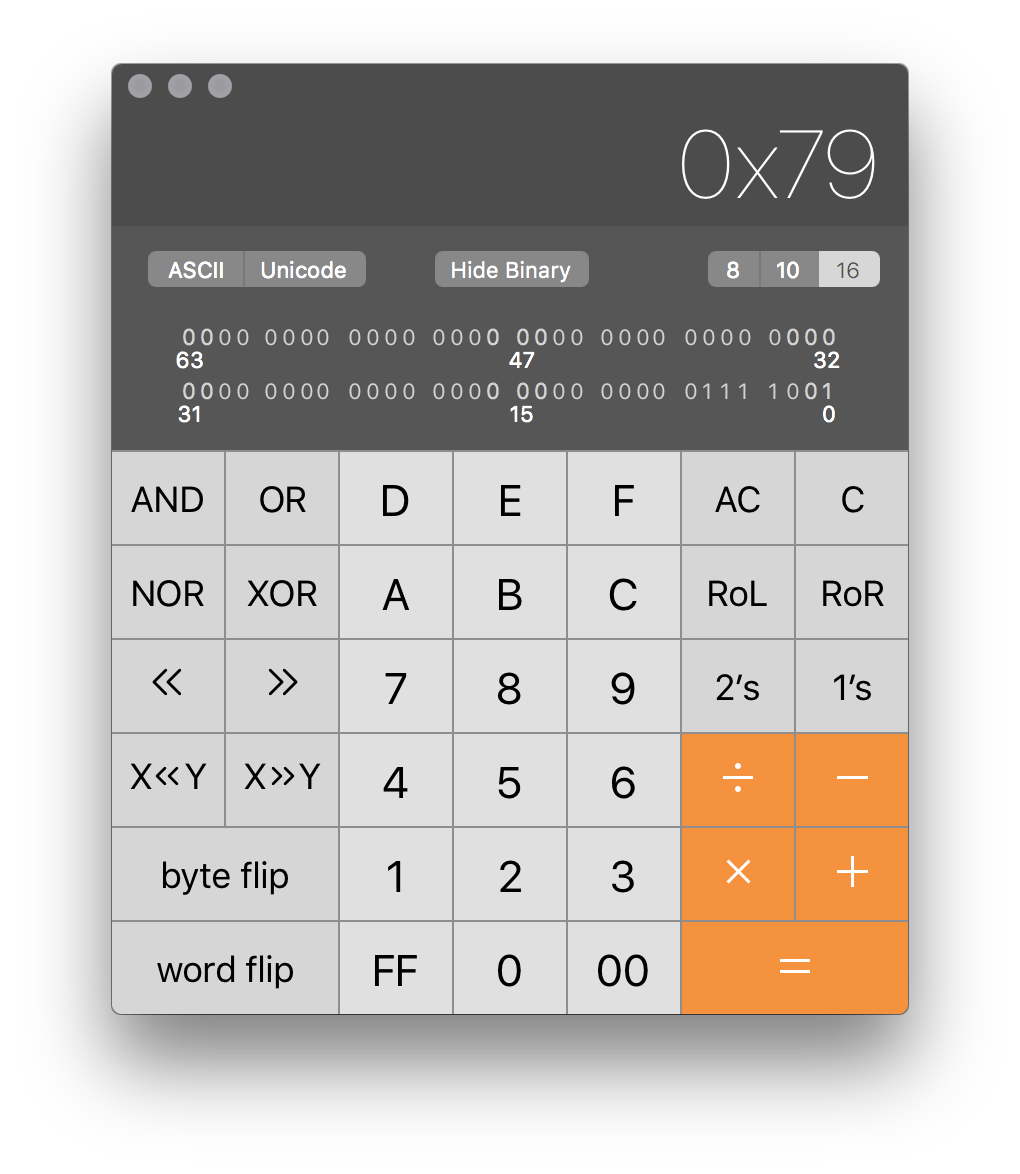
Also saw Δ9µs and f of 111.1kHz 115200 Baud. Within range.
simplified the main loop to
get_char(&serial_pins, serial_pin_in, &chr);

put_char(&serial_port, serial_pin_out, chr);

 $ lsusb needs to output this:
FabISP:
Product ID: 0x0c9f
Vendor ID: 0x1781
Version: 1.04
Speed: Up to 1.5 Mb/sec
Location ID: 0x14100000 / 9
Current Available (mA): 1000
Extra Operating Current (mA): 0
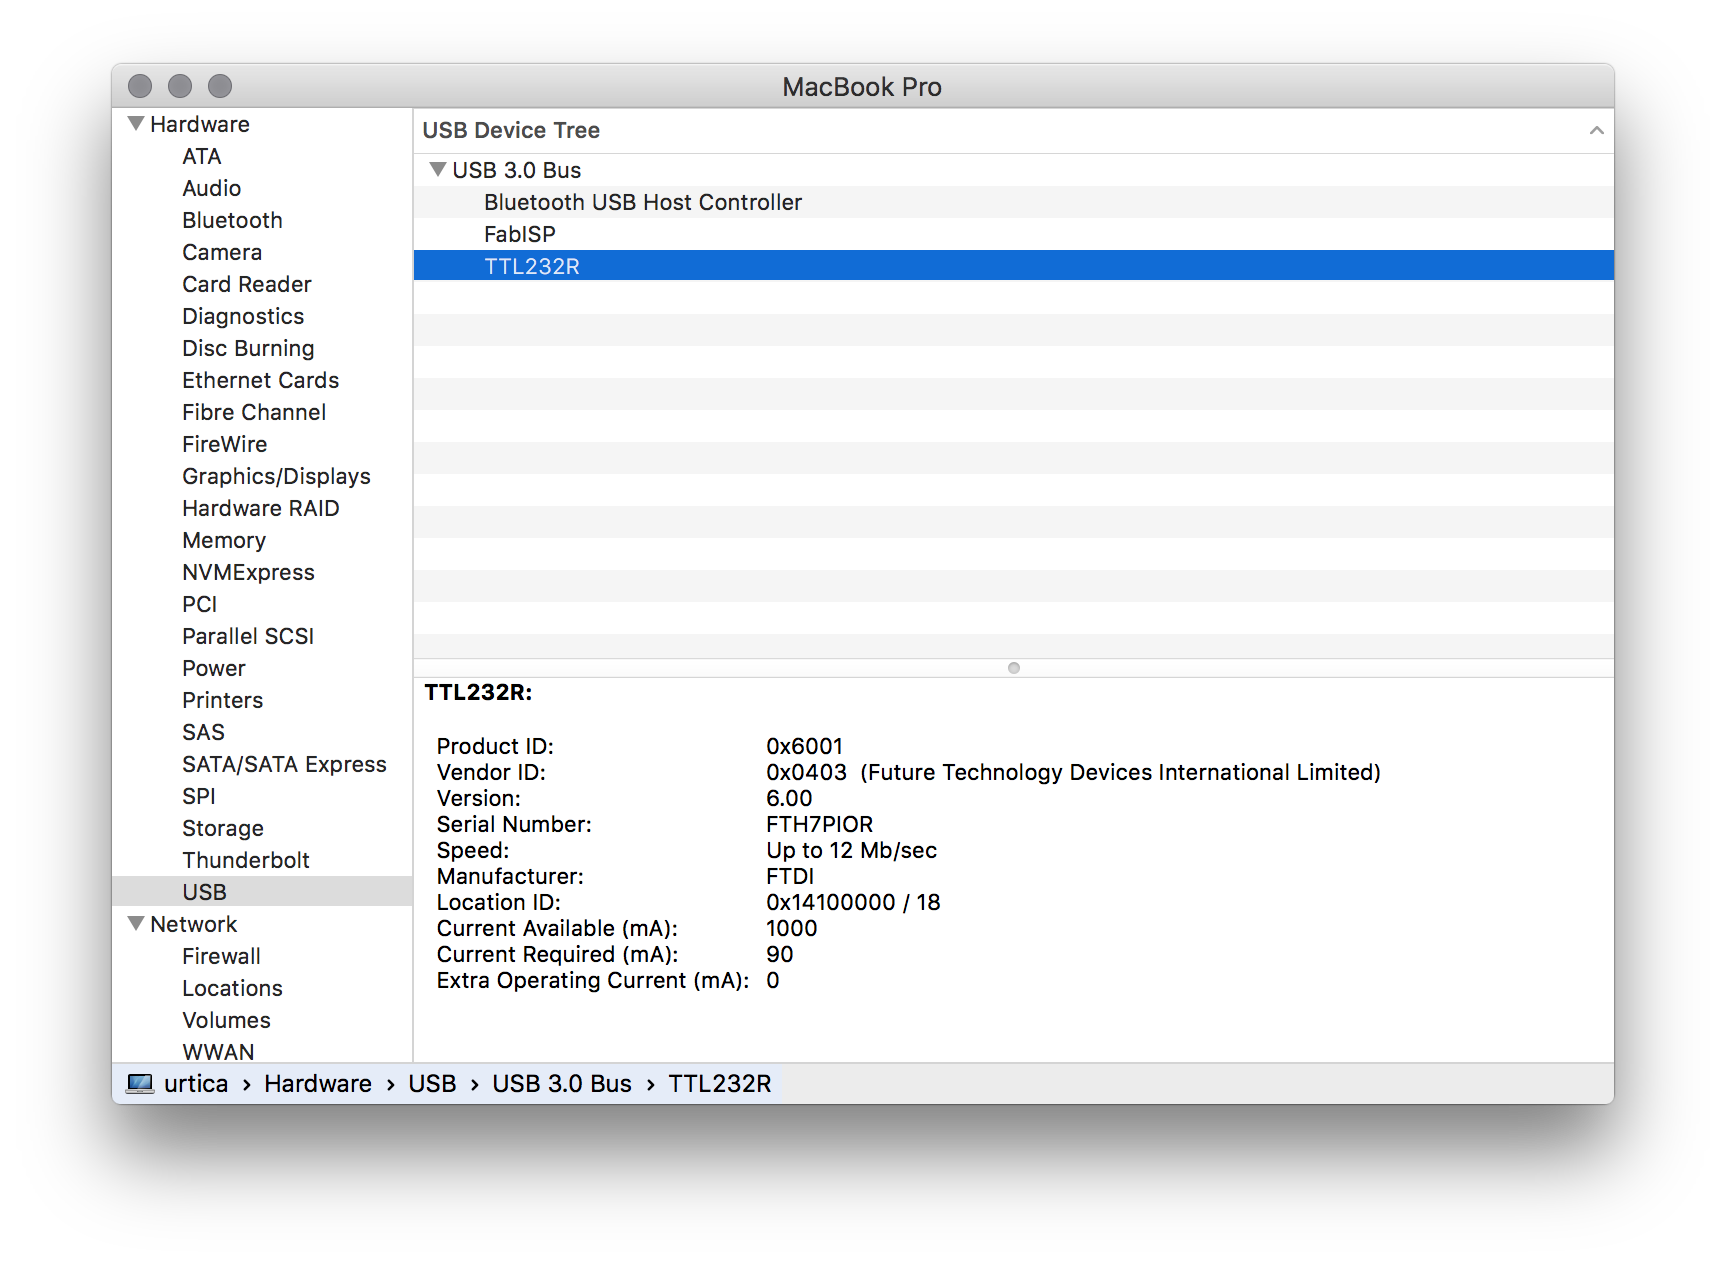
TTL232R:
Product ID: 0x6001
Vendor ID: 0x0403 (Future Technology Devices International Limited)
Version: 6.00
Serial Number: FTH7PIOR
Speed: Up to 12 Mb/sec
Manufacturer: FTDI
Location ID: 0x14400000 / 7
Current Available (mA): 1000
Current Required (mA): 90
Extra Operating Current (mA): 0
Note in both cases: if the Speed and Current fields are missing,
(fix: plug/unplug, try different usb port, or even restart)
Note: note processor lines (same number, changing letter) are pin and code compatible (e.g. t44->t44a, m328->328p)
$ lsusb needs to output this:
FabISP:
Product ID: 0x0c9f
Vendor ID: 0x1781
Version: 1.04
Speed: Up to 1.5 Mb/sec
Location ID: 0x14100000 / 9
Current Available (mA): 1000
Extra Operating Current (mA): 0
TTL232R:
Product ID: 0x6001
Vendor ID: 0x0403 (Future Technology Devices International Limited)
Version: 6.00
Serial Number: FTH7PIOR
Speed: Up to 12 Mb/sec
Manufacturer: FTDI
Location ID: 0x14400000 / 7
Current Available (mA): 1000
Current Required (mA): 90
Extra Operating Current (mA): 0
Note in both cases: if the Speed and Current fields are missing,
(fix: plug/unplug, try different usb port, or even restart)
Note: note processor lines (same number, changing letter) are pin and code compatible (e.g. t44->t44a, m328->328p)
Tutorials
I wrote two tutorials: Understanding Fuses and Understanding Clock Speed and Time.
Outlook
I’d like to explore the chip’s timer, interrupt, and PWM capabilities more.
Good resources are the AVR Libc Library Reference, AVRbeginners.net for example code and circuits, and the ~20min YouTube videos Learning AVR-C using the ATmega328P, especially: Episode 9 on External Interrupts, and on Serial Communication using the chip’s USART capabilities Episode 10 (TX, sending from embedded), and Episode 11 (RX, receiving on embedded).