DANCSYNTH QWEEN
What does it do? I created a wearable device that tracks your orientation and acceleration and converts that into music. So instead of dancing to music, your dance creates the music. When playing around with choreography and movement, I will sometimes create a phrase without knowing what song or beat to put it to, but there's usually some imagined melody or beat driving the movement in the back of my head. I would love to create a device that could capture that. I didn't get nearly that far with my final project, but at least have a proof of concept movement/orientation --> sound (I hate to even call the annoying sine oscillator music, but it did accomplish mapping movement to sound) and hope to develop further in my spare time.
Who's done what beforehand? There are a couple iphone apps that use distance and/or motion to create music: the AirSynth app and AUUG's Motion Synth. The AirSynth app tracks your hands in front of the new iphone depth sensing camera used for FaceID, allowing one hand to control volume and another pitch. The AUUG motion synth is more like a wearble like mine where the motion and orientation sensor in an iphone or ipad controls the octave or scale of music. However, the motion synth does not create it's own music, instead it modifies music coming from other iOS music applications or external devices.
What did you design? I designed the circuit board with the ESP32 and BNO055 breakout board, the wearable device, and the web app that connects to the board.
What materials and components were used? Where did they come from? How much did they cost?
| components | price ($$) |
|---|---|
| ESP32 | 3.80 |
| Adafruit BNO055 breakout | 34.95 |
| charge controller | 0.56 |
| 1200mAh LiPo battery | 9.95 |
| misc passive components | ~5 |
| neoprene fabric | 15.29 (per yard) |
| velcro | 12.99 (per 10 meters) |
| Firebase Realtime Database | 0.00 |
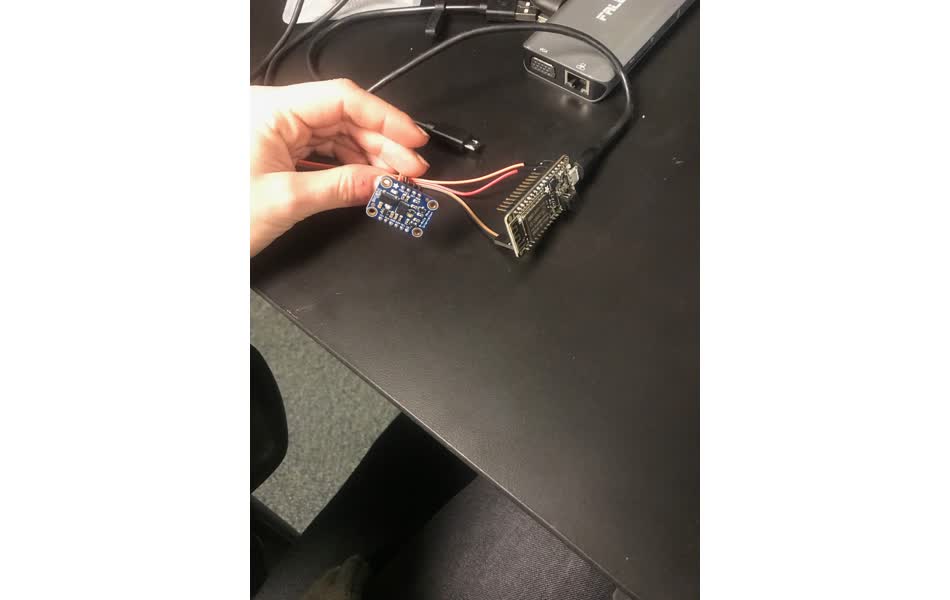
I started with the adafruit breakout board for the BNO055 because that's what I found around the lab. I ordered some BNO055 chips, which are only $11.16 compared to the $35 breakout, and was planning on remaking the board, but I ran out of time and heard from Zach that the BNO055 chips are very difficult to solder. I have a board layout with the BNO055 chip sans adafruit breakout, so when continuing development this is what I'll use moving forward. It will greatly decrease the size of the board, making it less bulky as a wearable.
What parts and systems were made? What processes were used? I designed and fabricated the main circuit board that makes the wearable. I milled the traces into a copper substrate with a 1/64th endmill on the Roland SRM-20. Then, I soldered all the components on.
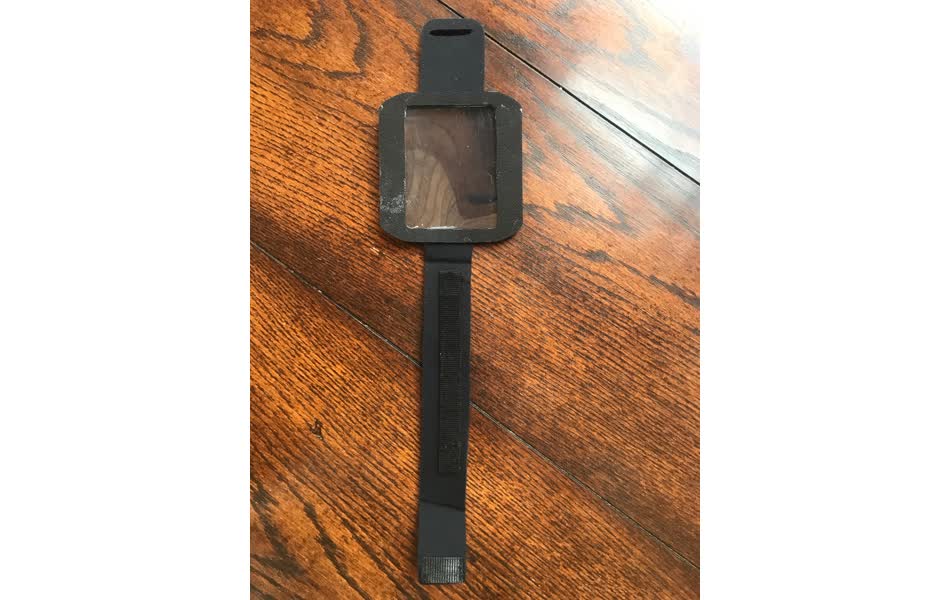
I drew the wearable in Fusion360 and Rhino and then Alfonso helped me cut out the Neoprene fabric, polycarbonate pocket, and rubber cover on the zund. I sewed the polycarbonate and velcro onto the neoprene, and glued the rubber cover around the pocket to make it look cleaner. I had also 3D printed a case for the circuit that I was planning on strapping to a wrist band, but it came out far too bulky, so I shifted to sewing.
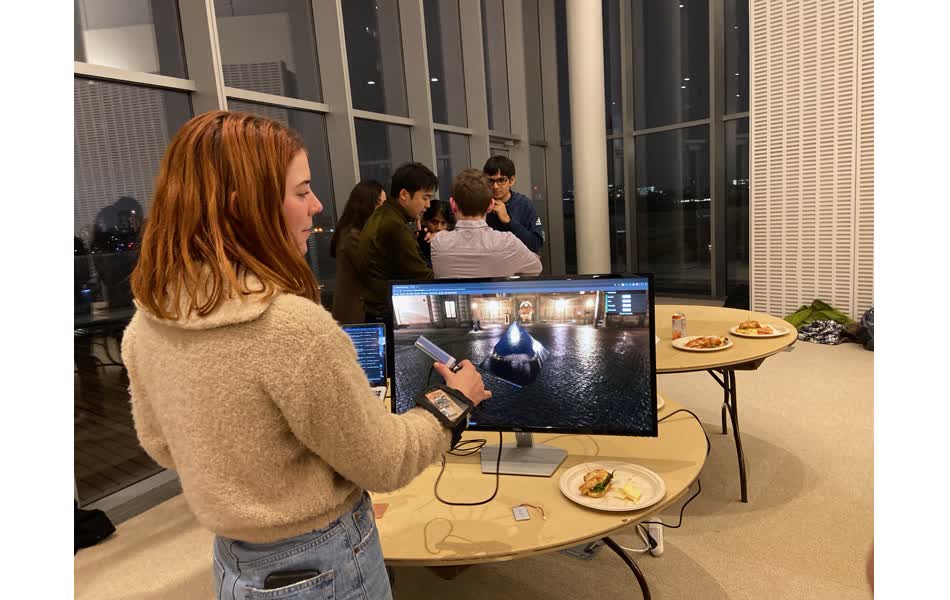
I programmed the ESP32 to write to a realtime database I created with google's Firebase Realtime Database. Then I created a webapp that pulls the the sensor data and generates sound and animation based on orientation and acceleration in the browser using three.js and tone.js. this process is documented in week 10 and week 12.
What questions were answered? what does movement sound like?
How was it evaluated? specific motion was sucessfully mapped to different sounds. There is a drop down menu in the top right corner of the app which allow the user to select how orientation axes map to the music. Currently, only oscillating waveforms are available for selection, but I'd like to add more advanced instruments and melodies that are available in tone.js.
It should also be evaluated on speed - ideally the music is synced with the motion in realtime. however, there is a delay between sending to the database and reading from the database. I fixed it from a very slow delay at first by using the firebase esp32 library which has been optimized for this problem, but it's still not perfect. I think it could be further improved with a stronger wifi connection (I have been using MIT GUEST) and a deeper dive into the source code searching for latency optmizations.
What are the implications? This project provides a proof of concept for a new way of choreographing and composing music. I'd like to create more than one device that could be hooked up to the web app all at the same time (I designed the workflow for the app to be parallelized easily with this goal in mind so it should be rather stright forward to add another input, once it's built.) that way you could have mulitple parts of your body contributing to the music, potentially letting each be their own instrument. With mulitple devices you could also put them on different people, so two people dancing together could create a song. Adding musical composition to dance choreography opens an exciting new outlet for creative expression.
--------------------------------------------
The final project should encapsulate all of the skills that we're developing throughout the class. This page is a brain dump of my thoughts and progress towards the final project throughout the weeks - it's all a work in progress!Brainstorming
such an open ended project . . . I have no clue where to begin . . . then anxiety about not having any ideas . . .I applaud all creatives who are able to pull content/art/prototypes out of thin air. It's not for me. I prefer constrained creativity - it's a thing, I swear, and the Oulipo group has some insane examples. soooo, without a starting point in sight I decided to outline out some goals and previous experience I could build off of.
- I know I want to make something interactive. Preferably something big since I'll have the rest of my degree to focus on tiny things.
- I'm familiar with computer vision deep learning models from my work experience.
- For years, I've wanted to choreograph a dance that is performed in front of a ton of motion sensors that would pick up the dancer's movement and play specific sounds loops when either one position/motion is repeated or a spatial region of the stage is activated. That way, the dance becomes the instrument as opposed to a reaction to the music. But, that doesn't feel like the right project for this class - since it's not exactly revolving around building a "thing".
Then, I remember that the COCO dataset has the person keypoint subset. It's a keypoint breakdown (head, shoulder, elbows, hands, hips, knees feet) of all the "person" objects in the COCO (Common Objects in Context) dataset - an open source object segmentation dataset with 330K images and 80 object classes. And Google Creative Lab already trained a human pose detection model, called Posenet, on COCO's person keypoints in TensorFlow.js. It can do human pose detection in real-time in the browser like this:
Then, I remembered that I'm back at a university now and don't need to worry about commercial-use licensing!! So I could finally use OpenPose - an even better version of basically the same thing.
OK, so what's the "thing" that's responding to these keypoints?
A mirror - turn each of the key points into robot nodes that attach to a vertical board and can move around to mimic your position as you move in front of them. All of the keypoints are labeled so each node can be a specific body part. Could they be connected by a ribbon or cable to make the stick figure outline more clear - but will these get tangled with movement?
A quick google search of mechanical mirror pulls up Daniel Rozin, an artist and professor at NYU who has made a ton of super cool mirrors out of different mechanical processes. My favorite is his Troll Mirror, which has a grid of pink and blue troll dolls that rotate to show reflections and forms through binary images.
time to figure out how that would work . . .
planning
I want to build a swarm of robots. Posenet returns 17 keypoint values - in an ideal world I'd have one robot for each keypoint, but given time constraints and unforeseeable networking issues, I'm going to set my expectations low and be happy if I get at least a few to work. When, designing I also need to keep things as simple as possible so that they are easy to reproduce and calibrate.As of now, I'm picturing the robots attached to a vertical magnetic sheet by a magnet stuck to the bottom of them. But, depending on what sensors I settle on, this magnet could interfere with other abilities, so I'm open to having it also lay flat on the ground ... mechanical shadow.
exploring other projects
zooids
open source swarm hardware developed by Stanford Shape labsgithub
These are almost exactly what I want to make. I like how small they are - 26 mm diameter, 22mm height, 12 g (light enough to put a magnet on them and move vertically?).
hardware specs:
- Allegro A3901 motor driver chip and FA-GM6-3V-25 micro motors
- STM32F051C8 ARM microcontroller for overall logic computation
- Nordic nRF24L01+ for communication with master computer
- 100 mAh LiPo battery - power consumption in order of most to least: motors, radio module, microcontroller, LED
- Projector based tracking system: projects gray-coded patterns to area robots will travel on and photodiodes on the robot detect patterns to decode location and send it back to master. more on that here.
polybotics - Abdullah, fabacademy '17
final projectproject development
- self organizing swarm robots guided by light patterns
- move with vibration motor
- goal of IR sensor, but ended up removing it
kilobots
opensource swarm hardware developed by Harvard Self-Organizing Systems research groupwebpage
Documentation appears to be out of date.
Fab final projects ft. swarms
Paul NicholsTim Rolls
Julia Ebert
Agnes Cameron
rough to do / timeline
figure out how to locate each robot
explore in week 8, input devices assignmentI'd like each robot should send it's position to the master computer - instead of using a separate camera to track the position of each one.
- point source magnet with multiple hall effect sensors on each robot to define position relative to big magnet. (could this capture two degrees of freedom?)
- I'd rather not include a projector like th zooids project, but I like the gray-coded location detection. Maybe pattern paper and put a tiny camera on bottom of robots to use the same location technique without projector.
figure out how to move robots
explore in week 9, output devices assignment- motors?
- servos?
figure out networking/communication
explore in week 10, networking and communications assignment- NRF52832 (?) - cba hello world example
Project Reivew 11/4
Met with Jake for final project review 11/4. My project is far out of scope for my experience and time frame. The localization problem is very hard and the nRF chips can be really difficult to work with. Also, there isn't a contained project that I can achieve each step along the way. I should come up with a project where each step can produce a complete project so that if I don't get to one I still ahve something to show for all the work.Jake said my initial idea about a device that could respond to motion with sound is enough of a final project because I could build a wearable device that requires molding or machining or build a speaker to play the music out of . . . looks like I have a new final project to outline.
RESET
Goal: make a device that reads movement (speed, position, orentiation, etc. --> one or all the above) and translate that into music.The actual "finished" goal is a moving target - depending on how each step goes I could choose to continue expanding or not based on time constraints.
running ideas list
- proximity sensors with multiple different boards to allow wrist-to-wrist or wrist-to-knee mean something different in the sound
- a way on the user end to specify where each one is so that foot makes one sound while head does another so that level changes are picked up more on something you wear on your head.
- wrap the whole thing in docker ??
final scramble
making a human synthesizer. dance becomes the instrument. ideally i want more than one accelerometer to be able to pull data from - could two boards tell how close or far apart each other are?what is the actual thing to attach to the body:
knit something to wear - socks, glove without fingers, headband/choker that has little pockets to hold on to boards electronics on circuit boards -
- sewn in to material?
- vinyl cut circuit boards? - but that wouldn't work for the accelerometer chip i have.
- little pocket sewed onto outside of wearable - the pockets could have jacquard patterns of little music notes
- each chip has it's own loop that plays based on different instruments and all the synthesizing is happening on the chip with a speaker somehow attached to it
- chips really just sense motion at a specific spot then that data is sent back to my computer where it's analyzed and matched to song loops and played through whatever speaker.
board design
I need a microcontroller with the BNO055 ~ I was planning on setting it up with a ATtiny44 cause that's what I had tried doing in input devices week, then eventually moving it over to the ESP 32 when I try to make it wireless. But I talked with Jake and he recommended that I go ahead and start with the ESP32 because I need a microcontroller anyway and it's not as simple as just swaping out the tiny44 with the ESP in an initial board design. He also gave me a feather dev board for the ESP32 so I can through together a circuit quickly to get everything up and running as a start.here's everything that can walk me thorugh how to use the ESP32 feather. and here's everything I need to know about the BNO055 breakout sensor.
it seems like there are so many ways to get this up and running - to get familiar with how it all works instead of trying to start from the ground up as I've been doing thorugh out the weeks with minimal success ~ I'm going to start from the easiest more abstract and documented layers, then repeate the process with less abtraction to make the most sense of it.
I ordered some more sensors so that I can have more than one chip if I make solid progress ~ but I didn't order the breakout boards - that might've been a mistake in terms of a nightmare debugginer, but also follows the theme of a the class better. so eventually, I'll need a board without all the adafruit dev work - just the BNO055 and ESP32 so with each set up I'll push back more layers.
to start, I'm falling fully on the arduino IDE - steps taken to get it running
- install adafruit sensor library for BNO055
- add ESP32 to arduino IDE board manager and install library. followed here
- also nees to install SiLabs CP2104 Driver - why?? USB to UART driver. downloaded here
setting up the ESP32 feather as a bluetooth device works, but then randomly disconnects. I can connect on my laptop but almost immediately the connection goes away and then it doesn't show up again. Neil sugested that it's most likely to do with the power supply because sometimes the power from USB is not enough to support the ESP32. I may explore this by hooking up the feather to an external power supply. but don't want to invest too much longer time into the feather board and want to start making my own soon.
first, I want to test wifi connection. Jake warned me that he's had issues hooking up the ESP32s to MIT's wifi network - potentially some security issues. so I'll start with my phone hotspot. walkthrough on wifi with esp32: aqui I can connect with camron's iphone hotspot - which maaay be the best route for the final project but could be bad for data spending. so lemme try MIT now.
Connected to MIT GUEST no problem . .
this seems like the best route forward for the final project. I can use MIT, but if there's a big issue day off I can just hotspot my phone.
so now, to figure out how exactly to send motion data through the wifi connection. neil's helloworld is a connection to a wifi as a client so the ESP32 visits http://academy.cba.mit.edu/classes/networking_communications/hello.html and returns what it reads. For my final project I need the ESP32 to write position results to the music making application that I need to write . . . so is the ESP32 a server? Or do I serve a webpage with gitlab and the ESP32 connects as a client which can write to server with api . . that seems best especially if I have more than one ESP they all just hit an api endpoint that returns the same position format.
figure out how to post data with feather or design ESP32 board??
here's a tutorial on how to post http requests with ESP32.
move over to networking and communication week to follow ESP32 board design :-).
App interface
now to design the app itnerface for the ESP32 to send data to and uer to control the sound output! work is documented in week 12.packaging
Designing the package for the circuit board. The benefit of working in Eagle is being able to export the board to fusion to easily design something around it. I was disappointed that the holes didn't carry over though.Then I exported it as an .stl file and send it to a prusa printer.
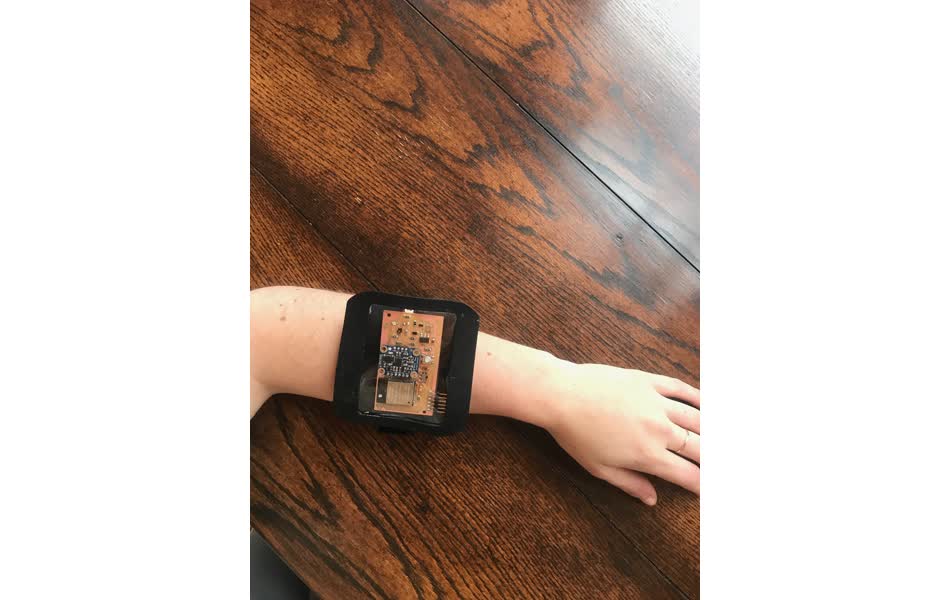
I made a wrist band out of Neoprene fabric with a large square for a pocket made of polycarbonate. I sewed the polycarbonate pocket on and then glued a black rubber cover for the top to hid the stitching. then, I added velcro to make the strap adjustable.
final assembled packaging for board
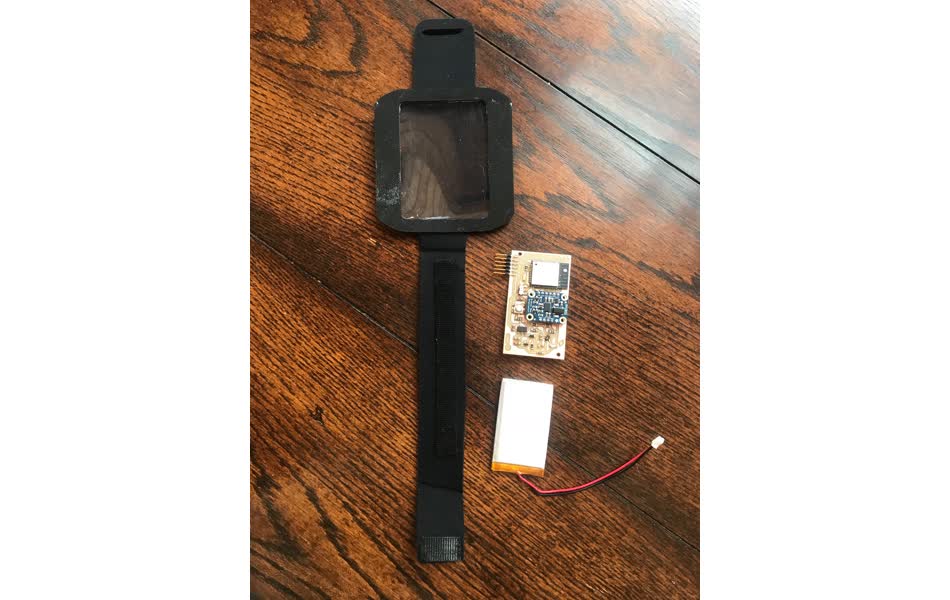
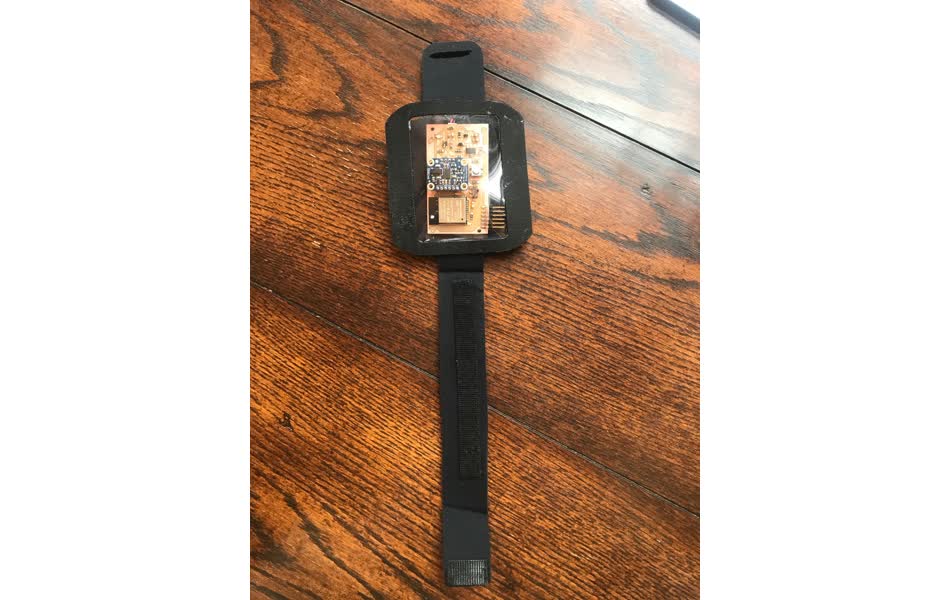
devices packaged!