Week [0,∞]: Final Project Development
Throughout the semester, I explored three different final project pathways, each inspired by a deep need for the product (at the moment, anyway). As external circumstances made the first, and then second, project idea unnecessary, I flexed to make a project that would still be used and worthwhile. This path changing twice meant that I coudln't get as long as I would have preferred for my final project, but at least I stayed true to my core values: Design with purpose!
Follow below my exploration through my three different (mini-)Final Projects:
Project 1: A Smart Kitchen Timer: Bringing students together through timely email notifications
The goal of this projects is to notify all the House members when the food needs just 15 minutes to be ready, and then again when it's finally ready. The idea is that if Jan has a toy that she likes to play with, she will very likely play with it on the daily, and the members (including myself) can always be notified, no matter how late or early the food is ready. Here you'll be able to track my progress on the development of my final project. Since work will come in stages and sporadically spread throughout the entire semester, I will make a point of cataloguing every significant work period here. I'm treating this semester-long assignment as a design project (and am thereby pushing myself to adhere to the (some) design process), whereas the weekly assignments are meant to be fabrication modules focused on learning the technique, not practicing the design process. Keeping with the pedagogical theme of my class website, I will also make it a point to document both the design fabrication techniques as well as the lessons learned while learning.
Hope you enjoy learning with me!
Background and Context
- TDC is a fraternity at MIT
- I live at TDC.
- Jan is the House Chef.
- She cooks lunch for TDC.
While Jan's food is THE yummiest food on all campus, as food-making tends to be, the times that it is ready varies with each recipe. Student schedules, however, do not. Students of the house are running between classes and never have a good gauge of when the food is going to be ready for pick-up. Time is tight. Students will usually either text their friends to ask if they've been by the house so they can run by during their 15-minute window, or just wait until all their afternoon classes are over so they can go home. The system is inefficient and cumbersome, and simply not going to do for the rest of my time here.
Exploration of project concepts and functional requirements
In this phase, I wanted to make sure my project would have a purpose as this tends to mean my design will be much more thoughtful and thorough. At some point during the two weeks that this assignment was in the back burner, I had the idea to make an electro-mechancial notification system: A toy for our house chef, a message manager for our residents.
Here at TDC we have a chef come in every day to make us lunch, but lunch time is a very busy time for students: Some are stopping in between classes, some are in between meetings, and some just dont' have the patience to wait around for it to be ready.
So, I set out to make something that would be:
- Fun and playful so our non-techy chef would want to play with
- Reliable and customizable for notifications in form of preferred method (can send text messages, WhatsApp messages, fb messages, email, etc.)
- Informed by the needs of the House and able to adapt to different scenarios (lunch and dinner)
- Accepted by the different profiles of users so there is enough buy-in that the House will continue to use the device
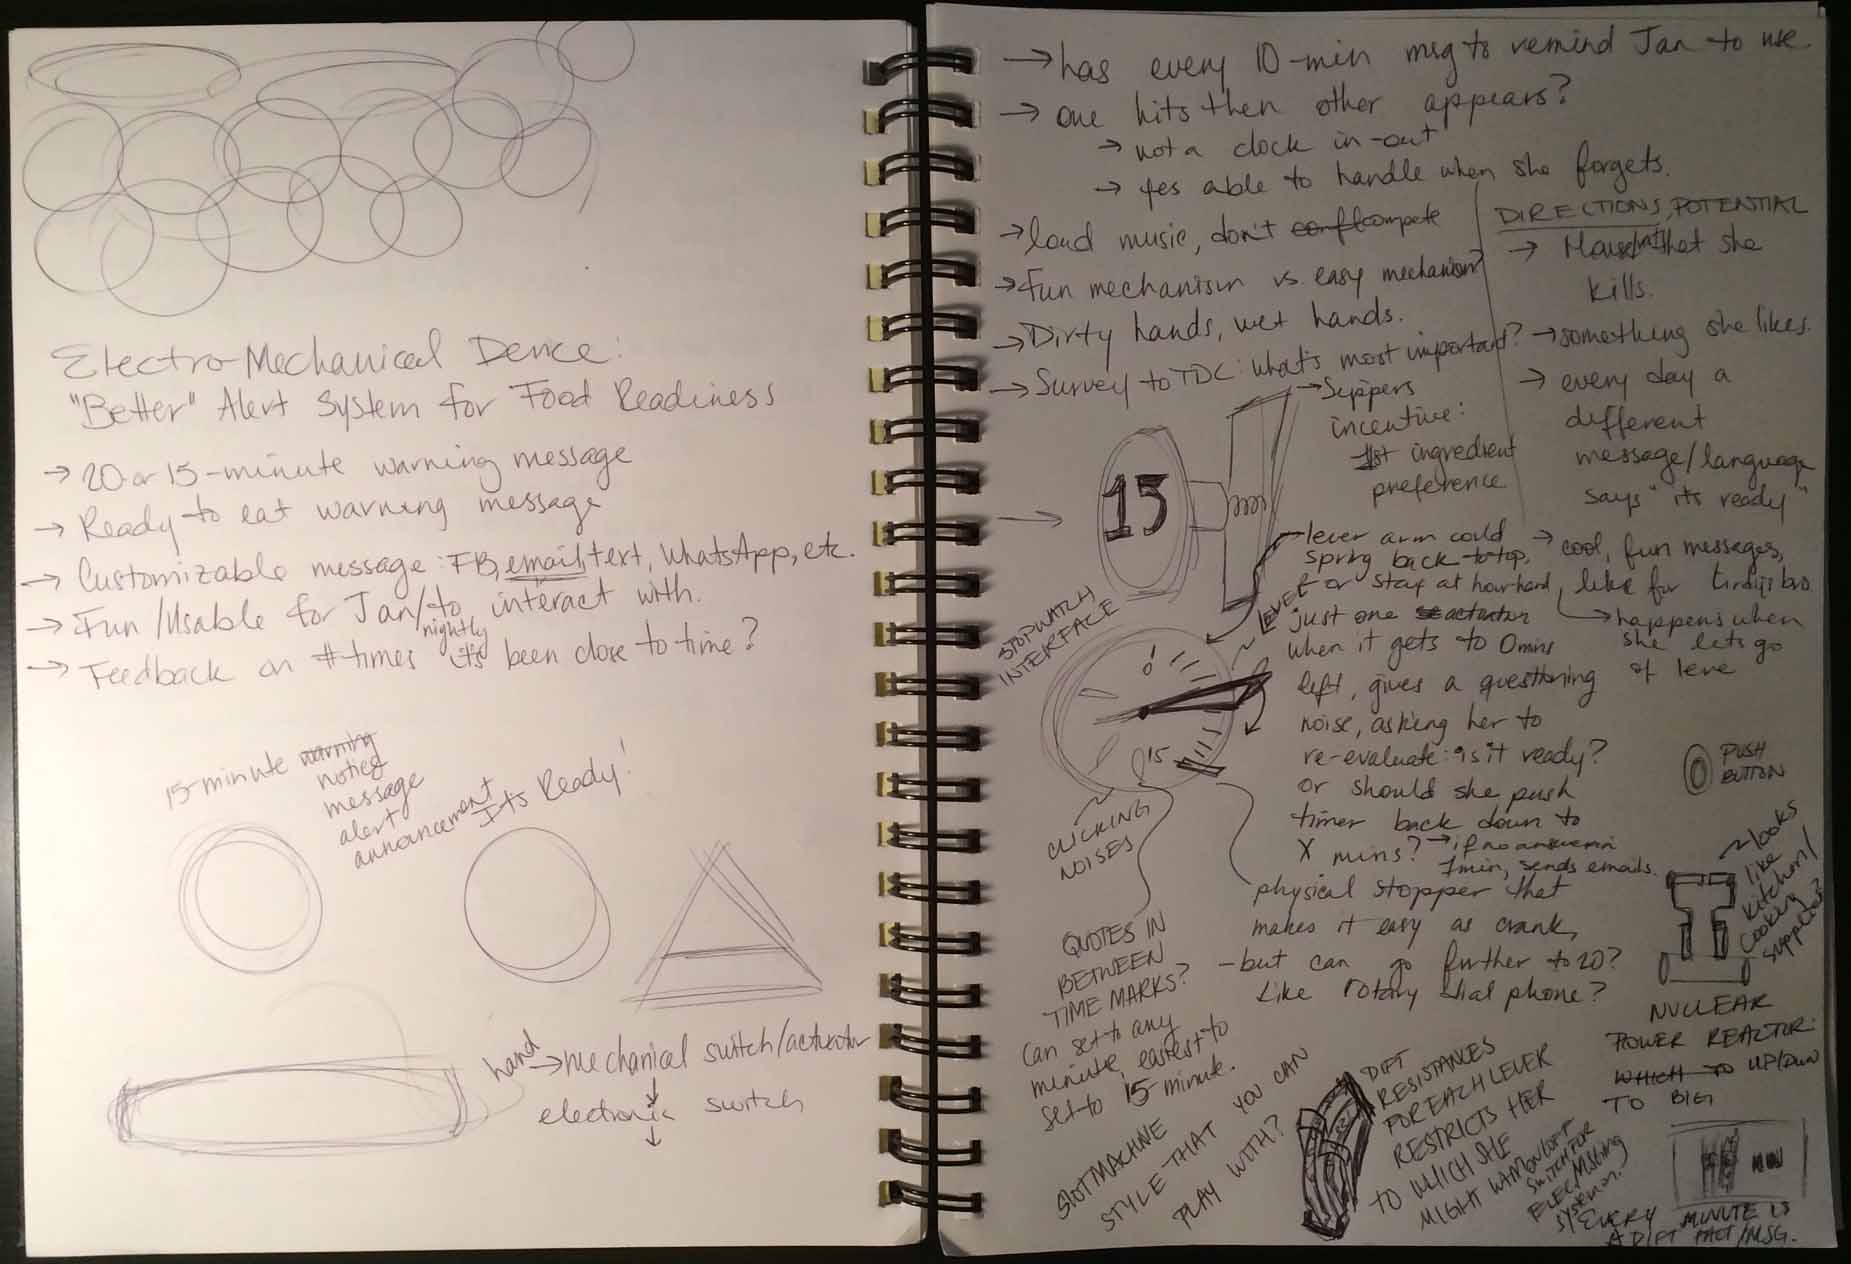 Some of the main points and ideas that emerged from this process included:
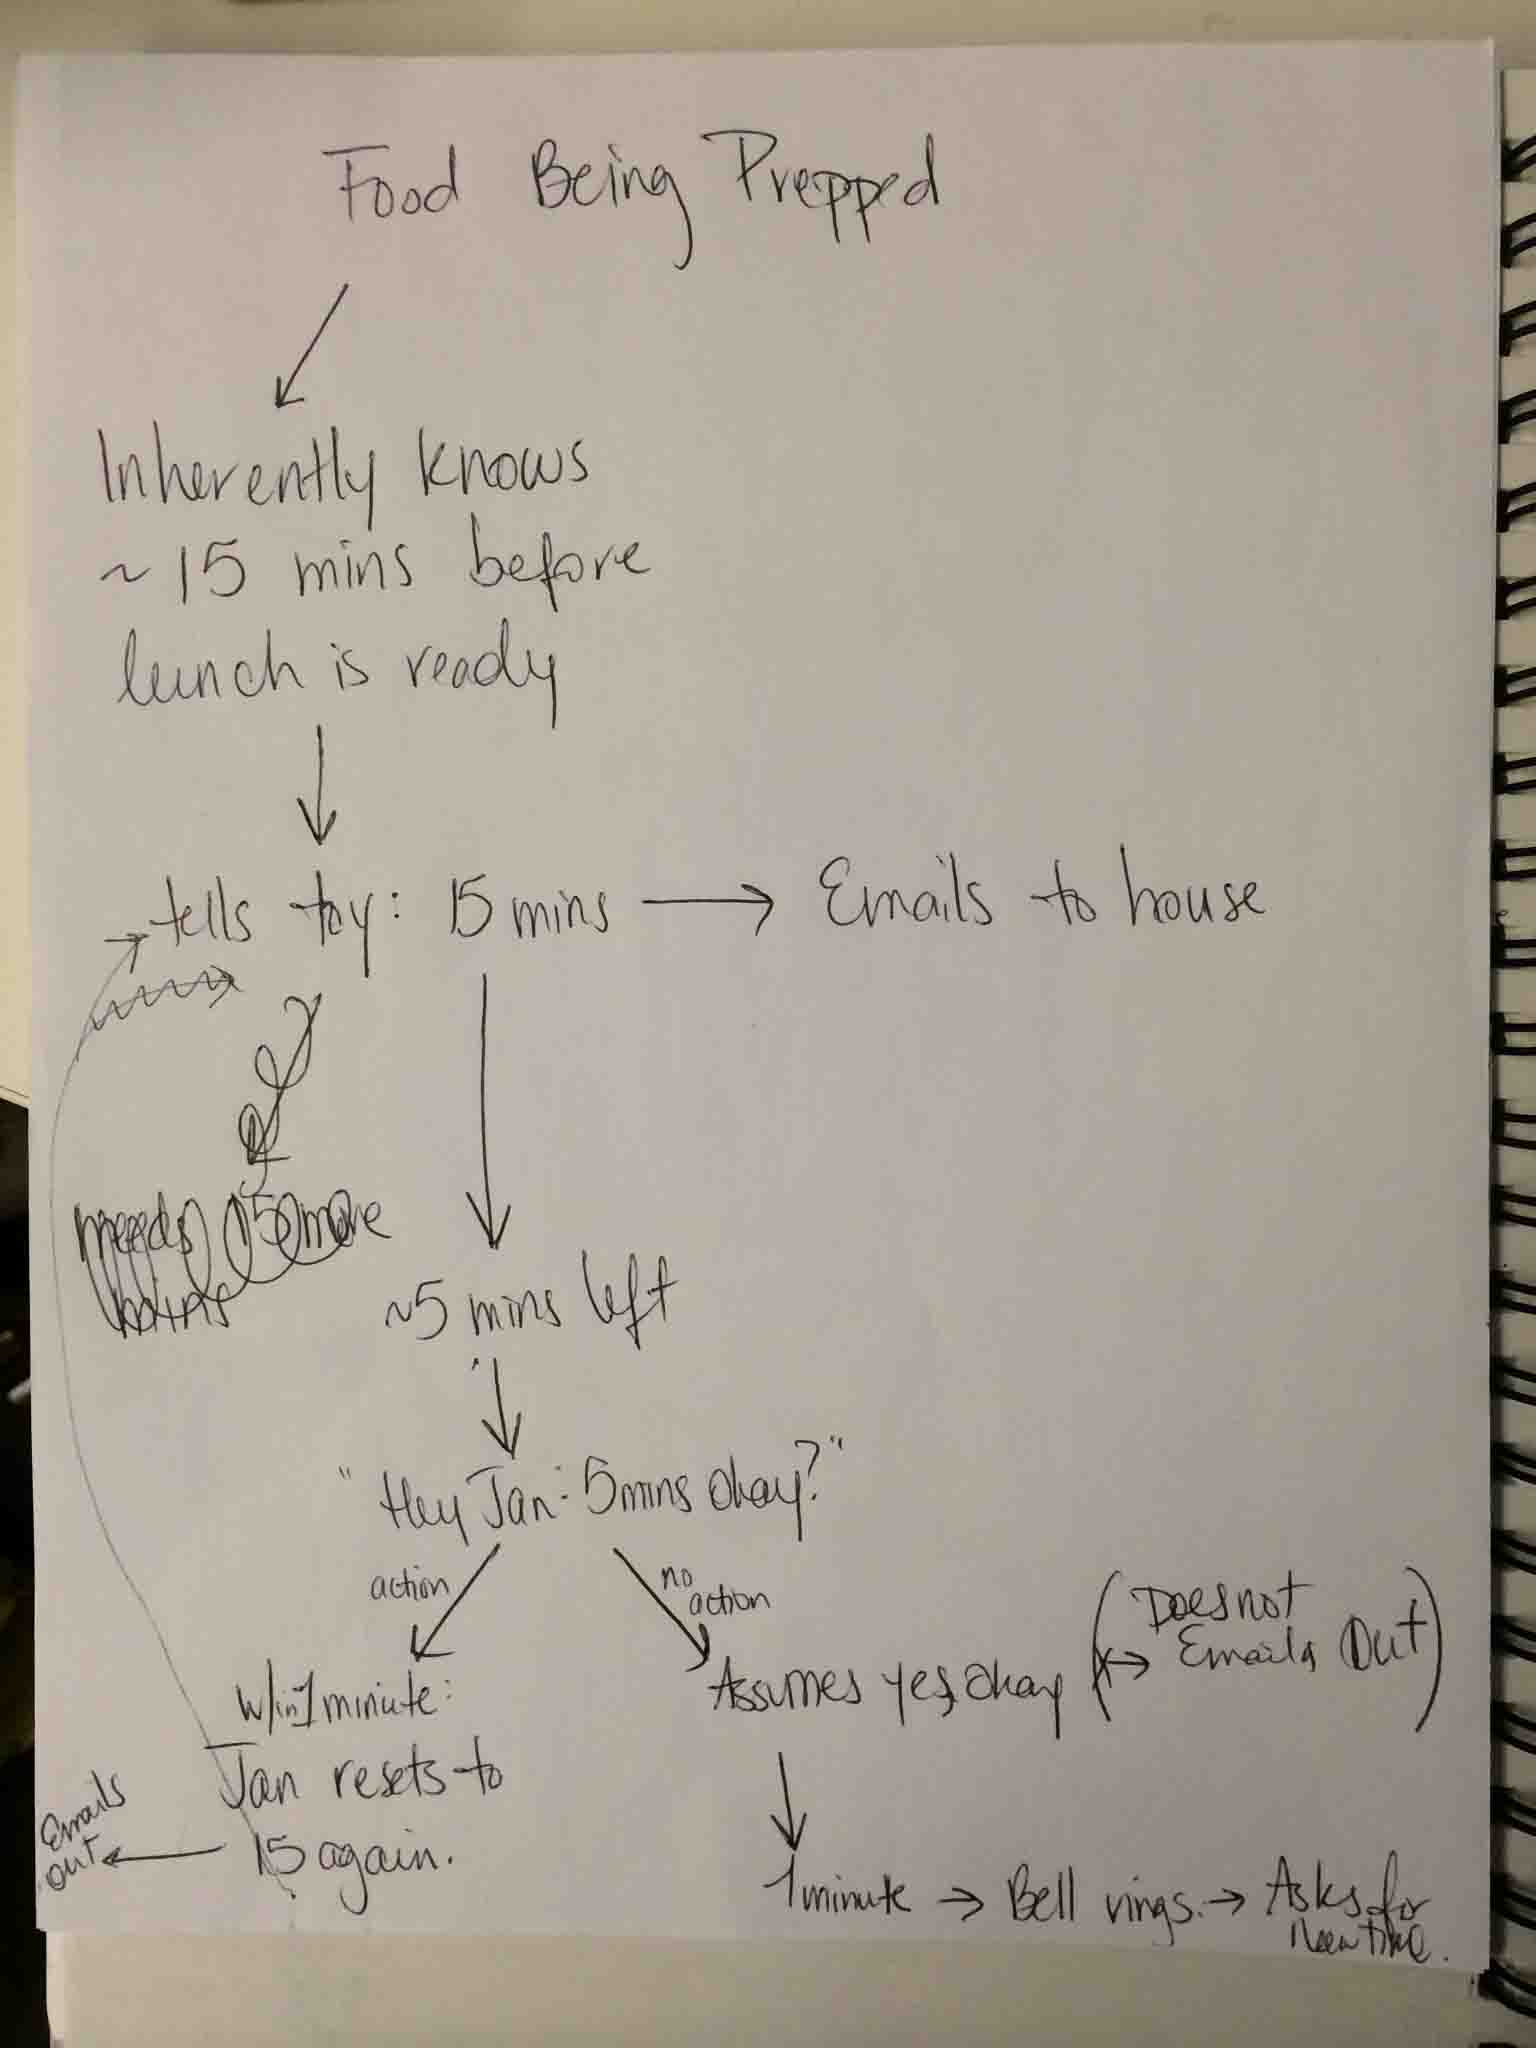
- ~15-minutes would be a good first message to the students, then a "Food is Ready" message would follow-up.
- ~Would be great to have feedback on the # of times the food has been on time, as predicted
Sketching Concepts
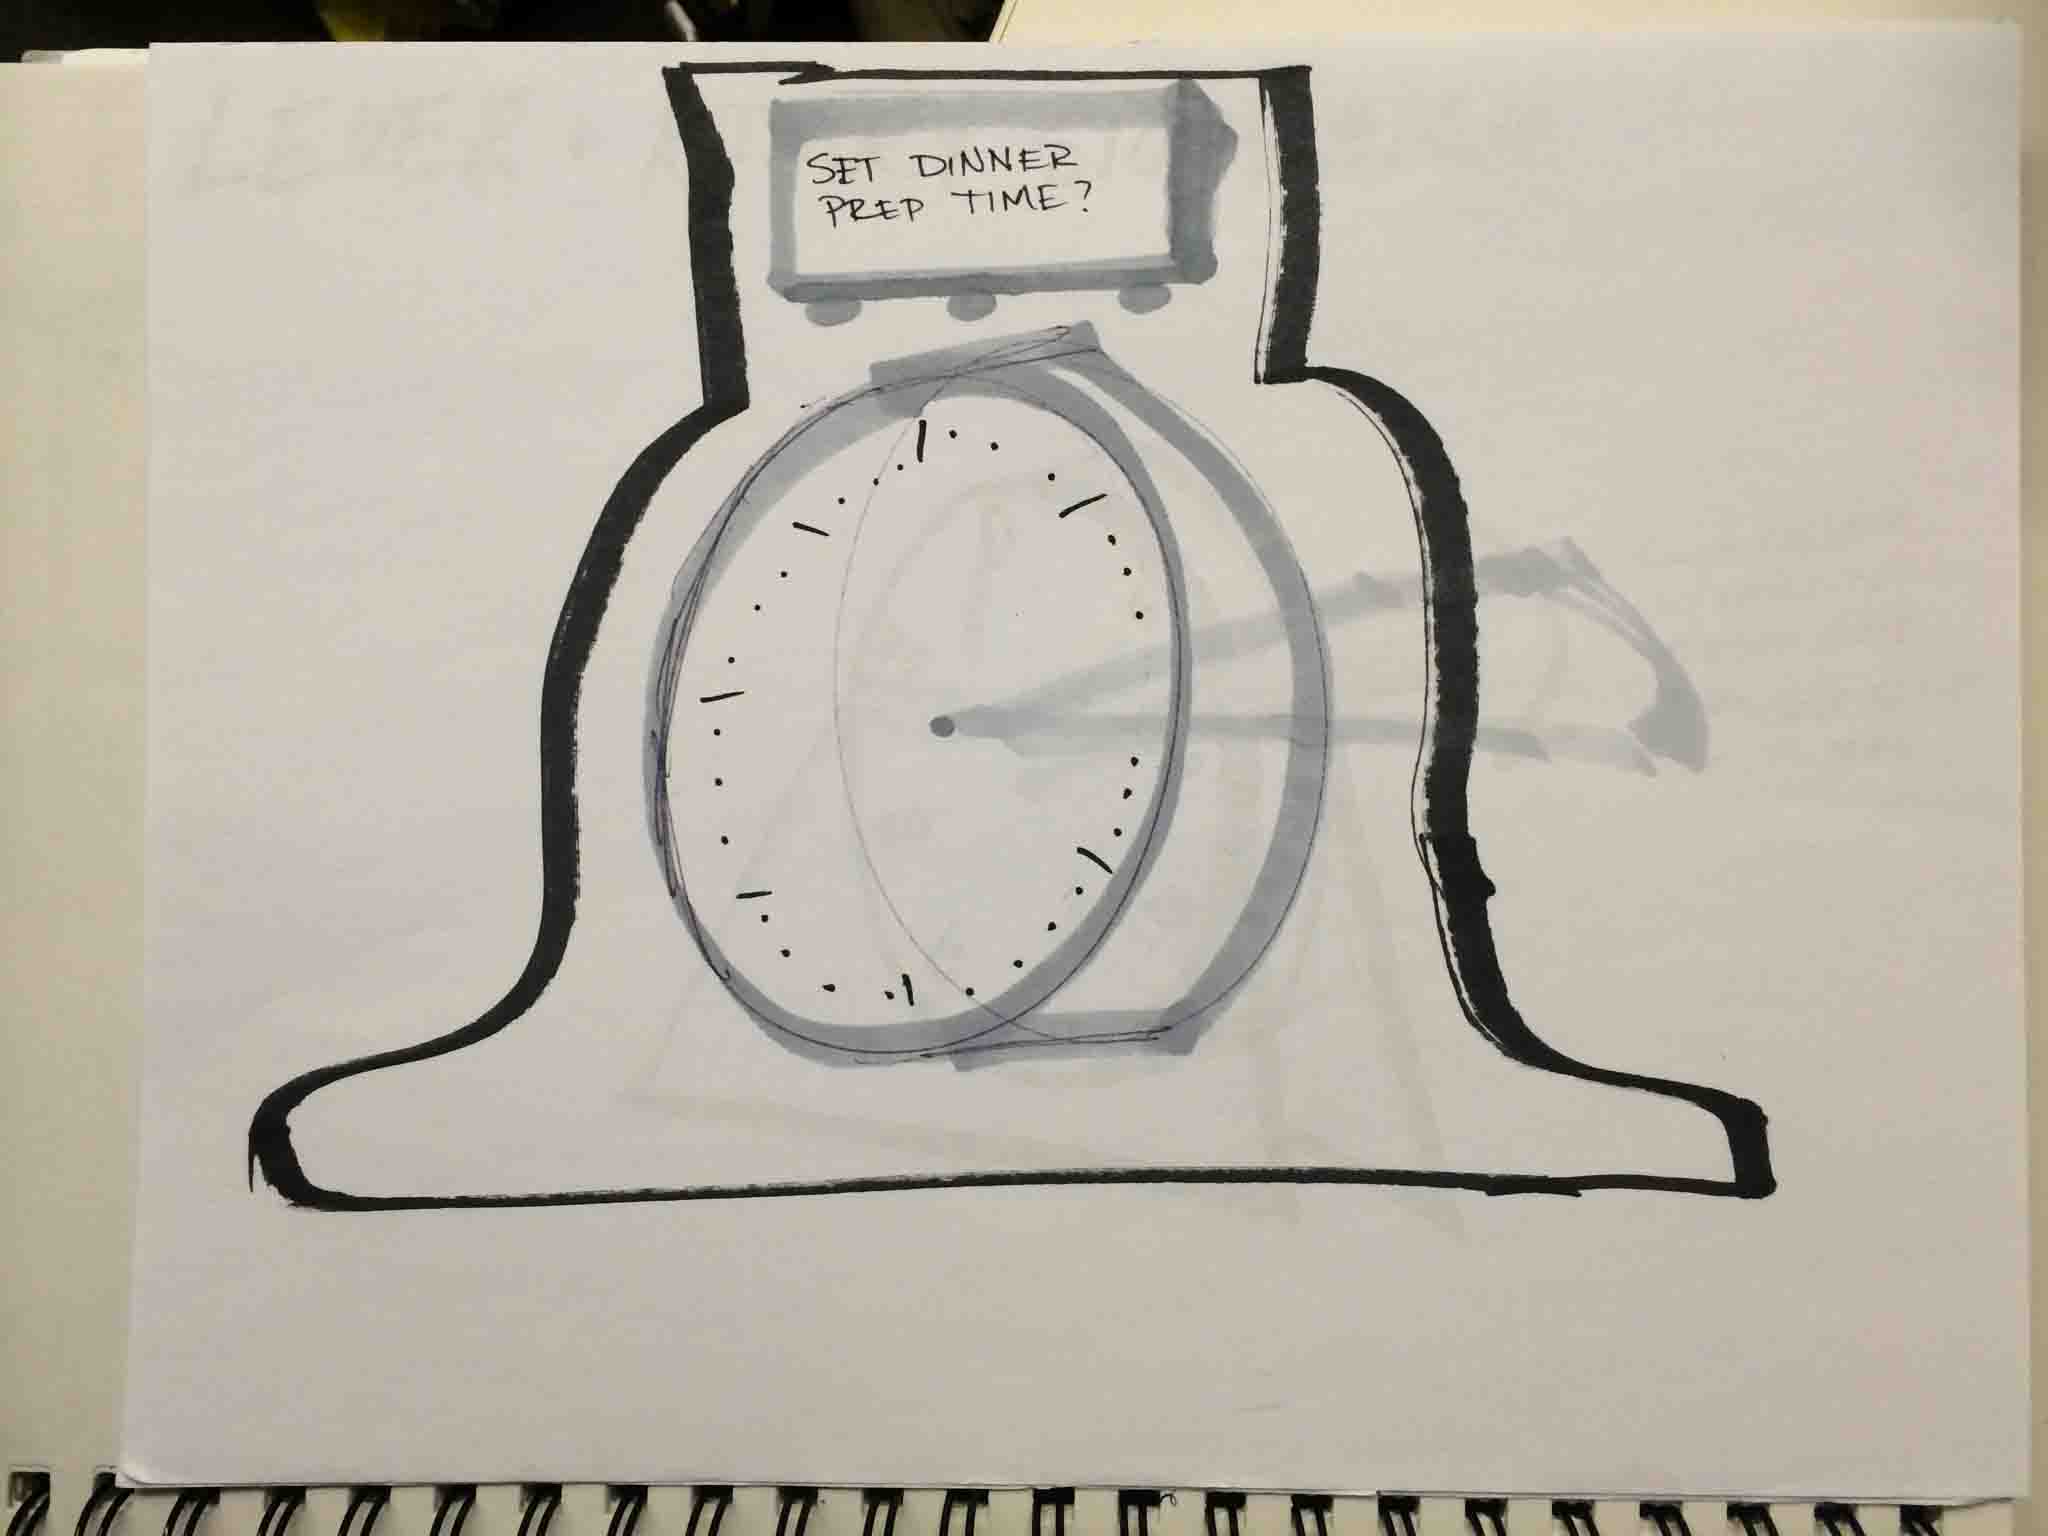
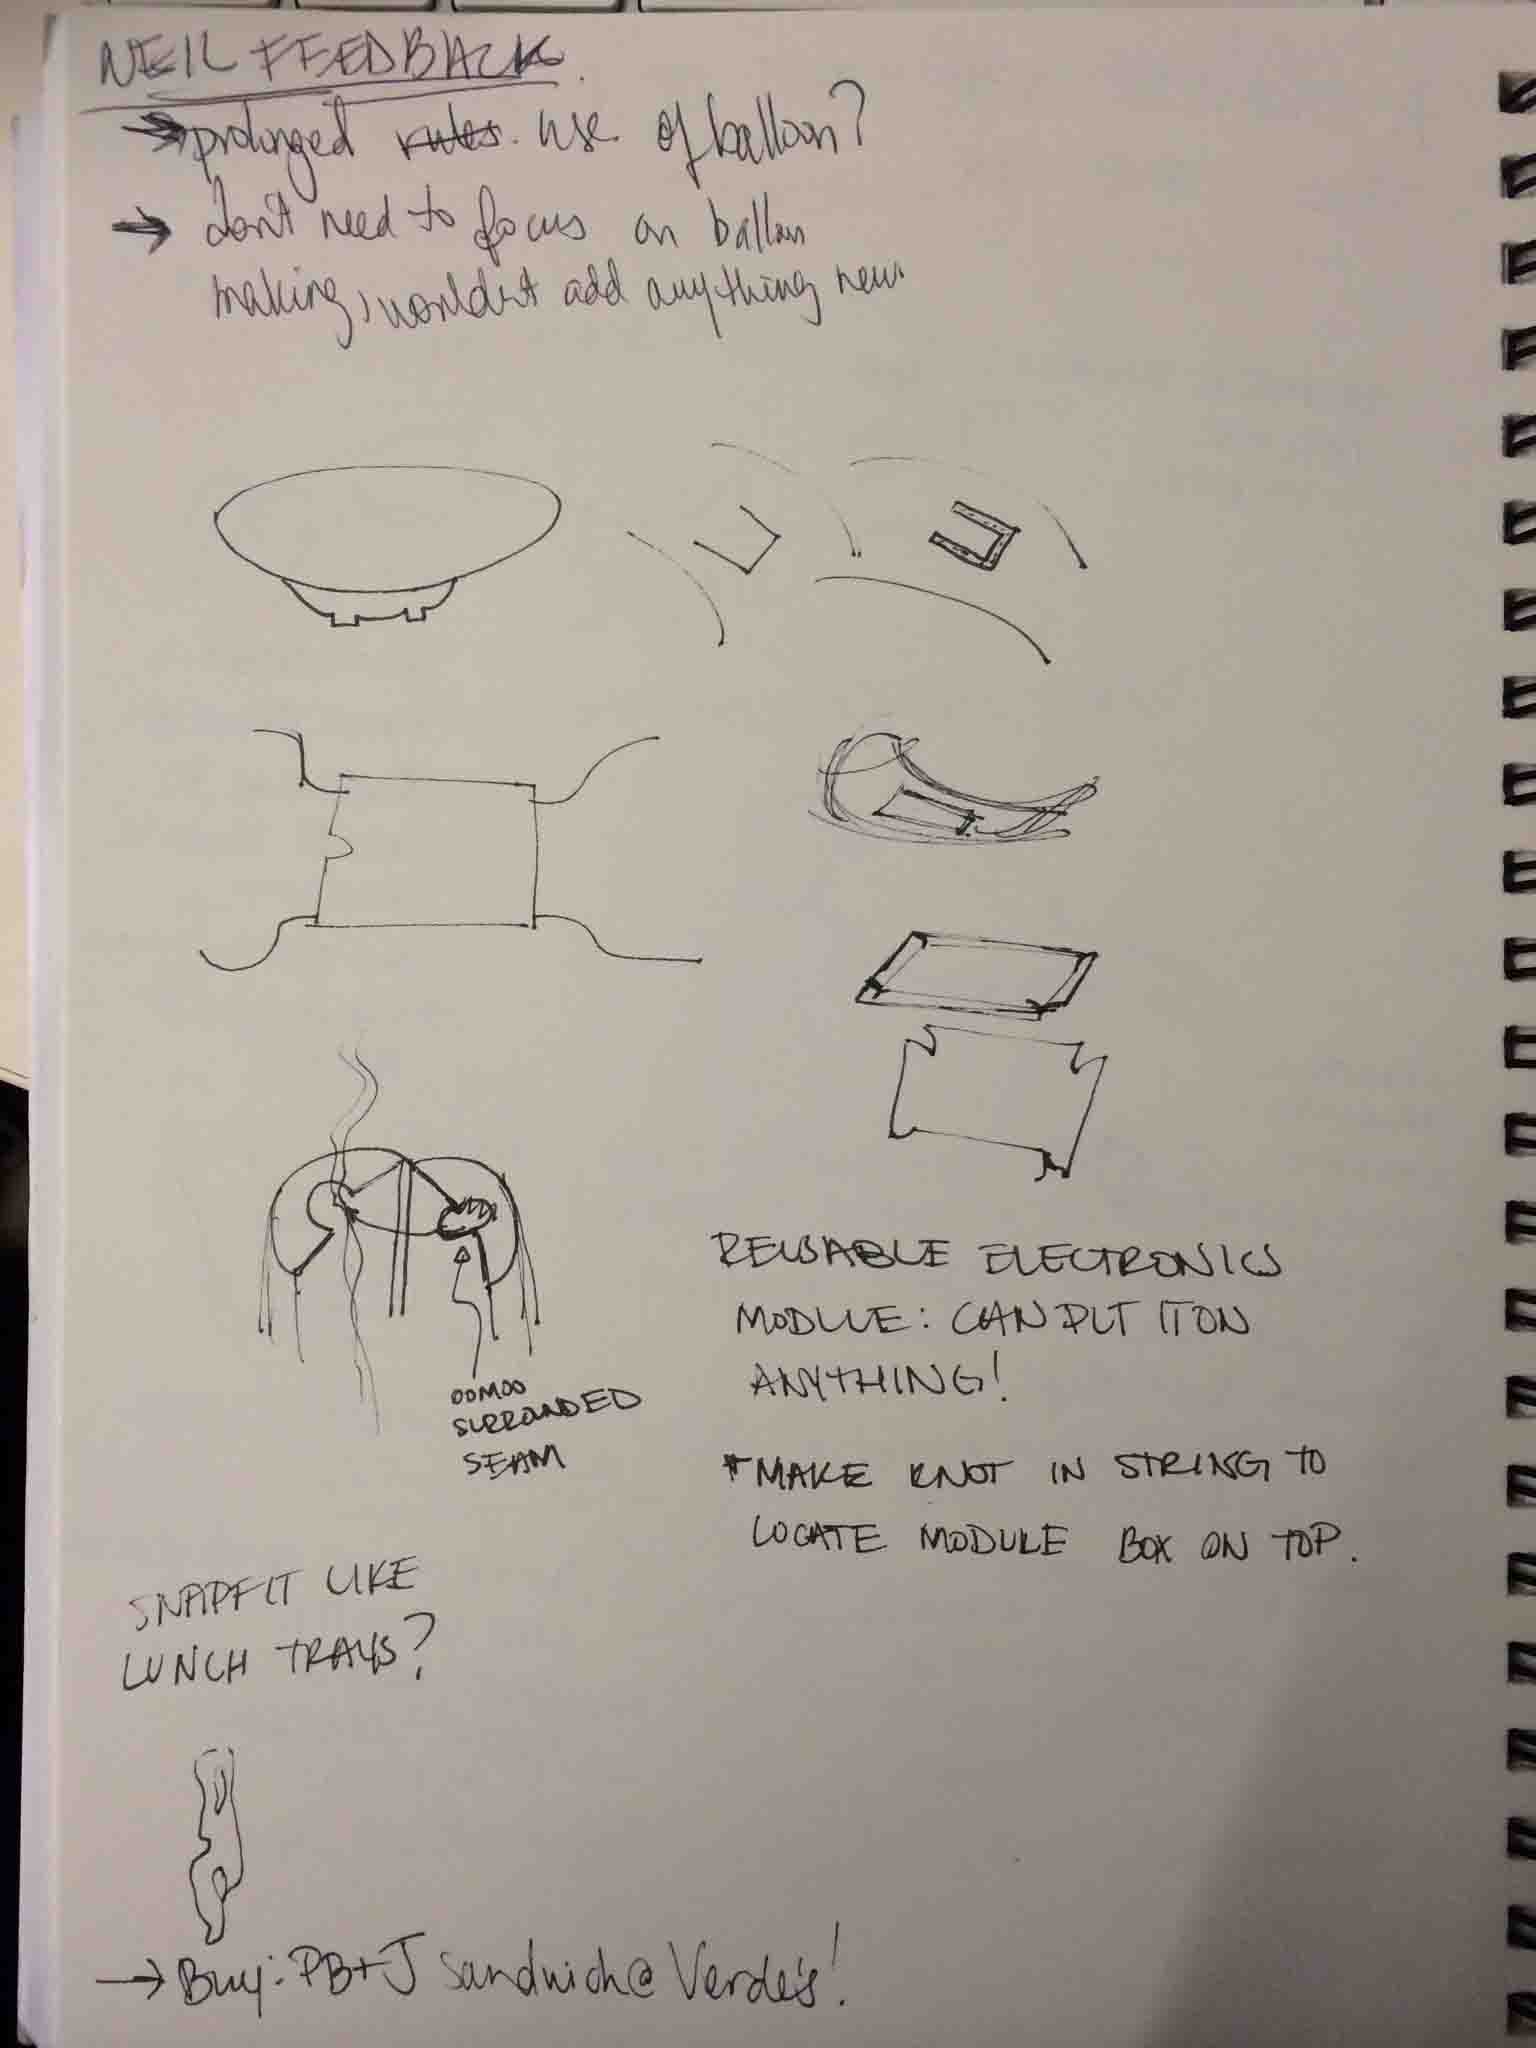
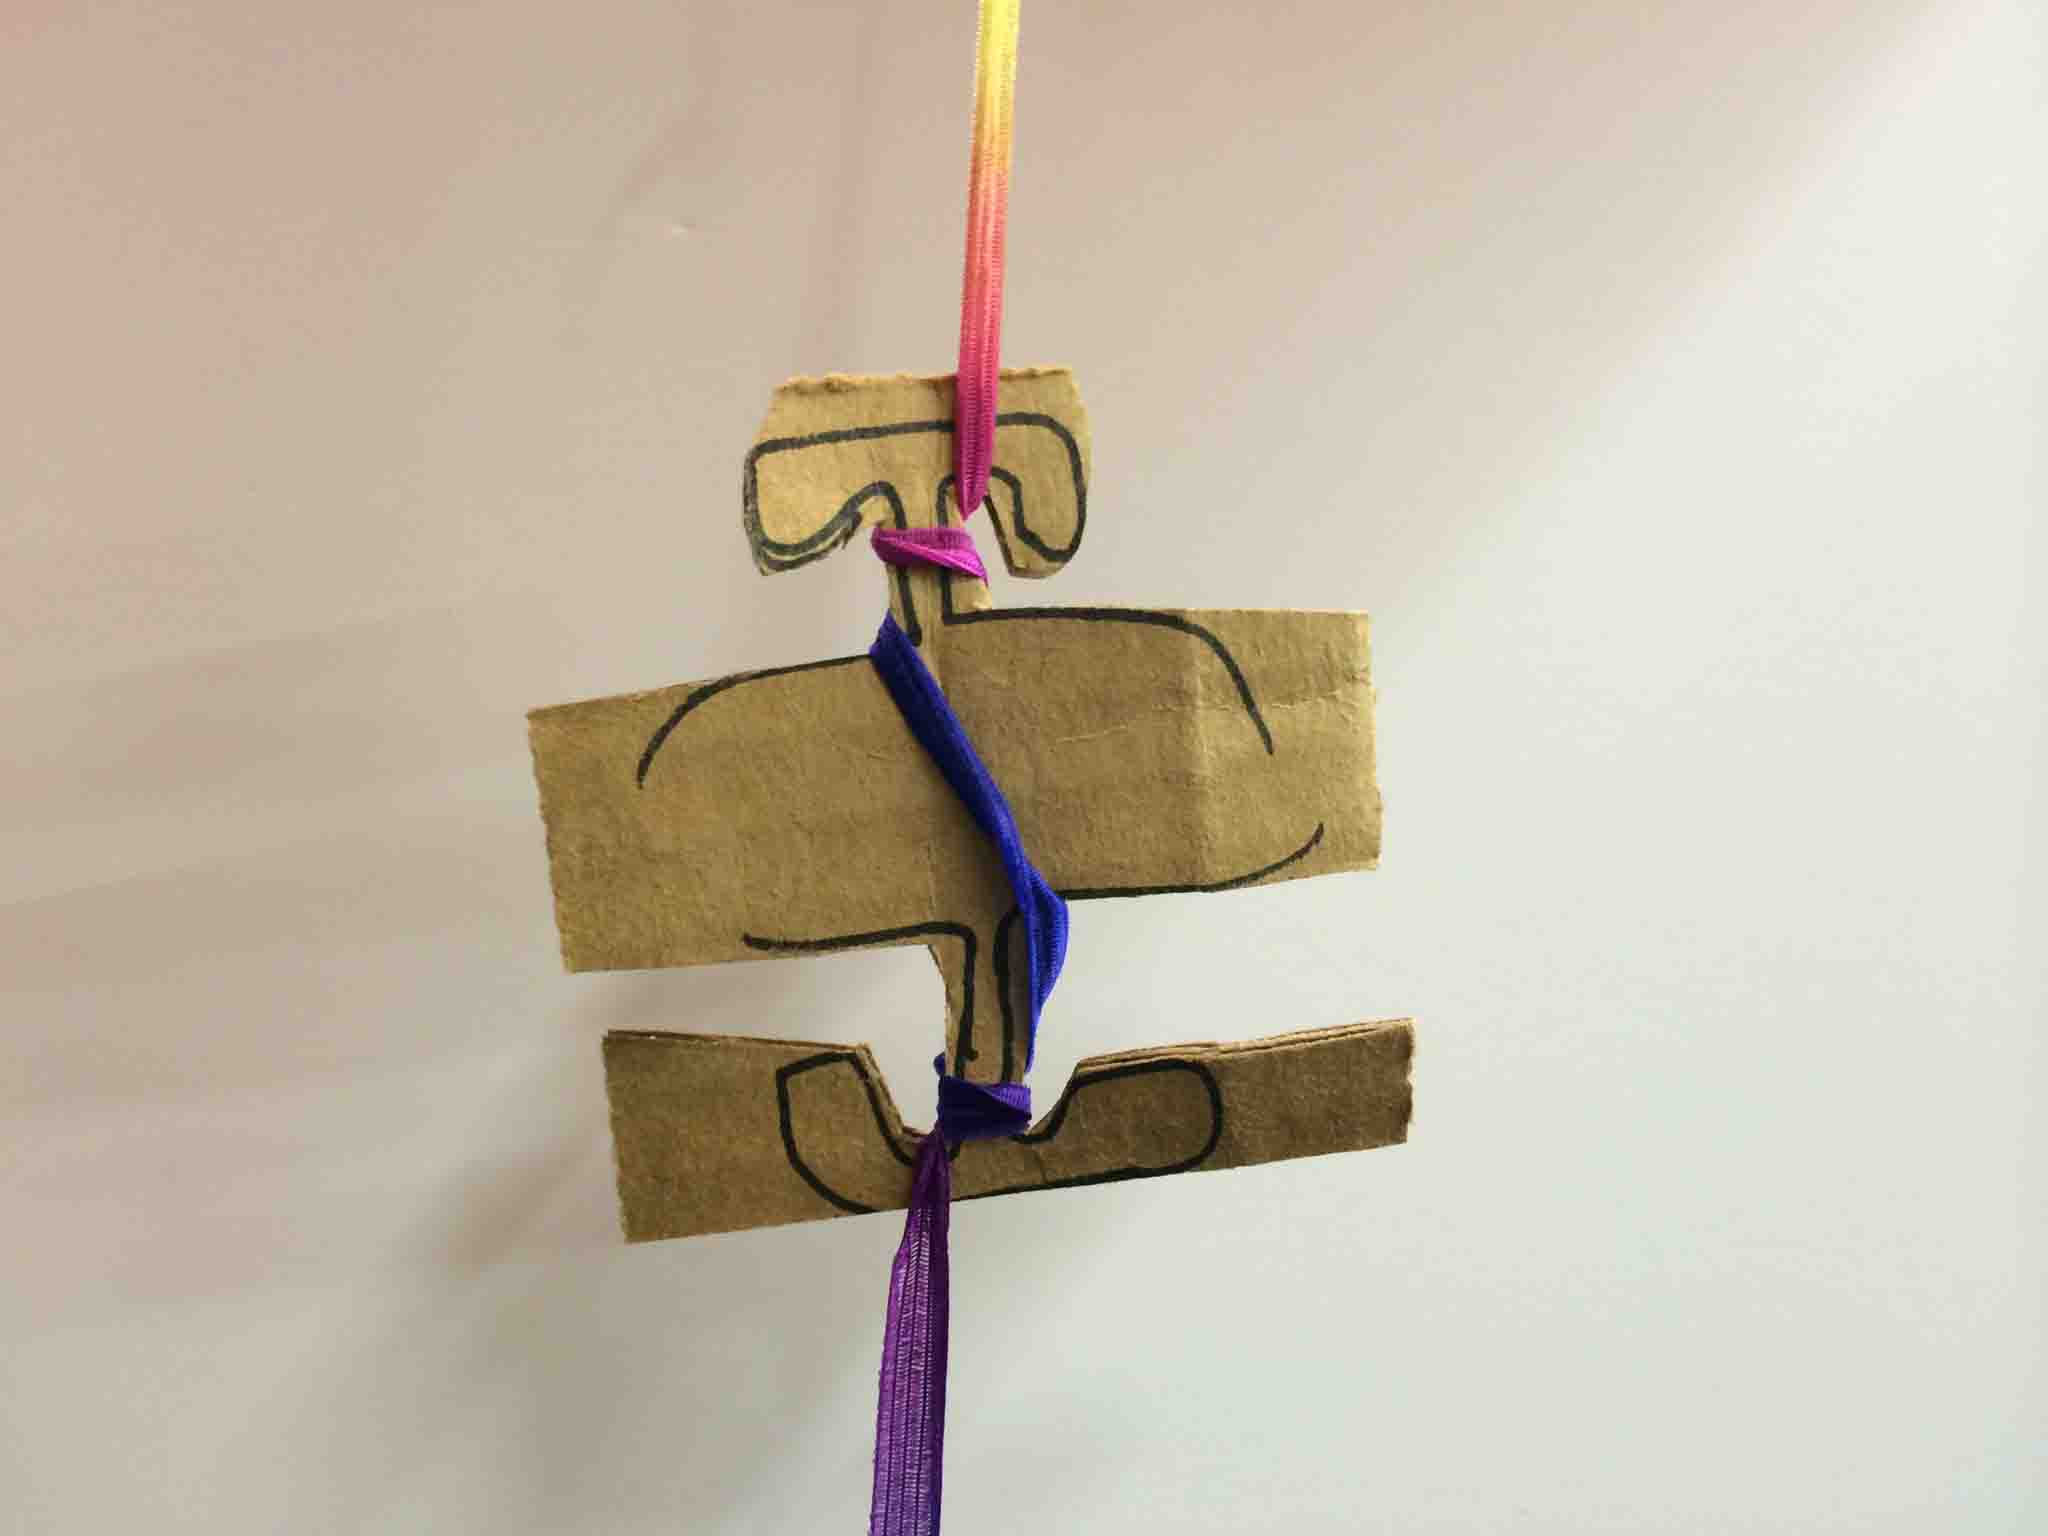
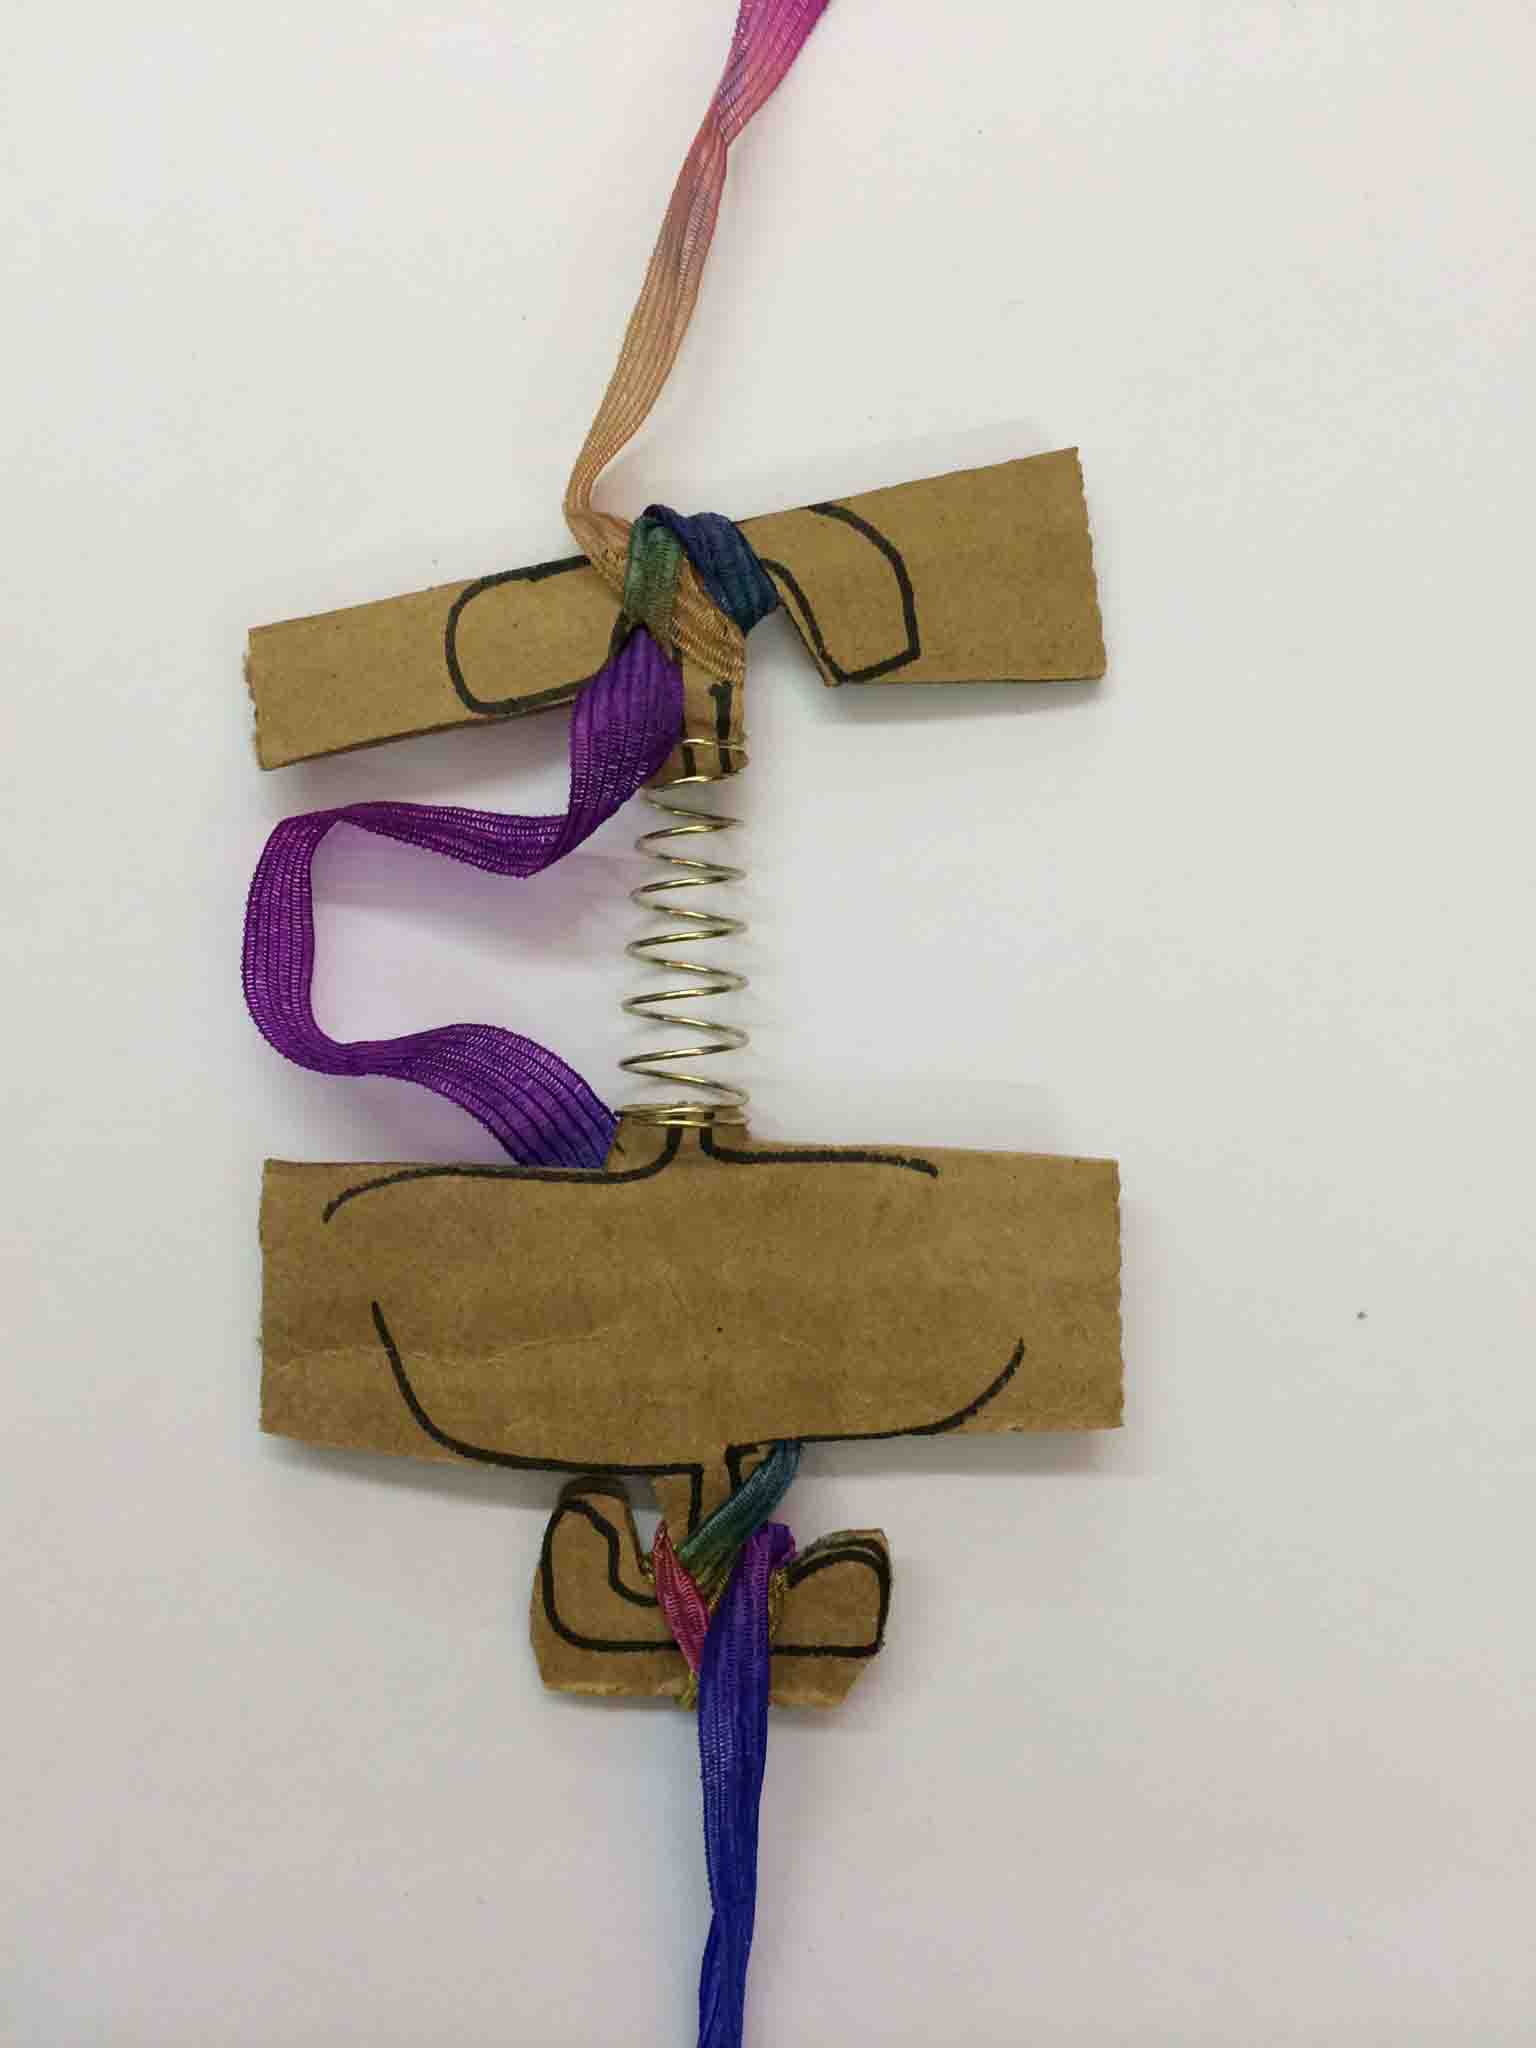
Then I began exploring different manifestations of this device, or what it could look like from our chef, Jan's point of view. Once I had a number of sketches, I chose the more promising ones and made three more refined, annotated skethces, pictured below.
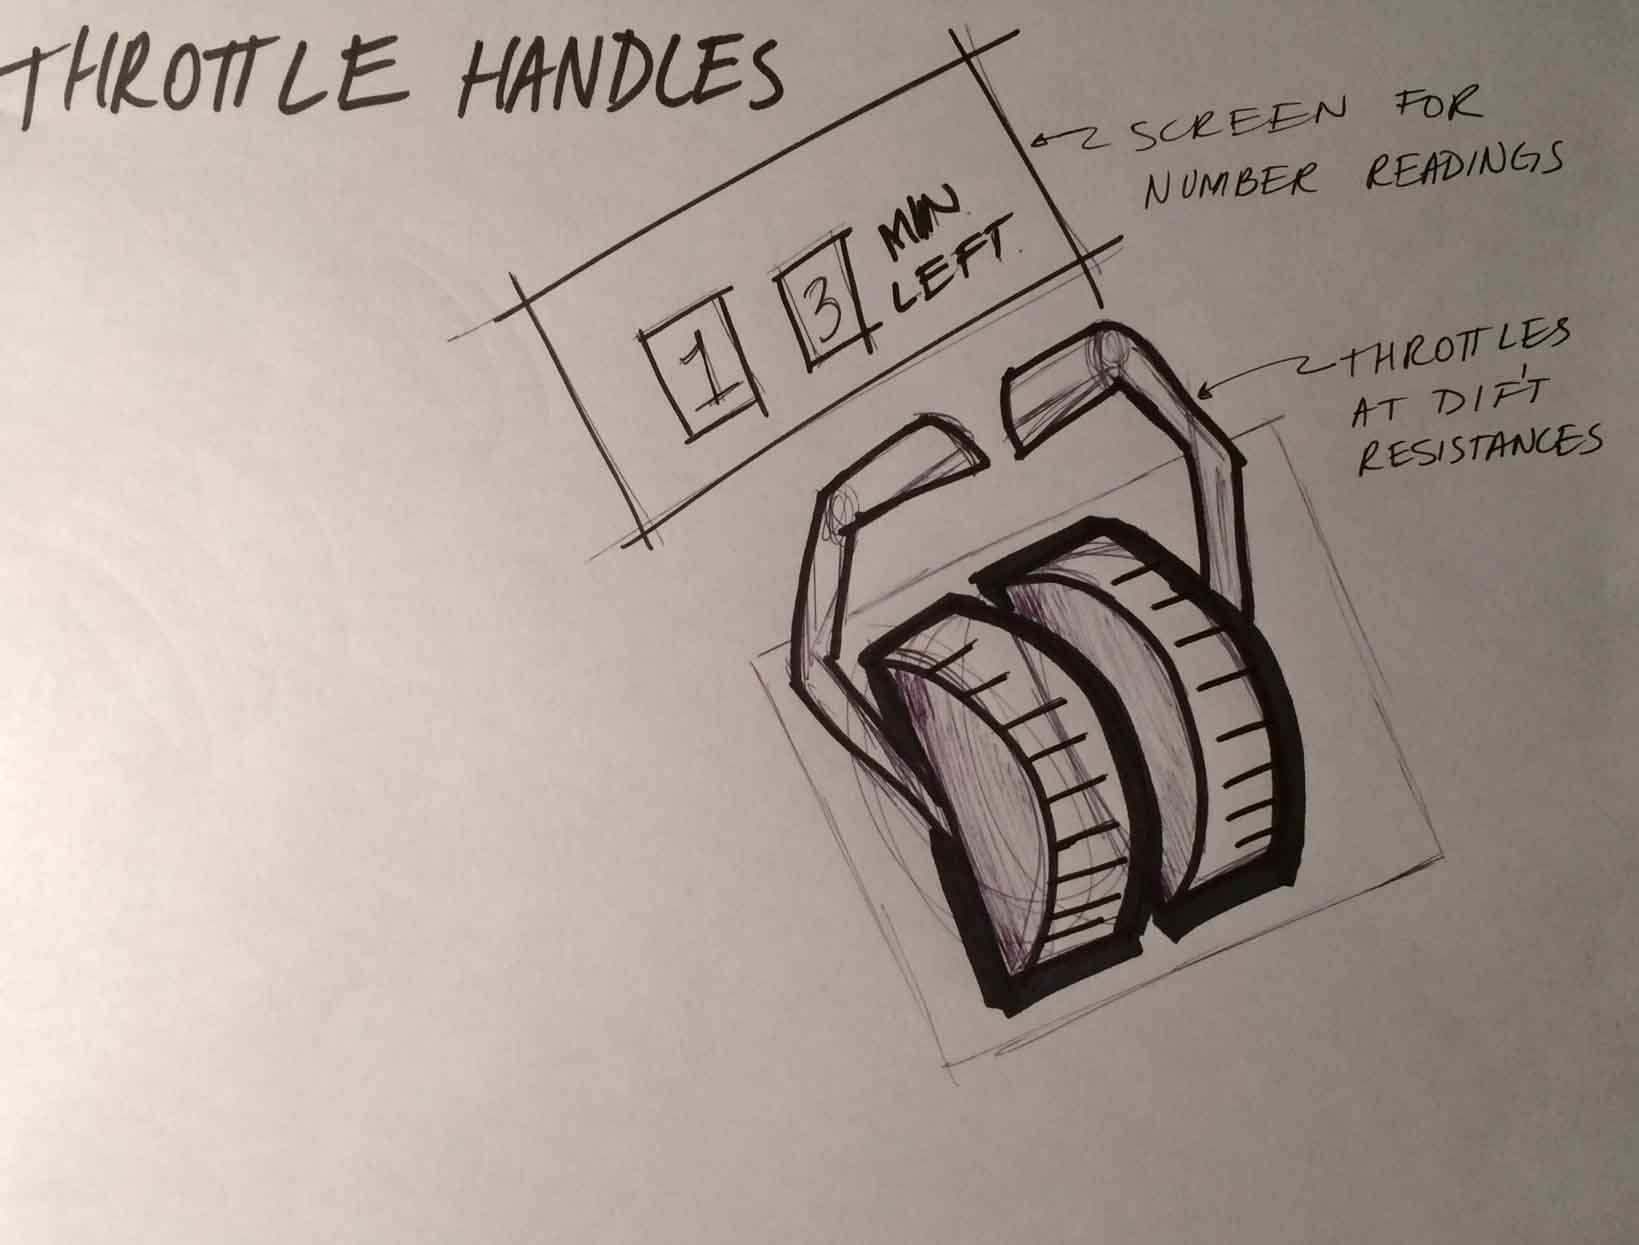
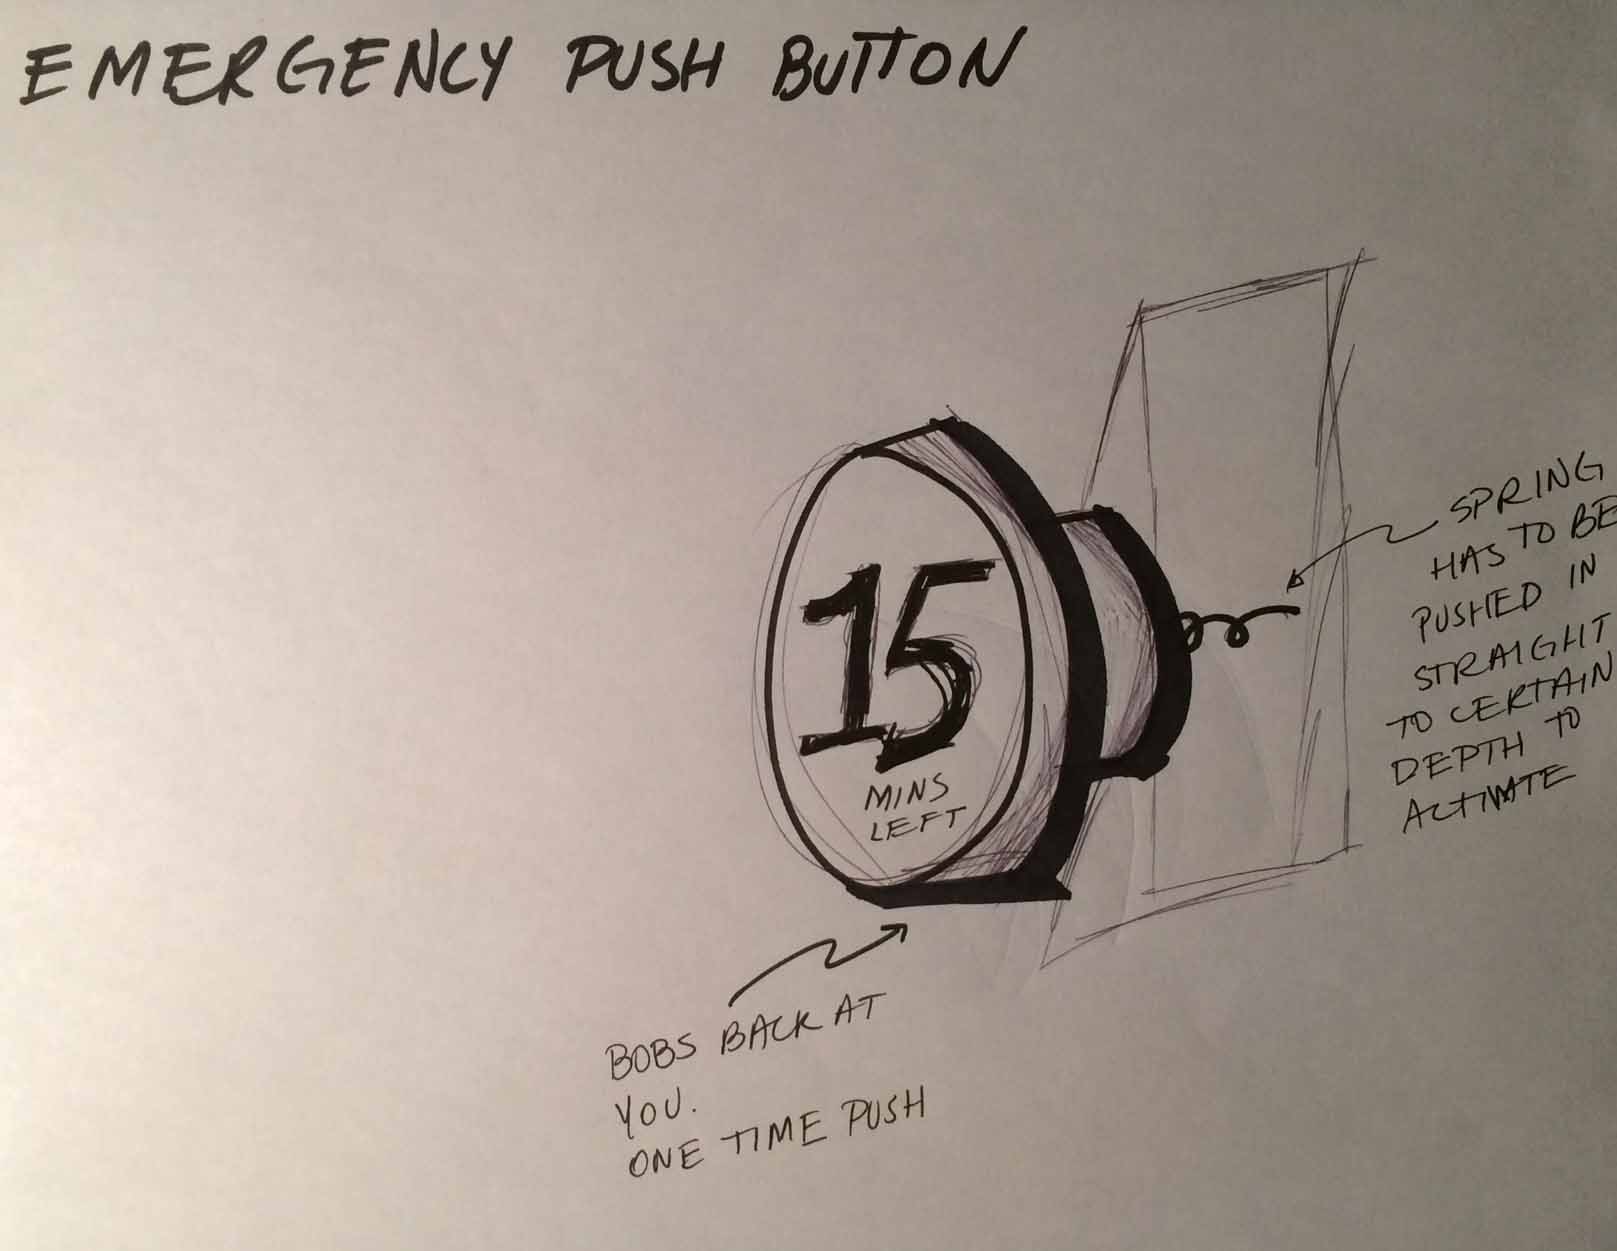
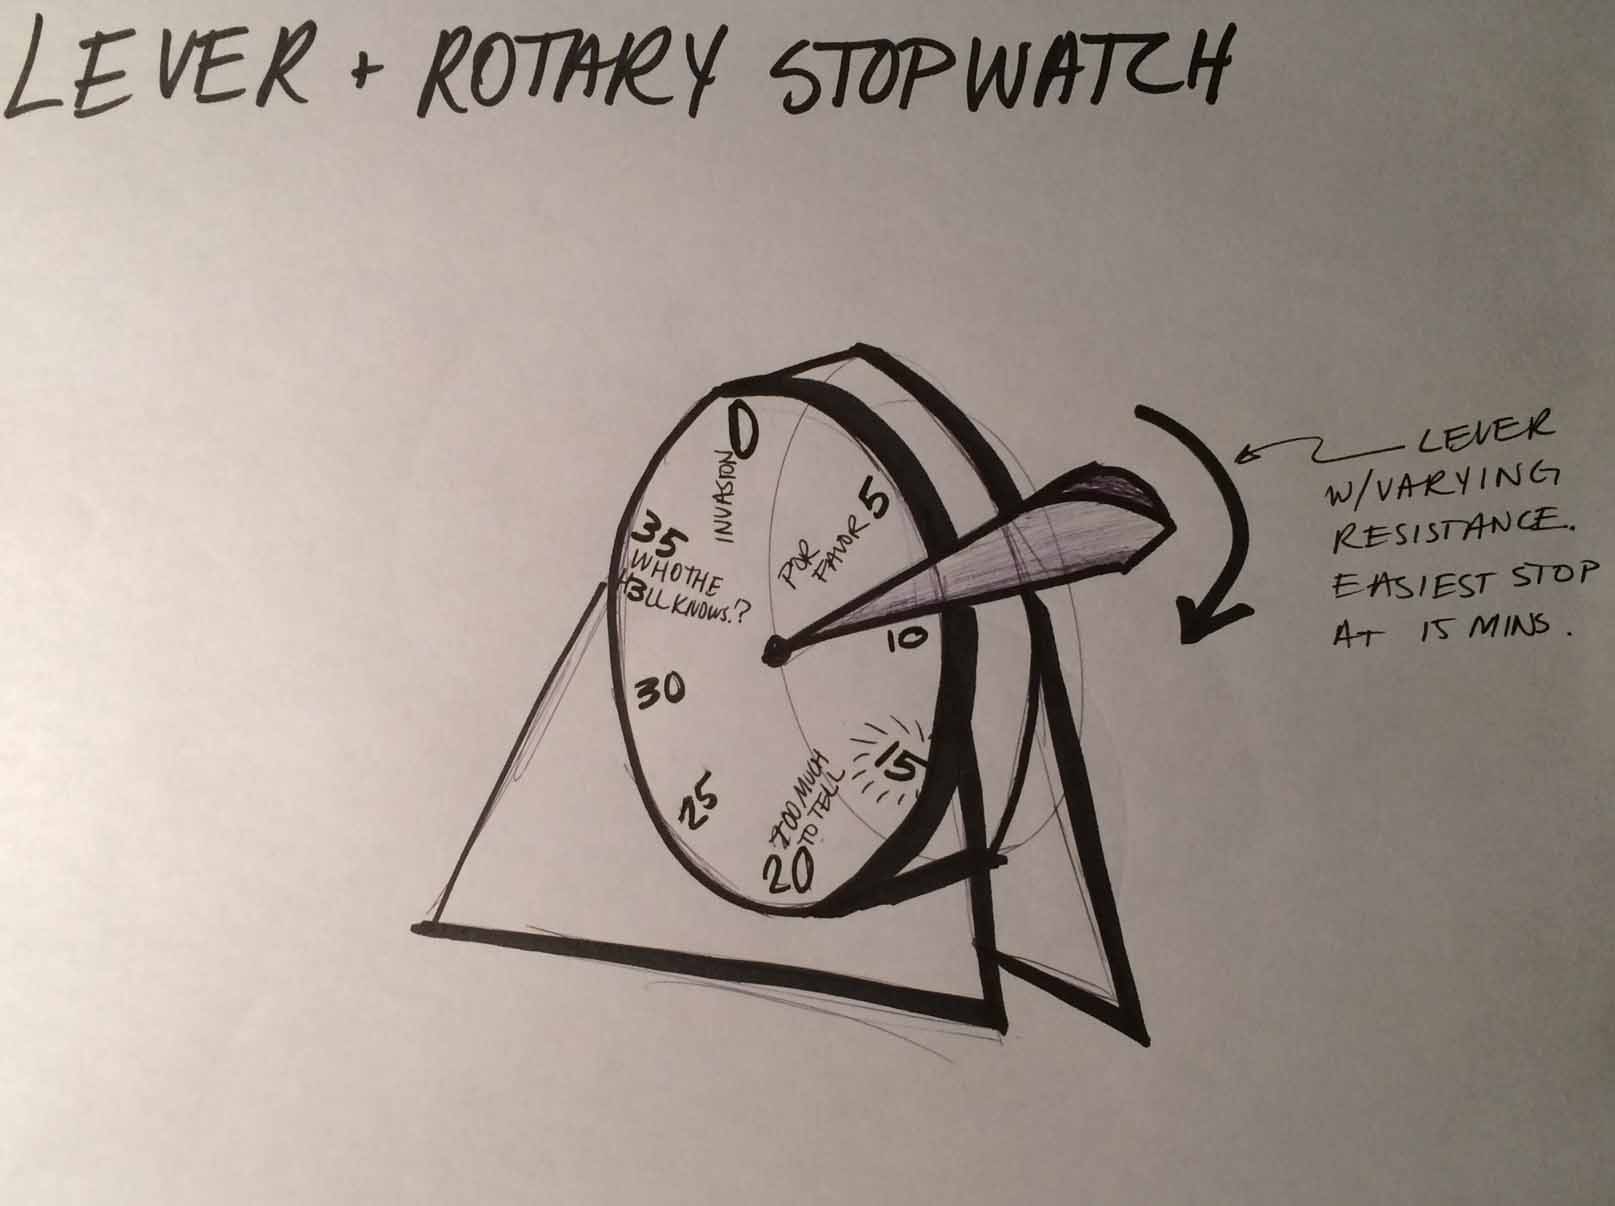
The next day I met with Jan, introduced the idea, and walked through the sketches with her. To my surprise (and blessing) she loved the idea and even had a strong favorite: the lever stopwatch.
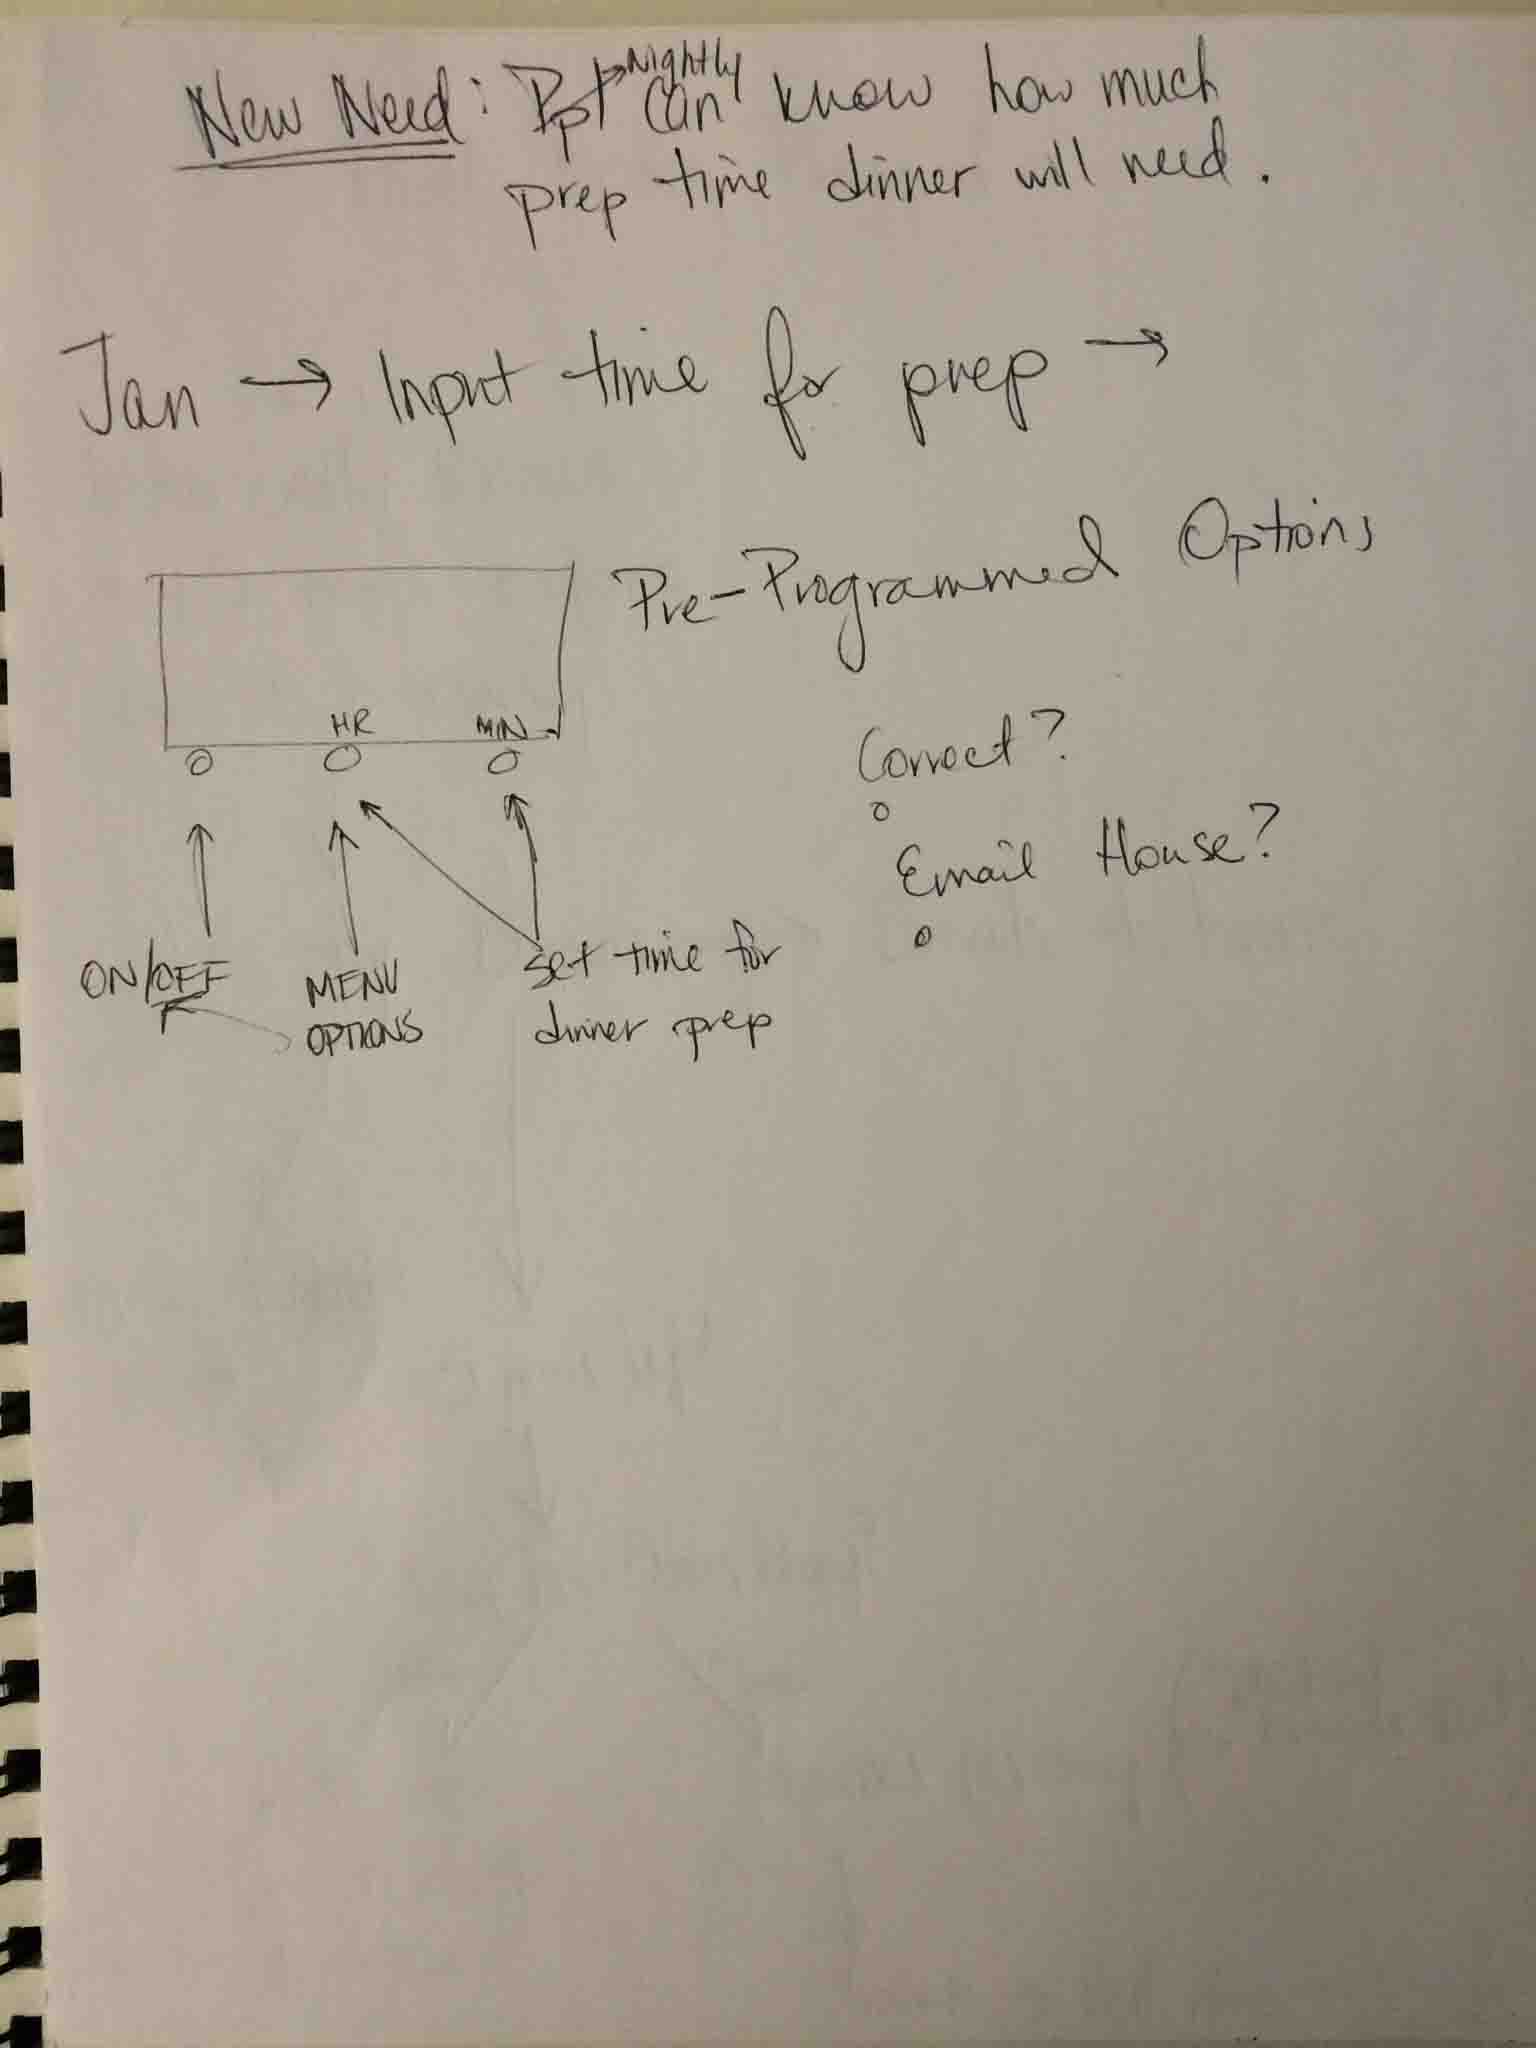
Over the semester I continued working on the design of the toy with members of the house and with Jan to really identify what key features would be needed to make this product actually want to be used throughout the house. I led multiple informal user interviews that shed light on the different use cases: Jan's notification that lunch was ready, the kitchen timer for the Nightly food setup, and the dinner time announcement. These notes informed my design iterations, including what input devices, output devices, and network communications I would need.
Parting with the idea
I mentioned earlier that my work was really driven by a need to be doing something relevant to fill a need in a space. At some point, I got word that the meal plans of the house were changing and that an alert system of this kind might not be needed soon.
Project 2: A "Vweet-ing" Desktop Toy: A portal into President Reif's office
Inspiration and Need
This year, I was chosen to serve on the President Reif's Advisory Cabinet (PAC). As Liaison between the Committie and his Office, I've gathered valuable insight into the gaps in communication and transparency that exist between the President and the student body. He's a great guy— he's just a really busy guy that many people just don't know. People wanted face time with the President and I wanted them to know how cool he was. I realized there was a window of opportunity here.
Creating a Portal into the President's Office
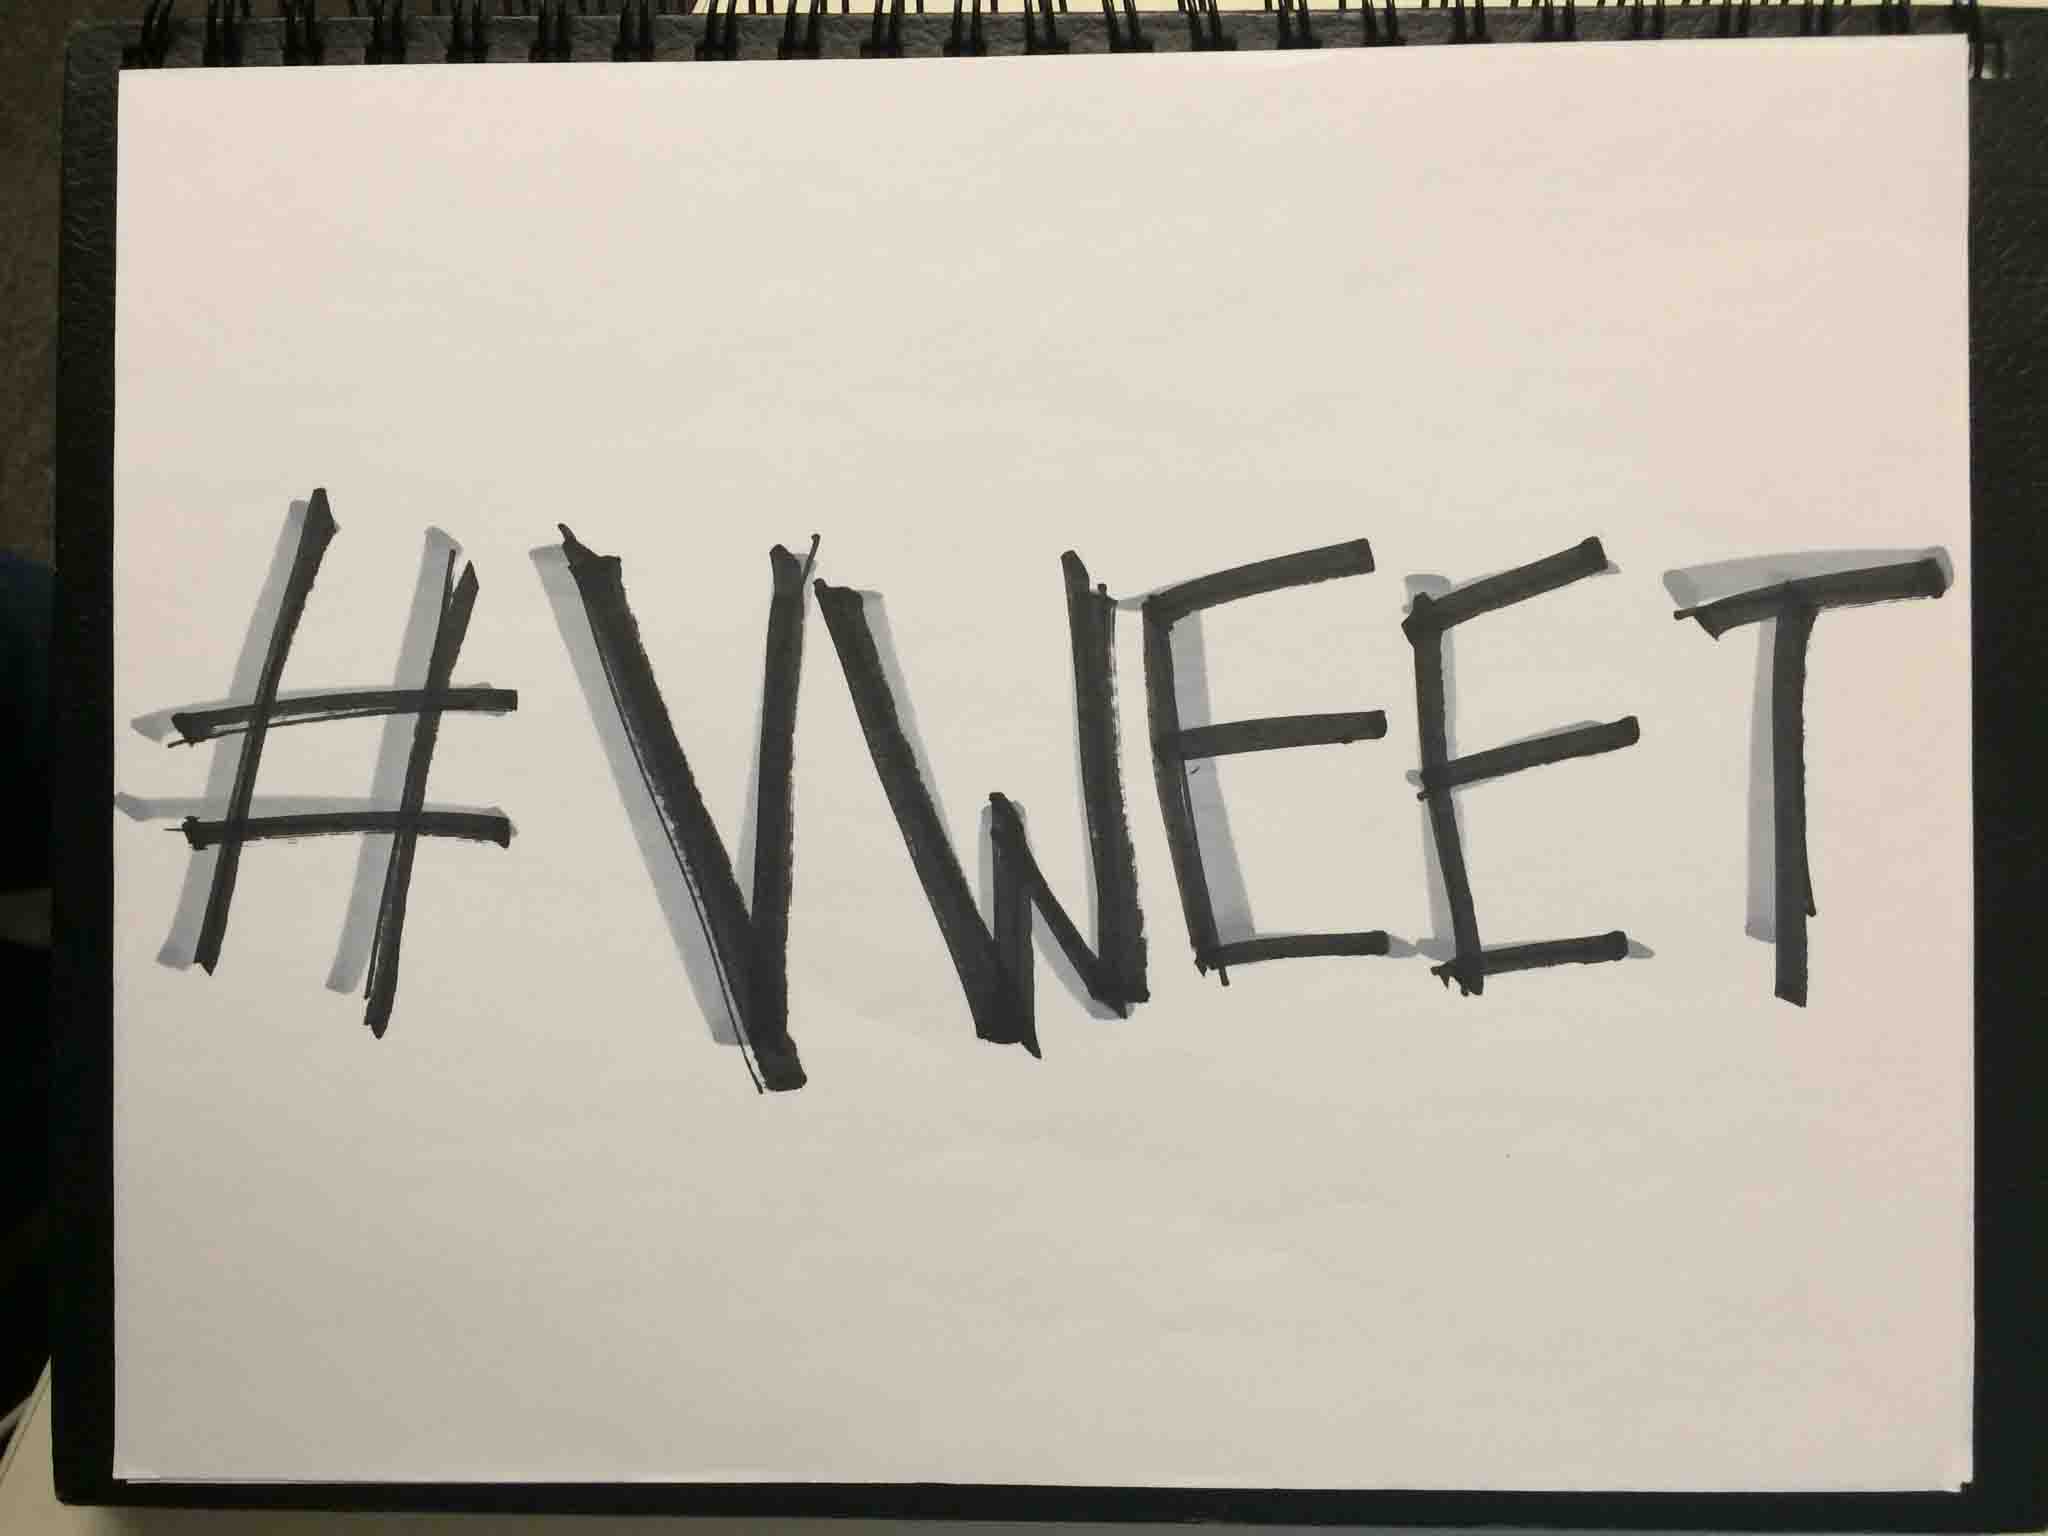
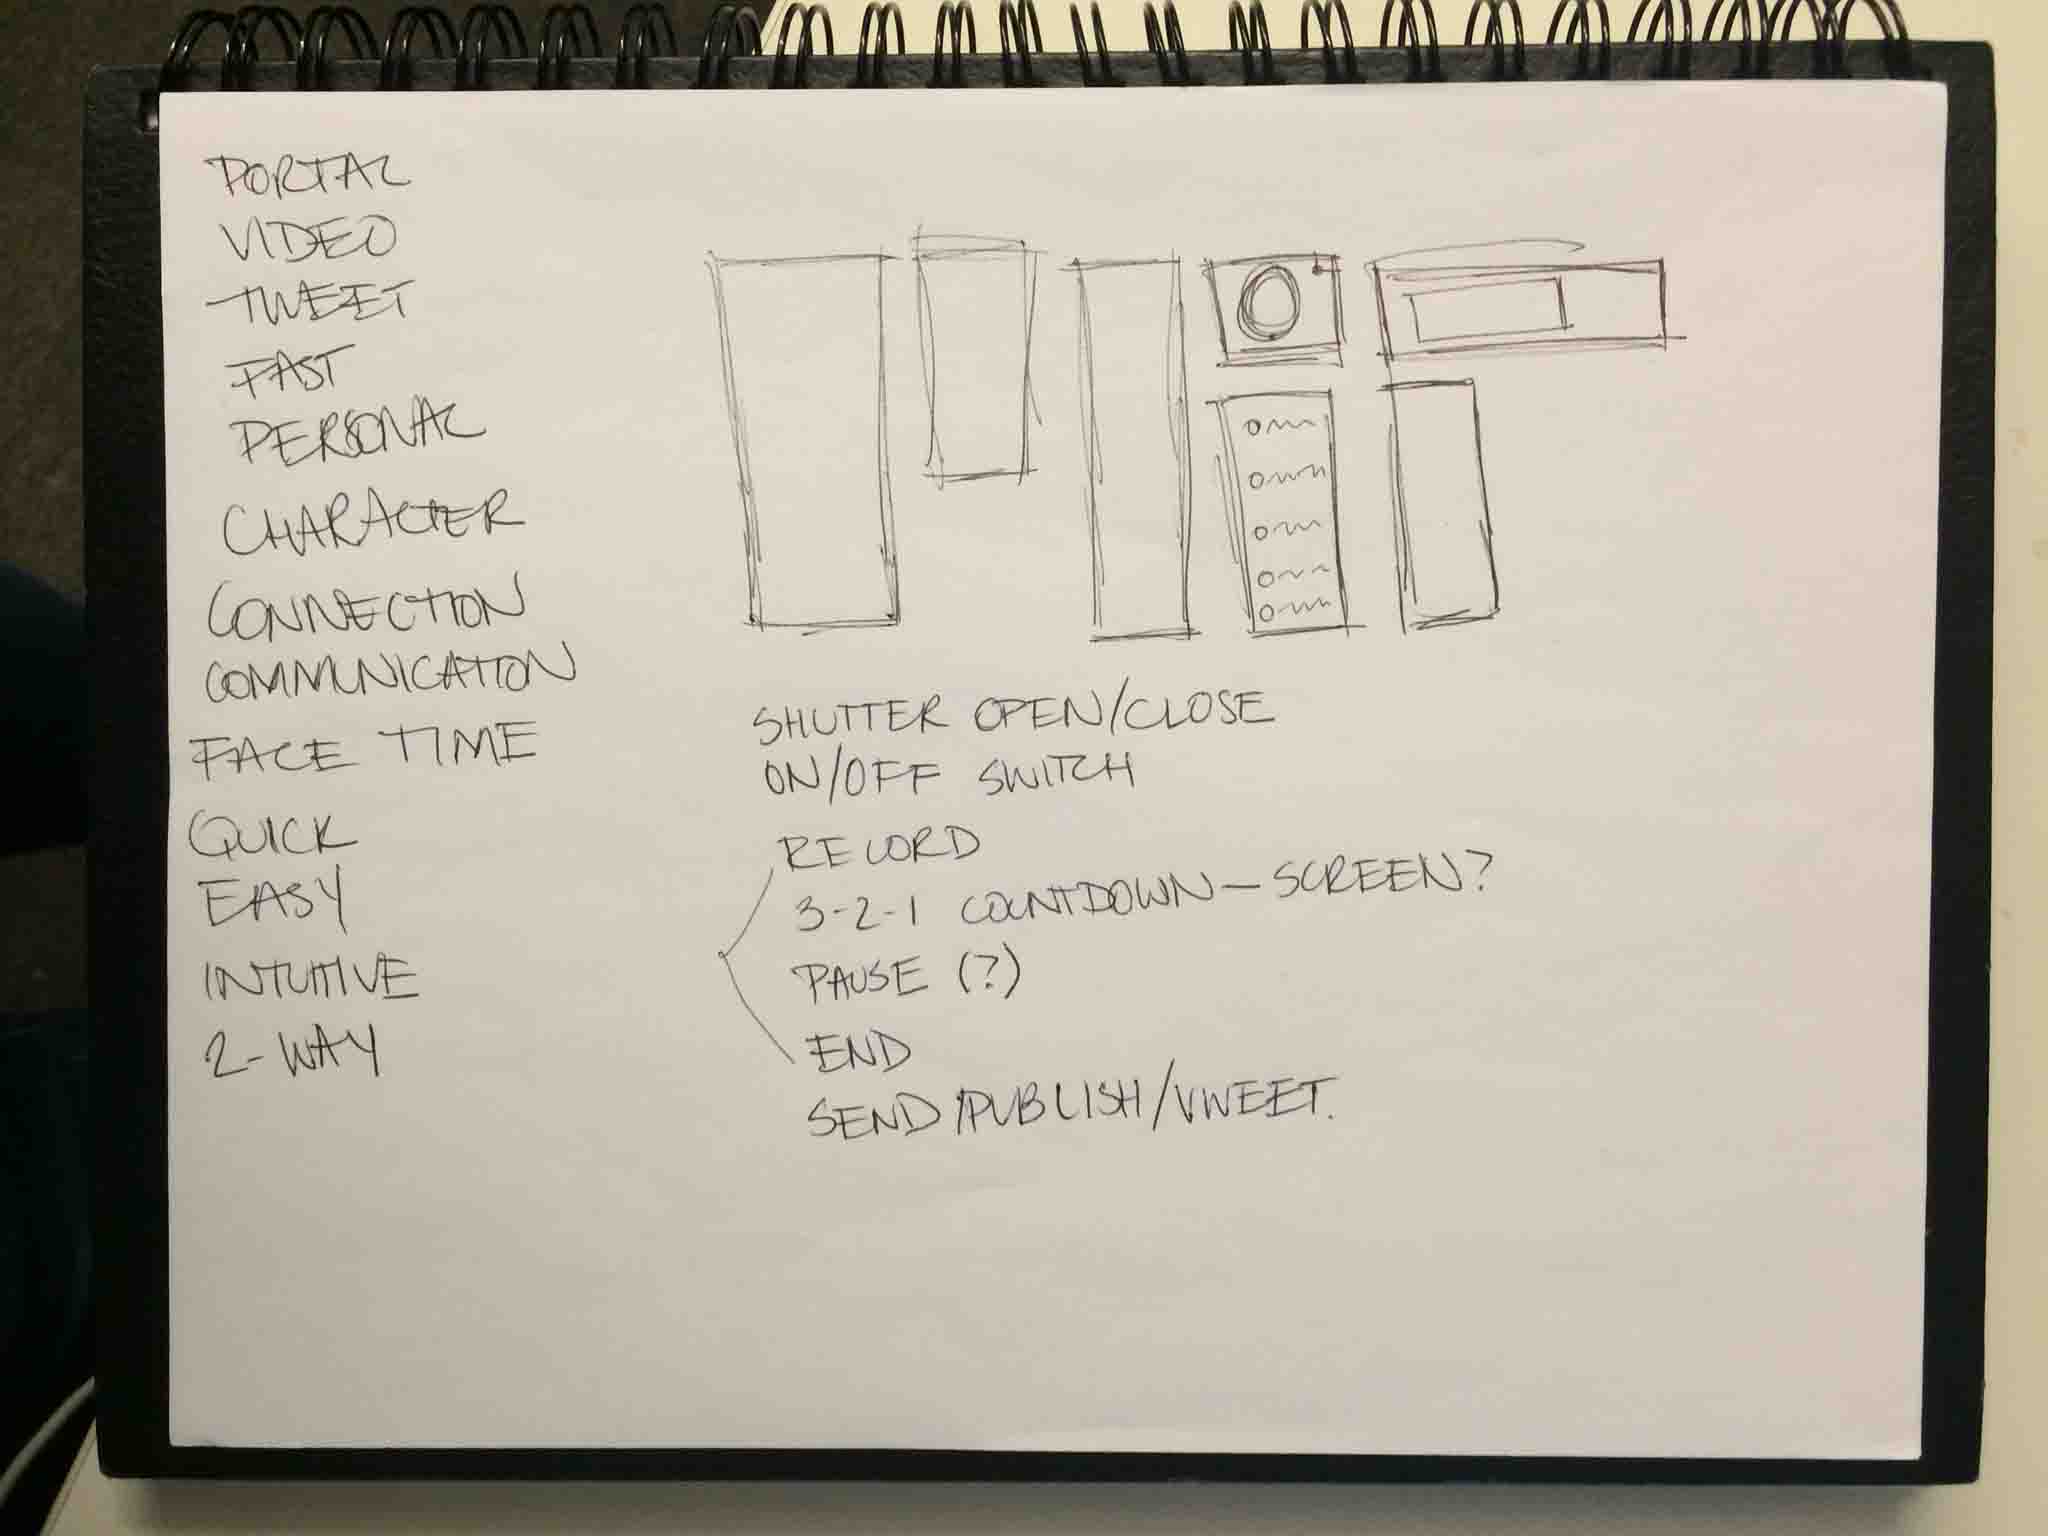
In the middle of one of these restless nights I had a sudden spur of realization: A desktop toy by which the president could "VWEET". What is a "vweet" you ask? Why, it's a video tweet: 140-second video that gets shared through circles and networks.
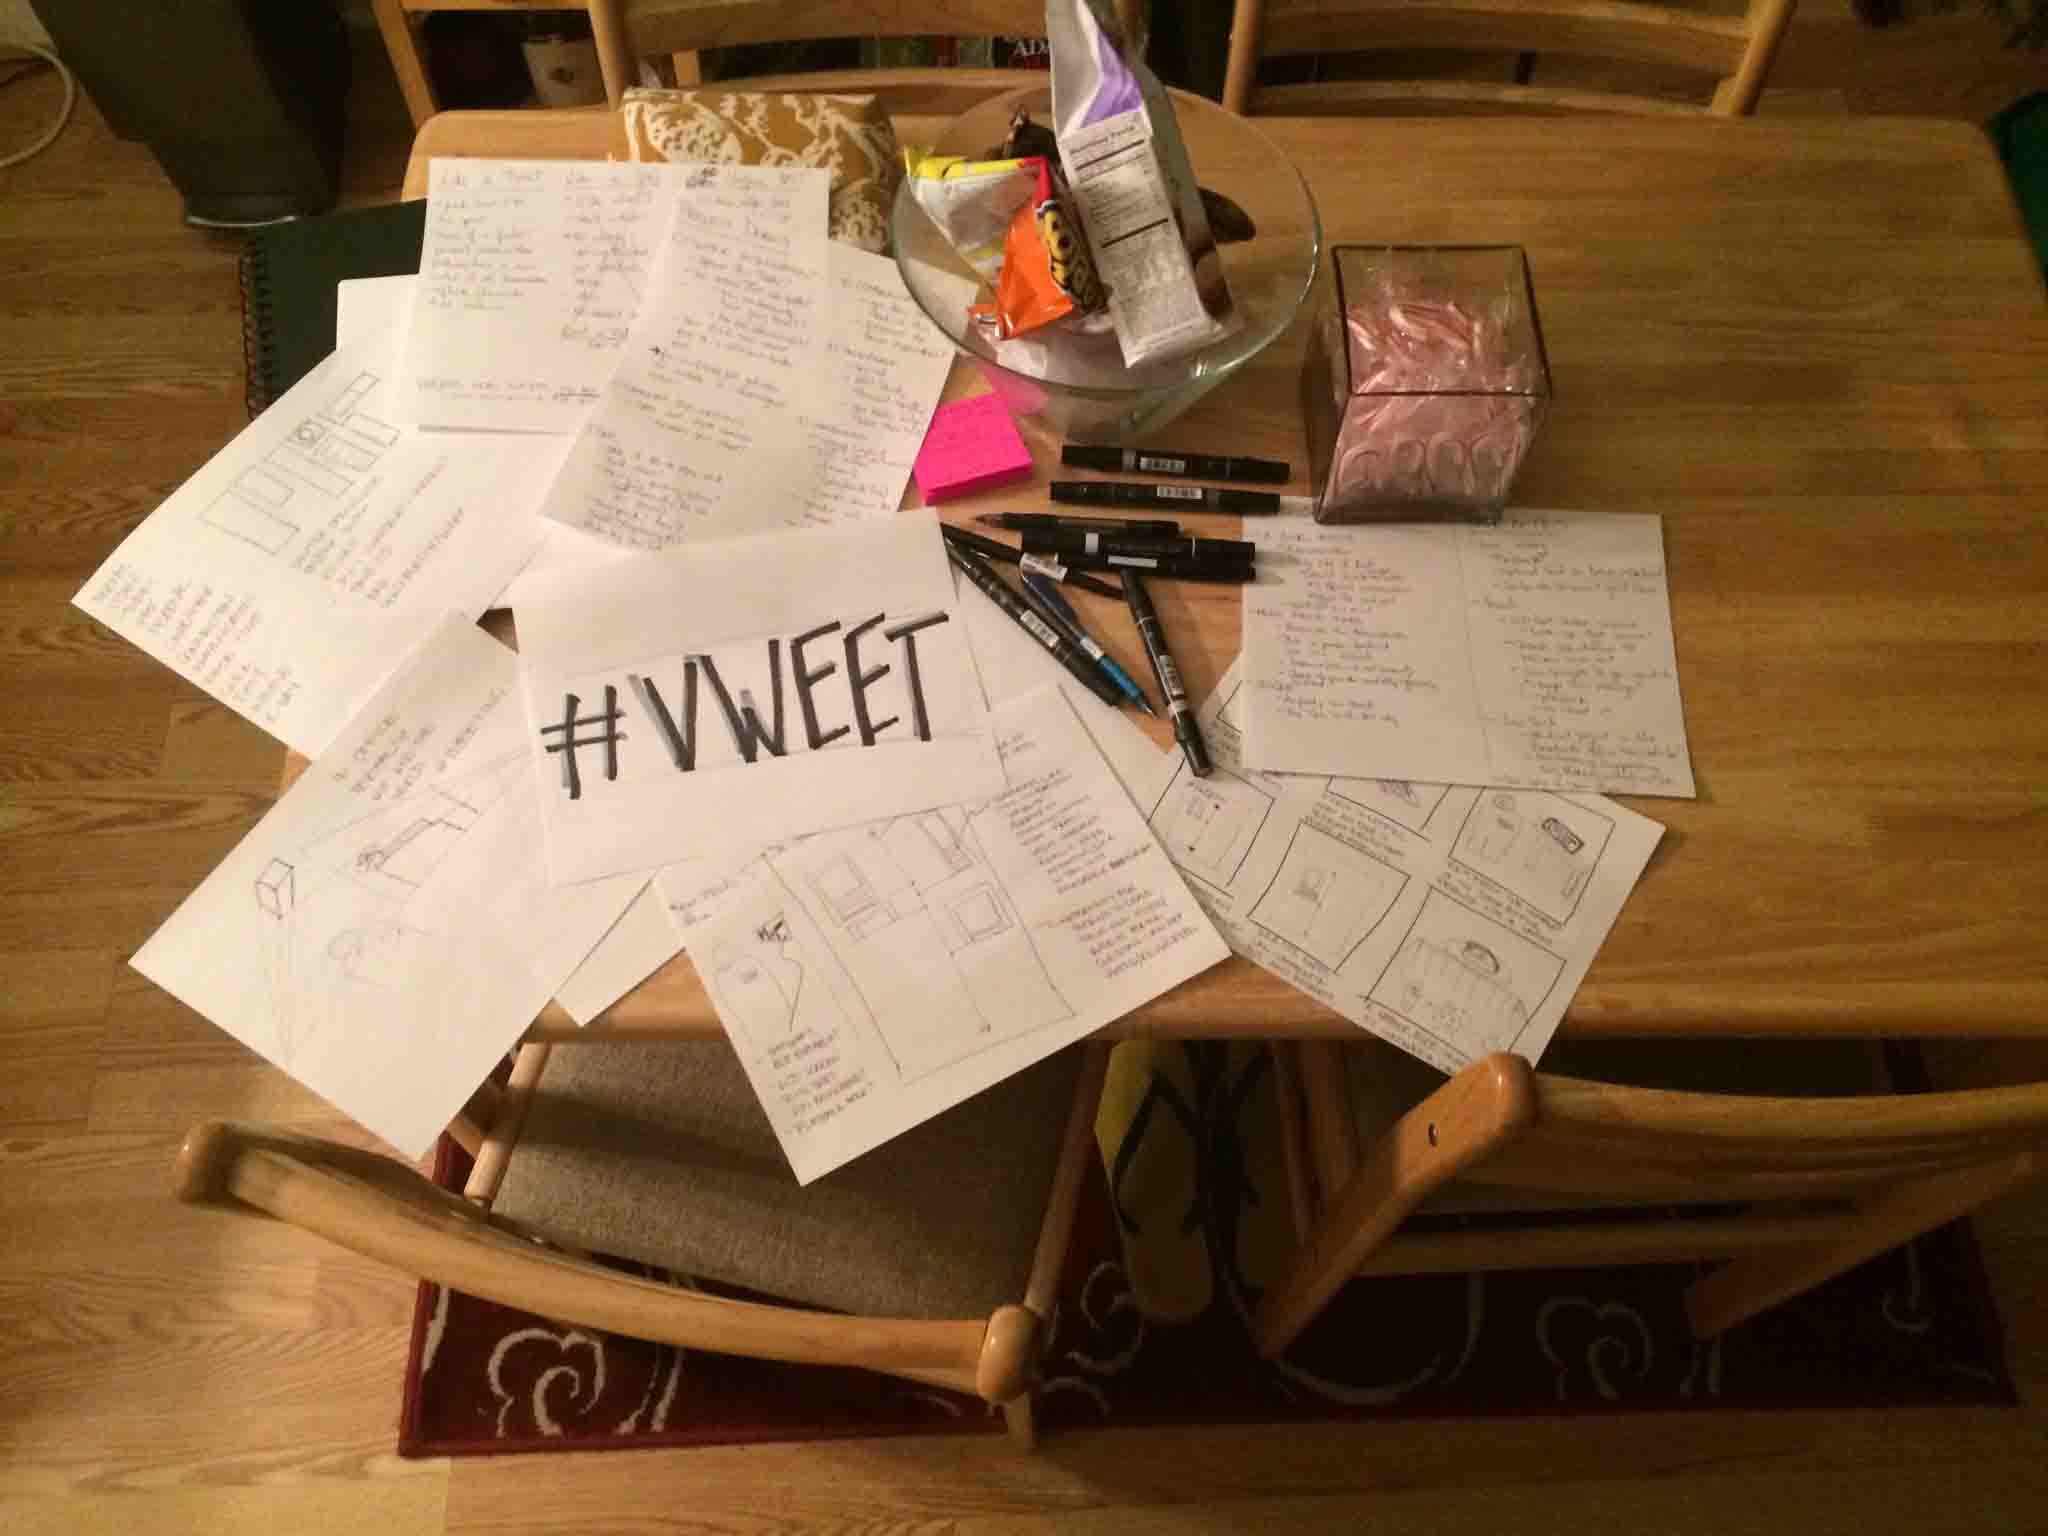
The idea here is that the President would be in back to back meetings in his office but might, after the wrap-up of a successful meeting, go ahead and invite his guests, say, the President of Ghana, to make a quick video (or take a quick picture) of their engagements. This vweet would be posted on the President's personal timeline on his personal website that would also invite discussion through comments on each post. Below are the sketches I made that middle of the night.
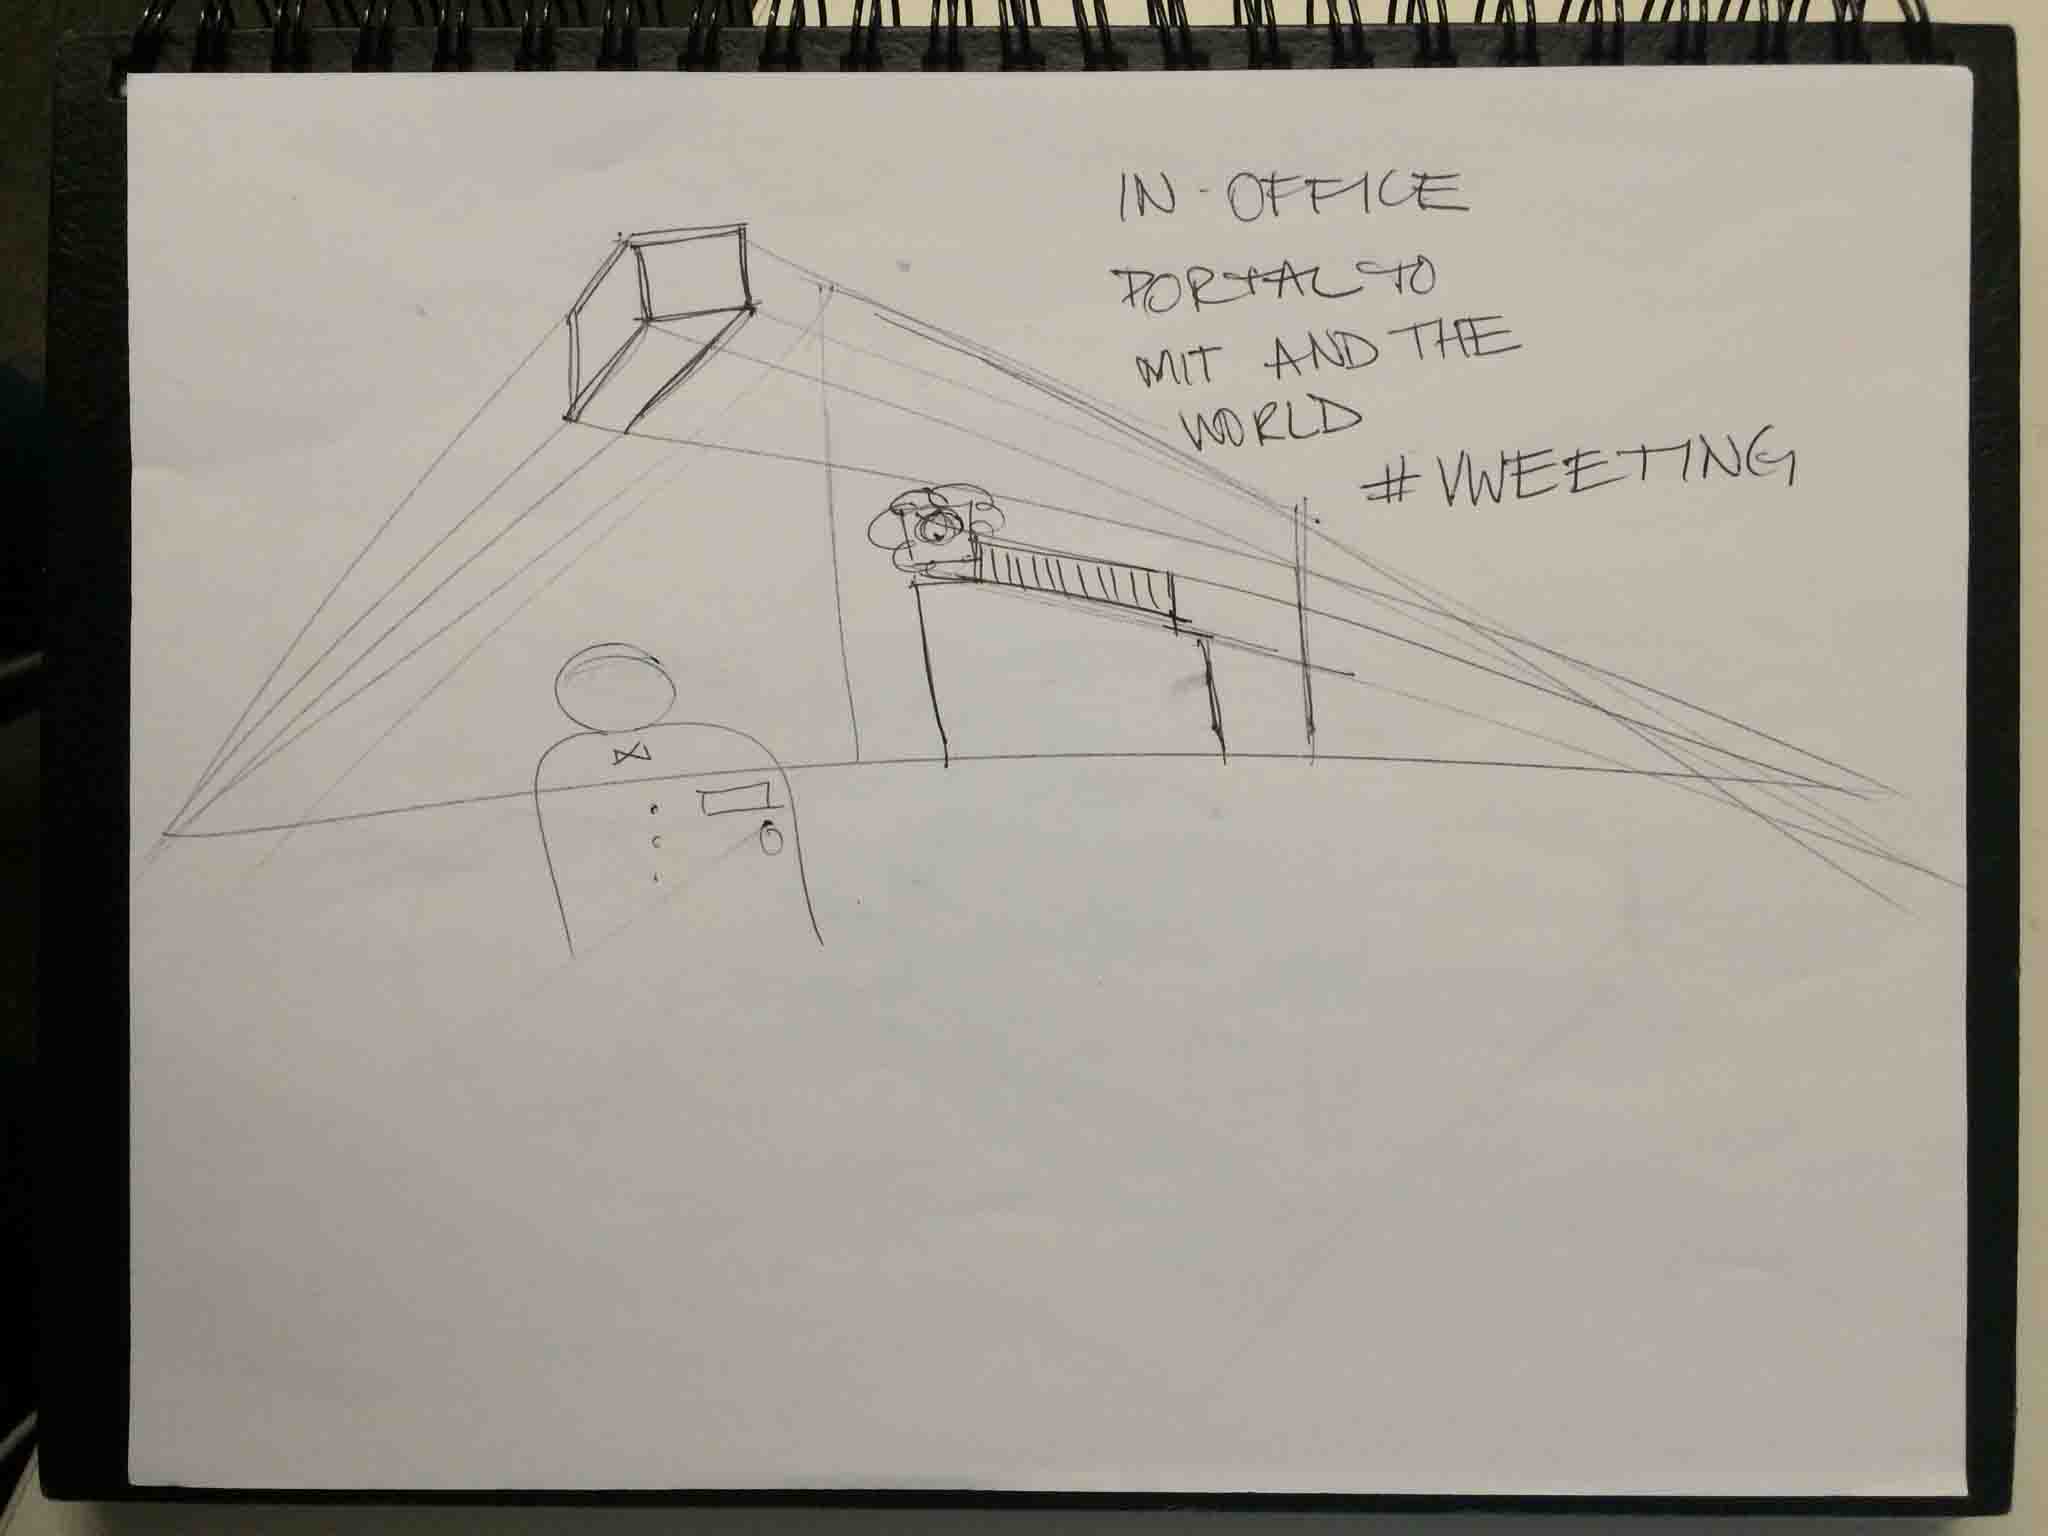
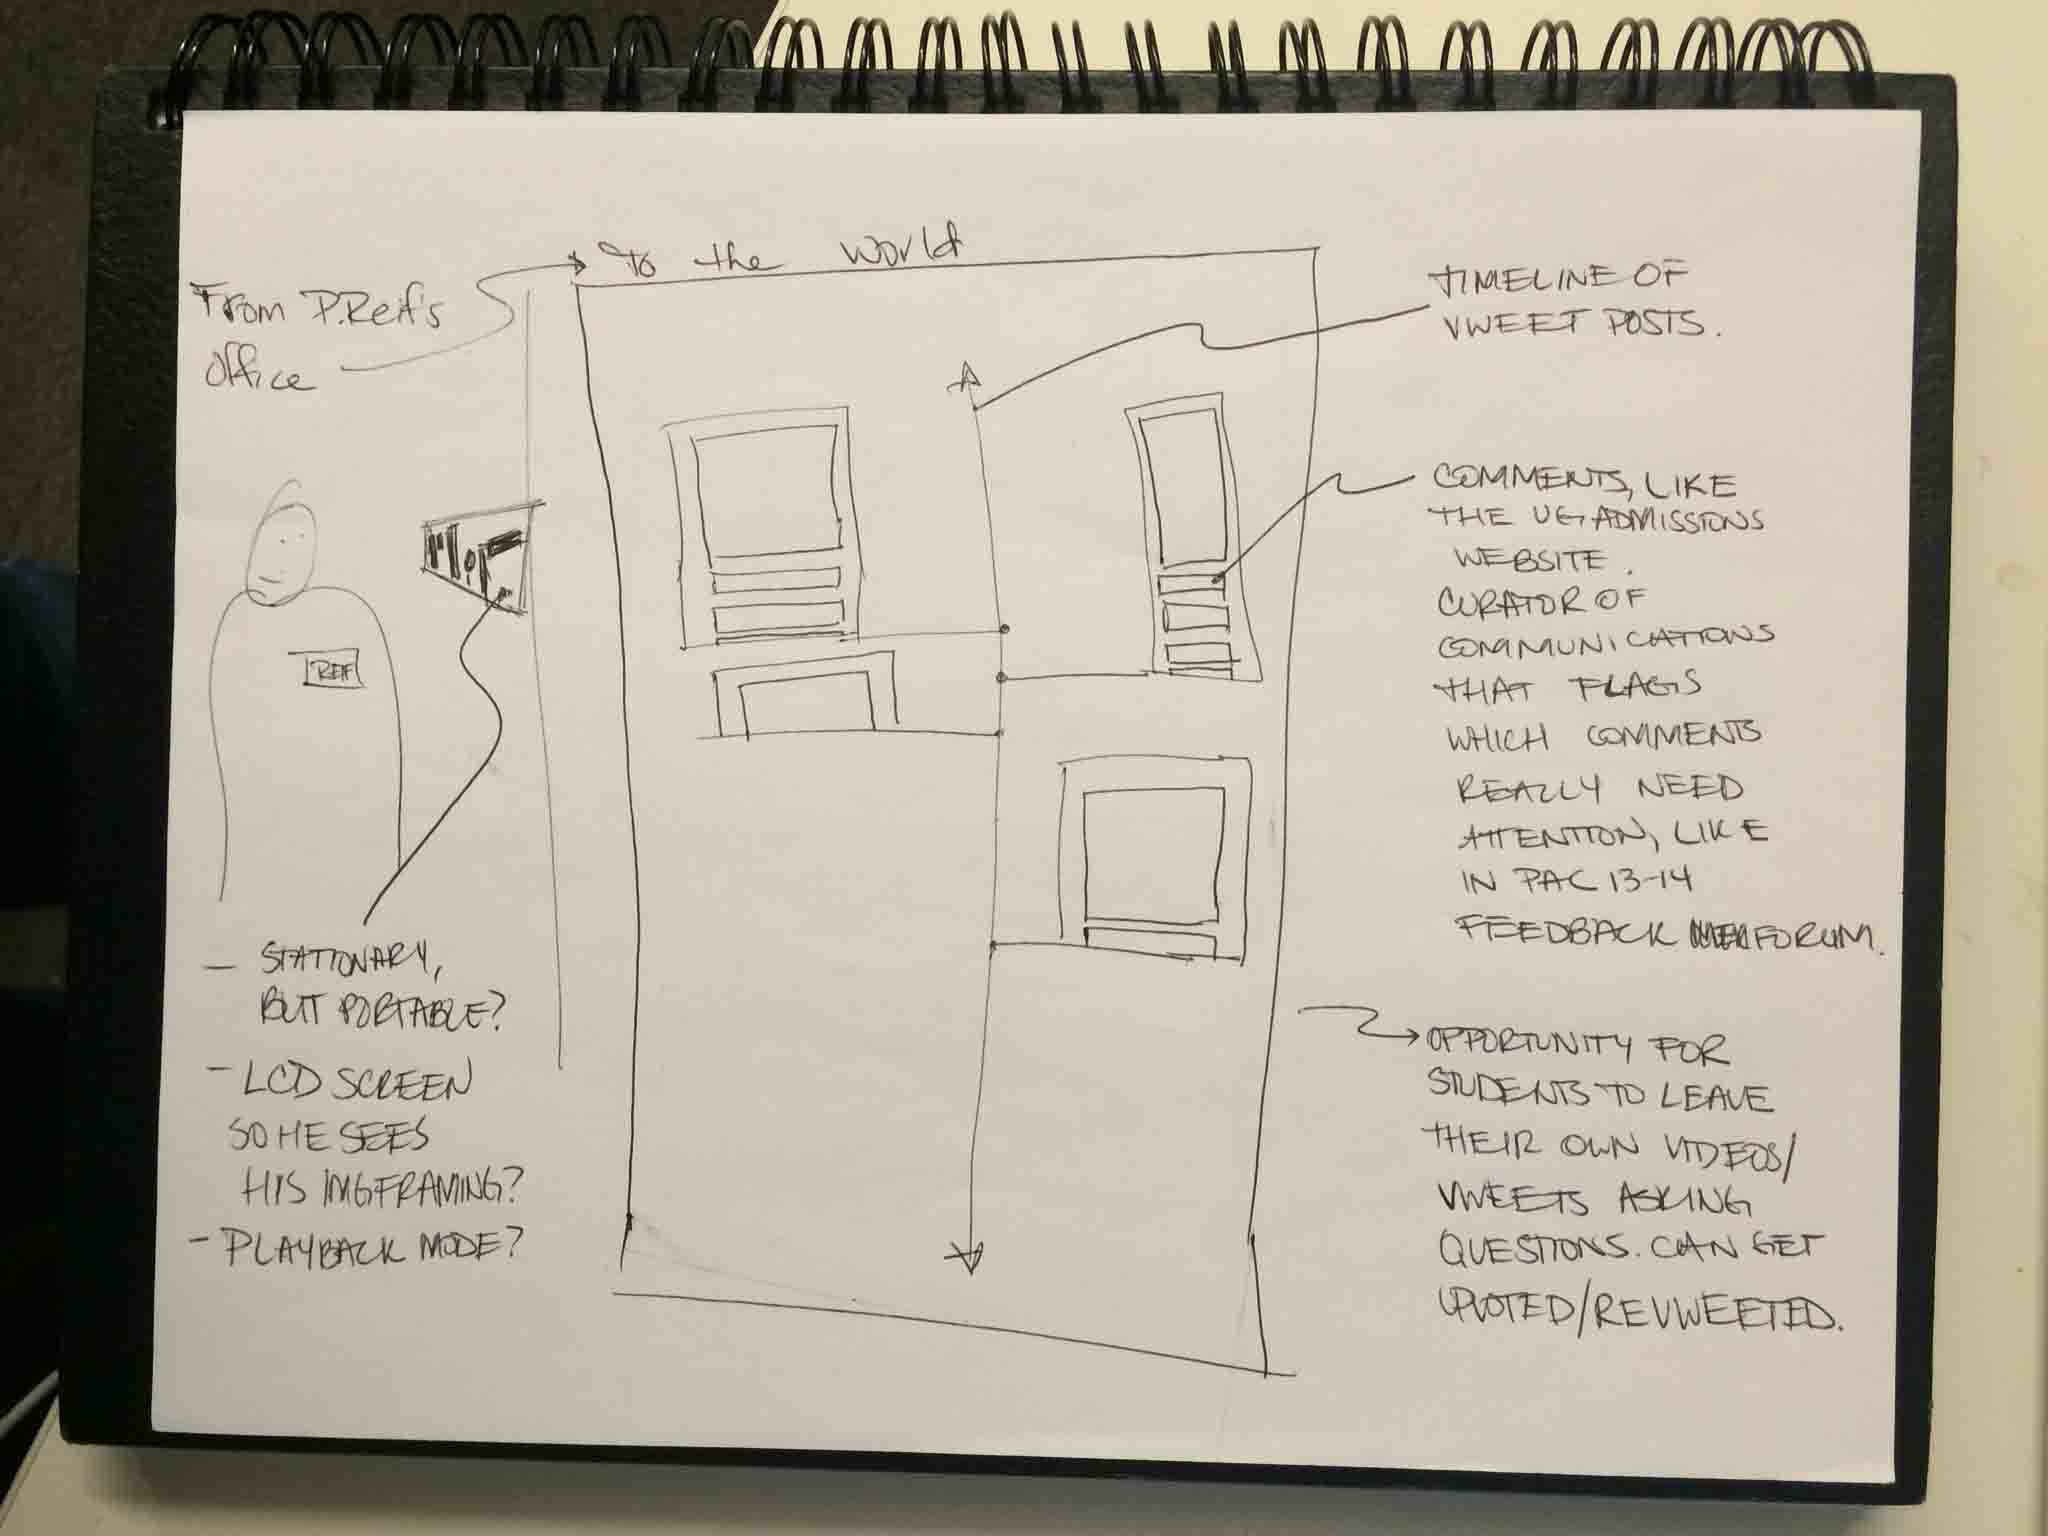
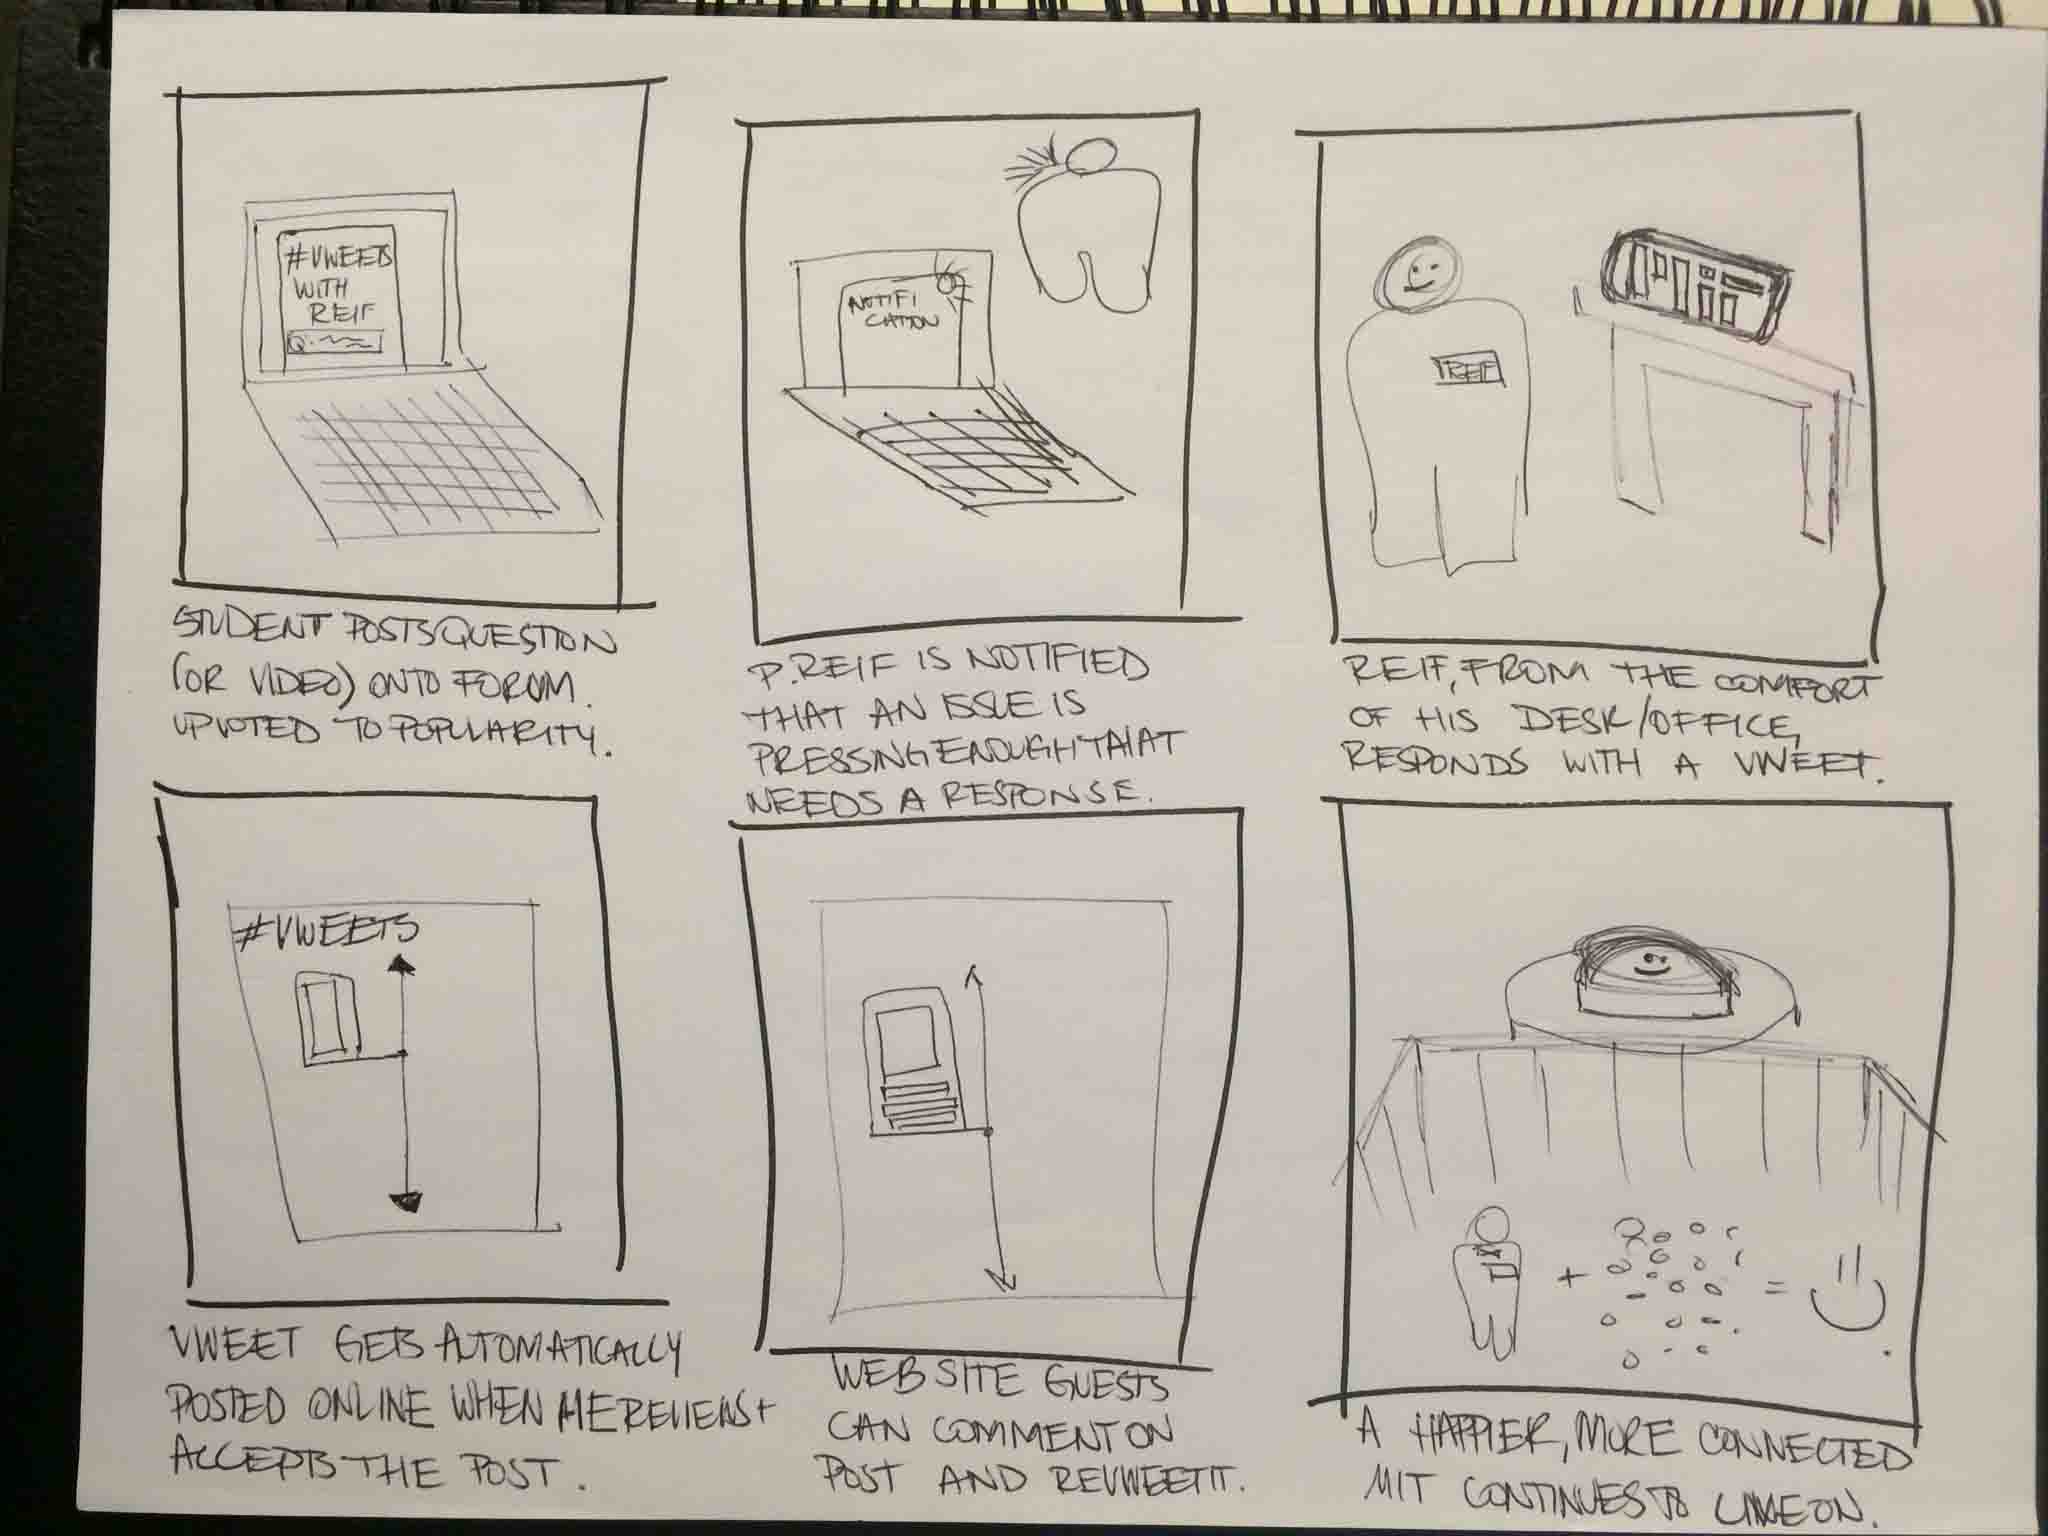
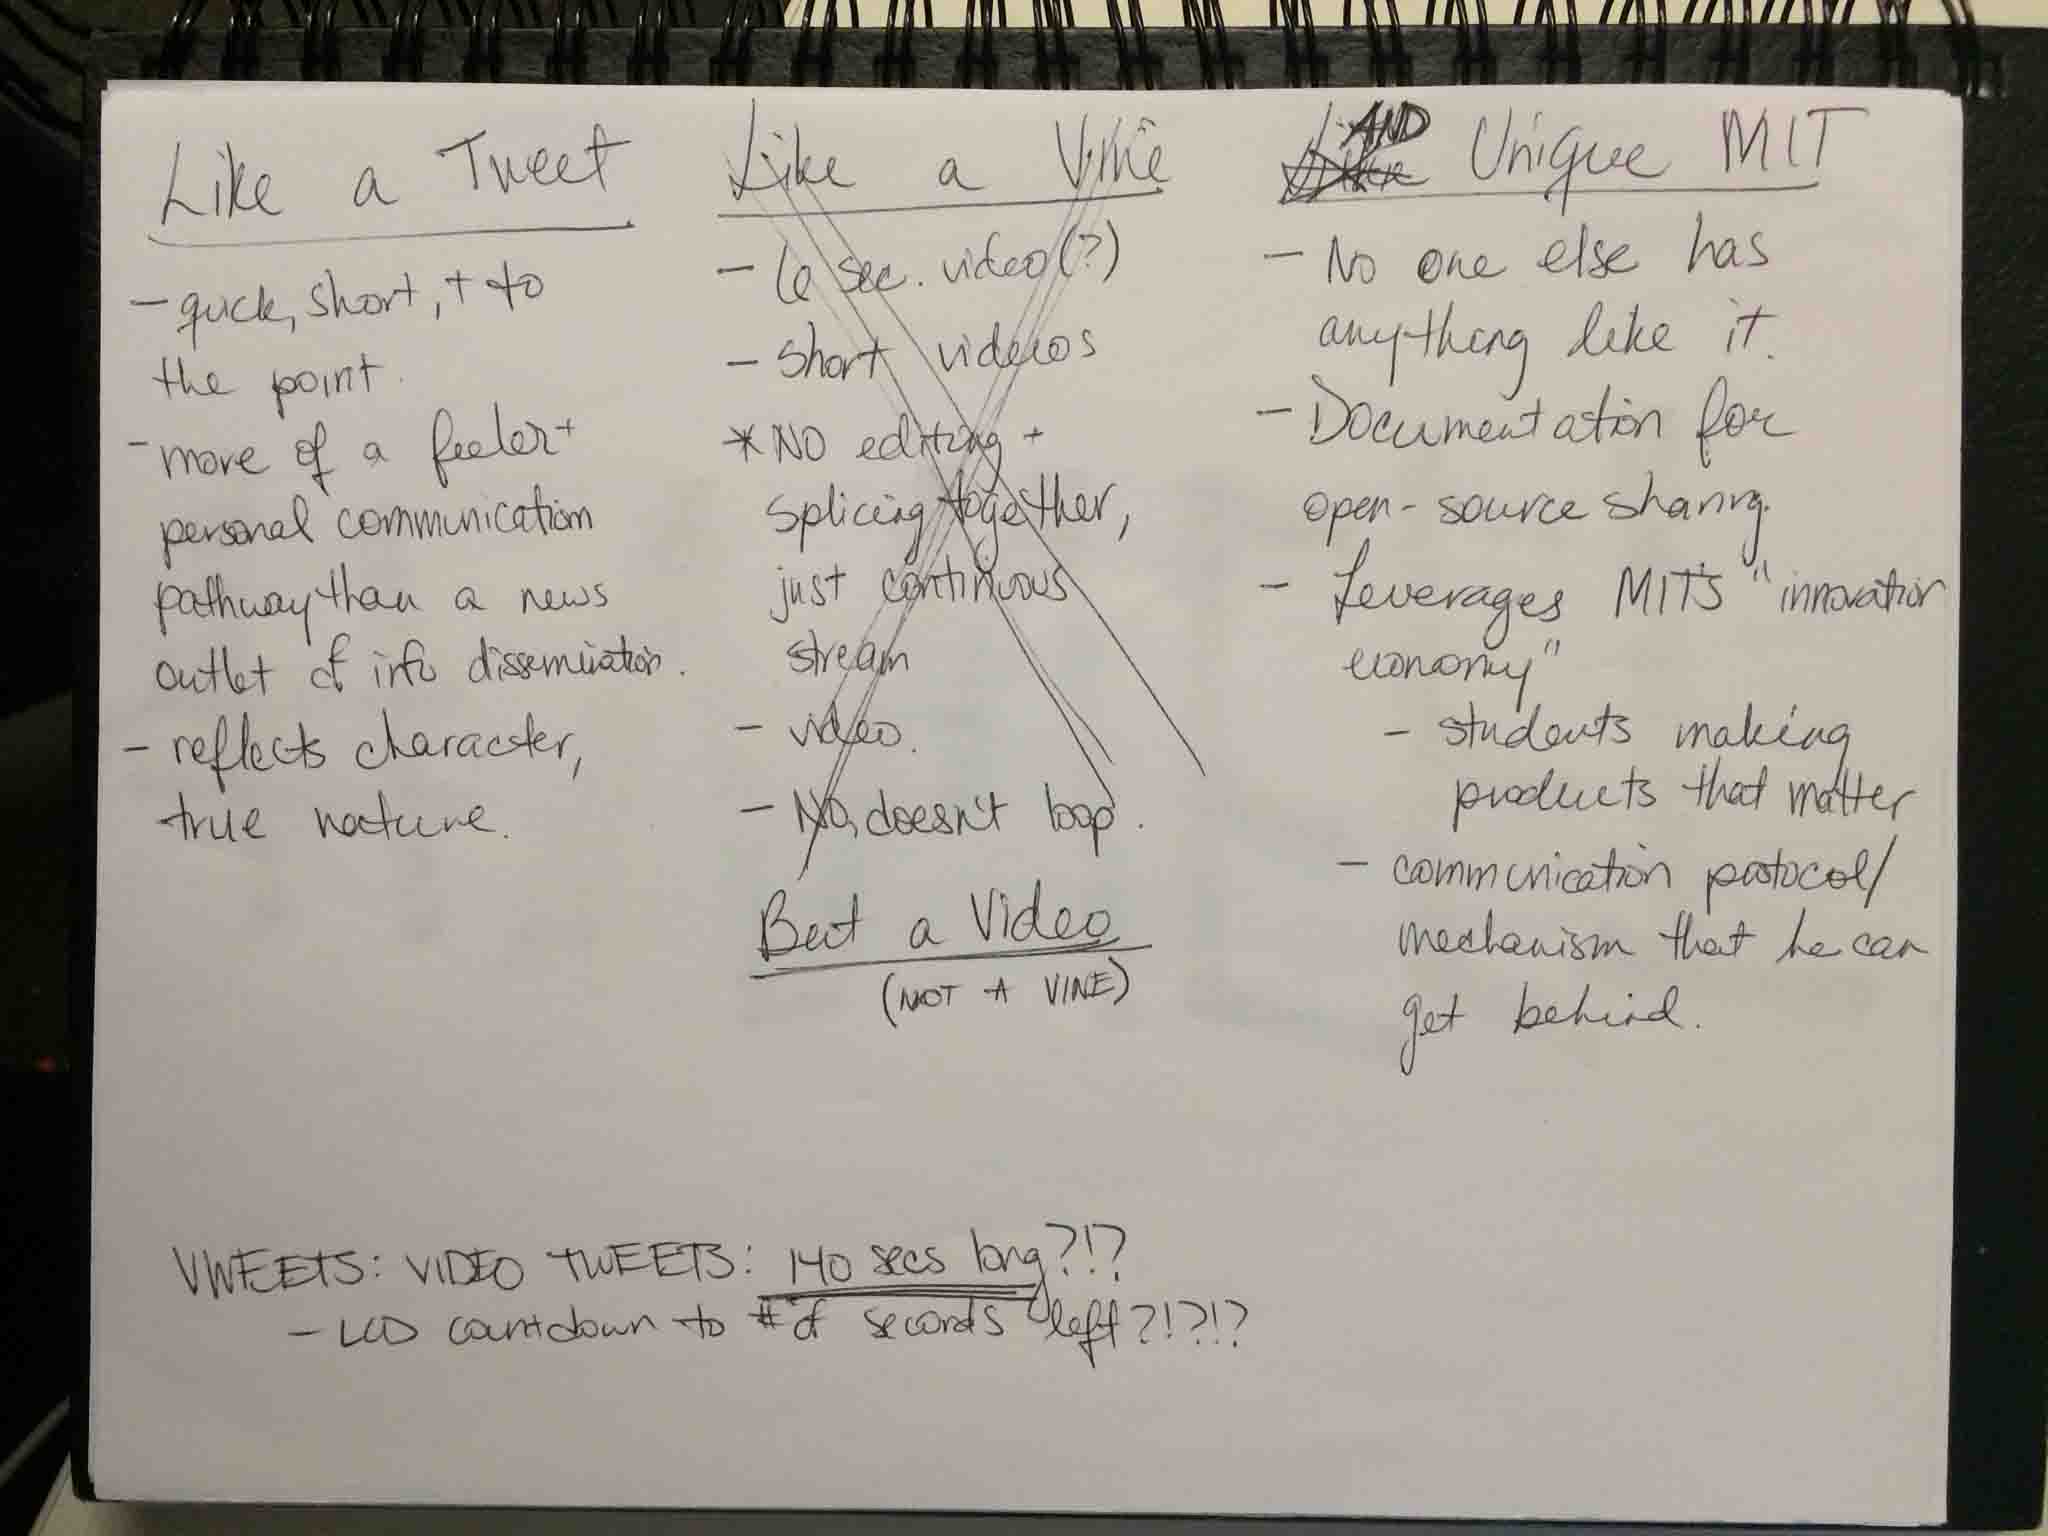
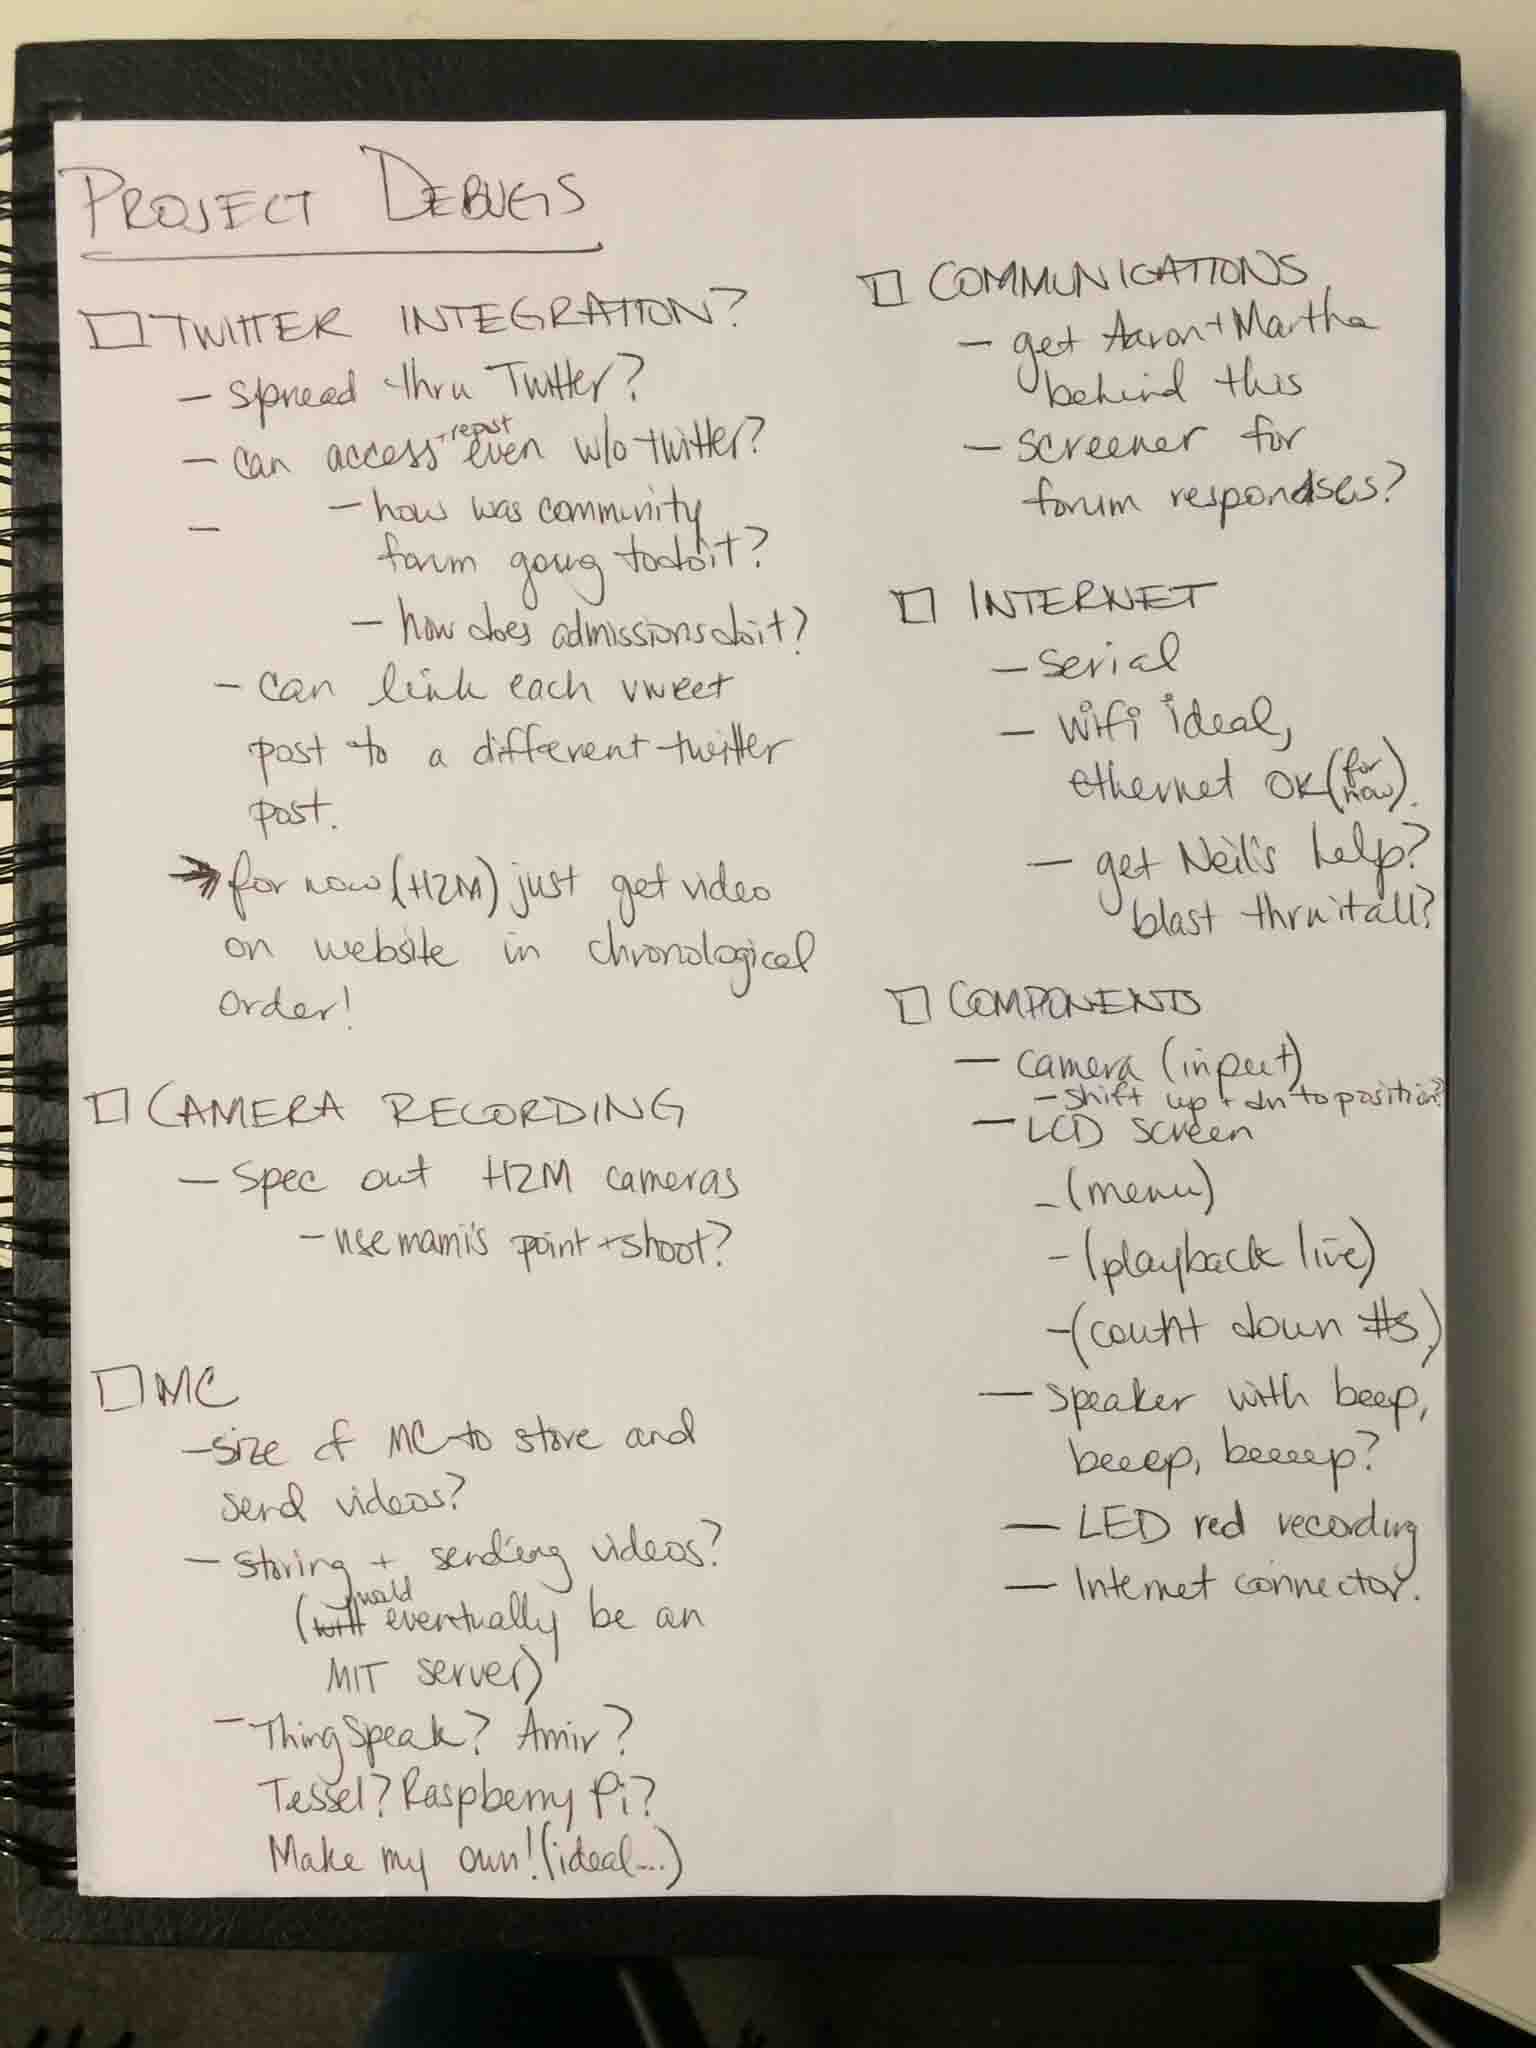
The next day, I barged into Aaron's Office (our Cabinet's Liaison with the Office of the President) and after explaining my idea to him, he called his neighbors for an impromptu meeting with the President's strategic members, including his Chief of Staff and his Communications Director. After a successful pitch, we agreed the idea had plenty of opportunity (daily usage, an enabler for a "Day/Week in the Life Series", etc.) but that there was a chance that it required too much communication commitment from the President that was not yet too clearly vetted. One of the main concerns: The President didn't really like attracting too much attention to himself and putting himself on center screen. The solution? After some iteration and discussion with PAC: see version3 below.
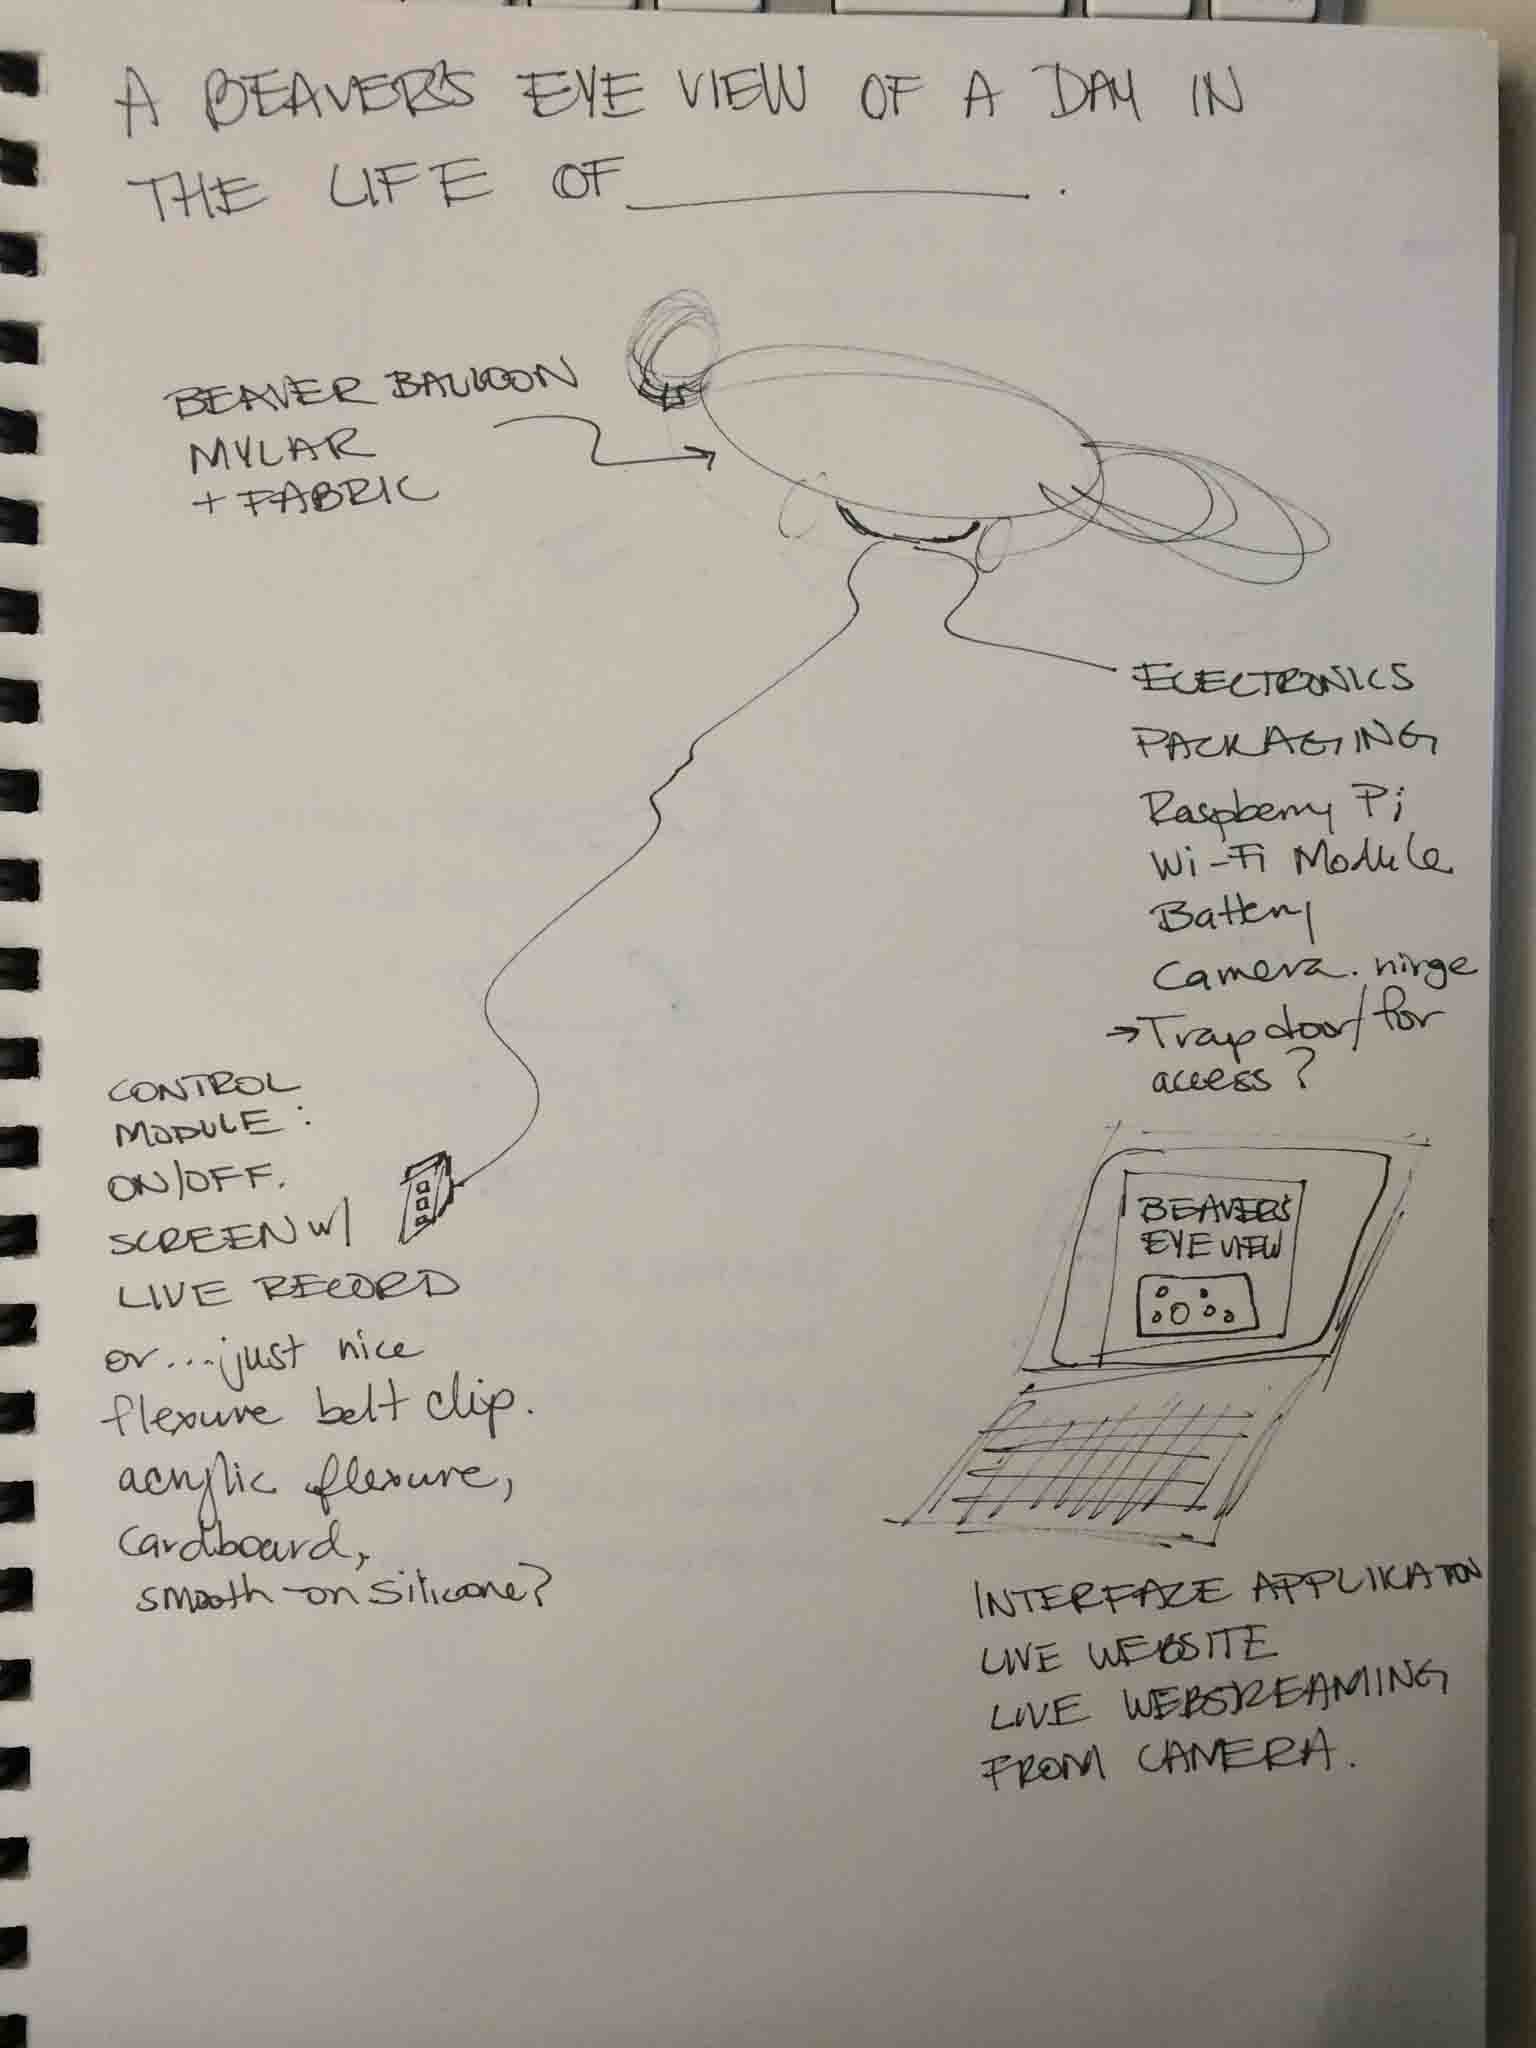
Project 3: A Beaver's Eye View: Live streaming the President's (or Neil's) Footsteps
Product Development: Merging Need with Comfort
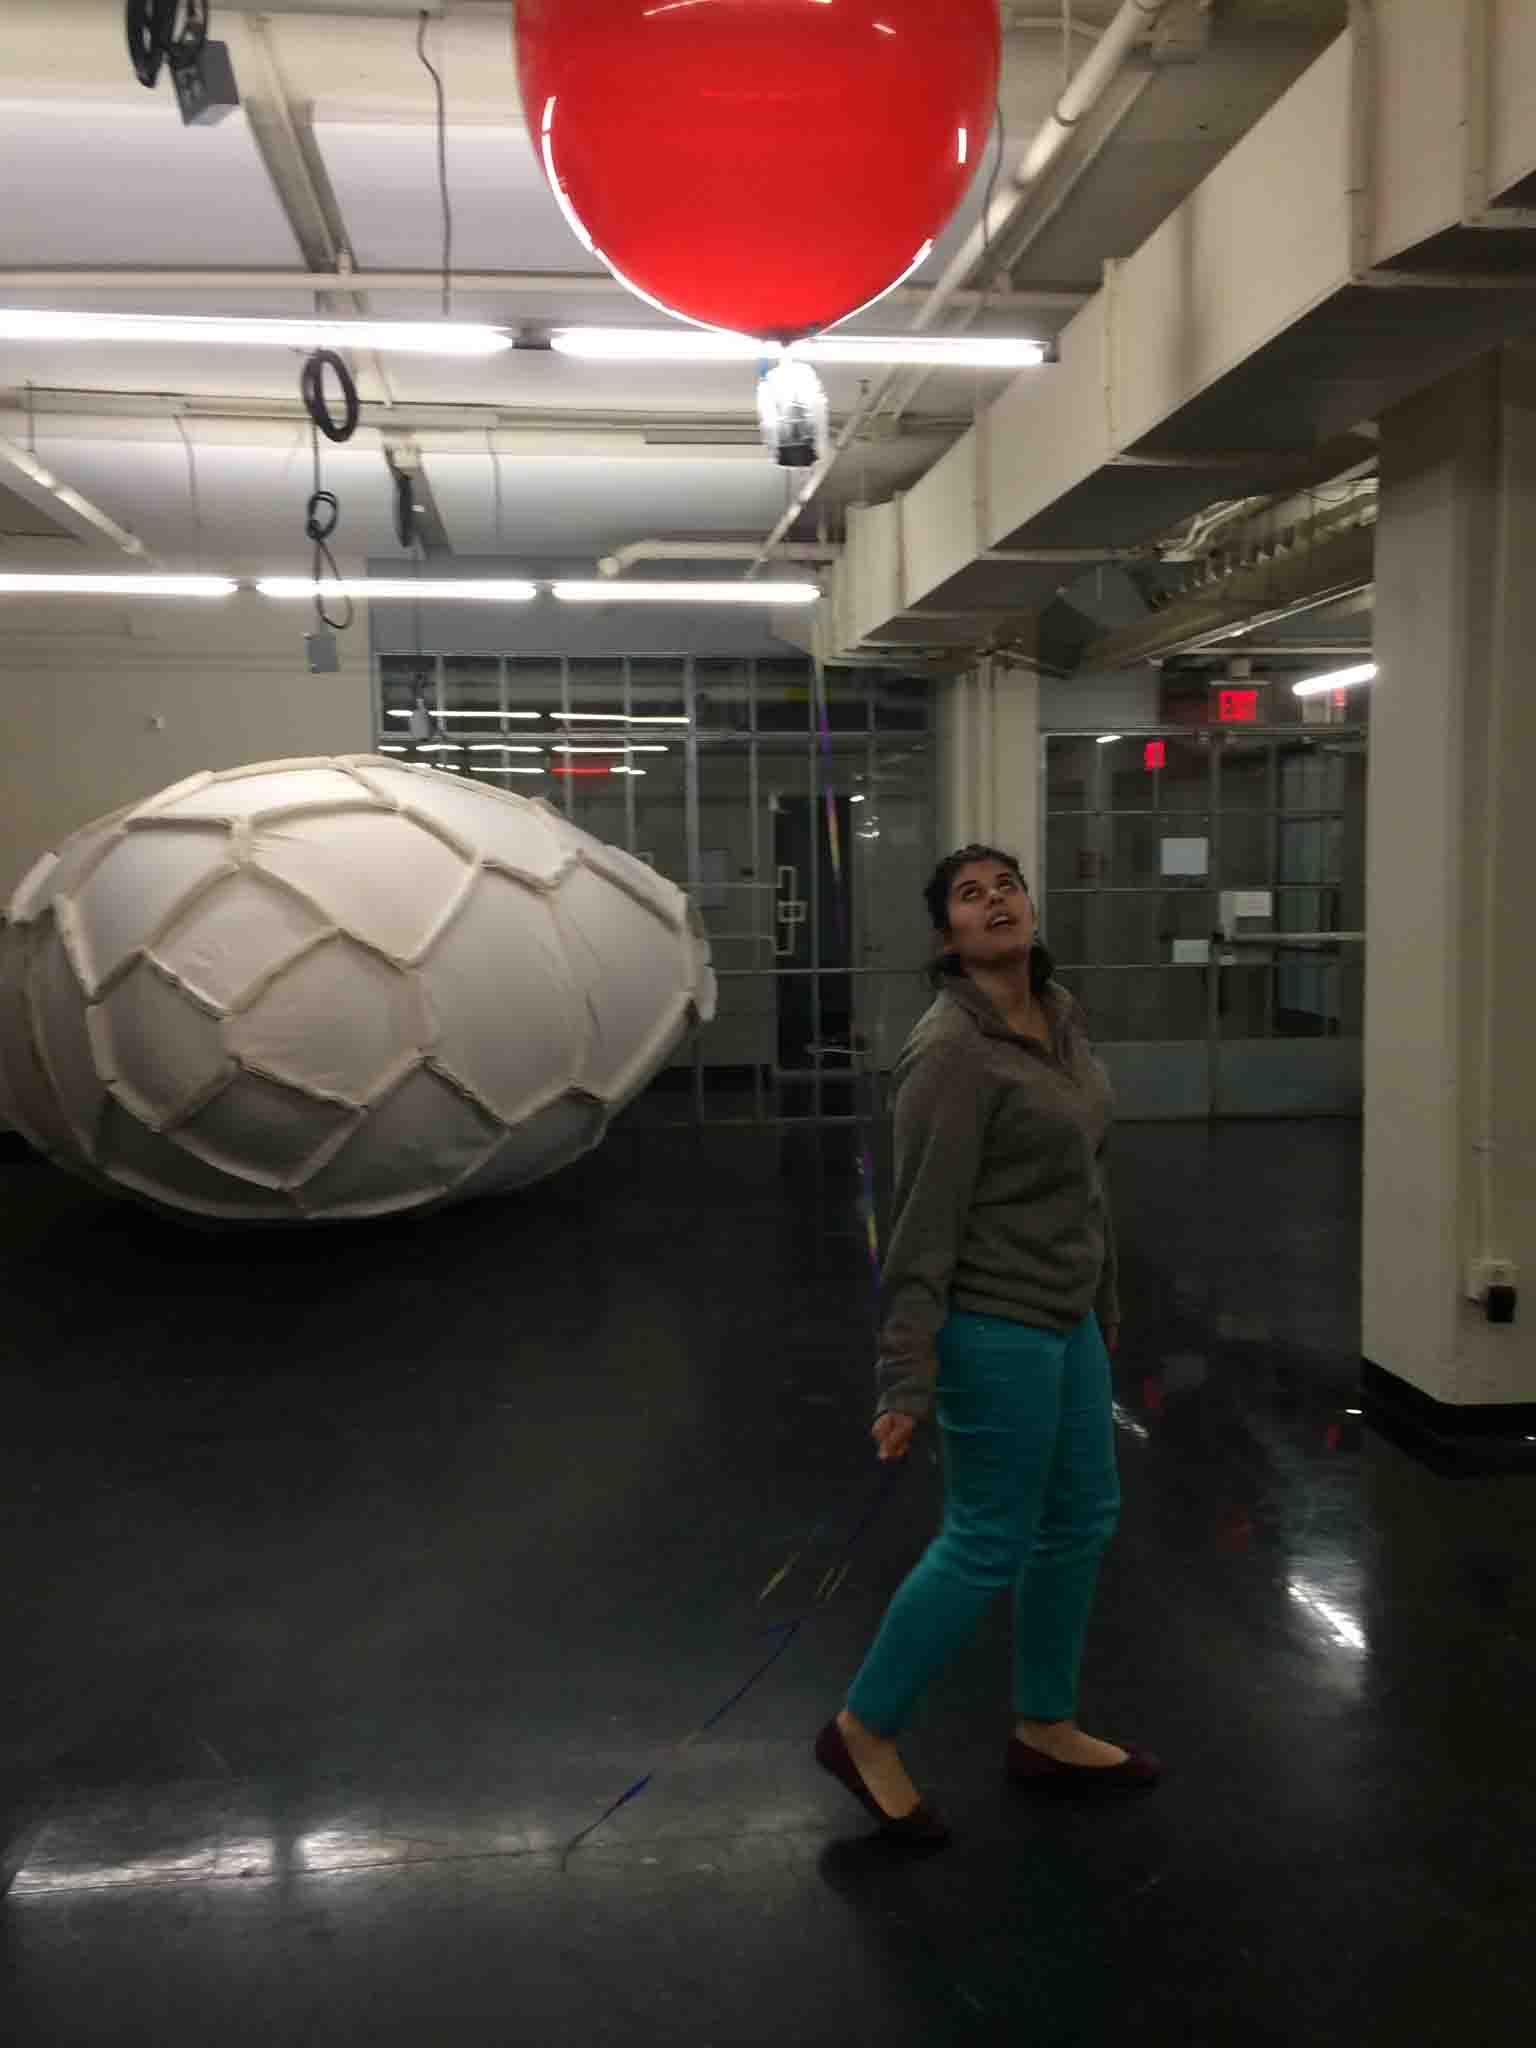
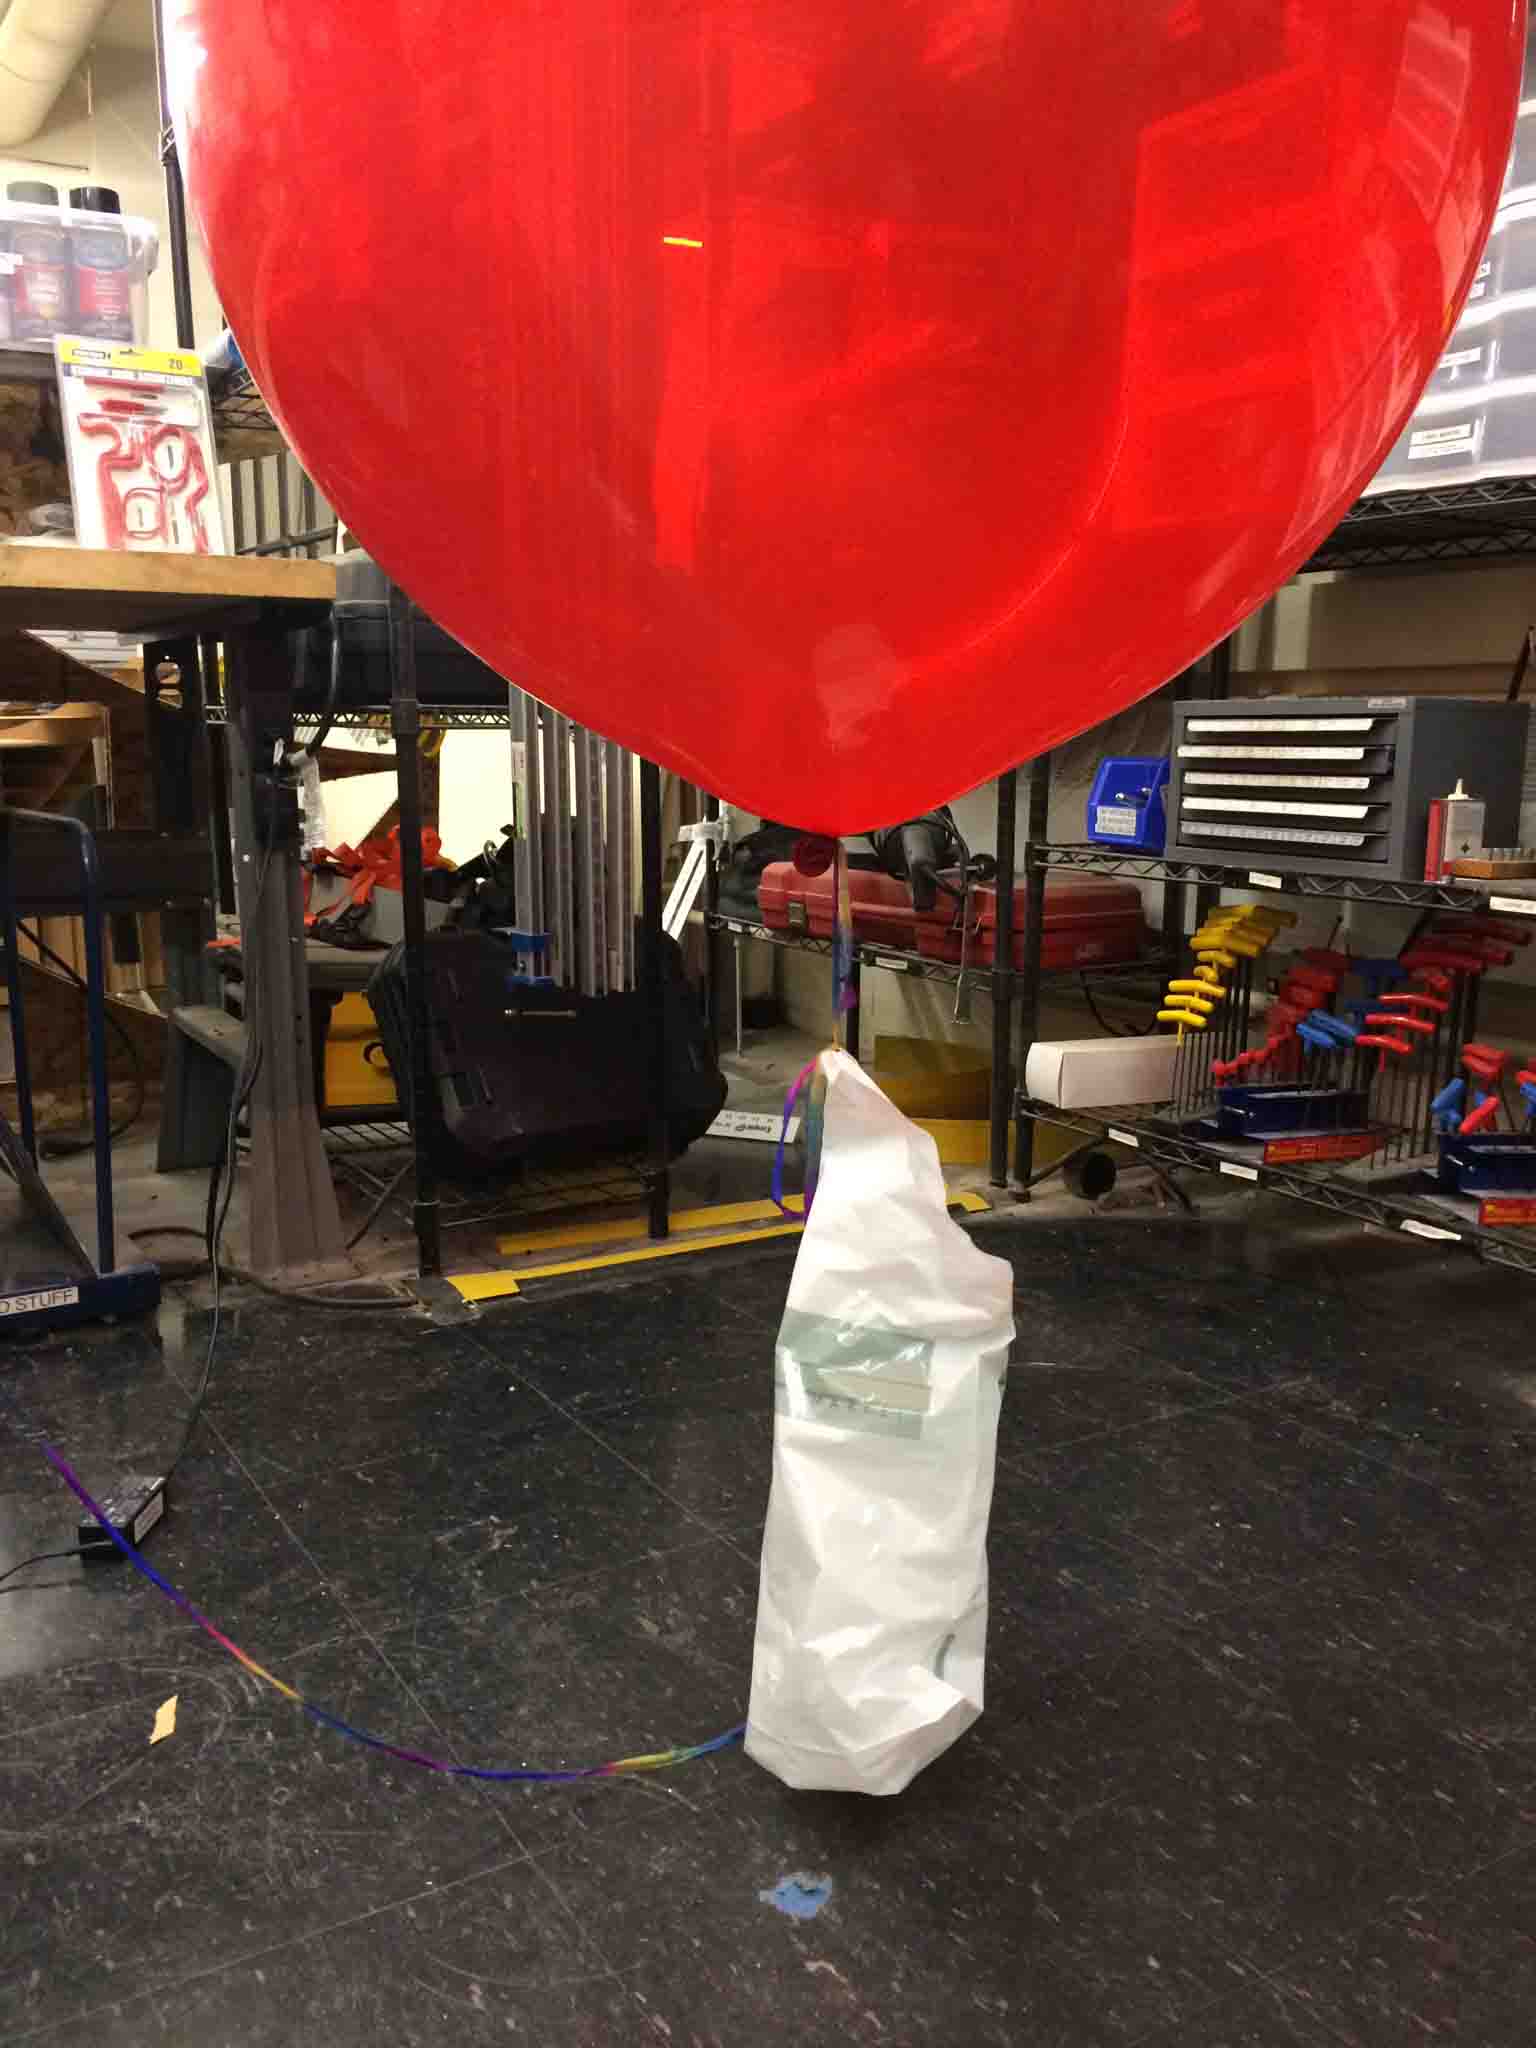
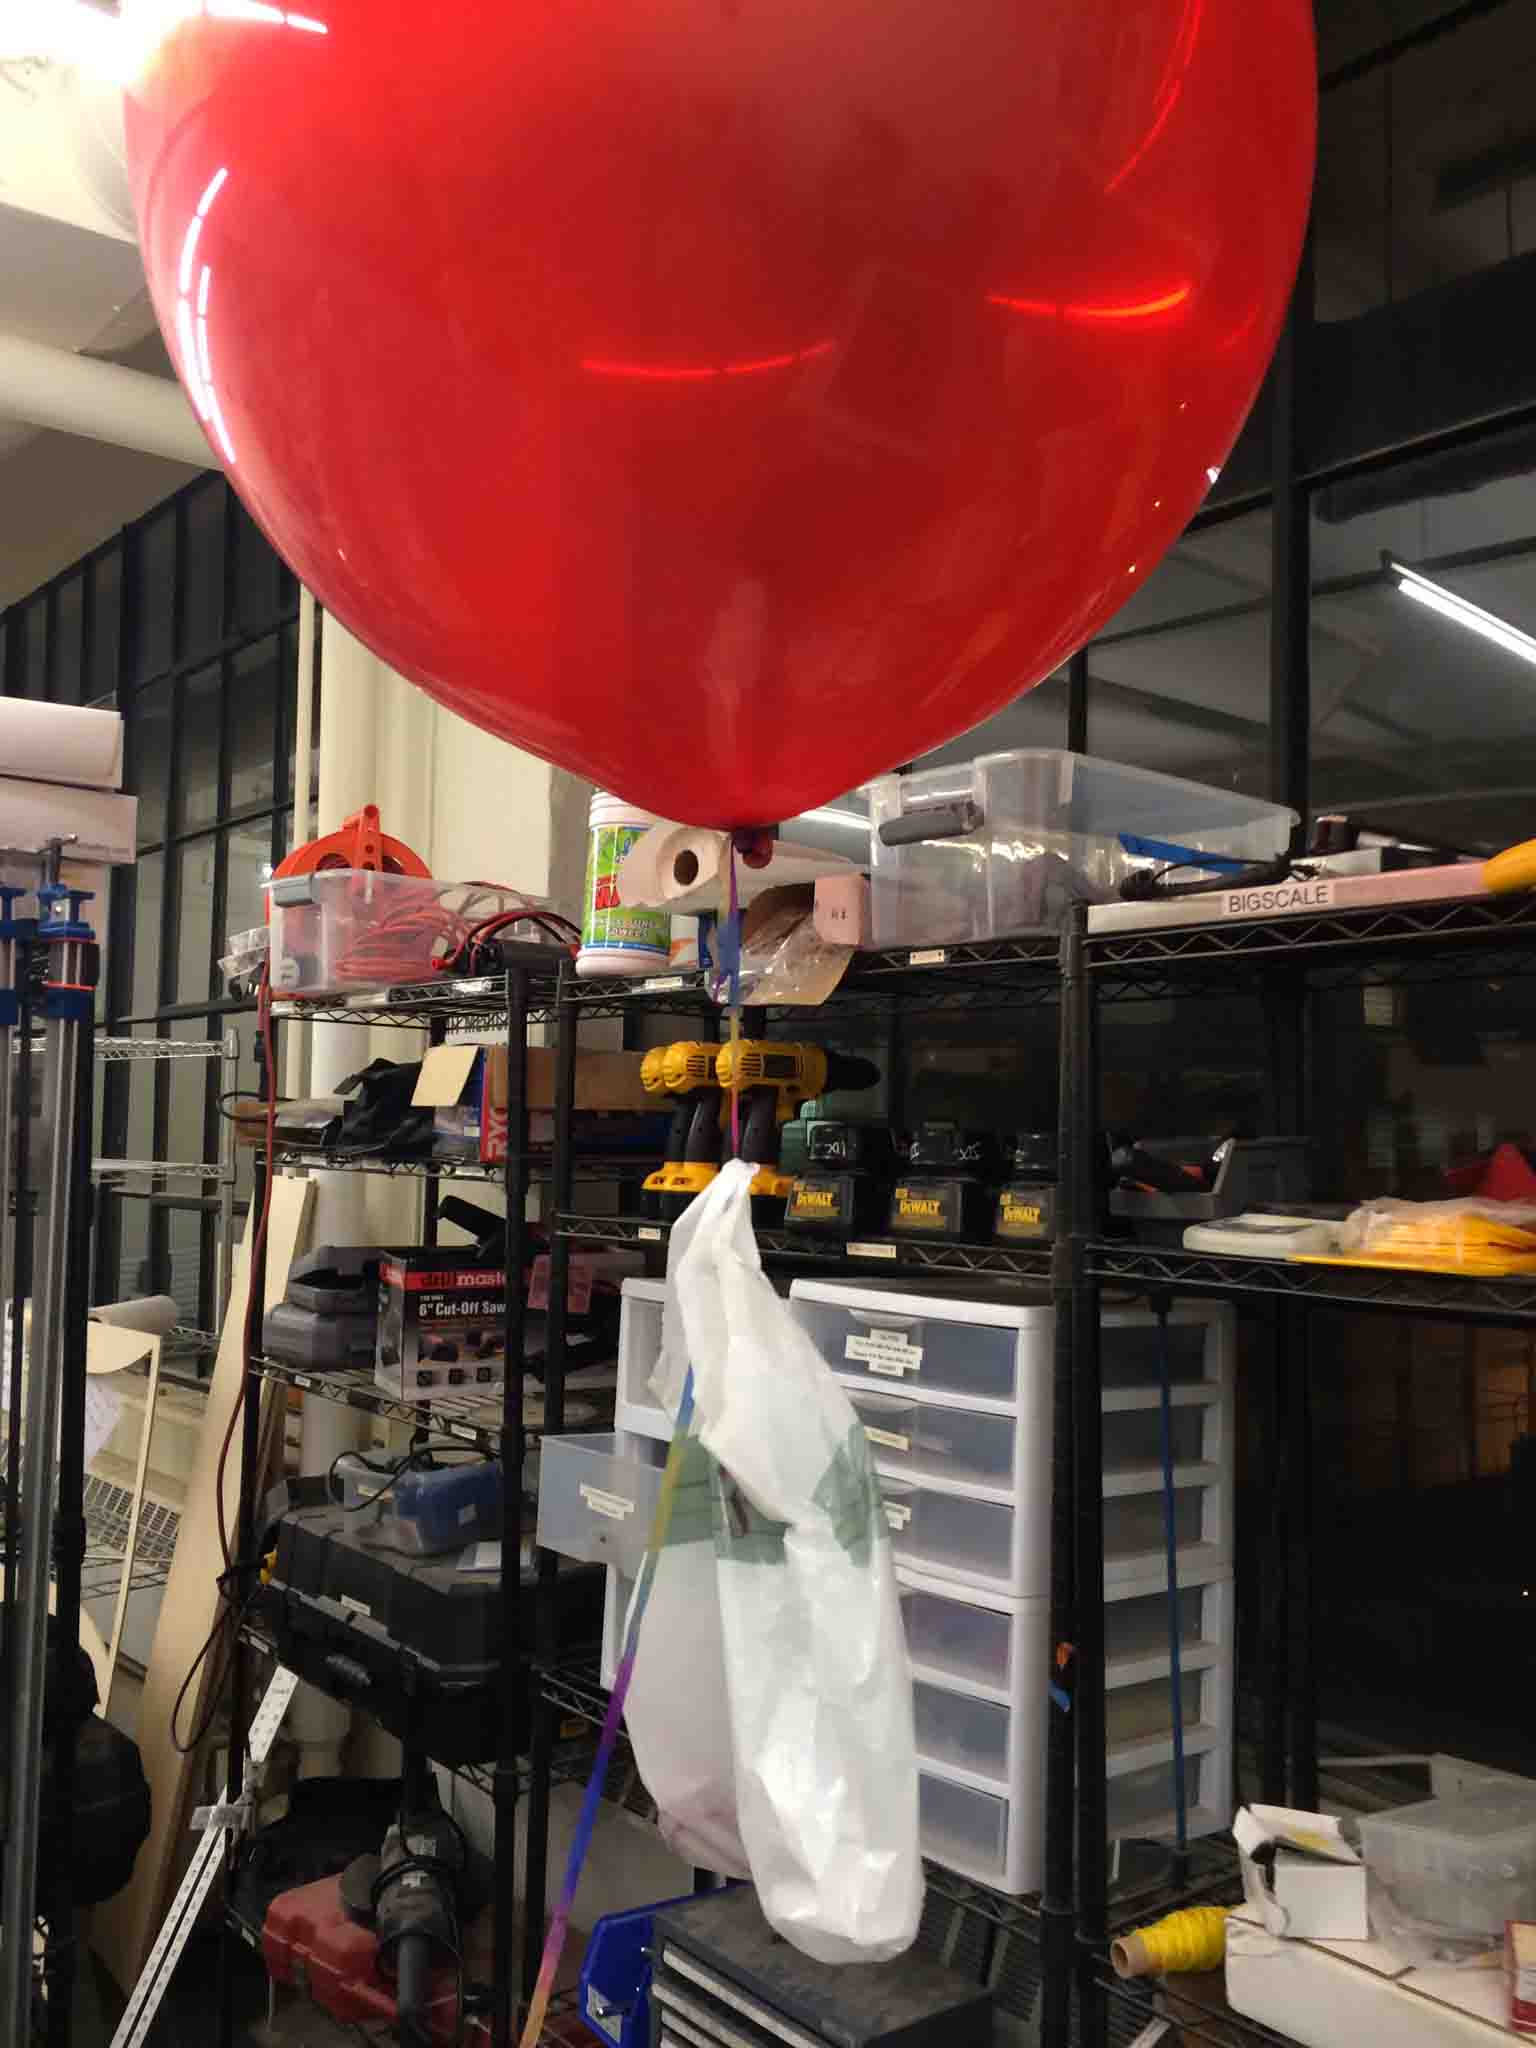
Much credit must go to my good friend Dhaval for revealing to me the magic of a floating overhead balloon. He showed me the video below of a programmable shark balloon, and I naturally thought: what if instead of a shark it were a beaver floating overhead?
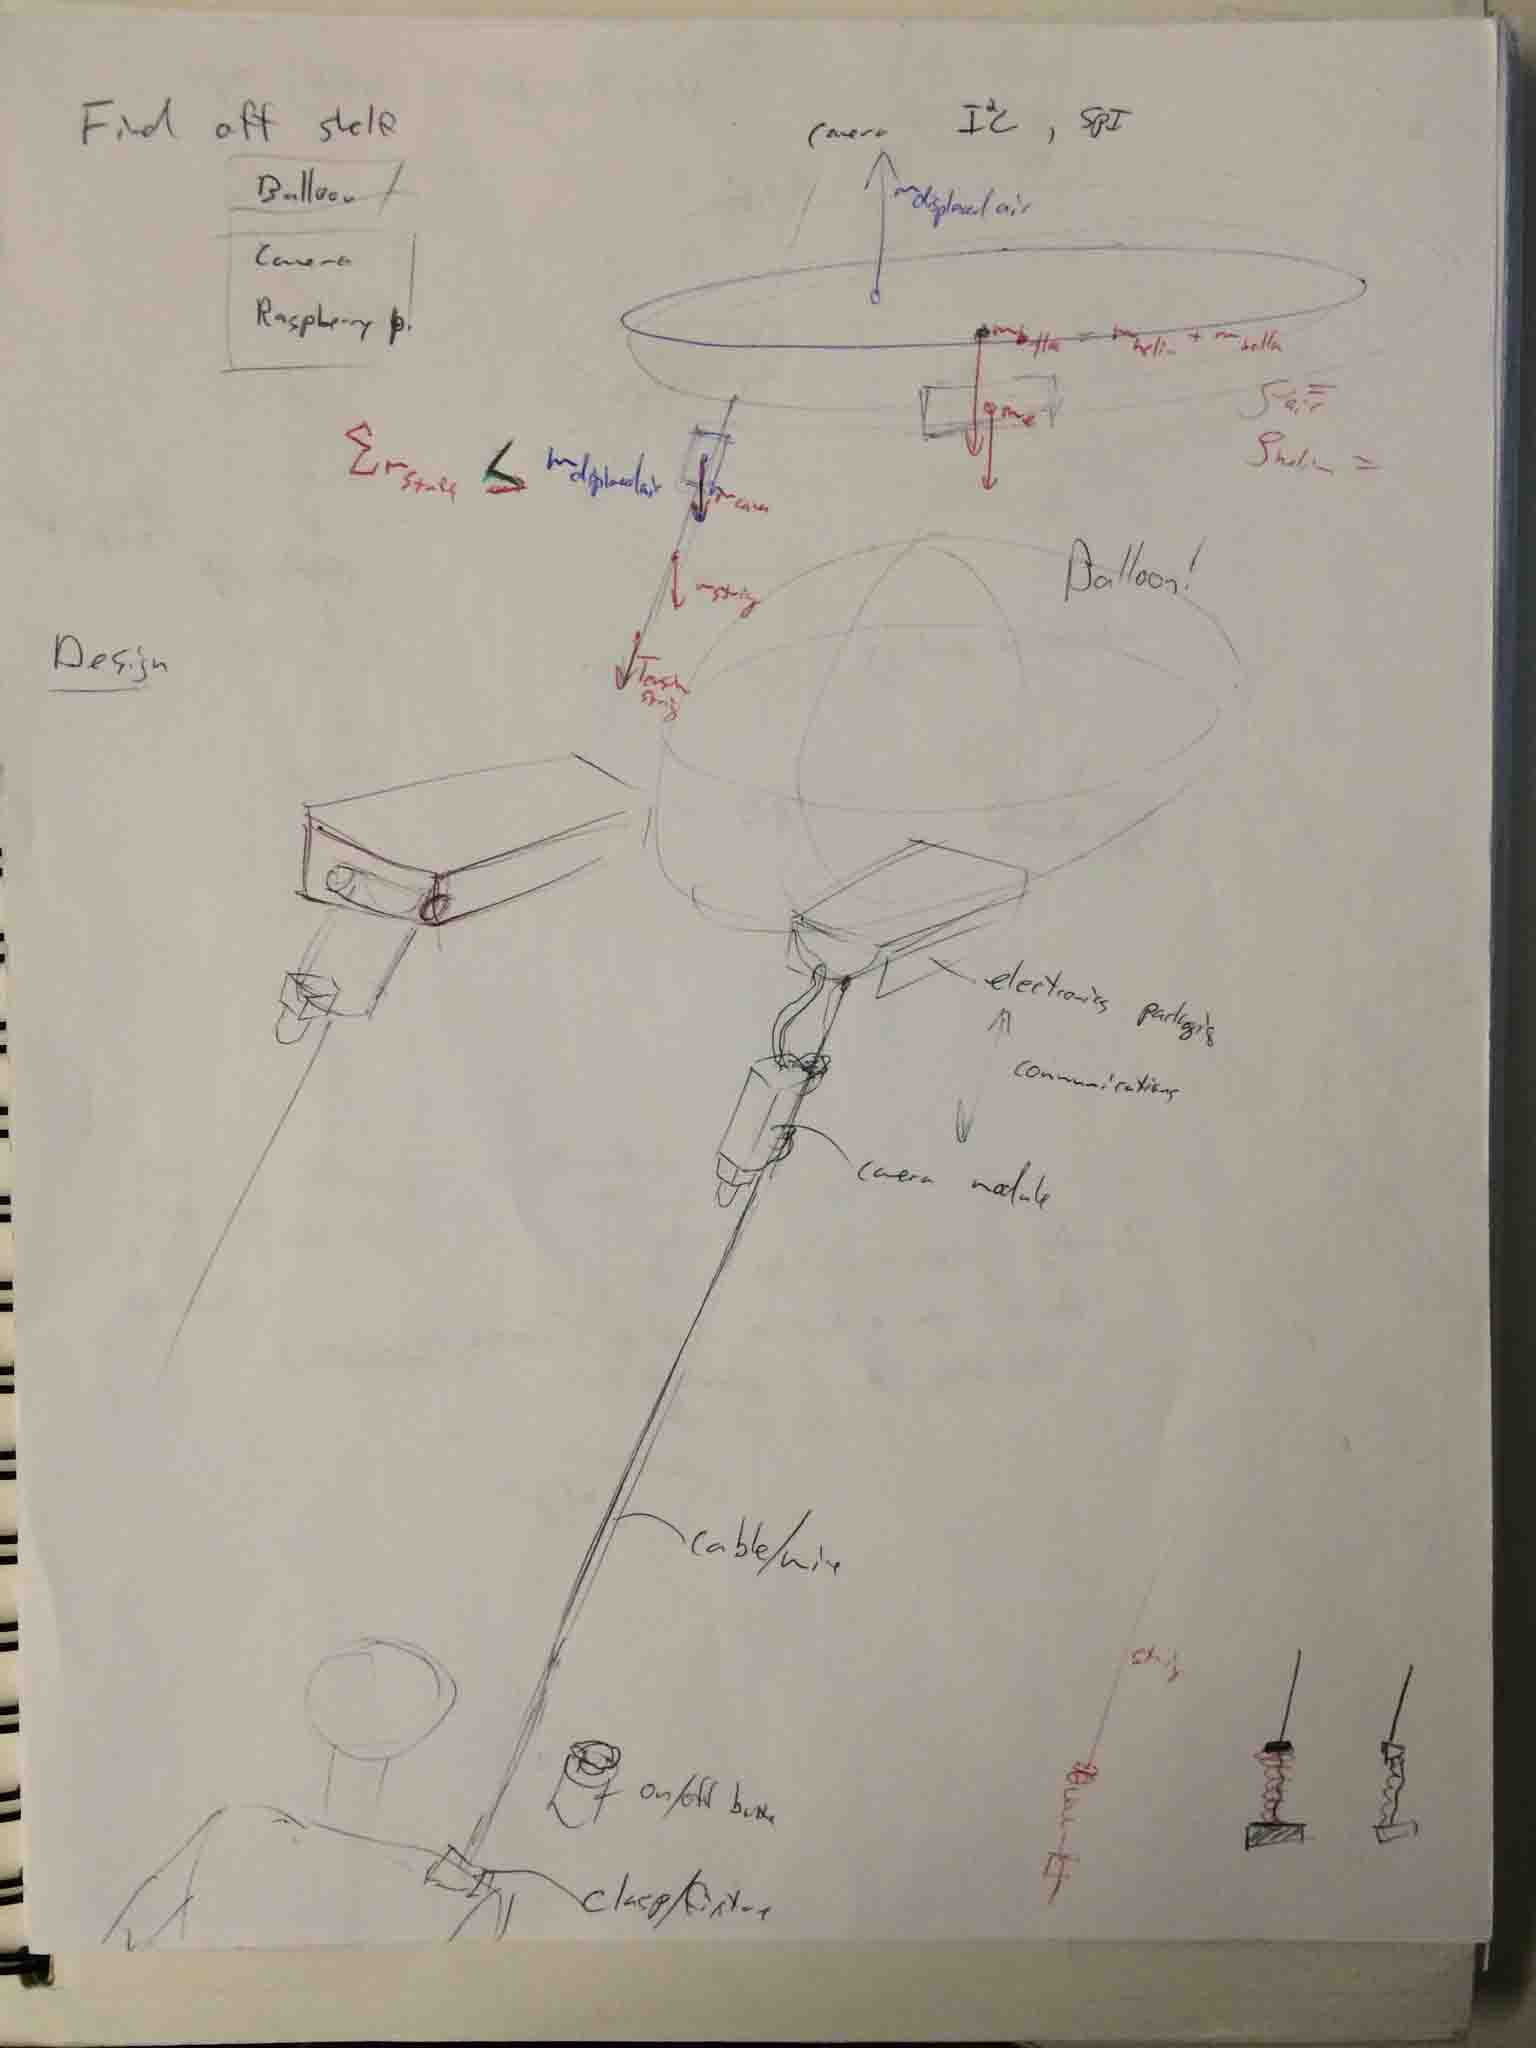
I got to ordering some balloons and realized that it actually felt pretty nice to have such a big balloon on top and so sketched out some critical components.
Framing the Product Potential and Learning to Triage
I met with many a TA to talk through my project's needs and most critical modules. Nobody thought it could all be done in less than two weeks. Little did I know how right they would be.
Matt Carney helped me think through the subsystems, weight distributions, and housing design for my electronics packaging.

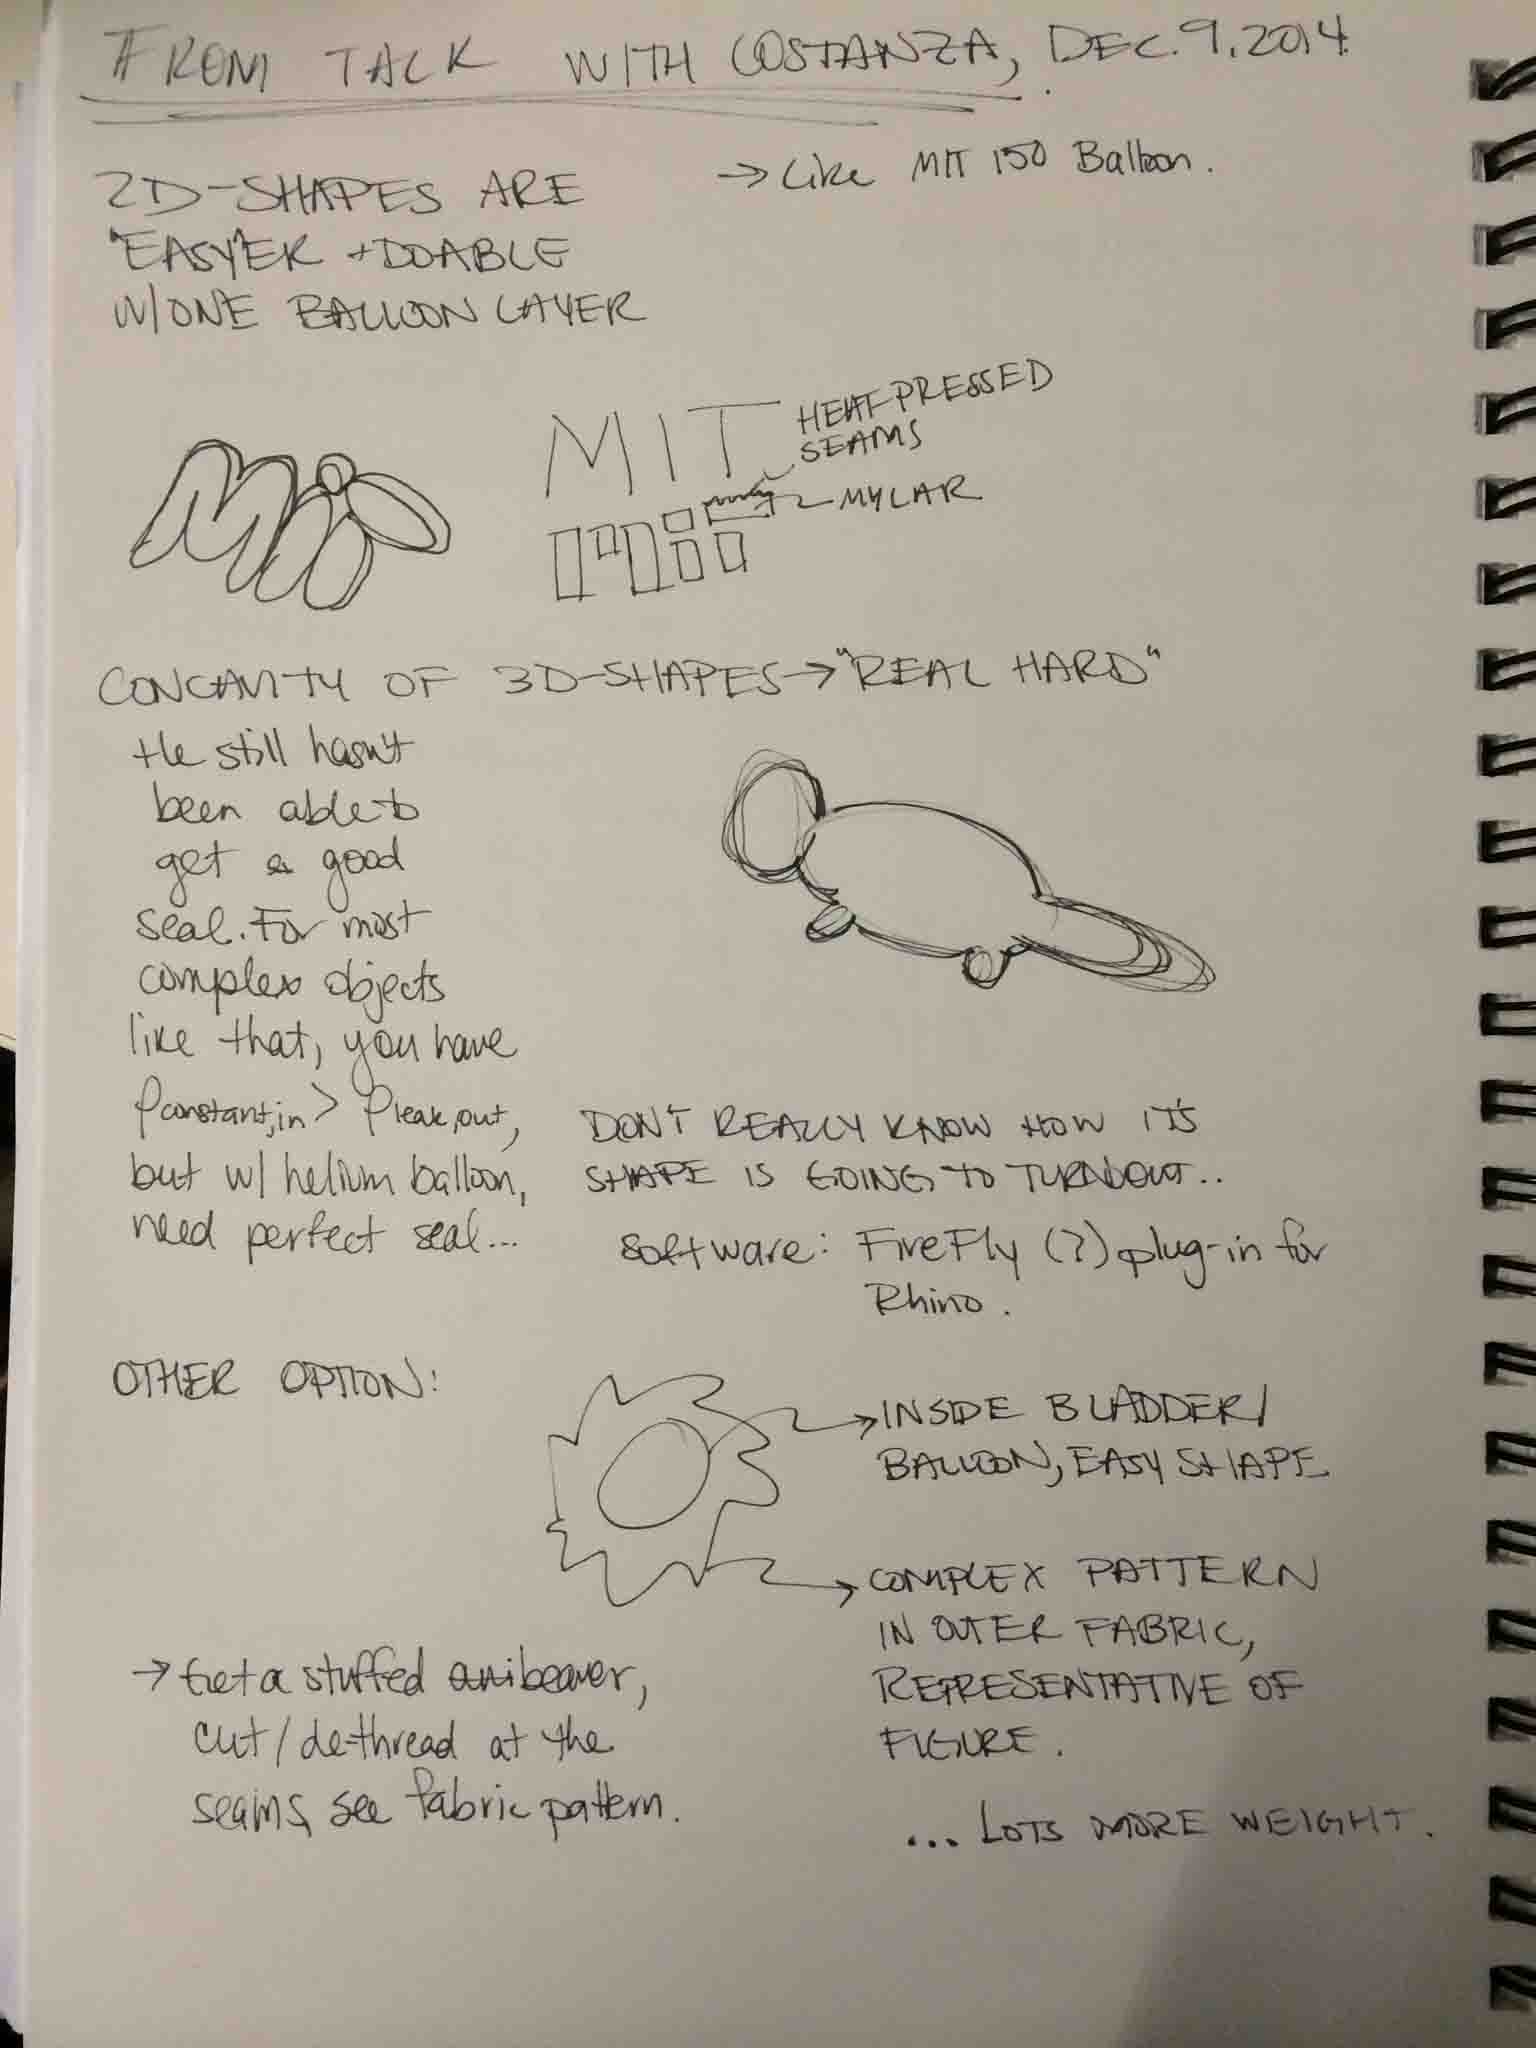
Costanza helped me understand the nuances of making inflatables and Sam pointed me to his great tutorial and reminded me how difficult it was to make my shape's geometry (a 3D form with many inner creases) to be airtight.
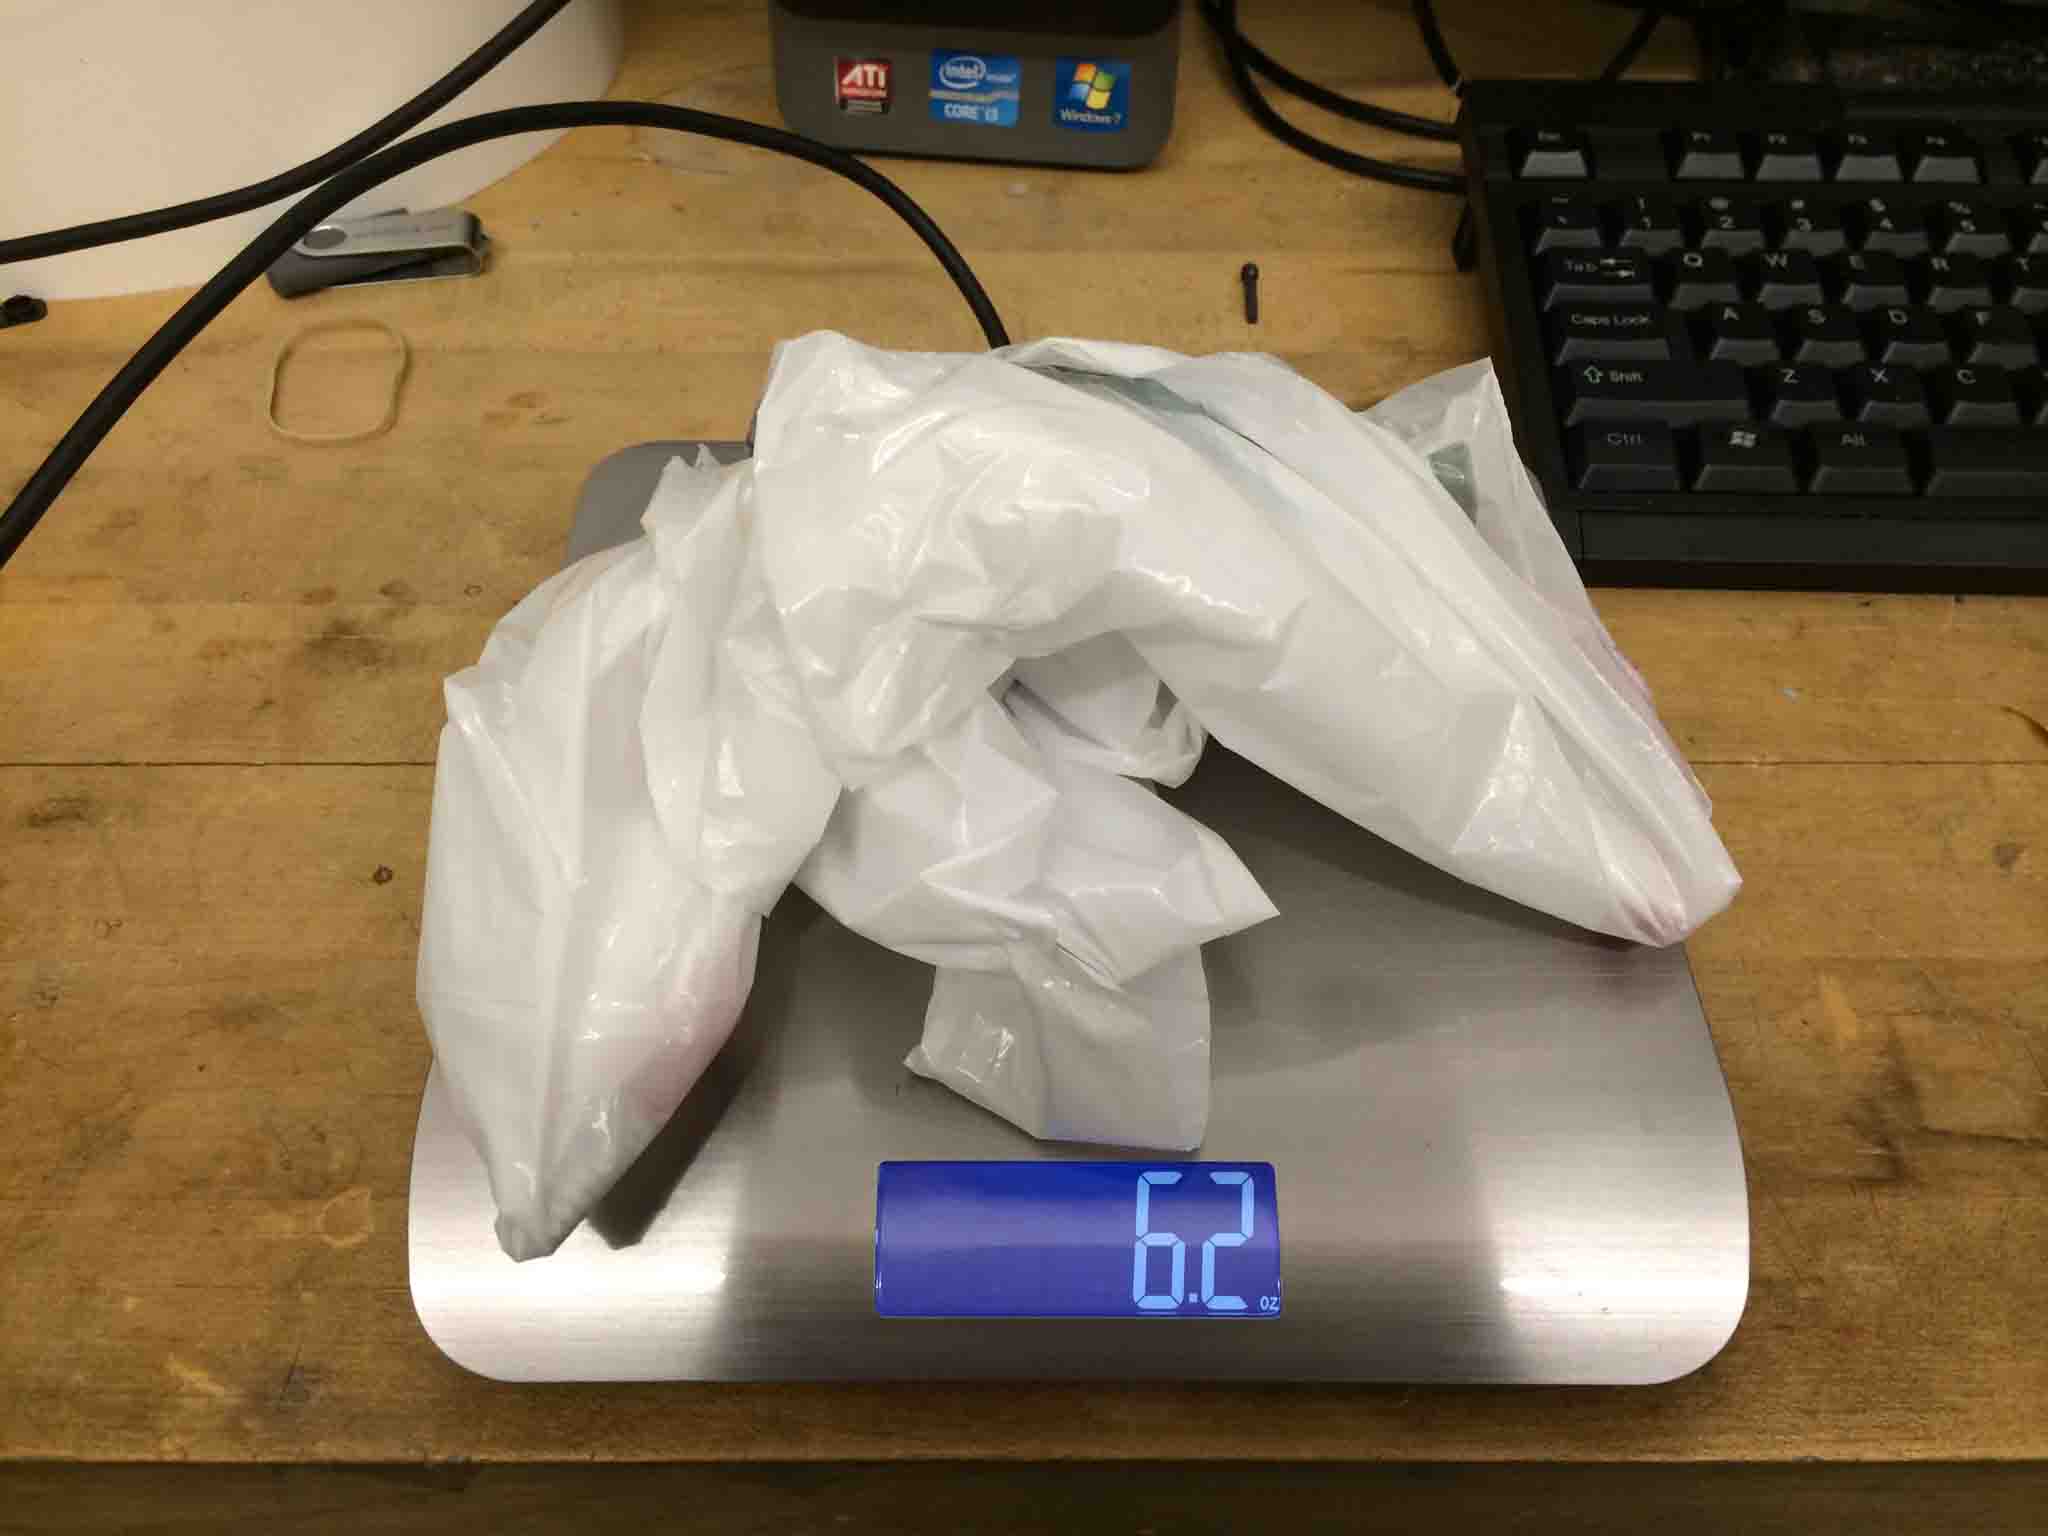
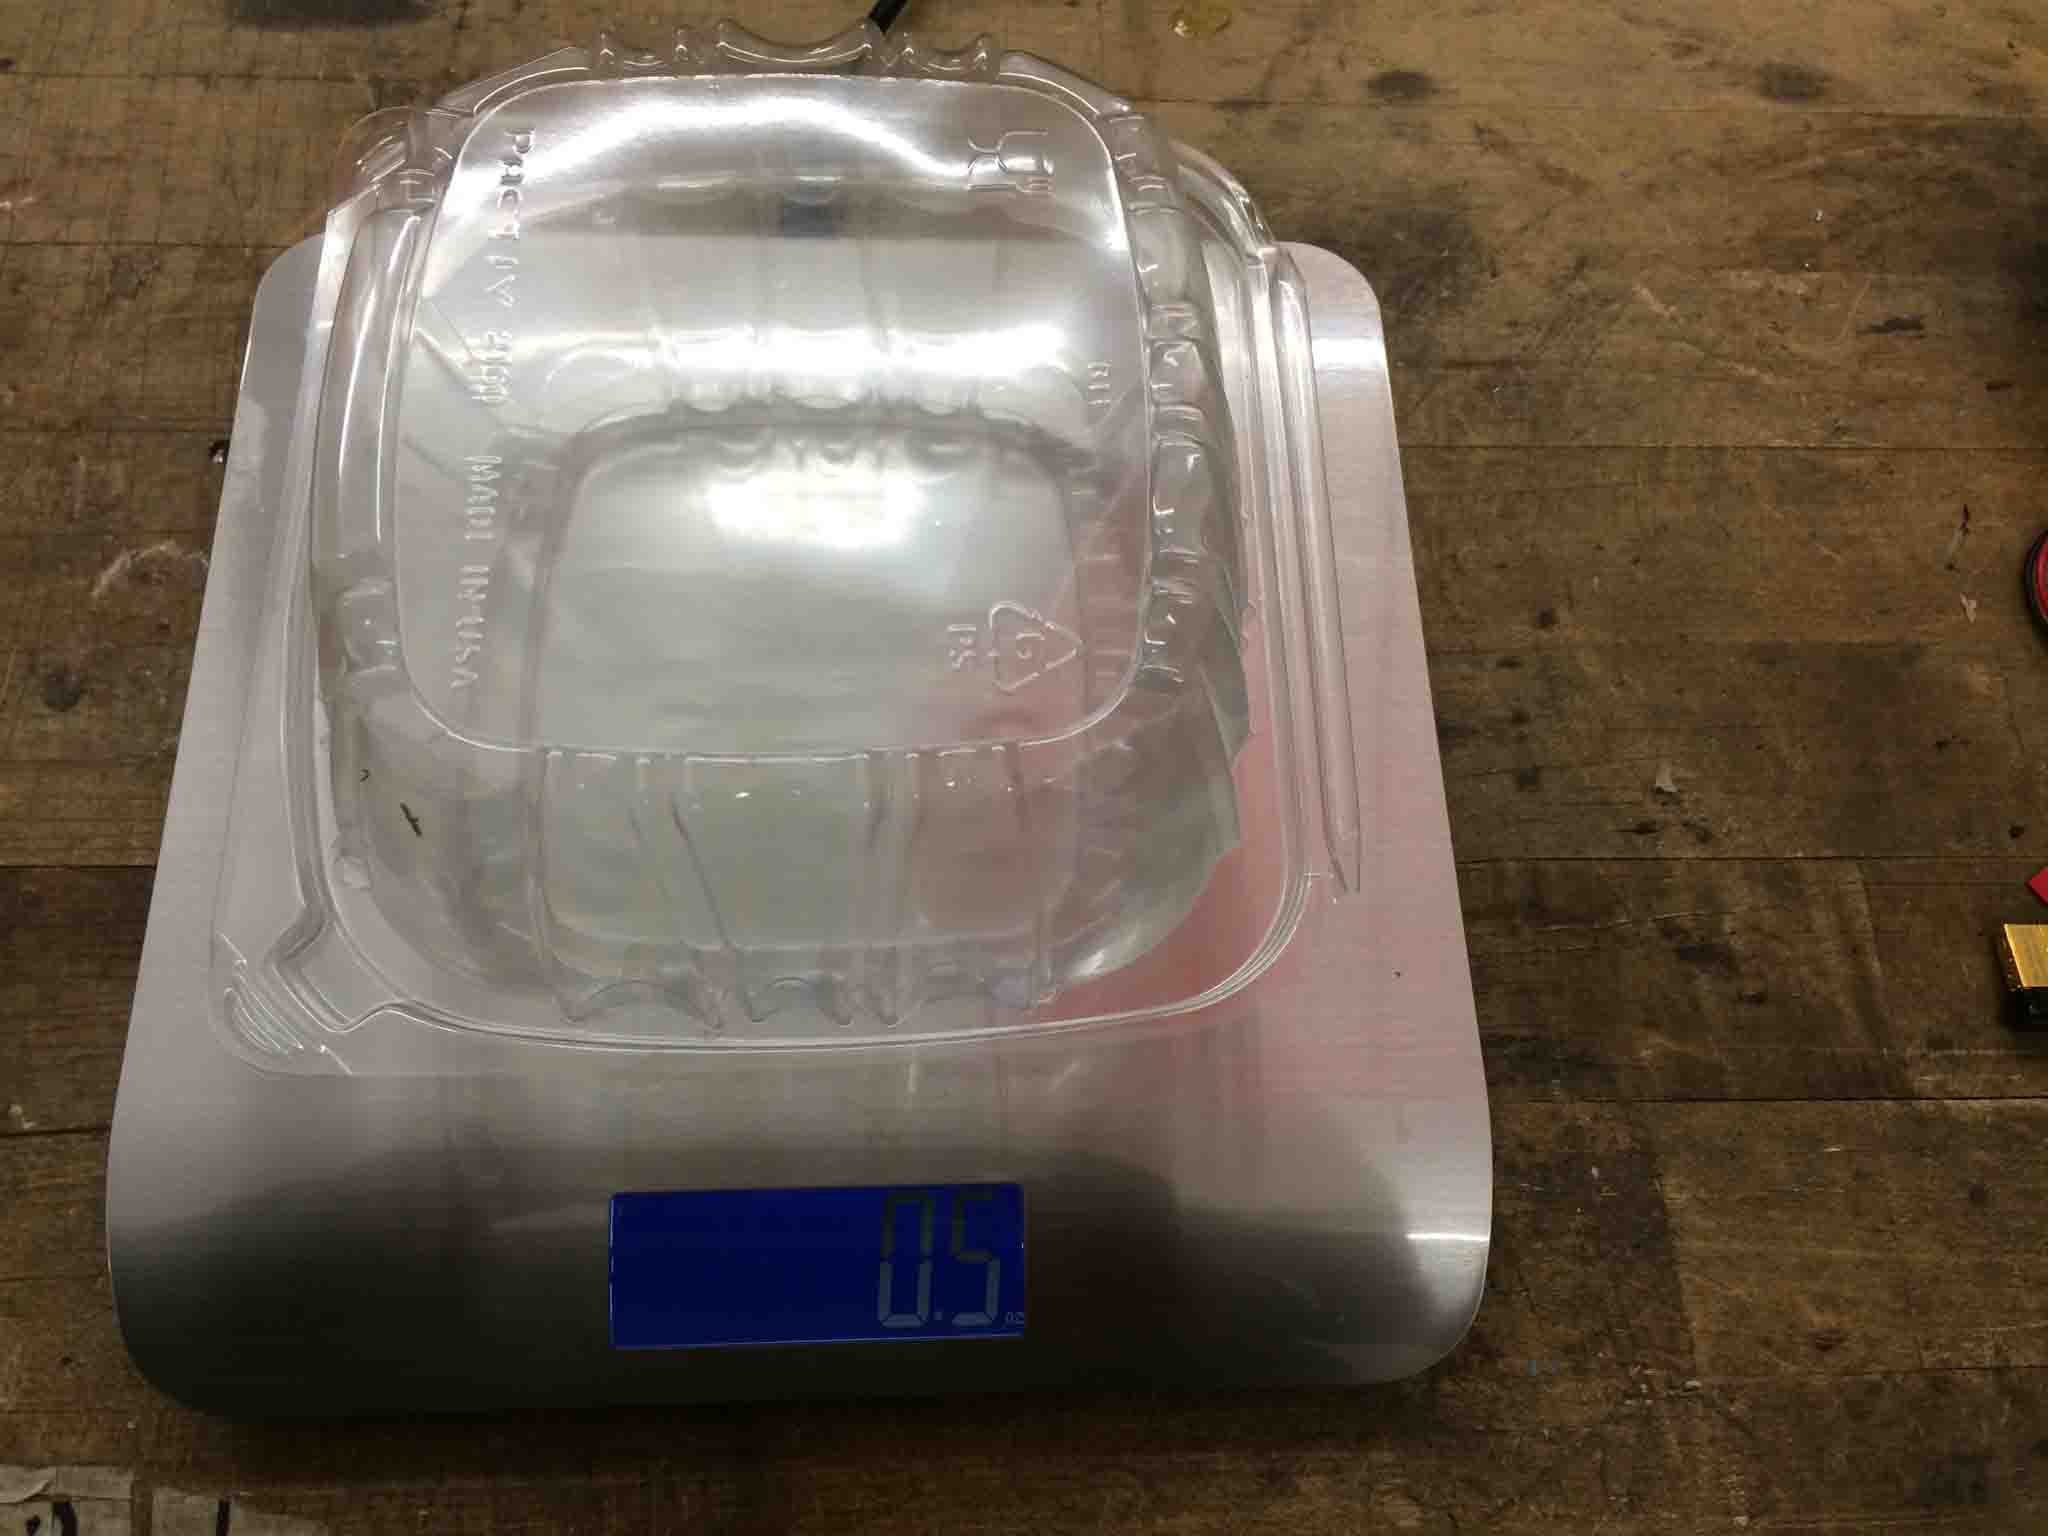
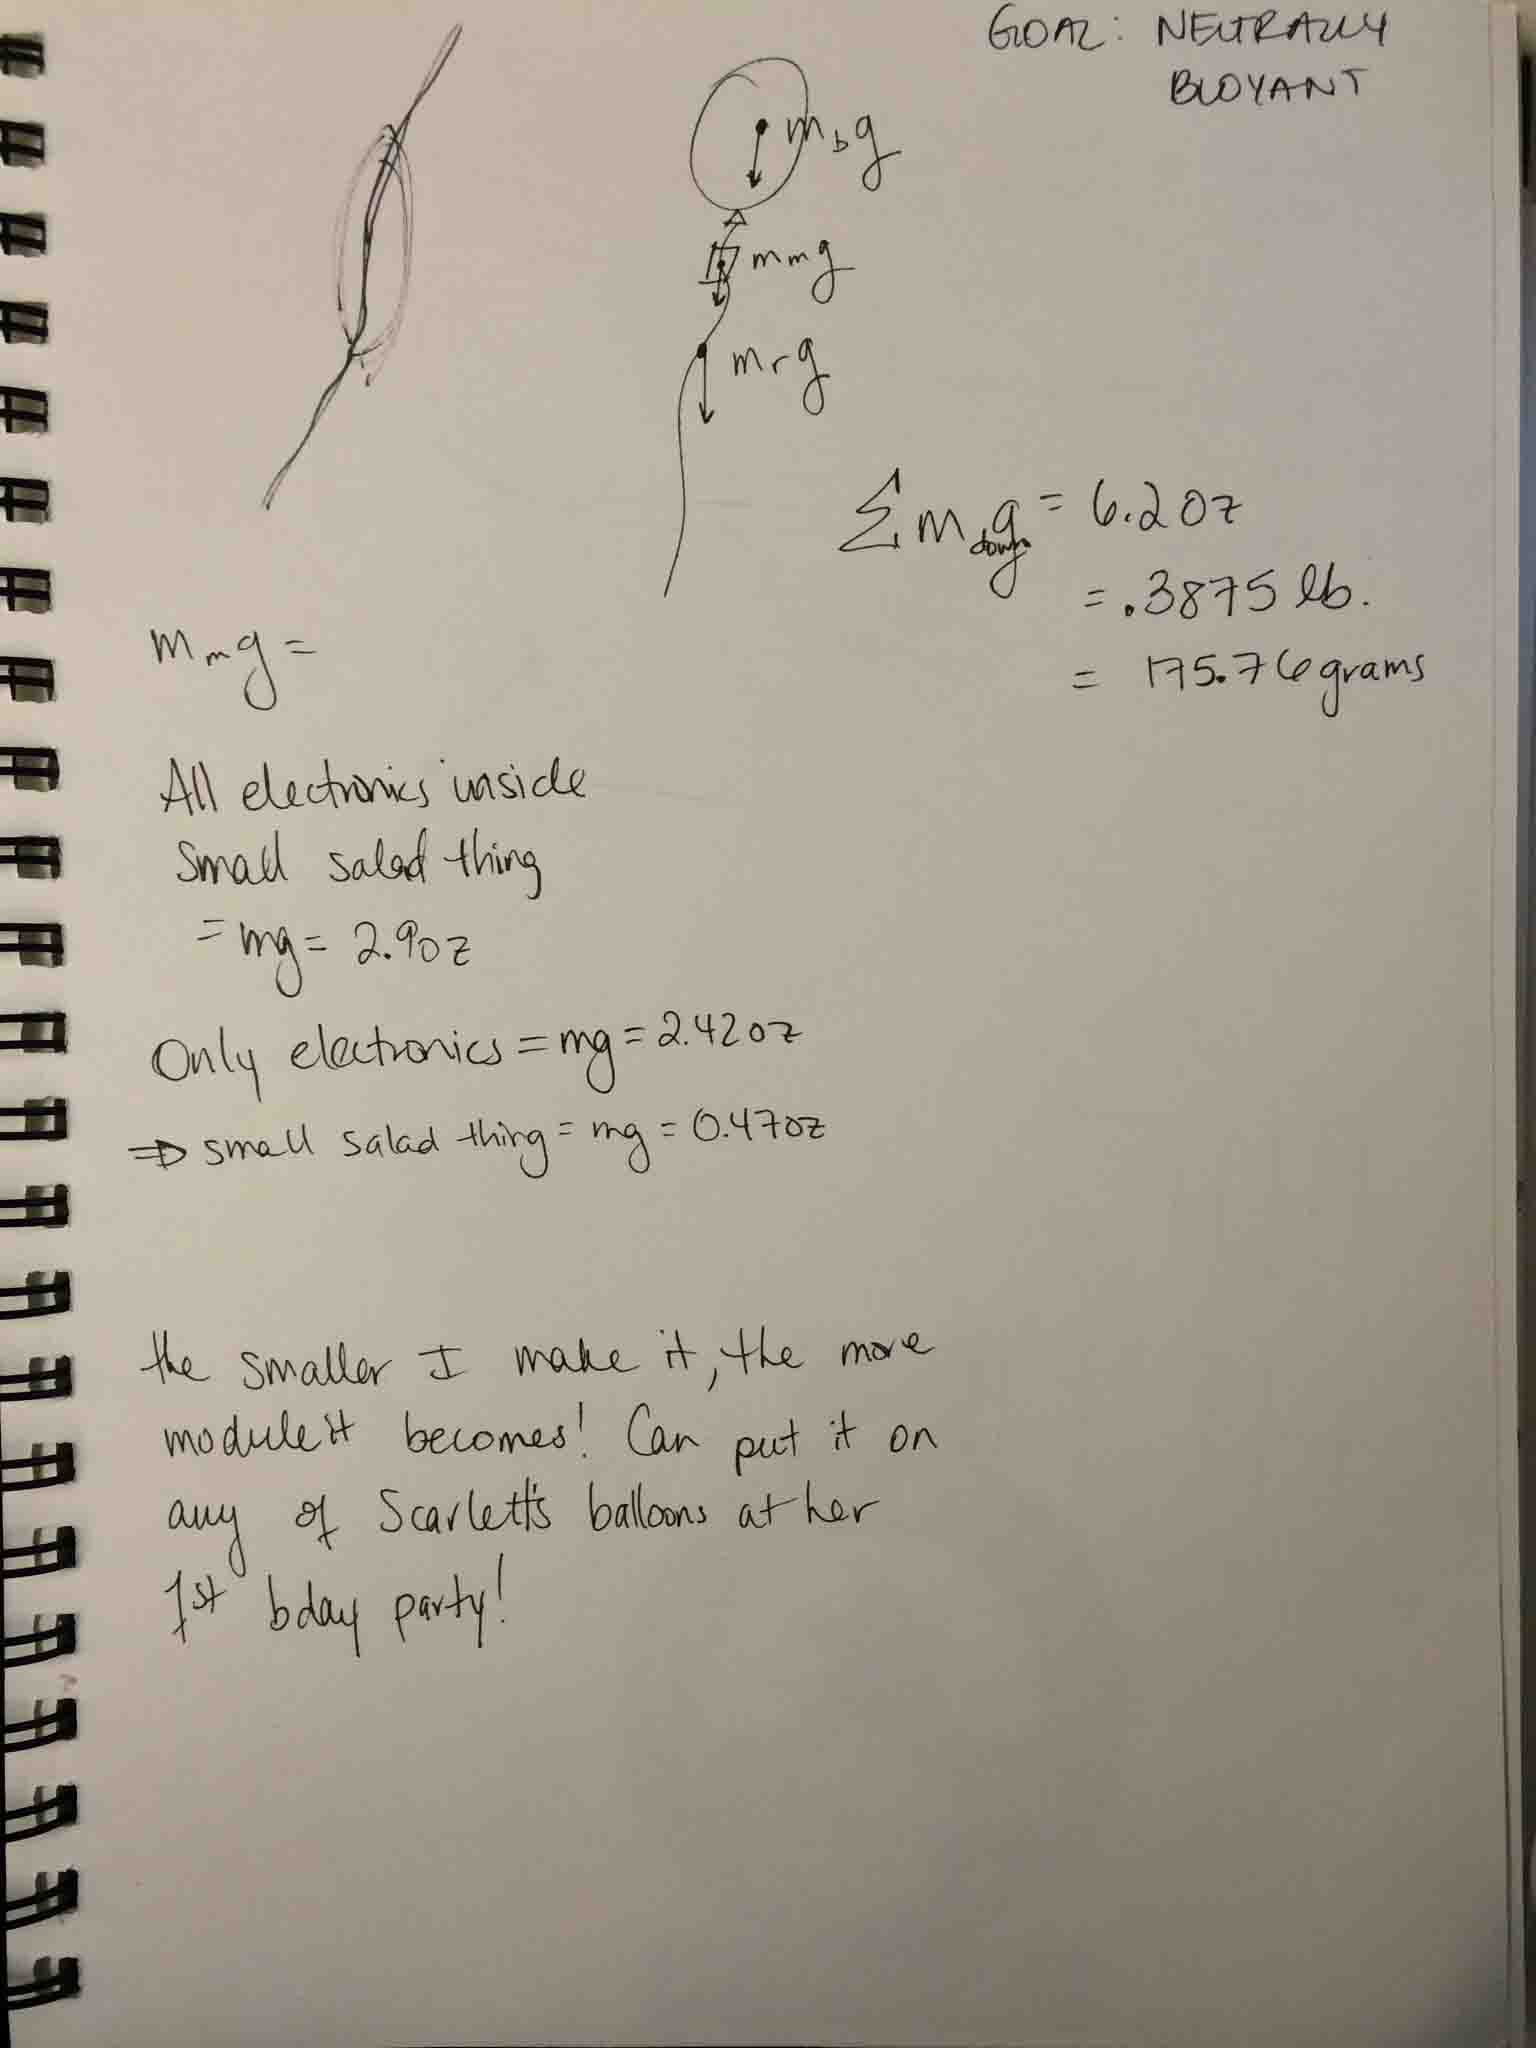
Testing materials and weights

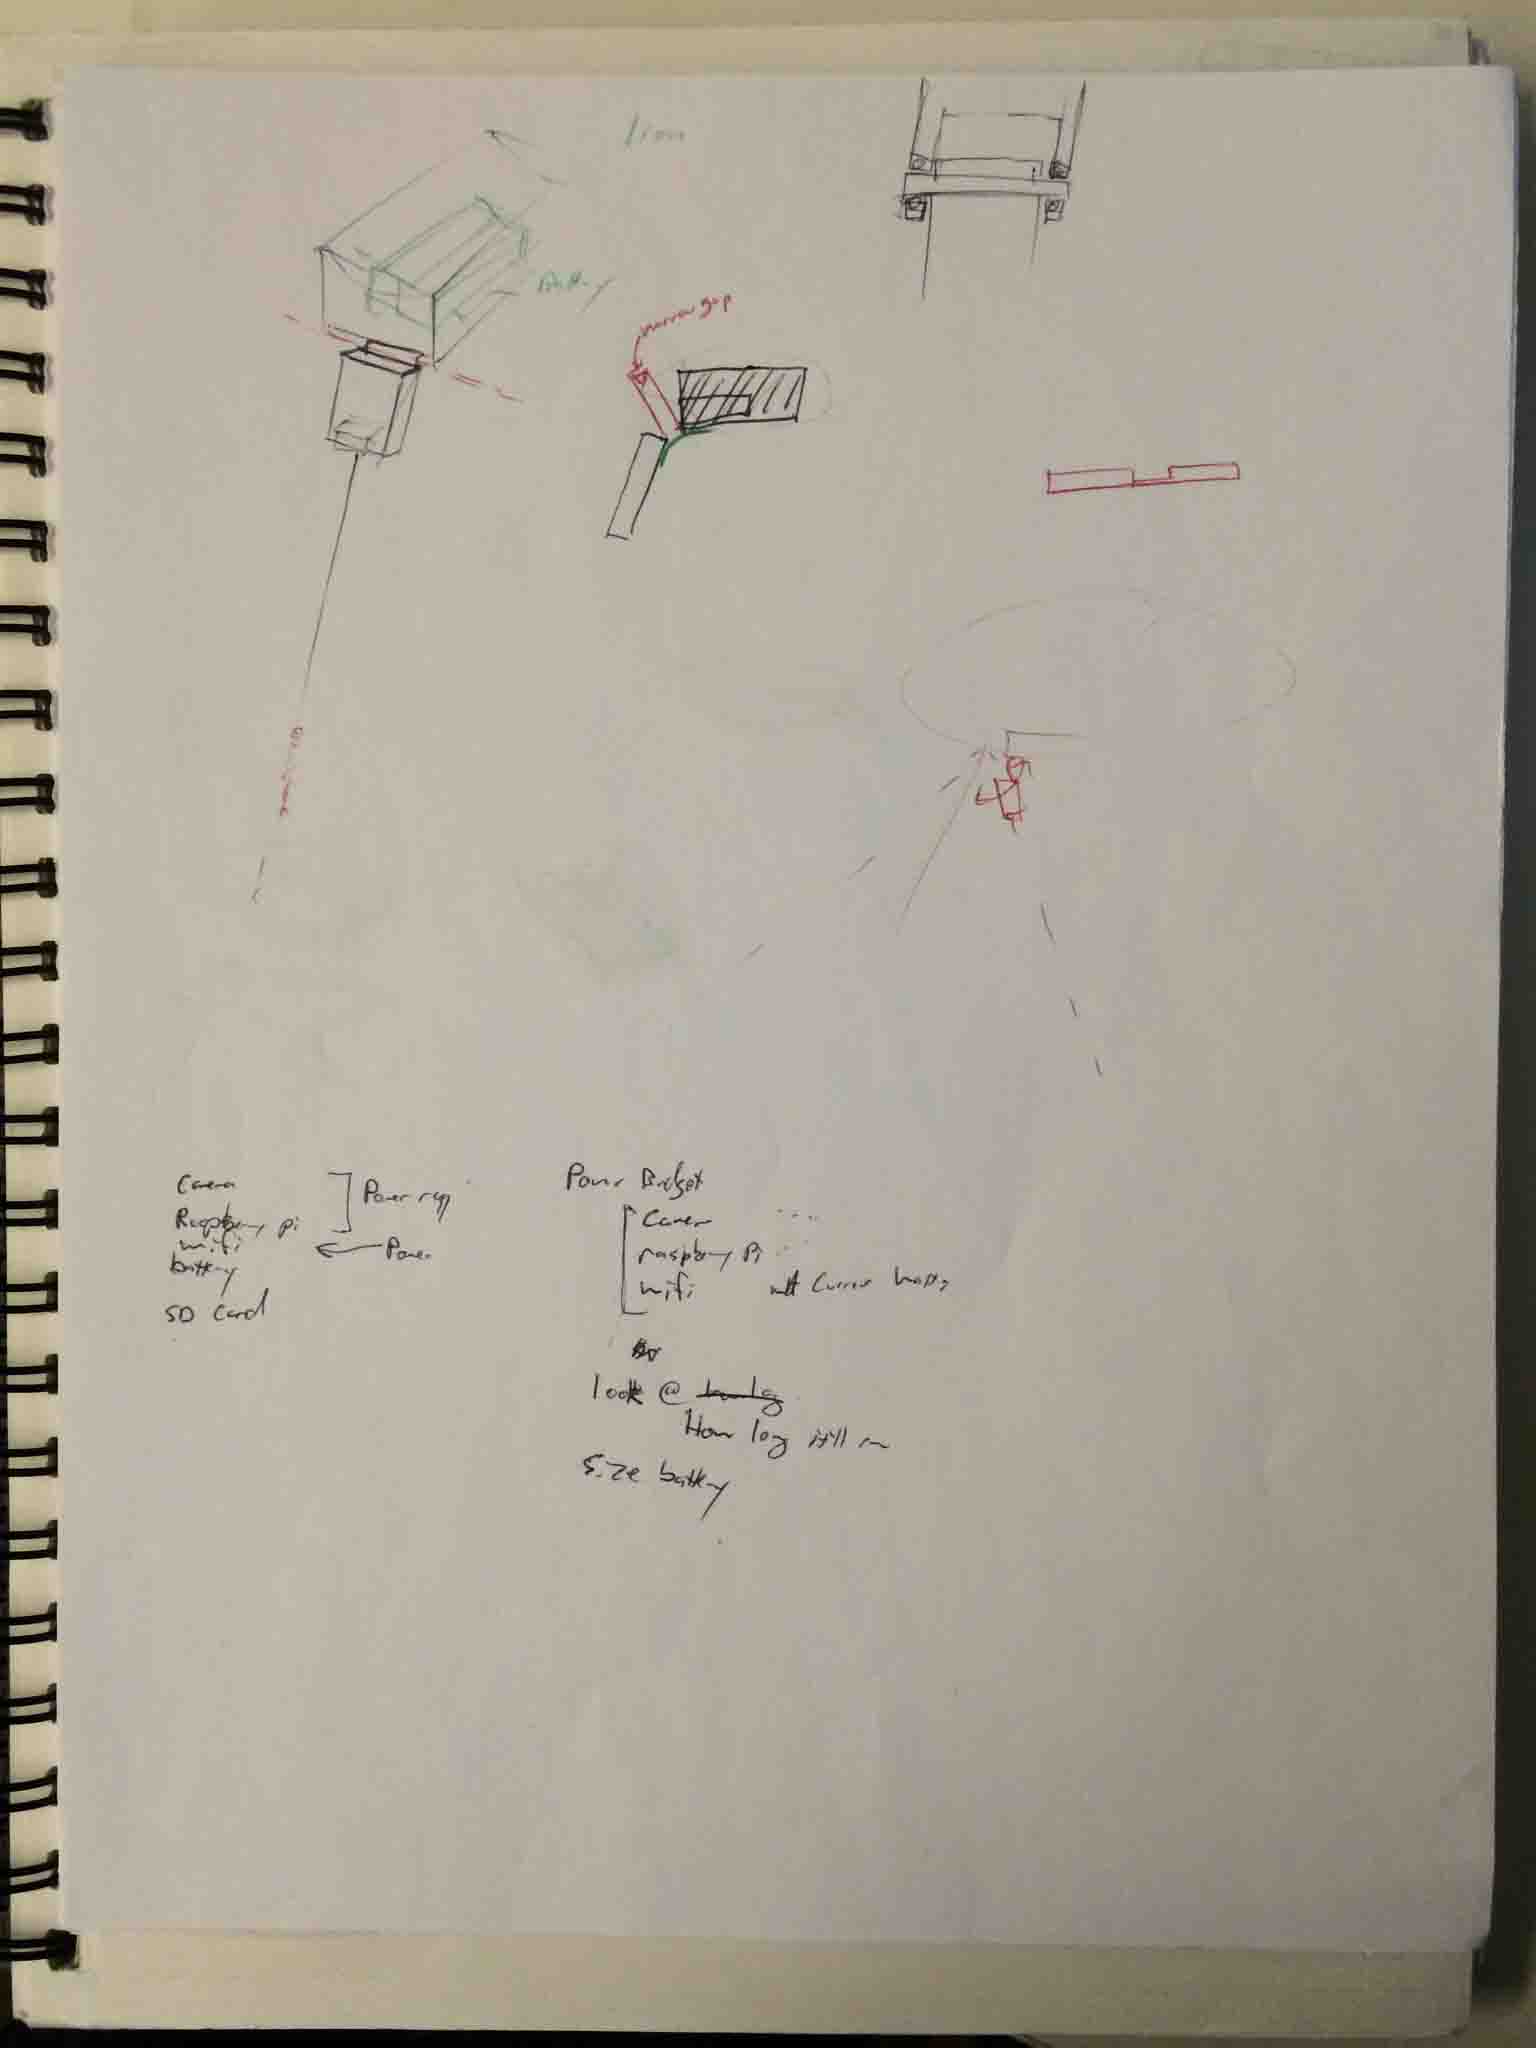
Electronics Packaging: Protyping, Design, & Thermoforming
Housing for Electronics
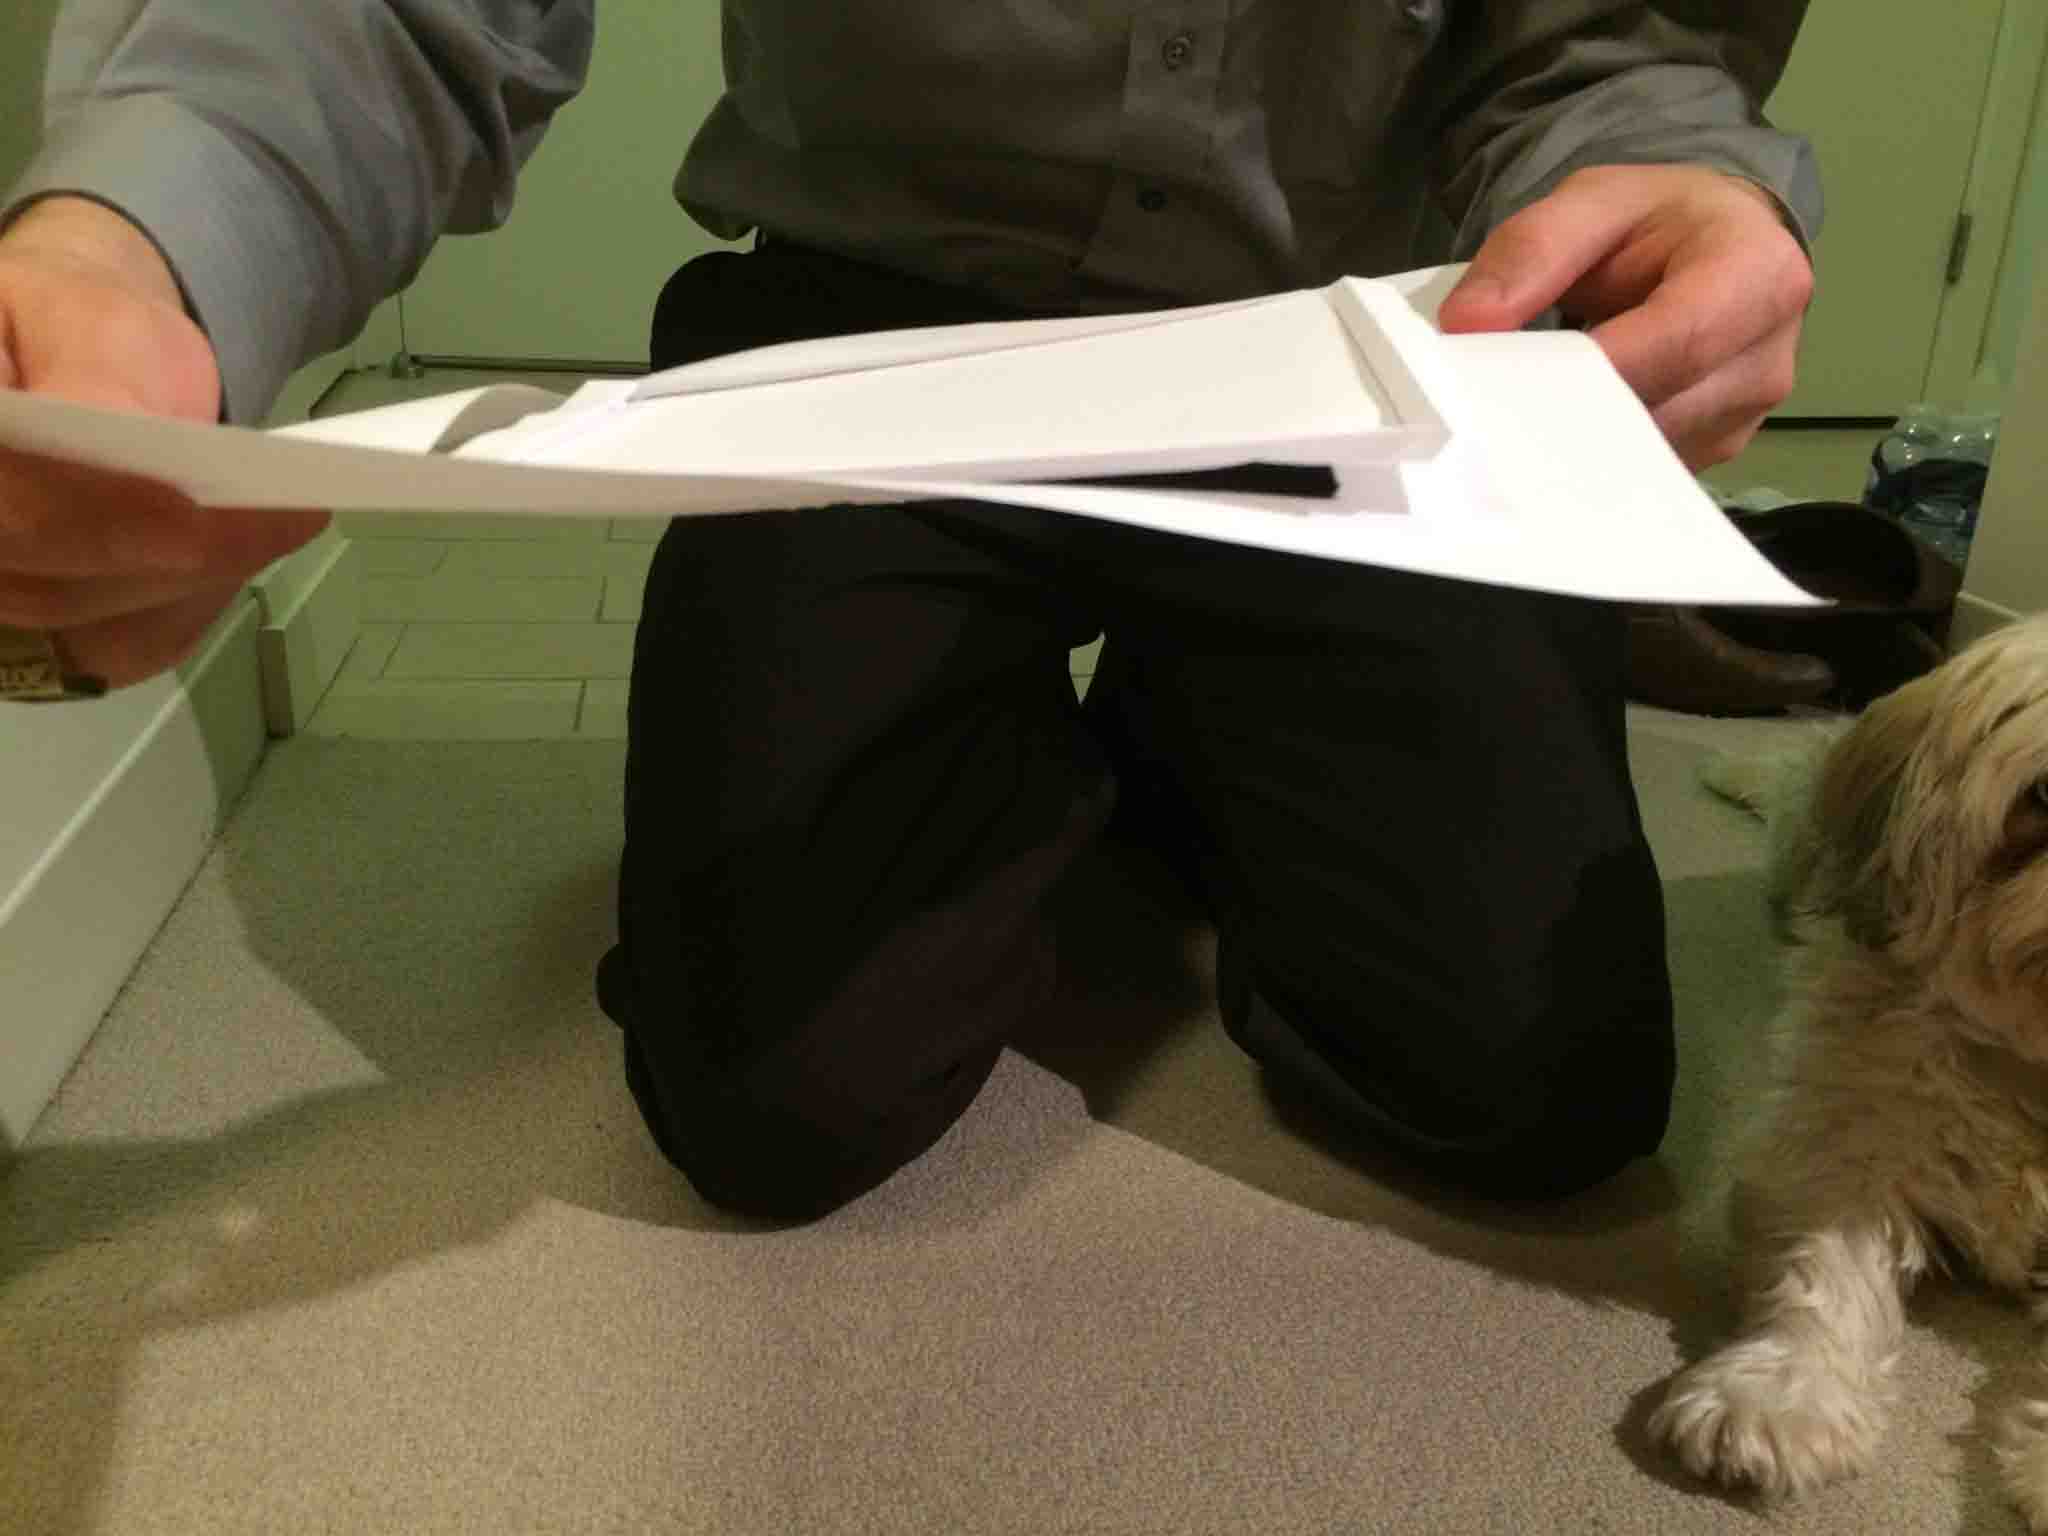
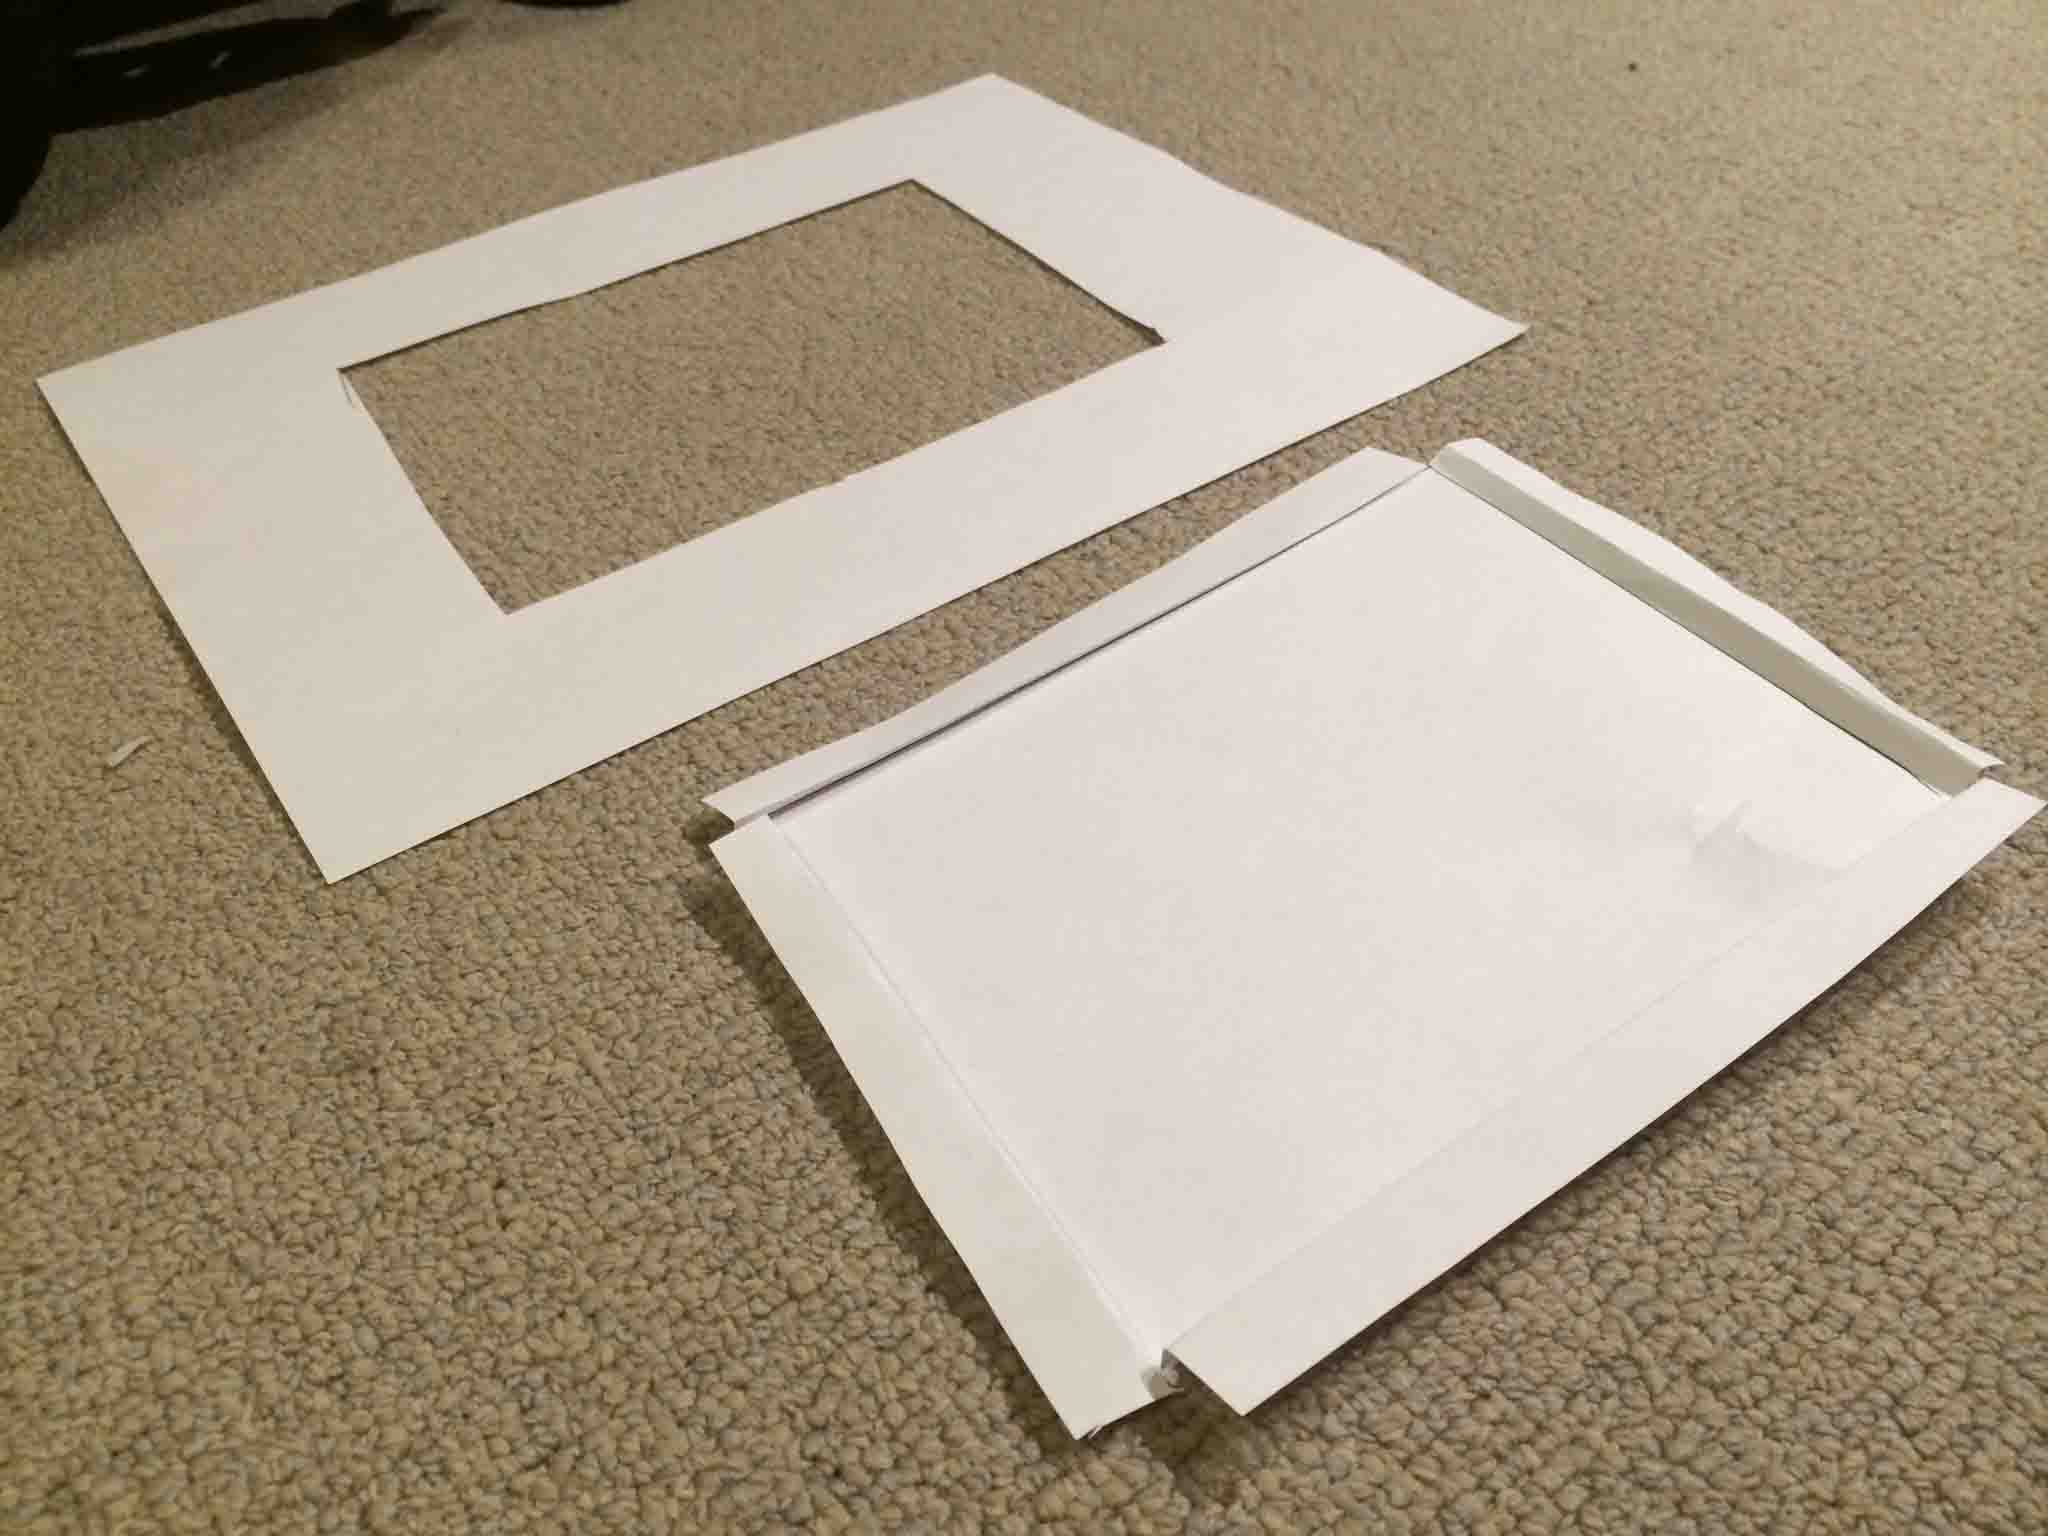
I first went to the basics of paper prototyping to explore some designs for the electronics housing.
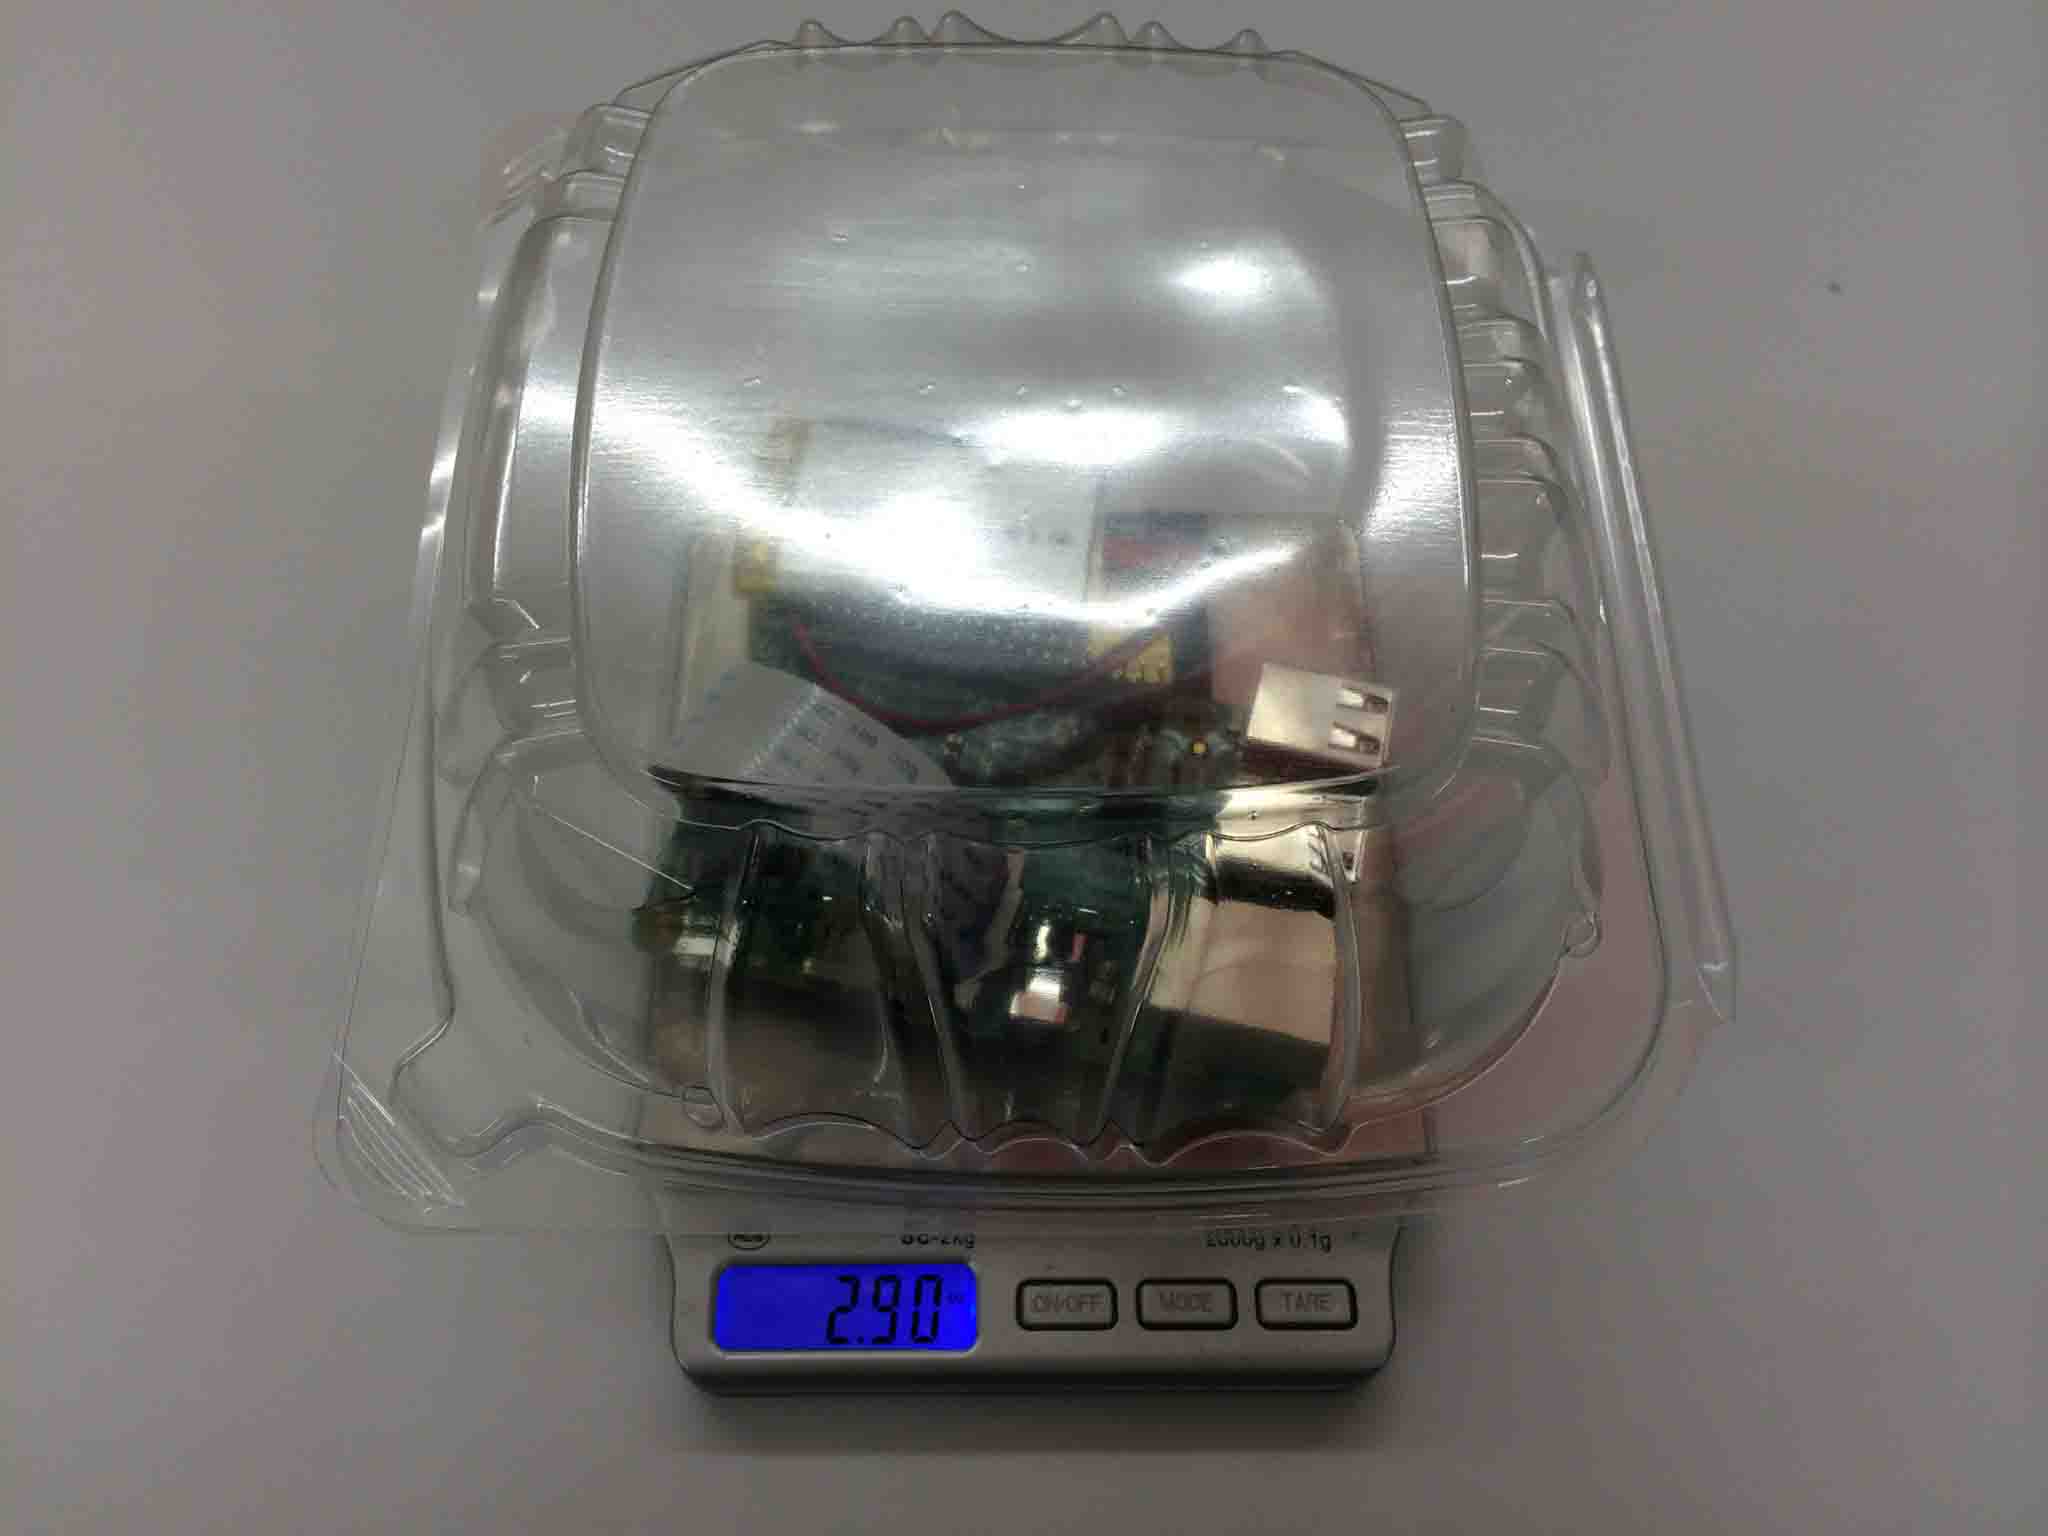
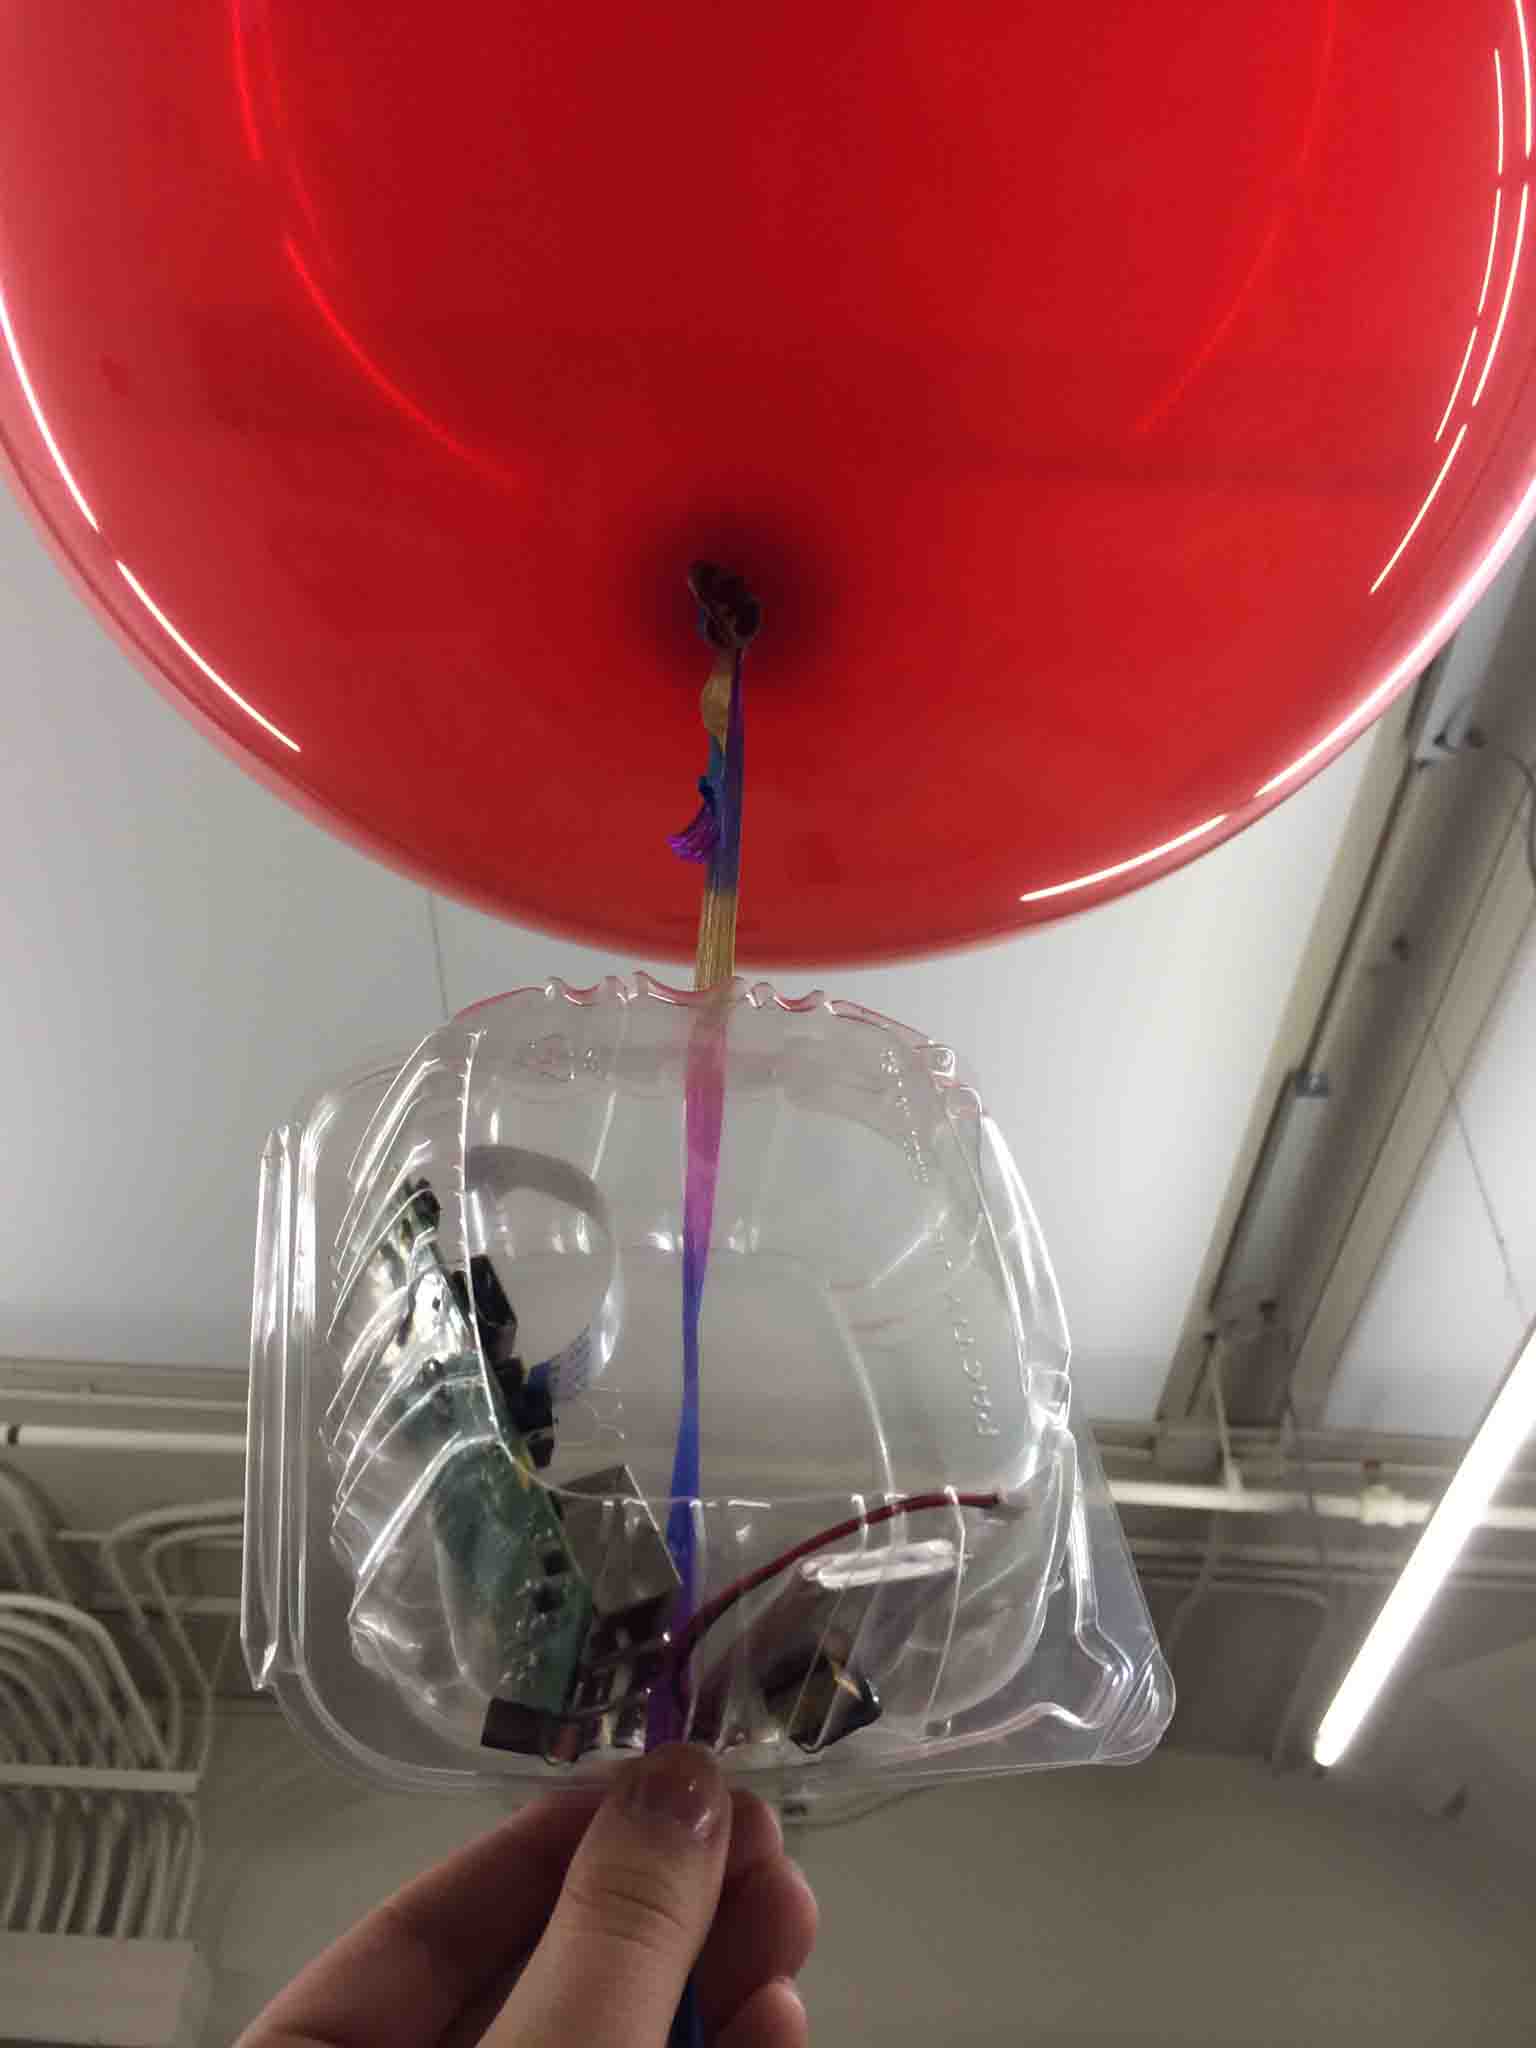
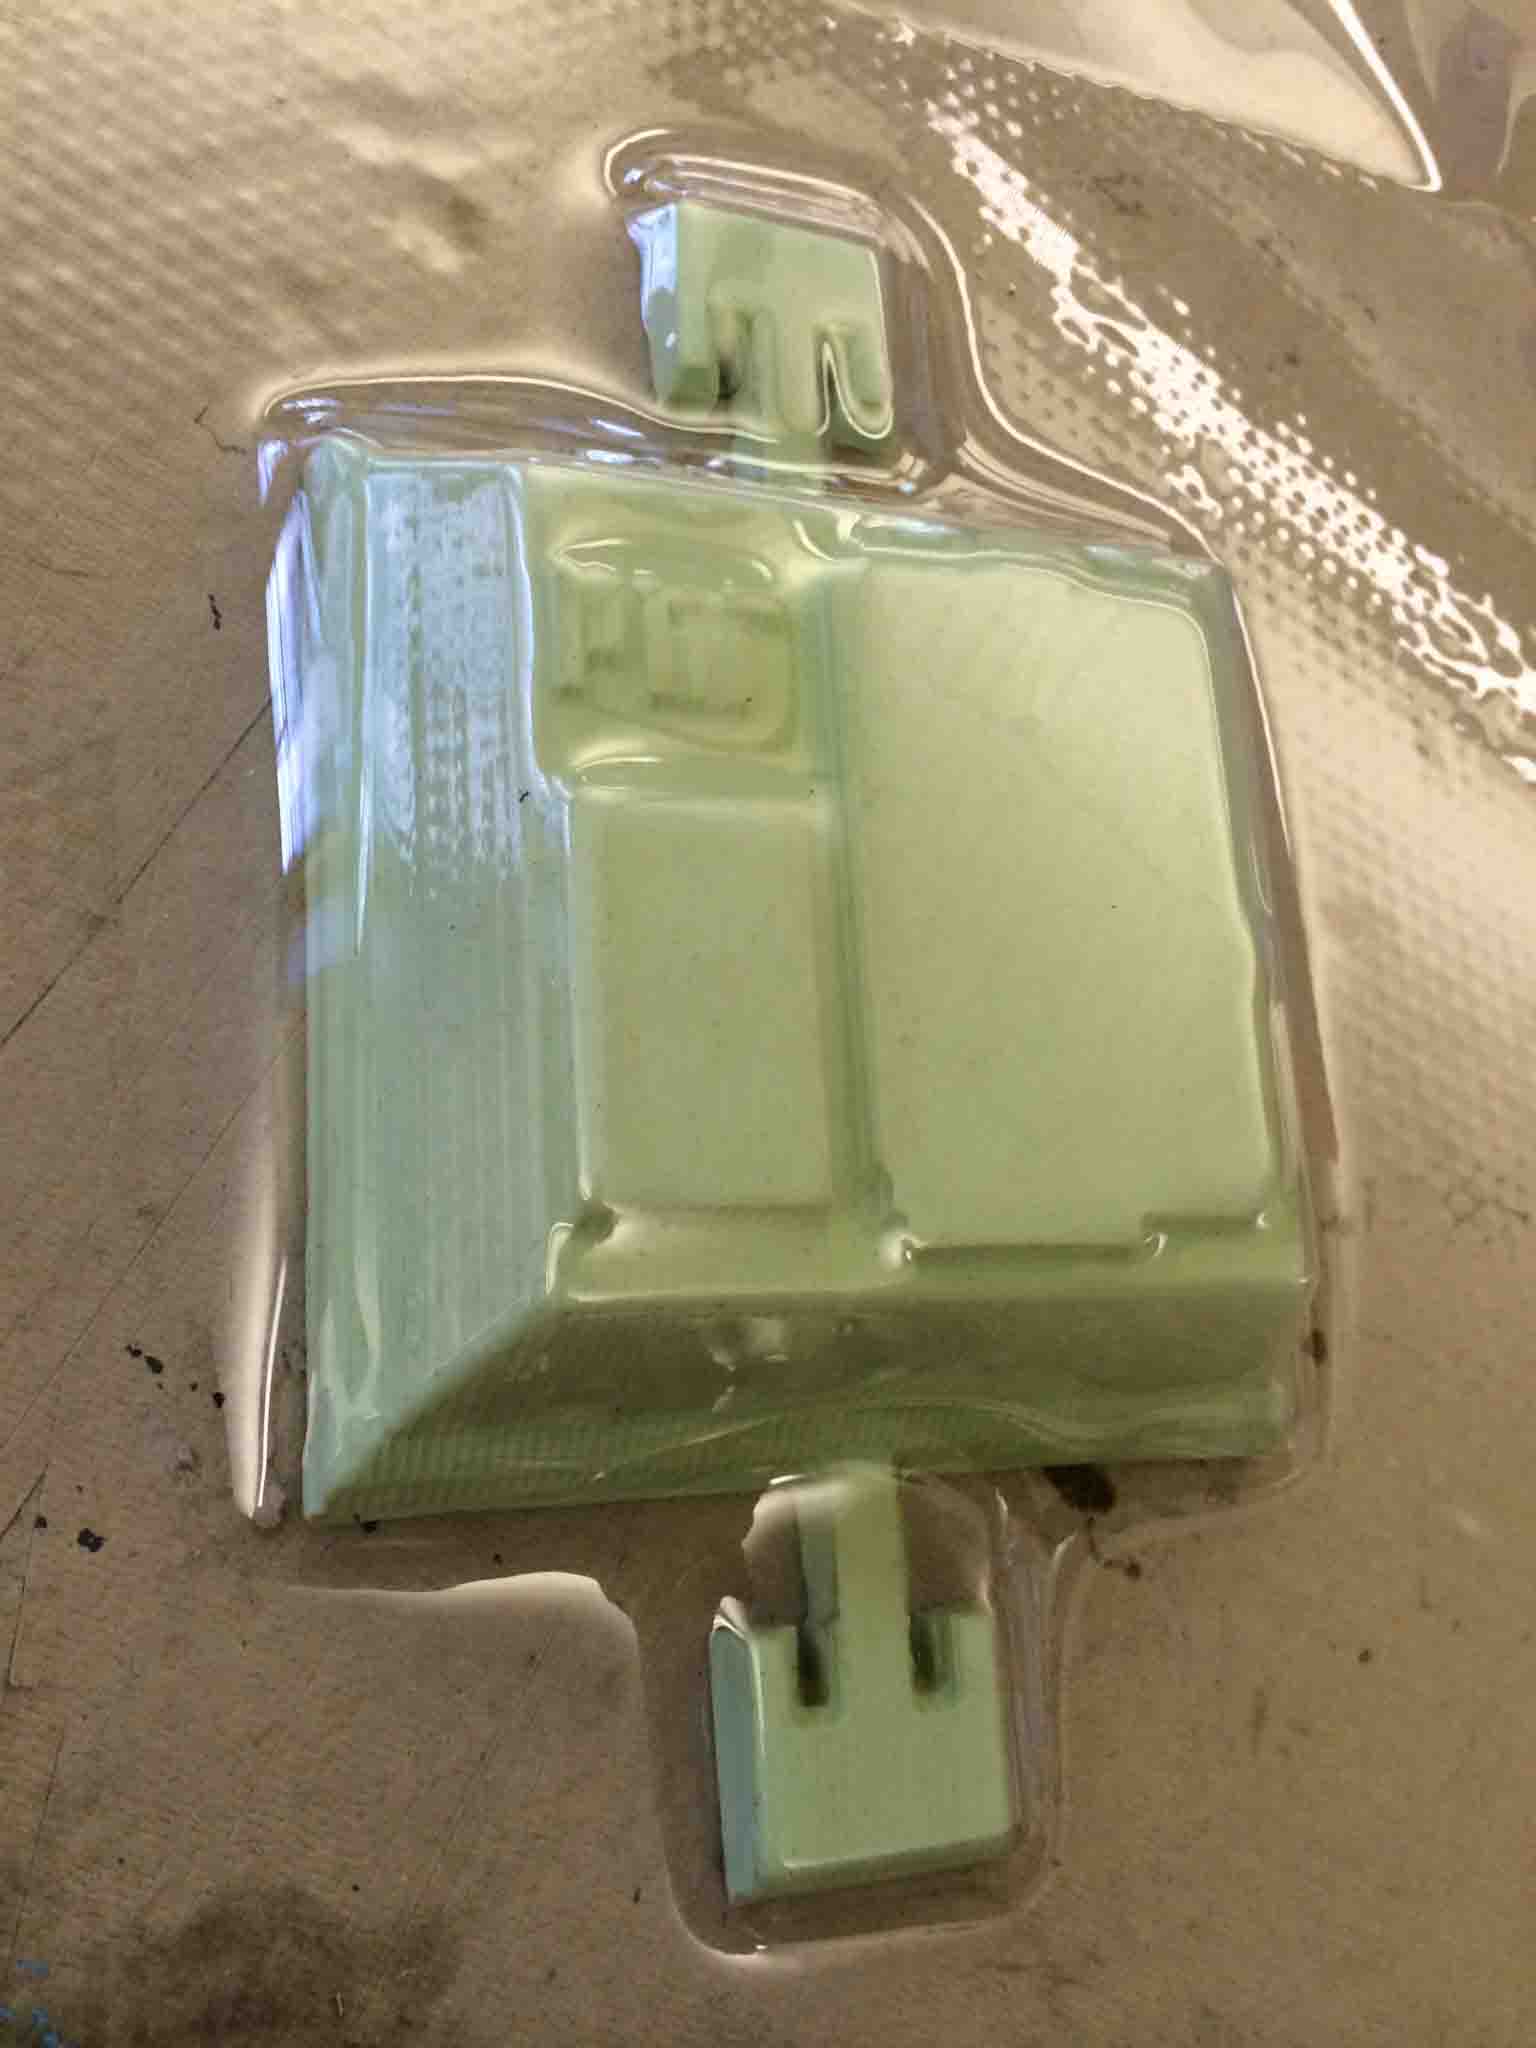
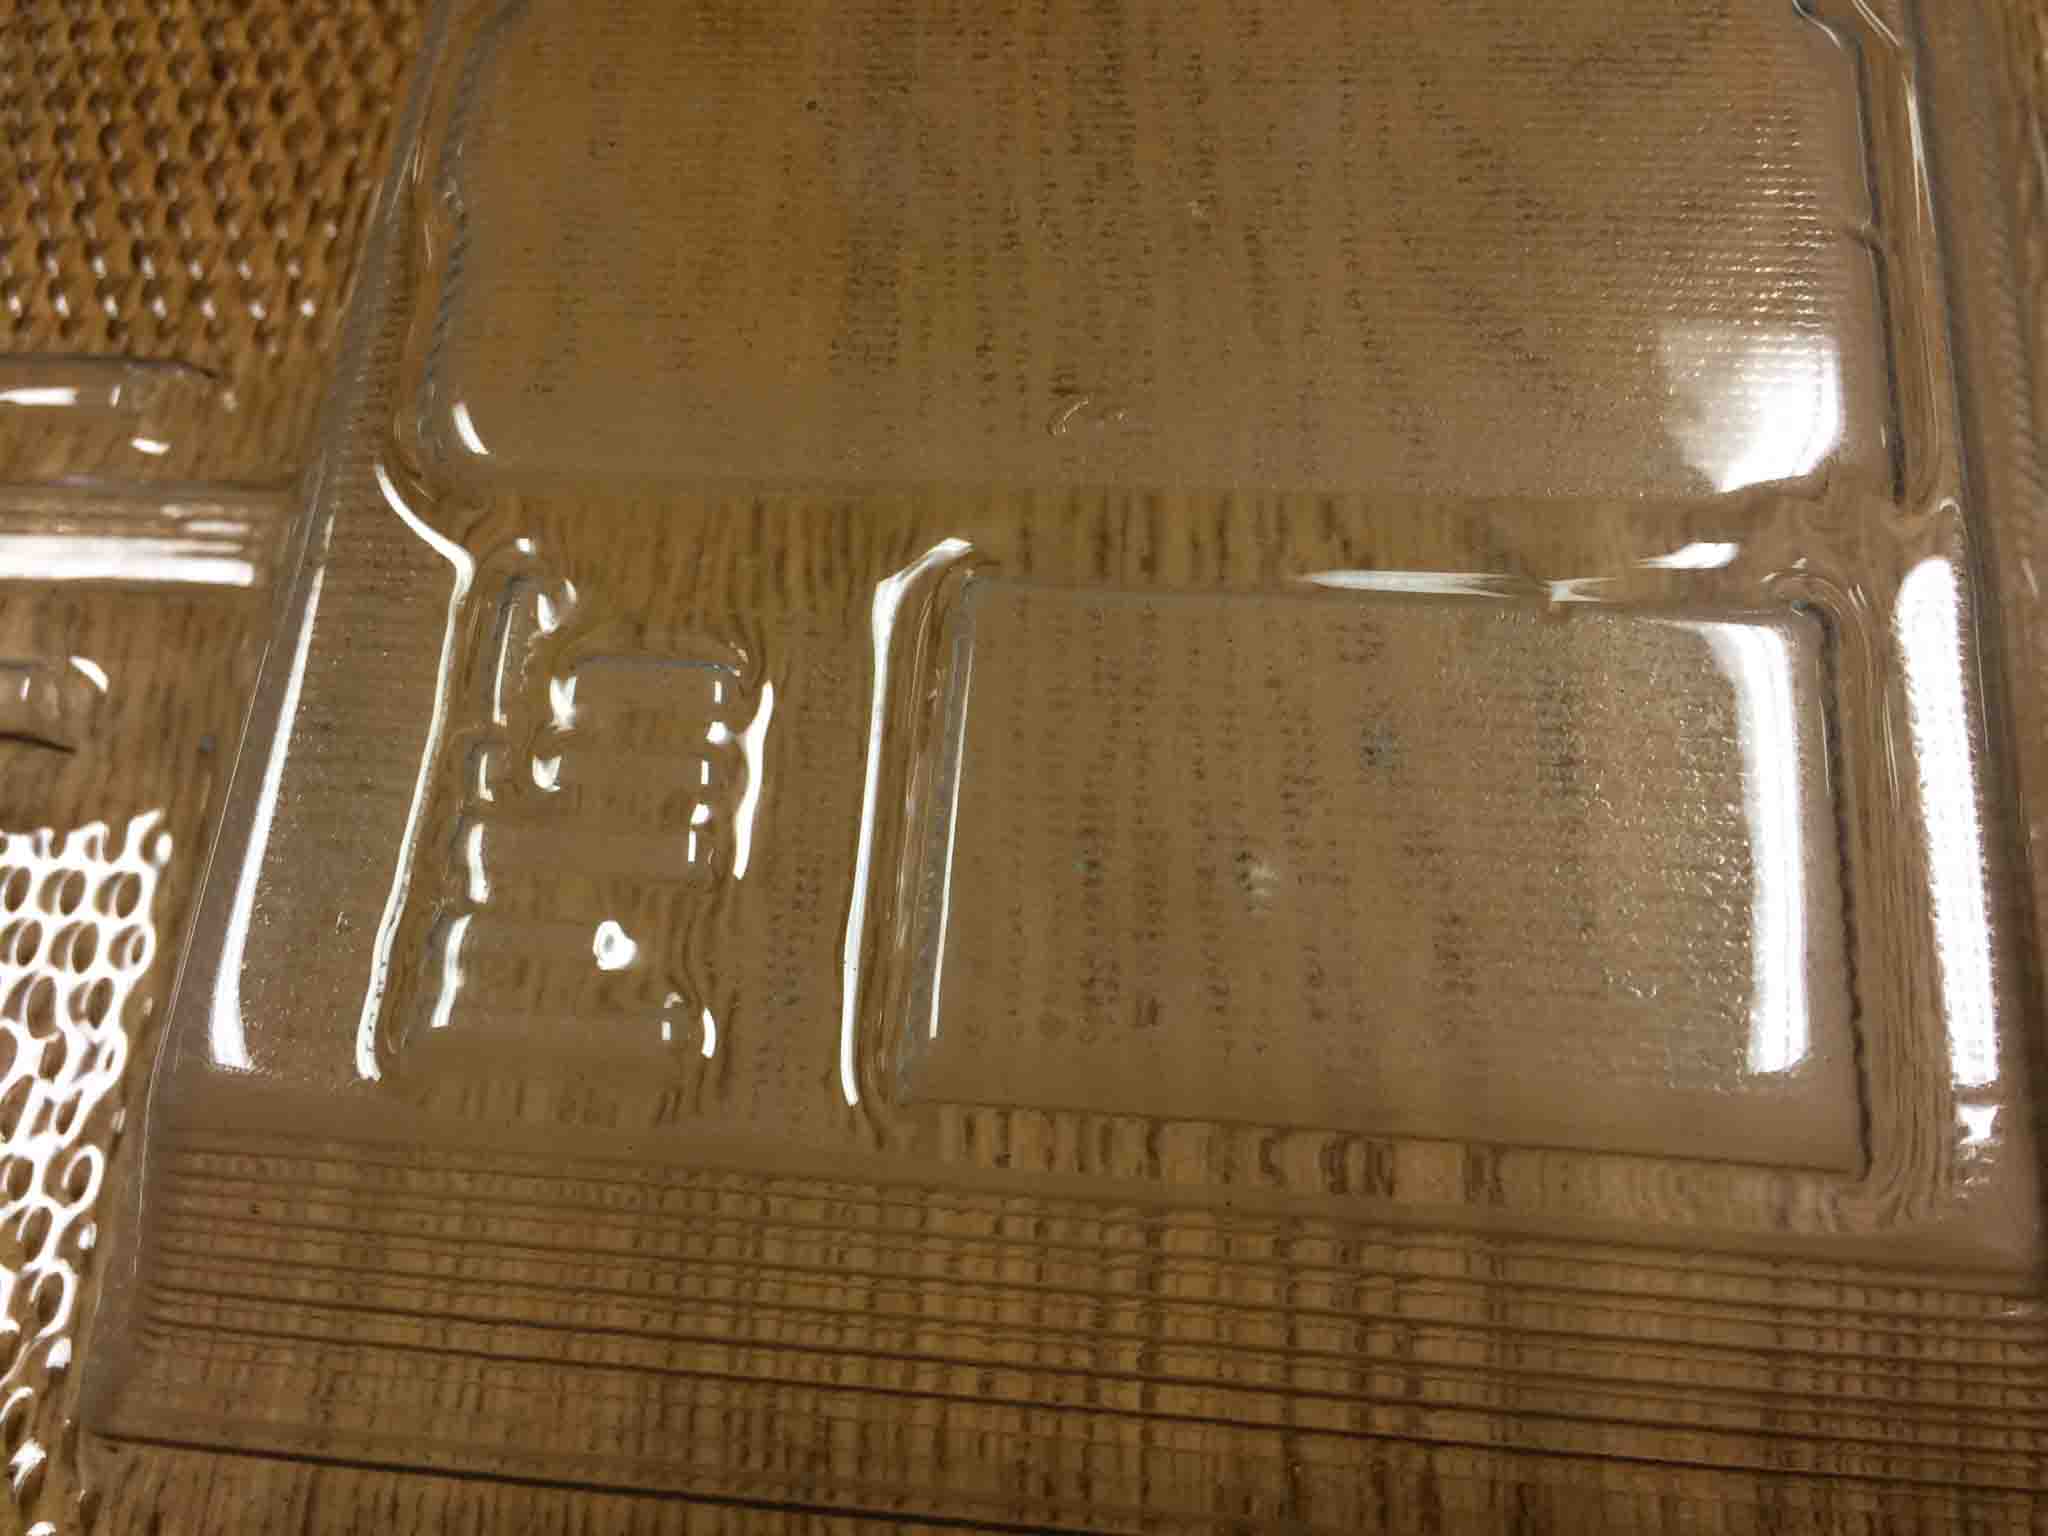
For some quick prototyping of what might work, I used some salad containers (courtesy of LaVerde's) and proved that snap fits would be ideal in trying to hold the plastic encasing on. Unfortunately,this would mean having very tight tolerances that were probably not going to be possible for a Shopbot and DIY thermoforming job.
When it was finally time to begin CAD for my housing, I made sure to have all hand sketches first.
Attaching Housing to Balloon String
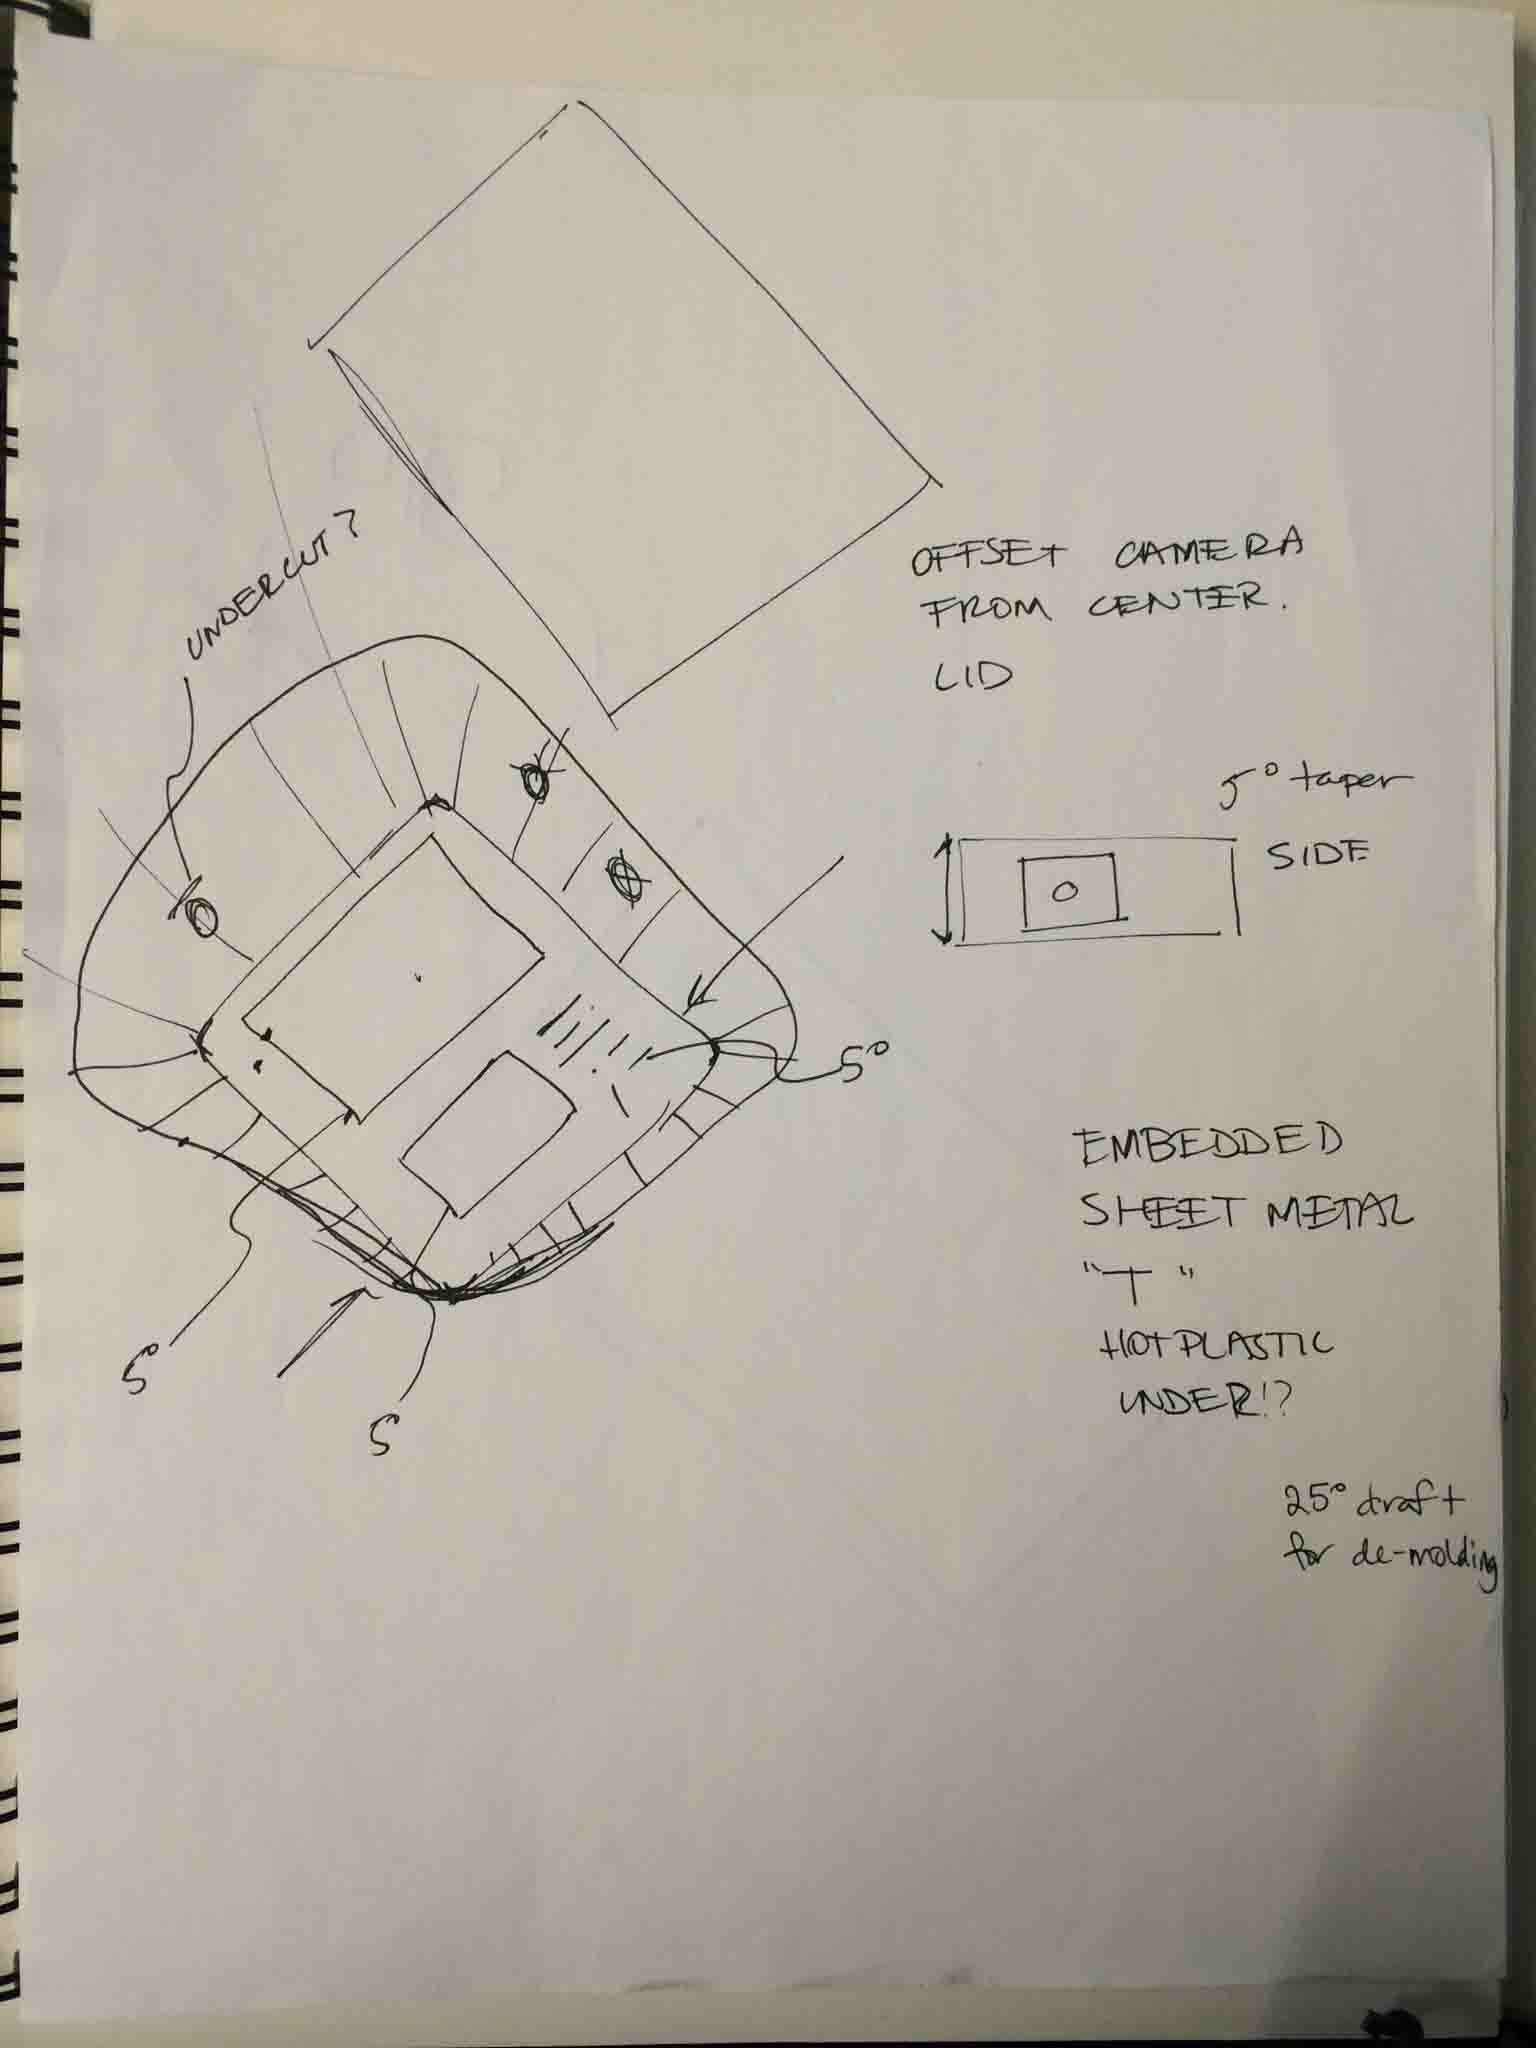
Depending on where I attached the housing, the video camera angle would also change the viewing image:
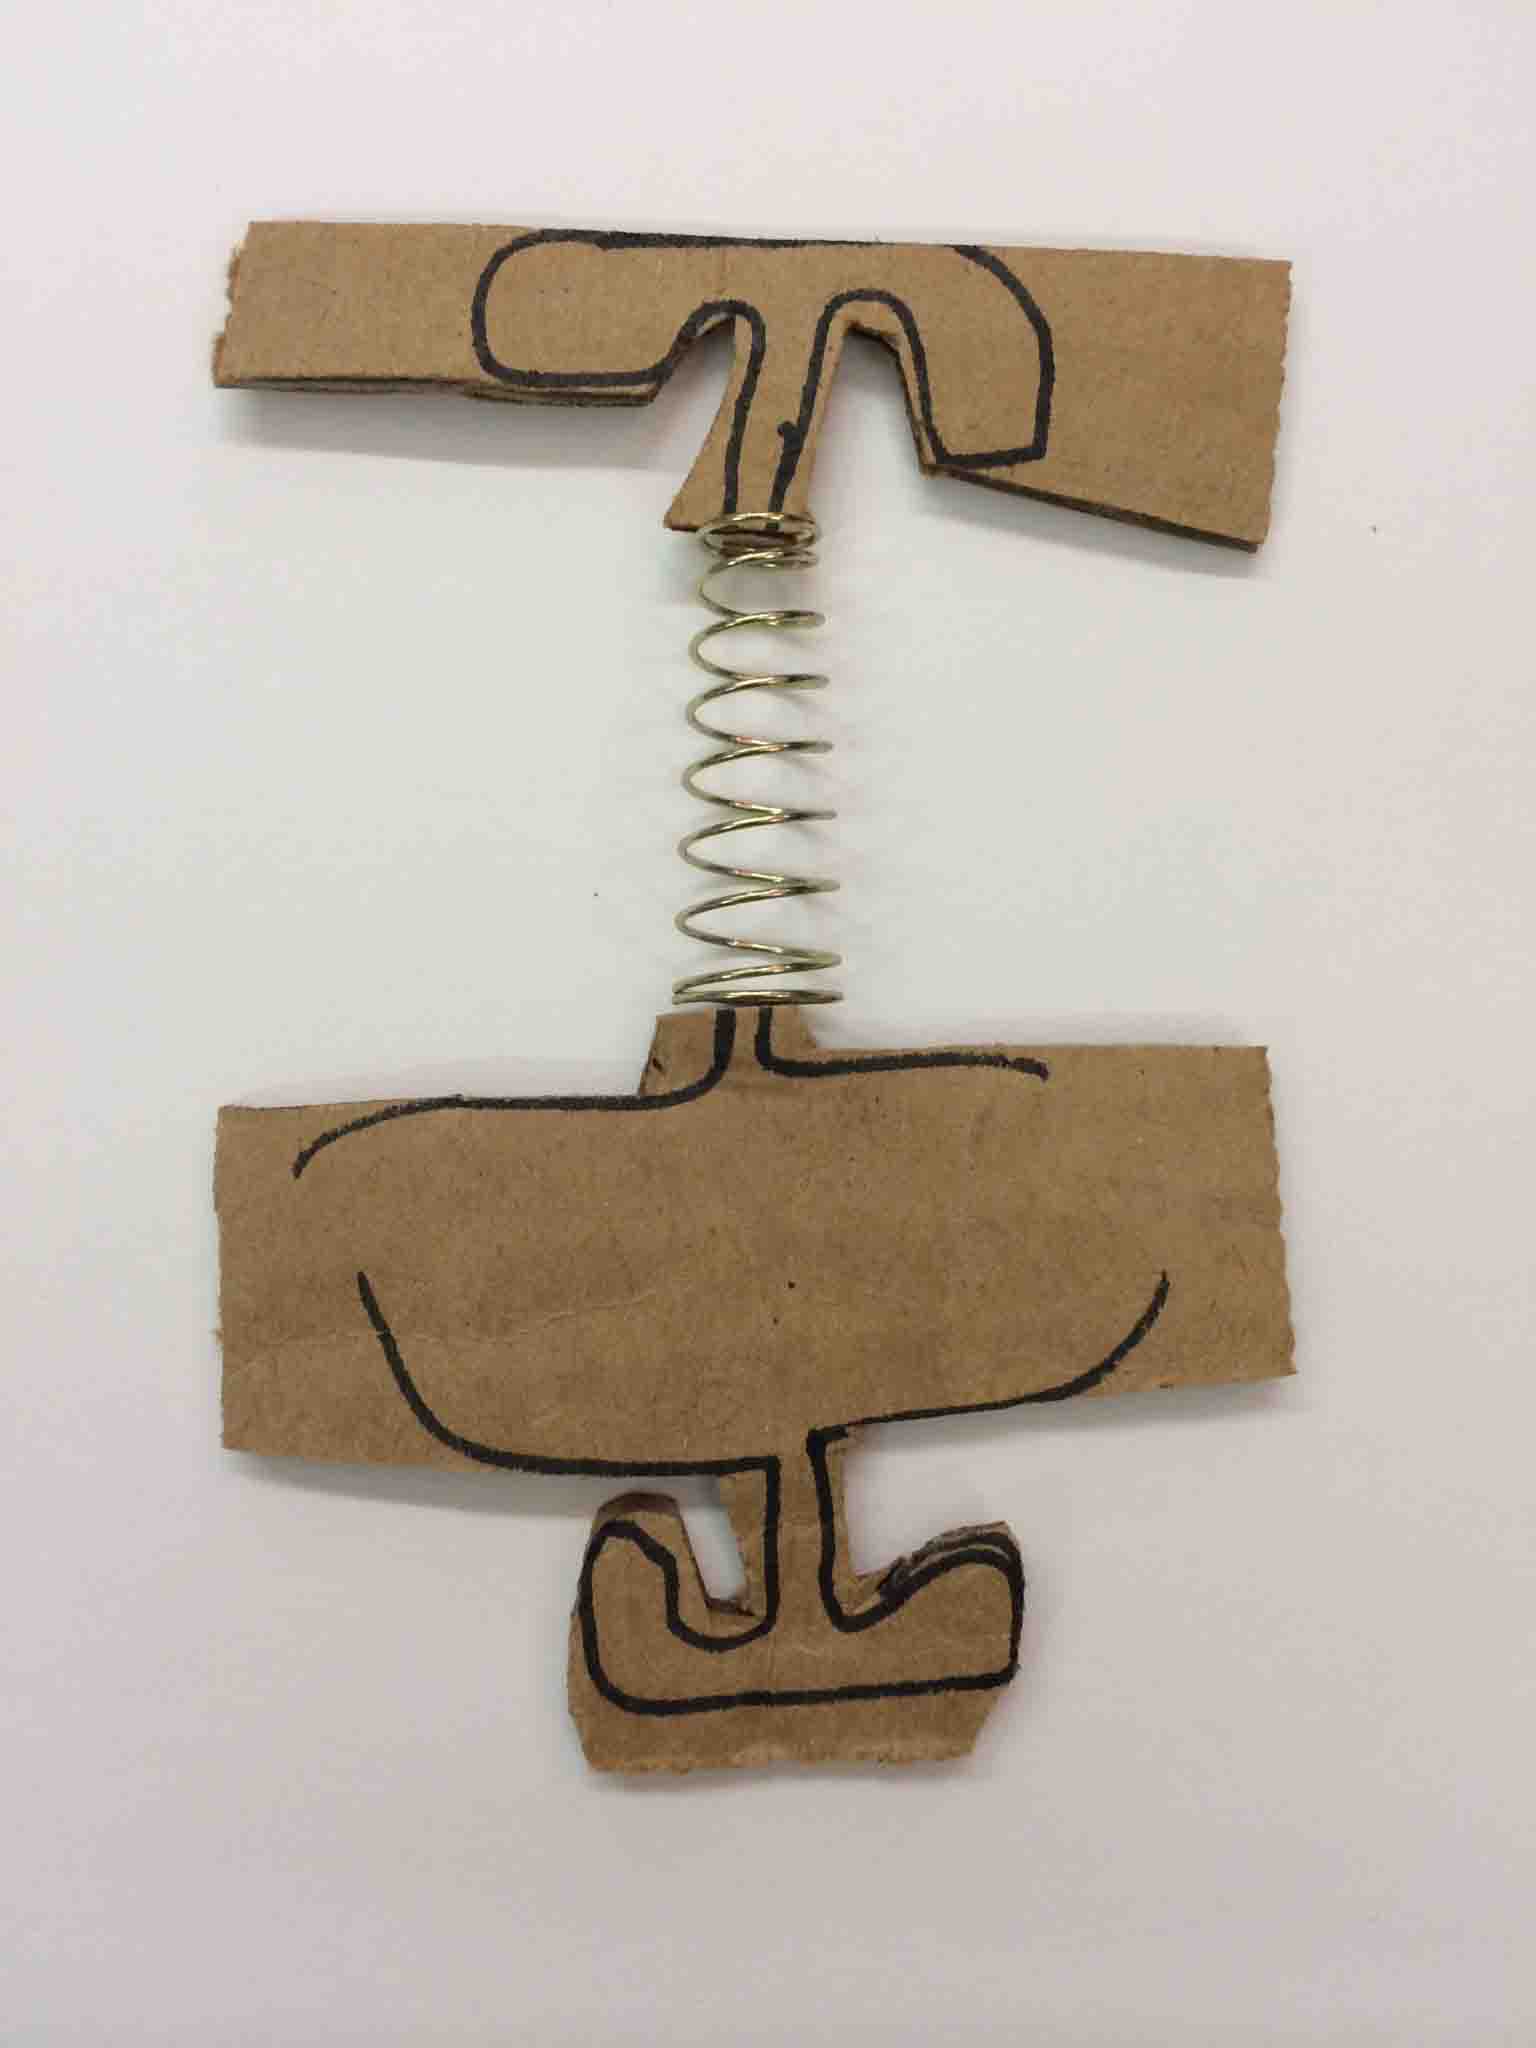
After doing some design consulting with Danny Braunstein, I used his idea of a T-shaped feature to tie around the string in a non-invasive way. 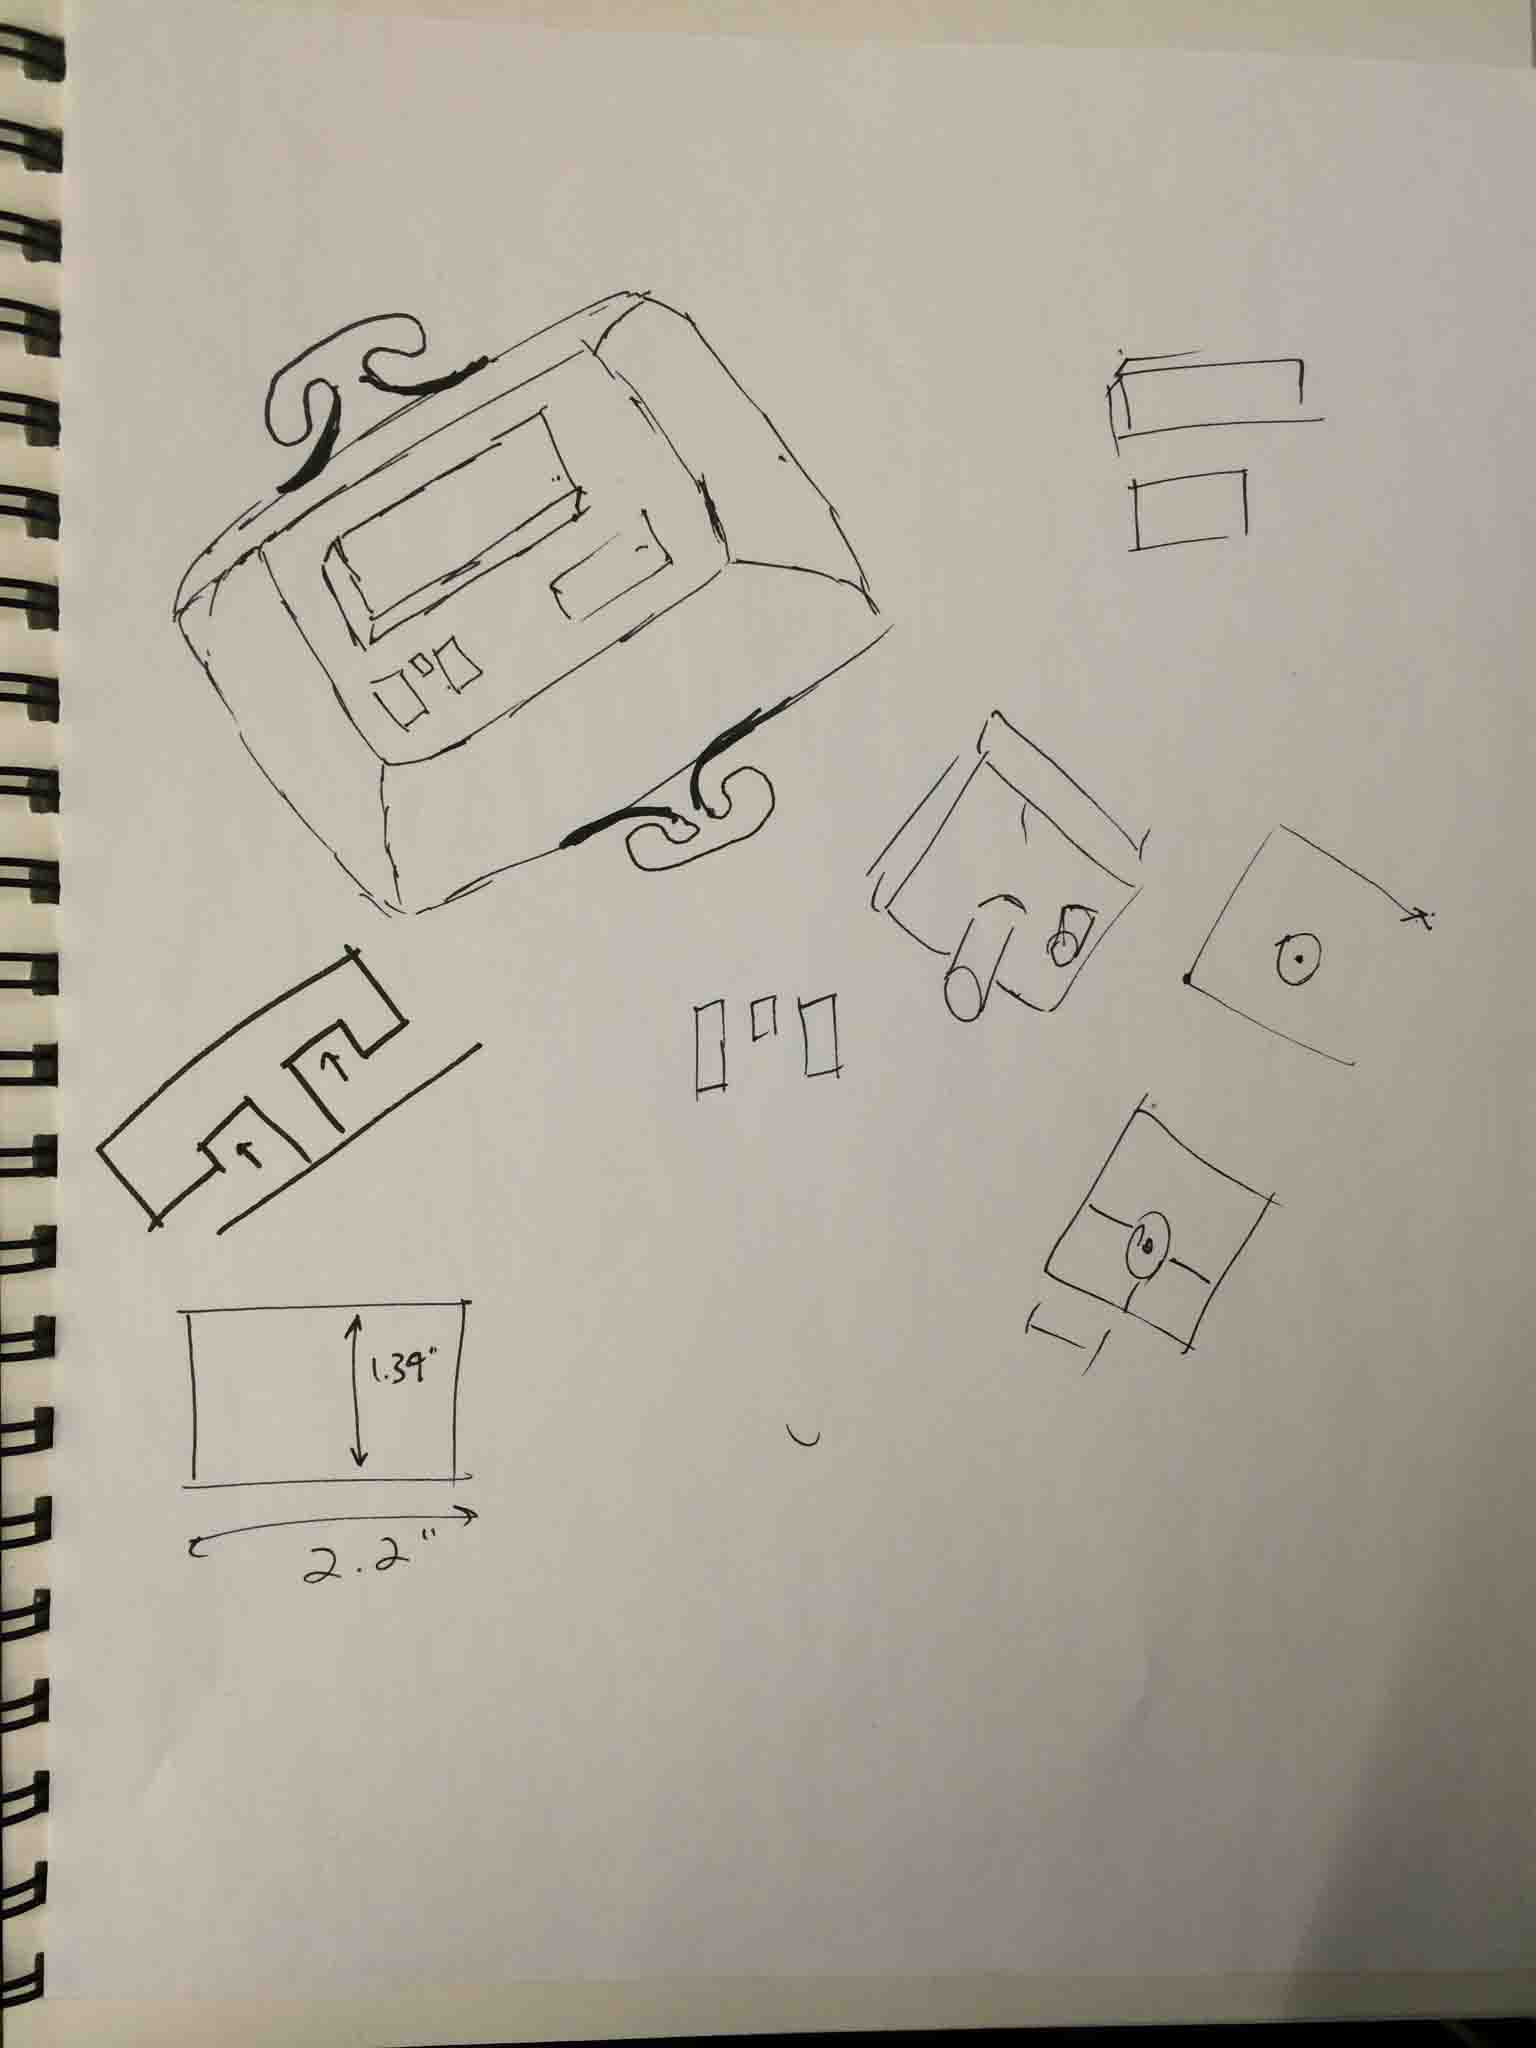
Designing with Slack
It was also very important to leave some slack so as to not disturb the camera housing too much and shock the viewing image too much by pulling the balloon too hard. I played with some ways of adding a flexible material into the very attachment design.
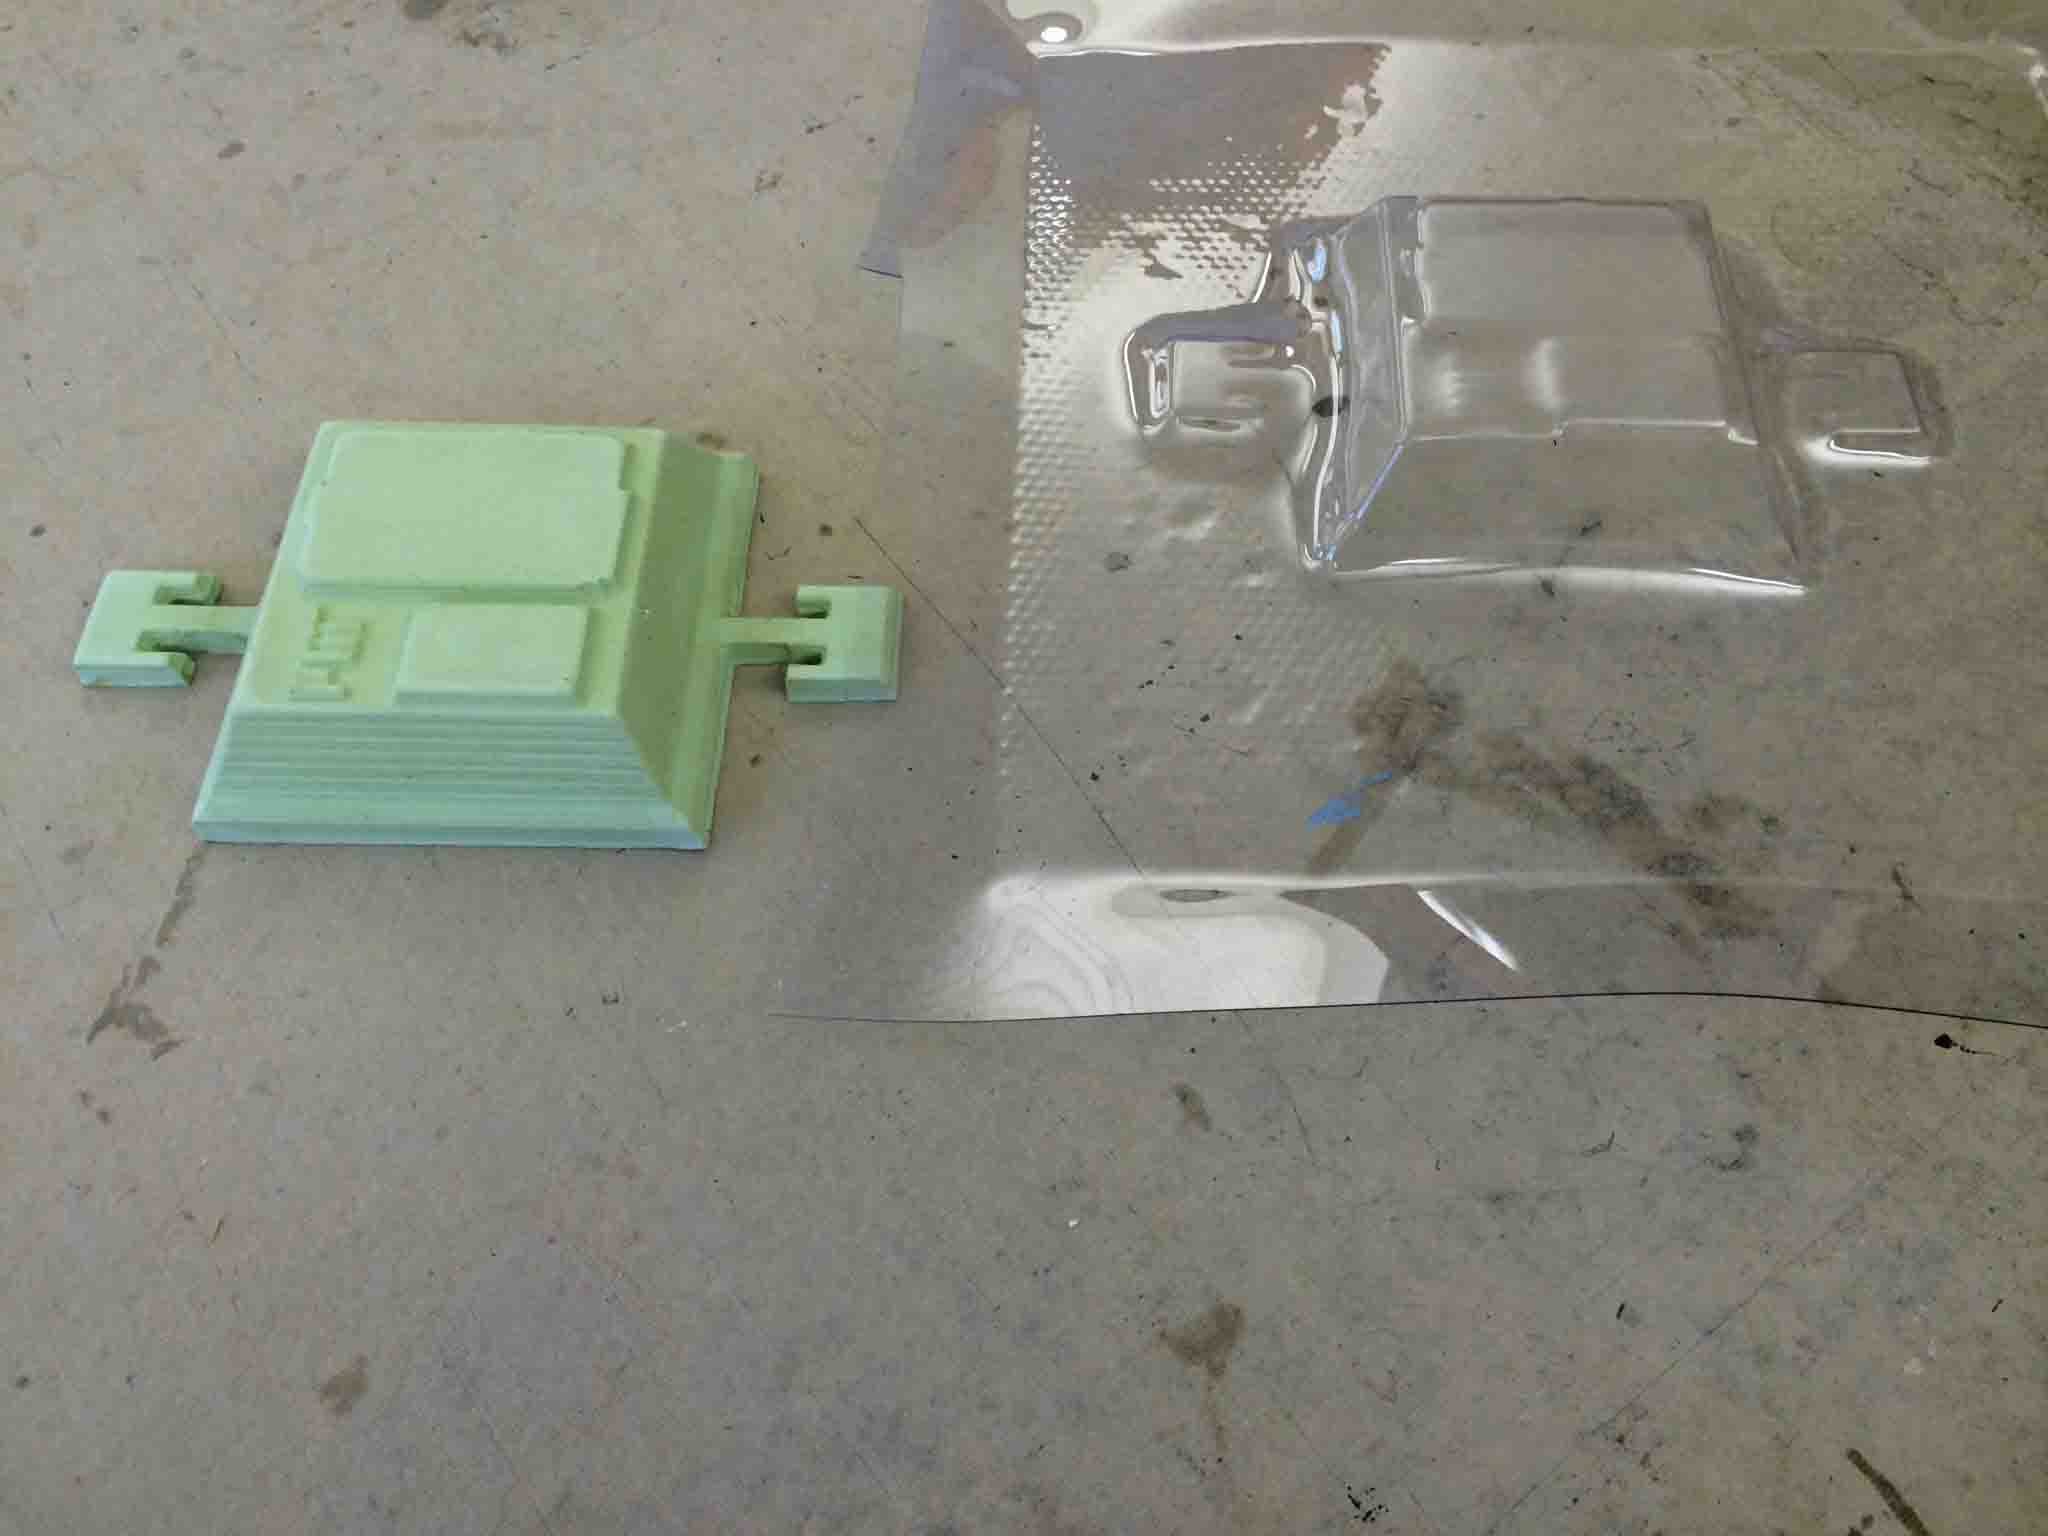
Thermoforming from a Mold
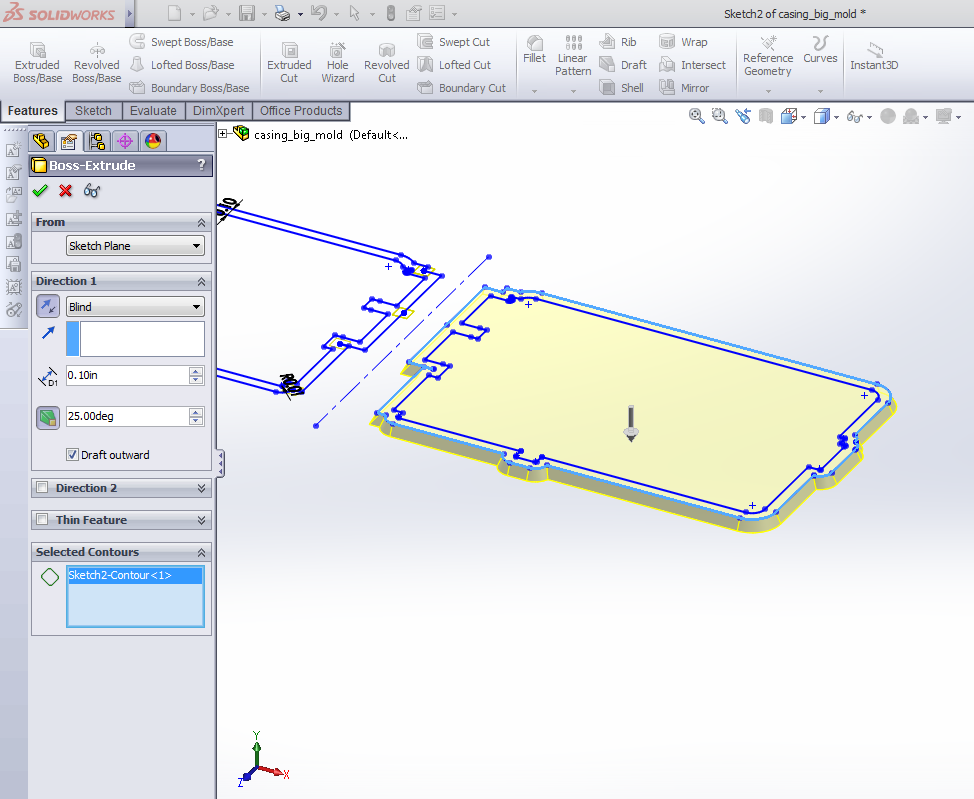
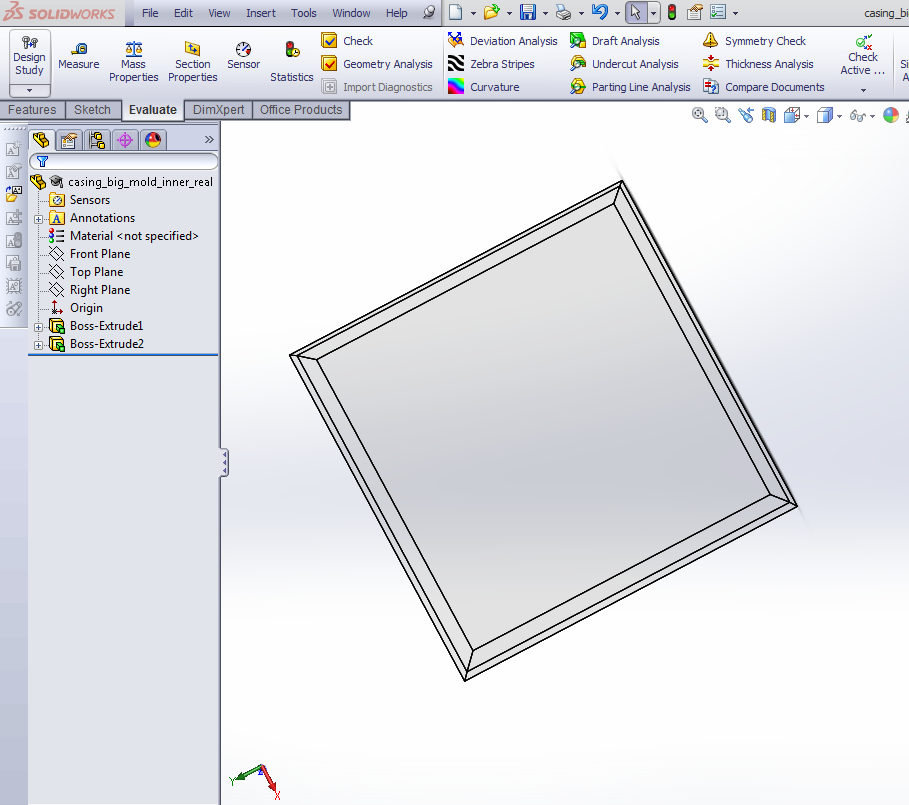
CAD Design
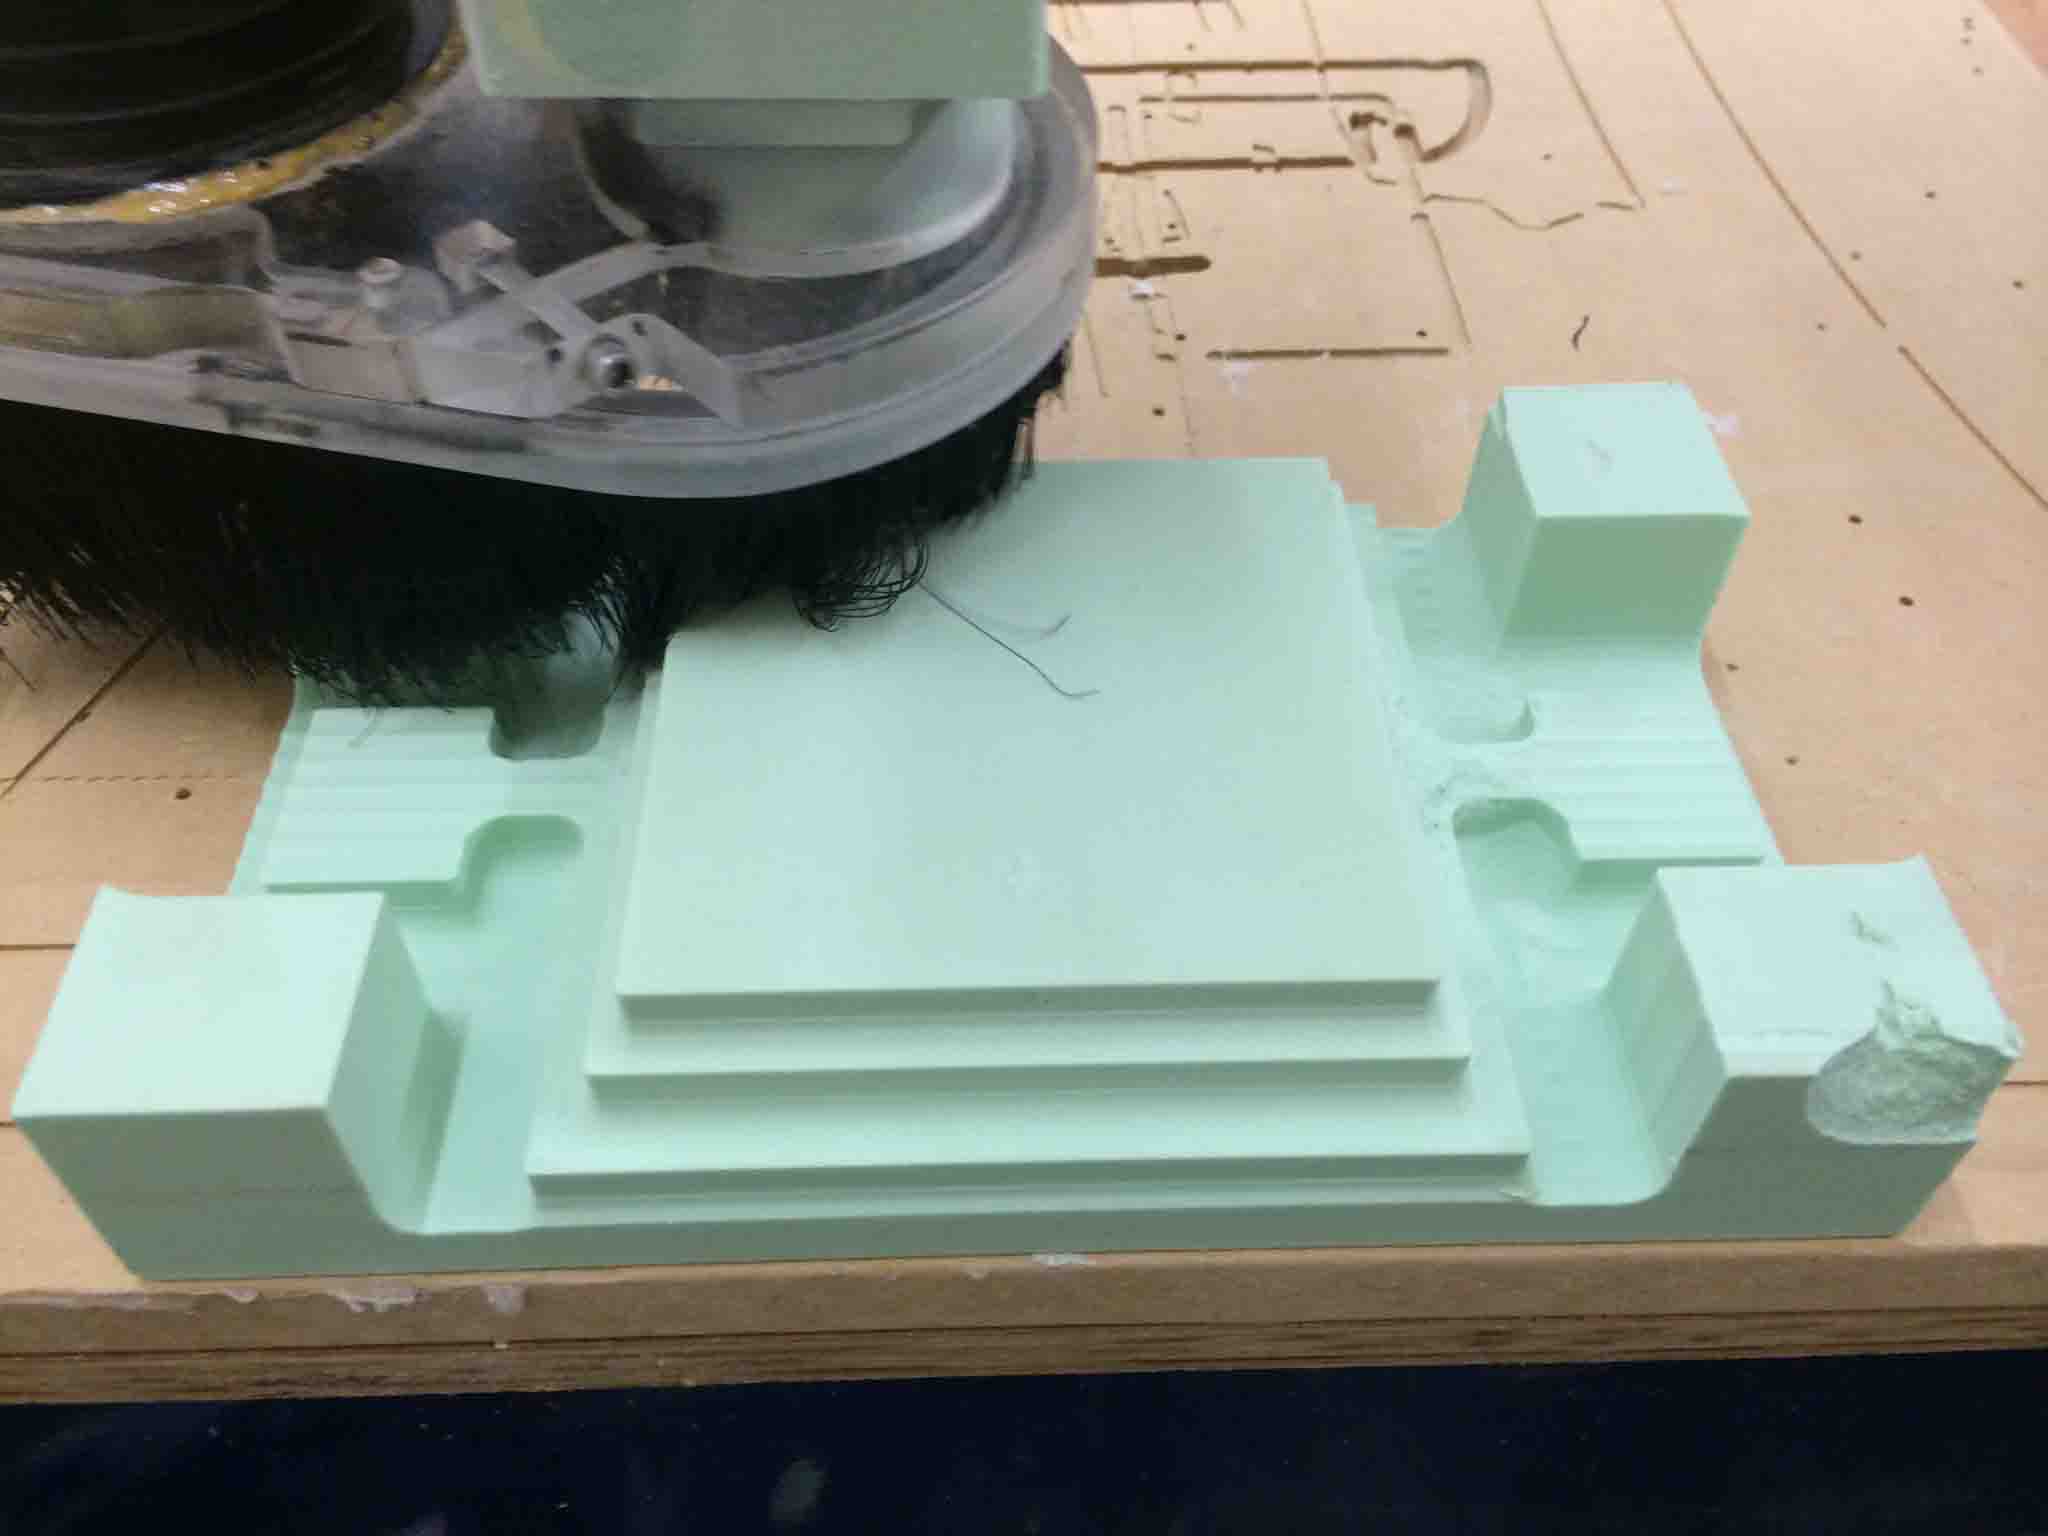
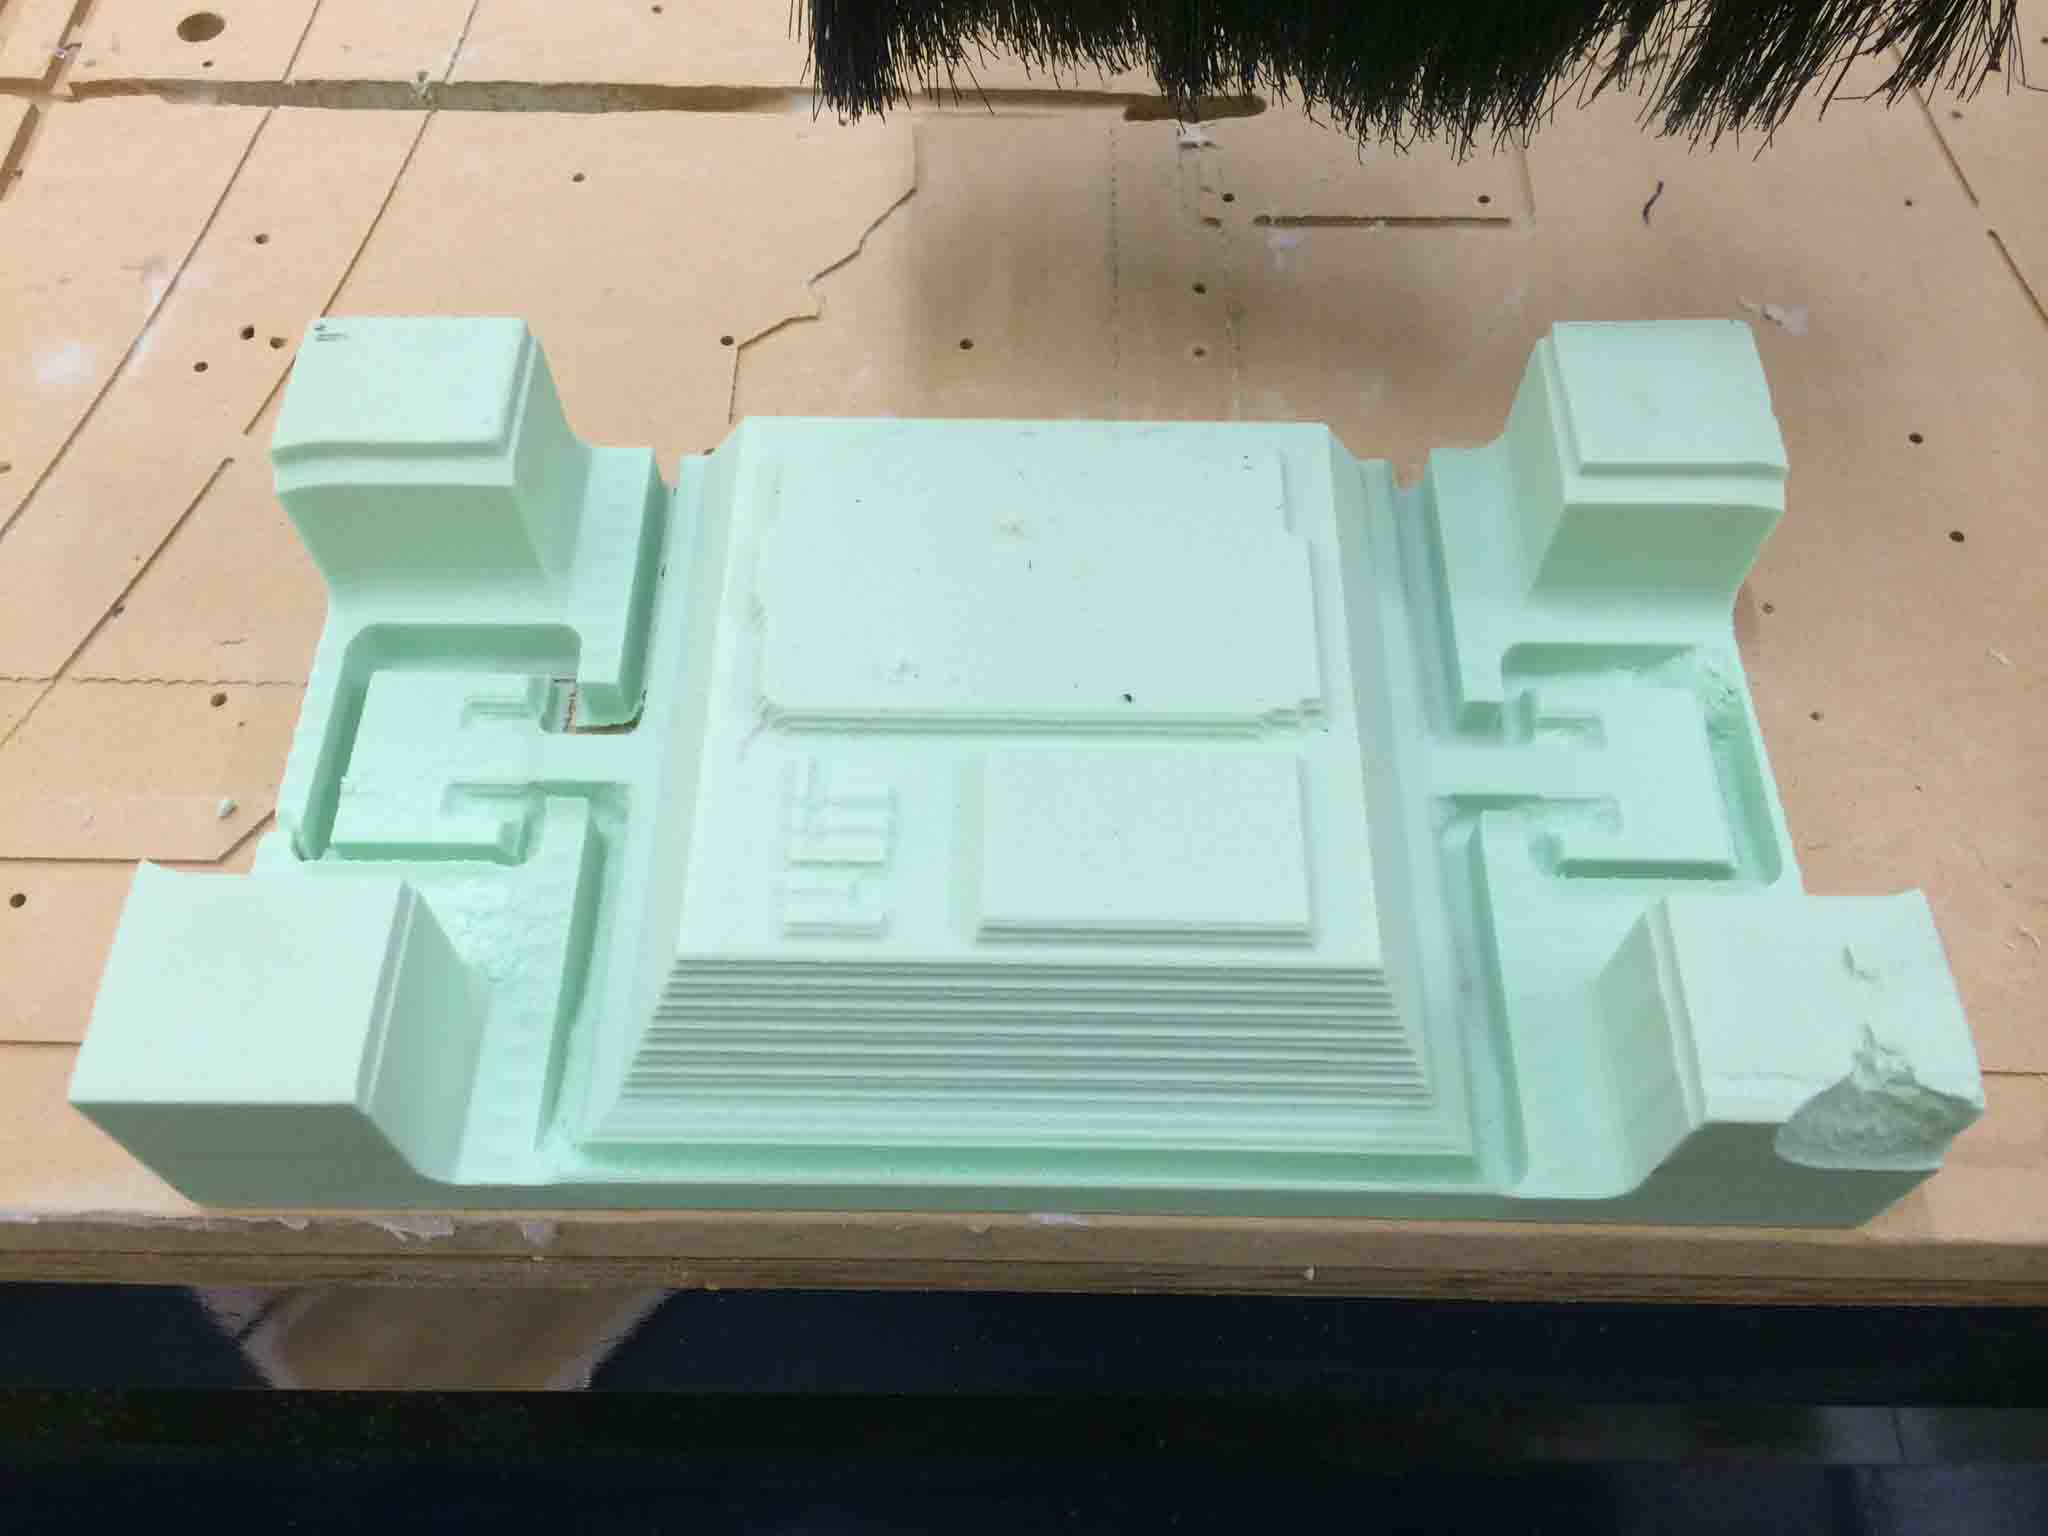
First came the CAD Design in Solidworks, building off feature's surfaces and making sure to make the negative mold so that the thermoformed final part is the positive of what we want. I built the assembly first and traced GrabCad parts to make the housing real snug around the moving parts.

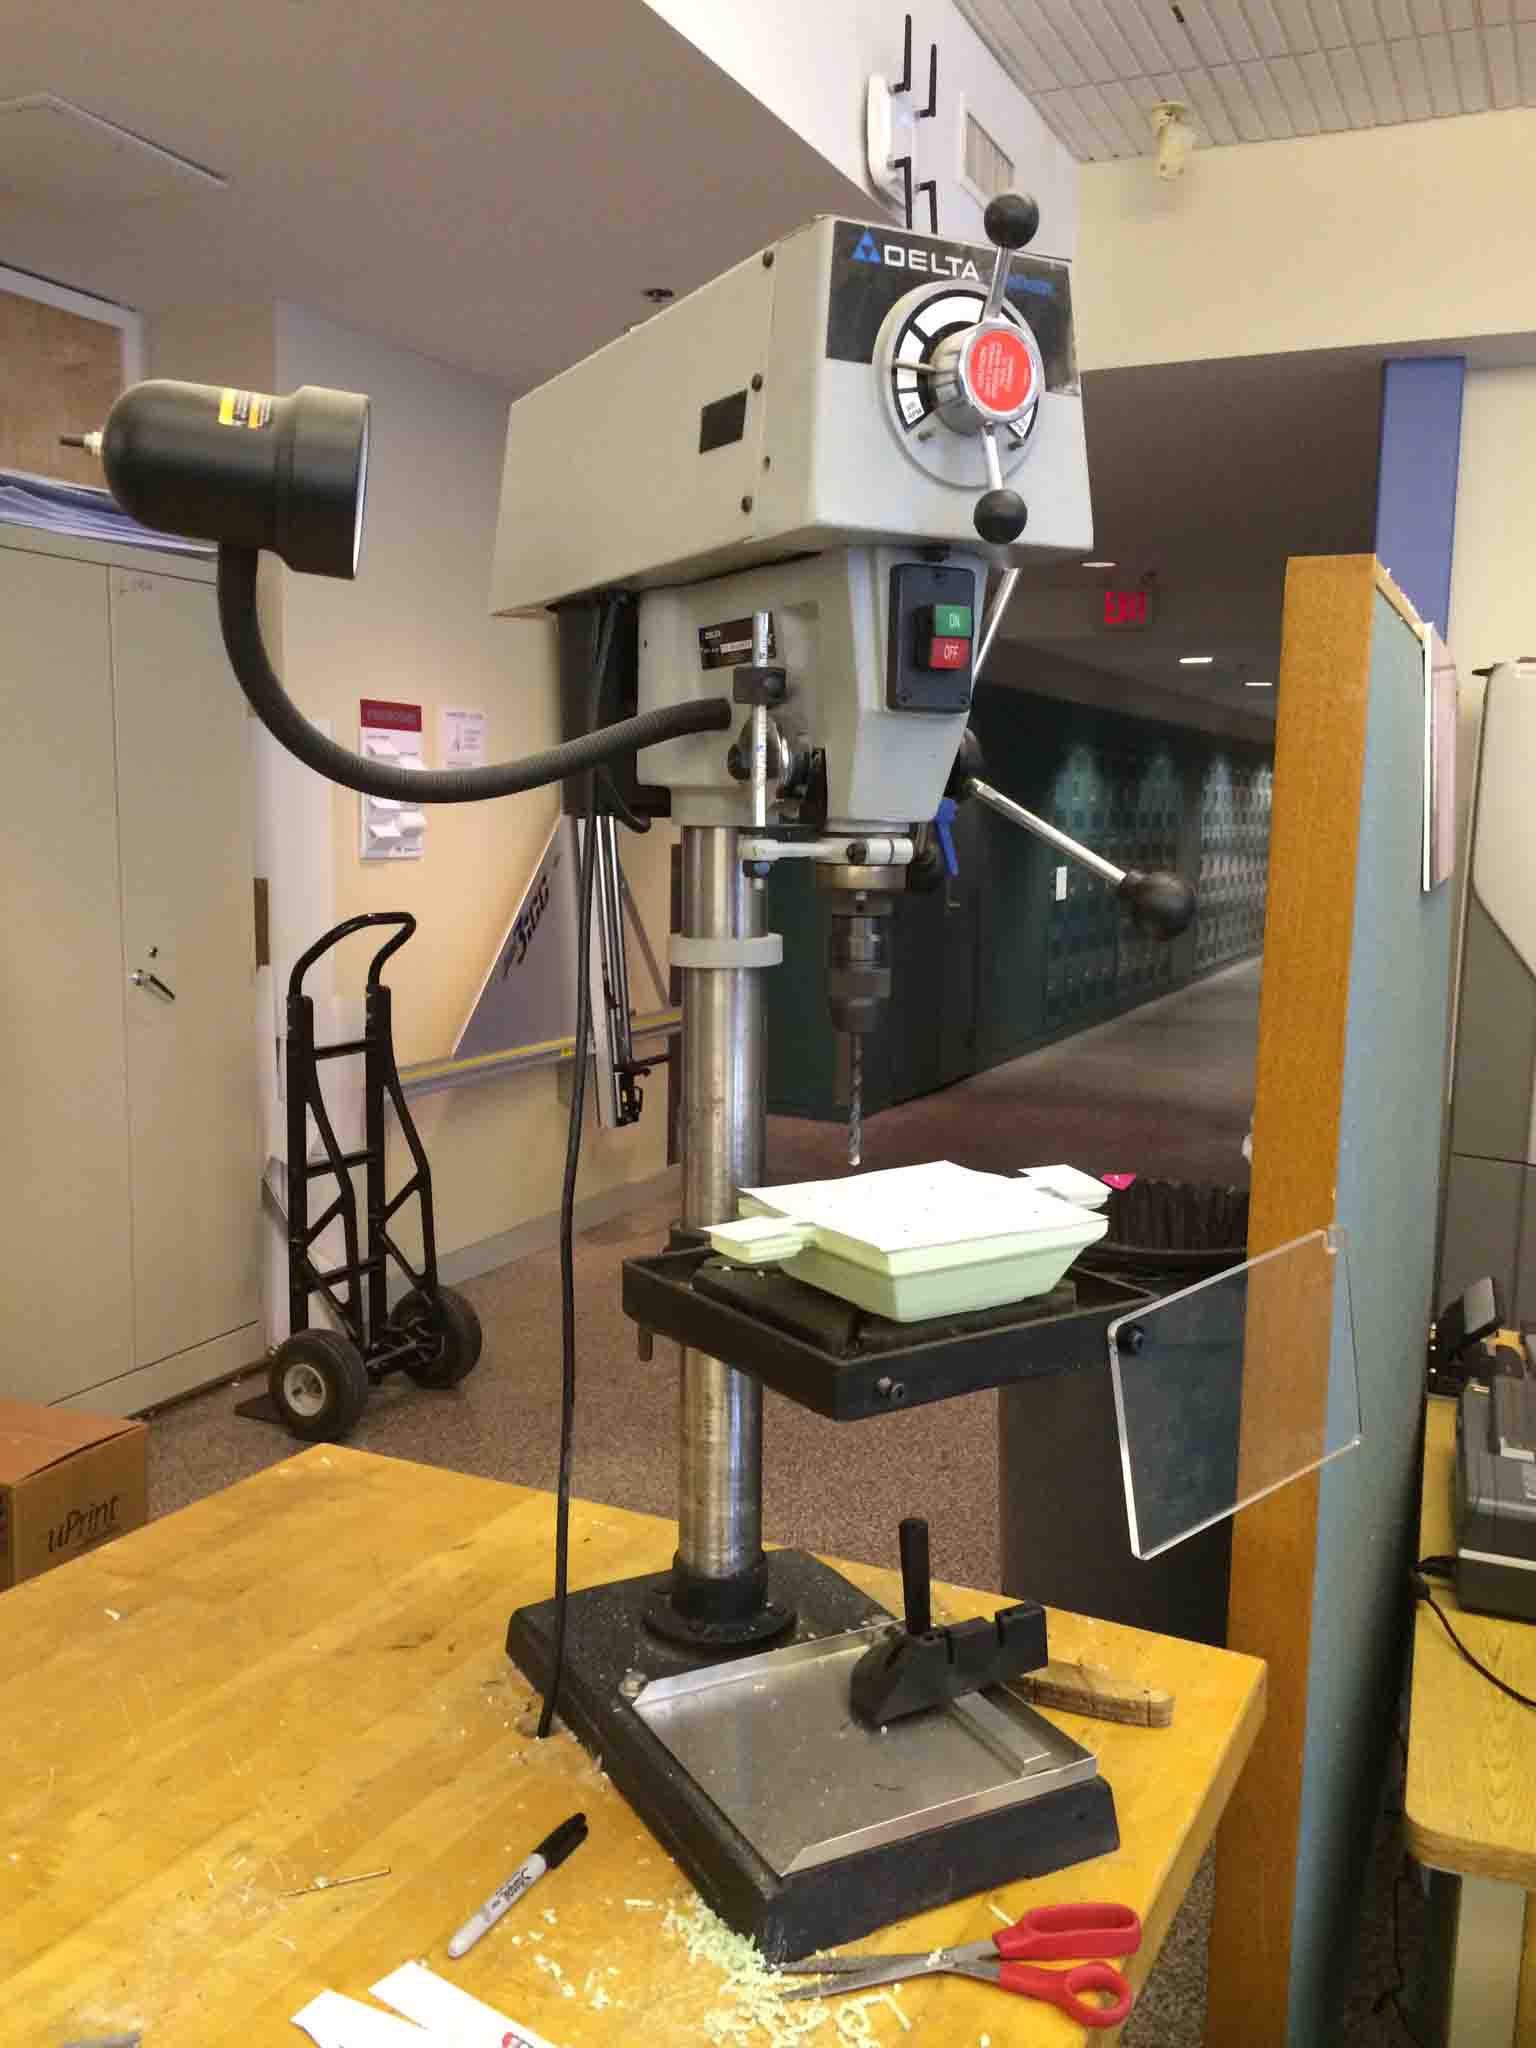
CNC Machining the Mold


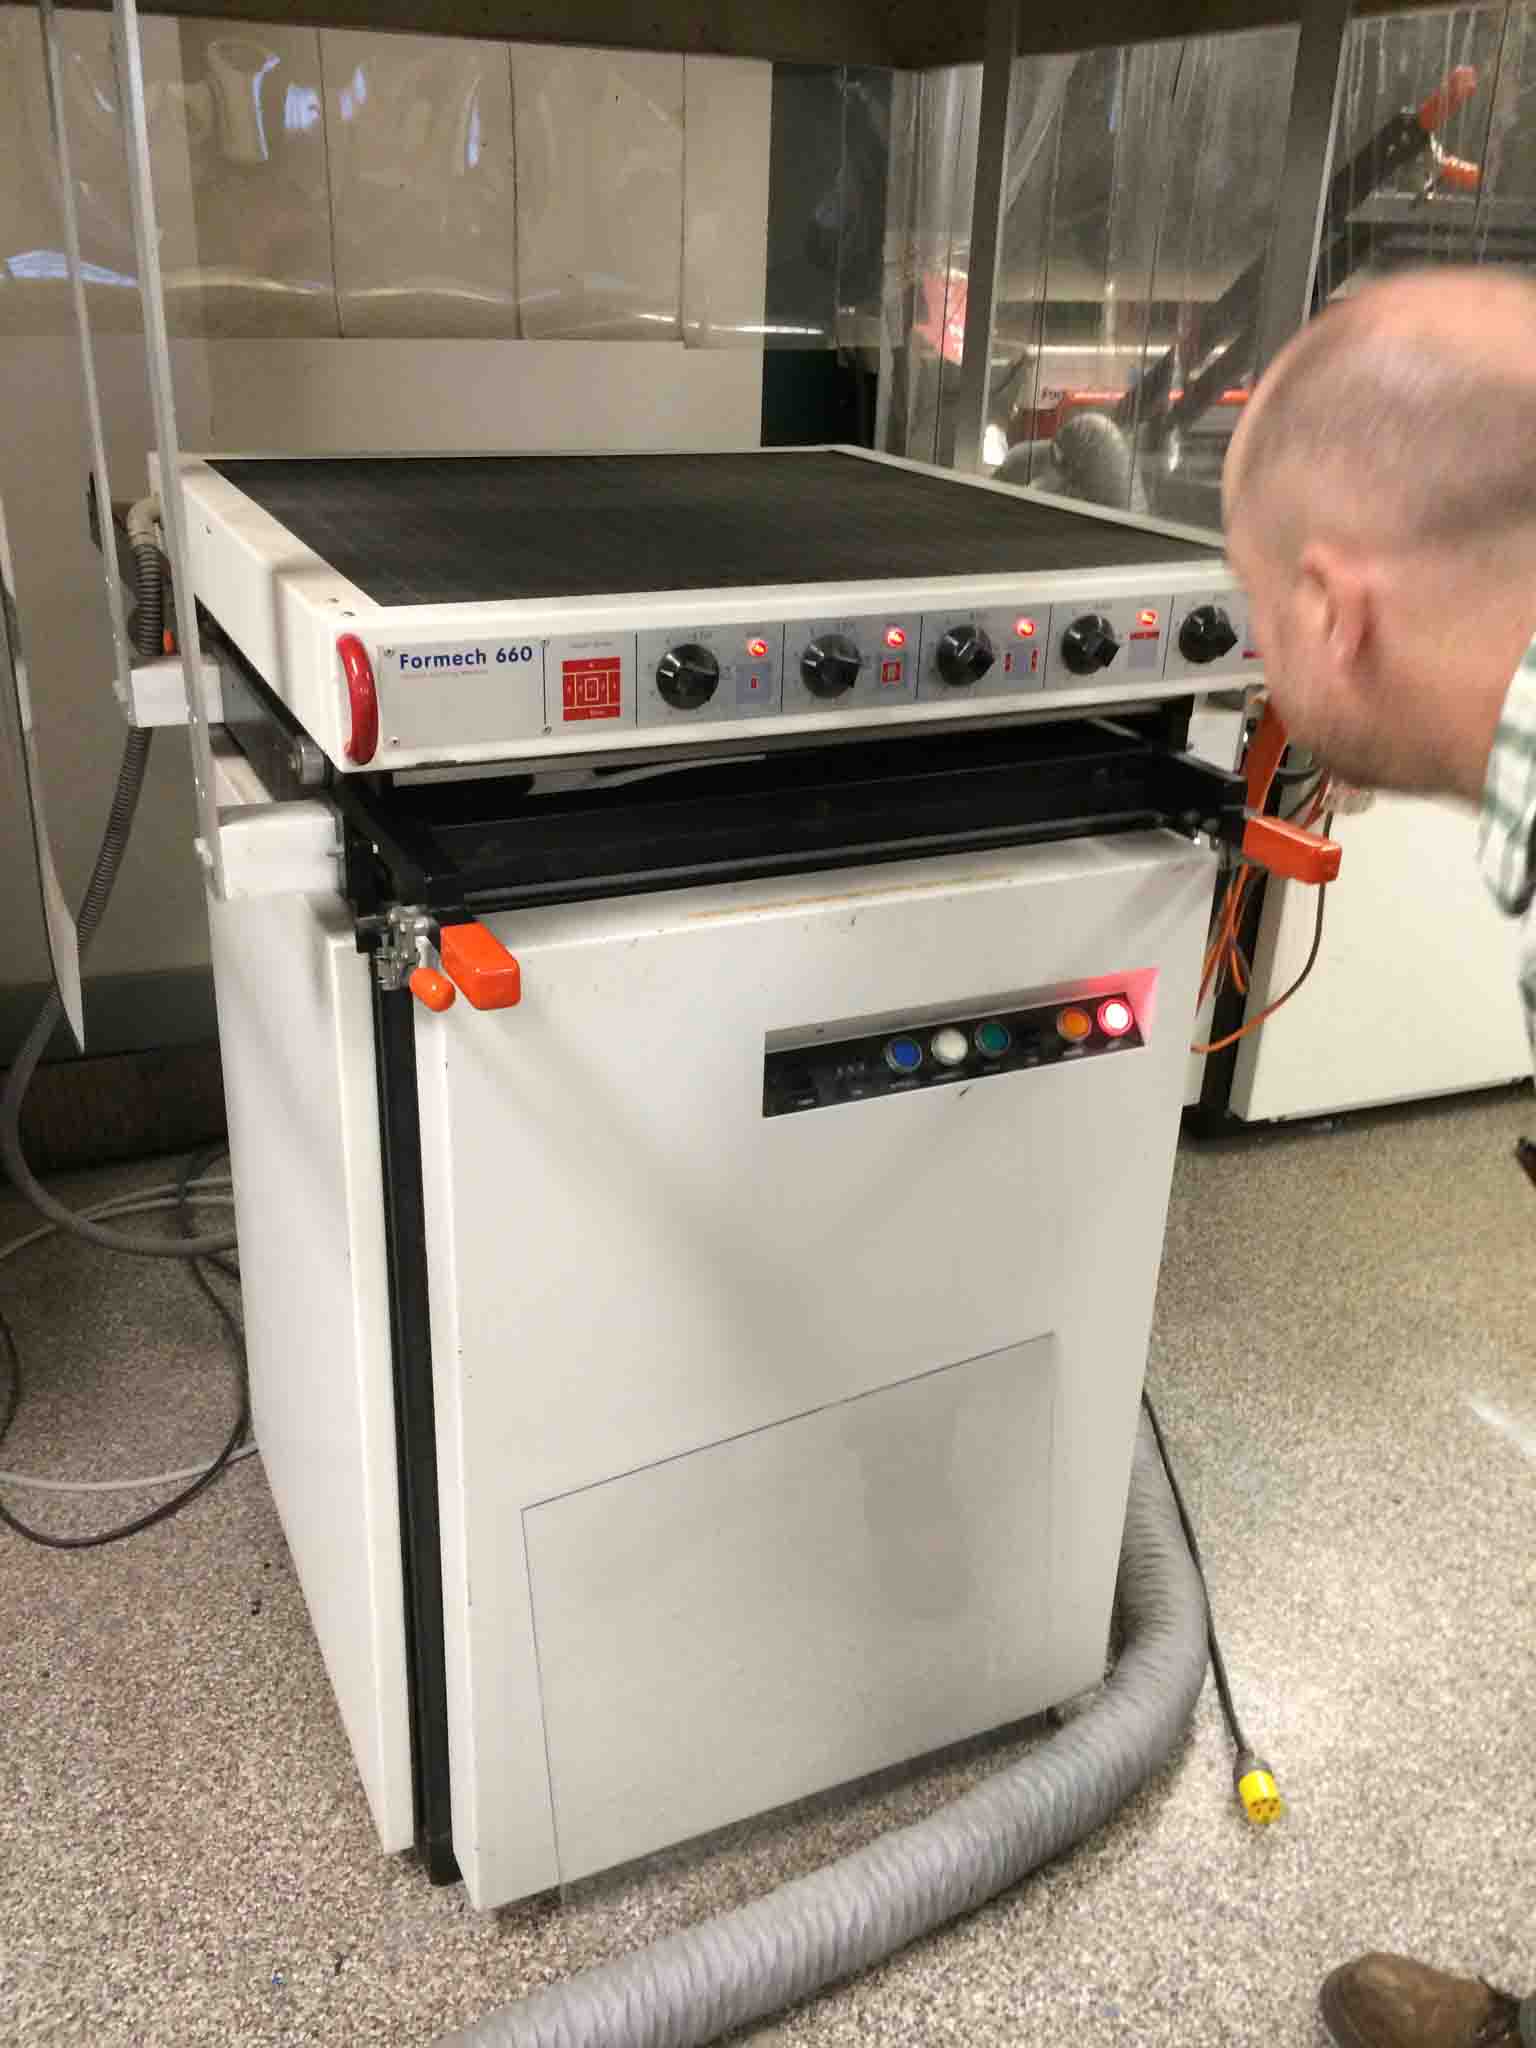
Thermoforming on the Pappalardo Formech FMD 660
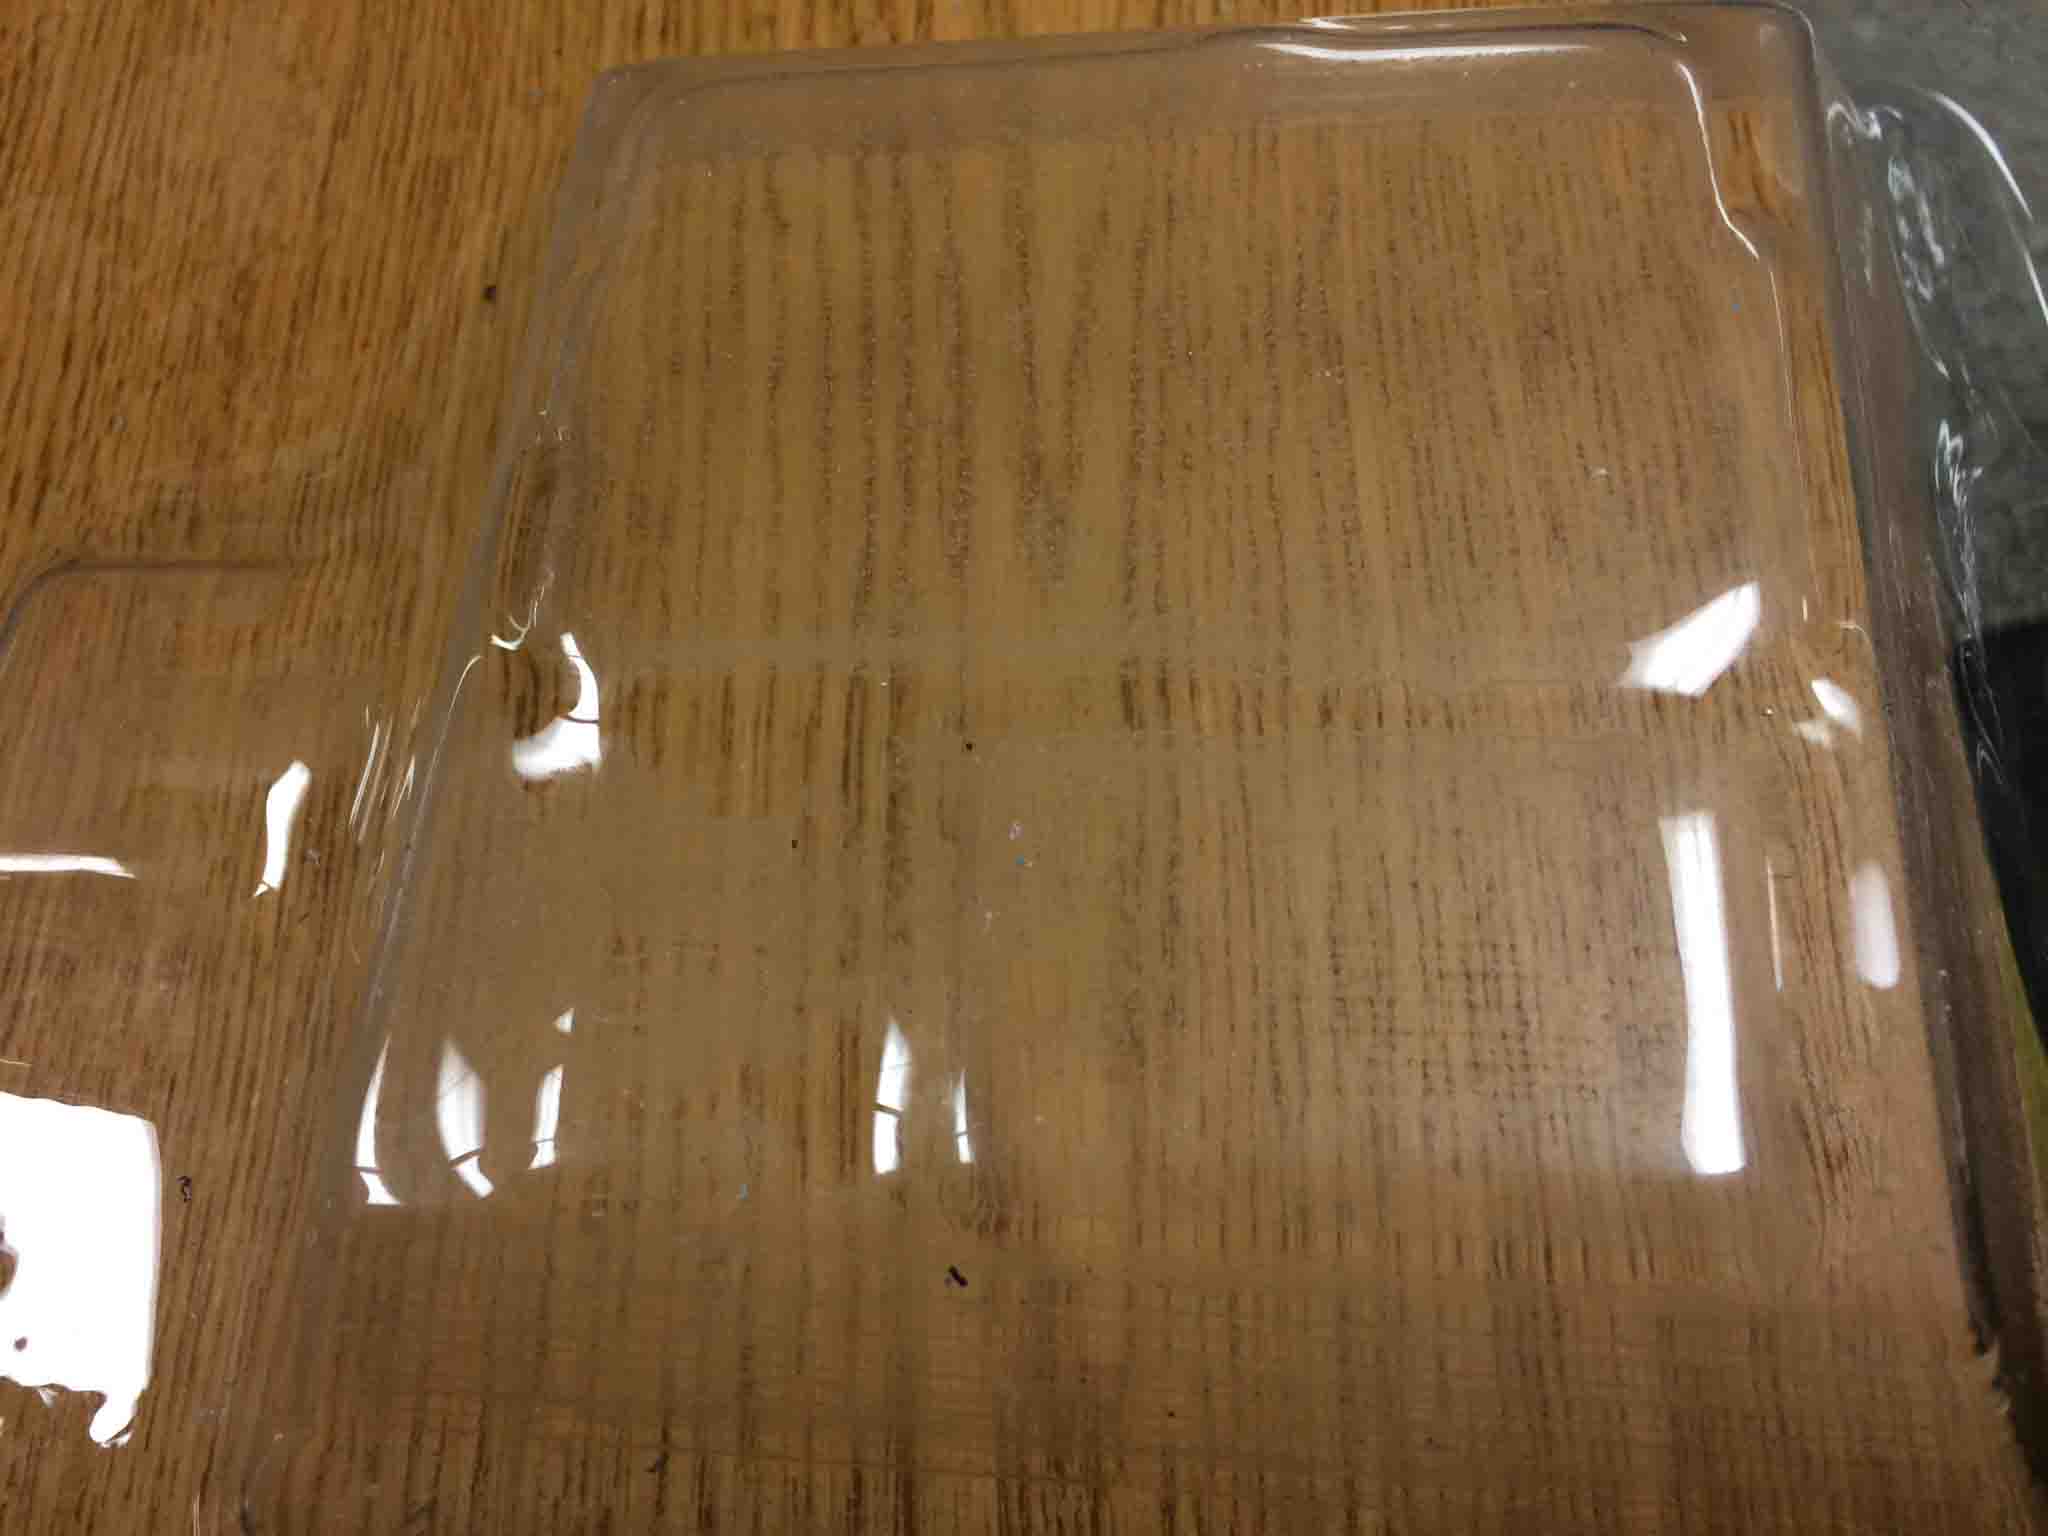
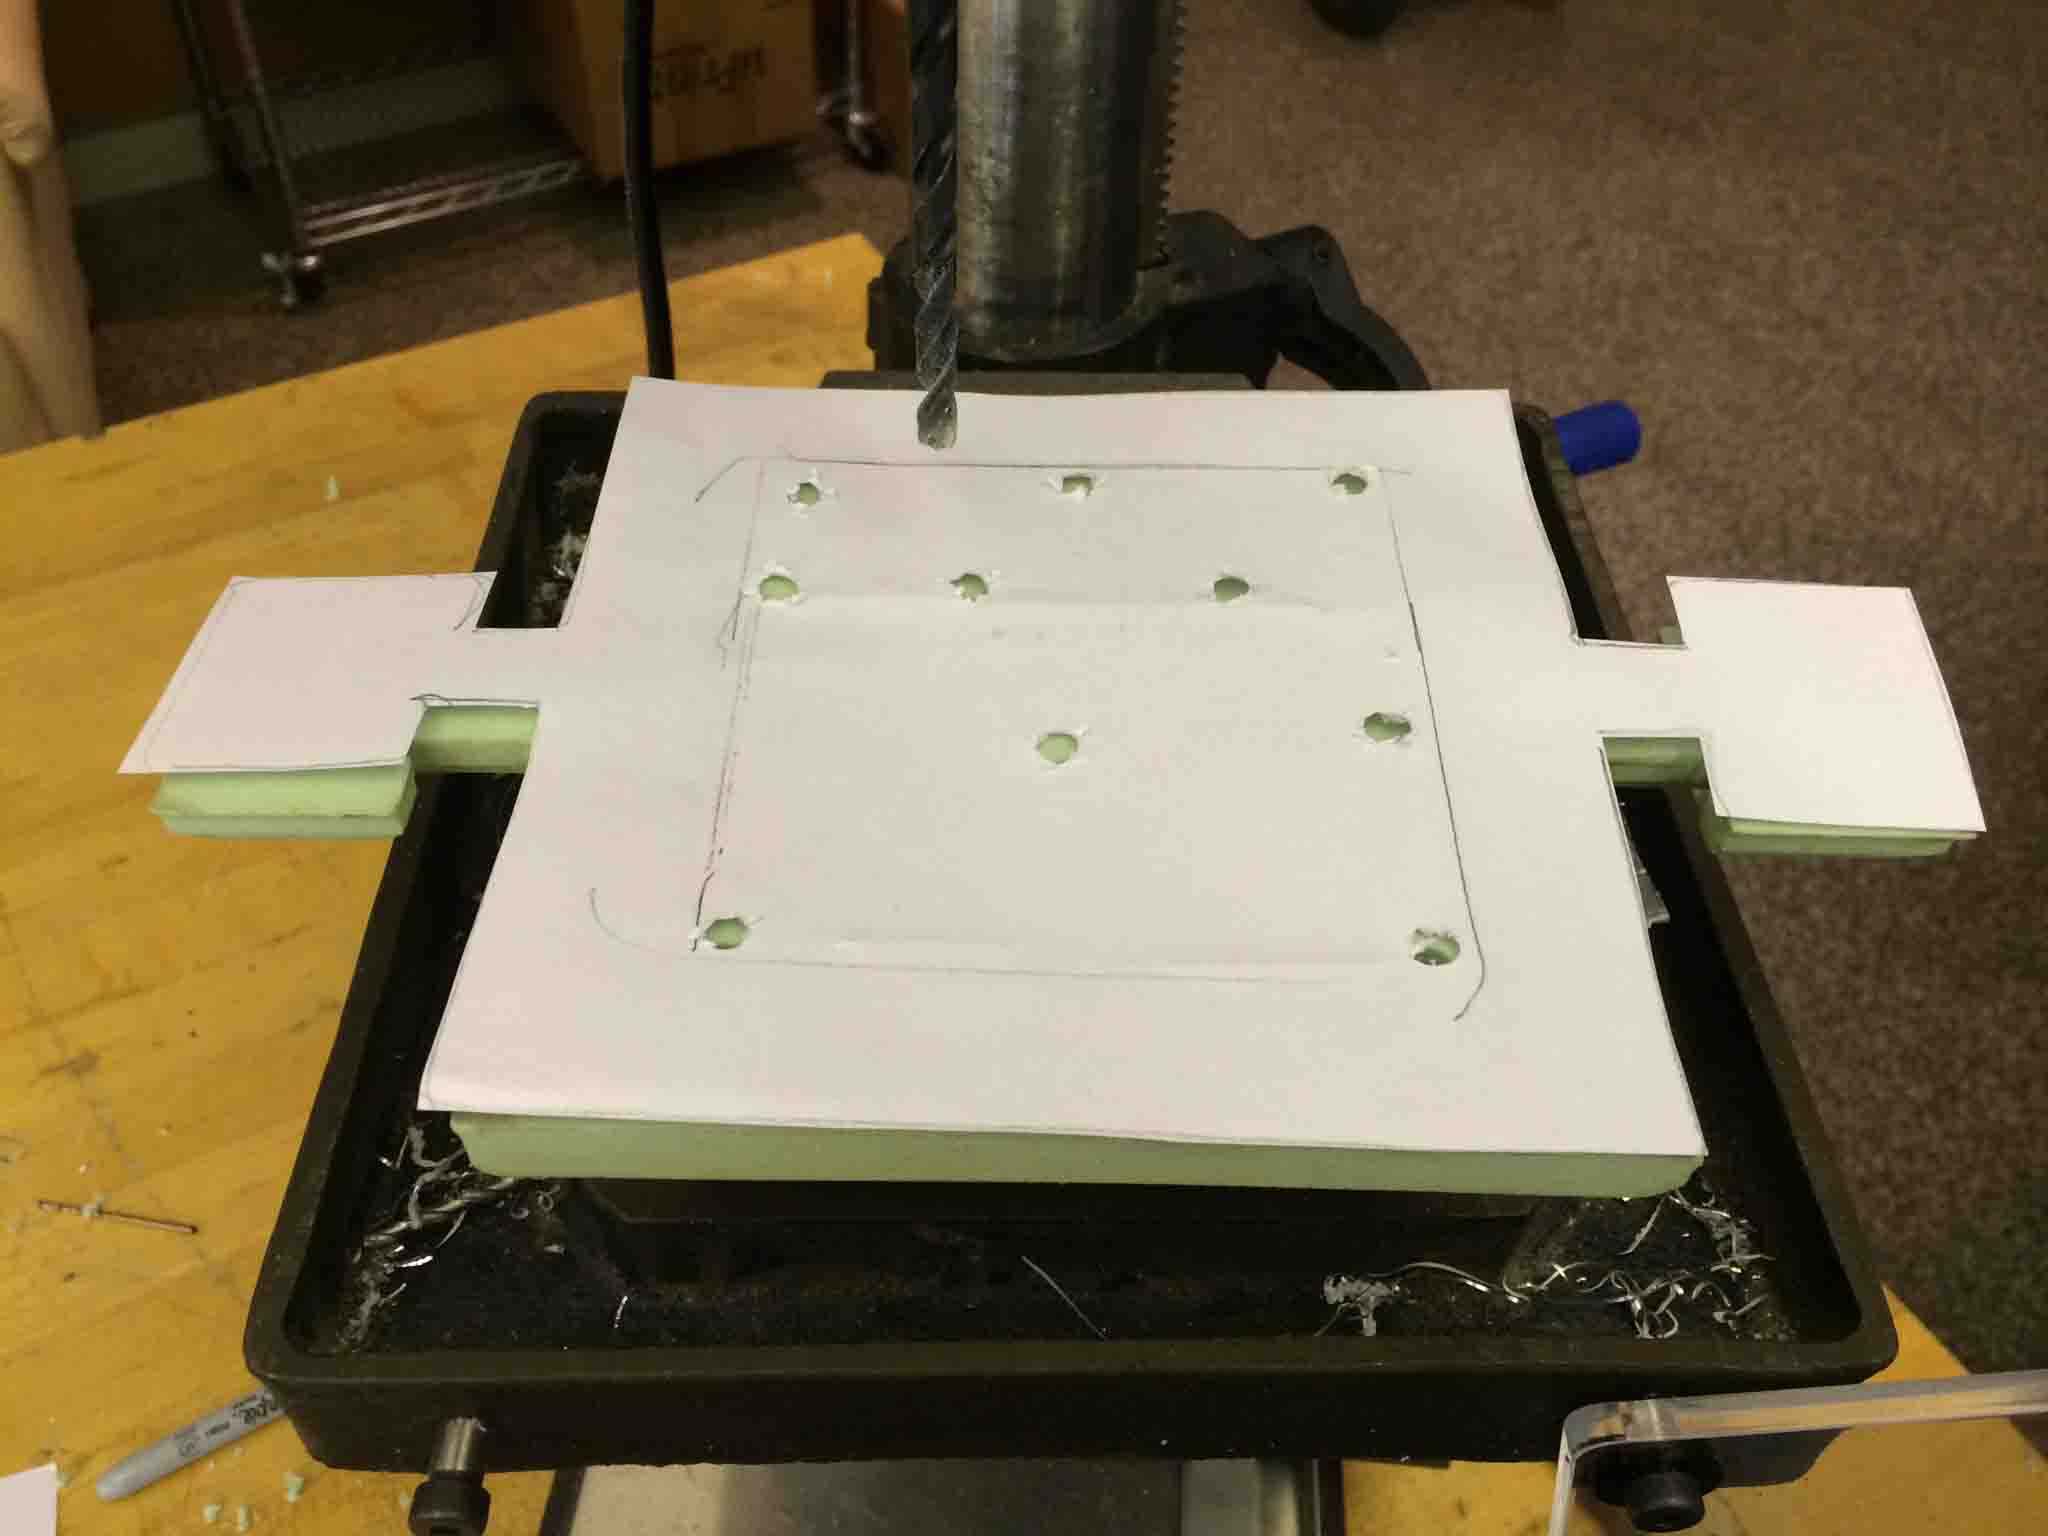
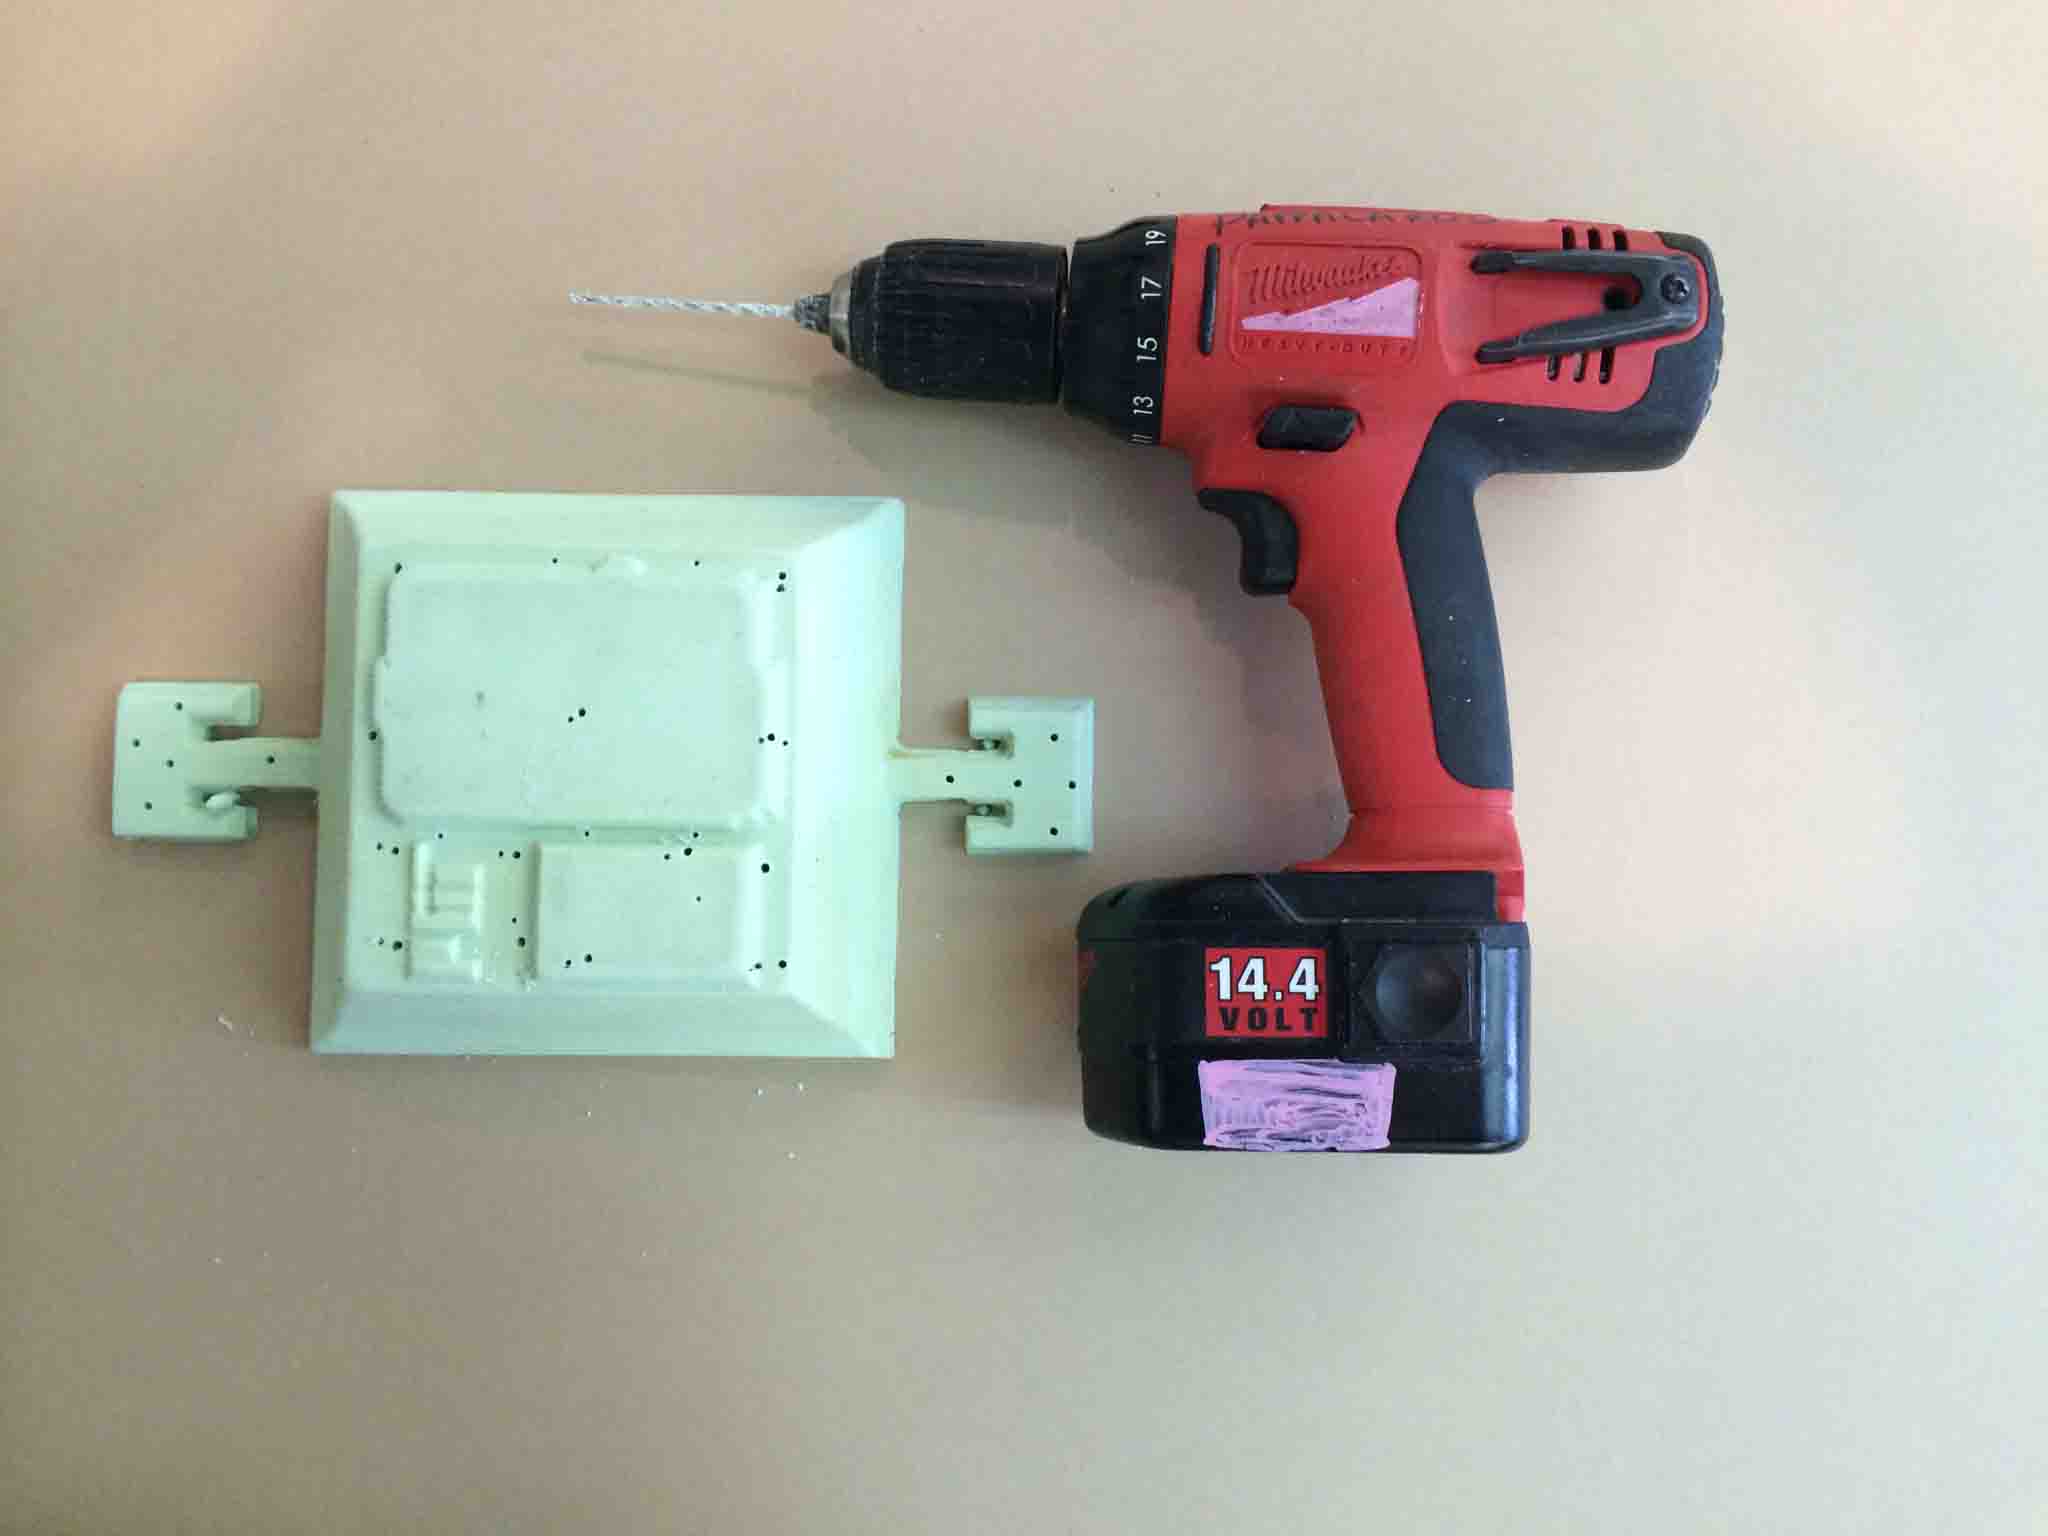
As it turned out, we needed to have holes in the mold in order for the vacuum to really get into all the features of the mold, which is why the above features, like the MIT logo, didn't really come out.
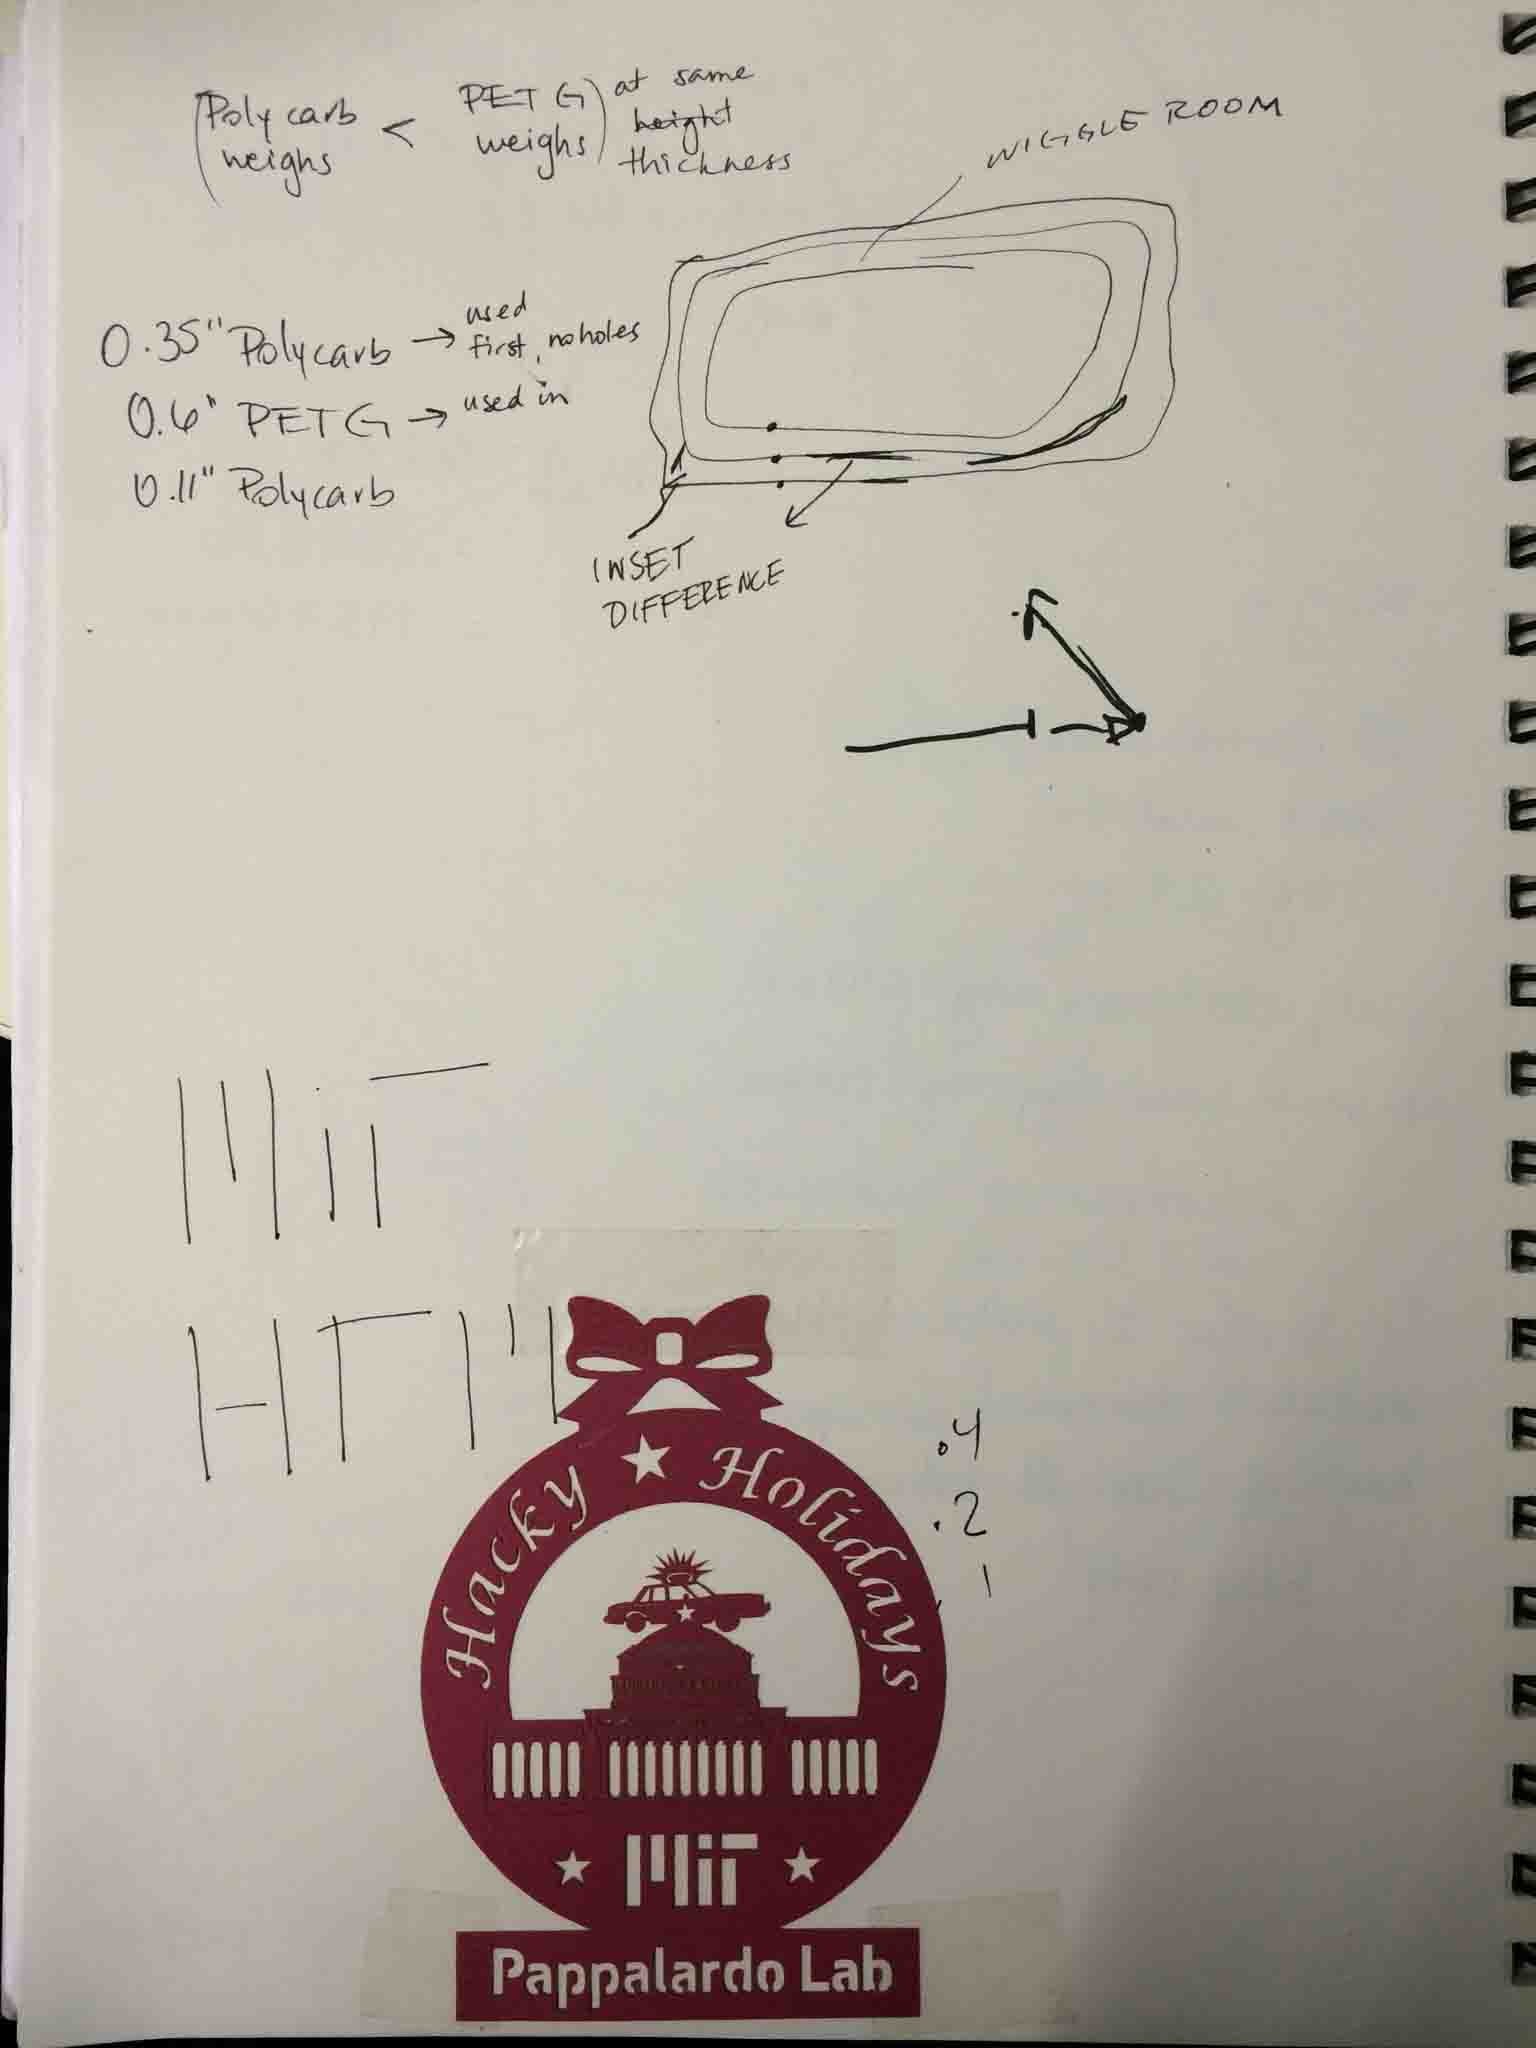
Then when it came time to thermoform a second time we learned the lab had run out of stock so we had to use different plastic materials that were more heavy. Here's a note on their relative differences:
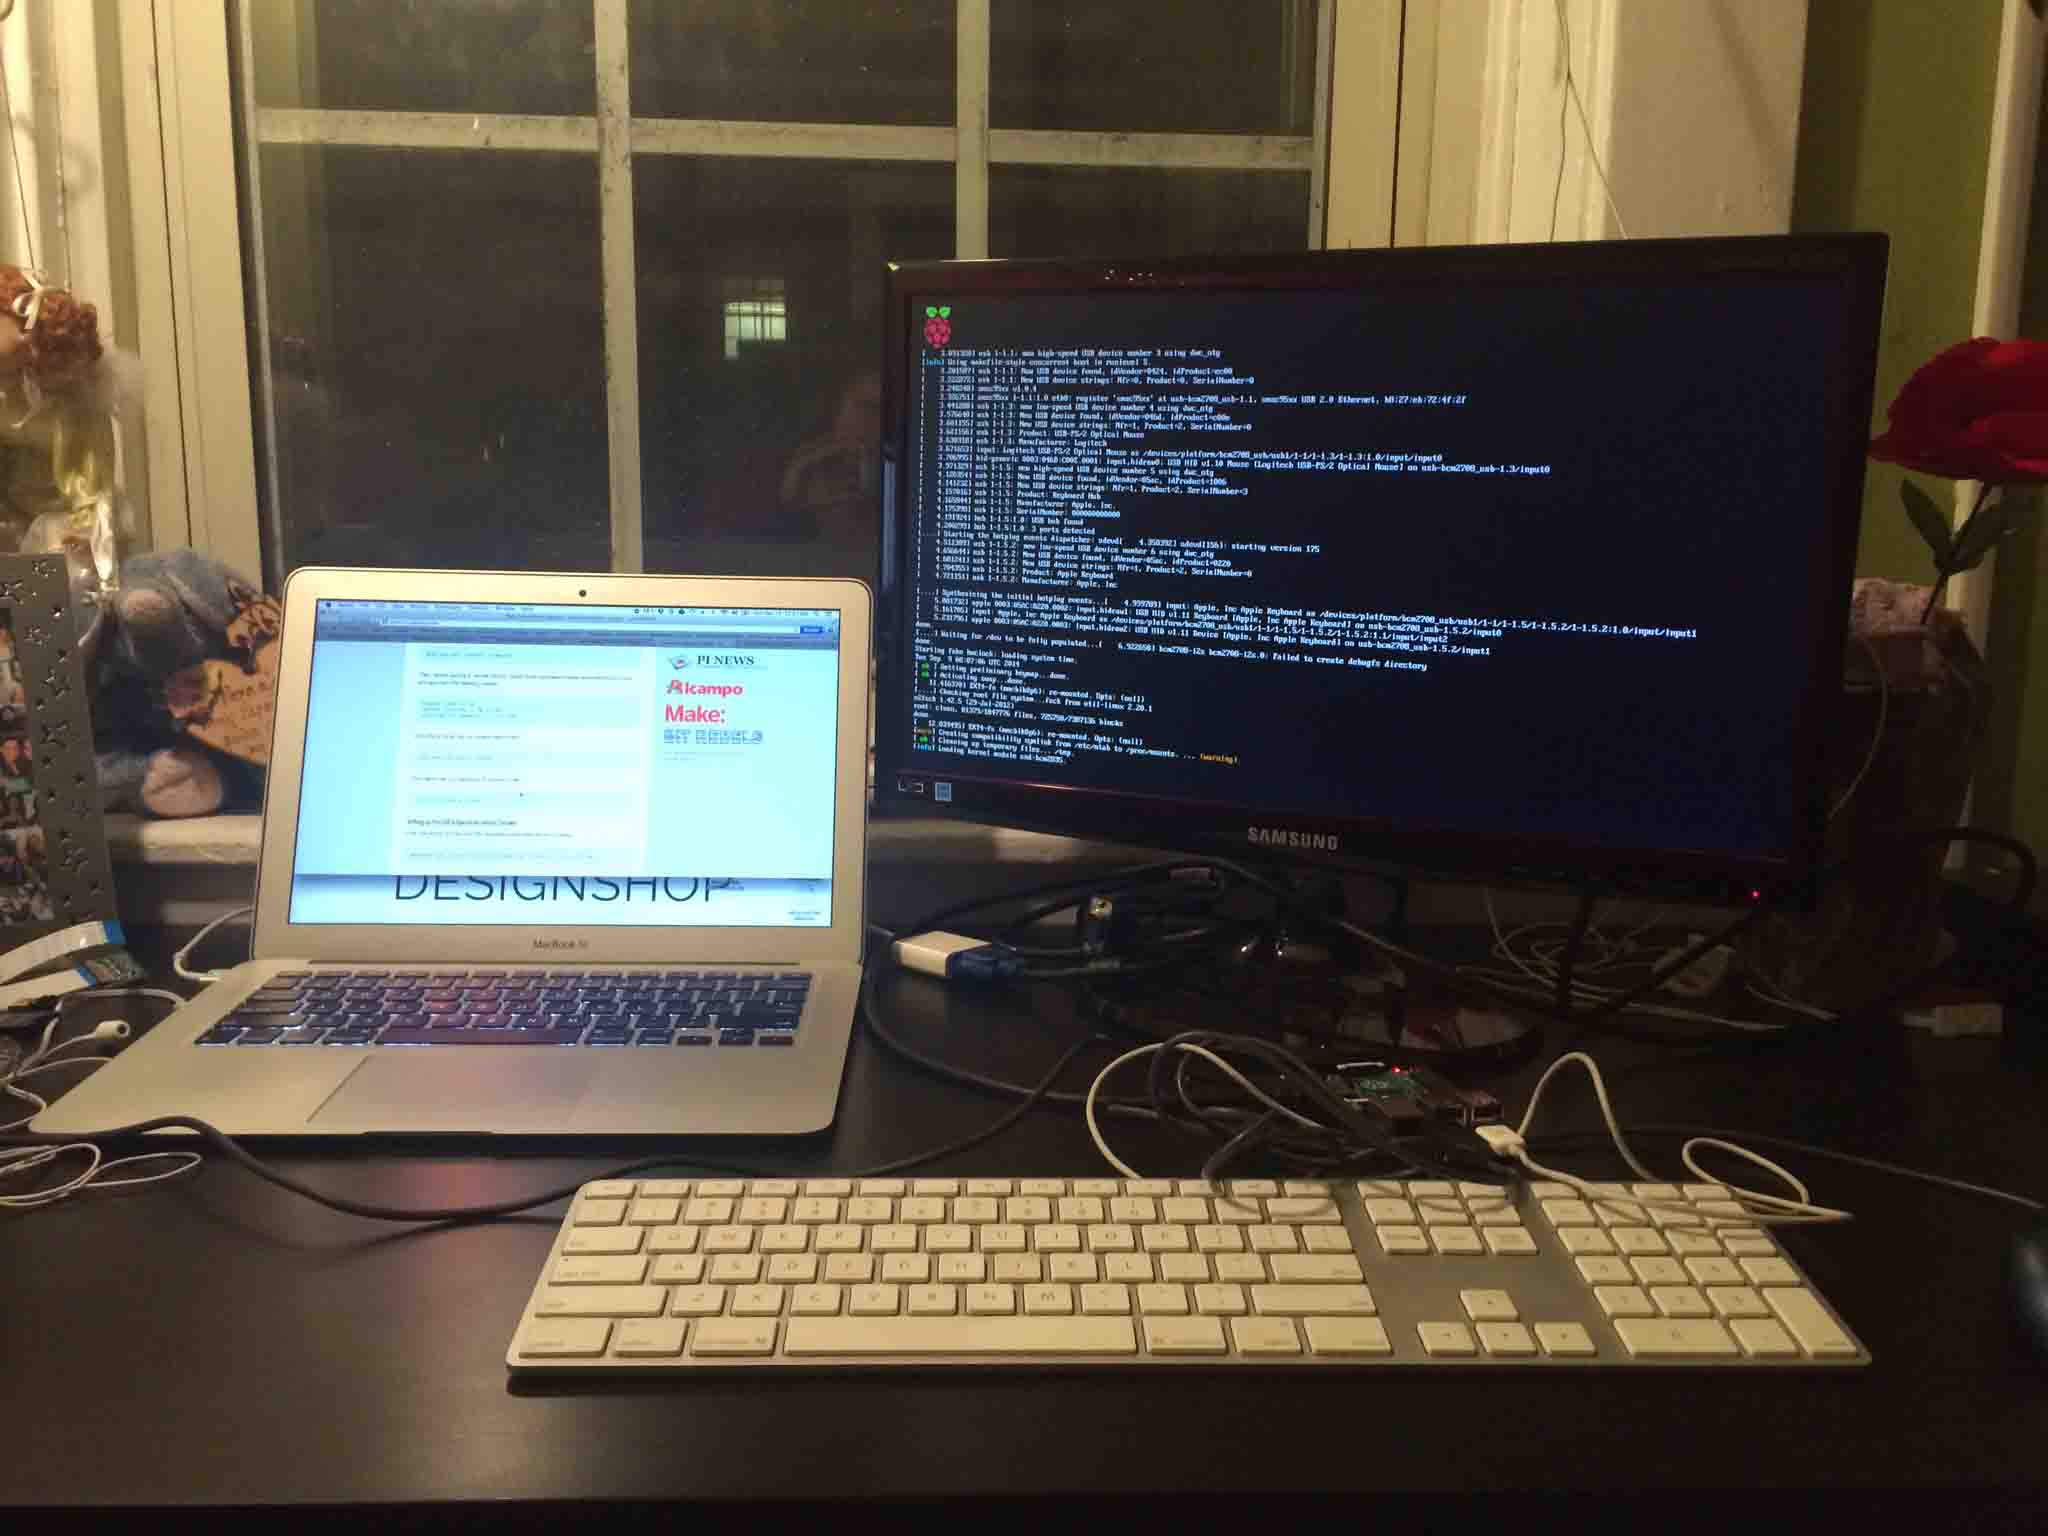
Live Streaming Video online through Raspberry Pi
First off, coolness points for having two different computers at a time!
My decision to base my electronics off of Raspberry Pi (RPi) comes from the realization during Networking and Communications Week and Interface and Application Programming Week wherein I learned that our current in-house technologies wouldn't suffice for streaming video over wifi to multiple devices. (Our cameras only took pictures, our wi-fi shield wasn't proven to have ever done this even remotely close, and our interface programming would mean that we would need a server solely dedicated to processing the information coming from the board, and that wasn't something we could afford in our product design.
I'll admit that as a novice to the field of electronics, programming, and interfaces, I thought that Raspberry Pi would be easily adoptable because of the many tutorials available in the space. As it turns out, it wasn't. It required a much deeper familiarization with Linux than I had to be able to translate year-old tutorials to be compatible with new versions of the Camera Module.
Setting up Raspberry Pi (aka giving it the brains)
This part was very straightforward with the setup tutorials that offer support on their home page
Connecting over Wi-Fi
This was the first most satisfactory thing I got my RPi to do using this tutorial.
At first I was having trouble fetching from websites when using the apt-get, so I noticed in the comments of the tutorial above that if you’re connecting to an internet connection that doesn’t need a password, you simply have to delete the “psk” line that gives a password. I changed the code in one of the files and connected successfully!

Taking Screenshots
This is apparently not as easy as it sounds. I tried with this tutorial and this one, too, but decided to wait until I connected over SSH so that I could use my main computer to take the screenshots.
Deciphering live video stream: JMPEG vs. VLC vs. HLS
From reading up on live video streaming, there's one thing that's clear. Live video streaming is NOT trivial, even if it is aided for Raspberry Pi. I would argue RPi is the only reasonable DIY solution for hobbyists (and students) out there, but it is still definitely not trivial.
When deciding between streaming methods, there seems to be an inherent design trade-off between frame rate continuity, real-time delay, and compatibility with your device:
JMPEG
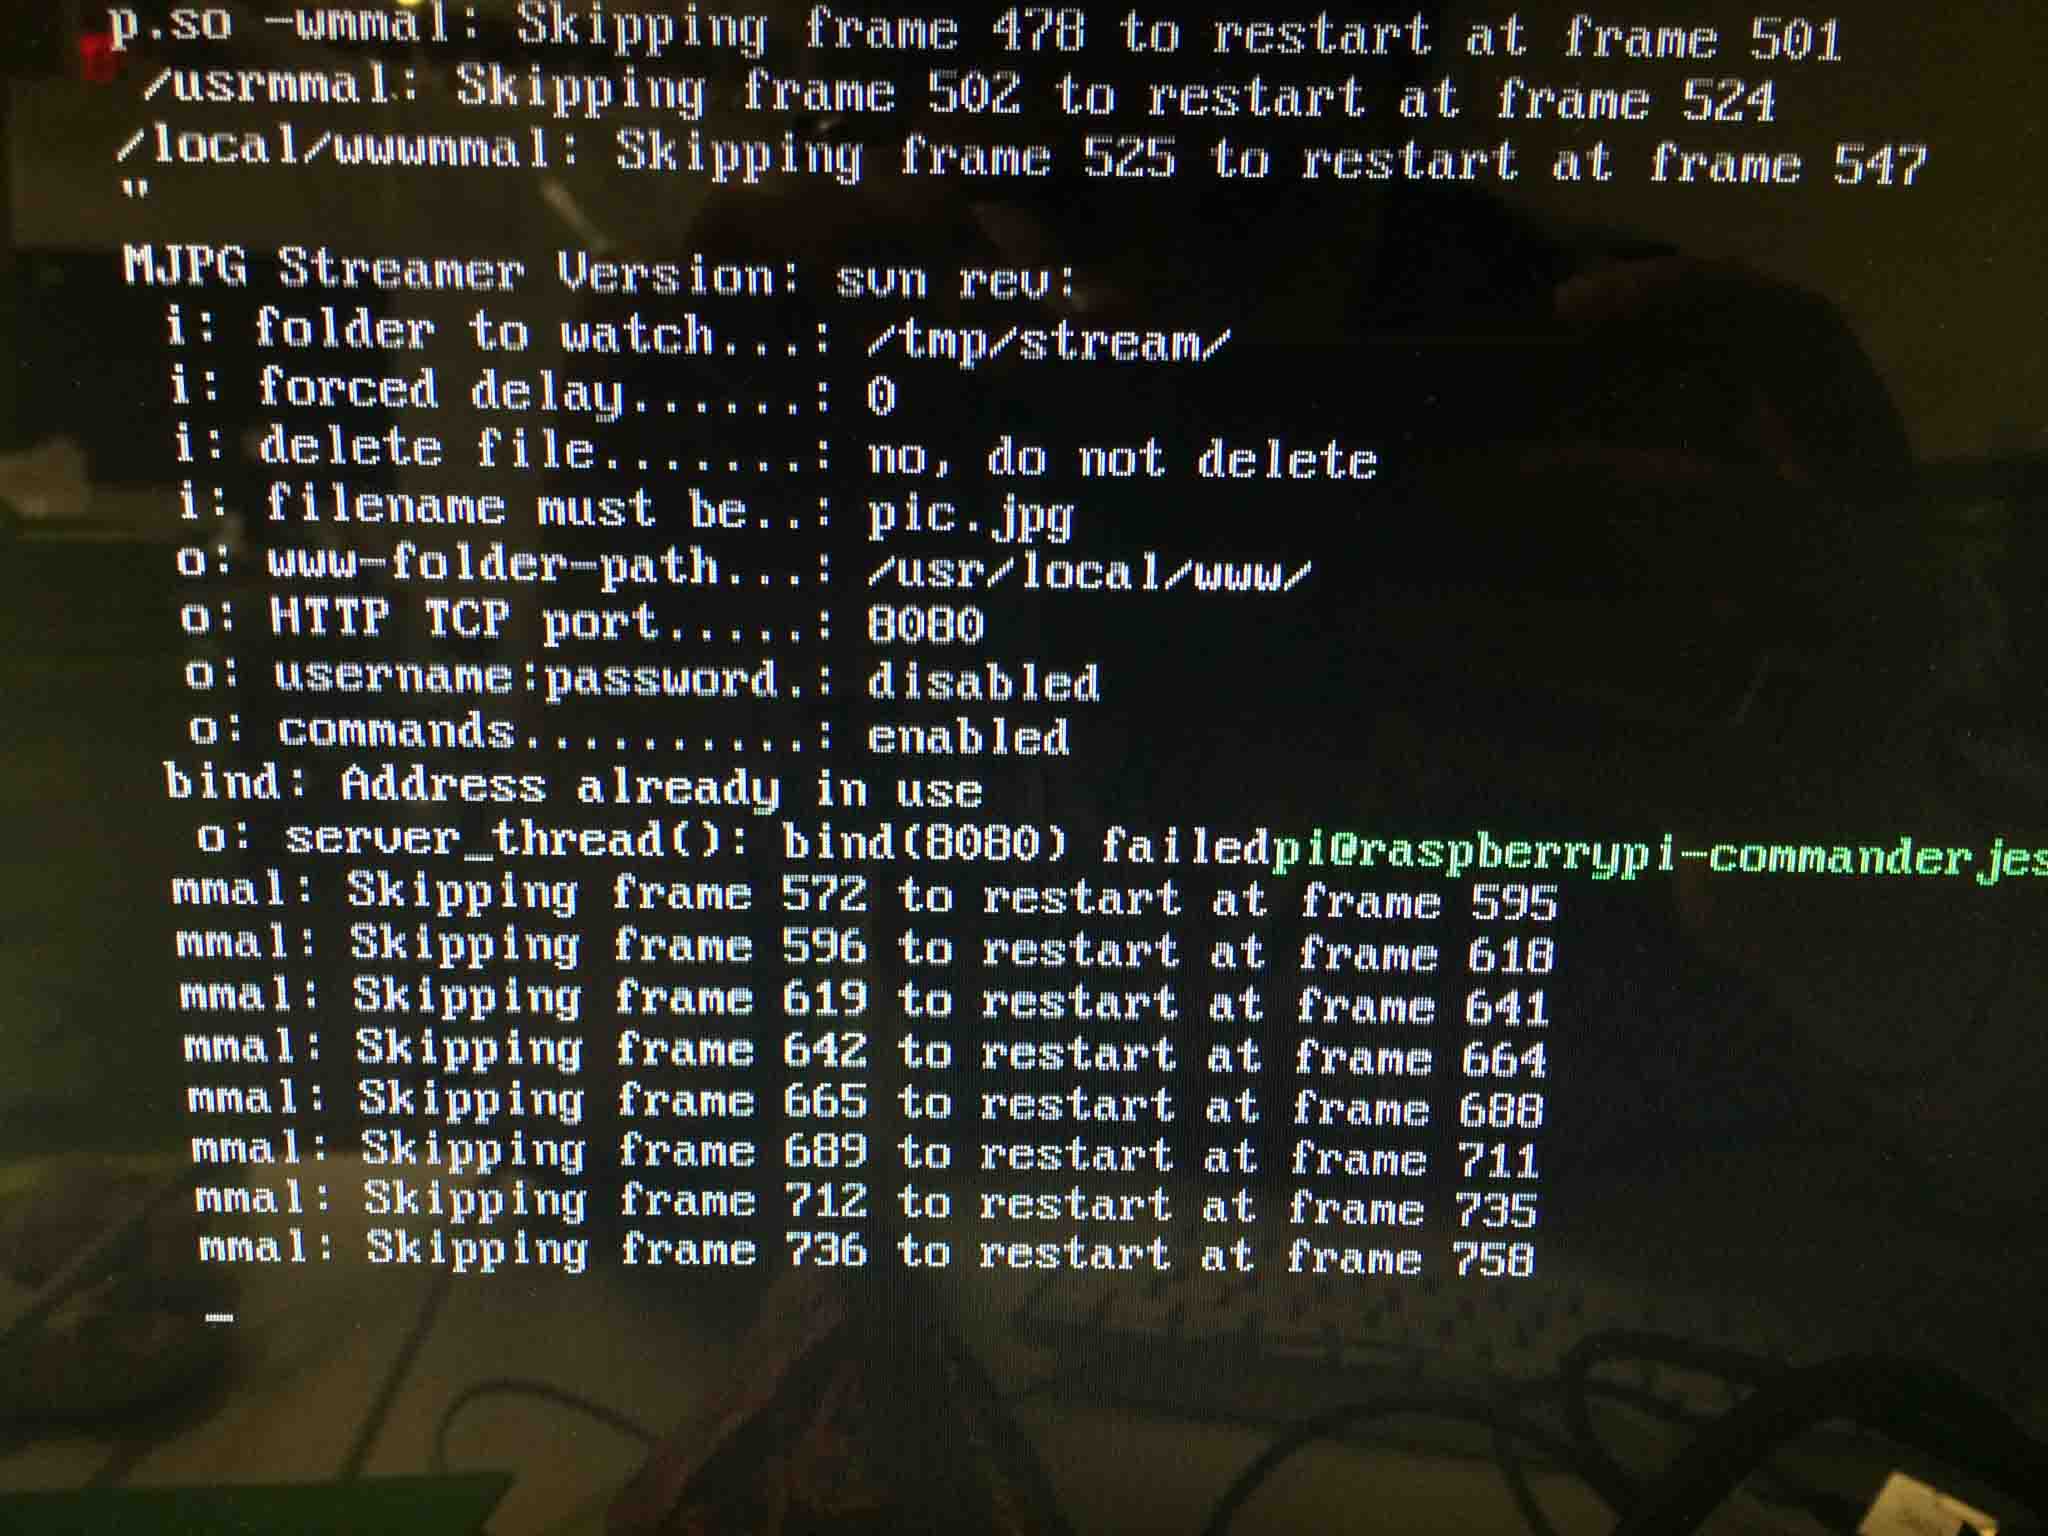
My first approach was to try JMPEG through this tutorial, which is a series of pcitures that are timelapsed together at a fps that is close to a movie. This seemed very enticinig because it would mean I could go back and use the stills generated for the video to add to documentation. When I tried to do this it would give error trying to fetch something, so I ran “sudo apt-get update” and then I was able to download the program. I followed instructions in the tutorial and got my camera working!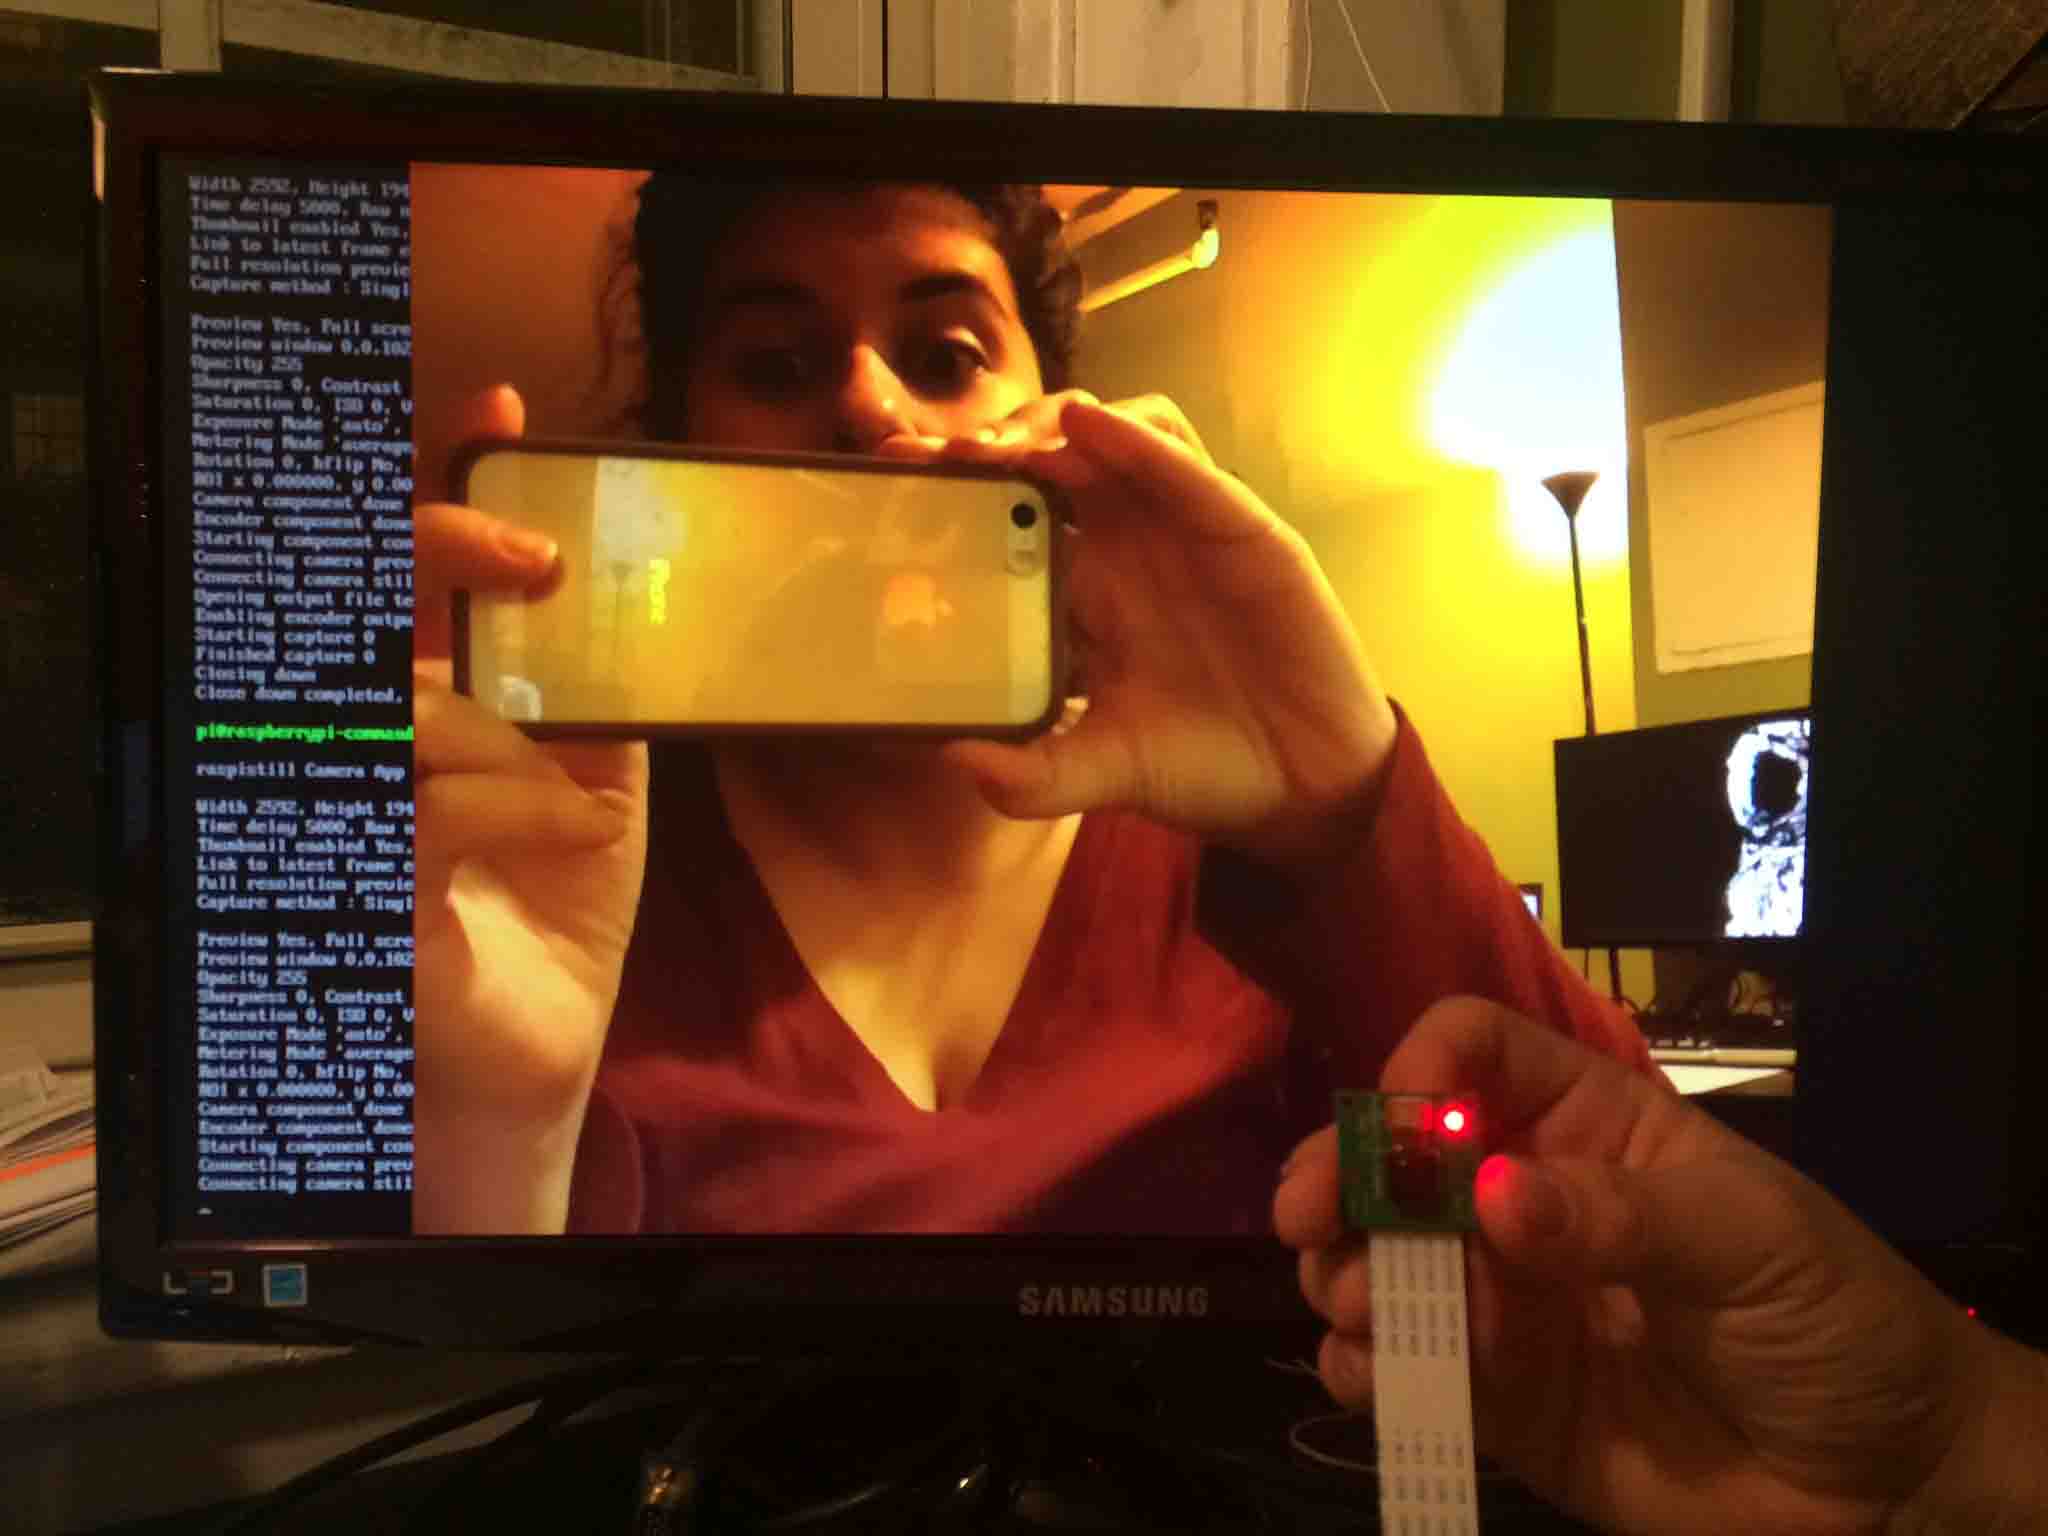
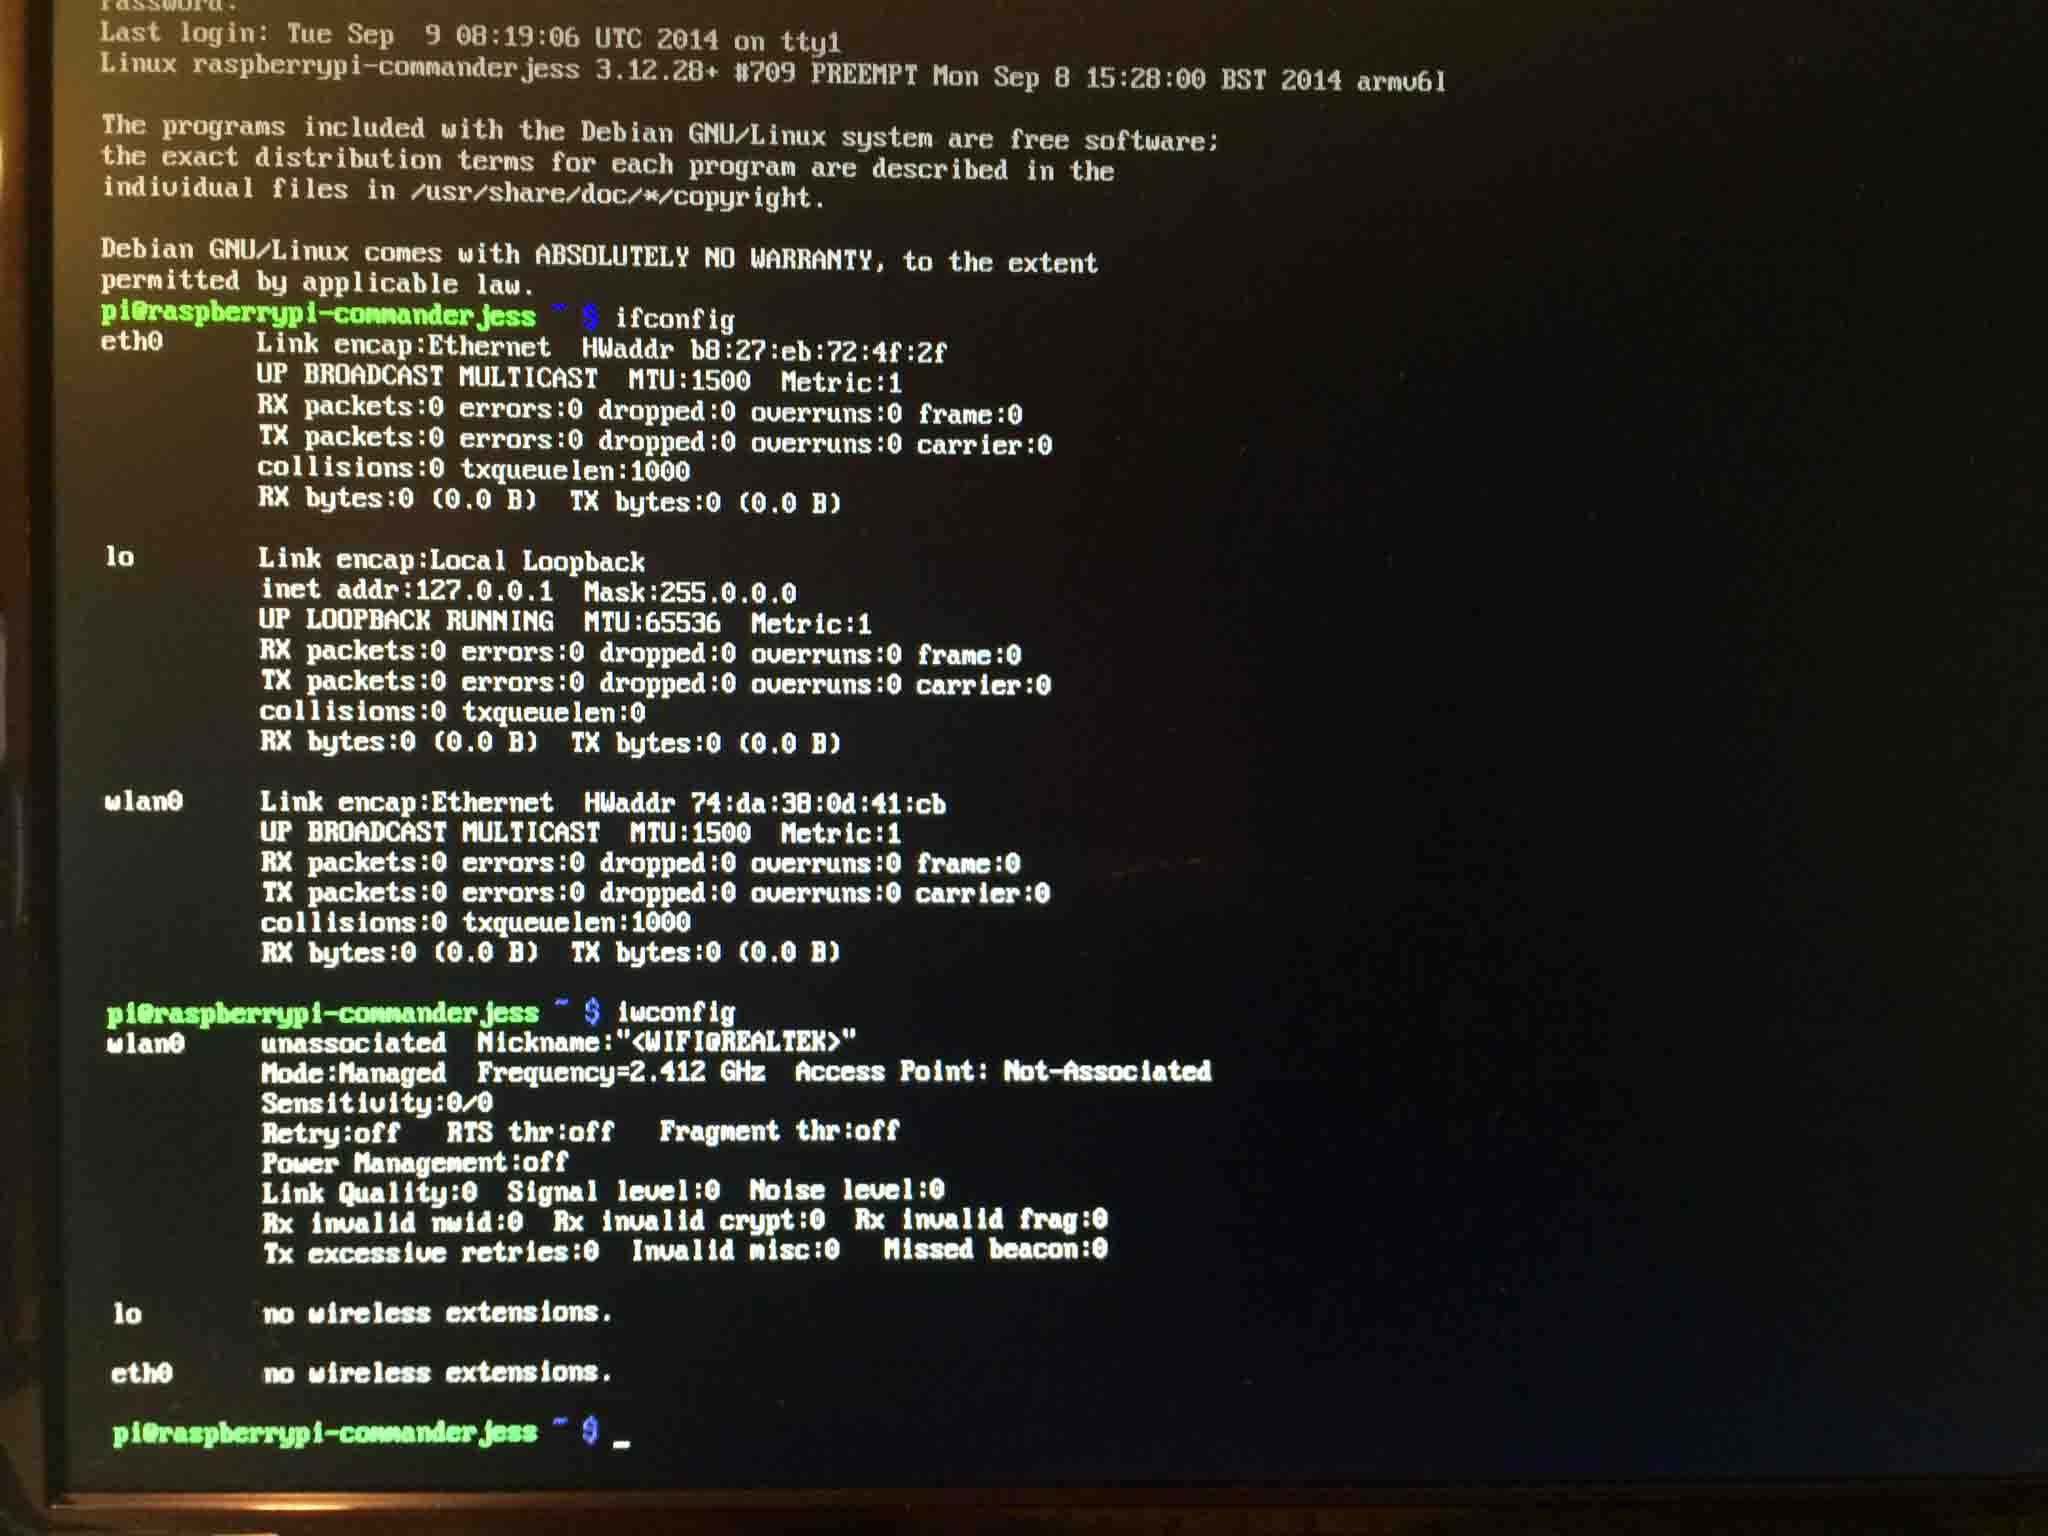
However, when I ran the command “ifconfig” for my IP address: 10.189.68.29, I was unable to open device in the other computer.
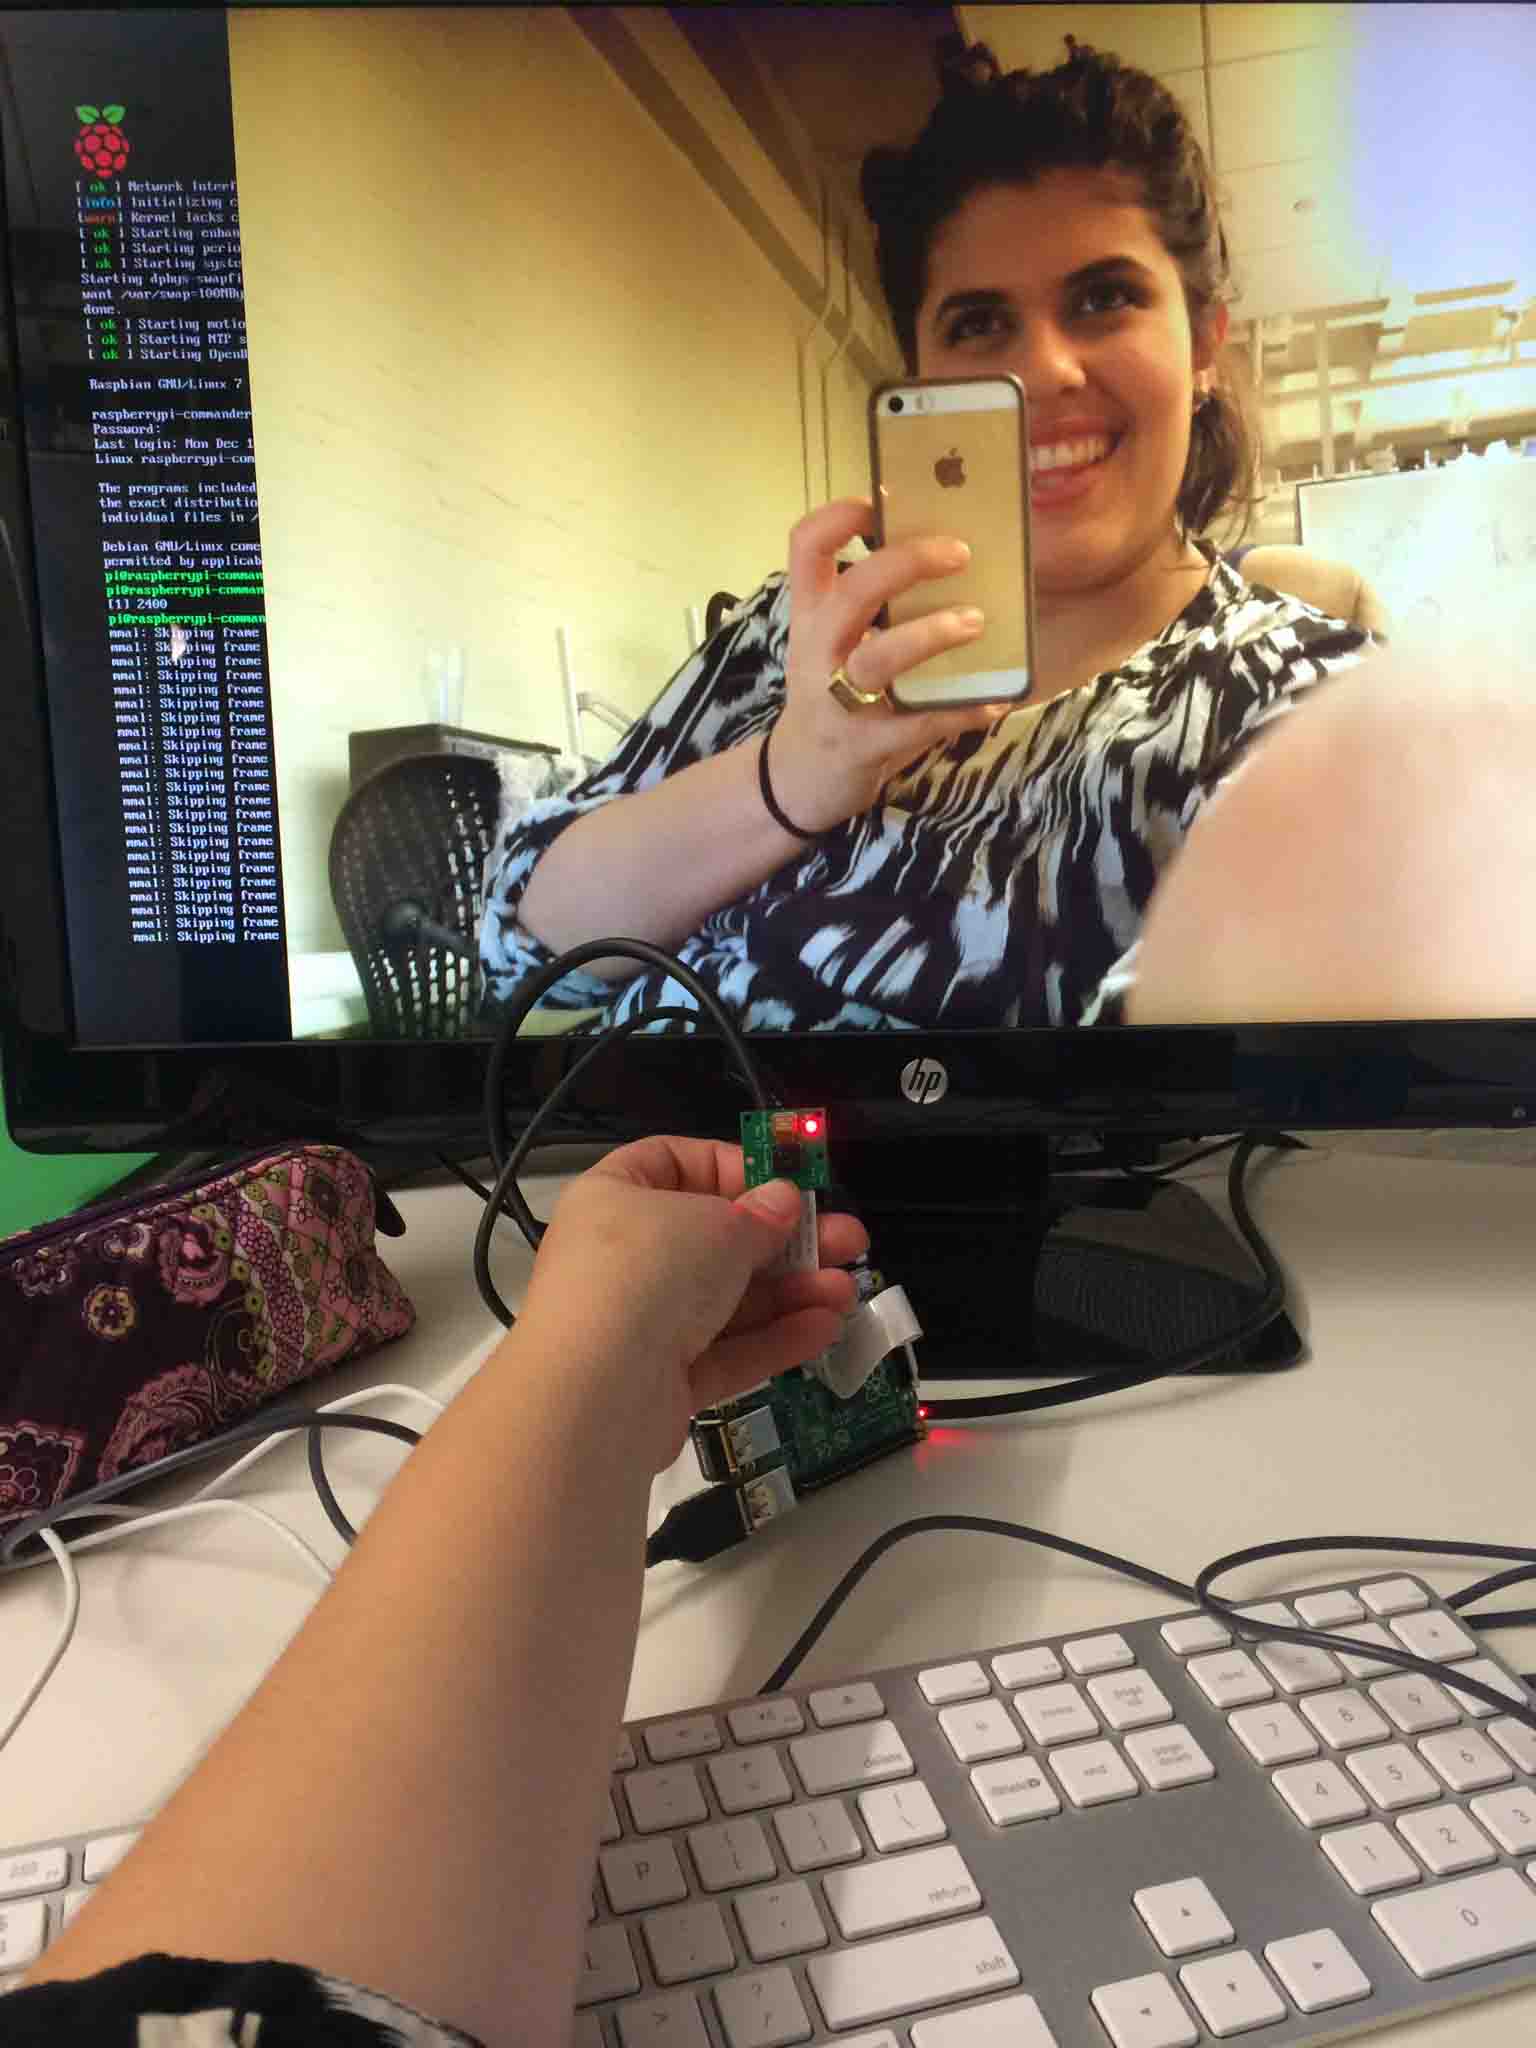
There was quite some iteration in trying to do this with other tutorials through other methods (see VLC and HLS below), but I did keep coming back to our promising JMPEG version. I was able to replicate it working (camera on, saving files, but not transmitting the live stream) once more in this selfie within a selfie:
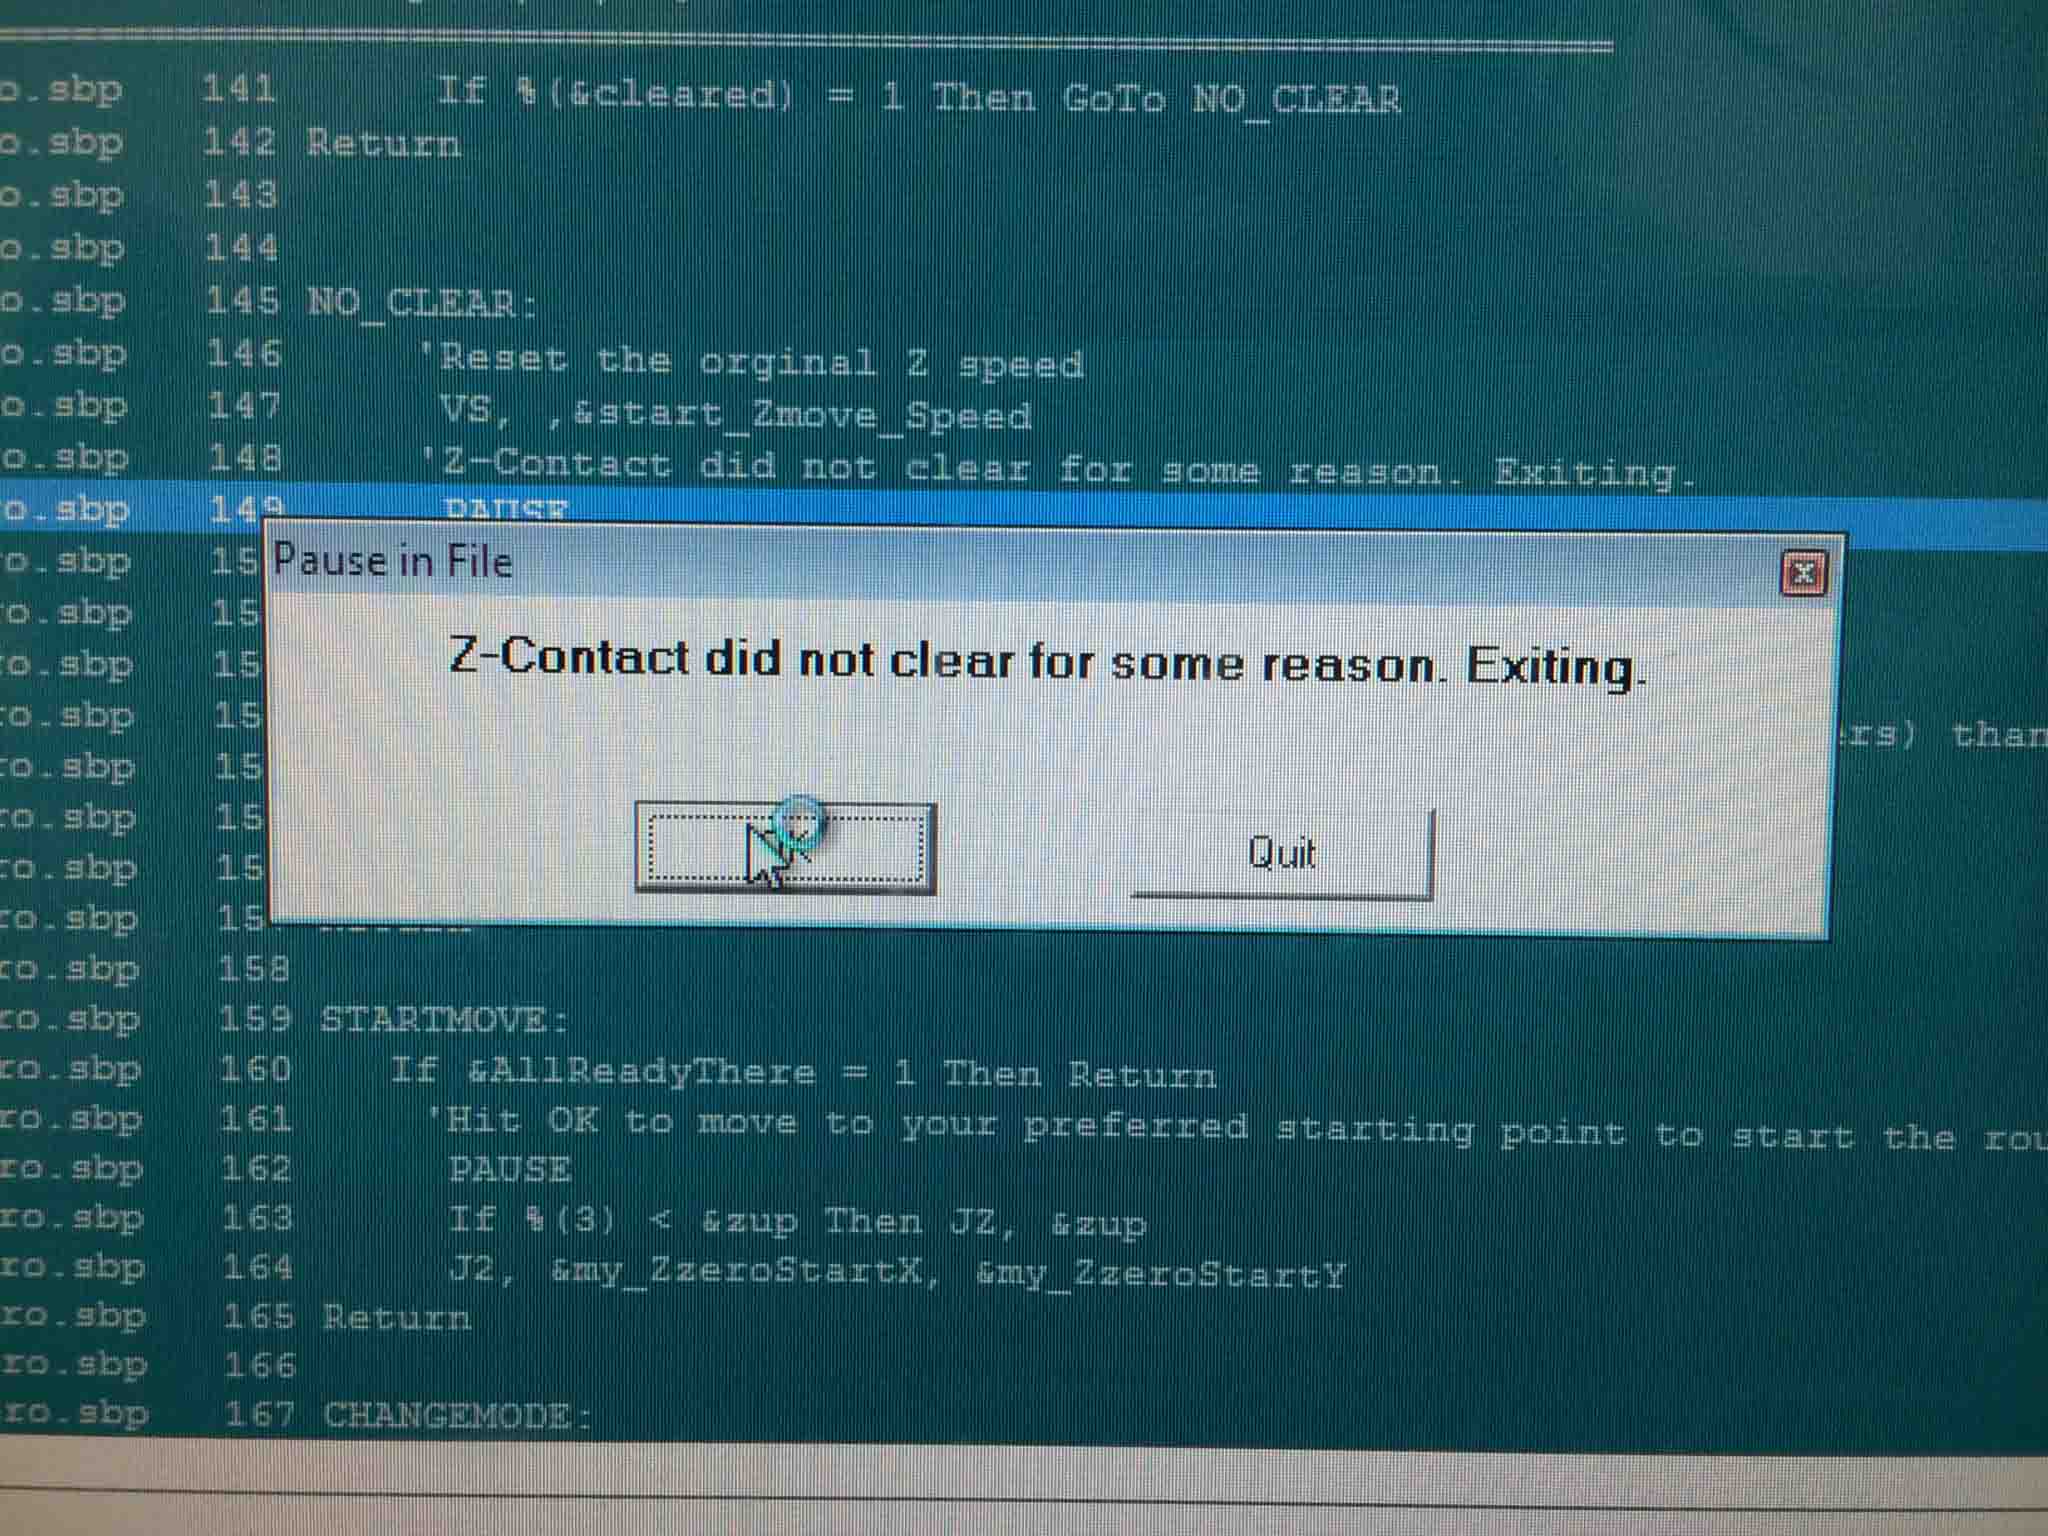
But unfortunately kept getting new errors regarding the camera module needing firmware updates (after updating it and rebooting some 30 times or so) and not being able to live stream, now getting a new ENOSPC error:

VLC
My second attempt, per Will's suggestion, was to try a different method: VLC. I used this tutorial to attempt it, but was not able to get it running. Quite f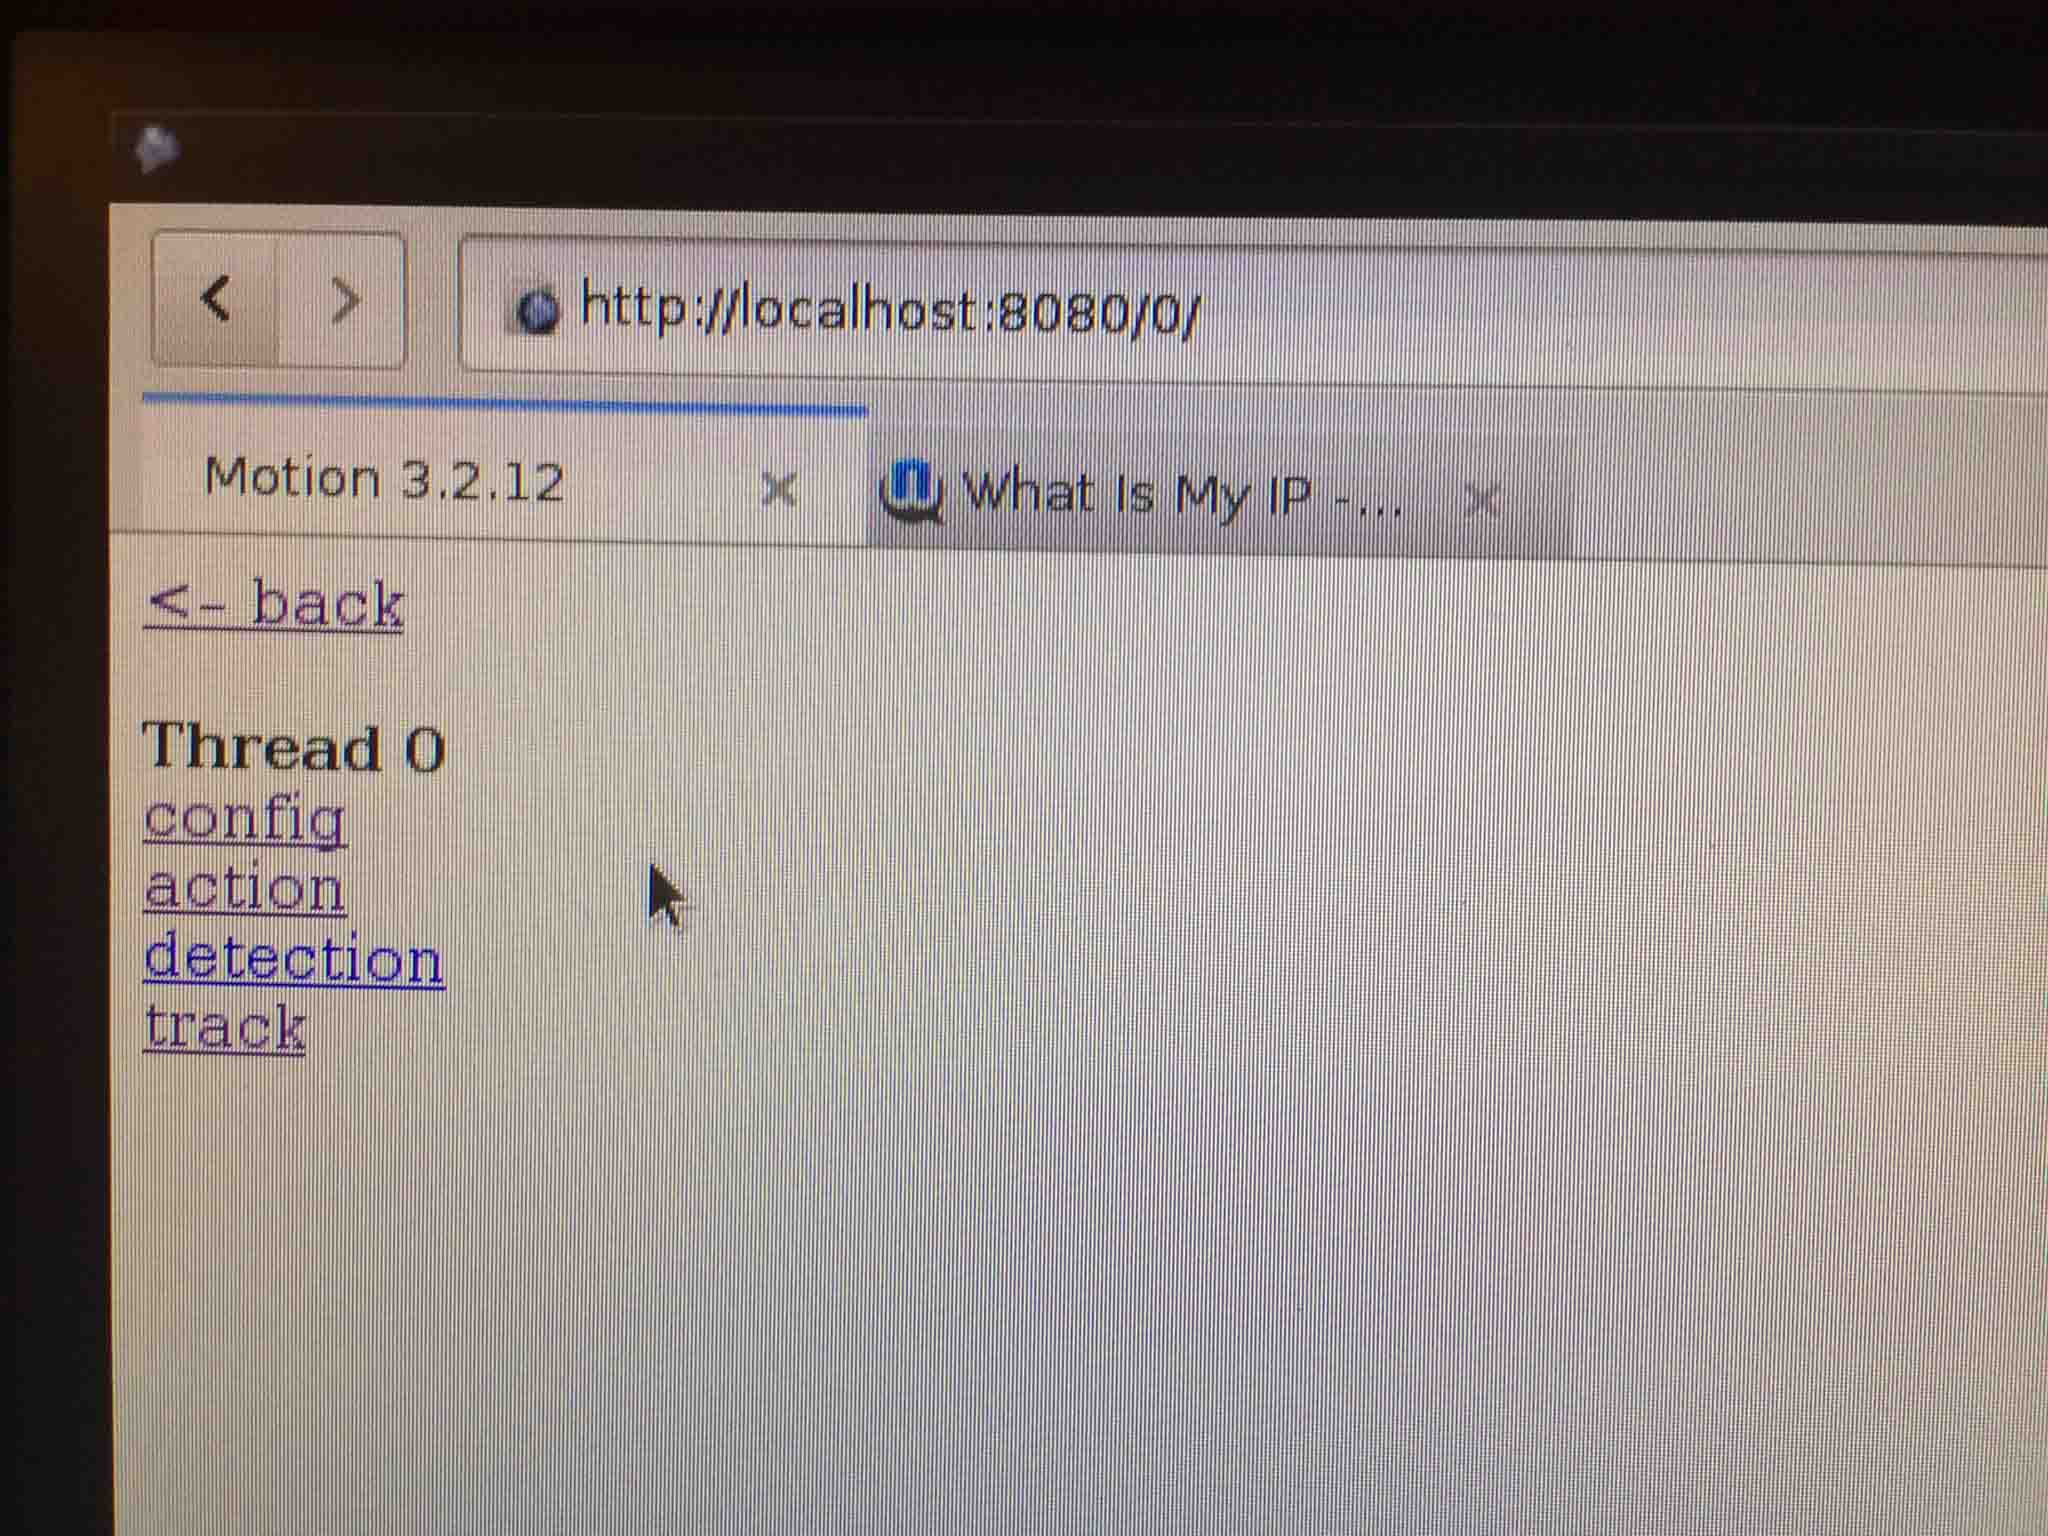
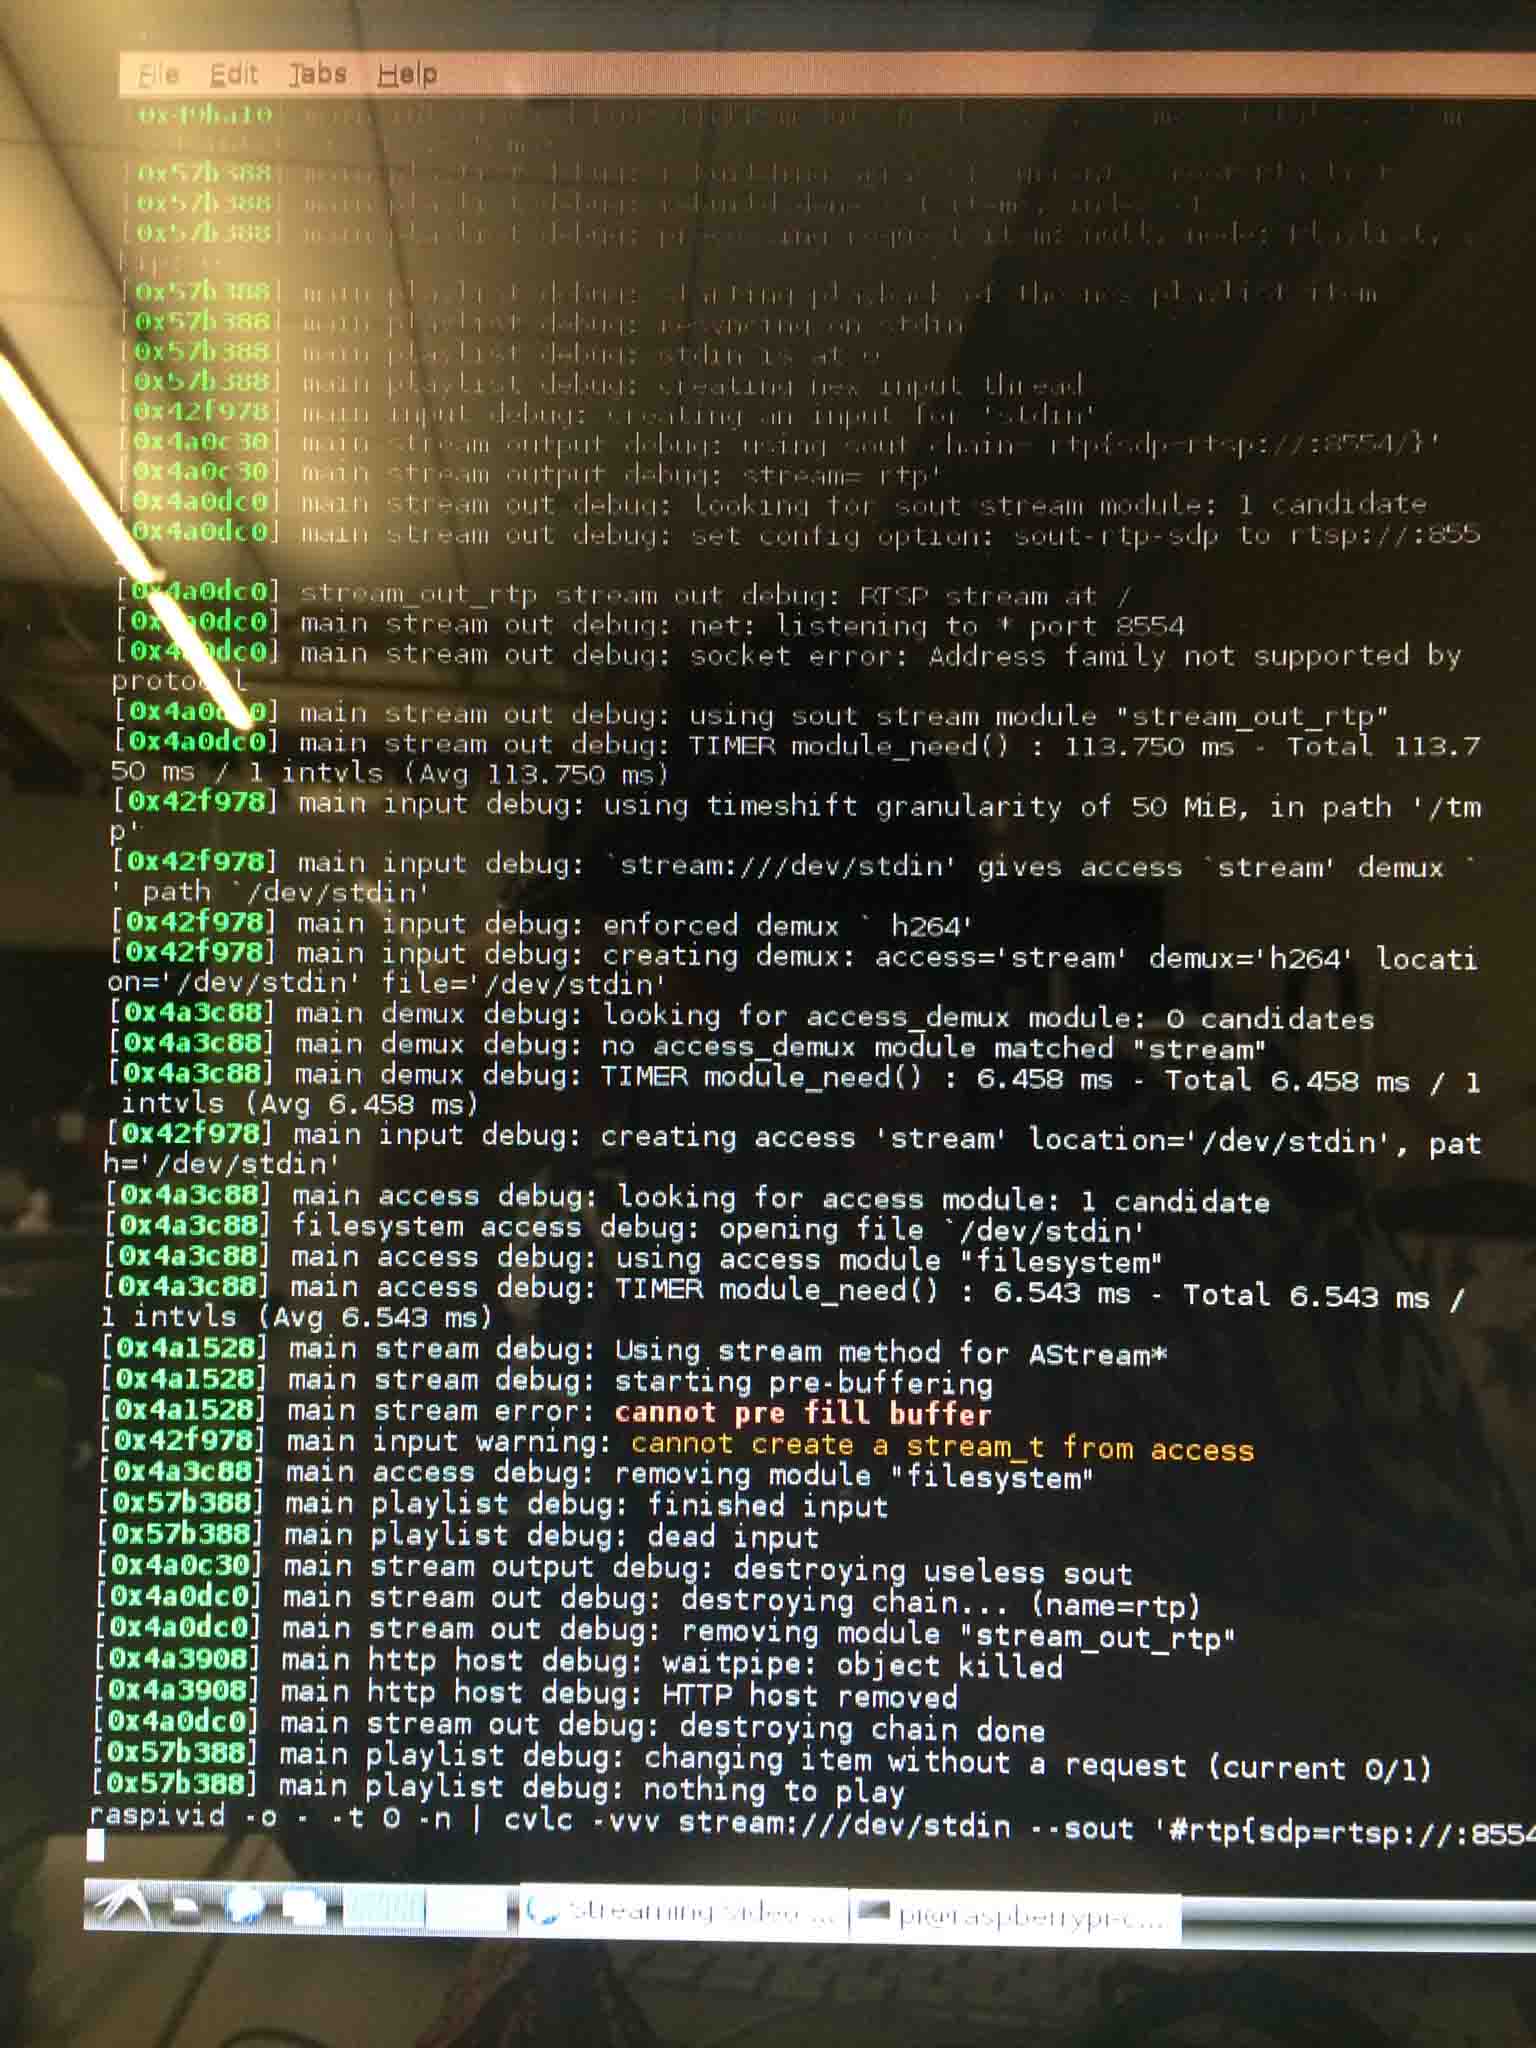
Quite frankly, most of my time was spent trying to make the keyboard non-British and finding how to insert the pipe symbol in the code!
HLS
HLS stands for HTTP Live Streaming. Sounds ideal, right? I found this tutorial that actually has support and explanation, but I found them too late into the game and was not able to try them out for myself. I bribed TA's Will and Nadya to sit with me and try to navigate Raspberry Pi with me, but we just weren't able to get it done in reasonable hours, and they just weren't familiar enough with RPi. I think this is where the language barrier comes in: With my knowledge after reading all the tutorials I read, had I known Linux a bit better I would have definitely been able to translate last year's generous tutorials to this year's camera firmware edition. Perhaps over IAP...?Future Work
Though the semester came to an end before I could conquer more turf on this project, having this solid product vision and more familiarity of the technical challenges makes me well-poised to offer President Reif a feasible student-made project to connect with even more students! I would say as a product, this project is (almost) at the stage of bench level prototype. If this idea were to be well-received by President Reif, there's plenty of things I'd like to do it before presenting the alpha protoype to him, including: