Networking and Communications
Files: Board traces; Board outline.
This week we’re exploring networks and communication among devices.
For my final project I want to have a camera inside the robotic fish, which will record the water environment to allow for real-time monitoring and identification of pollution sources. So I decided to play with the ESP32-CAM module, which integrates WiFi, Bluetooth and an OV2640 Camera.
PCB Design
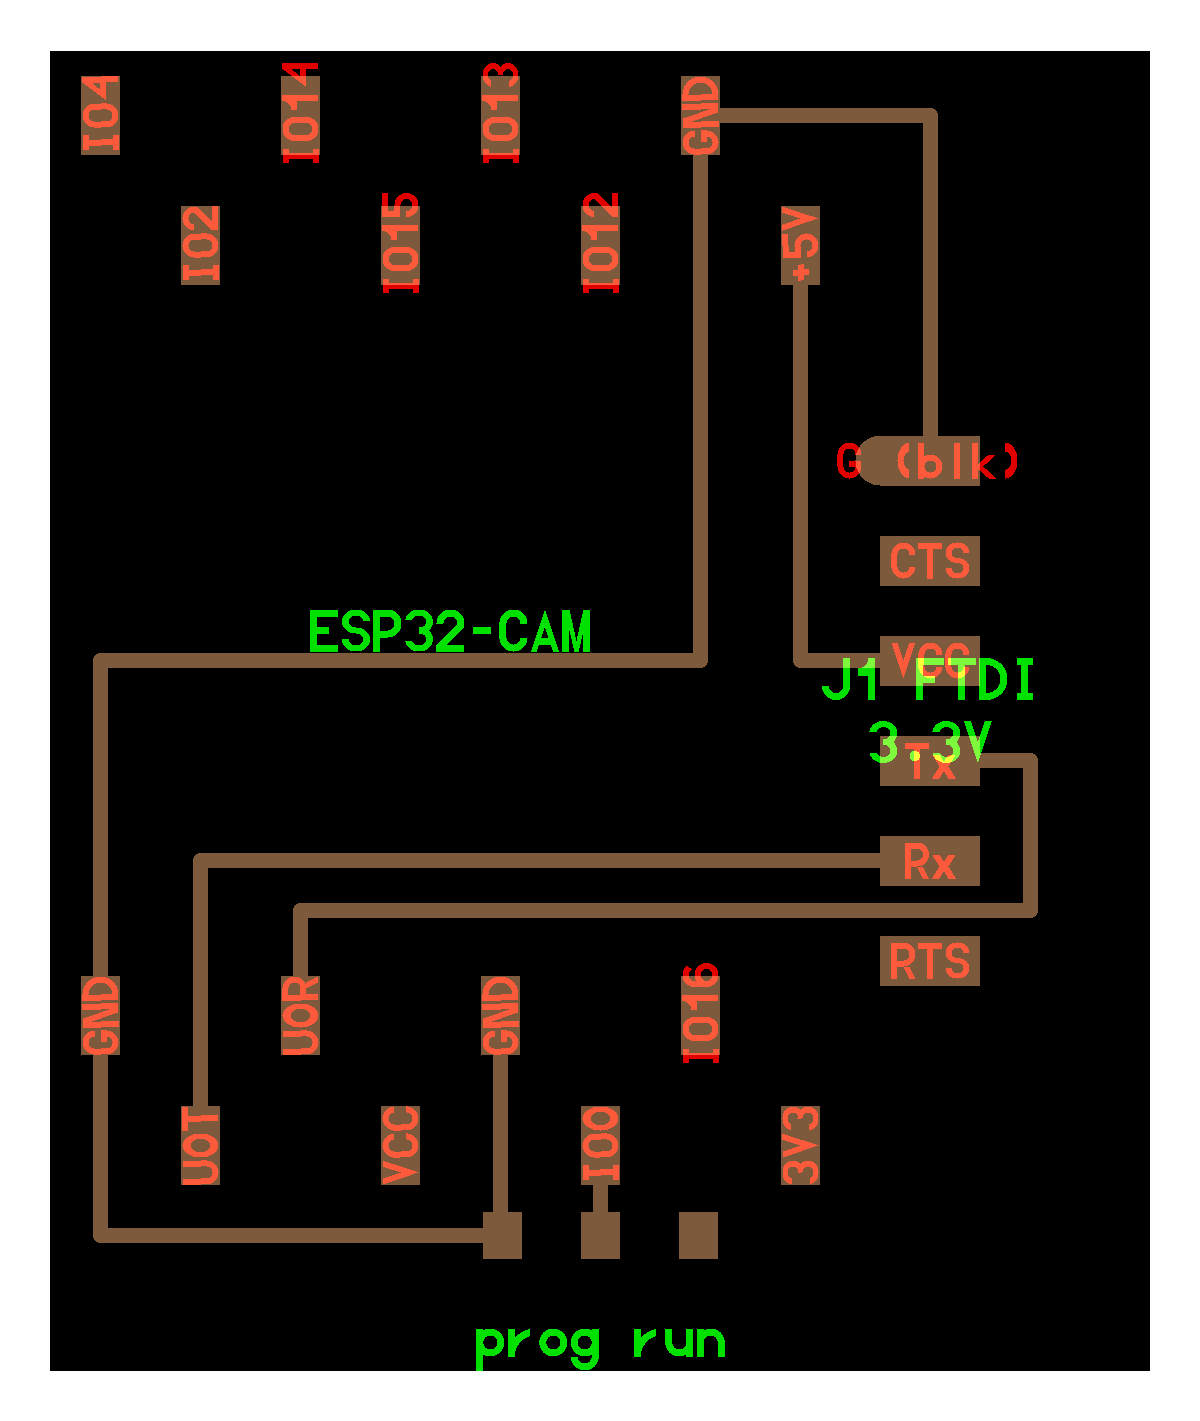
I redrew Neil's ESP32-CAM board using the Kicad platform (board setup option: clearance 0.4 mm; track width 0.4 mm; via size 0.8 mm; via drill 0.4 mm).
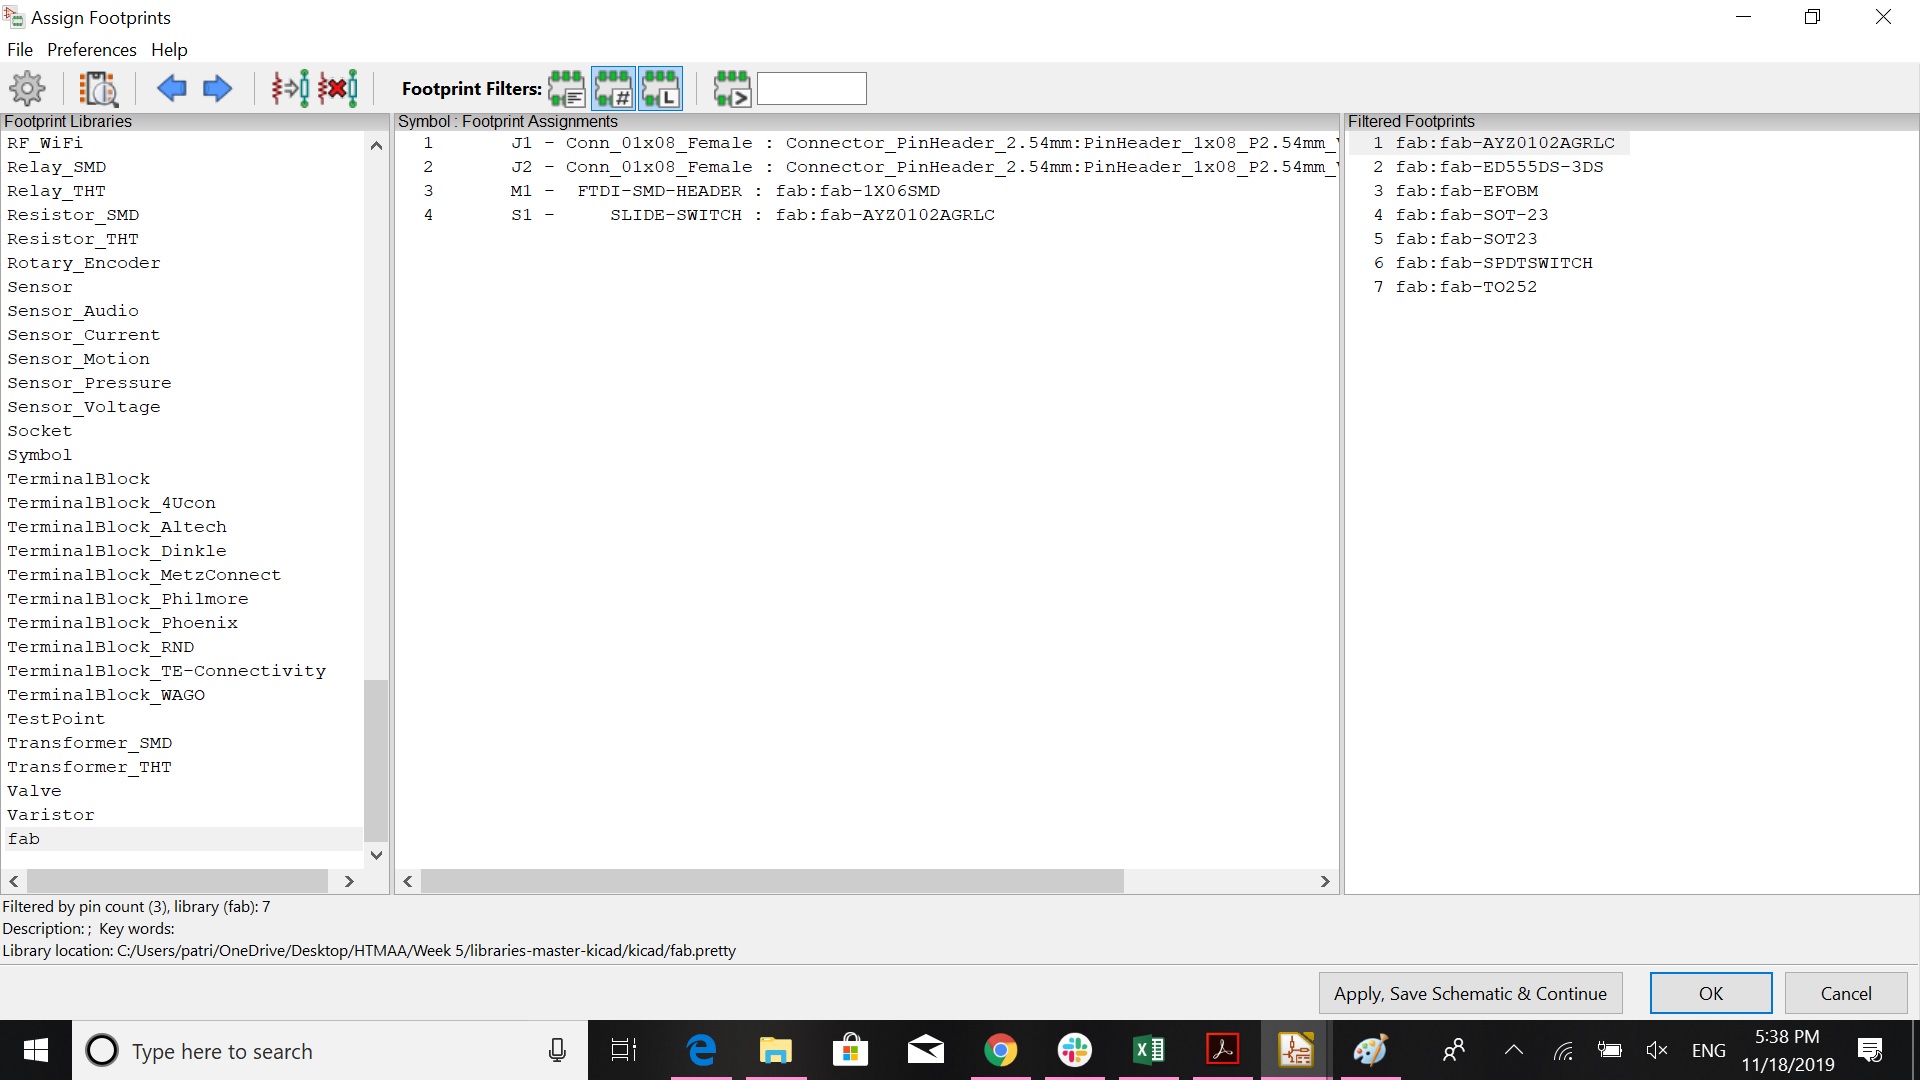
First I drew the schematic, following Neil's design and then I drew the traces and the outline of the board. The footprints used for each board component are shown below.


Production
I used the Roland SRM-20 milling machine, controlled with mods to mill my board. I opened the traces file first in mods and mounted the 1/64" end mill. After setting the origin and zeroing the tool Z-axis manually, I set the cut depth at 0.004", the maximum depth at 0.008" and the offset at 2. I then sent the file to the machine and everything went smoothly. After milling the traces of the board, I mounted the 1/32" end mill to the machine and I imported the outline file in mods. I used the default settings, set the origin, zeroed the Z-axis and sent the file to the machine. My board was ready!
Then, I went and found the necessary components to be mounted on my board:
- 2x 01x08 Pin Header Female, 2.54 mm, SMD (on which the ESP32-CAM chip will be mounted)
- 1x FTDI SMD Header
- 1x Slide Switch
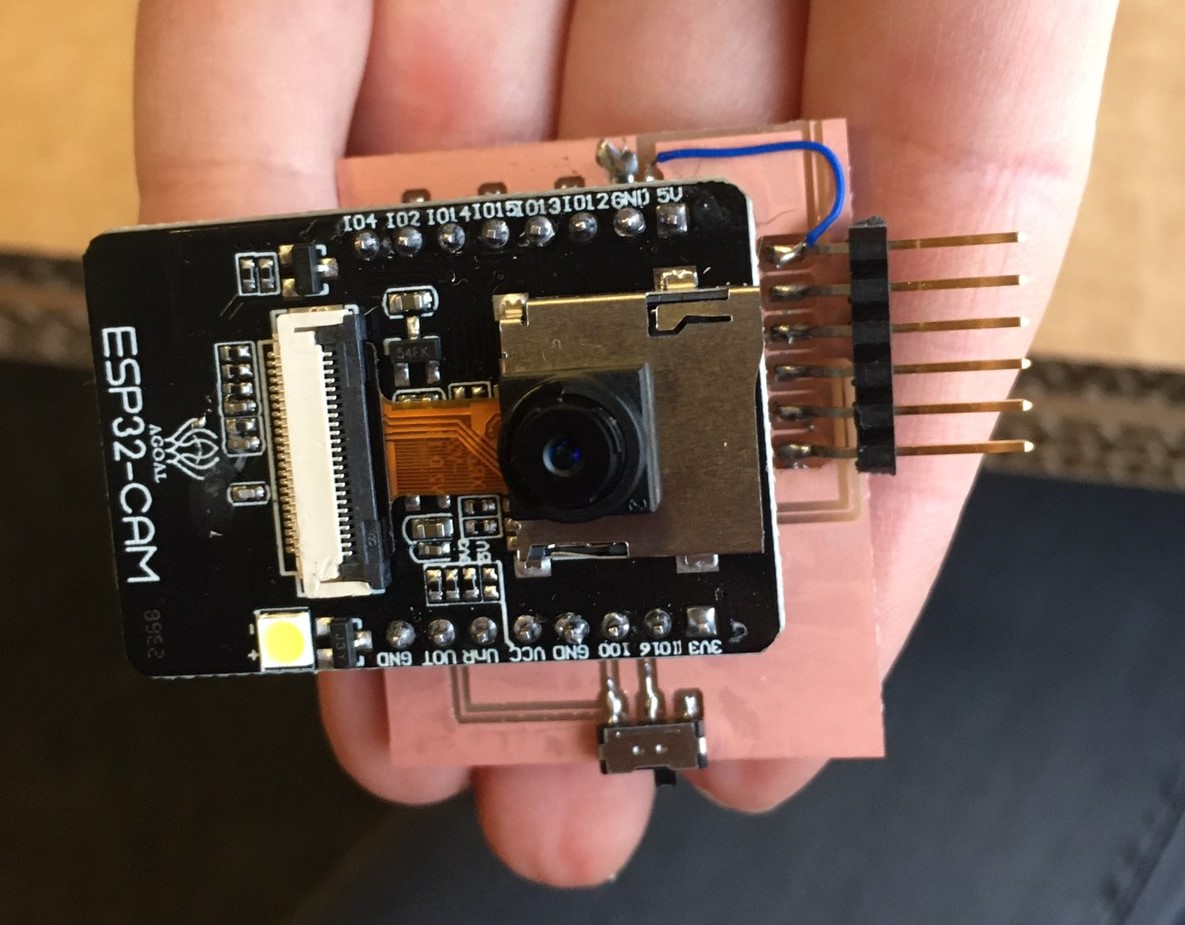
While soldering I realized that I have lost one trace on the top end of my board, and Zach (thank you so much!) showed me how to "save" my board by soldering a cable to substitute the lost trace. Soldering went pretty smooth!
Programming
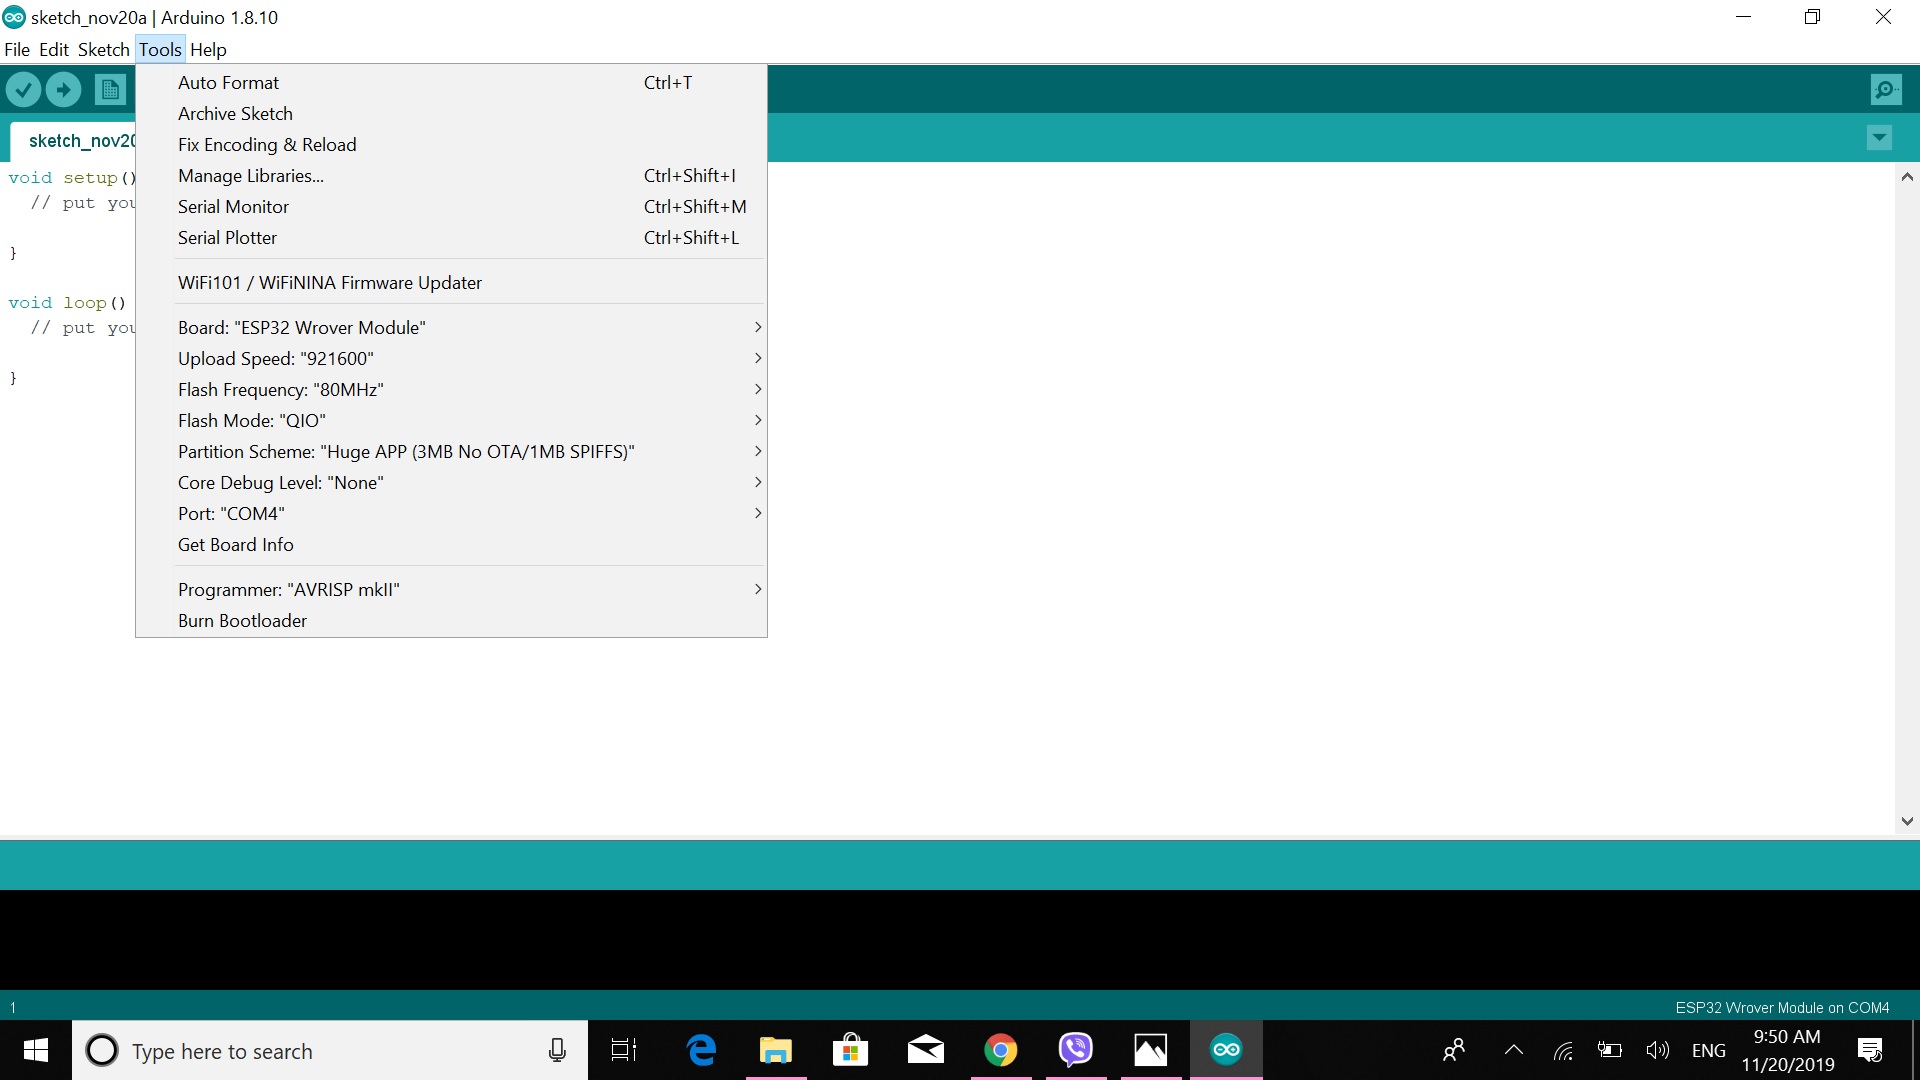
I connected the board to my computer using an FTDI cable and used the Arduino IDE to program it. I first followed this video in order to install the ESP32 Board in Arduino IDE, and then followed the instructions in Neil's video to upload the code on the ESP32-CAM chip and obtain its IP address.

Web Camera
As soon as I got the IP of the Web Camera (192.168.43.140), I typed it on my browser and found my camera module!! After changing the resolution to SVGA(800x600), I hit start streaming and the web cam was working!


My next step now is to connect this module with my temperature sensor that I developed during the Input Devices week in order to be able to view the temperature measurements together with the video on the web.