Final Project
Magic Wand
The Original Idea (from Week 1)
My final project idea is a magic wand. At Universal Studios, you can buy an ultra-expensive Harry Potter
wand and it'll trigger special effects around the park if you wave it correctly. I want to do something
kind of similar (but with a totally different implementation and hopefully much cheaper) - making a magic
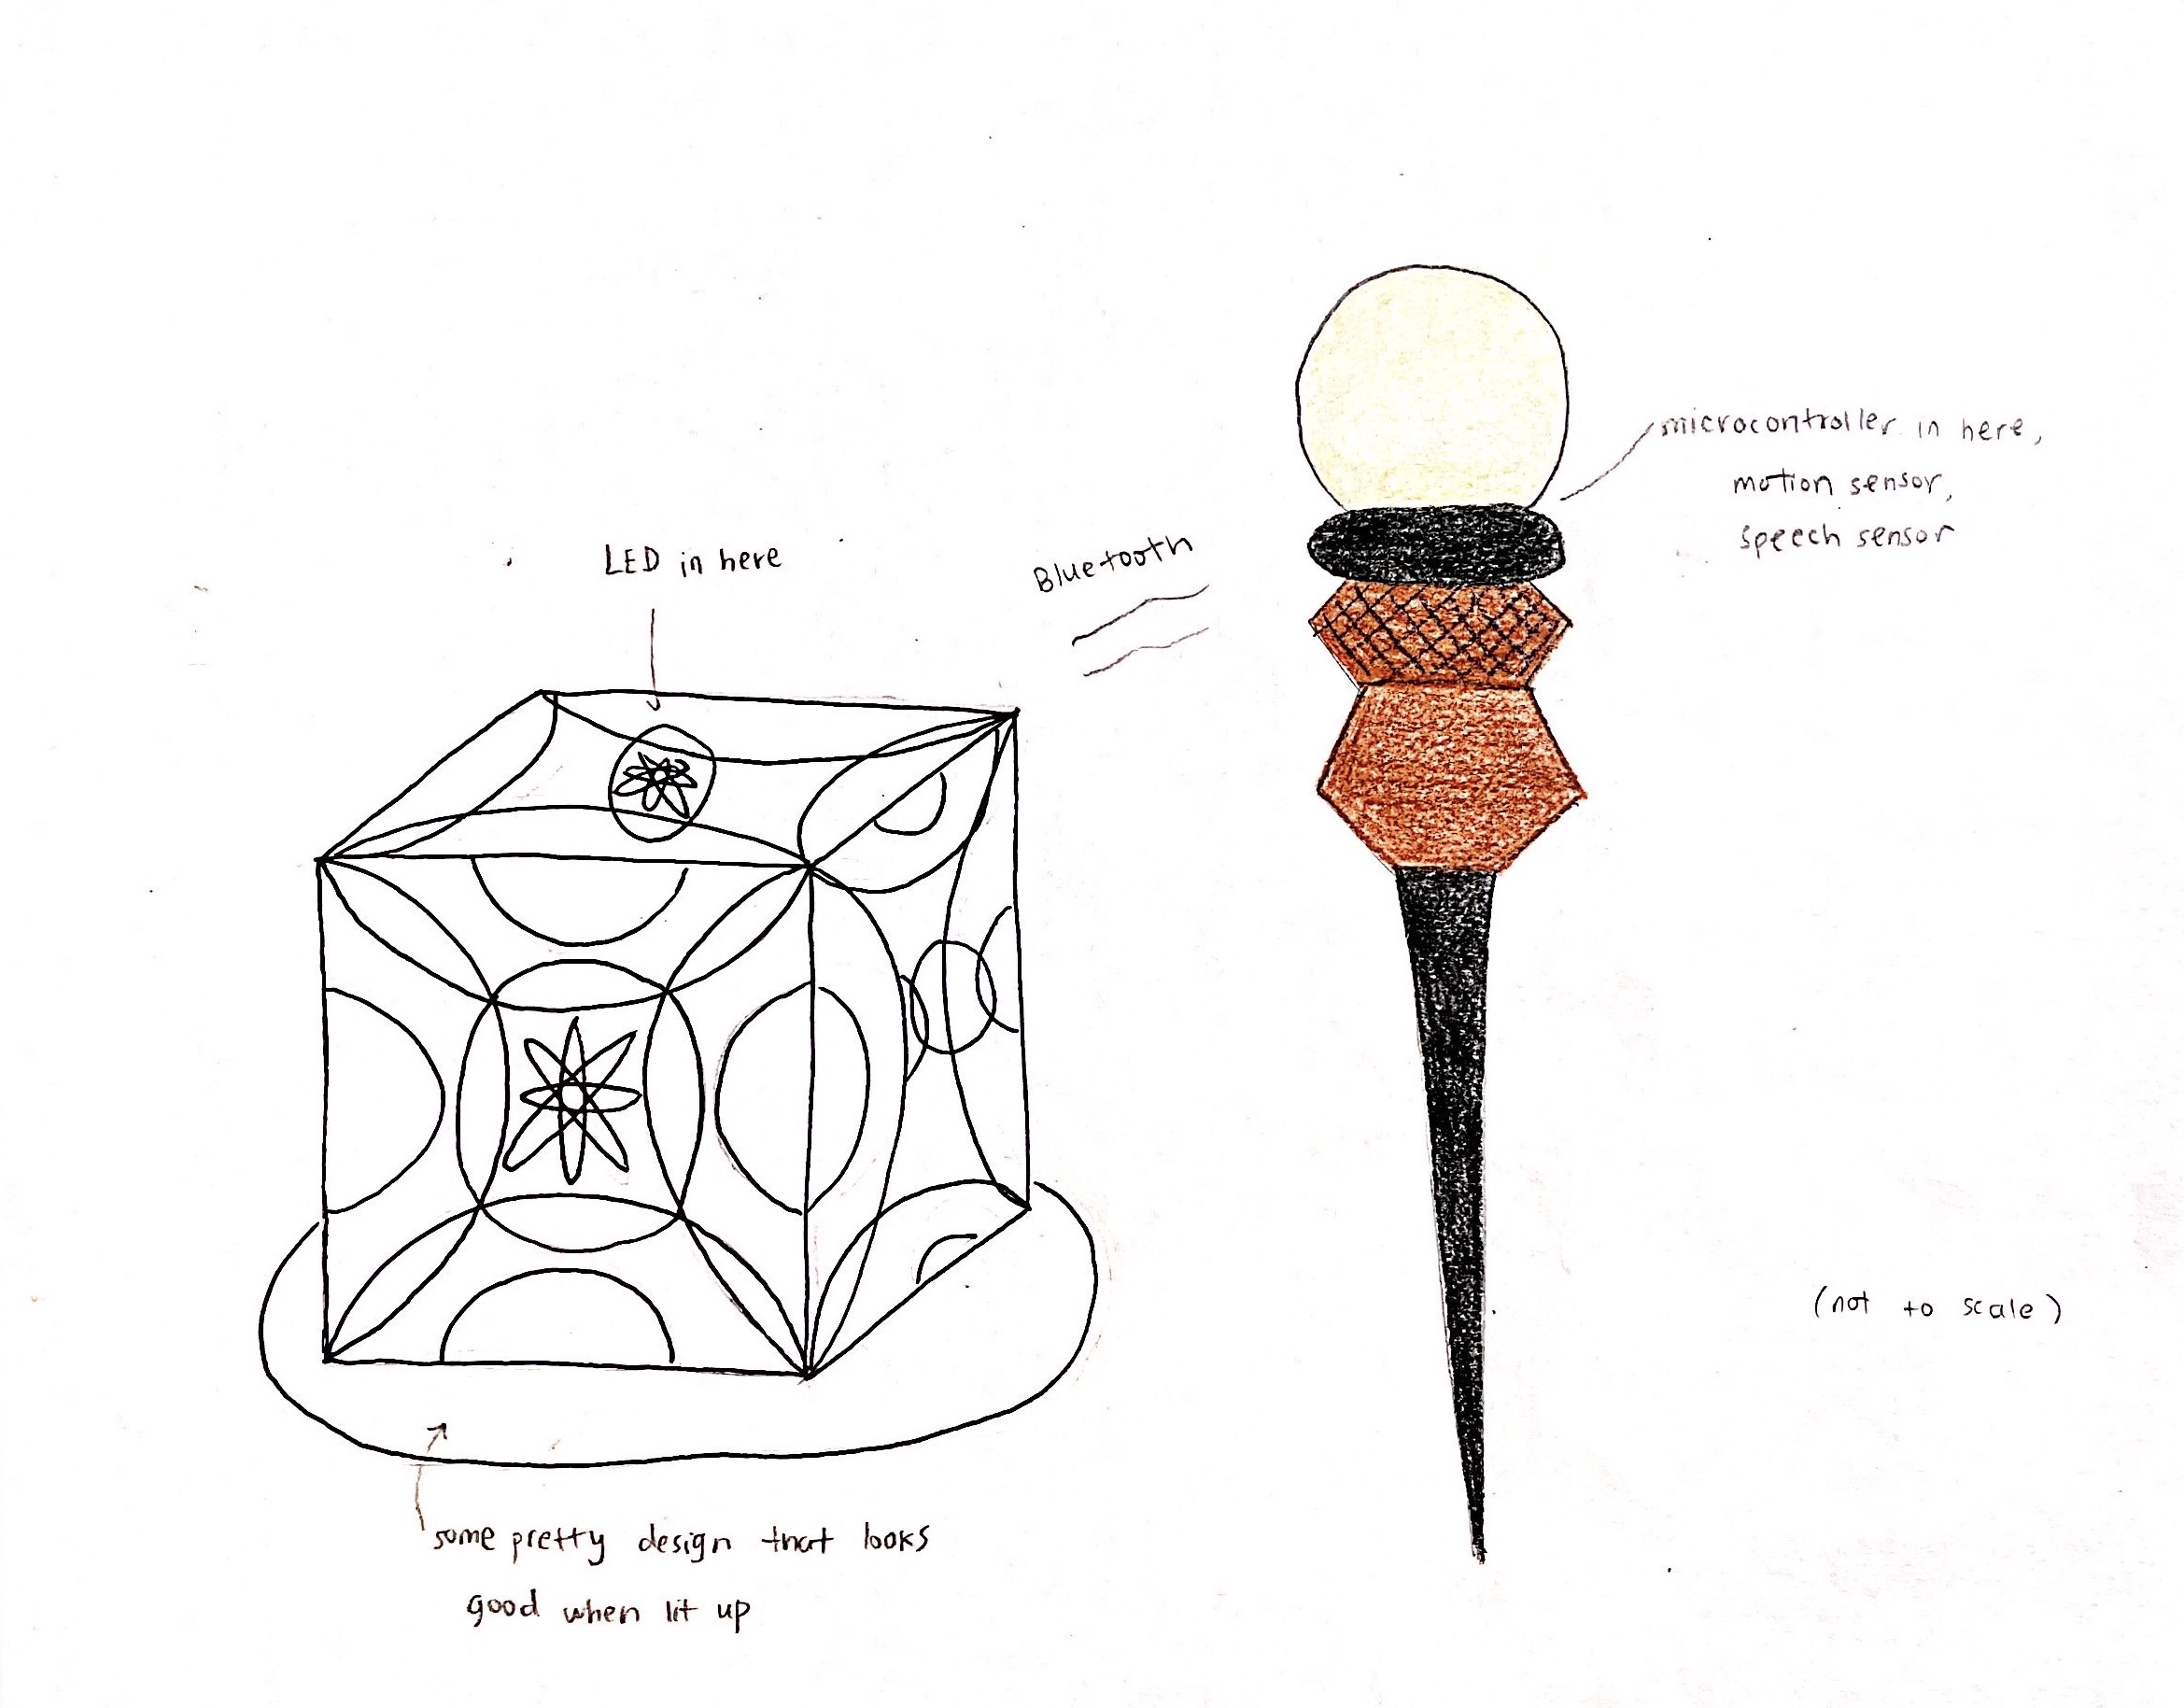
wand that controls a pretty box/lamp. The wand would have a speech sensor (microphone)
and a motion sensor (IMU), so the user has to say the spell and wave the wand correctly in
order to control the box. I would like for the box to be able to light up, spin around,
and open/close.
The Updated Idea (around Week 9)
Upon further thought, specifically from realizing that I am extremely bad at electronics, I am simplifying
the project to have the wand just detect motion, and have the lamp light up in different
patterns. If I have time, I'll add a speaker to make the lamp play music.
The Wand
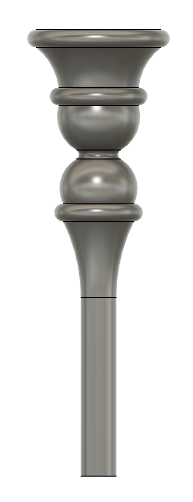
CAD: Here is my design for the wand. I used this wand
from the Internet as inspiration.
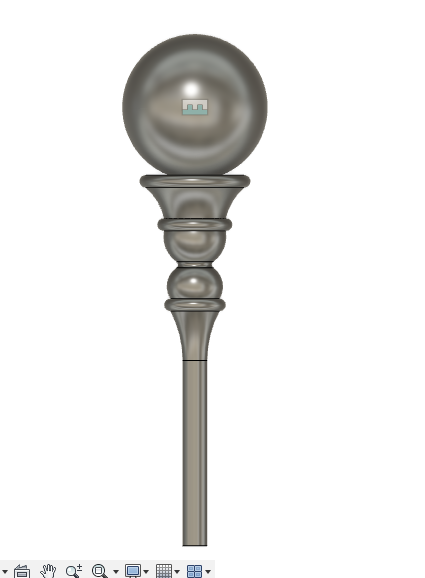
The ball will be a plastic bath bomb mold shell
(or something similar) with my PCB board with the sensor inside. I'll spray some coating or something on the outside of the ball so that you
can't see inside. The ball will be glued to the wand stick. The wand stick will be molded and casted - haven't decided on the material yet. I made a vaguely similarly
shaped thing for molding and casting week so I'm fairly sure it'll work.
Electronics: the PCB board will have an ESP32, the MPU6050 IMU, an RGB LED, and a battery.
In the input/output weeks, I got the MPU6050 IMU to detect motion using a SAMD21E microcontroller. For my final project, I will be using an ESP32 instead
because it has more storage and has wifi/bluetooth capabilities which are needed to communicate with the lamp. With the additional storage, I'll be
able to store the past 50 accelerometer readings and send them to a basic ML algorithm in Python to classify it into a specific gesture (or indicate that
no gesture was detected). Also, I'll be able to use an existing library for the IMU instead of reading the raw sensor values from the registers.
The Lamp
CAD: I haven't decided how I wand the lamp to look, but if I don't think of something good or don't have time to make one since it takes me 7 tries to make
one PCB board, then I'll use the press fit ball that I made in week 2.
Electronics: I will put adressable fairy lights around it
which will be connected to a PCB board on the inside of the lamp. The PCB board will also have an ESP32 and a battery.
Networking/Communication
My goal is to get accelerometer readings from the wand, run them through a simple ML algorithm to classify it into a gesture (or not) and
send the result to the lamp so it can do the appropriate response. I'm a bit confused at the moment about the best way to connect Arduino to Python and
how to send the results to the other ESP32 (send the results to a server and have the lamp ESP32 continuously request from the server??) but
I am very confident that I can figure it out once I have functioning boards to work with. Also, we did a lot of Arduino Python server stuff in 6.08
so I can look through my code from that class.
Some interesting/sus tutorials:
ESP32 as server,
ESP NOW protocol
The Final Documentation
The Wand
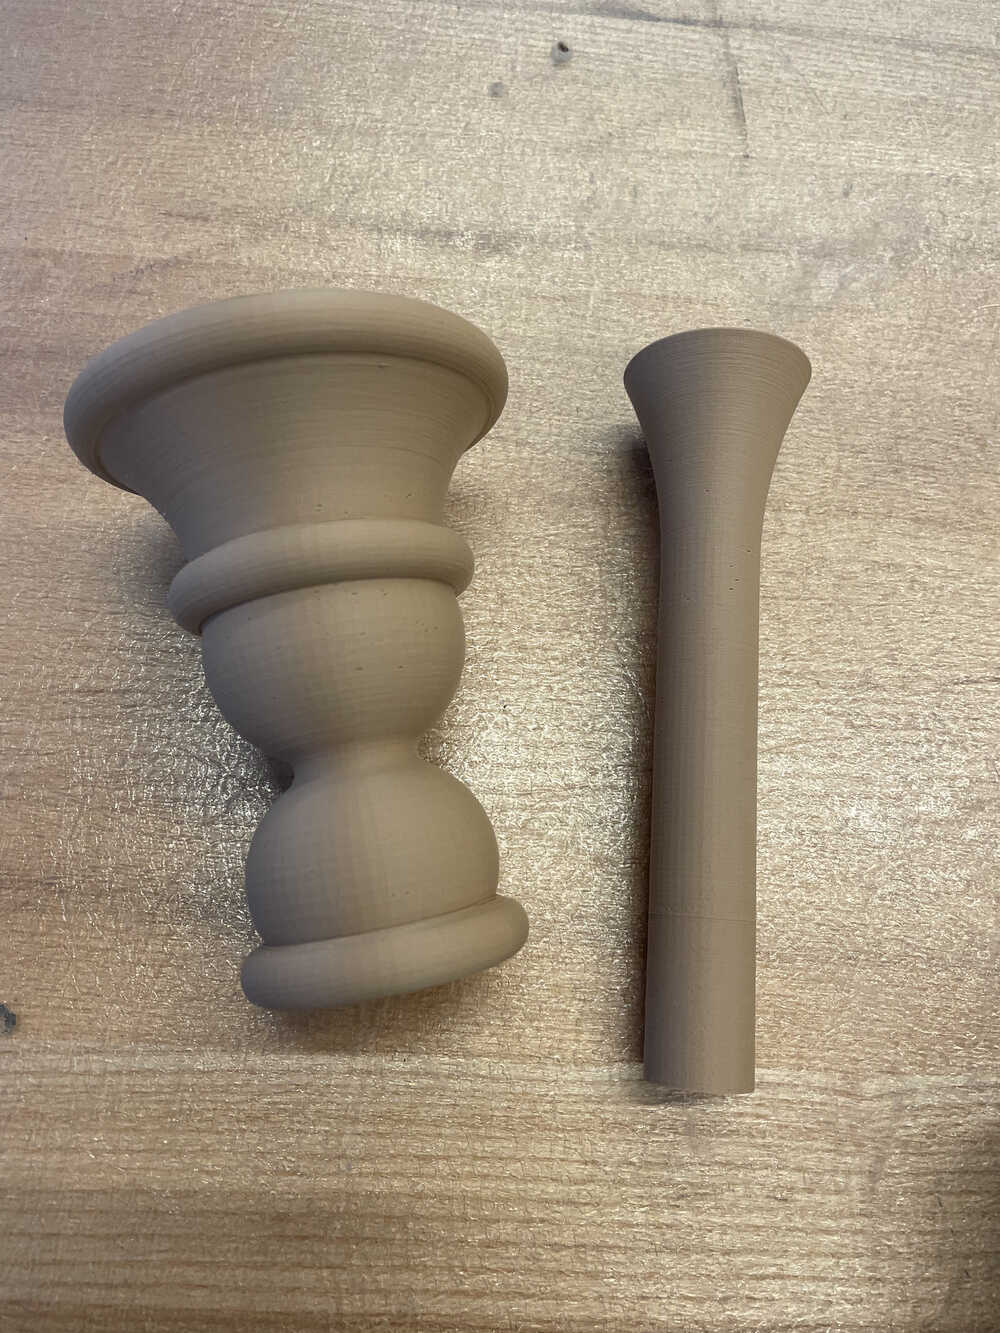
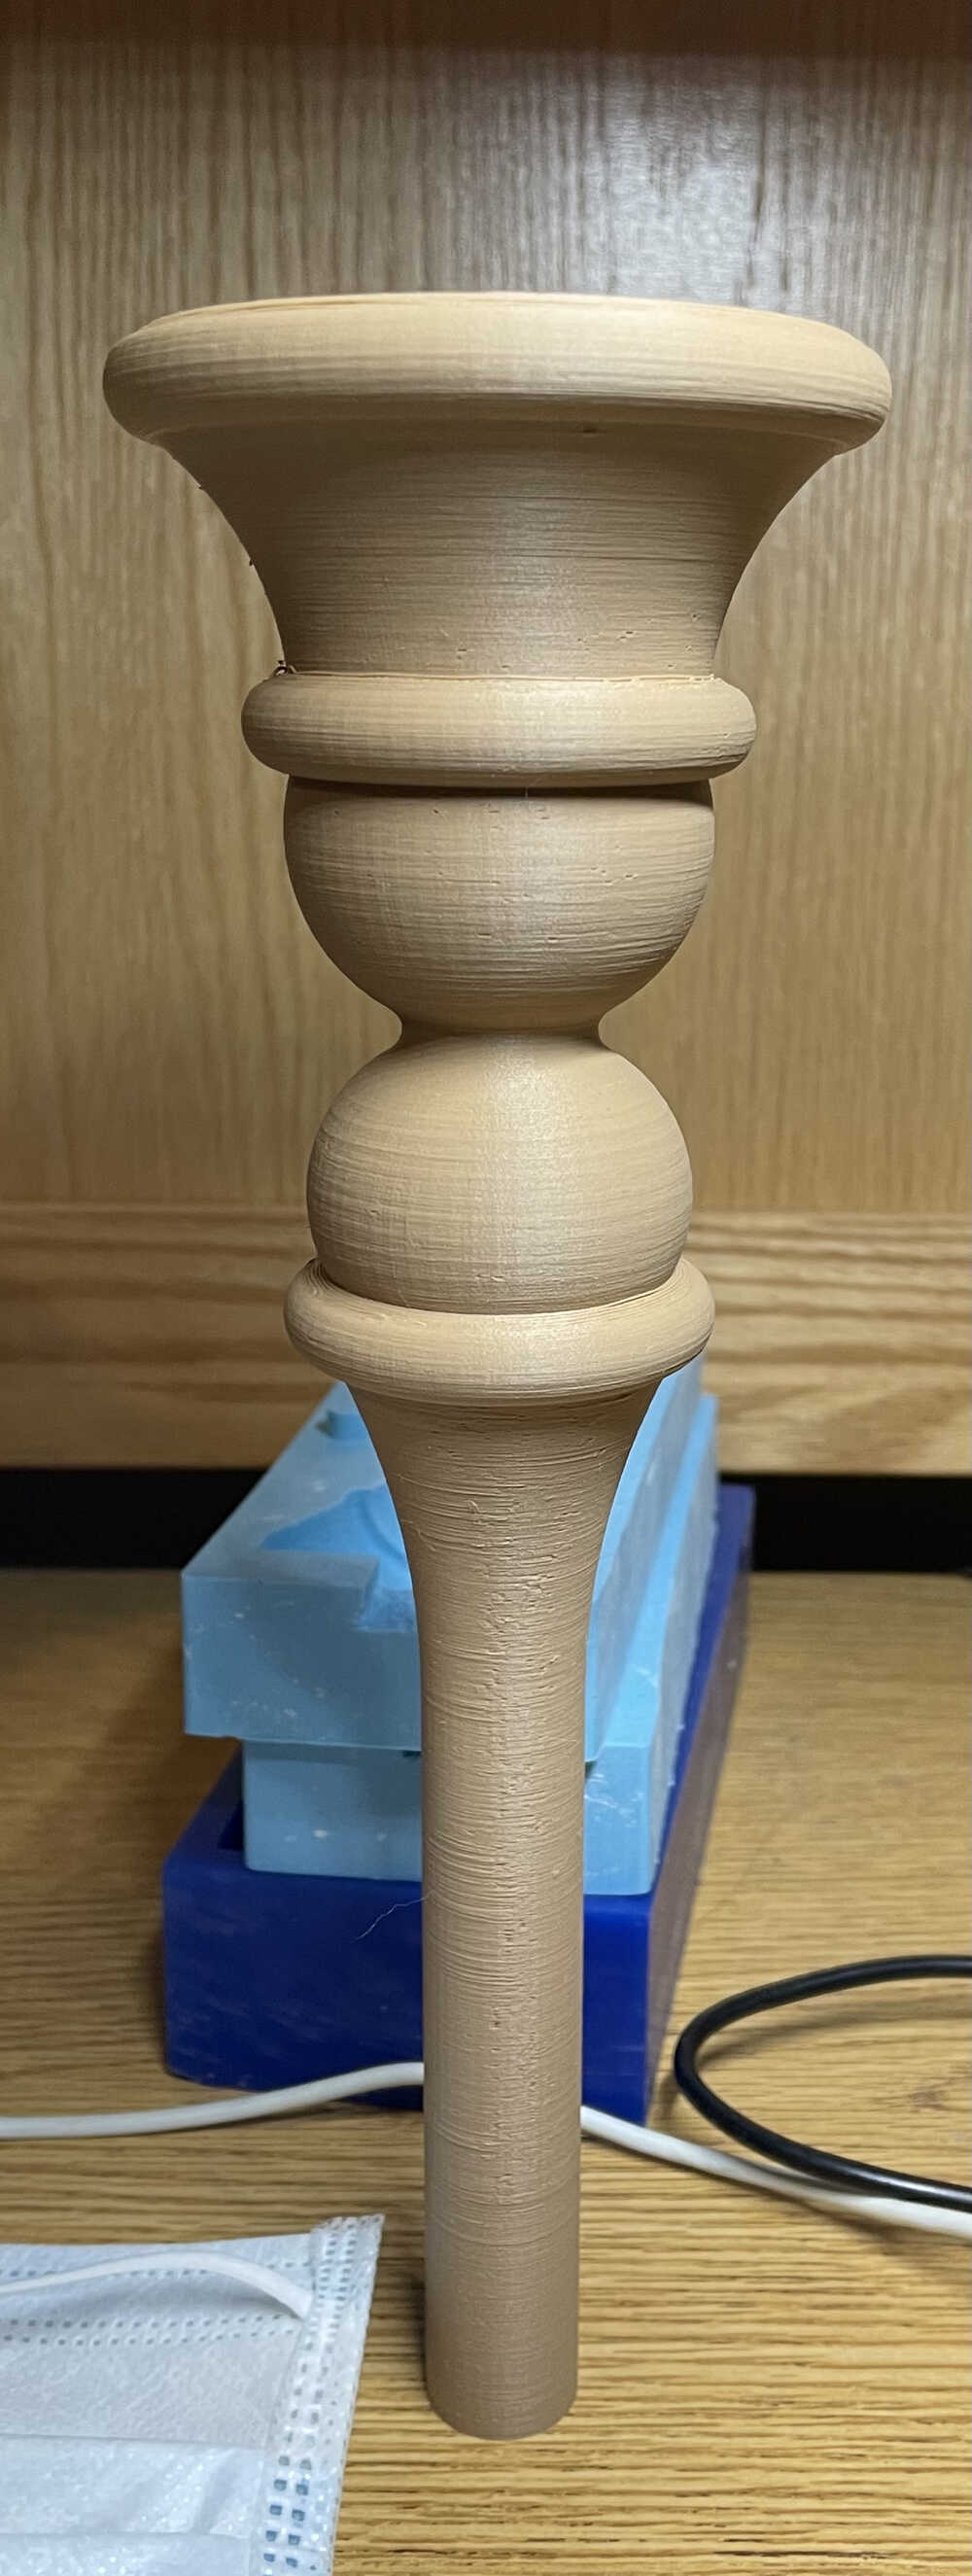
Physical Design: I designed the wand in Fusion 360. Anthony suggested that I 3D print it instead of molding
and casting it so I could make it bigger (since the wax blocks are only 7 inches tall). Anthony is a genius!!!!! We used a wood
filament on the Prusa and it turned out so beautifully!! We had to cut it in half and print 2 pieces because it was too big for the Prusa,
but I superglued it together at the end and you can't even tell that it was two pieces! The final version is 10 inches tall. Unfortunately,
it fell off the table when I wasn't paying attention and the long part snapped in half so I had to glue it back together. Luckily, with some
sparkly string I covered it up nicely.
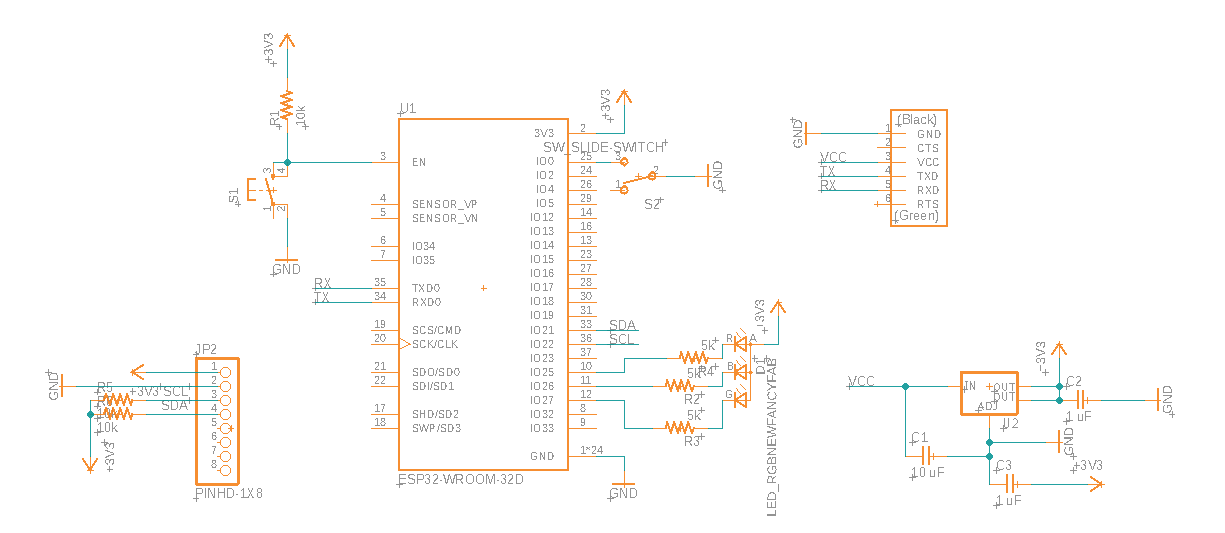
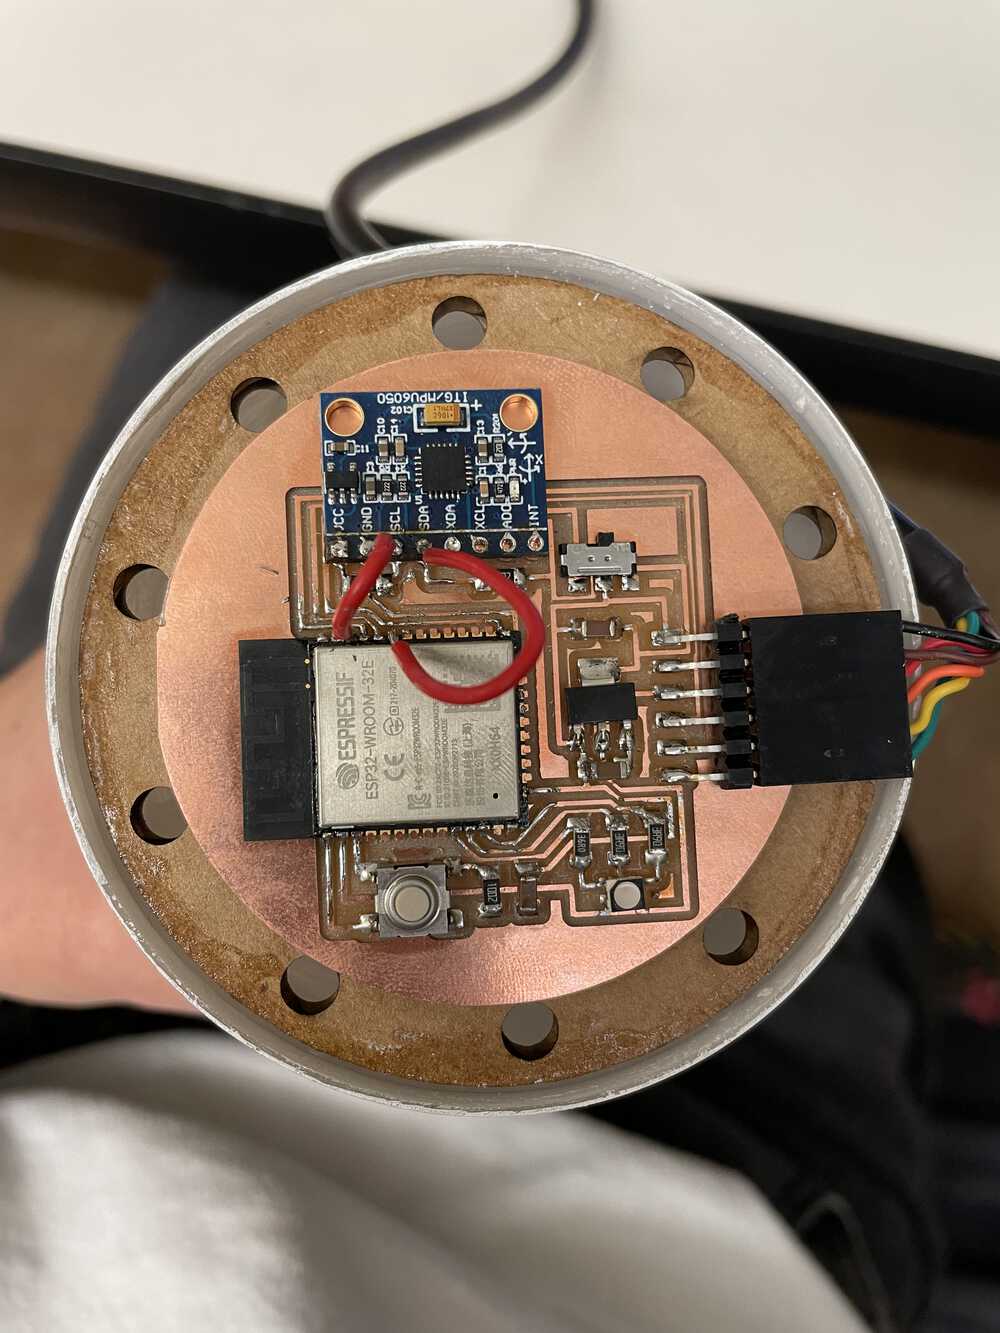
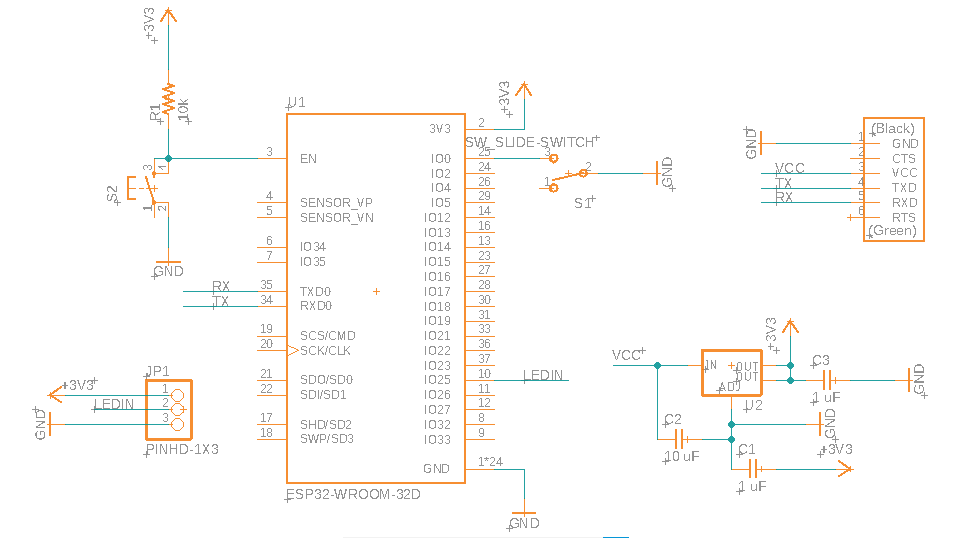
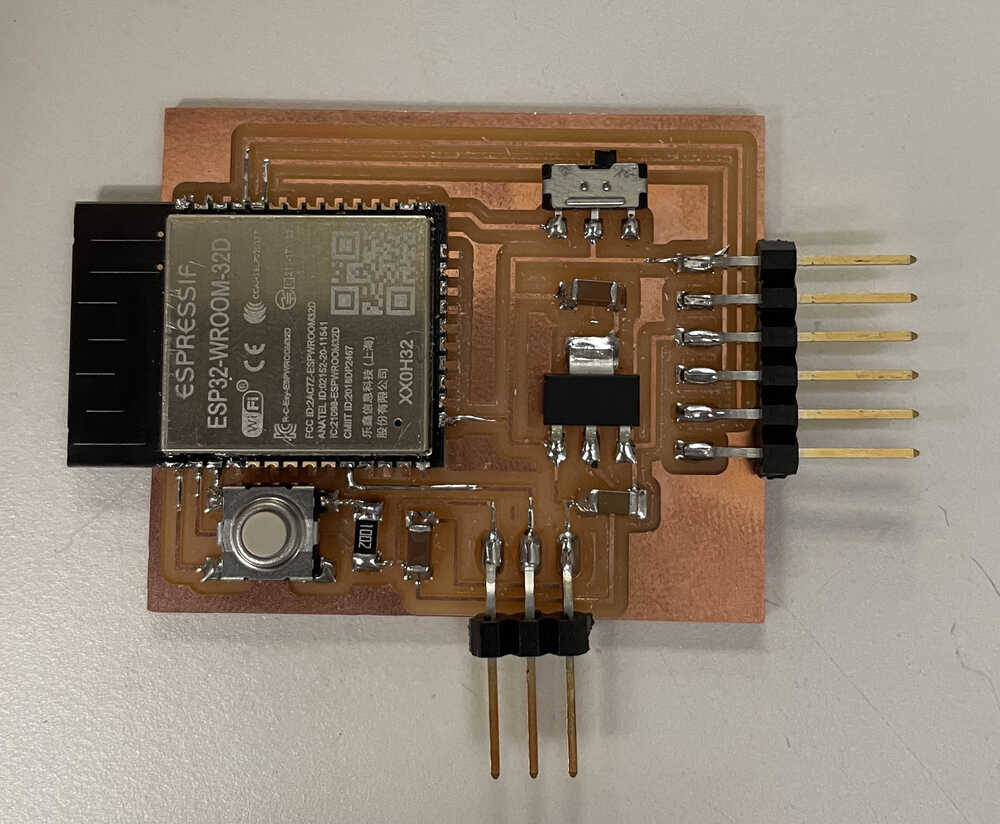
Electronics: The PCB board for my wand has an ESP32, an MPU6050 IMU, and an RGB LED. I started with Neil's
basic ESP32 board
and added the extra components. Unfortunately, I messed up by connecting SCL and SDA on the IMU to the pins numbered 21 and 22 on the ESP32 footprint
instead of pins GPIO21 and GPIO22, so I had to fix it with jumper wires. Here is the (fixed) schematic and the final board.
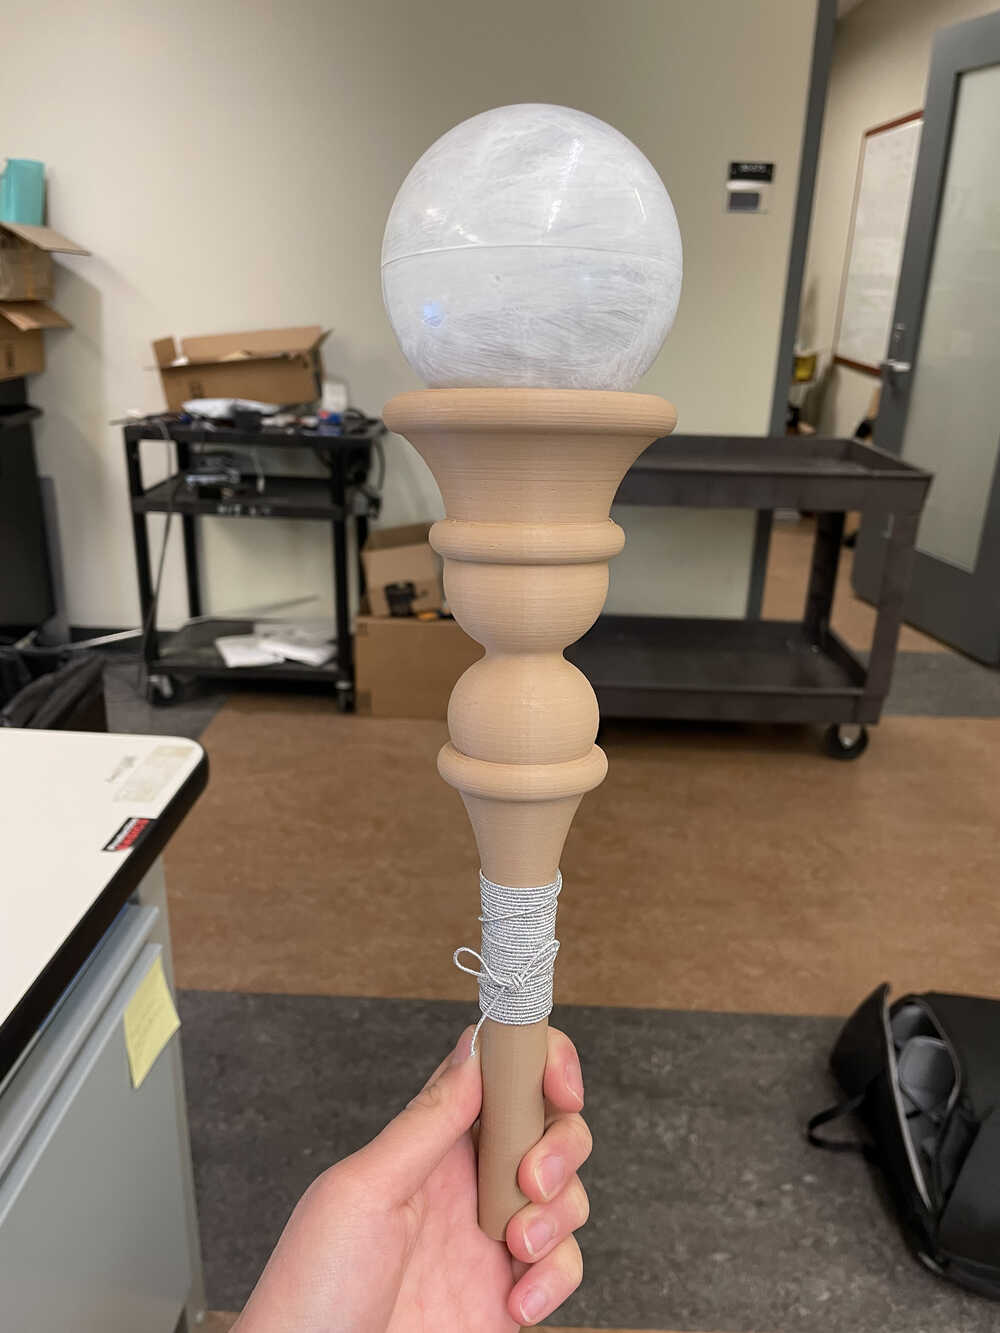
I bought an ornament ball from Michael's for $1, stuck the PCB board inside, and painted the outside of the ball to give it a frosted glass look and
so you can't see the PCB board inside it. I think it looks pretty nice!
Code: My wand is a state machine. It starts in the WAIT state and continuously reads the accelerometer data. When
it detects the "ready" position, which is holding the wand vertically, the white light turns on and it moves to the WRITE state. In the write
state, it sends the acceleration data (300 samples each for acceleration in the x, y, and z axes) to a Python script via the pyserial library
and moves to the READ state. In this state, the board waits for the script to send back a gesture. The Python script puts the data through a
pre-trained machine learning algorithm and sends back the detected gesture (or that no gesture was detected). Once the board recieves a gesture/no gesture value,
it changes the color of the LED, sends the gesture to the board inside the lamp via the ESP NOW protocol, and moves back to the WAIT state.
Here is the Arduino code for the wand.
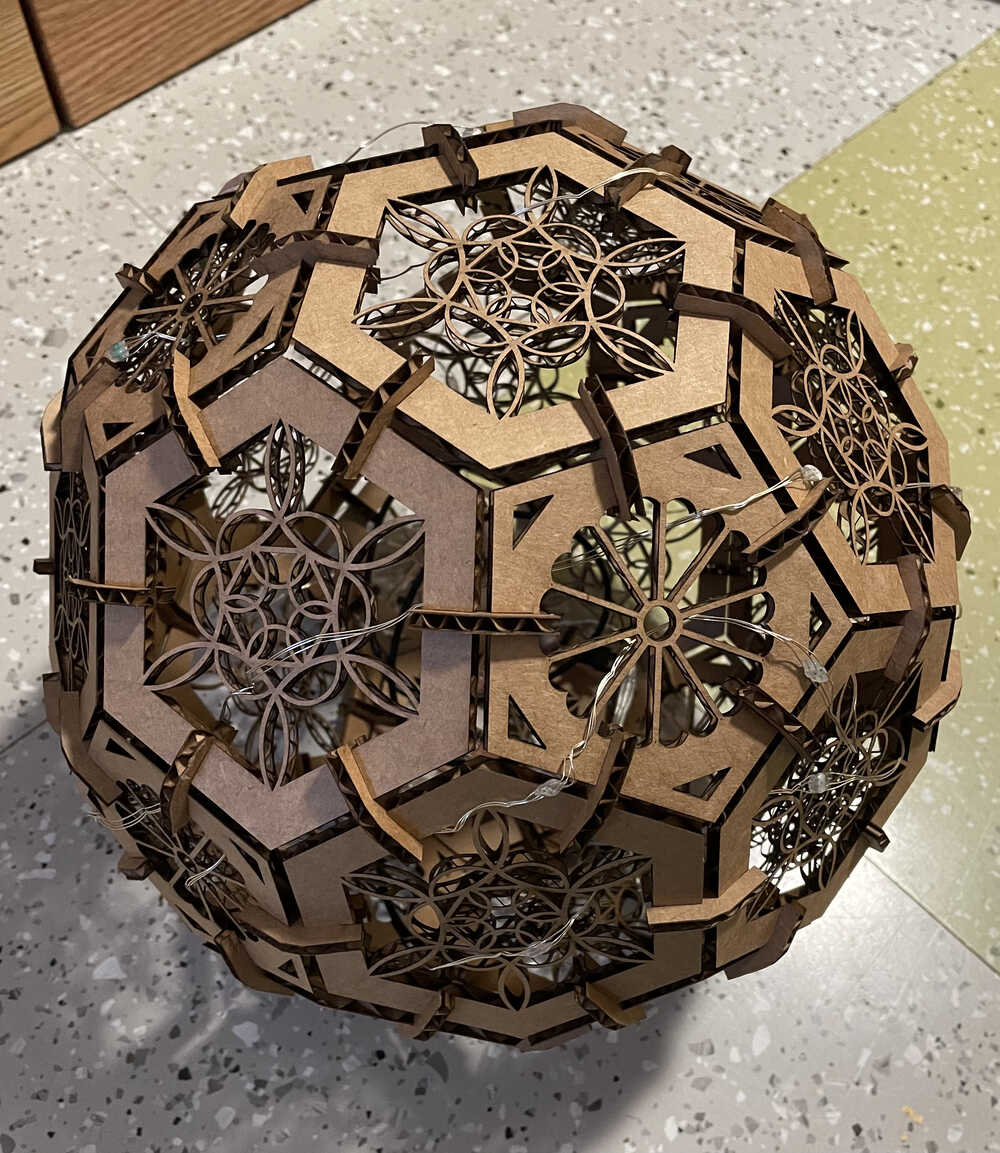
The Lamp
Physical Design: I modified my soccer ball lamp design from laser cutting week to make the holes bigger so that I could
string lights through them. For the lights, I bought fairy lights
that use the WS2812B LED, so they could still be programmed with the Adafruit NeoPixel library. I like them a lot because they are easy to shape. They cost $12 for 16 feet (with 50 LEDs).
Electronics: The PCB board for my wand has an ESP32 and breakout pins for an LED strip. Here is the schematic
and board.
Code: The board waits for a gesture from the wand and changes the light pattern on the lamp accordingly.
Here is the Arduino code for the lamp.
Networking and Communication
Code: I used the ESP NOW protocol for sending data between the wand and the lamp. I followed this
excellent tutorial to implement it and it works
quite well. I sent data from the wand to the Python machine learning script and back through serial using the pyserial library. Because of the
serial communication, I had to use a FTDI cable connecting my wand to my laptop.
For the record, I tried EXTREMELY hard to make everything fully wireless. As in I spent the same amount of time trying to implement this as
I did writing all of the rest of my code. It is surprisingly hard to send data between a microcontroller and Python. Some things I tried include:
1) converting the machine learning model to C code so the ESP32 can directly run it, 2) sending the accelerometer data via Bluetooth using Bluetooth
Serial and the pybluez library, and 3) uploading the data to Firebase and downloading it in the Python script and uploading the gesture back. Method 1) didn't work because the
libraries that do that (micromlgen, emlearn, sklearn-porter) all have TERRIBLE documentation and I couldn't get it to work for the life of me. Like
why would you write a library and not write good documentation for it.....it is literally useless without documentation.....ANGERY. Method 2)
didn't work because the Bluetooth Serial library takes up a ridiculous amount of space - so much that there wasn't enough space left on the ESP32 for
the rest of my code. I actually got method 3) to work but there were some bugs and I didn't have time to fix it :(
Machine Learning
Code: The machine learning was super simple. I used a Decision Tree and a K-Nearest Neighbors classifier to classify the
gesture based on the acceleration data. If the two classifiers agree, then I say that a gesture was detected, and if they don't the I say that no
gesture was detected. I implemented everything with the scikit-learn library and trained the models on my own gestures.
Bonus
I was feeling a little embarrassed because my project was simple, so I added two bonuses. The first is that certain gestures will
make music start playing on my computer (I didn't have time to add a speaker to my lamp board). This was easy to implement
with the pyaudio library in Python. The second is drawing with the wand! If you've watched Disney Channel, you'll understand the beginning of my video.
I modified the code from a ball tracking tutorial
to implement this using only Python.
Summary
Hopefully you enjoyed reading about my final project! I definitely had a great time in this class. Special thanks to Anthony for giving me
many ideas about how to implement things and helping me fix things when they broke.