Week 2
Computer Controlled Cutting
This week's assignment: 1) Cut something on the vinyl cutter. 2) Create a parametric press-fit
construction kit.
Part 1: Vinyl Cutting
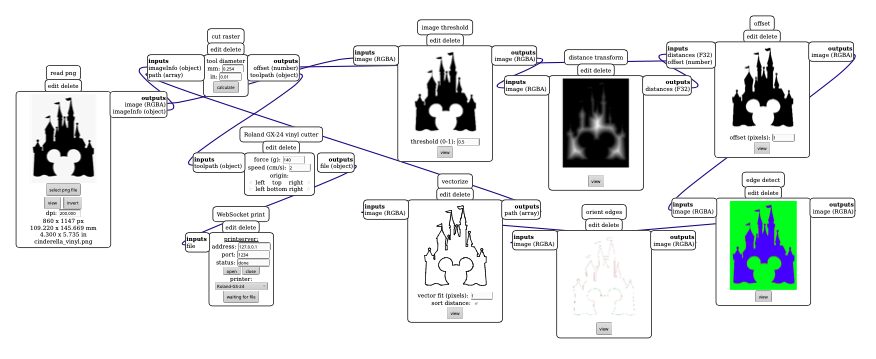
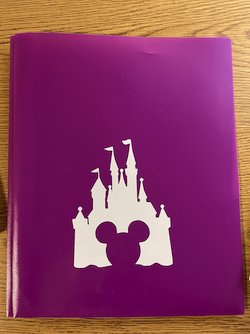
I made a very cute sticker from an image I got online. I used mods to streamline
the workflow for importing a png and setting up the parameters for the vinyl cutter.
After sending it to the printer, I stuck it on transfer paper, peeled the backing off, stuck the
sticker on my folder, and finally peeled the transfer paper off. Here's the final product:
Part 2: Press-fit Construction Kit
As a group, we characterized the laser cutter's focus, power, speed, rate, kerf, and joint clearance.
For the cardboard in the shop, we found these values to be best for the big laser cutter:
- Power: 100%
- Speed: 10%
- Kerf: 0.5 mm
- Joint Clearance: 4.1 mm
I went through a bunch of ideas for my construction kit including a mushroom and a rocketship,
but I gave up on all of them because I had never CAD-ed before and it is very hard :( So I decided
to make a soccer ball lantern since it has fewer parts, drawing on inspiration from people from previous years.
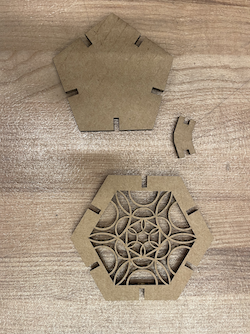
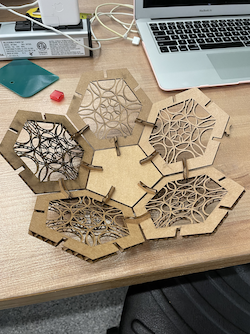
The 3 parts of the soccer ball are the hexagonal face, the pentagonal face, and the connector. I
designed the parts in Fusion 360.
In my first iteration, the parts were way too big, but since my
design was parametric, all I had to do was change some parameter values and Fusion 360 automatically
scaled the parts! Work in progress:
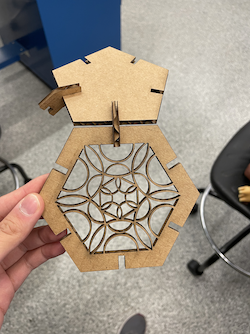
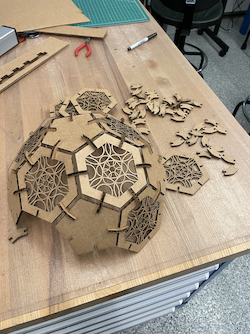
Pro tip since lots of people were asking: in Fusion 360 there's a circular pattern tool (Create ->
Pattern -> Circular Pattern) that lets you copy designs in a circle! So I only had to make 1/6 of
the design on my hexagon and the circular pattern tool did the rest. Here is my finished product:
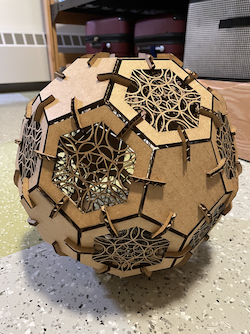

Putting all the pieces together was kind of a struggle, but once it was all assembled it was super sturdy. I'm
really happy with the way it turned out! Unfortunately you can't play soccer with my ball, but feel free to use
it for a romantic candlelit dinner :)