11
NETWORKING AND COMMUNICATIONS
This week we had to work on desiging, building, and connecting wired or wireless node(s) with network or bus addresses
| Tools: | Arduino IDE |
| Files: | Servo Board, OLED Board |
| Date: | 11.23.2022 (update: 12.18.22) |
Network Design
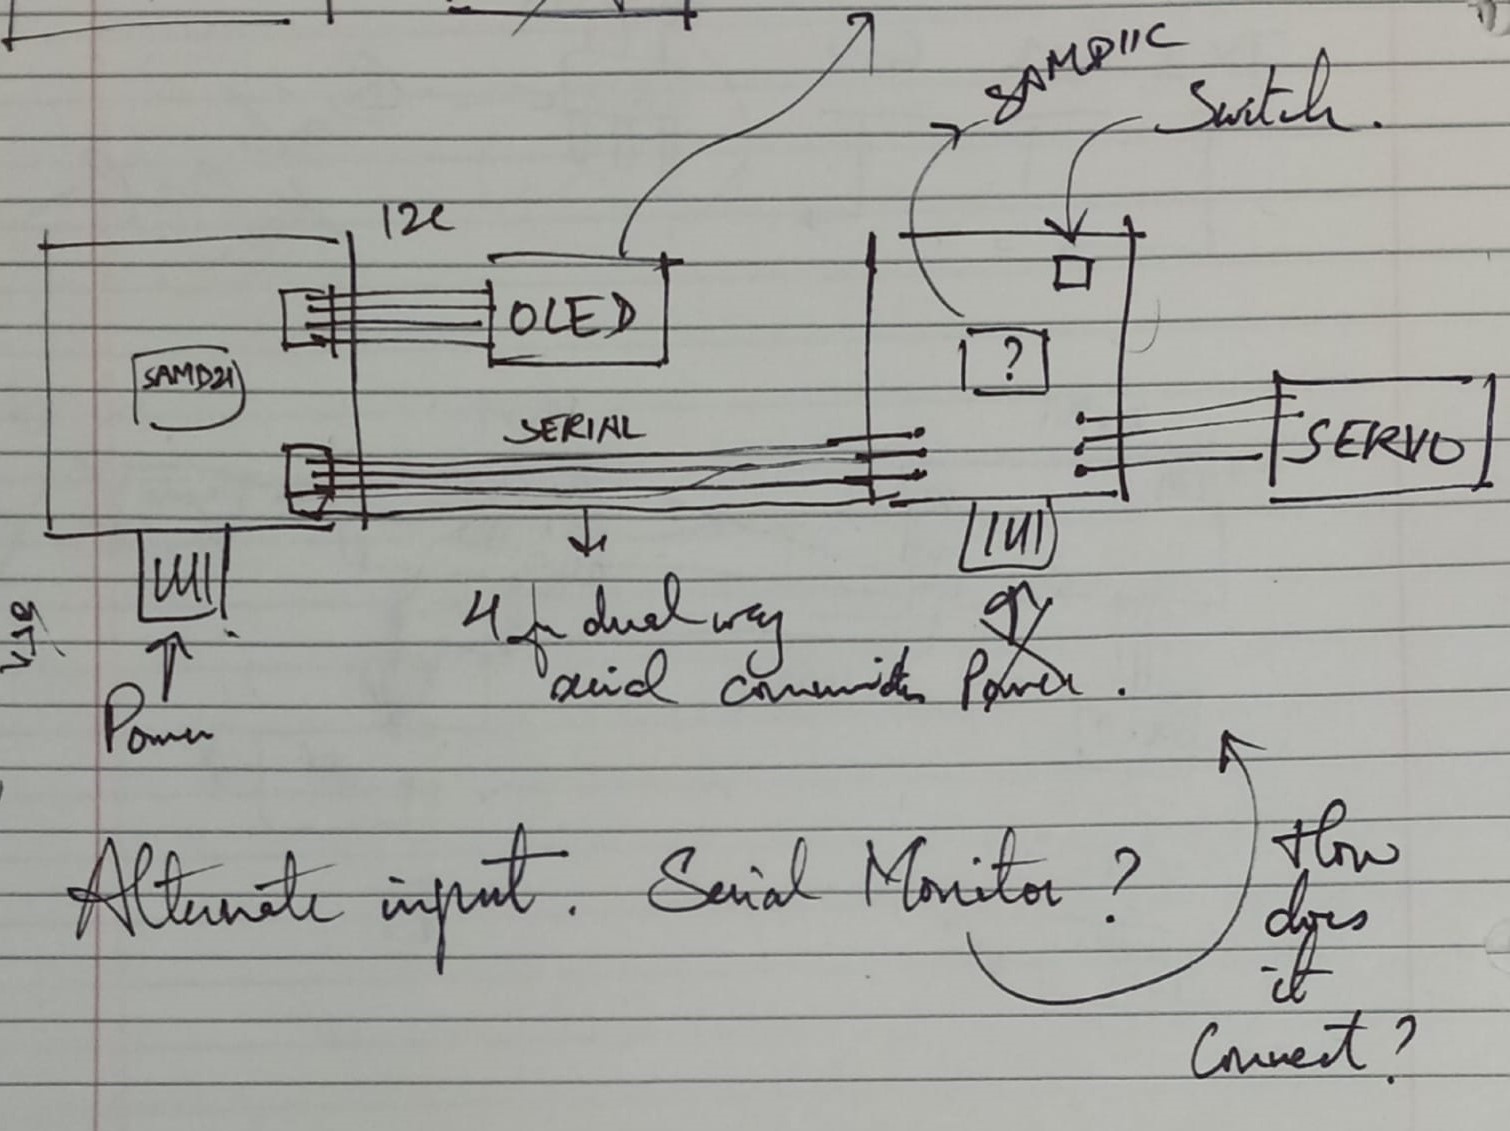
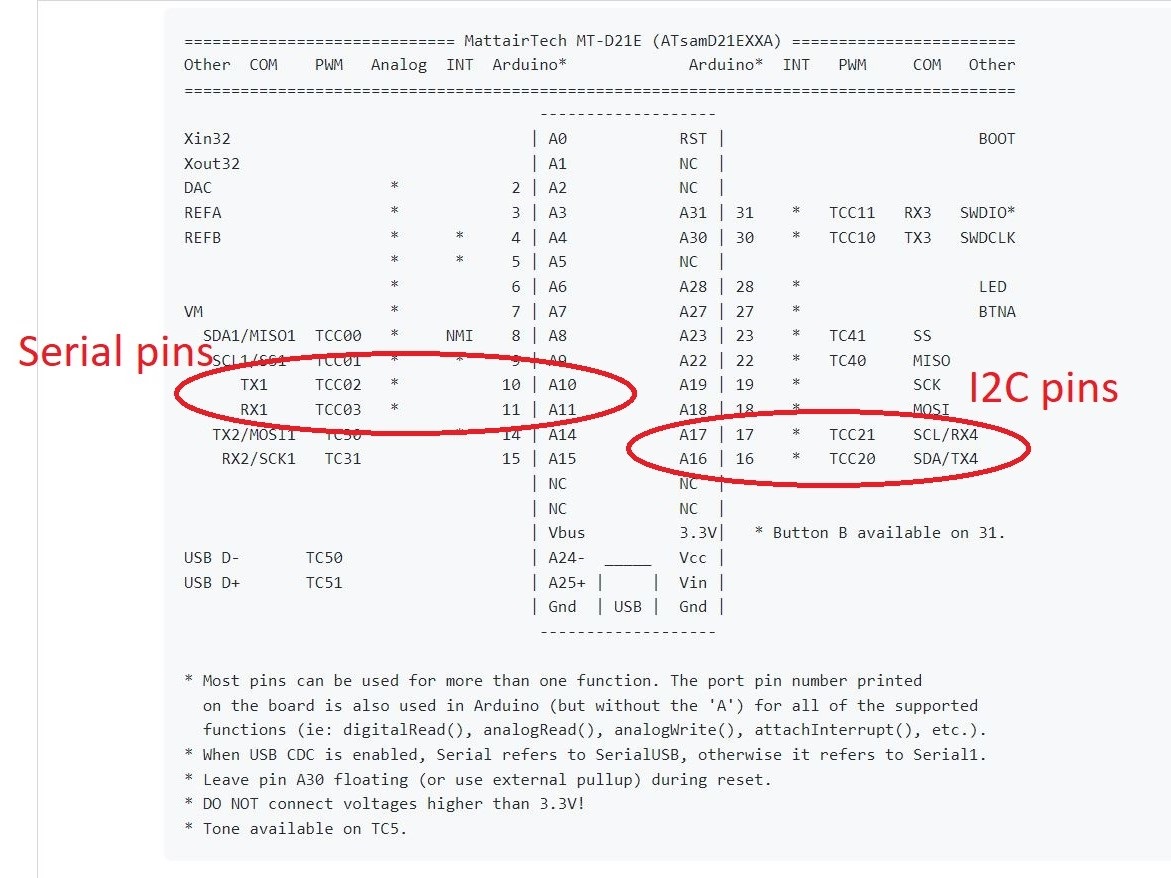
I wanted to have two boards, one controlling a servo motor and one controlling an OLED, for my final project. These boards would need to communicate between eachother to sync their responses to the user input. There would be two alternate modes of input: word count fed through a serial monitor and a button. I planned on using Serial communication (i.e. UART) for this purpose. The OLED which is connected to a SAMD21's I2C pins would serve as the output device. This would receive the necessary input through the Serial pins connected the other board's (with a SAMD11) Serial pins, thus functioning as a secondary board. The other board would have a button for alternate mode of input and would also be the main board to which the user sends her input through the serial monitor. Since the servo motor on the main board needs 5V (as opposed to 3.3V for all other parts), it would also need to be the board powering this network.
Serial Communication
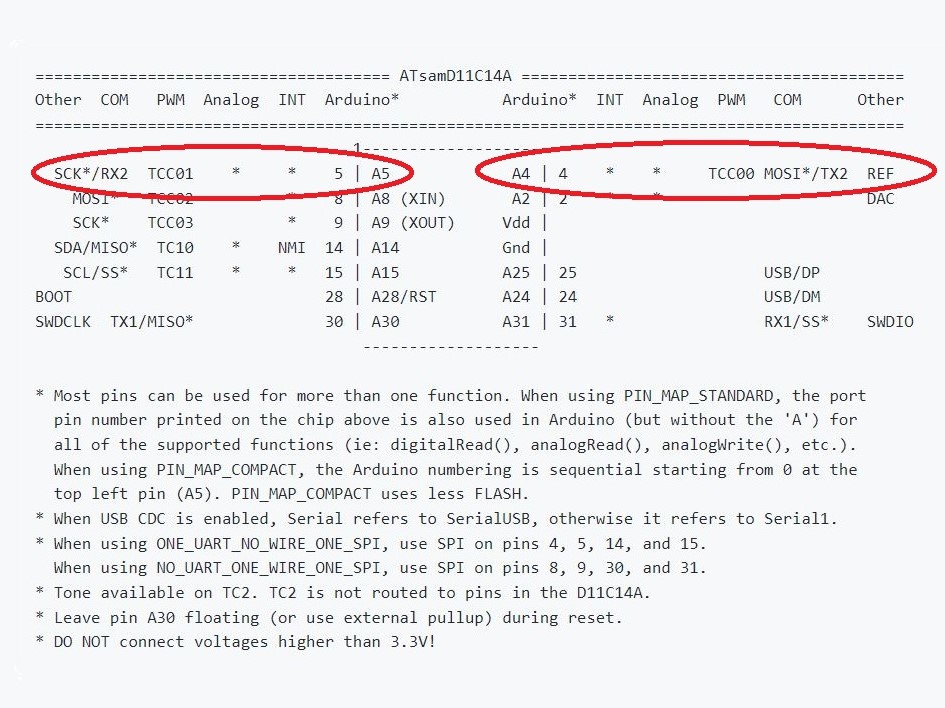
Serial communication necessitates connection between the microcontrollers' Serial pins, which is possible through 2x2 headers connected to TX, RX, GND and 3.3V. It is important that TX on one board goes to the other board's RX, and RX to TX. Thankfully, the board I made during week 9 would allow this because I no longer need a GPS model which requires Serial pins too. The board for week 10 was designed specifically to allow this functionality. In the following boards, the SAMD21 uses Serial1 pins whereas the SAMD11 uses Serial2 pins. I chose to have to bidirectional communication, just in case I wanted to add some functionality at a different point.
Programming
Anthony pointed me in the direction of the SerialPassThrough example on Arduino which has sample code for sending and receiving data through Serial communication. Despite this, it took me a very long time to establish effective communication between the boards. I assumed that communicating over some wires would be much simpler than wireless communication, but peers who chose wireless were having a much smoother time. Additionally, I found that there is not a lot of beginner level, useful documentation about Serial communication. This meant that I had to spend many hours trying different code and debugging.
It was clear that the code for sending data would be much simpler, because the microcontroller would just be throwing information one bit at a time. Receving on the other hand would need to collect all this data and interpret it. To ease this process, Anthony suggested I add an end delimiter to indicate to the receiving end when the message has ended. Added to this, I also needed to somehow distinguish between the input sent from the serial monitor vs. the button. I simply (still hard to debug) chose to make this distincting using the type (i.e. int vs. String) of the data for the message.
I also learnt that Serial2.print and Serial2.write don't work in a similar way and I needed to do a lot of debugging to find out what was indeed being sent/received. Most of the time it seemed like ASCII or just the first character of a message.
//Servo Board--Sending
//SAMD11C
//The following excerpts of code relate to Serial communication.
//See Files above for full code.
Code related to Serial communication in void setup():
Serial2.begin(115200);
Code related to Serial communication in void loop():
if (Serial.available()){ //If anything comes through Serial (USB)
newCount = Serial.parseInt(); //Read user input and save it
Serial2.print (newCount); //Send the input over Serial 2
Serial2.print (endDelimiter); //Send the delimiter over Serial 2
}
else if (digitalRead(button) == LOW && lastState == 1){
message = "Button>";
Serial2.write(message.c_str()); //Send message over Serial2
}
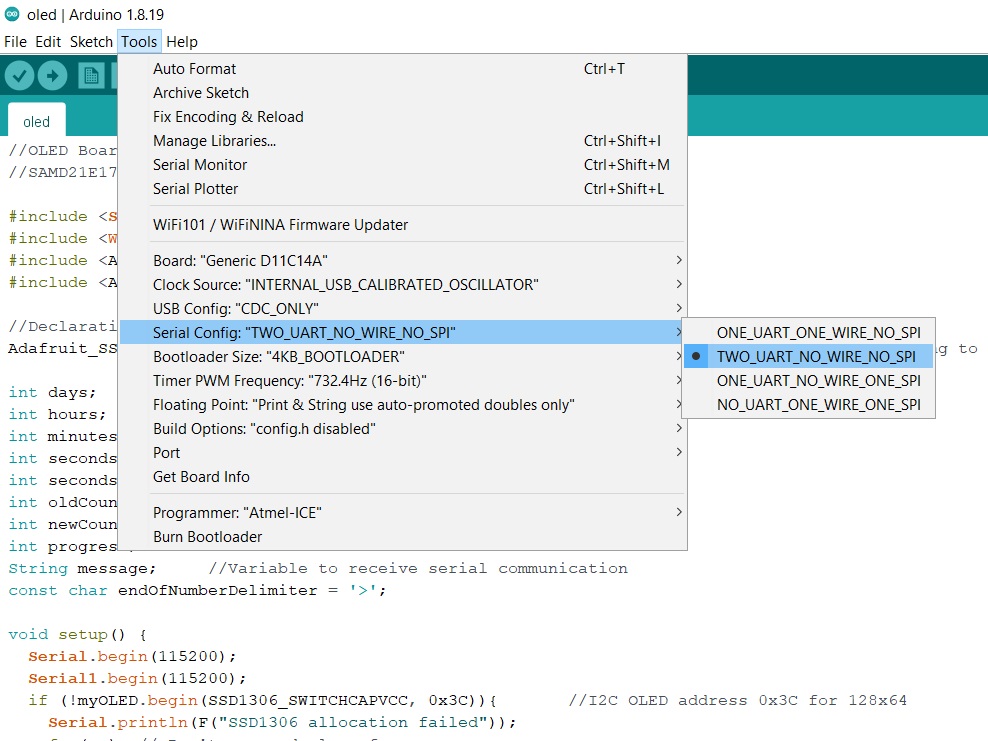
//OLED Board
//SAMD21E17A
//The following excerpts of code relate to Serial communication.
//See Files above for full code.
Code related to Serial communication in void setup():
Serial1.begin(115200);
Code related to Serial communication in void loop():
if (Serial1.available()) {
message = Serial1.readStringUntil('>'); //Read message over Serial 1
newCount = message.toInt();
if (message!="Button"){...}
else {...}
}
The above code only shows excerpts relevant to serial communication. See the files attached above for the full code for my final project. The video below shows the communication of a button input and the OLED's response to it.