Find the PCB files here
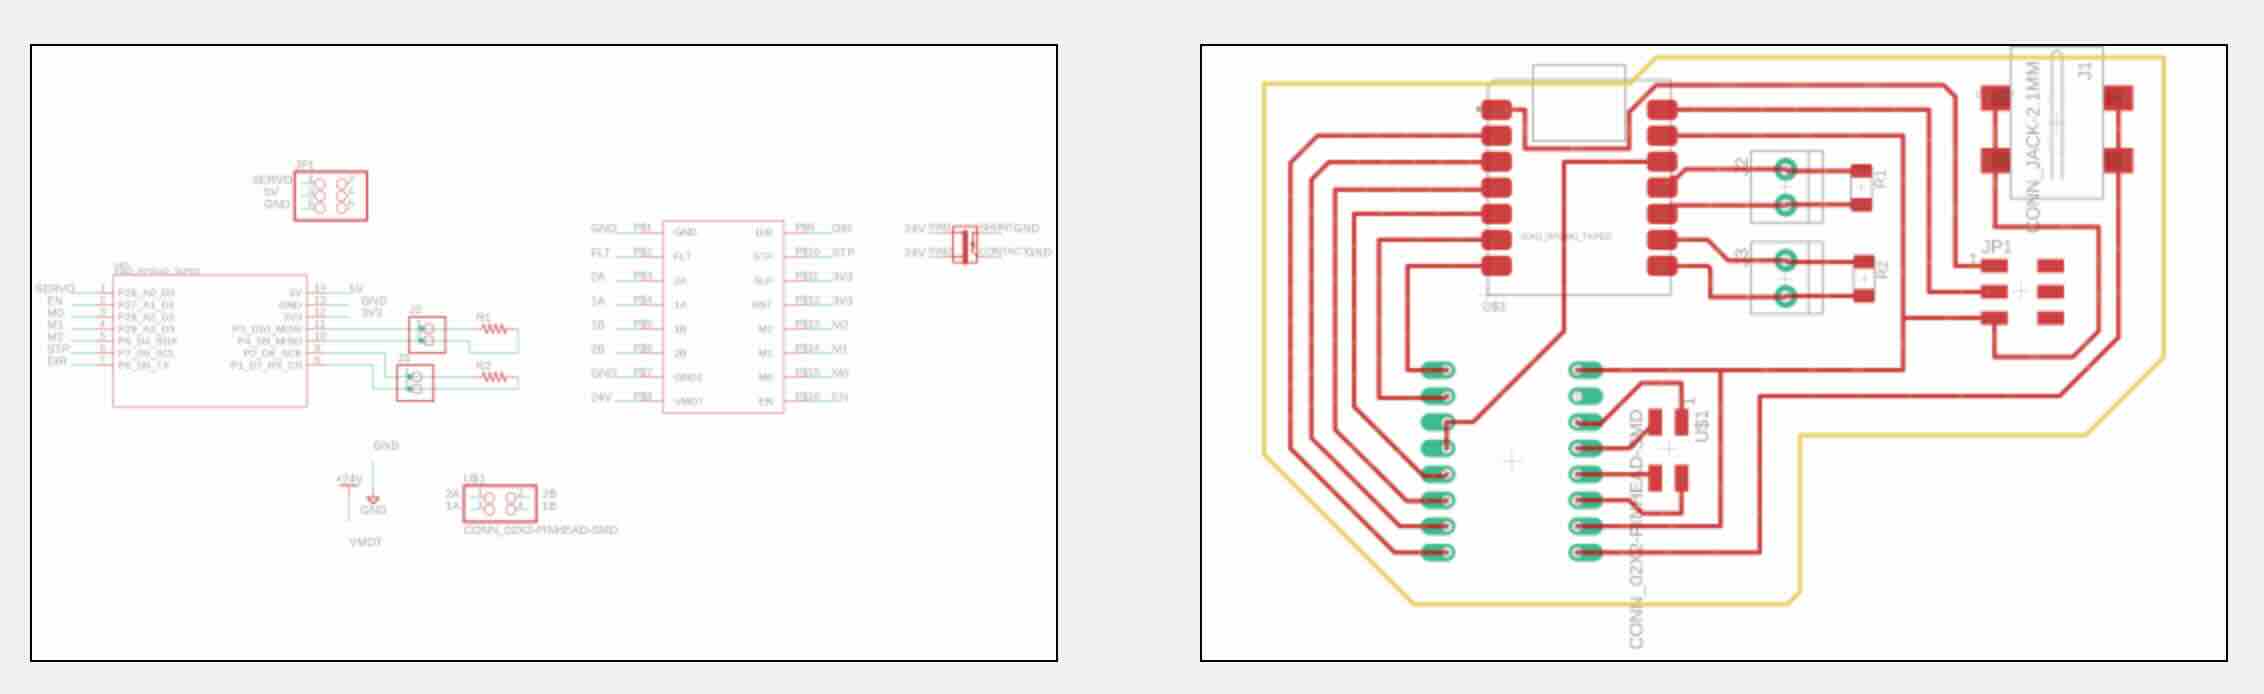
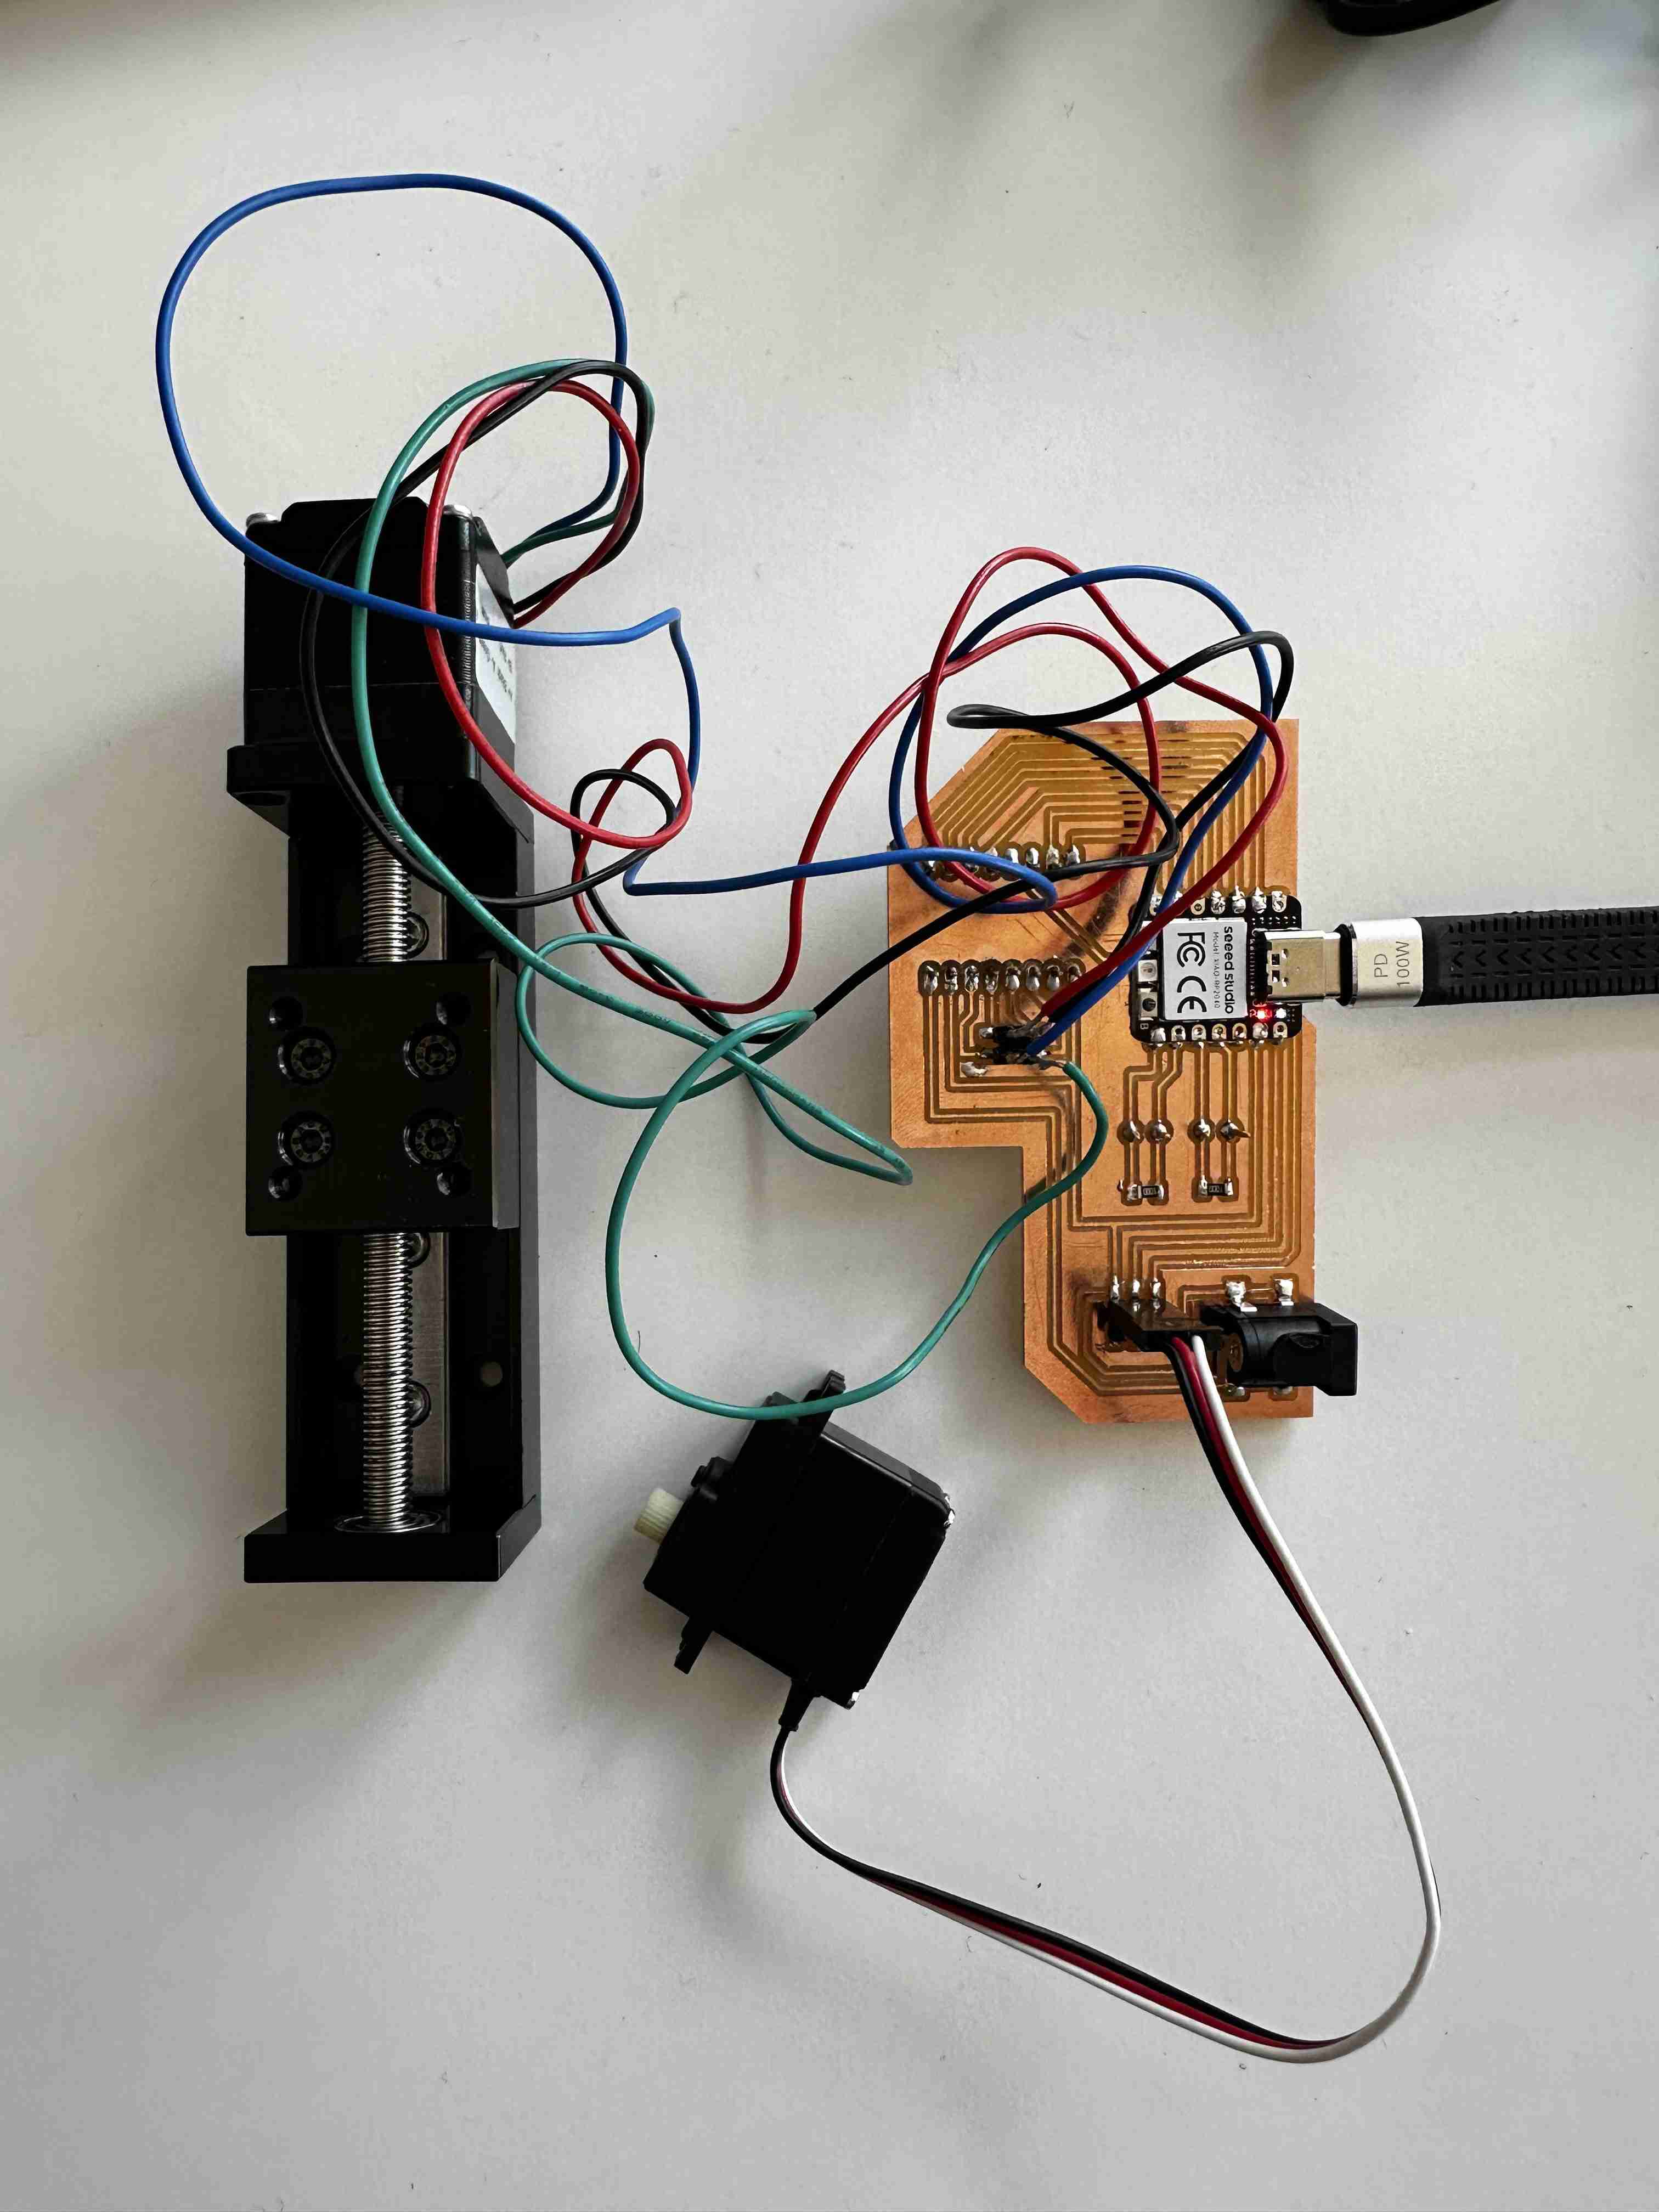
I soldered a xiao rp2040, a driver, pins for capacitance sensing, a linear actuator, and a servo motor.
Parameters:
- wire thickness: 16 mil
- clearance: 16 mil
- board perim clearane: 40 mil mil = 0.1 inch
Components:
- barrel jack
- servo motor I only have one
- other servo Replace with this one, which is in class stock
- DRV8825 I only have one
- DRV8428 Replace with this one, which is in stock
- linear actuator
See video of linear actuator testing here. The motor movement is a little slow because I didnt have the correct power supply with me (I had a 12V wall wart instead of a 24 V if I remember correctly). I didn’t video the servo motor, but the servo worked well.
arduino script: servo example
#include <Servo.h>

Servo myservo;  // create servo object to control a servo
// twelve servo objects can be created on most boards

int pos = 0;    // variable to store the servo position

void setup() {
  myservo.attach(9);  // attaches the servo on pin 9 to the servo object
}

void loop() {
  for (pos = 0; pos <= 180; pos += 1) { // goes from 0 degrees to 180 degrees
    // in steps of 1 degree
    myservo.write(pos);              // tell servo to go to position in variable 'pos'
    delay(15);                       // waits 15ms for the servo to reach the position
  }
  for (pos = 180; pos >= 0; pos -= 1) { // goes from 180 degrees to 0 degrees
    myservo.write(pos);              // tell servo to go to position in variable 'pos'
    delay(15);                       // waits 15ms for the servo to reach the position
  }
}
Tips:
- drc = design rule check
- scrape parallel to lines , you dont need to be too gentle if your traces follow drc
- for macOS users the xiao instructions are slightly different. Arduino>Settings>Additional board manager URLs> “https://github.com/earlephilhower/arduino-pico/releases/download/global/package_rp2040_index.json"
- don’t forget to tape the bottom of the microprocessor if you chose the taped component from library … this might be why servo code isn’t working
- update here is that you need to check xiao rp2040 pinout and call the P pin number rather than the digital pin number printed on the board
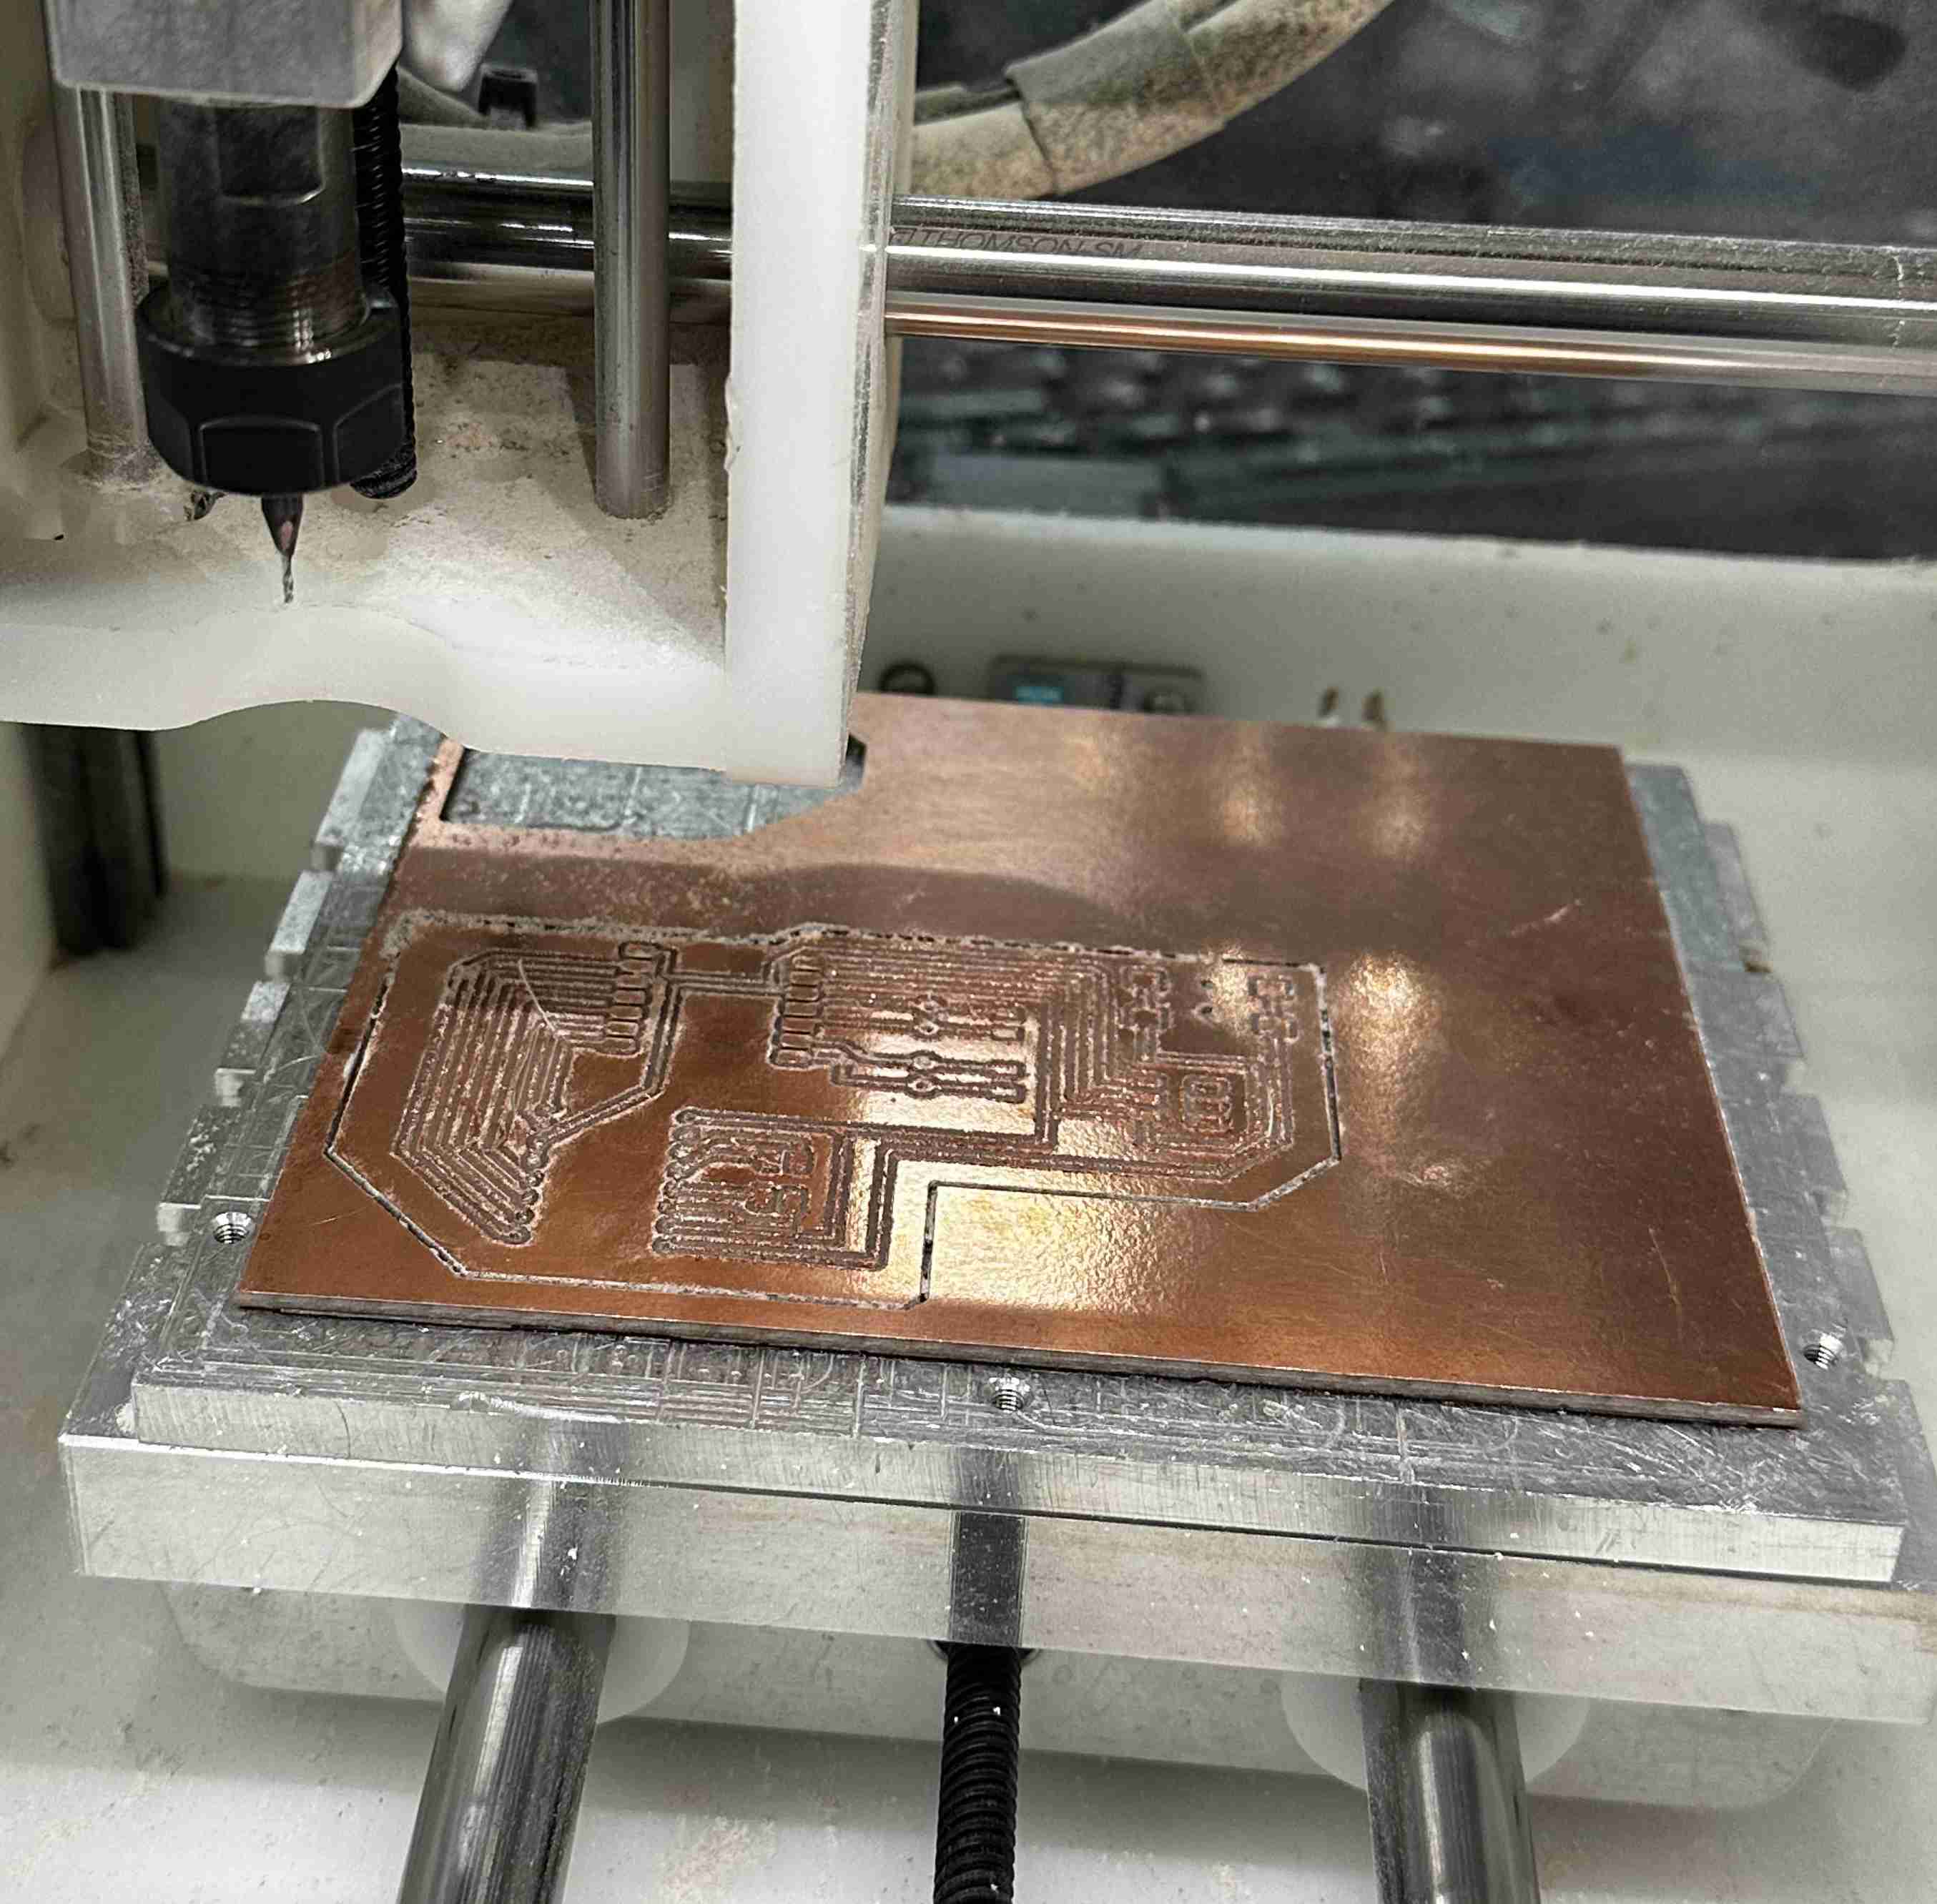
Instructions for milling:
- upload brd file to OtherMill
- use double sided tape to place one sided-copper piece down.
- set up the job by placing your design ~5 mm away from each edge (use the right panel to move)
- press start, machine will prompt you for the type of nmil you need, ask you to place it, and test the distance to board AFTER you press start.
- we were using 1/36 " end mill and 1/16” if I remember correctly?
Alt board design: I made a cookie pcb where each LED is a sprinkle! I want to mill this and use as soldering practice.