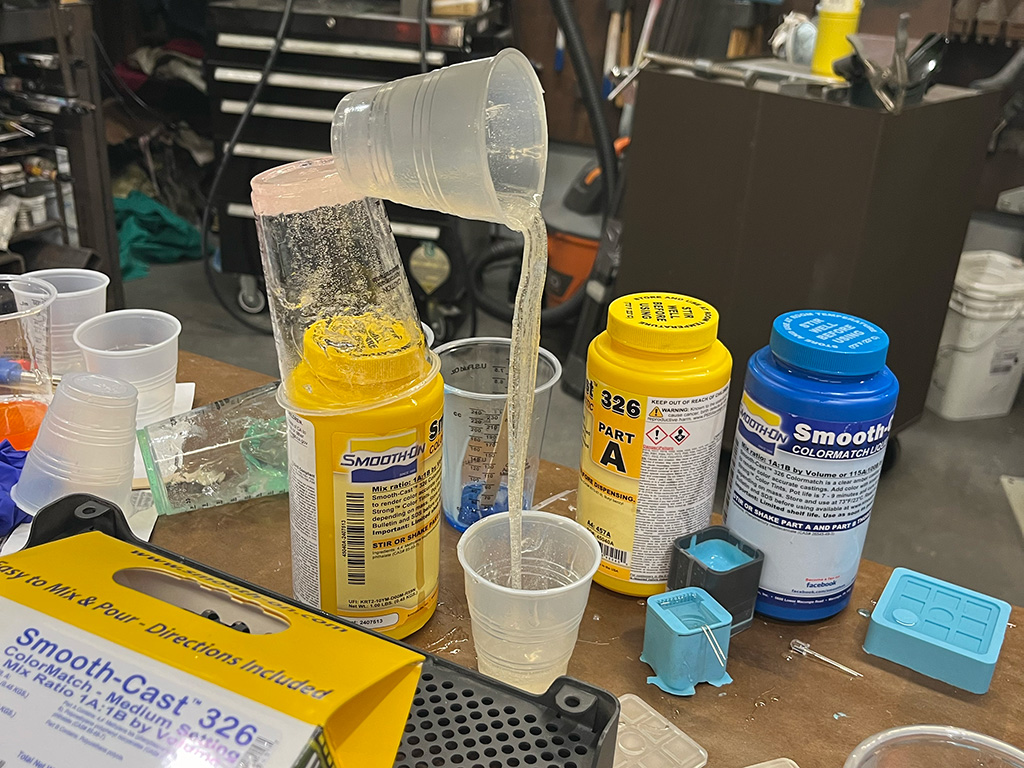

During the group training we first learned how to make silicone molds with Smooth-On oomoo 25 (which has a 15 minute pot time and supposedly a 75 minute cure time but it often seems to take longer). Safety wise, it needs to be used in a ventilated room and with gloves as it should not contact skin. We then learned how to cast with clear plastic Smooth-Cast 326 (which supposedly has a 7 minute pot time but ended up being closer to 9, and a variable cure time that can take a few hours). This material is more toxic and it is very important that you do not breathe it in or let it contact your skin. We went over the safety sheets for both materials, made silicone molds of the CBA logo with Marcello's 3D printed molds (and some students' molds which they had brought in), and then cast the logo design in plastic using silicone molds which had already been made. We also got lots of tips on how to make a successful mold and cast with the provided materials.

This week I wanted to experiment with something that would work towards my final project. While I was initially really hoping to work with metal, I've gradually been coming to terms with the fact that that plan isn't the most compatible with the specific manufacturing skills covered in this class (or the available resources) and while I could make it work, I think the amount I'd have to restructure my plans and goals warrants redirecting more heavily. Anyways, that brings us to my idea for this week-- I wanted to make some rings! Since we are working with clear resin and I am interested in exposed electronics, I thought it would be really fun to play around with casting wires and sensors inside of the resin. Part of my plan for this week was to work with Wedyan to make laser-induced graphene flex sensors so I ended up coming up with a design that would allow for those to be cast inside of the rings. I didn't exactly start with that, though.
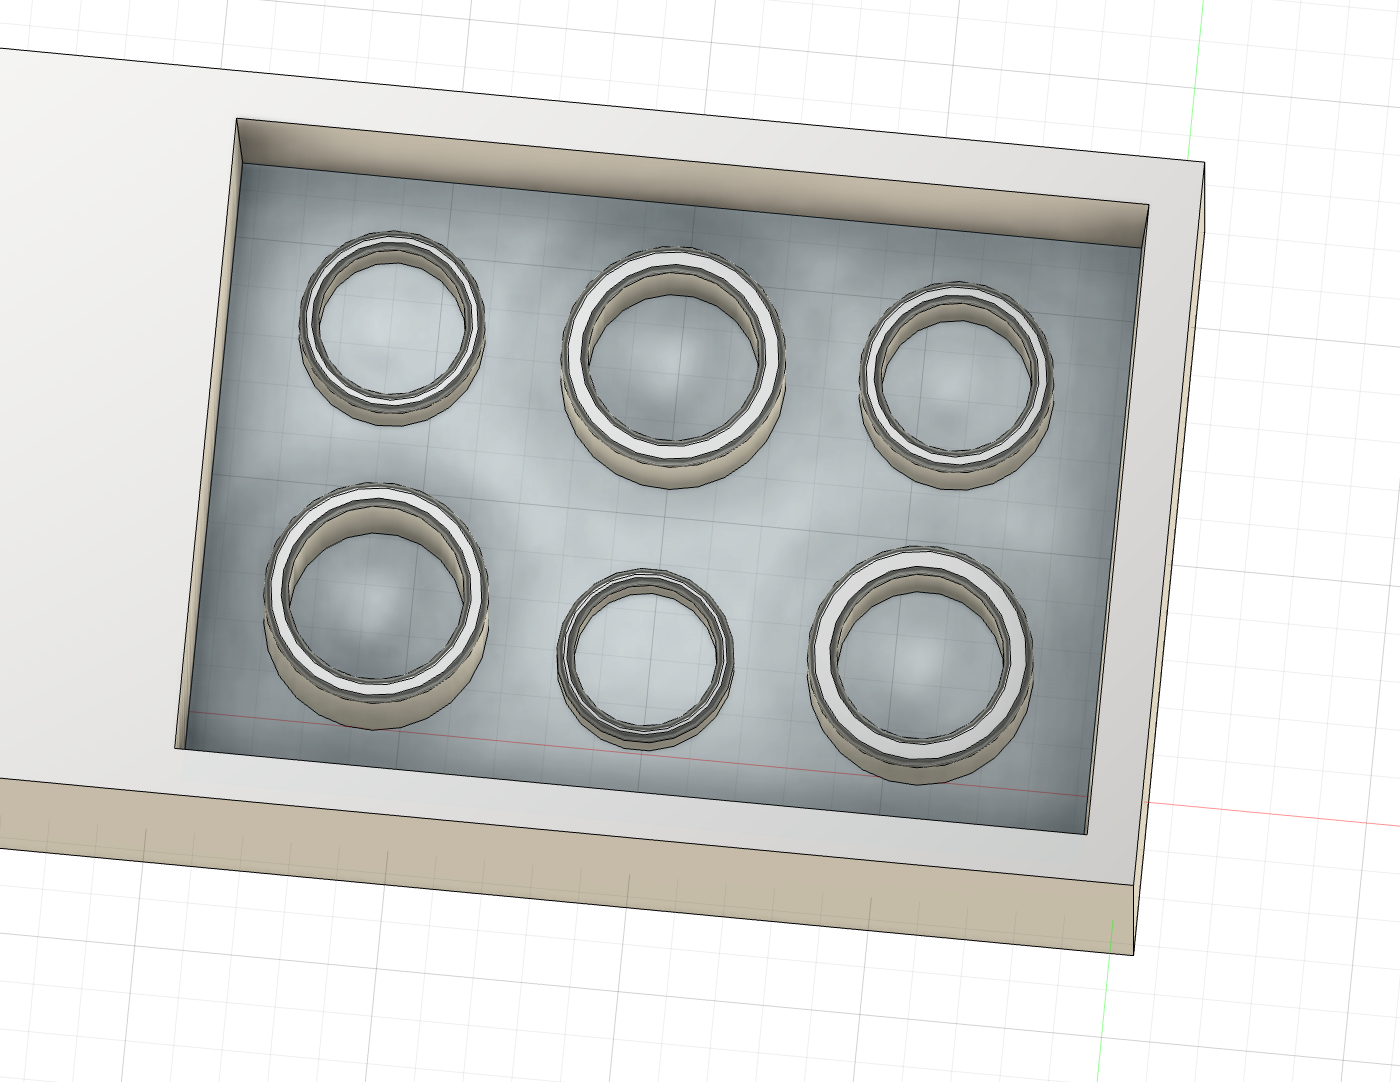
My first mold design was for 6 rings in a variety of thicknesses (band and material) and diameters (3 for proximal knuckle and 3 for middle). At the time of making it, I didn't have a very good way to check ring sizing but I know I'm a size 7ish so I went up and down from there. Here's how that turned out:
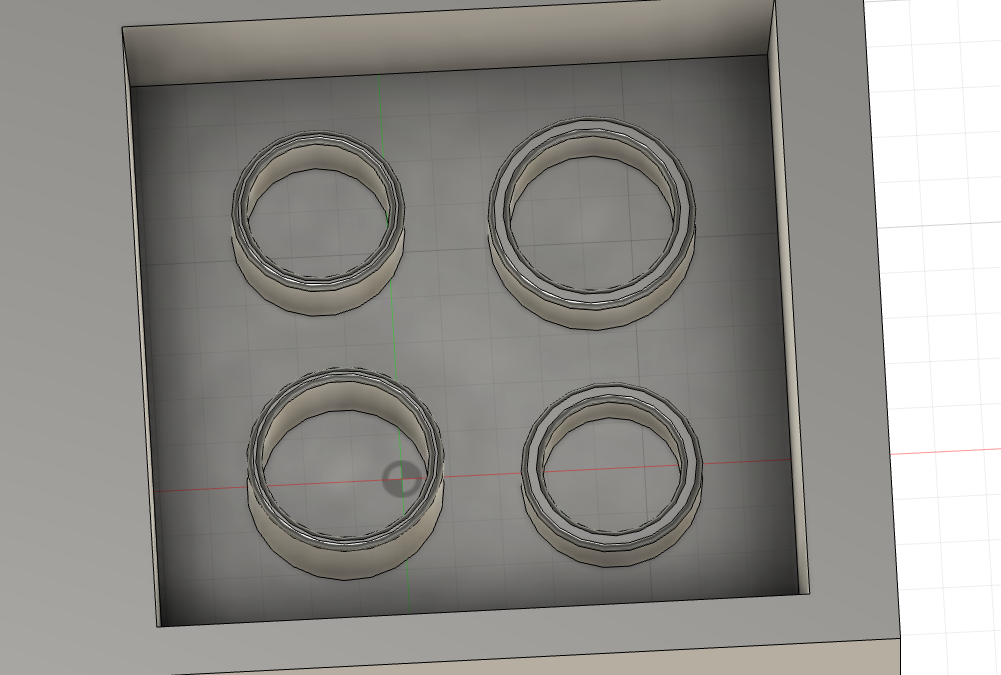
After designing the first mold and going through the setup/toolpath simulation process, I realized that the estimated mill time was way longer than I wanted, so I decided to scale down to 4 rings. While making the second model, I checked my ring box to grab something to help me visualize sizes and ended up finding a plastic ring sizer that I didn't realize I still had. That was super convenient. Here's how the second design turned out:
Immediately after finishing the second design, I had to go to the shop for the group training. That's where I learned that the material we were using was the clear epoxy resin and getting to actually touch the material and let my wheels turn a bit mentally got me ideating further. As mentioned above, I'd already considered casting the sensors inside of rings but I didn't have a very concrete idea for it. After the training, I went to go mill my mold with the second design but there were a couple people ahead of me. So I decided to take advantage of the wait time to make yet another design. Getting to see the material and finding the ring sizer both gave me confidence in securing dimensions for a single ring pair, and having designed the previous molds made it much faster to make a third one. But rather than go for a simple ring design, I figured I should make something which actually could hold a sensor. This was monday evening, and I already had plans to meet with Wedyan on Tuesday morning to go through the process of making LIG bend sensors so the hope is to use the sensors we make. (As I am writing this- it is tuesday and I haven't finished the process yet, not sure if I will have time to finish the sensors and cast them in rings before this is due... but I will at least try!)
The concept for the sensor ring pair is for the proximal ring to have a sort of 'bezel' which will secure the base of the sensor as well as the wiring, and for the other ring to have a channel for the sensor to slide through when the finger bends and extends. after making the design of that though I realized the provided endmill/finishing mill were far too large for the sensor channel so in my final design I simply cut that part out figuring I could come up with another solution later.
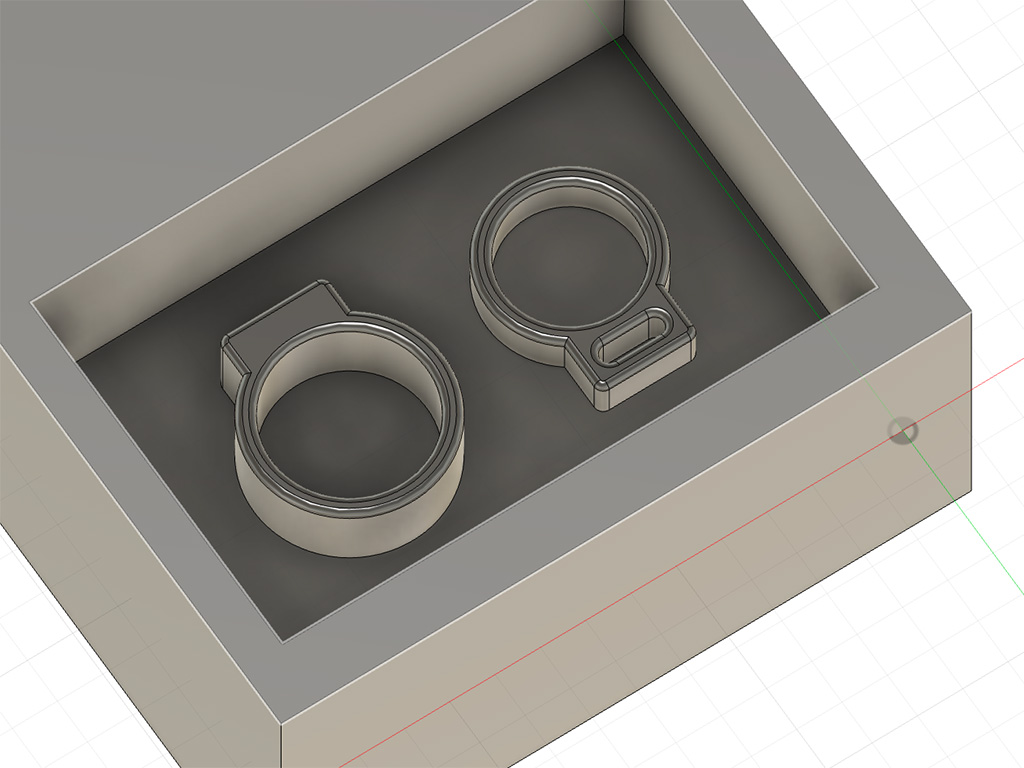
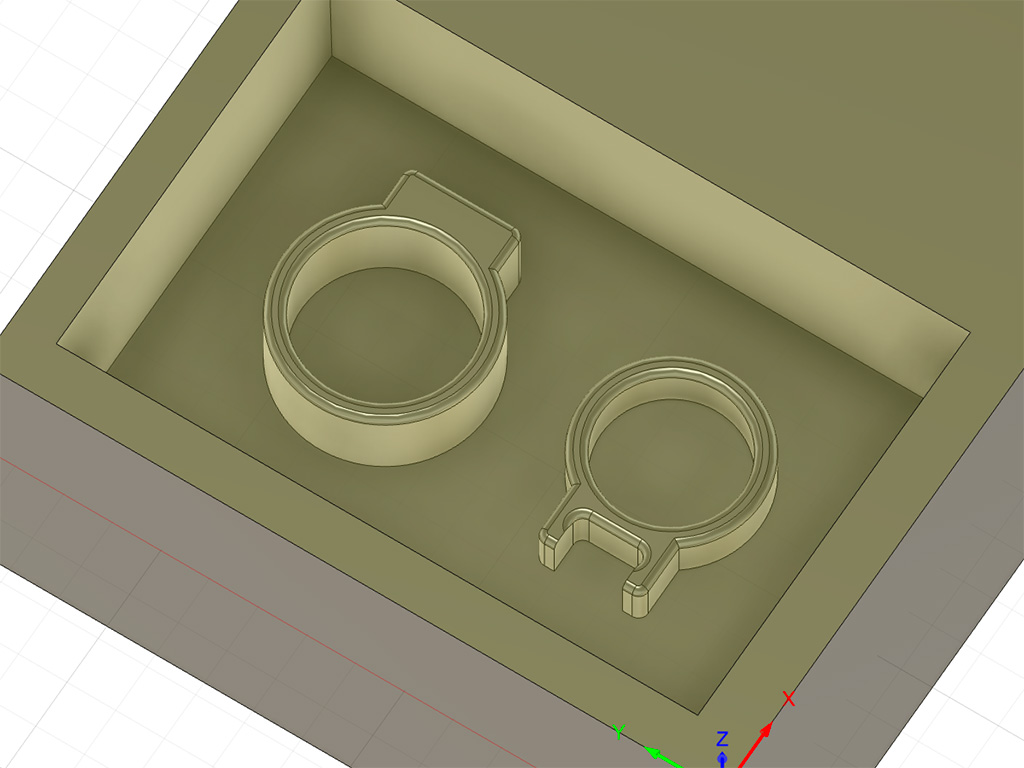
It's worth noting that getting the layout right in all of these versions such that the endmill had sufficient clearance was a bit annoying. Like, the tool itself is 1/4" (6.35cm) but the toolpath won't actually have it go through spaces narrower than like 8.5 cm or something. And because I am still learning how to CAD efficiently, adjusting this and getting everything to look right was a pain. But also something I was far far better at by the third version.
With the design done, I was able to generate and simulate the toolpath. I was going to use the default speed settings as recommended in the doc one of the TAs made, but another student suggested something a different TA had said which was supposed to work better, so I followed that advice. I exported and uploaded my gcode, set my origin coordinates, and started milling. The rough cut went really well and was looking good. Unfortunately though, the finishing pass missed several chunks and left some things uneven, which was really dissapointing. I hadn't recognized it initially, but I was able to spot these things in the toolpath after the fact. It turns out some of the settings suggested by the other student were used to help speed up the process, but some other parameters I didn't know about needed to be tweaked so that it wouldn't cut corners in a way that hurt the final product this significantly. Oh well, lesson learned. I deleted the settings as soon as I figured out because I was pissed off and didn't think to document them but I did take a screenshot of the simulation in process which kind of shows the retrospective sketchiness. I cleaned it up a bit with a knife but ultimately decided to mill again with different finishing settings (everything default except the speed, basically) and checked the toolpath more carefully.
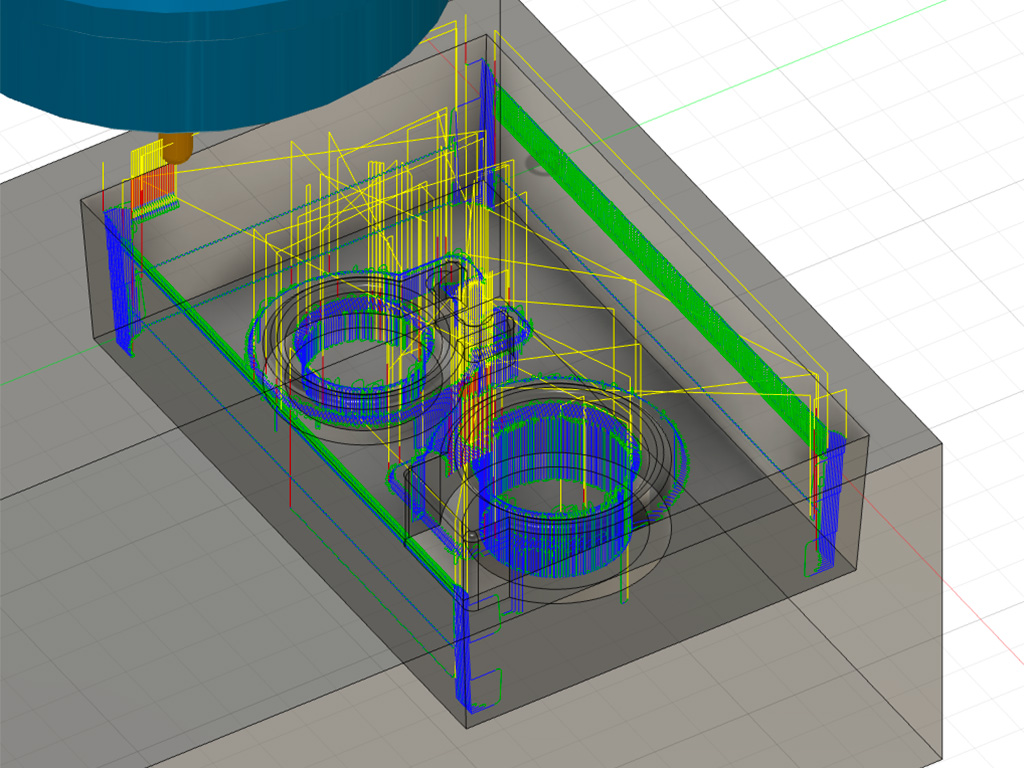

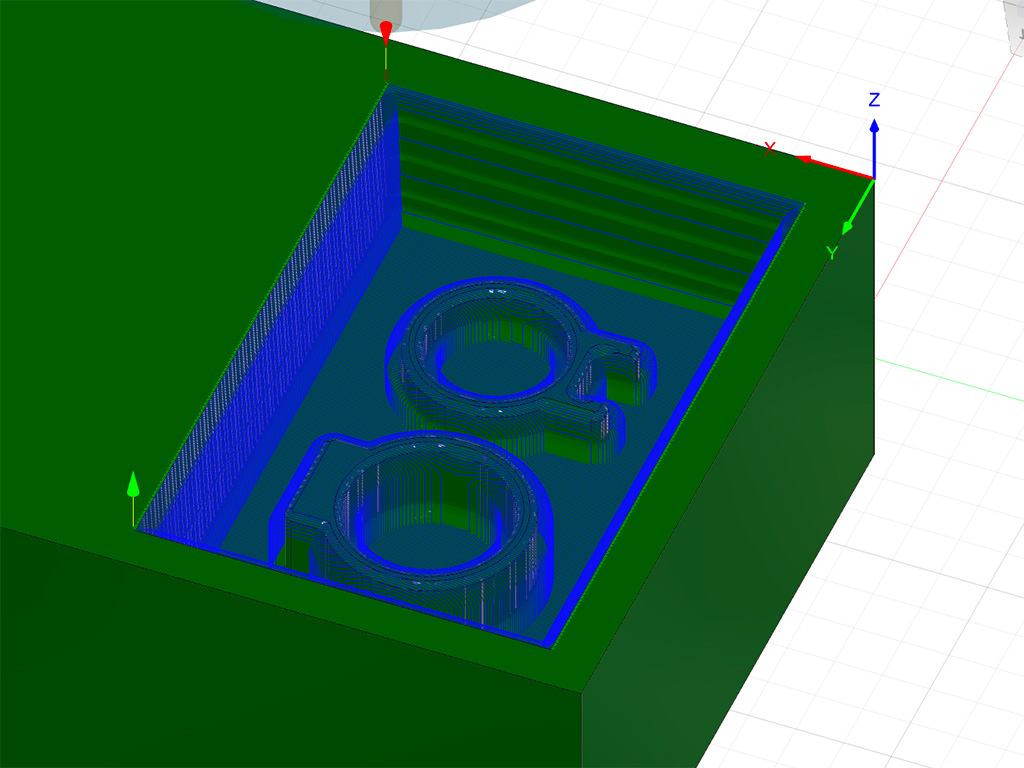
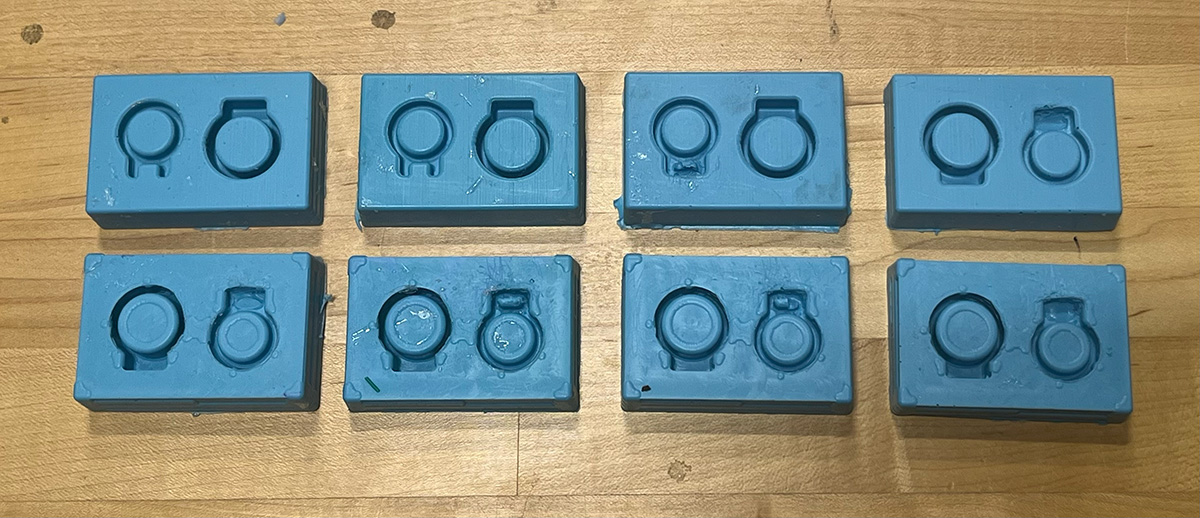
The second one came out much better! for some reason surfaces along the x axis didn't come out as well but the mold produced was satisfactory enough for me! The picture of the finished mold doesn't show how different it is but as you can see from the resulting silicone molds below the difference is major.

The next day, after meeing with Wedyan, I made my first round of molds with the oomoo silicone. I decided to make molds of both the first and second mill attempts just to compare, and because I wanted to experiment with modifying the 'failed' mold with
hot glue to try and recreate the part which I'd had to remove from my design due to the slot being too small.
—- interrupting myself because this is how far I got with my first round of documentation and that was followed by an absolute blur of bouncing between several concurrent processes for 8 hours straight so rather than document things chronologically
I am going to break it down by process because it would be far too much of a clusterfuck otherwise.
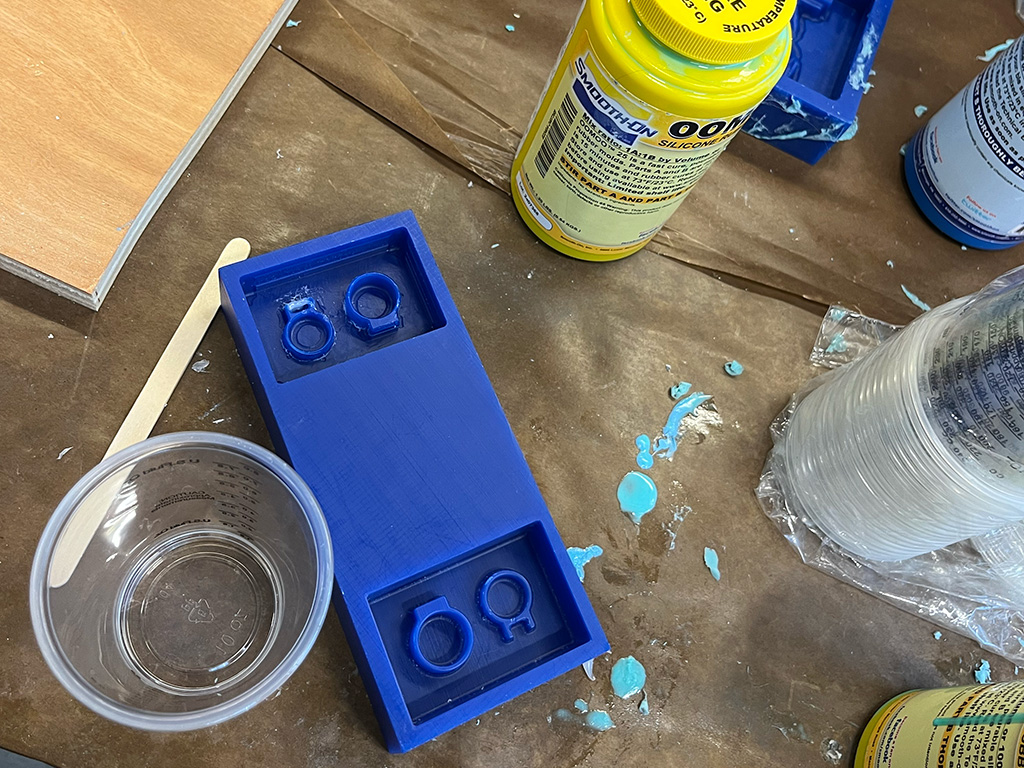
I made 4 sets of molds. Each time, I ended up casting both the cleanly milled side and the messed up one. As previously mentioned, I use the messed up one as a low pressure way to experiment with recreating the sensor enclosure on the small ring but on the 3rd round I ended up doing that on the clean version and on
the final round I filled it in completely so I could have an enclosure for the stretchy version of the sensor.
Each round went a bit differently- I changed up my process slightly each time and I don't think there was a perfect one but the second and third were both great! The 4th round came out comically bad because I was using a wider stick to stir and ended up with way more bubbles than any of the previous rounds so I tried to vacuum it to fix that
but didn't do it long enough or something so the bubbles were not removed they just all came to the top and went straight into my mold in a way that no amount of banging on the table or using the vibrating plate could fix. In this photo most of the molds have been used so they look a little rough.
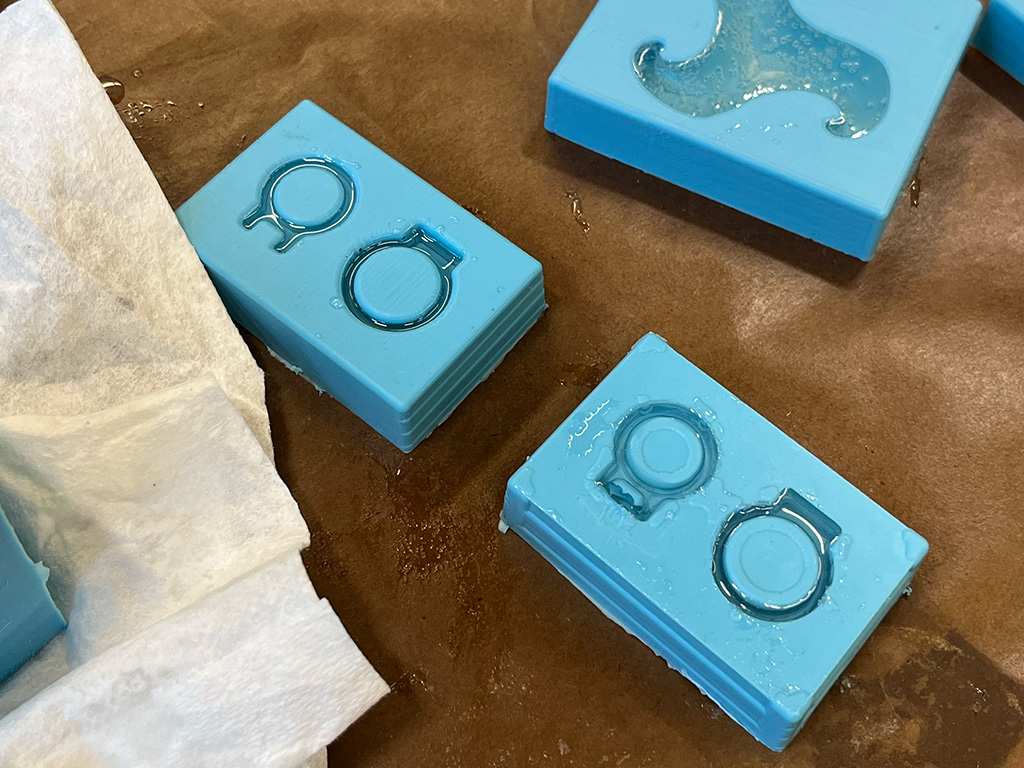
To start, I made 4 normal rings with my first pair of molds. They are very tricky to pour because of how small they are and even the smallest bit of overpouring means I have to clean them up with a knife later. After that, someone else had leftover plastic and I wanted to experiment with wrapping a wire around the mold but the plastic hardened as I was pouring so it turned out badly but still looks cool. Then another person had leftover red plastic later so I made a set of red ones (in the messy mold so they are rough but still cool). The small rings from my first 3 clean molds ended up being useless so I took them as an opportunity to play around-- one I tried filling with stripped wire (not pictured but it wasn't that cool) and another I painted the mold with leftover silver epoxy from the lig process.
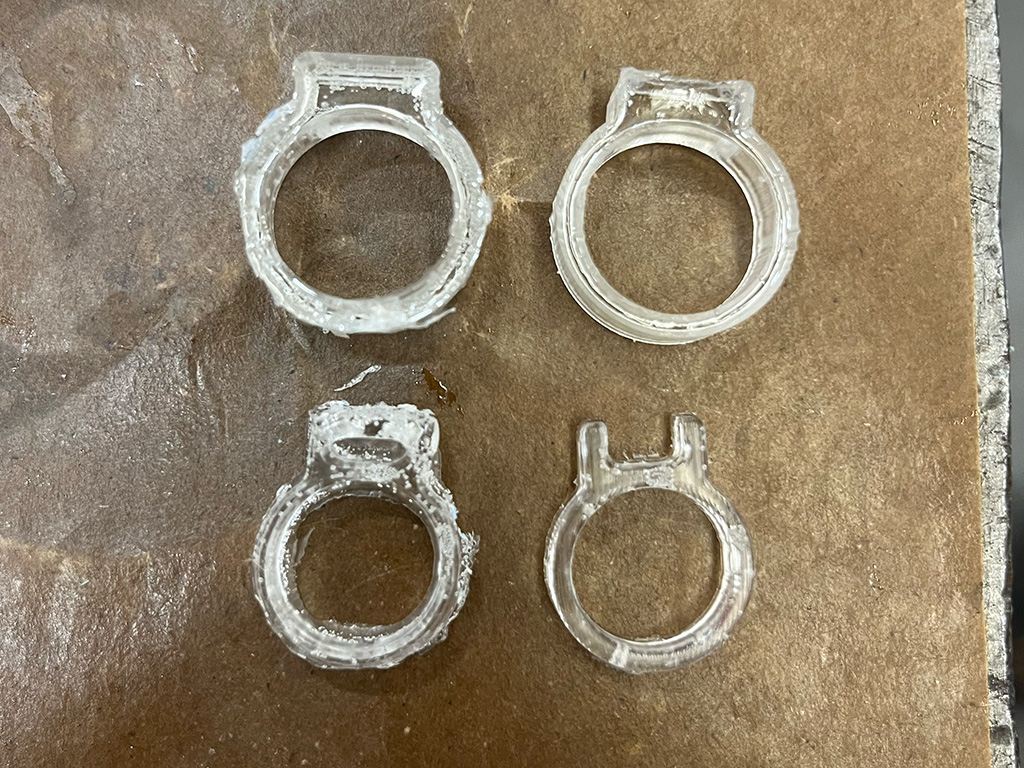
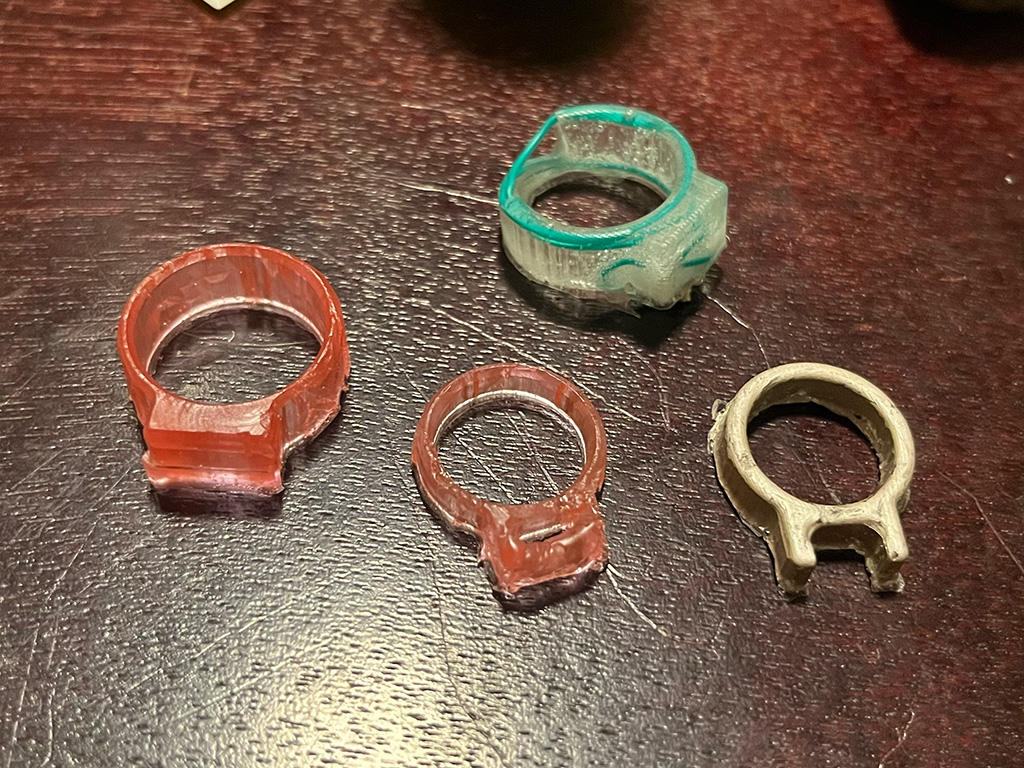
None of my rings turned out particularly great, honestly. They all had so many bubbles and such rough edges and I also probably demolded everything too soon. However, I am really okay with how badly they turned out as casts because my focus was on the sensor aspect. Which is maybe antithetical to the actual assignment. If it's any consolation though, I will be molding and casting for my final project, so I'll have to get better at it sooner or later.
To see how I made the sensors (which for the record all went down in between making the molds and casts shown here, it has been a VERY long day), view my LIG documentation here. Casting them in the rings was very finicky and very stressful- first off, I had a limited number of sensors that I'd spent a while making so I didn't want to mess them up! Pouring in the tiny mold space while holding the sensors in place was really tough, especially with the first 2 because I was overly ambitious and did them at the same time. I used leftover silicone chunks from the trash and used mixing cups to hold things in place a bit, which helped
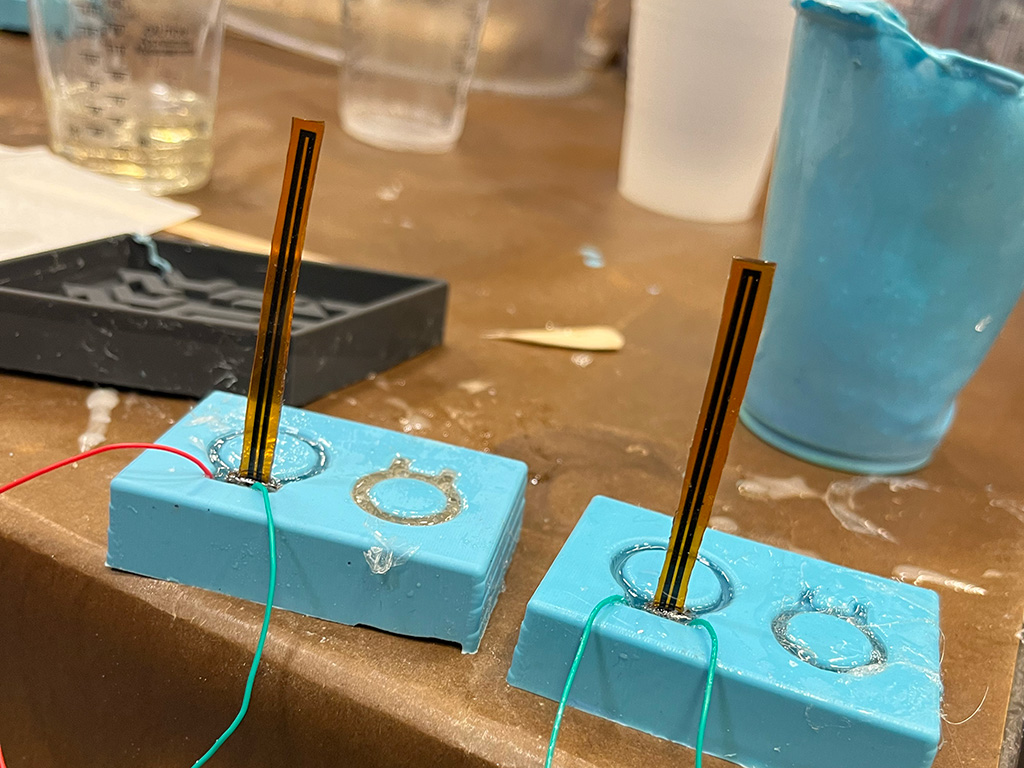
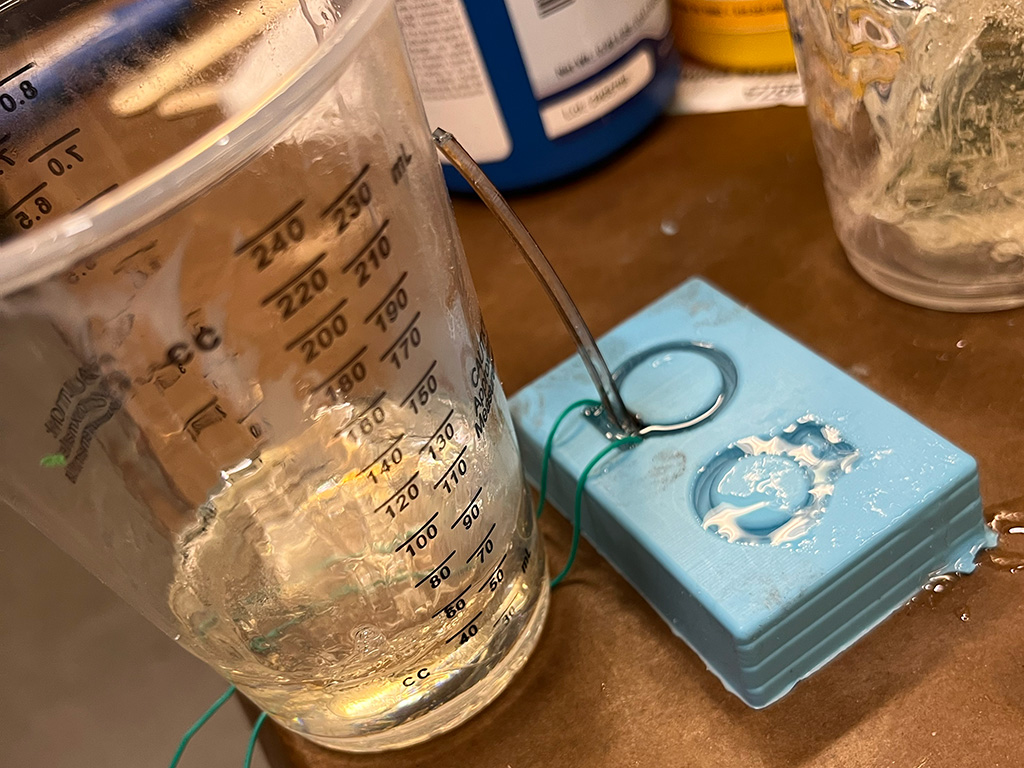
And much to my surprise (and joy!) it WORKED! Like, as well as I had hoped for and better than I expected.
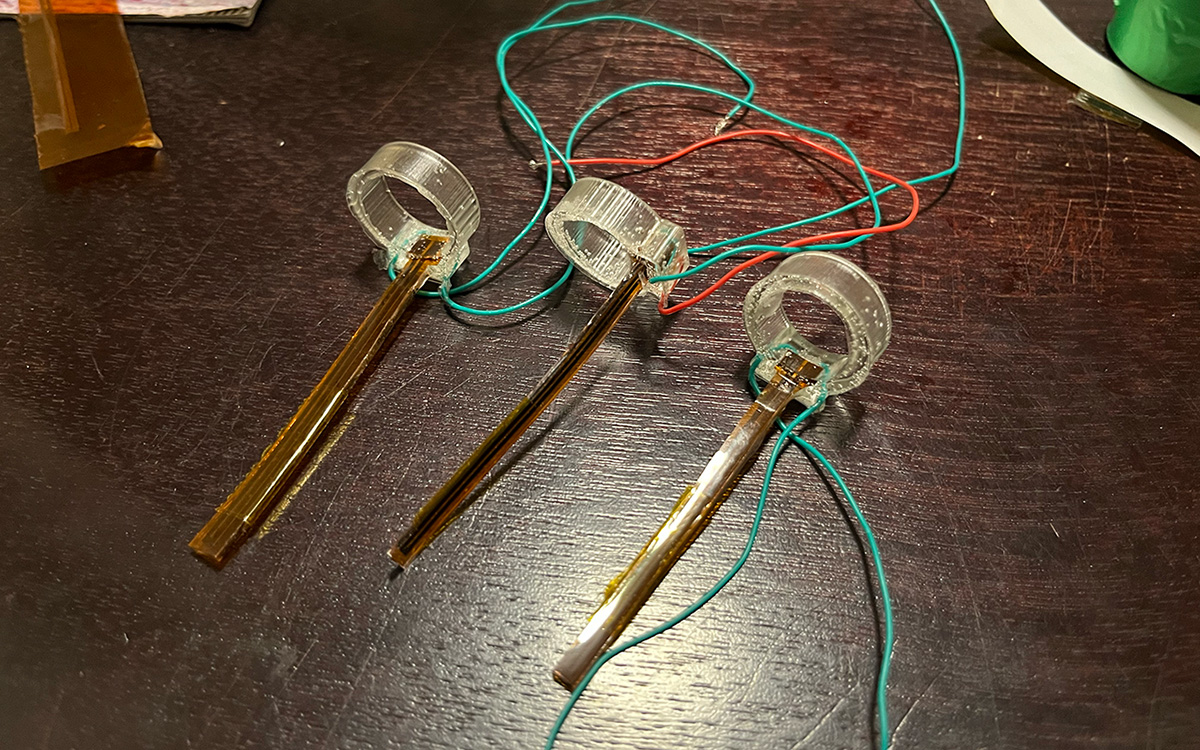
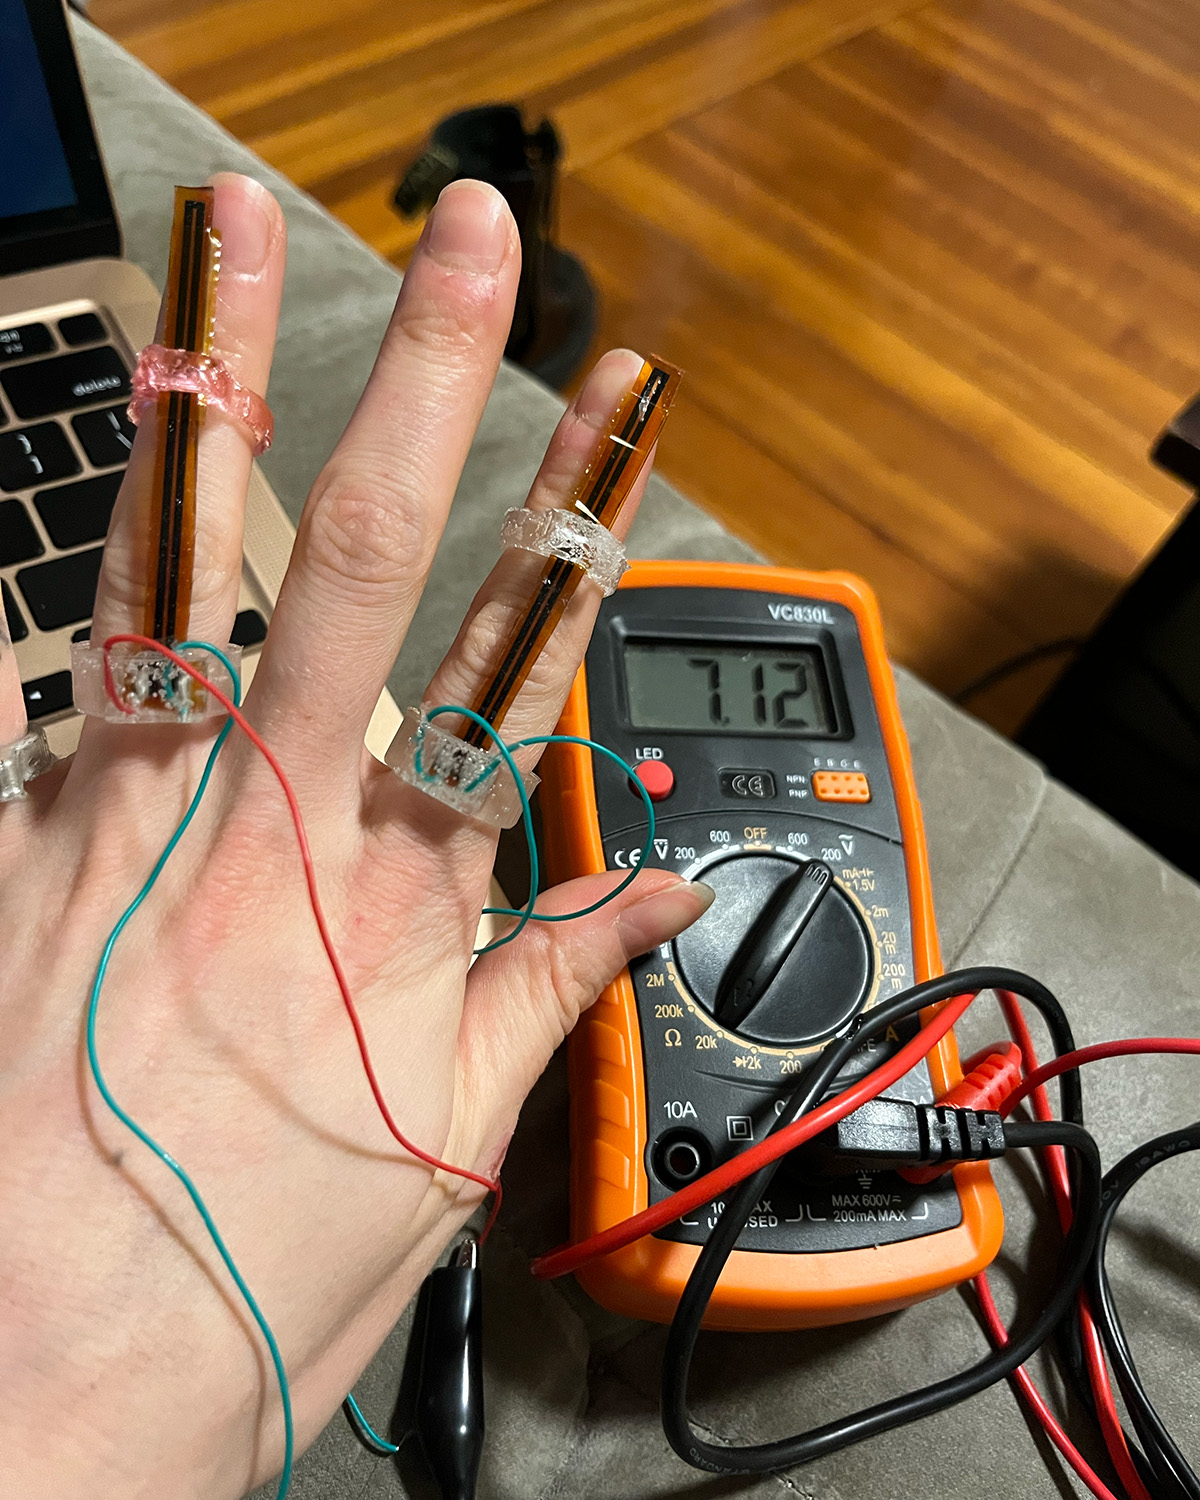
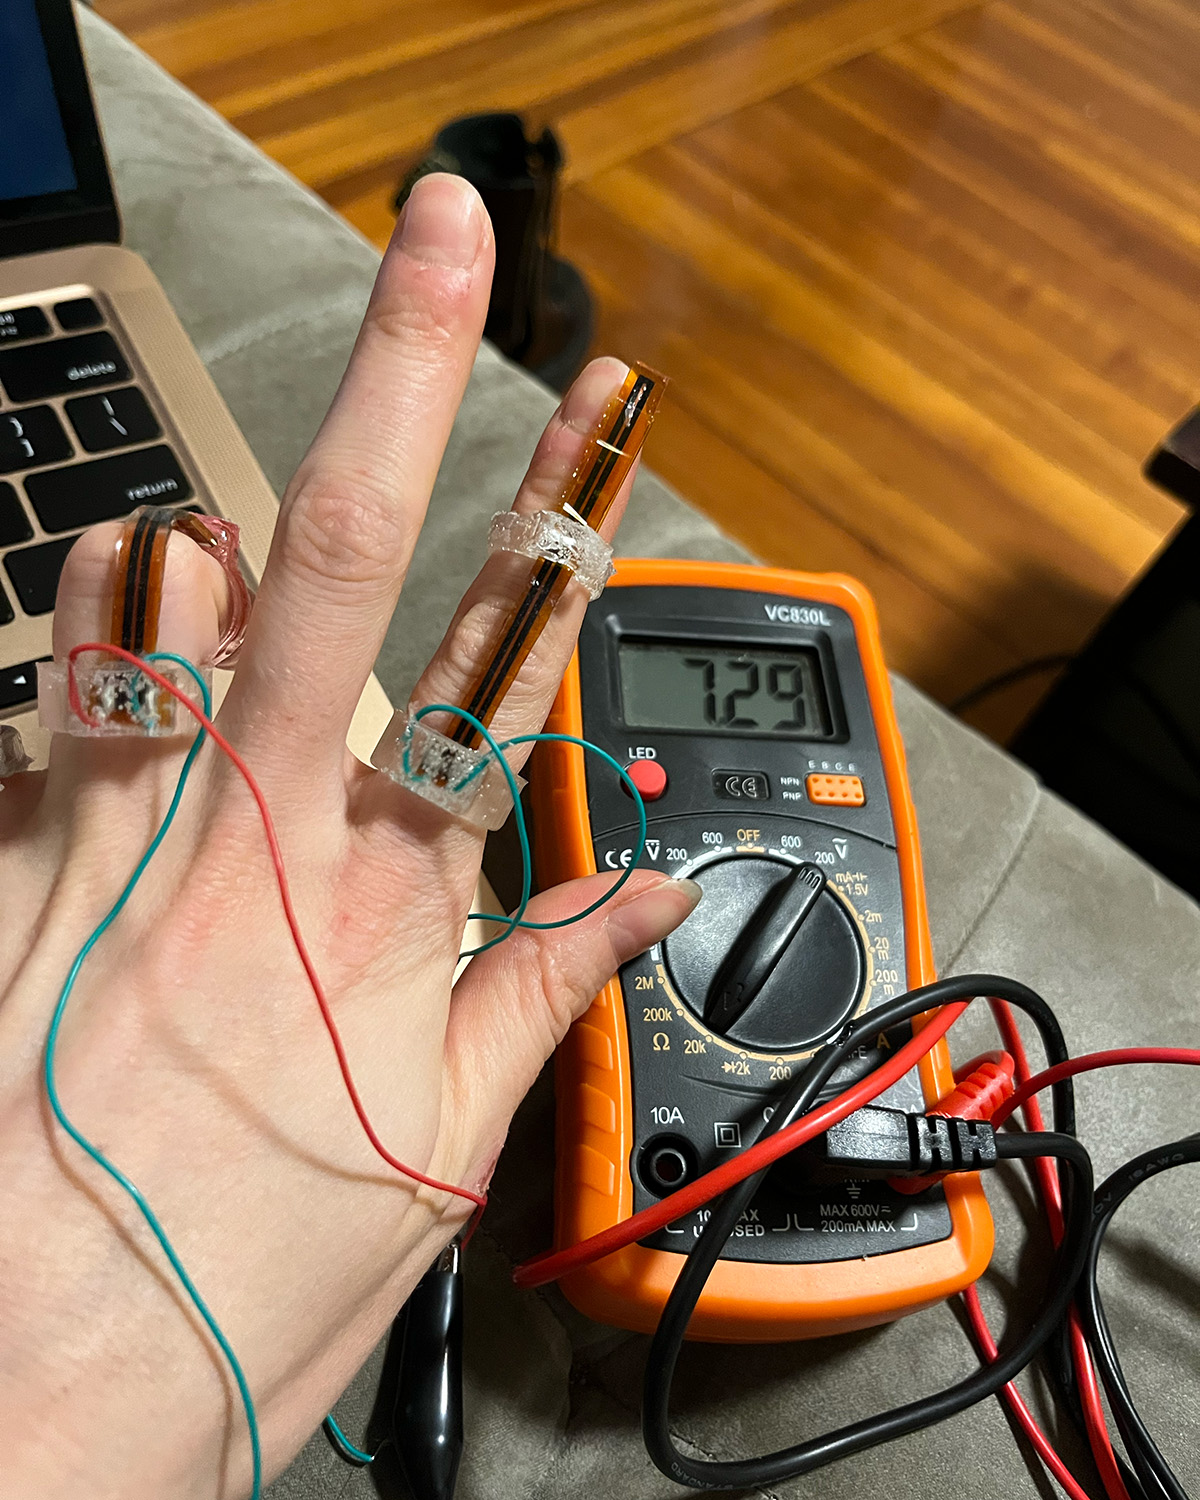
I needed to wrap a portion of the flex sensors in some tape to help them properly slide through the small ring enclosure since the silicone is so grippy. I also needed to carve at the enclosure with a knife to smooth out the shape made by my makeshift hot glue method. And it looks really bad, partly because of the hot glue and partly because i was using rings made from the shitty mill run wax mold. But for a proof of concept, this is a major success!!!
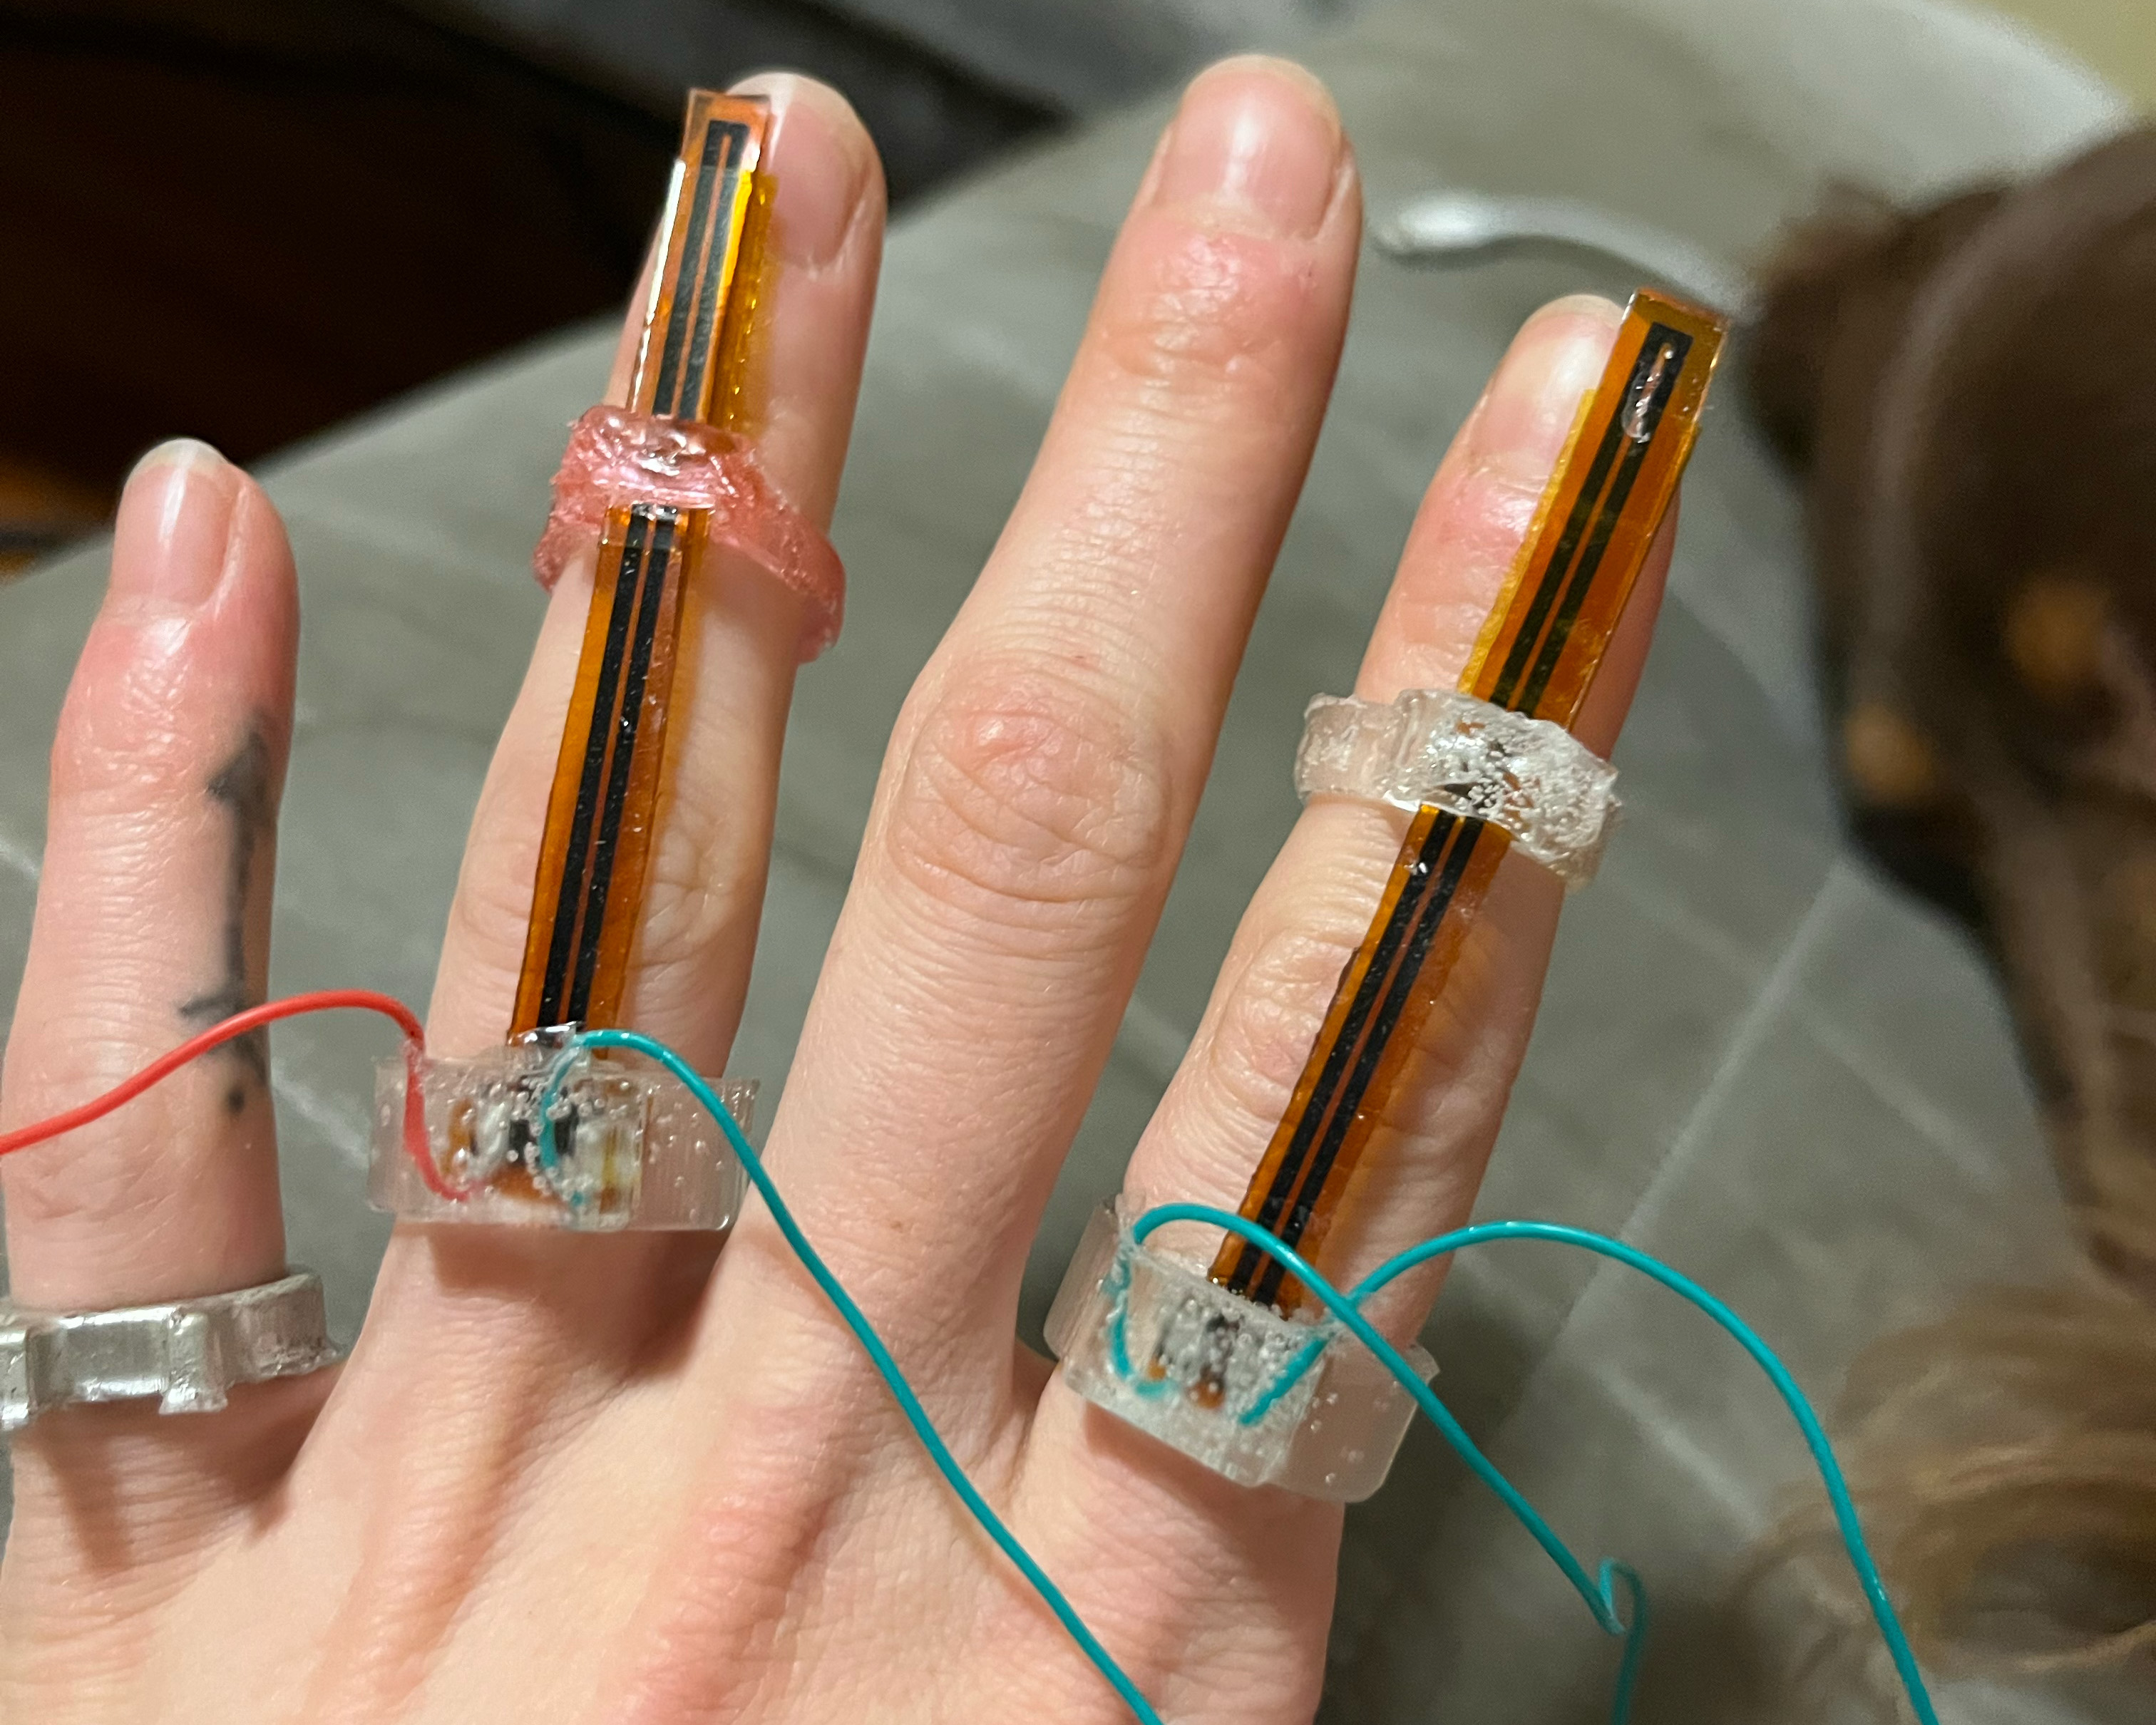
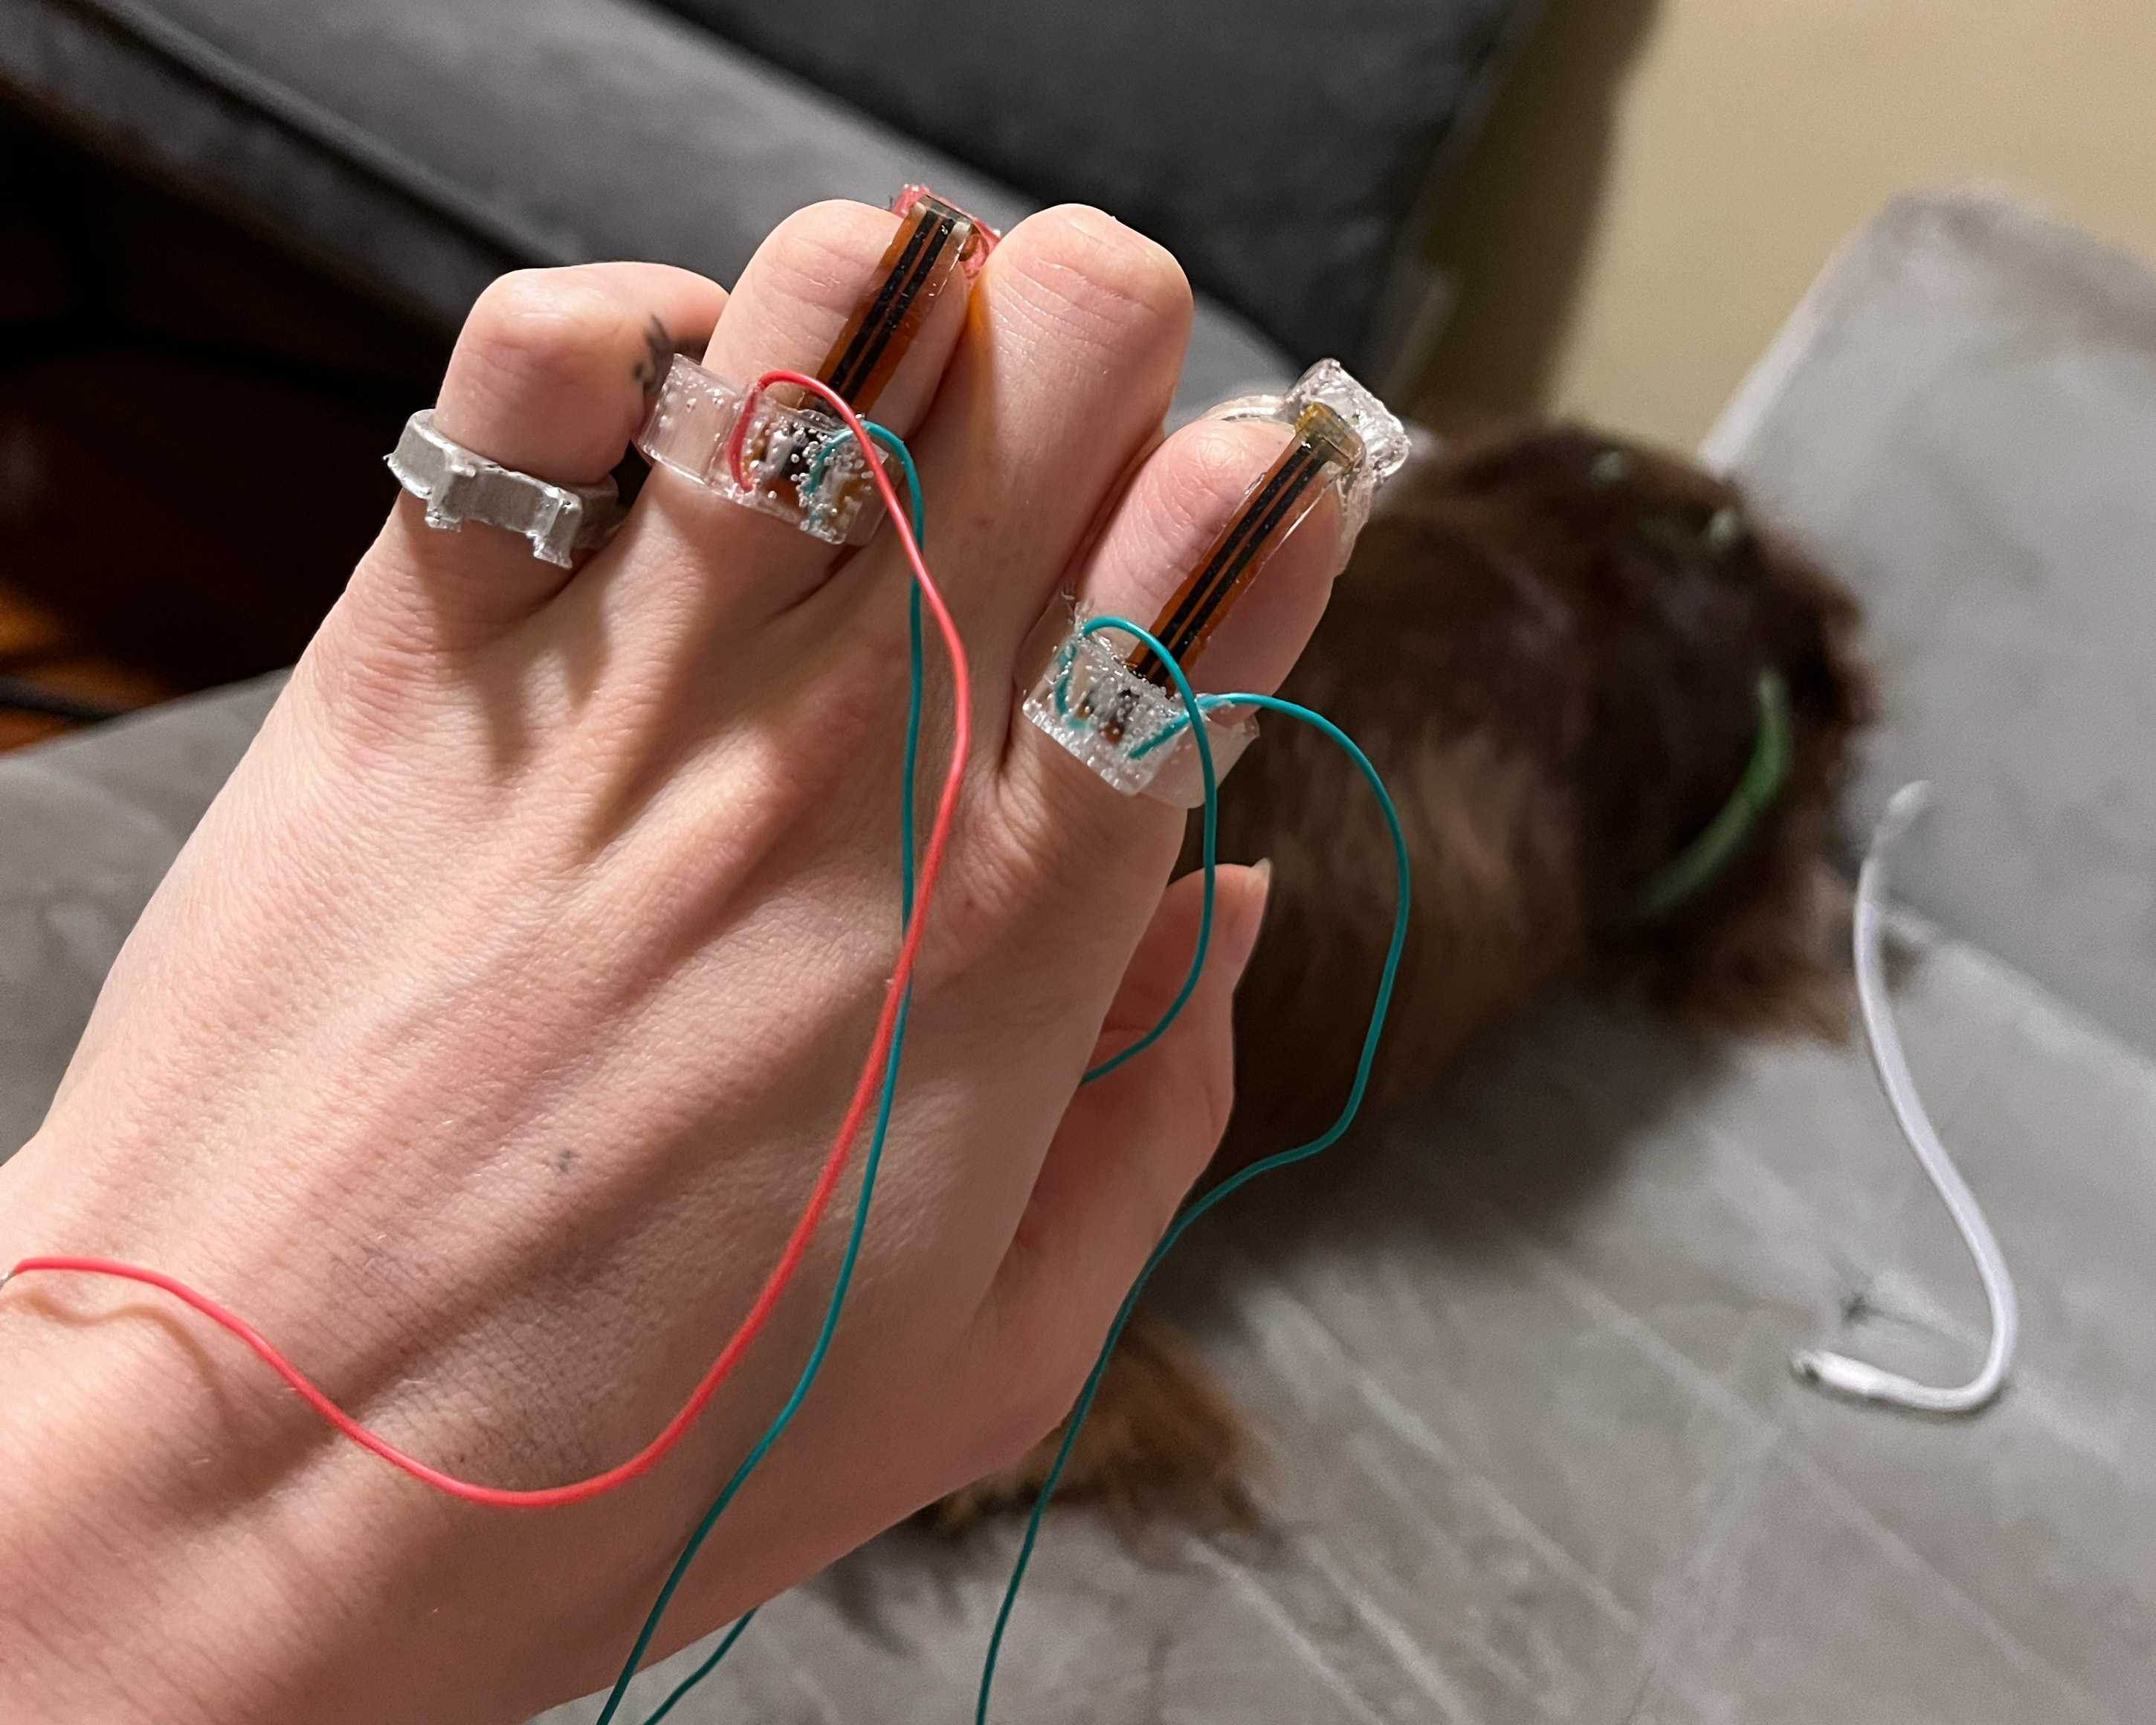
And at last, the moment of truth... testing with a multimeter to confirm that the sensors worK!
Bonus content: Marcello started a contest in our section who could get the tallest mid-pour set with leftover plastic and I am very proud of this one (it's balancing on stuff to not fall over while it cures but it does hold itself up!)
