This week's assignement was to use a 4x4 piece of OSB to make "something big" using a large format CNC machine. I was really excited for this but didn't was to use OSB. I think it has its place in constuction but in general is a pretty cheap material to make finished goods with.
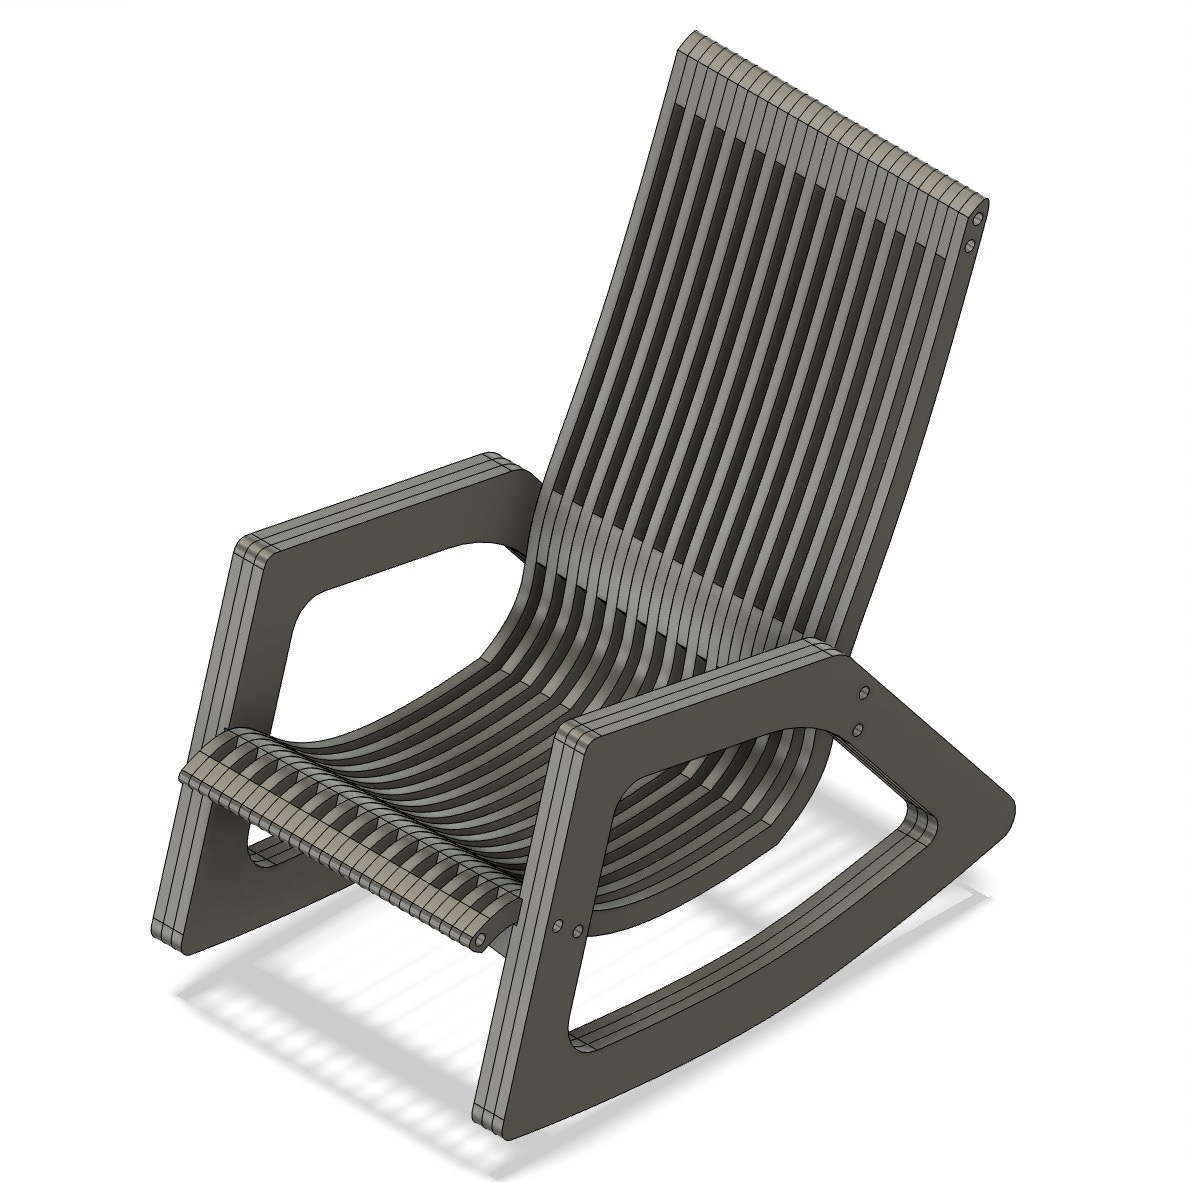
My inital intent was to make a lawn rocking chair inspired by a addirondac chair. I looked through the internet to get inspired and settled on the below design. My chair is supported by inset mortises in the rockers and a 3/4 in oak through dowel. In CAD I offset the mortises by 15 thousanths and the dowel hole by 10. We can comeback to that later, but short story, the mortises fit perfectly and the dowel holes needed to be sanded. Additionally, while the CAD looks great, the finished chair will not turn out as intent. I think I should have 3D printed a mock up to ensure I got the design porportions right.
I used the arrange feature in CAD to model the 2D parts flat on a 4x8 sheet of plywood. My inital design would have required 3 full sheets - this got $$$ so I reduced the arm width to two panels which allowed me to only use two sheets.
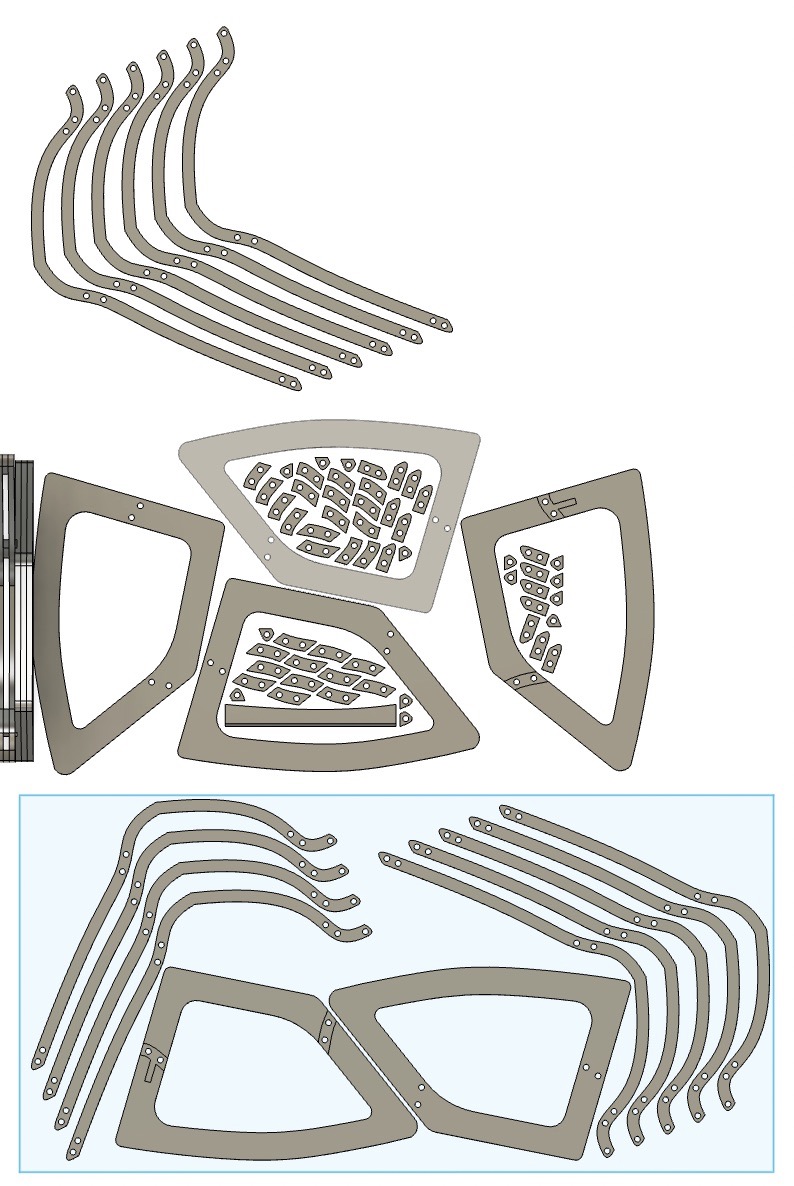
This is my second, and final arrangement

To ensure that I could center my arrangment in the stock during CAM, I modeled two 4x8x3/4 sheet and referenced at the origin (same location as the ply)

During the CAD, I used these parameters to better tune in the actual thickness of the material. In retrosepct I should have paid more attention.

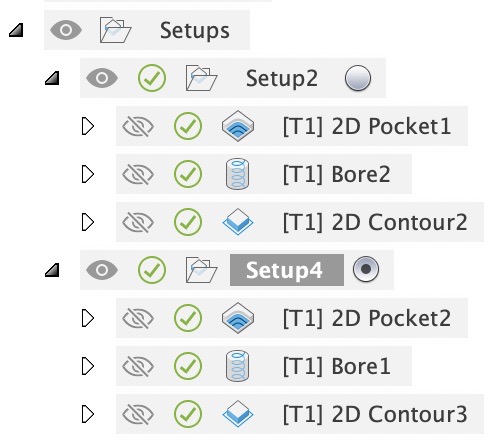
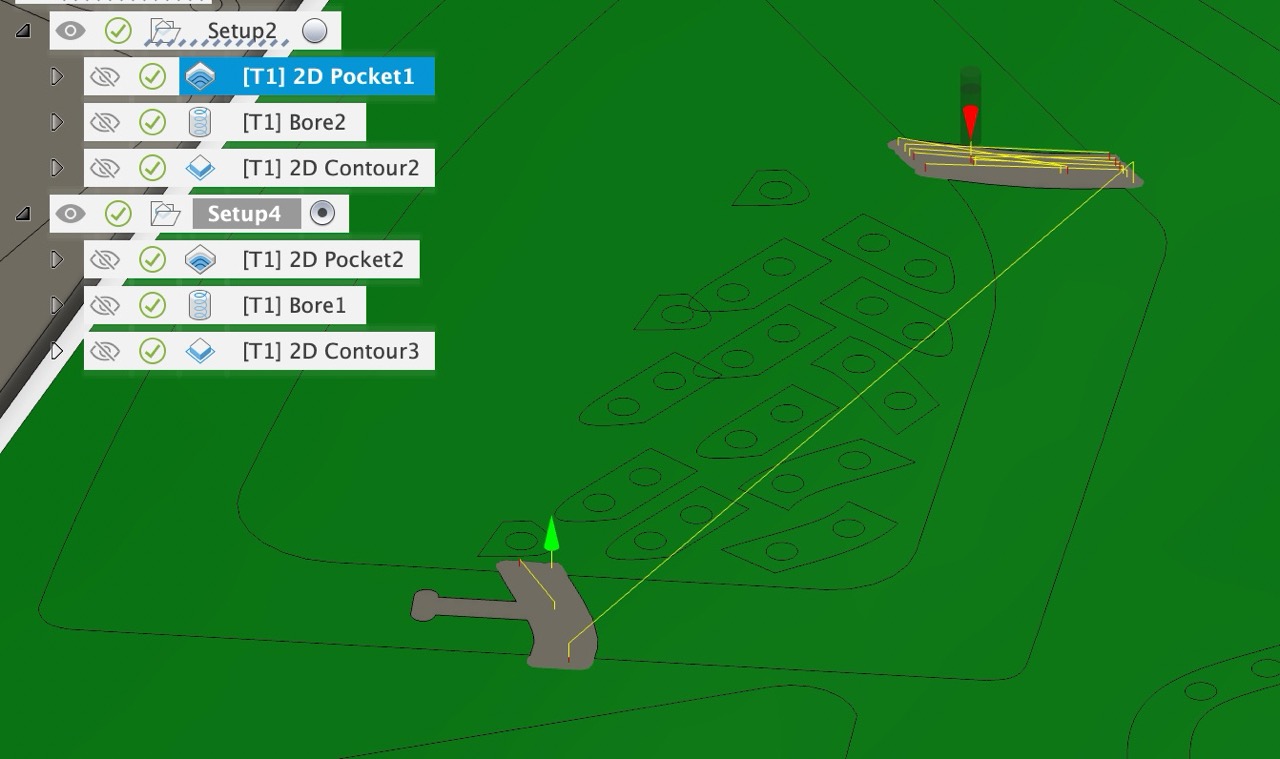
Finally, I was done with the CAD. Below you can see my tool paths in CAM. I used a setup, 2D pocket, bore, and 2D contour for each sheet. I will use the large format mill in the hobby shop as it can accomodate a full ply sheet. I elected to use one tool during the whole operation; I decided on a 1/2 inch 2 flute flat endmill. I choose the shorted on that the hobby shop had with a cutting length at ~1.5 inch. Additonally, in the subsequent steps I ensured to make maxium roughing depths to be no more than half the diameter of the tool (0.25 inch).
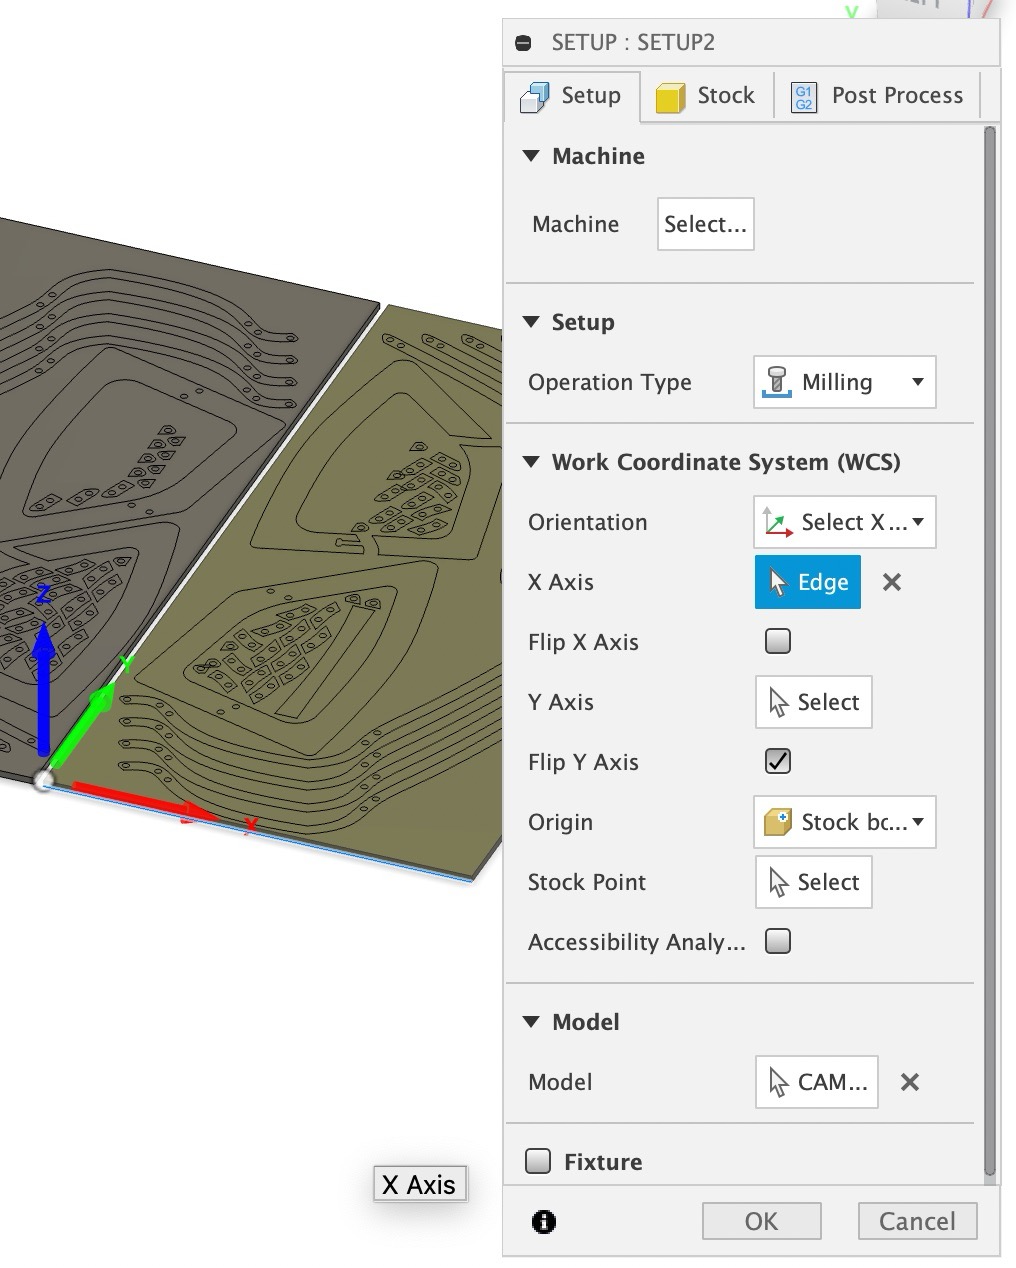
For the setup, I ensured ot reference the stock at the lower bottom left hand corner with x on the short axis.
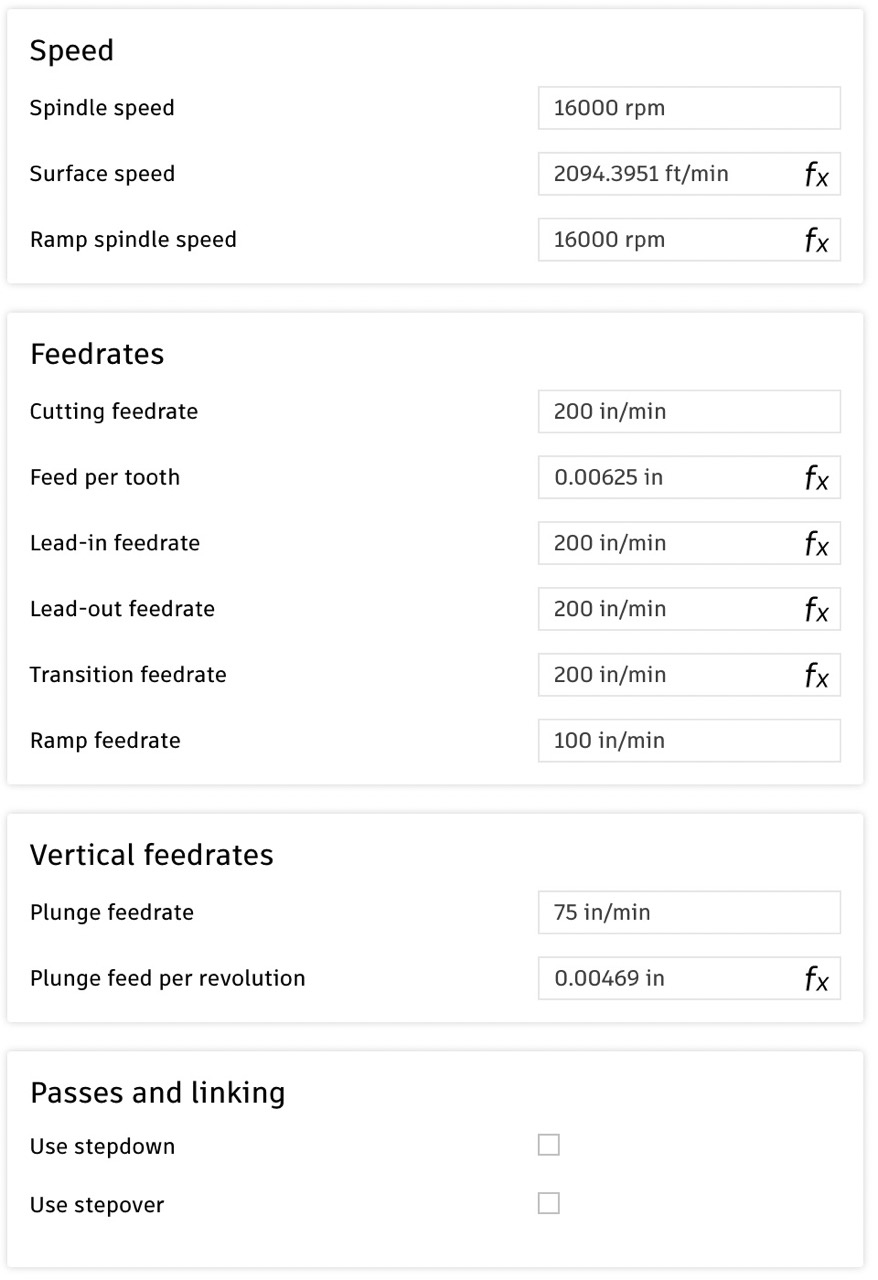
Details on tool choice, feeds and speeds. I initally used the FABLAB calculator, but defaulted to advise from Coby, the SME at the Hobbyshop.


The next three pictures show the individual tool paths in order. In the troubleshooting paragraph below I will talk about why they are oriented this way


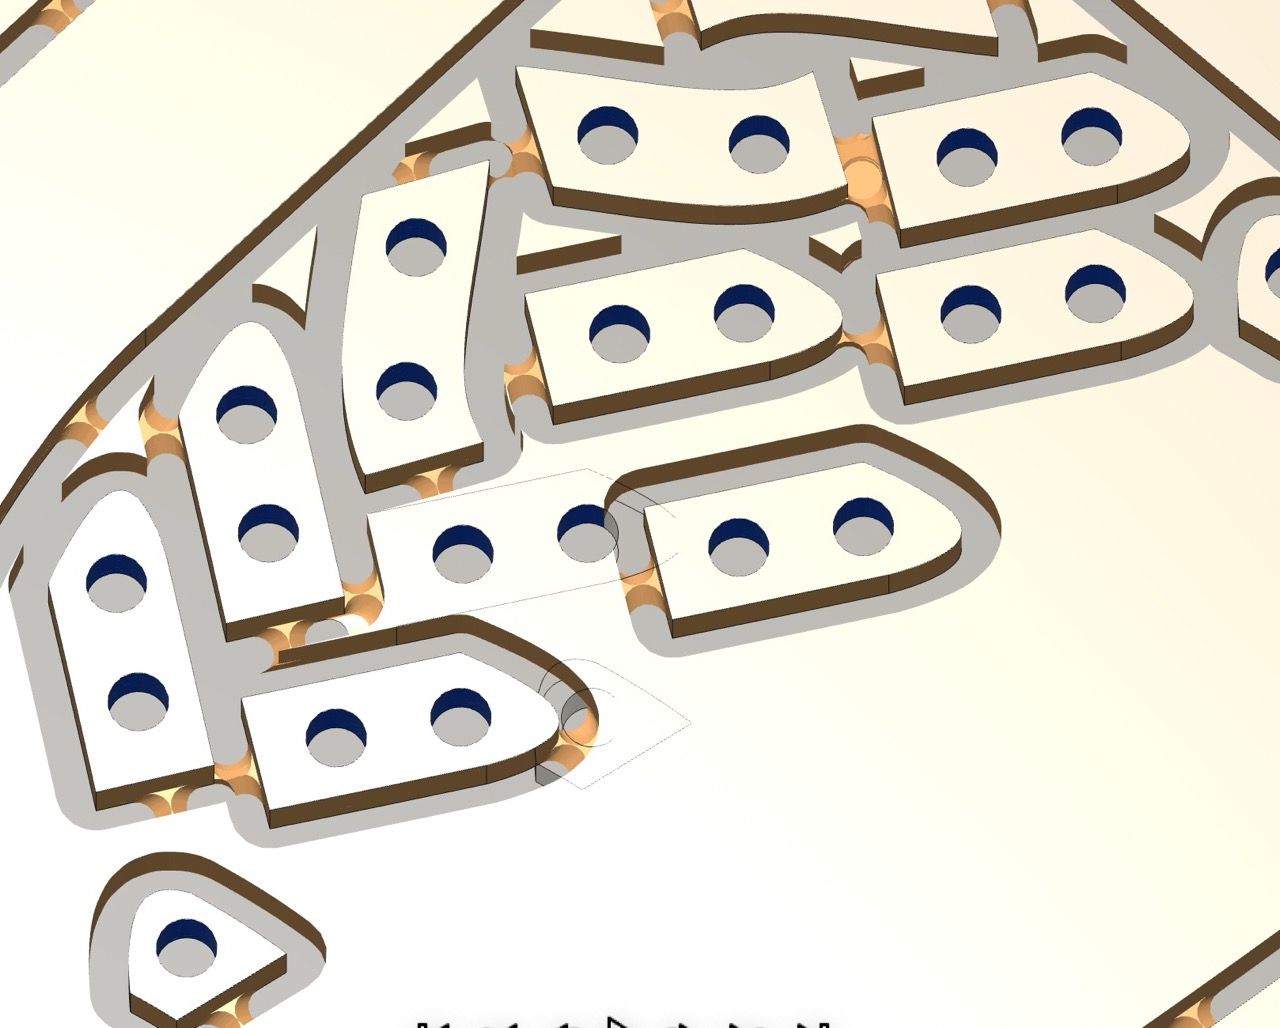
I needed to route a dogbone in the inner corner of the support mortise for the chair. The picture below that shows the tab placement for material support. I used triangular tabs as it affords an endmill the ability to cut on the sides too with inceased the longevity of the tool.

I ran into many challenges during this assignement. In order, my first attempt to cut the plywood was unsuccessful due to a dull tool which cause the top veneer of ply to shear and splinter. Luckily, unlike 3D printing, CAM can be stopped-adjusted-and restarted. I changed the bit and continued to machine. The next problem - which I foretold - was a small piece coming loose during the machining. Coby wasn't worried about very small waste material getting loose and confident in the tabs; however, soon one of the small spacer pieces came loose. This is due to my original toolpath ordering with the bore, after the 2D contour. The boring put a lot of torque on the support piece which had only been held down with tabs. I re did the CAM and pressed on. Finally the operation was going well - unluckily for me, the tool found and shear an embedded screw in the spoil MDF. Coby and I weren't sure where the other screws were so I rezero'ed the z axis 0.1 inches above the work surface. This would ensure that I didn't hit any screws, but resigned me to a long time of jigsawing and flush trime routing.

These pictures show the CAM in operation during the milling of the first sheet of ply


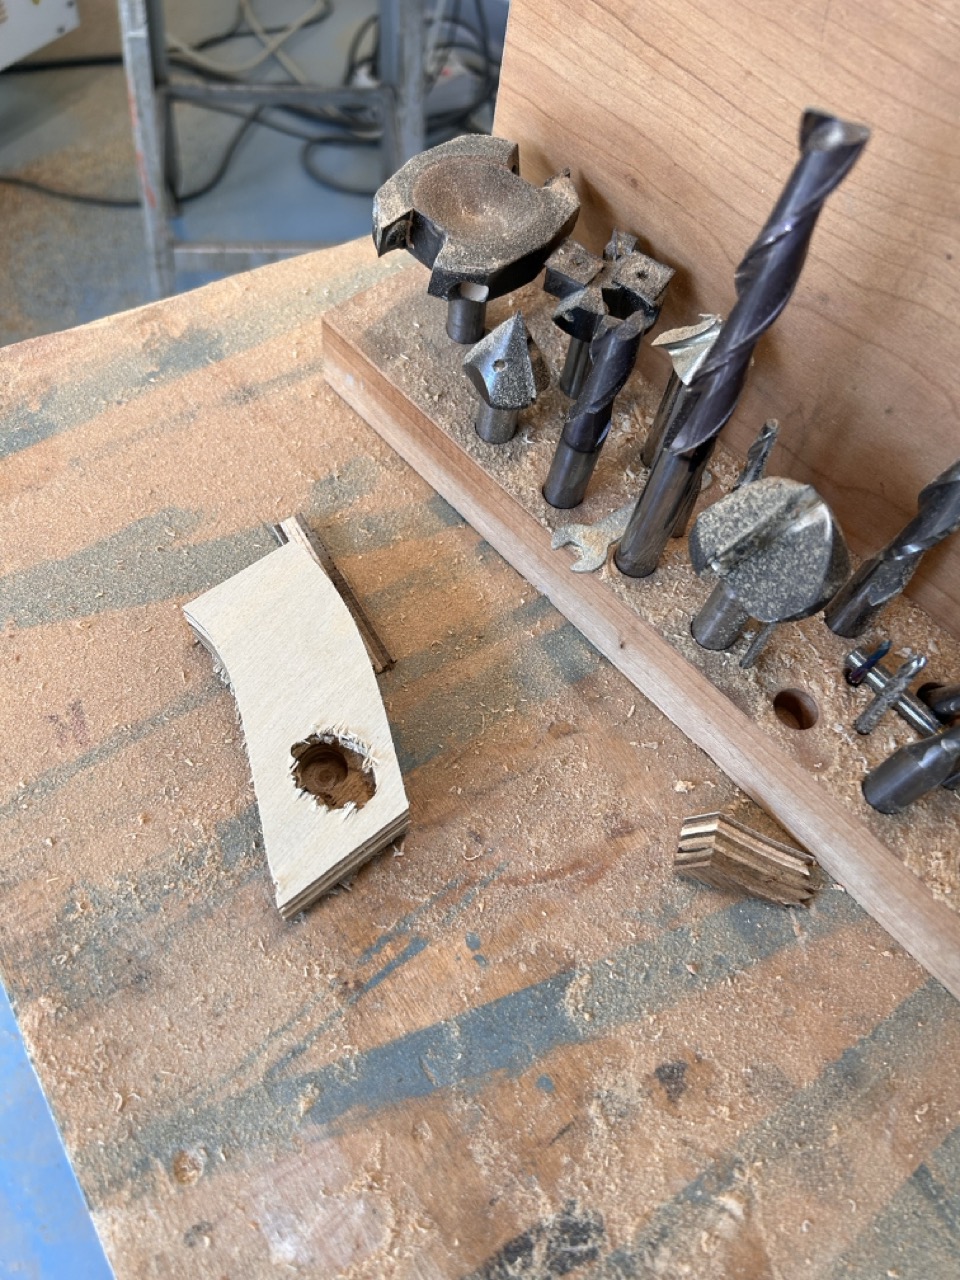
This is the small fly away support that came loose before I reordered my CAM.
This was a big project and I was only able to finish milling the first sheet this week. Finishinf the chair will require a lot more work to mill the second sheet, and post process all the pieces, bore out the holes, glue/assemble, and finally sand/finish with a few coats of poly.