Identifying an Unknown Antibiotic Resistance Gene
by Alex Mijalis, Li Li, Jessica Weber
Pre Lab Questions - Restriction Digest
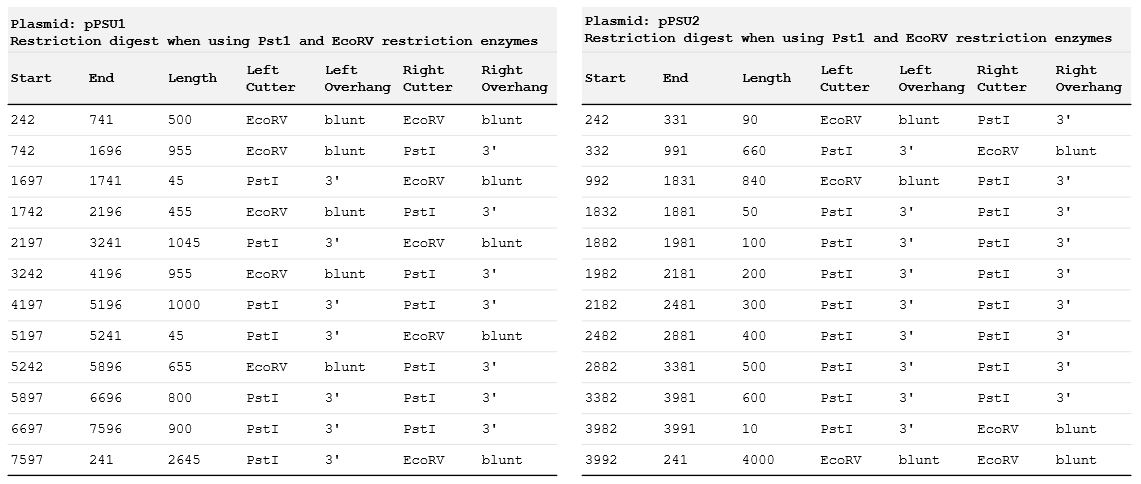
Download and review the genbank sequence files for pPSU1 and pPSU2.Question: Where do PstI and EcoRV cut within their recognition sequences?
Answer: This table shows the expected cut locations for both plasmids. I found these by running a restriction digest simulation on Benchling
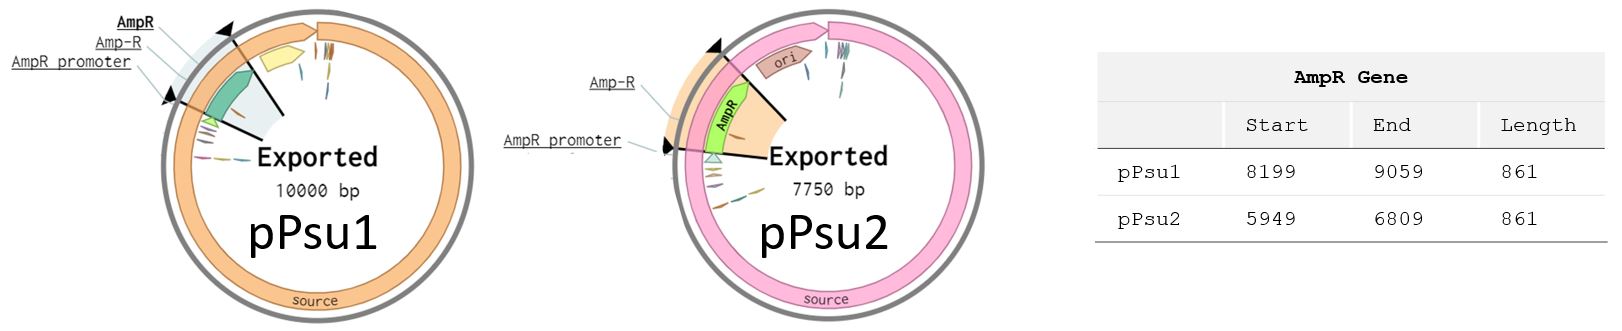
Question: What gene is encoded into the plasmids?
Answer: It's the ampR gene, which confers resistance to the antibiotic ampicillin. I get the answer from the plasmid map in Benchling.
Question: How many copies of the plsamid would you roughly expect in each cell? What information did you use to determine this?
Answer: The Origin of Replication (ORI) will determine the ‘Copy Number’ (expected number of plasmids in each cell). pPsu1 and pPsu2 are engineered plasmids and I can see in Benchling that they both use ORI pBR322 ORI-F. Then I used this
DNA Libraries
Question: How big is the E. Coli genome?Answer: It consists of about 4,600kb and contains approximately 4,000 genes.
Question: The spectinomycin gene cassette of interest is 1.2 kb. What is the probability of finding that gene in a sheared E. coli gene fragment of 2,000 bases?
Answer: The probability of finding the starting basepair of the gene is 1,200/4,600,000 = 0.026%. Hoowever, the probability of the gene being complete and not truncated within the fragment is 800/2,000 = 40%. Therefore the probability of finding the complete gene in any fragment is 0.026% X 40% = 0.0104%.
Question: How many E. coli transformants would you have to screen through to have a 99% probability of finding the spectinomycin gene?
Answer: The most used approach is:
N=ln(1−P)/ln(1−R)
Where:
N is the number of E.coli transformants which I have to screen to find the target gene
P is the probability of finding the fragment (in my case 99%)
R is the ratio of Fragment Size to Genome Size (in my case 0.26%)
Therefore:
N = ln(1-0.99)/ln(1-0.00026)
N = 17,709
number of transformants to screen to be 99% certain of finding my target gene.
Step 1: Preparation of an Open Source DNA Ladder
The plasmids pPSU1 and pPSU2 were isolated from E. coli culture and digested, and used to make a DNA ladder.
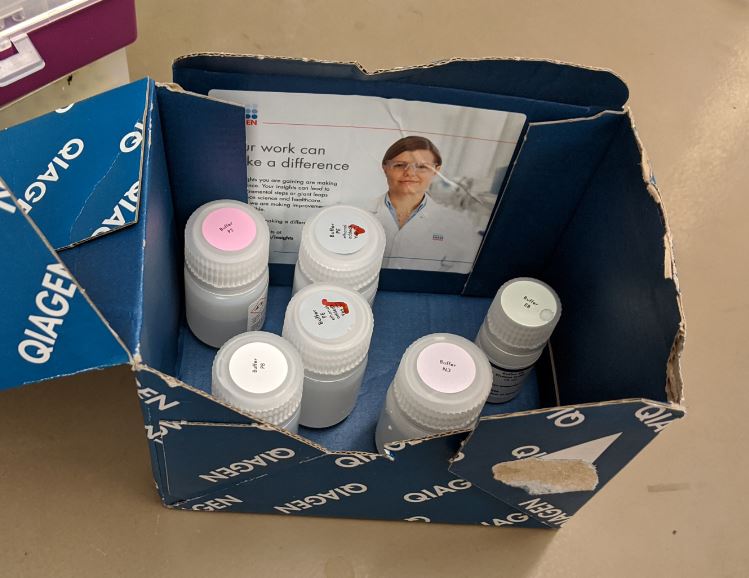

1. Miniprep (This step is to isolate the plasmids from the DNA)
A miniprep was undertaken using the QIAprep Smin Miniprep Kit and protocol to harvest pPSU1 and pPSU2 DNA from overnight E. coli culture.
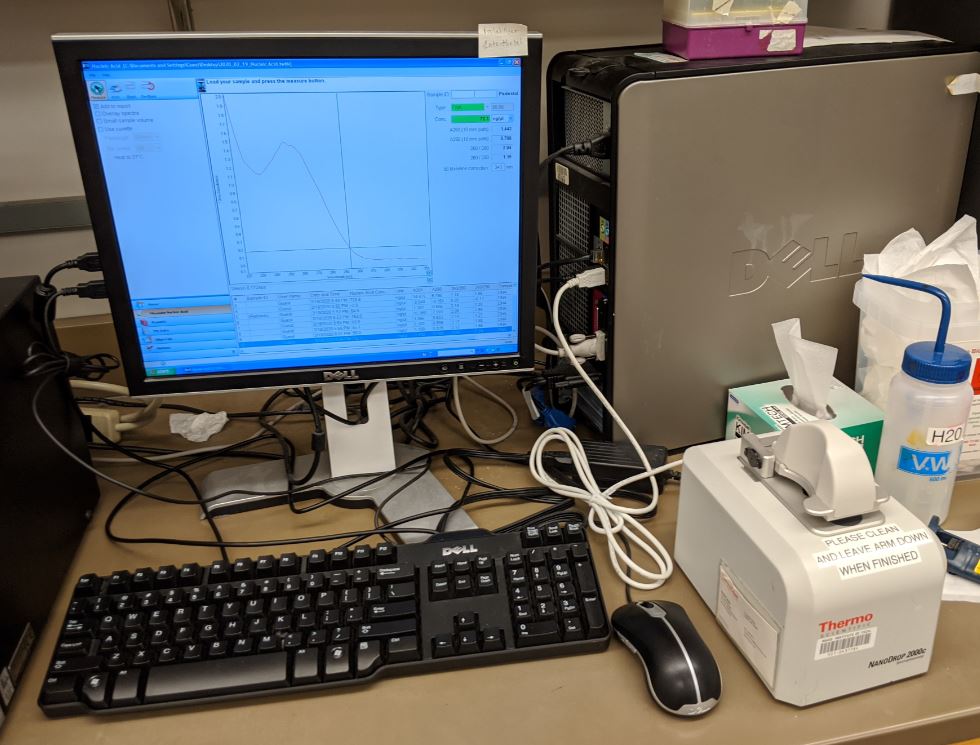
2. Measuring Concentrations (This is a measurement step to determine the concentration of the plasmids in the medium)
A Nanodrop spectrophotometer was used to measure the pPSU1 and pPSU2 DNA concentration:
a. pPsu1 was 99.7ng per μl
b. pPsu2 was 61.5ng per μl
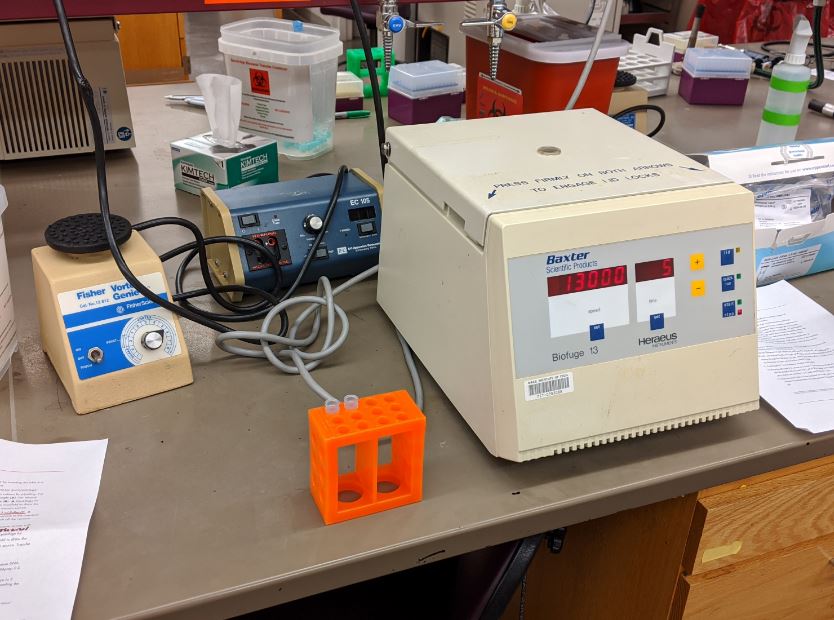
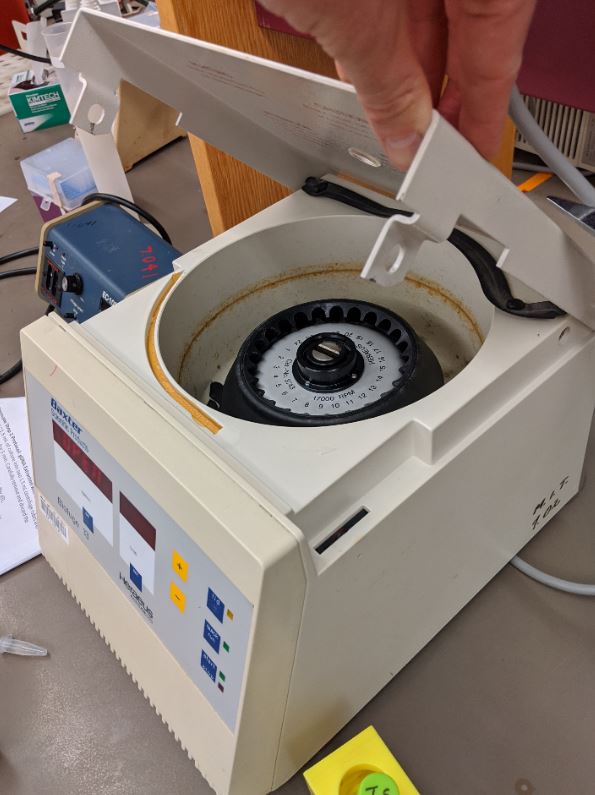
3. Restriction Digest (This step is cutting the Plasmid DNA into Fragments)
The enzymes PstI-HF or EcoRV-HF (from NEB) were used in a restriction digest on both the pPSU1 and pPSU2 DNA, in order to cut the DNA into fragments. The reactions were prepared as follows into a PCR tube. Always remember to add the restriction enzyme last in order that it is not out of the buffer.
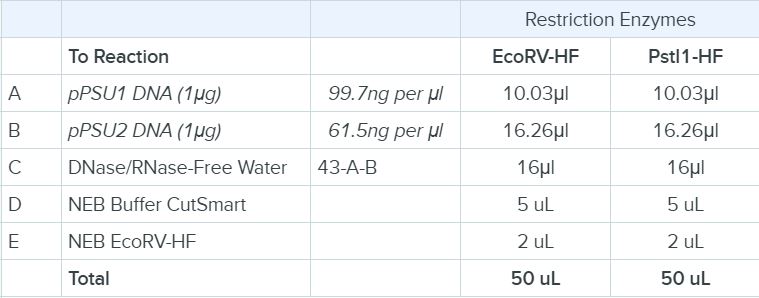
These were Incubated at 37oC for 15 minutes in a Thermocycler.
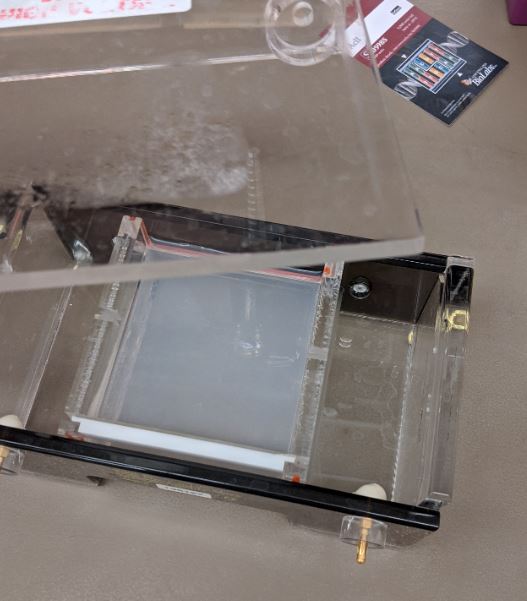
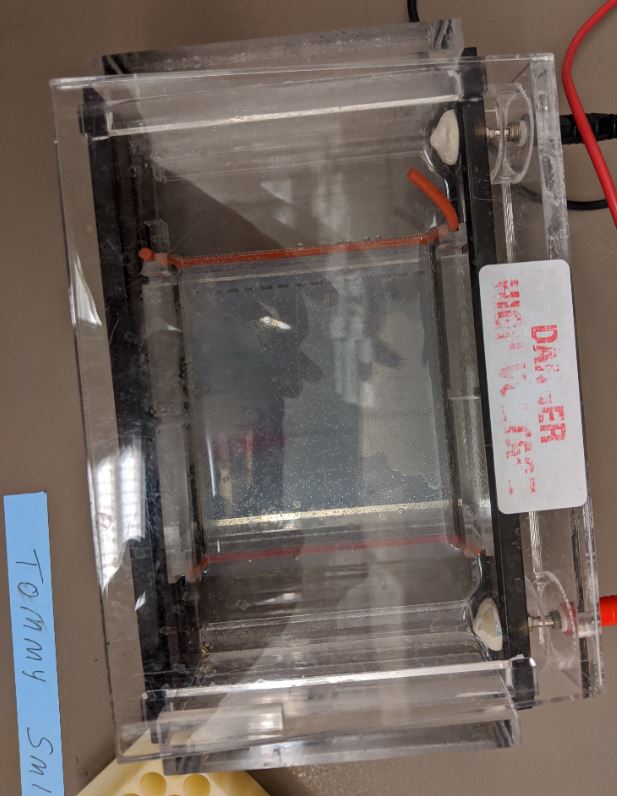
4. Preparing the Gel (This step is preparing a gel box with gel, in which the ladder will be created)
Weigh 1.0 g agarose and add into 100 mL 1xTAE. Microwave until agarose completely dissolves.
Add 10 uL of 10000xSYBR-Safe DNA stain - swilled until disolved
This was poured into a large gel box tray and the comb inserted
Left to set for 45 minutes
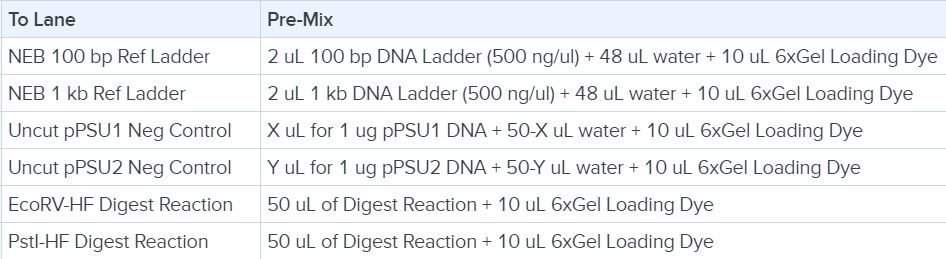
5. Loading the Lanes in the Gel Box (Adding reference ladder, control and our plasmid DNA fragments into lane wells)
The following were loaded into lanes:
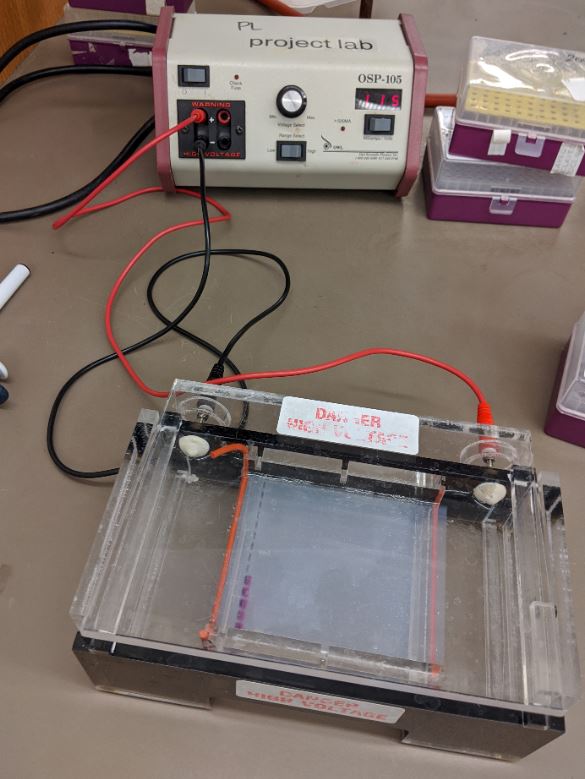
6. Running the Gel Box (putting the positive charge makes the DNA fragments run through the gel)
The power supply was connected with the red (positive) cable to the far end of the Gel from the lane wells. DNA is negatively charged and attracted to the positive charge.
The Gel Box was run at 120V for 1 hour.
7. Illumination (illumating the bands created when the distinct DNA fragments travel different distances due to size)
The Gel was removed from the Box
The transilluminator was used to image the Gel. The best illumination happened at 500hz
Step 2: Isolation of genomic DNA from bacteria
We start with a strain of E. coli which contains a spectinomycin resistance gene. Then we multiply these cells, and lyse in order to separate out the geneomic DNA. The genomic DNA is longer (4-5 Mb in length) than plasmid DNA (~10 kb in length) and so easy to separate. This genomic DNA will be used to prepare and sequence DNA libraries in parts 3 and 4.
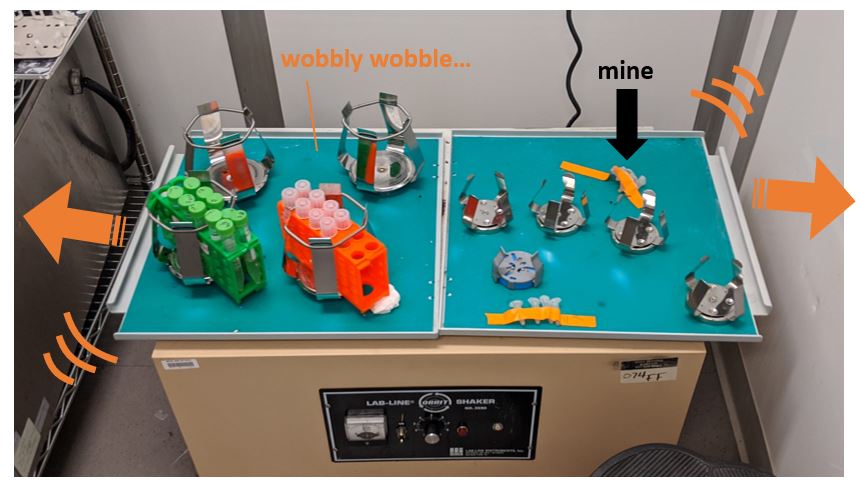
The following steps were taken in two identicle but seperate centrifuge tubes. The process starts with cell culture of ecoli bacteria and turns it into just the genomic DNA concentrated and suspended in medium. It was done using the Qiagen DNEasy Kit.
Centrifuge (Separating the Cells from the Media)
1.5ml of culture was centrifuged at ~5,000g (or 9,500rpm) for 5 min. This resulted in a pellet at the bottom of the centrifuge tube. The supernatant was removed and discarded.
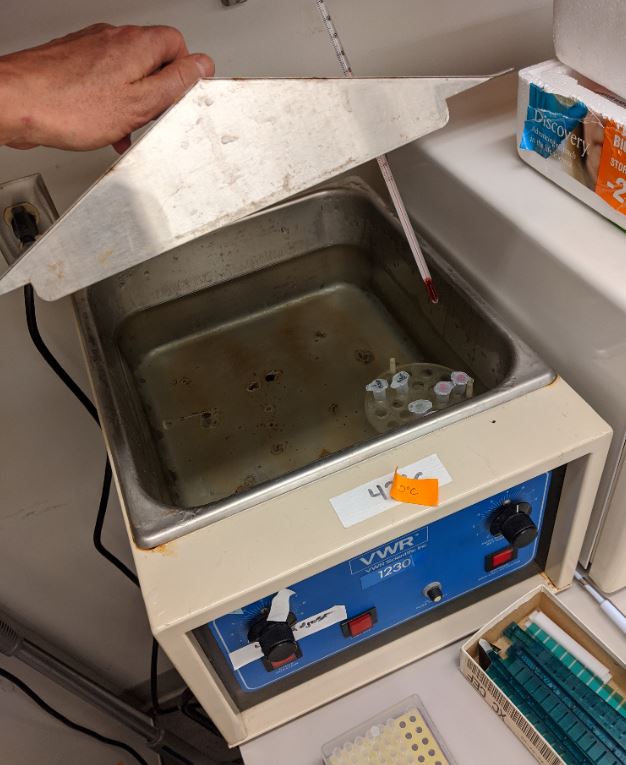
Preparing (heat, buffers and vortexing to prepare the mixture for lysing)
The pellets were resuspend 180 uL Buffer ATL and 20 uL proteinase K. Then this was incubate at 56C for 30 min in a VWR flotation bath.
Vortex for 15s.
Add 200 uL Buffer AL to each sample and mix by vortexing.
Add 200 uL absolute ethanol to each sample and mix by vortexing.
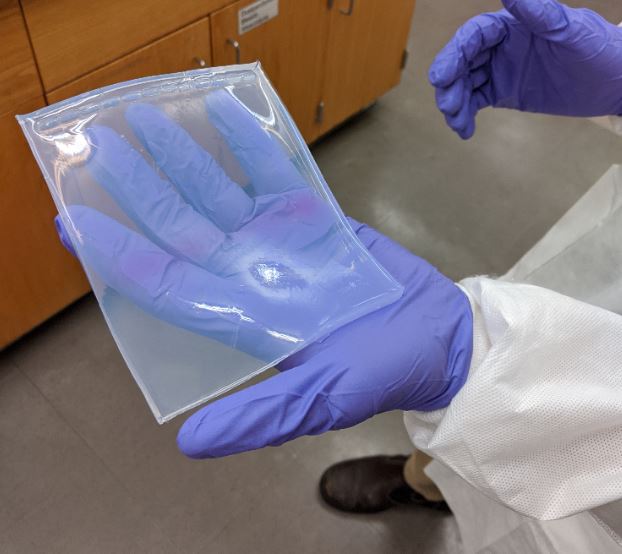
Separating (Lysing the cells and removing the small particles with a column and centrifuge)
The material went into the Dneasy Mini Spin column in a 2 mL collection tube
Spin at 6,000g for 1 min and discard the flow-through and collection tube.
Add 500 uL buffer AW1, centrifuge for 1 min; discard the flow-through and the collection tube.
Add 500 uL buffer AW2, centrifuge for 3 min; discard the flow-through and the collection tube.
Extracting (eluting the column to extract the genomic DNA)
I transfered the spin column to a new centrifuge tube.
Elution step with 200 uL buffer AE - incubate for 1 min at room temperature, then centrifuge for 1 min.
Measuring Concentrations (This is a measurement step to determine the concentration of the plasmids in the medium)
A Nanodrop spectrophotometer was used to measure the concentration of my genomic DNA
a. Sample 1 was 55ng per μl
b. Sample 2 was 72ng per μl
Step 3: Fragmenting the Genomic DNA and Analysis by Gel Electrophoresis
In step 3 we run a restriction digest in order to fragment the genenomic DNA into a fragment library. Then we use Gel Electrophoresis in order to understand the DNA fragments.

This step didn't go too well for me - I had to run the gel electrophoresis three times, but there was a ton of learning.
Starting Genomic DNA (from step 2, I started with two DNA samples at 55 & 72ng per ul)
I decided to proceed with the 72 ng per μl sample, and keep the other in storage in case of mishaps (a good decision as I would need it later)
Restriction Digest (fragmenting the genomic DNA)
Four restiction digests were set up using the protocol used in step 1, including Cutsmart Buffer and dye provided in the NEB kit:
- A mixture of EcoRI-HF + EcoRV-HF + Pvu11-HF @ 2μl each
- Sau3AI at a 1x concentration
- Sau3AI at a 1:10 concentration
- Sau3AI at a 1:100 concentration
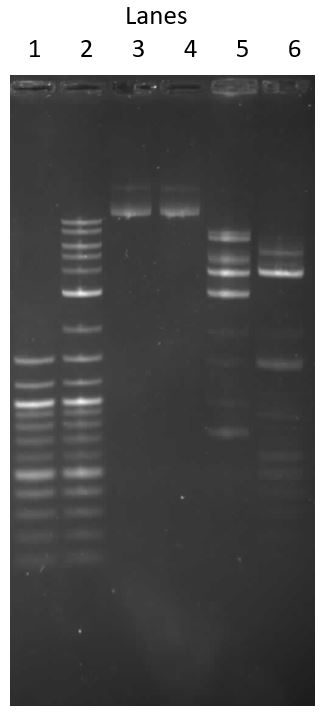
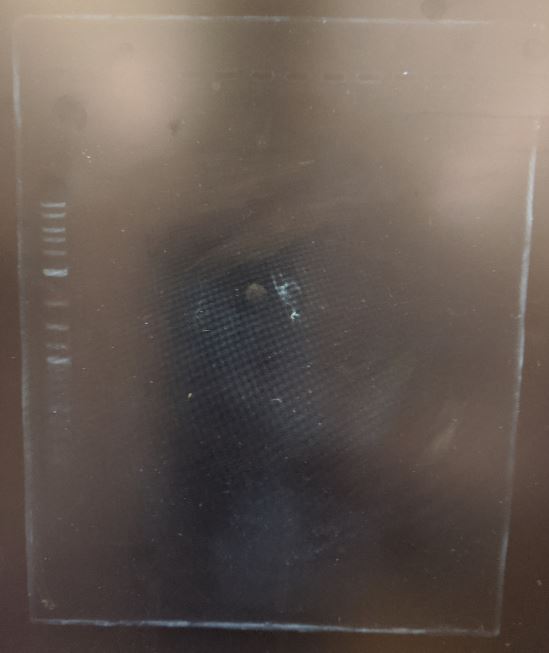
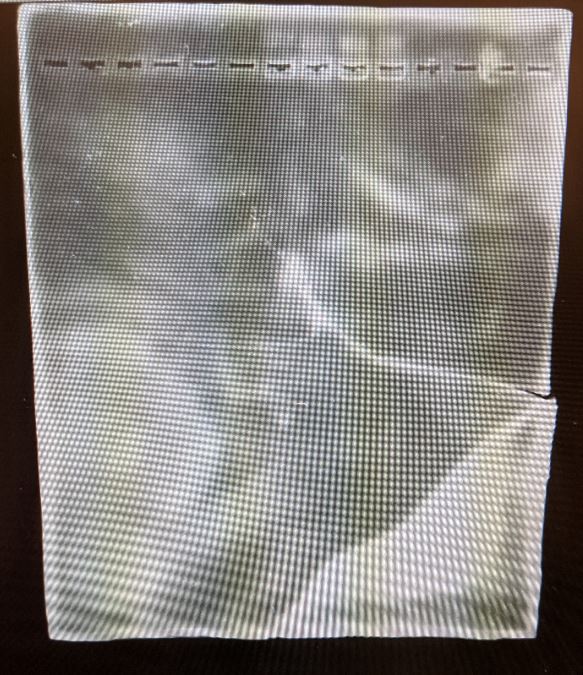
The initial gel (image above) had a clear ladder profile (1Kb) but only had a feint smear visible in the lanes with the restriction digests (it looks like the Sau3AI even at the low concentrations didnt cut well)
I decided to re-run using the second half of the restriction digest, but for some reason, the DBA didn't run from the wells.
I then went all the way back and re-run the restriction digests using my reserve DNA sample (55ng per μl). This time, I set up the four lanes with a different concentrations completely:
| Lane 1 | Lane 2 | Lane 3 | Lane 4 |
|---|---|---|---|
| 5μl Cutsmart + EcoRI-HF + EcoRV-HF + Pvu11-HF @ 2μl each | 5μl Cutsmart + Sau3AI 1μl + 36μl DNA + 8μl water | 5μl Cutsmart + Sau3AI 1μl + 30μl DNA + 14μl water | 5μl Cutsmart + Sau3AI 1μl + 40μl DNA + 4μl water |
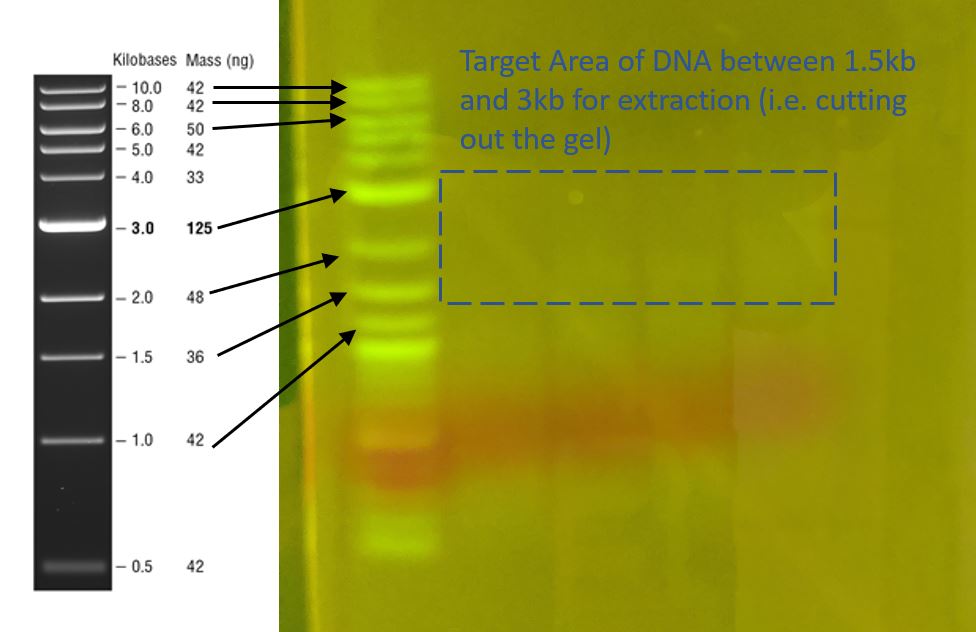
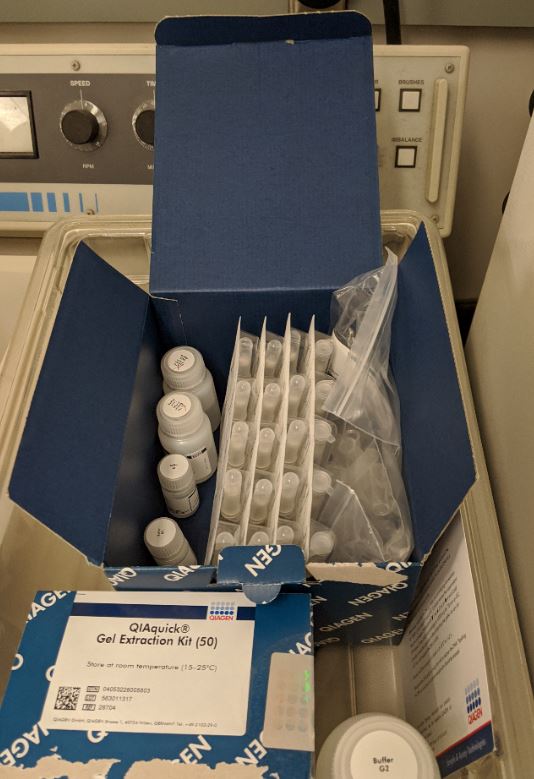
I did a Gel Extraction, which means cutting out the above section of gel where I believe that the DNA of interest is contained (yes, literally cutting the gel block with a razor blade). Then I used the NEB Gel Extraction kit to isolate and purify the DNA in the gel block. The NEB Gel Extraction Kit follows a process like this:
- Cut out the gel and put it into a Eppendorf tube
- Add buffer QG (gel dissolving buffer) up to about 3X the volume of the gel into the same tube
- Incubate at 50C for 10 mins, then vortex – repeat these two steps until the gel is dissolved
- Washing with buffer PE – stand and centrifuge. Then, elute with buffer EB and spinning
| Lane 1 | Lane 2 | Lane 3 | Lane 4 |
|---|---|---|---|
| 3.9ng/μl | 11.3ng/μl | 15.1ng/μl | 9.2ng/μl |
Step 4: Reparing the Fragments, adding to a Plasmid Vector and Multiplying
I went into step 4 with my genomic DNA which has been fragmented, and then sorted in the gel and extracted from the Gel. Step 4 is to repair the DNA, firstly by fixing the sheared ends and making them blunt (NEB DNA Blunting Kit) and then ligating them into a plasmid vector, which we will clone up on plates, select using antibiotics and identify targets and send off for professional sequencing.
Blunting (converting fragments to phosphorylated, blunt-ended DNA)
In this step, I used the NEB Blunting Kit in order to fix the uneven ends of the DNA by convert 5´ or 3´ overhangs to 5´ phosphorylated, blunt-ended DNA).
This is needed before they can be ligated into the plasmid vectors
This is a protocol using
Ligating (inserting the DNA fragments into a plasmid vector)
To Ligate – transformative verb “to join together (something, such as DNA or protein chains) by a chemical process” Merriam-Webster
The now-blunted fragments were ligated into special plasmid vectors provided by NEB. The plasmid vectors were already containing a ampicillin/carbenicillin resistance gene. This is useful when we later select the plasmids have been successfully ligated.
This is a protocol using
Electroporation (short, high voltage shock to open the pores and inset plasmids into EColi)
The gene-containing-plasmid-vectors were then transformed into E. coli using electroporation.
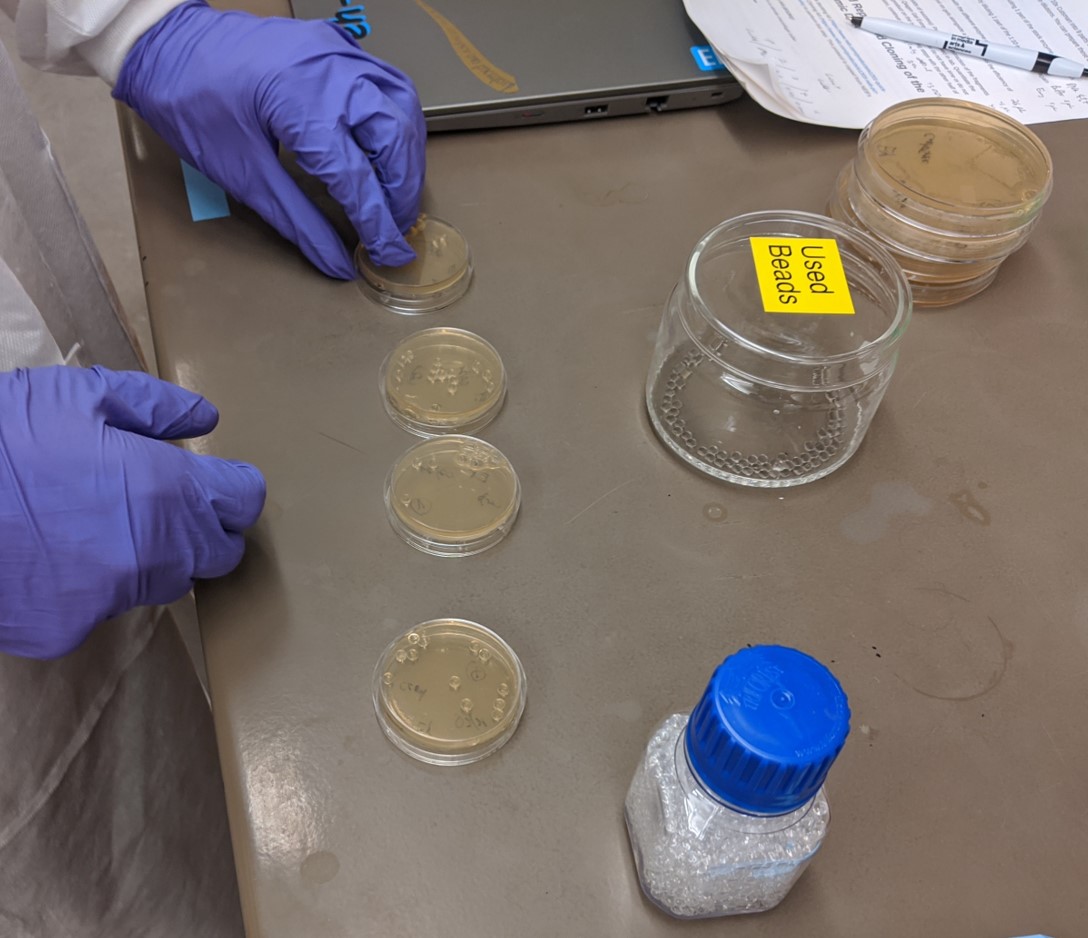
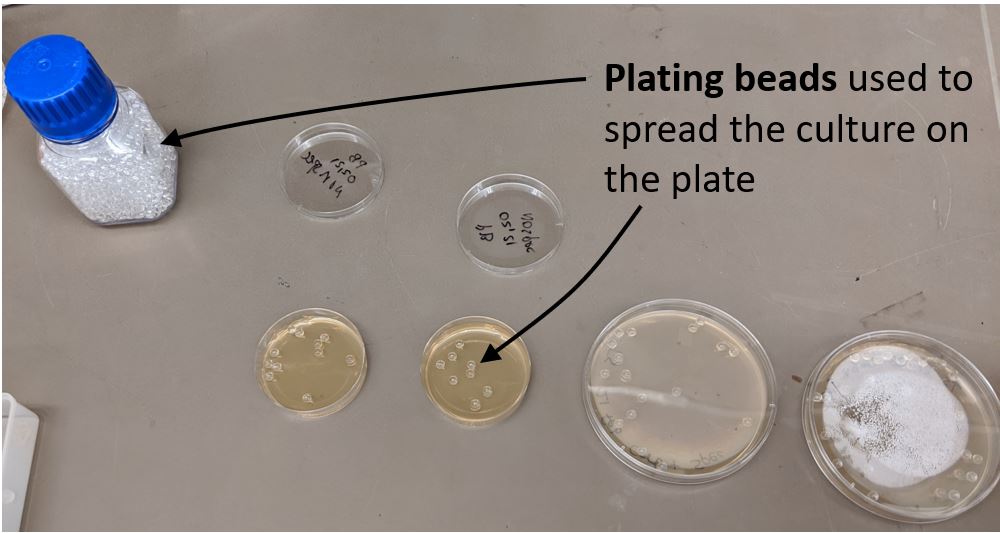
Plating and Culturing (for selection)
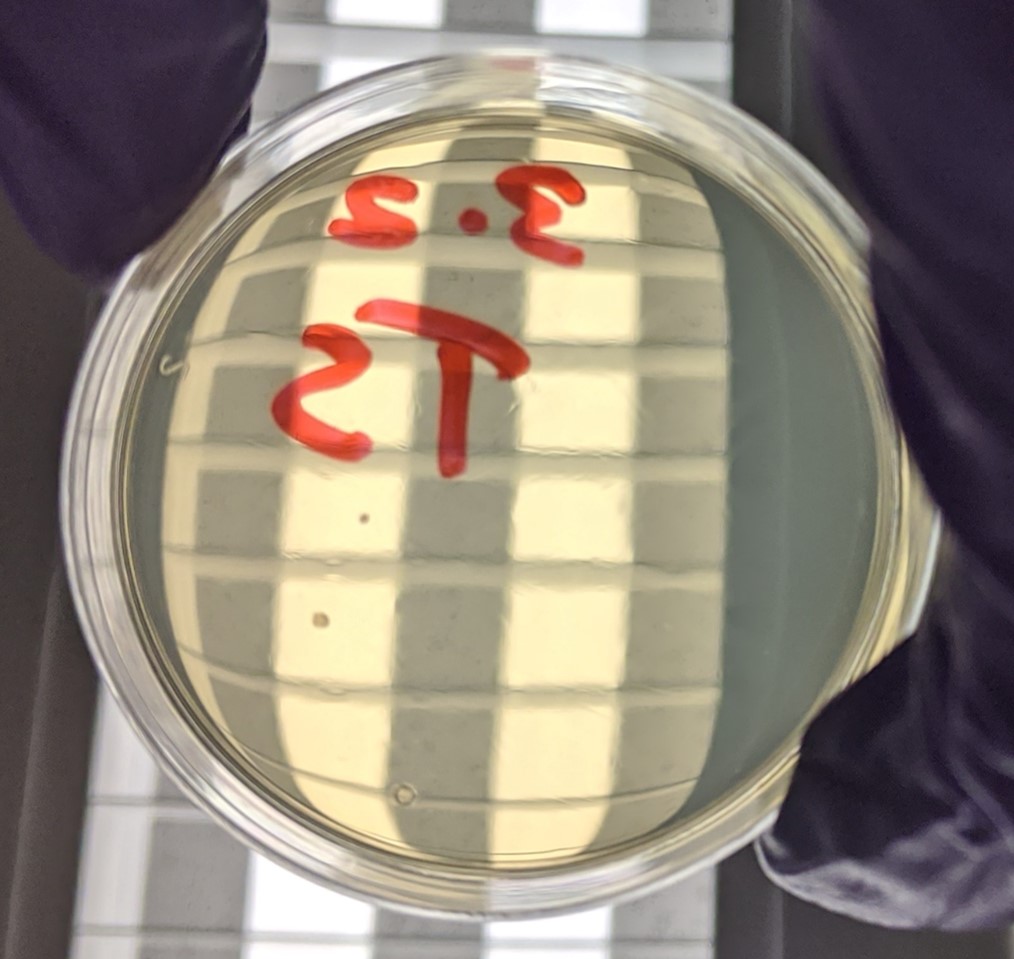
Then these were transferred to pre-prepared LB Agar plates:
- All of them contained carbenicillin (to select for bacteria that contain the plasmid)
- Some of them contained spectinomycin (to select for plasmid vectors that contain the isolated antibiotic resistance gene)
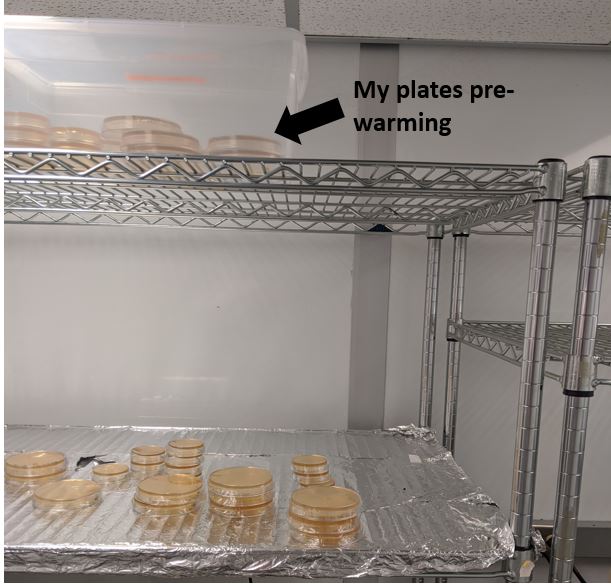
Finally they were put in the warm room (37C) for 24 hours to grow the cultures.
Results and photos coming soon.
The final step will be to select any colonies which have grown successfully and send them off for professional sequencing.
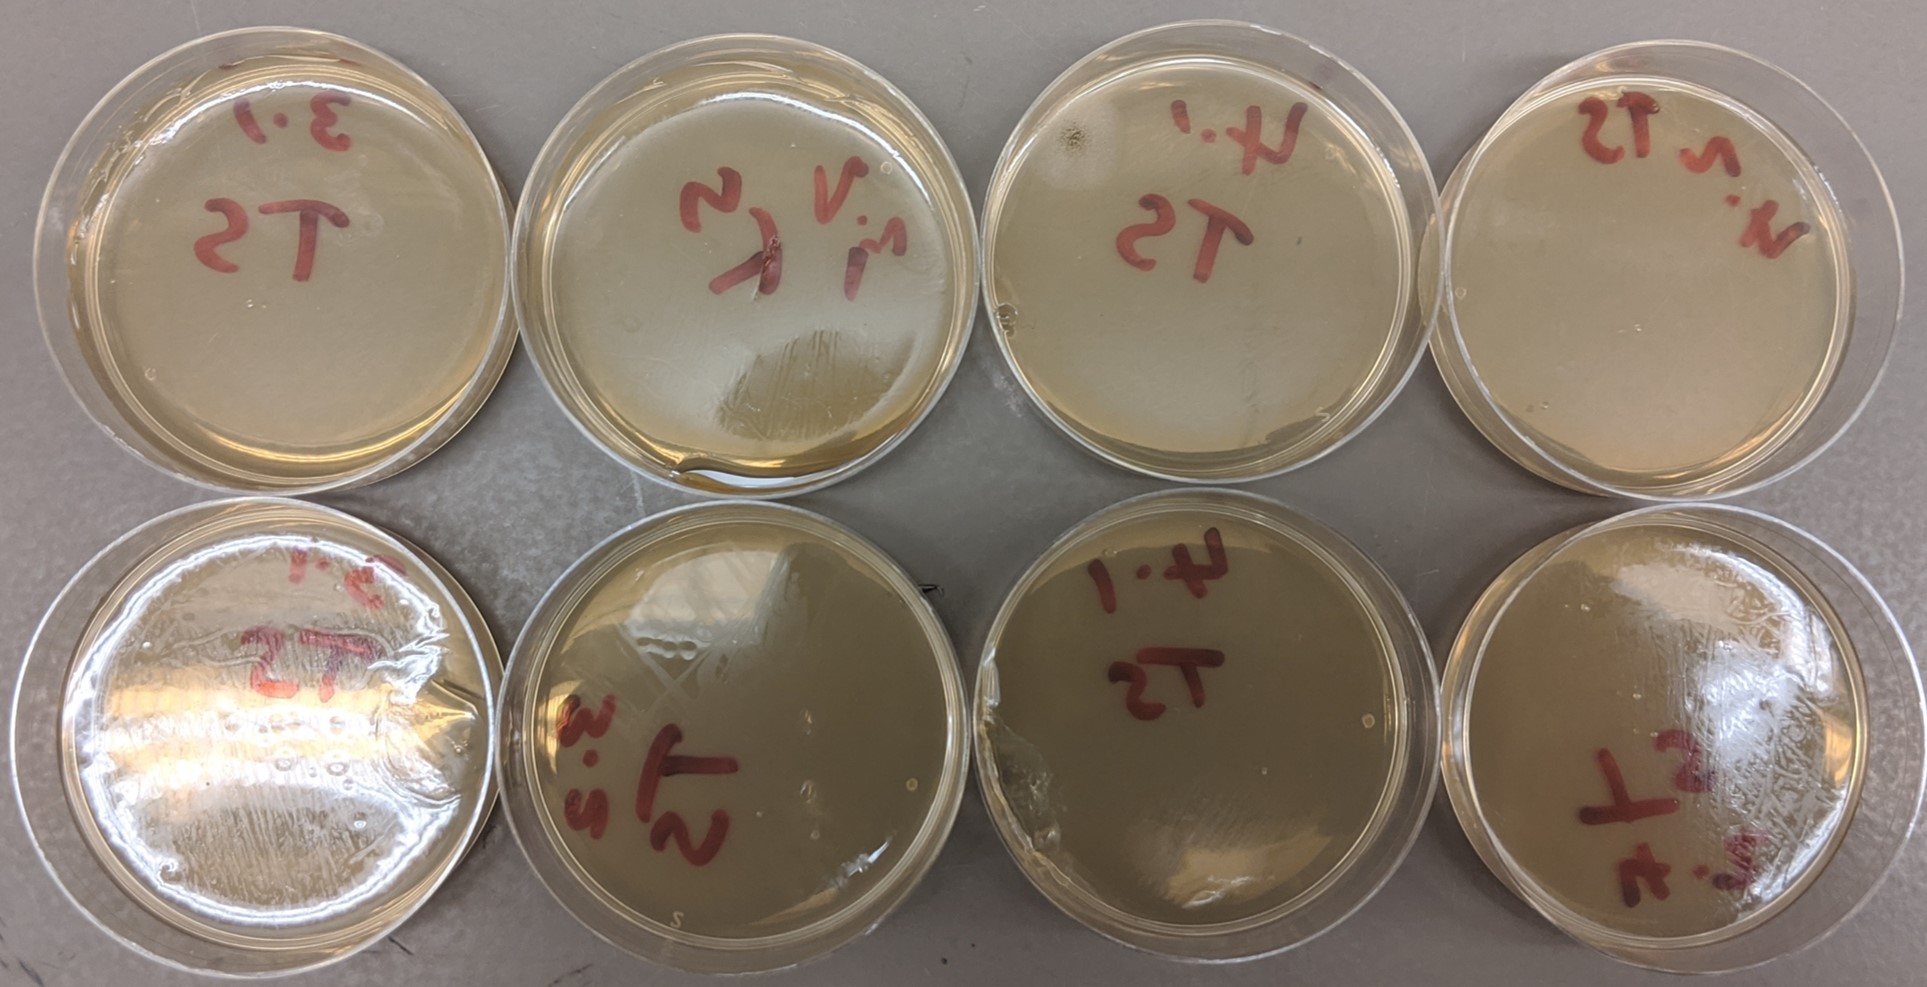
Final Result
These are my carbenicillin only plates.