-

- Final Project Journal 01
- Computer Controlled Cutting 02
- Electronics Production 03
- 3D Scannnig + Printing 04
- Electronics Design 05
- Computer-Controlled Machining 06
- Embedding Programming 07
- Molding + Casting 08
- Output Devices 09
- Machine Design 10
- Input Devices 11
- Interface + App Programming 12
- Networking + Communications 13
- Composites 14
- Final Project 15
- Misc
HOW TO MAKE (ALMOST) ANYTHING
Kevin Guiney
Final Project Journal
This past summer I visit a museum in the middle of Wisconsin called The House on the Rock. It’s hard to describe, but it's warehouse after warehouse of collections of everything form model ships to merry-go-rounds. The extreme collections of a weathly and eccentric guy. One thing he had a lot of colliopes; steam powered animatronic instruments.
I was fascinated by these, both visually and musically. My initial goal was do do something like that. A musical instrument that was part analog, part digital and part whimsical. I also love wind up music boxes, and ultimately decided I wanted to create something that made that same sound. I toyed around with the idea that it would be a performance stage, meaning you pushed a button and music played and characters animated. I finally decided I wanted something you can play. Music boxes only play one song, but I want to create something where you have control over that distinctive plucked metal sound.
How will it look? I’d like it to look like a real piano, just shrunk down to tabletop size. The keys should be playable by adult fingers. The back of the piano I still am not sure how it will look. Will it be like a baby grand, with a flip-up lid, or will it be a more saloon style? A lot of this depend on how much room I have back there taking the board and motors. Because of the size of each motor, my comb will have the individual spines spread far apart, probably a couple of inches. This can make for a very long piano, unless I can stack them in some way. I also want to make sure the sound resonates well, so will have to figure that out as well.
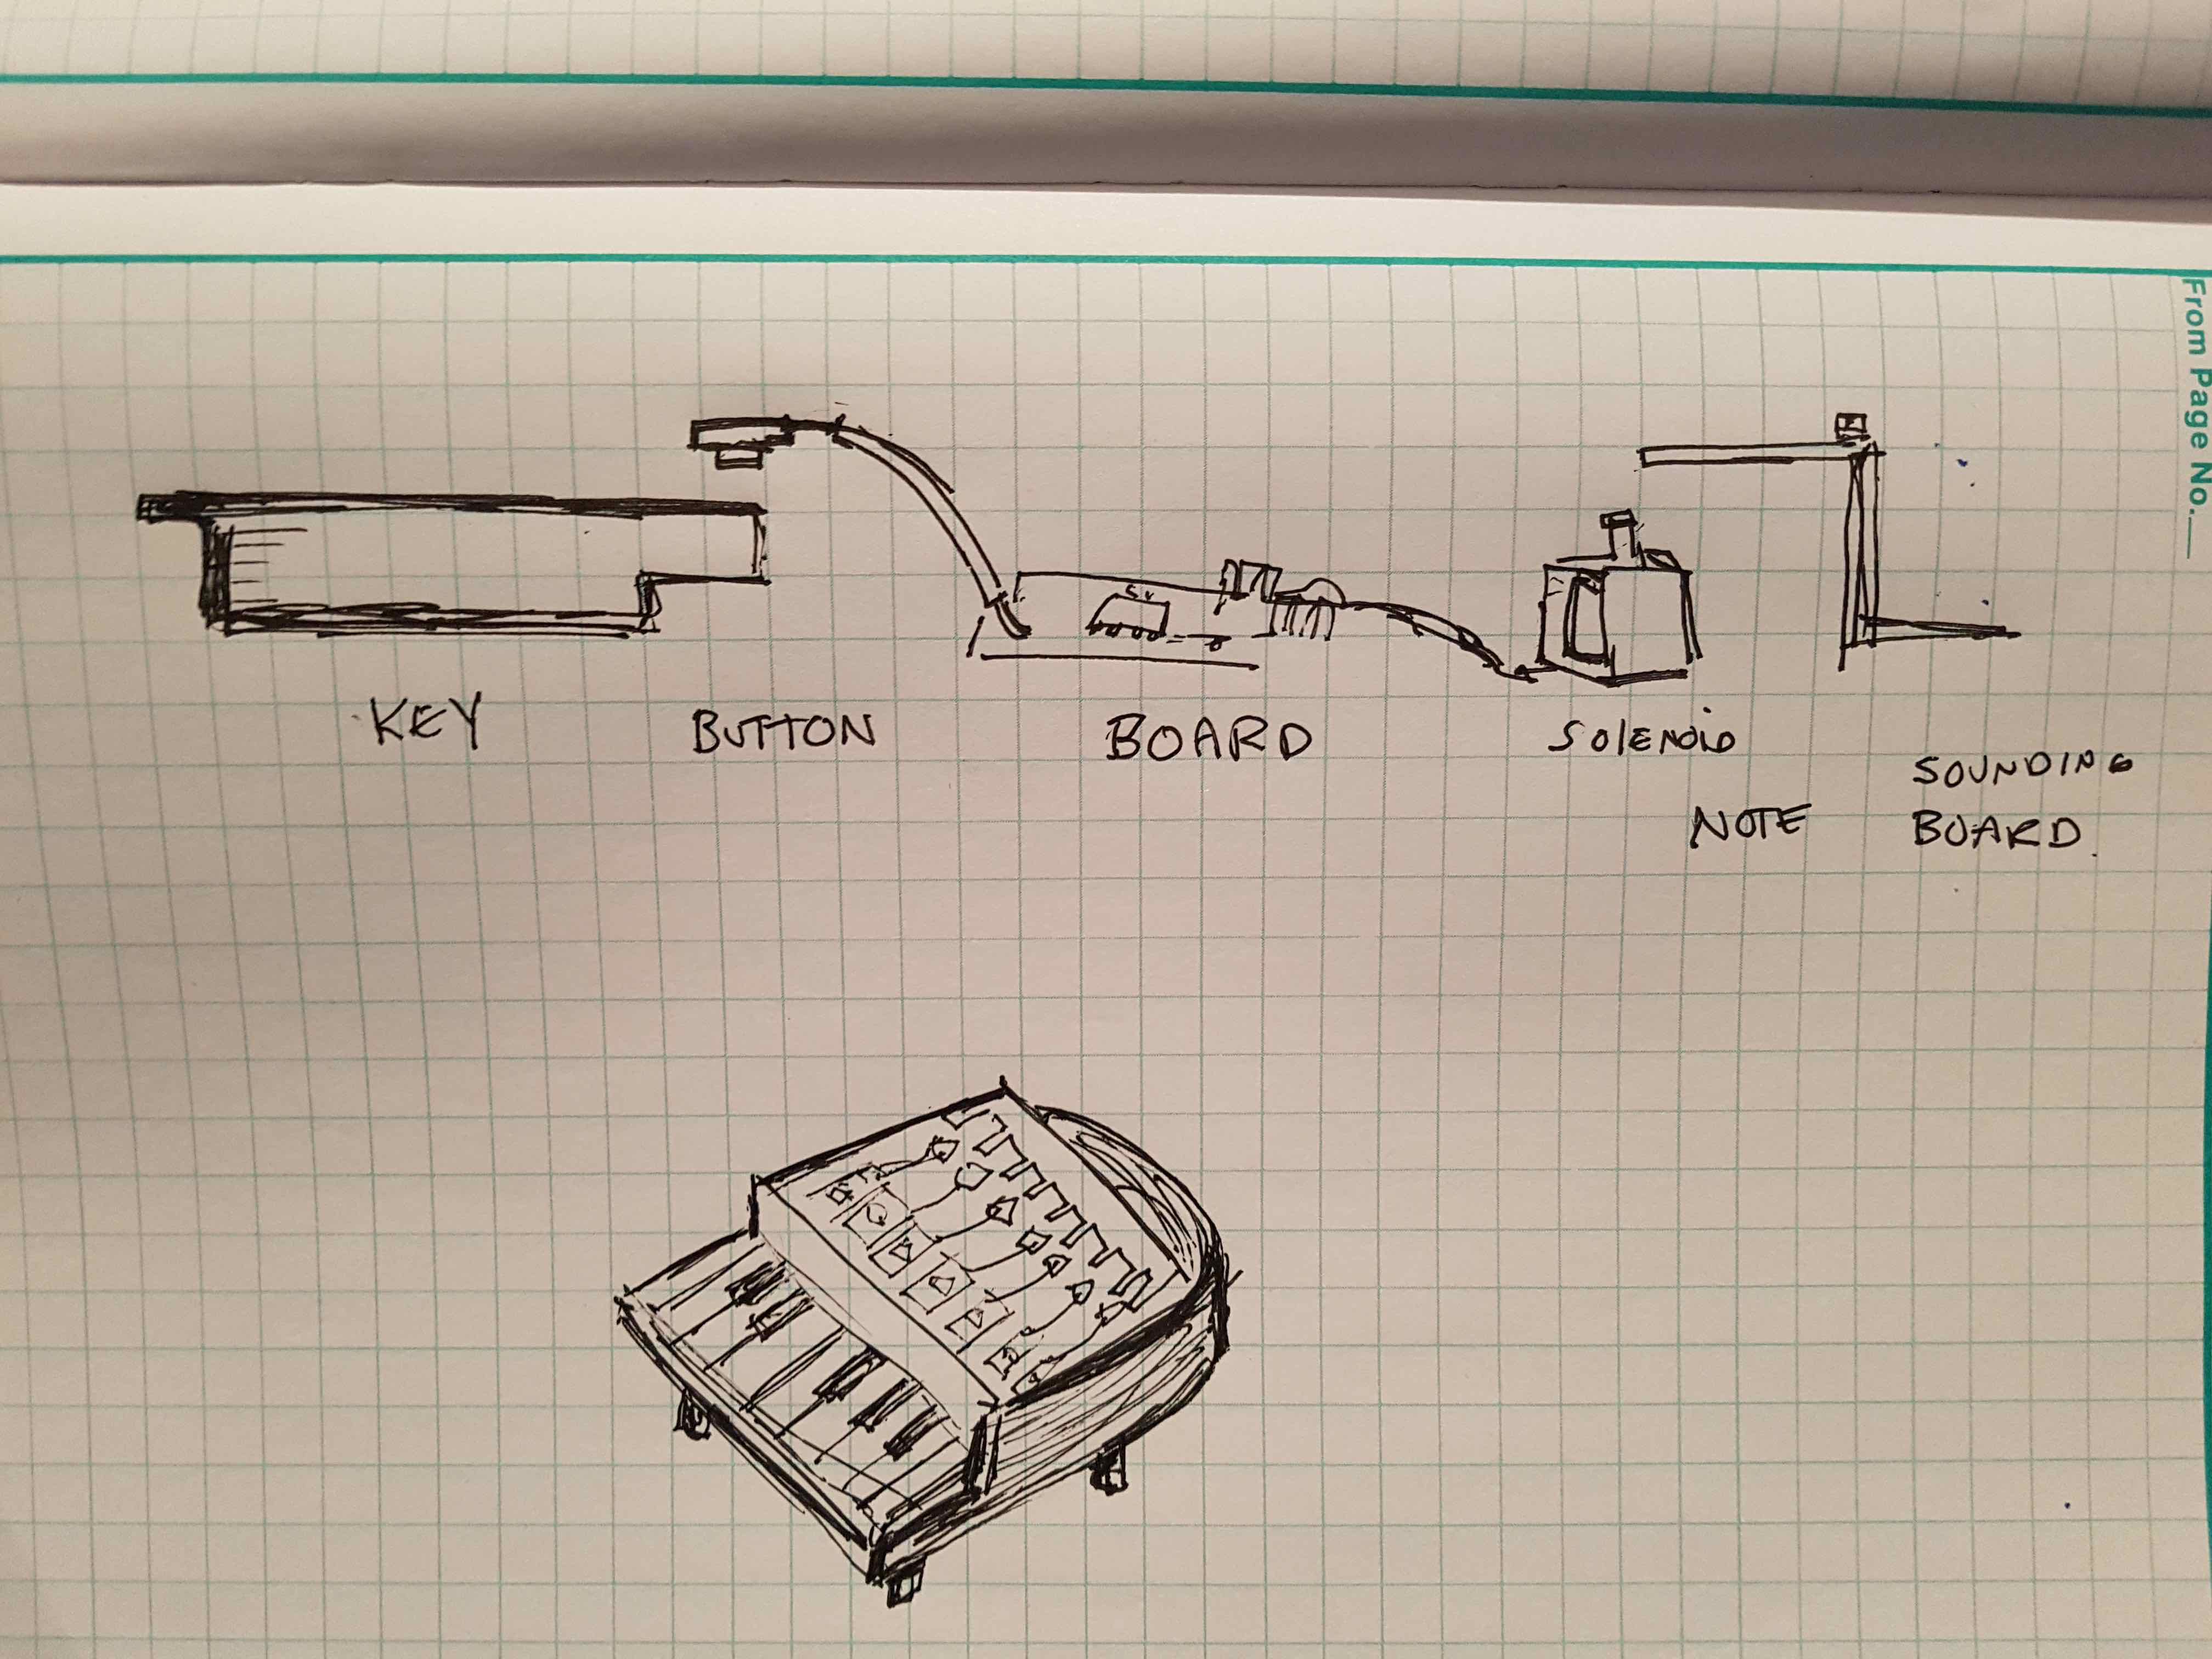
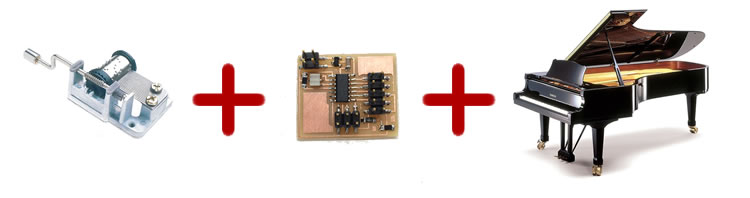
What skills from class will be a part of my final project? Hopefully most. Parts of the piano will be milled (frame), parts will be 3d printed (keys), the board will take input form the keys and then drive a motor. Given time, I’d like to network the keys together so I can sent a preprogrammed song to trigger each individual board in sequence.
How can I make this modular? While it would look a lot cleaner to have all the keys and motors connect to one board, I have decided to make a one key per one board. I think this will be beneficial for a number of reasons: -I can start with a proof of concept with one key plucking one note. I won’t have to build a more complex system only to realize there are things I need to change. -I’m not sure how many keys I will have time to add. If you by a mini usb keyboard they don’t come smaller that 24 notes.
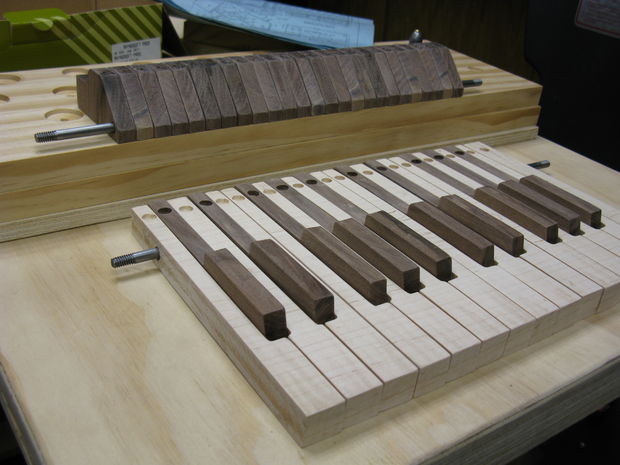
What materials is it made out of? The frame I’ll make out of wood They keys I’m still deciding if they will be milled out of wood or 3d printed (probably in formlabs for a smoother surface) The biggest thing I’ll have to figure out is what the metal comb will be made out of, and how to tune it. Here is a not too detailed guide on how to make a comb I could always buy them, but that would be cheating wouldn't it?
I really like the look of these wooden keys, from this site where a guy tried to make a steam calliope.
How will the note get triggered? The notes will be hit by a solenoid. One challenge I’ll have is how the note will be stuck once as the solenoid pushes up, but not strike it a second time when it goes back down. I need to ask Rob about the solenoids, as they look more expensive than I thought, especially if I'm buying a bunch: Jameco or McMasters or cheaper but poorly reviewed ones on amazon
What will the board look like? I’d like it long and thin to tuck back behind the piano key. It will be two-sided. What will the motor be that I use? I’ve decided on a solenoid, which will be the simplest solution.
How will I pluck the note once, making sure it’s not plucked a second time? Good question. More on that to come.
How will I make the spines (comb) that are plucked? After I find the correct medal, I may cut them with a dremmel.
How will I power everything, especially if I am going with one board per note? Each board will have a header. That can be powered. Because the modular build, I can add more power sources as needed.
What additional features can I add if I have time? If time permits, I’d love to have pre-programed music that with a push of a button can play whole songs. Song thoughts: Peanuts Christmas, Claire De Lune, City of Stars
The project is split into these main areas
Board: Status- I have 8 boards ready to go. If time allows I'd like to add more, a full 12 note run. I'd also like to add a couple that pluck a chord, but we will see how time goes.
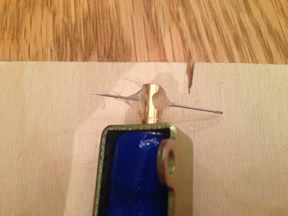
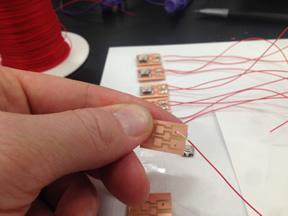
Plucking the note Piano : Status-After a lot of trial and error, I found a way to make a plucker. I was able to drill a small hole in the top of the solenoid, insert a needle and hot glue it in place. I just need to build a channel for the neddle to travel up and down, because the solenoid head can easily rotate. without the channel it could move out of position.
Keys triggering the note: Status-All buttons are ready, I just have to build a support for them to sit on. I have the wood for the keys and will mill them on Friday.
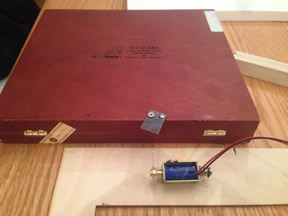
Case of the whole instrument - Status - where most of the remaining work remains. Building the frame for this all to sit in, which hopefully looks like a piano. The most important part will be where the solenoid is mounted and pucks the keys, which are mounted on a cigar box (the best thing I found for a clean loud sound.
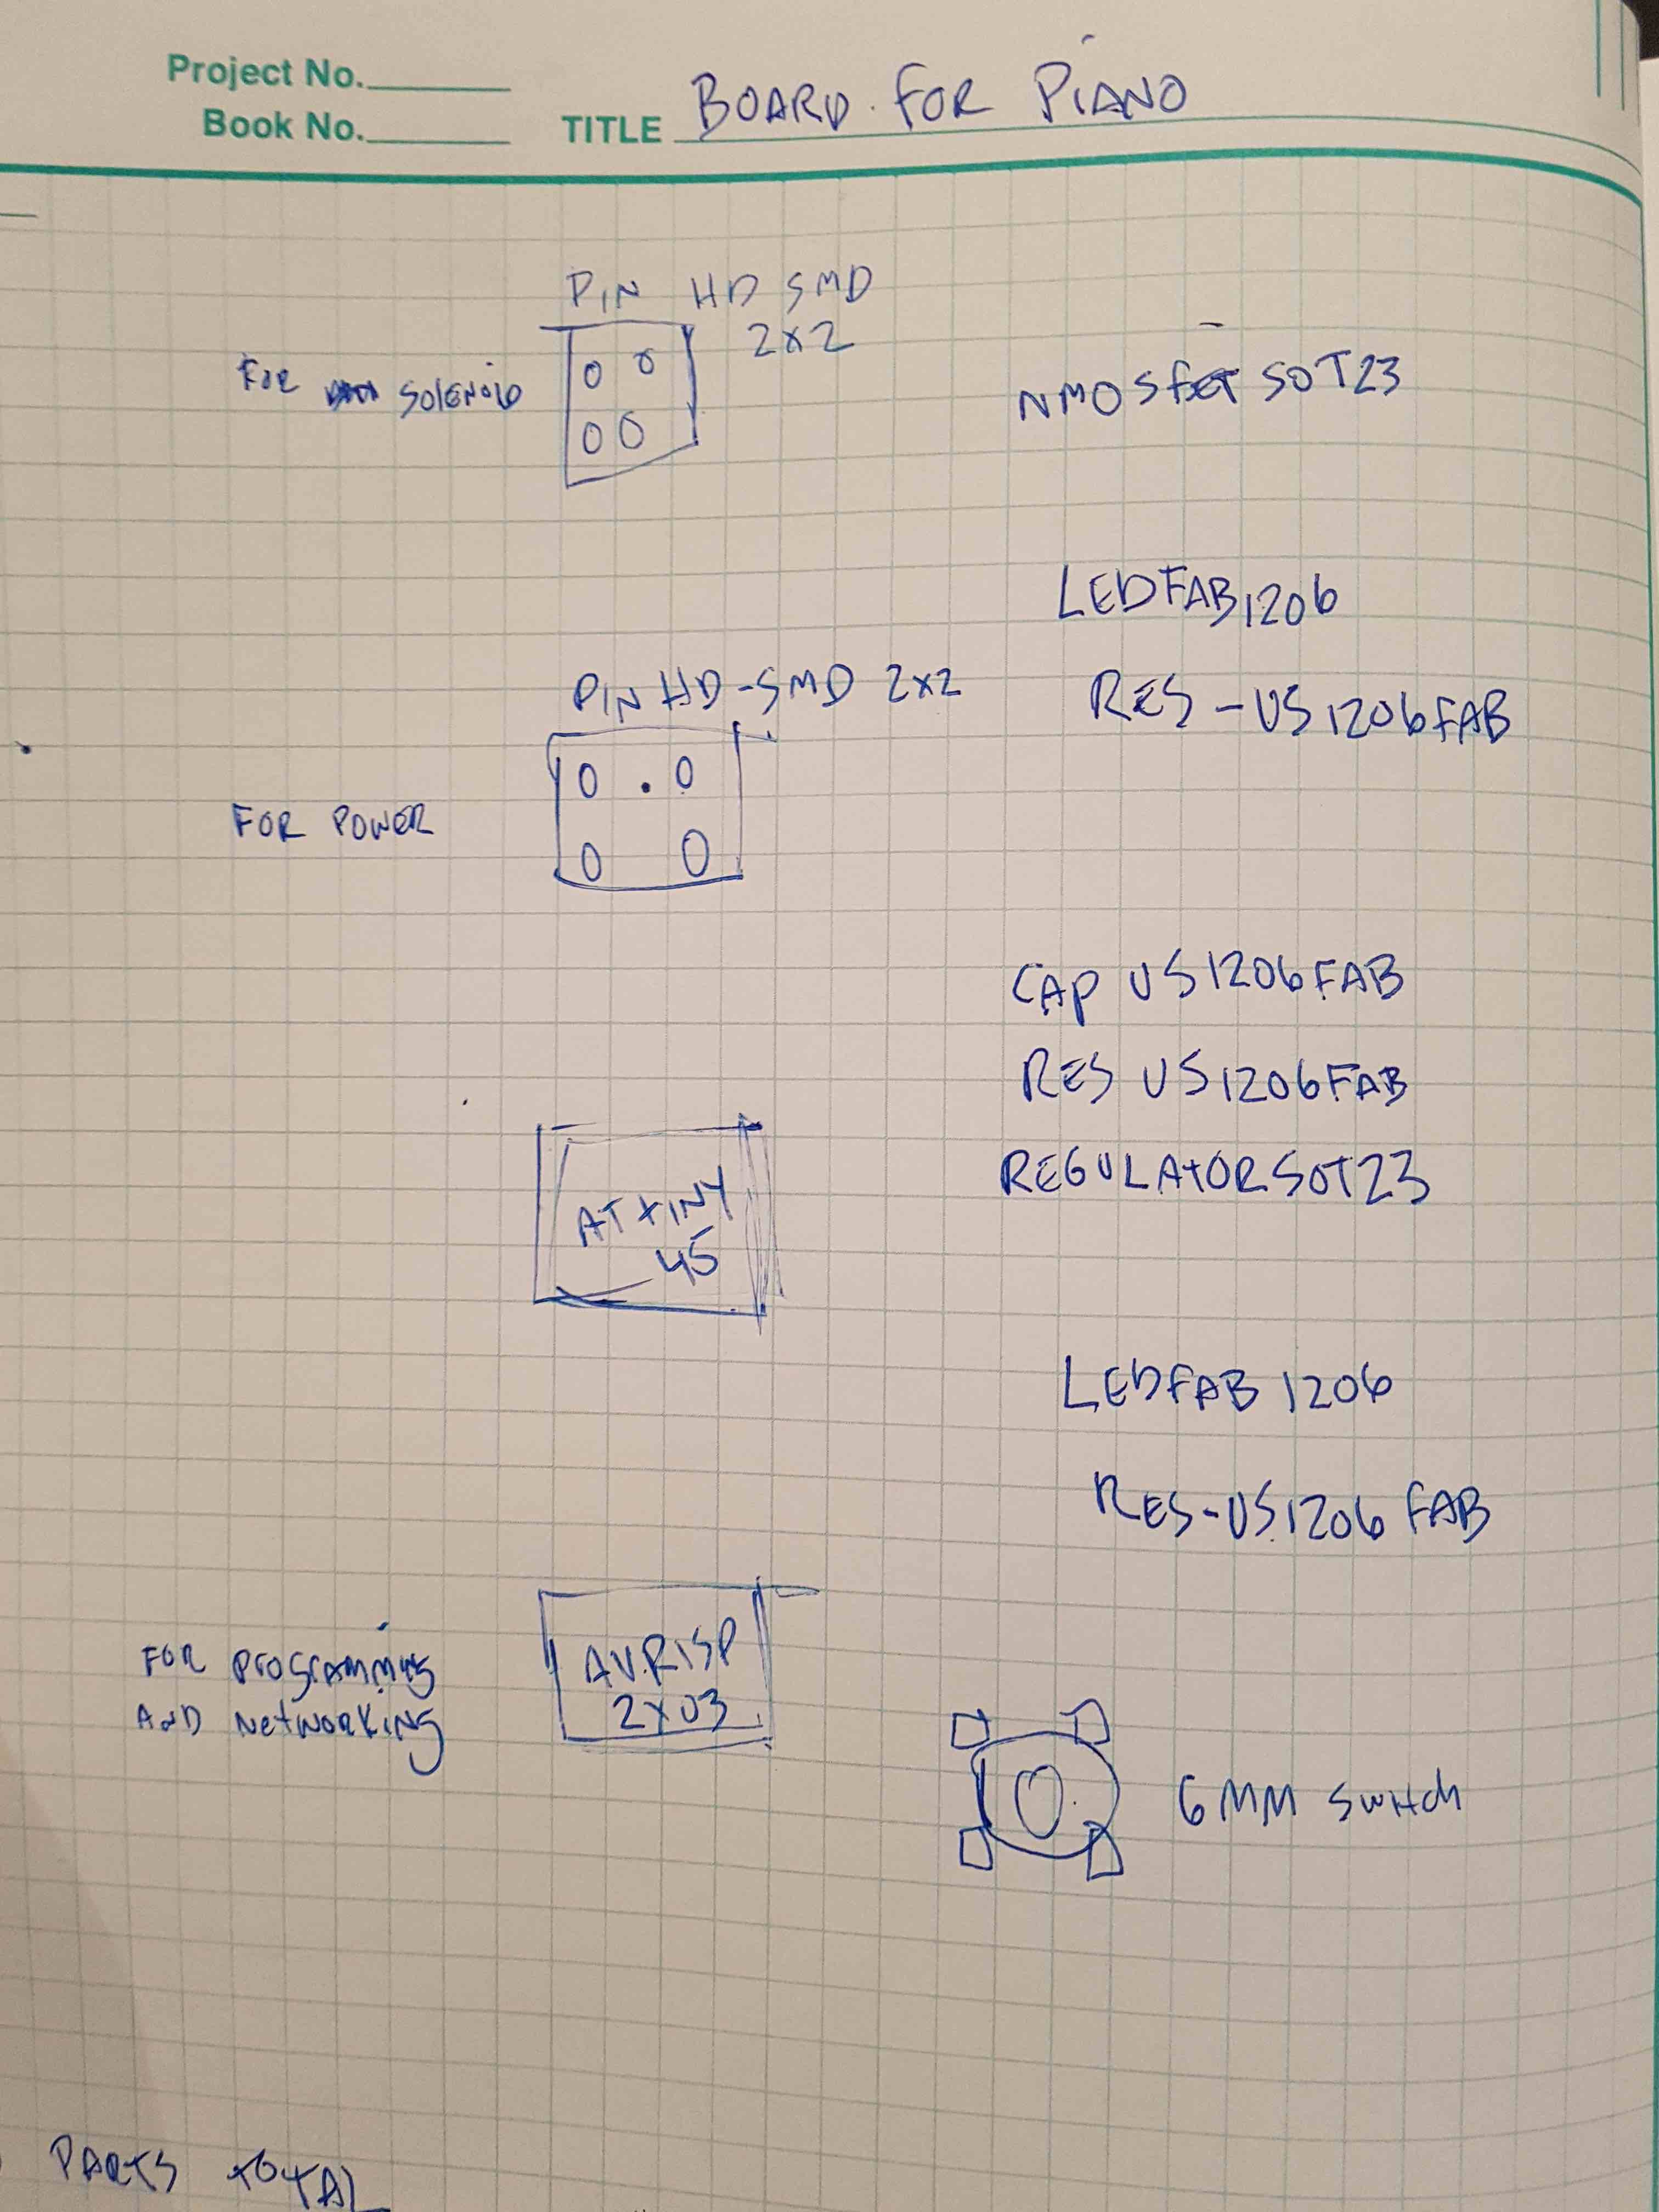
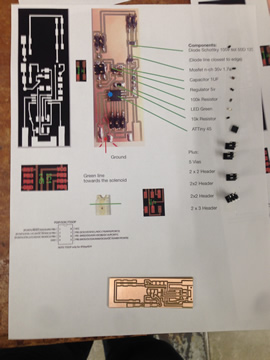
Board:
Synopsis: I have 3 board for each key, connected by wires. Board 1 is just a switch, a button that sits under a piano key and when pushed a note is plucked/heard. Board 2 is my ATTiny which one pin is listening for the button and a high or low is set. A mosfet and diode sit a the the end of the board. The 3rd board is used just for powering my solenoid. I originally had the power on board 2, but found the voltage the sloenoids needed was at pretty high (14) and I blew up one of my boards. For nuerotic saftey, I moved the solenoid power to its own board, and protected my ATTiny board with a resistor and diode. Board 2 will have it's own power source. Update: I have combined the power and the attiny boards.
Dec 4: This was a long weekend of work. On Friday I finally got everything working from one end to another. Push the button, the led will go on and the solenoid will fire. I had a small size solenoid that was in the lab. The other good news is that the solenoids came in from Jameco I would be using in my final piece. I was excited about this because if I could get one working in it’s final state, I’d just need to repeat it for each key. I could finally get to testing the plucking to see if the sound was what I wanted. When I first attached it, it wouldn’t move. Then I realized I was powering it with a 9v battery and the solenoid is in the 12-24 range. Testing it, at 14v is when it pops up. I’ll need at least that to have the force to pluck the note. I found a larger power source and plugged it in without thinking ( a result of working too late into the night). Boom, my board erupted with a cloud of smoke. A heartbreaking setback. After discussion with Dixon, I decided to make a operate board that was just from the solenoids. Powered by 22v. My first try at making this board was mixed. The solenoid fired, but was stuck up (so the button really wasn’t controlling it. After much testing and consulting with Rob, we determined that I had not grounded it back to the original board correctly. A new test board fixed that problem. The next step for this part will be to make a big board were all the solenoids are connected.
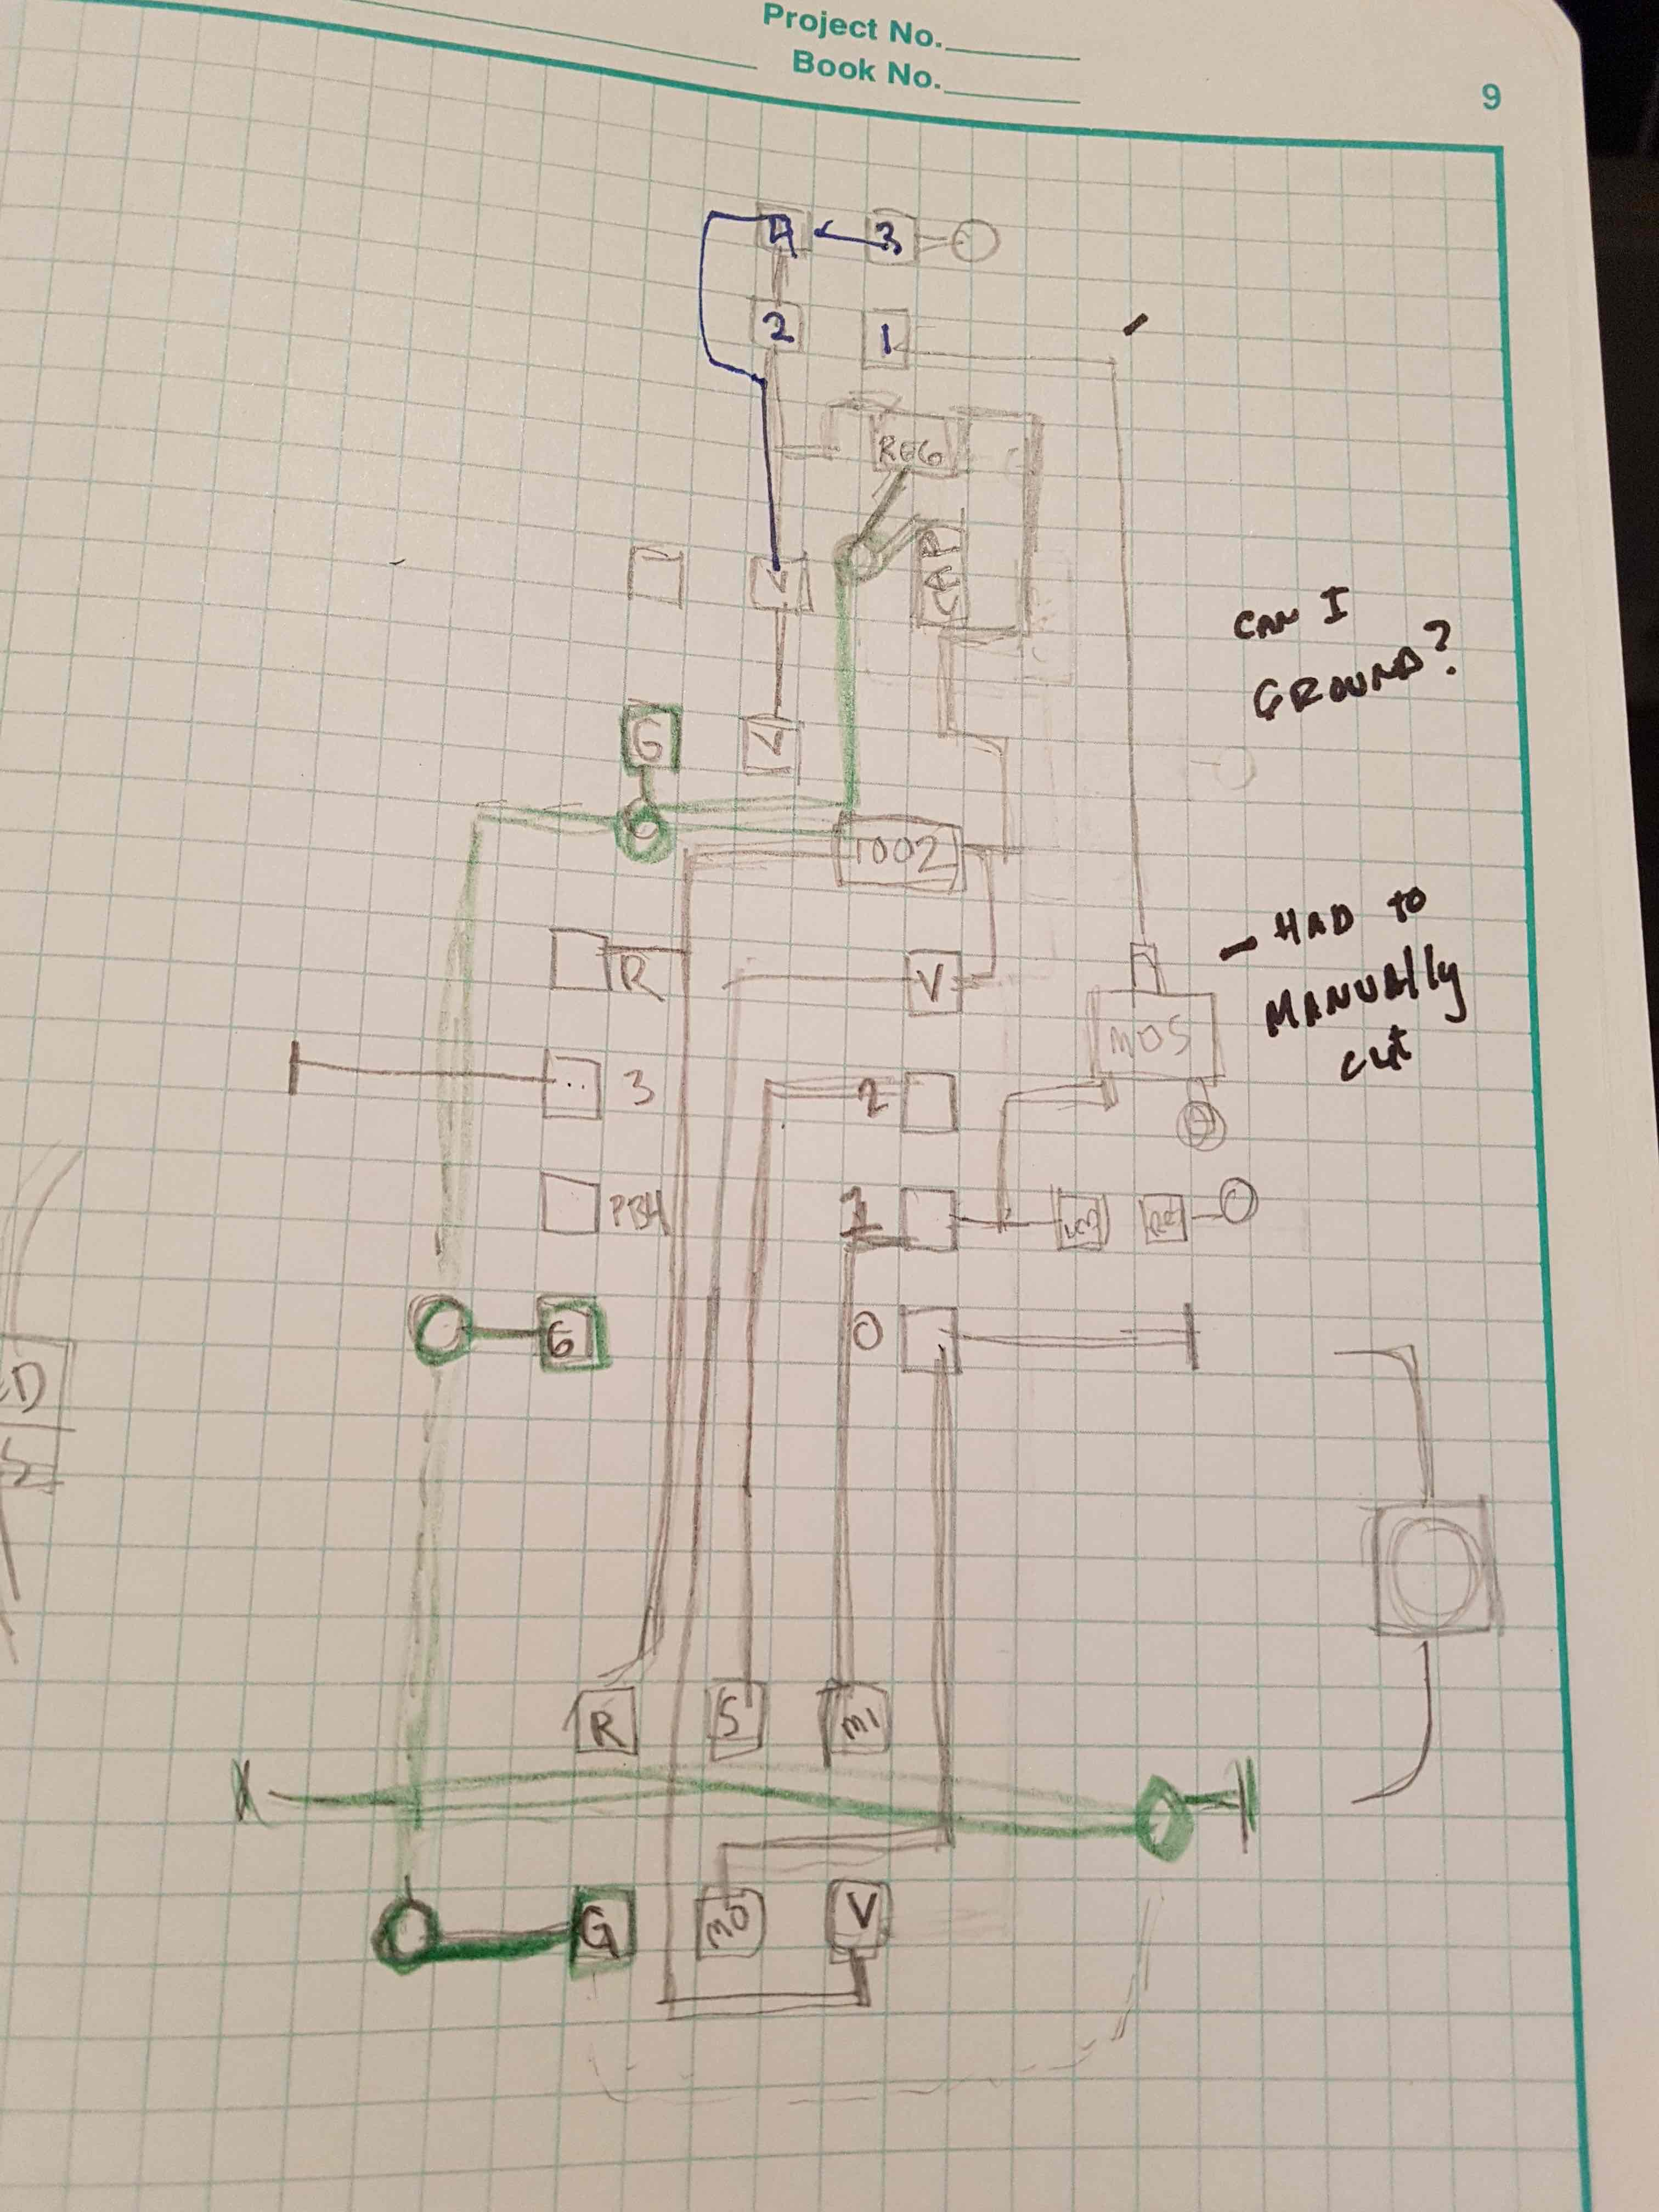
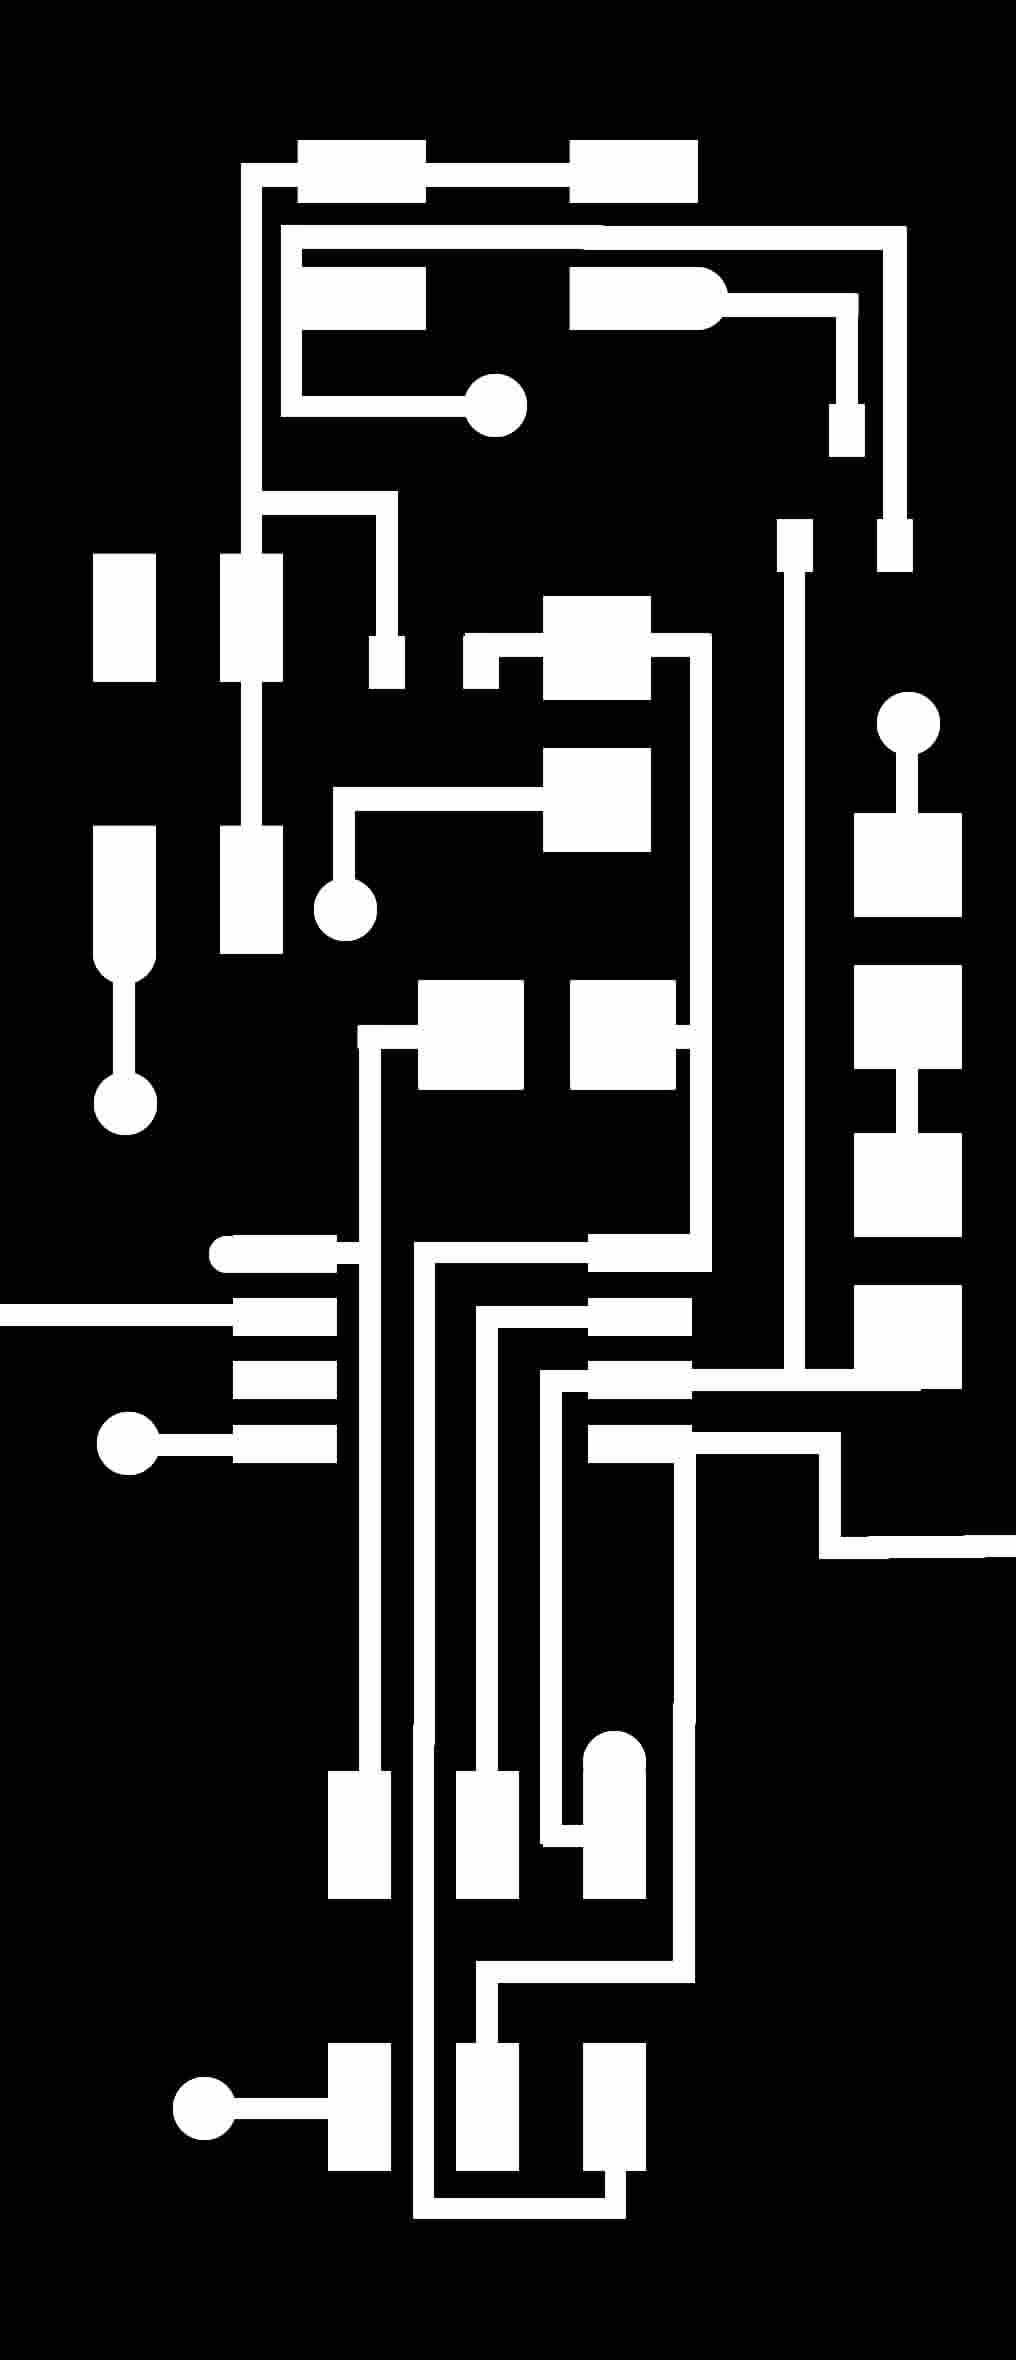
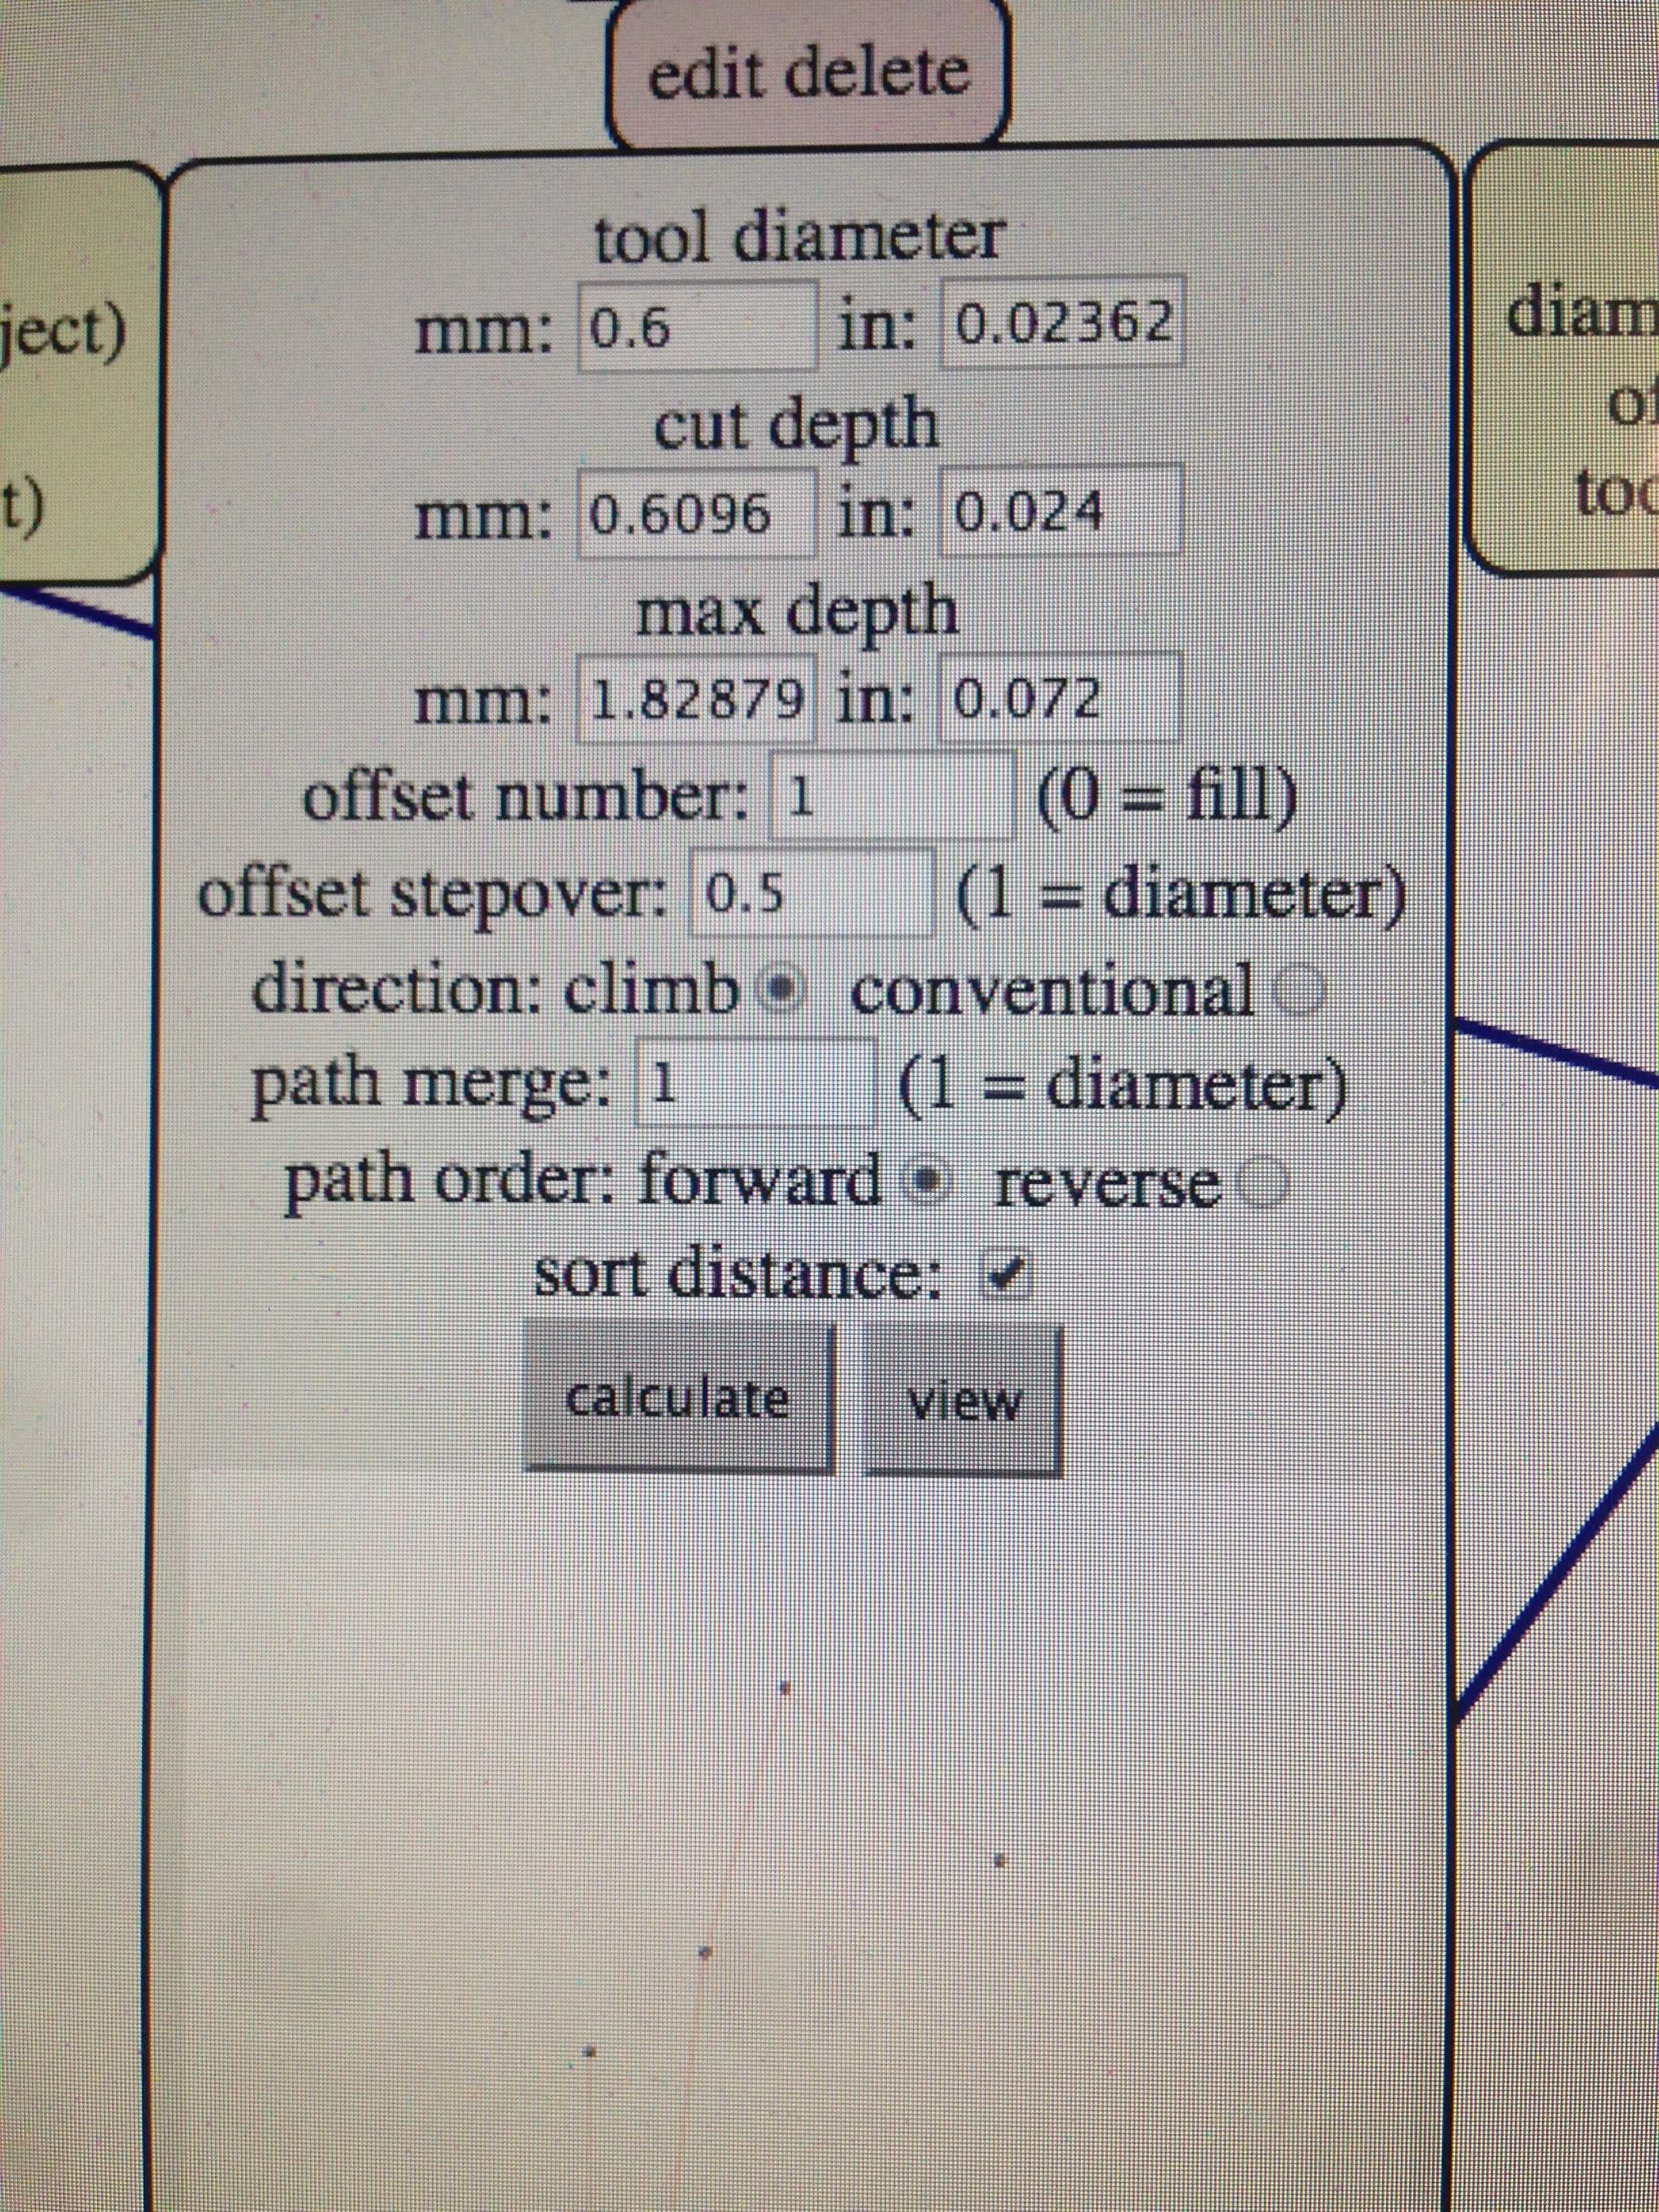
I have a lot on the board so made it a two sided board with vias going through to the back. Richard had done this on a board and advided me on changing the tool diameter. Rob showed me how to thread a wire through the holes and solder them. In the end, I didn't have one go all the way through and only found out when my board wouldn't flash. After testing I found the one bad spot and re-soldered with a londer wire.
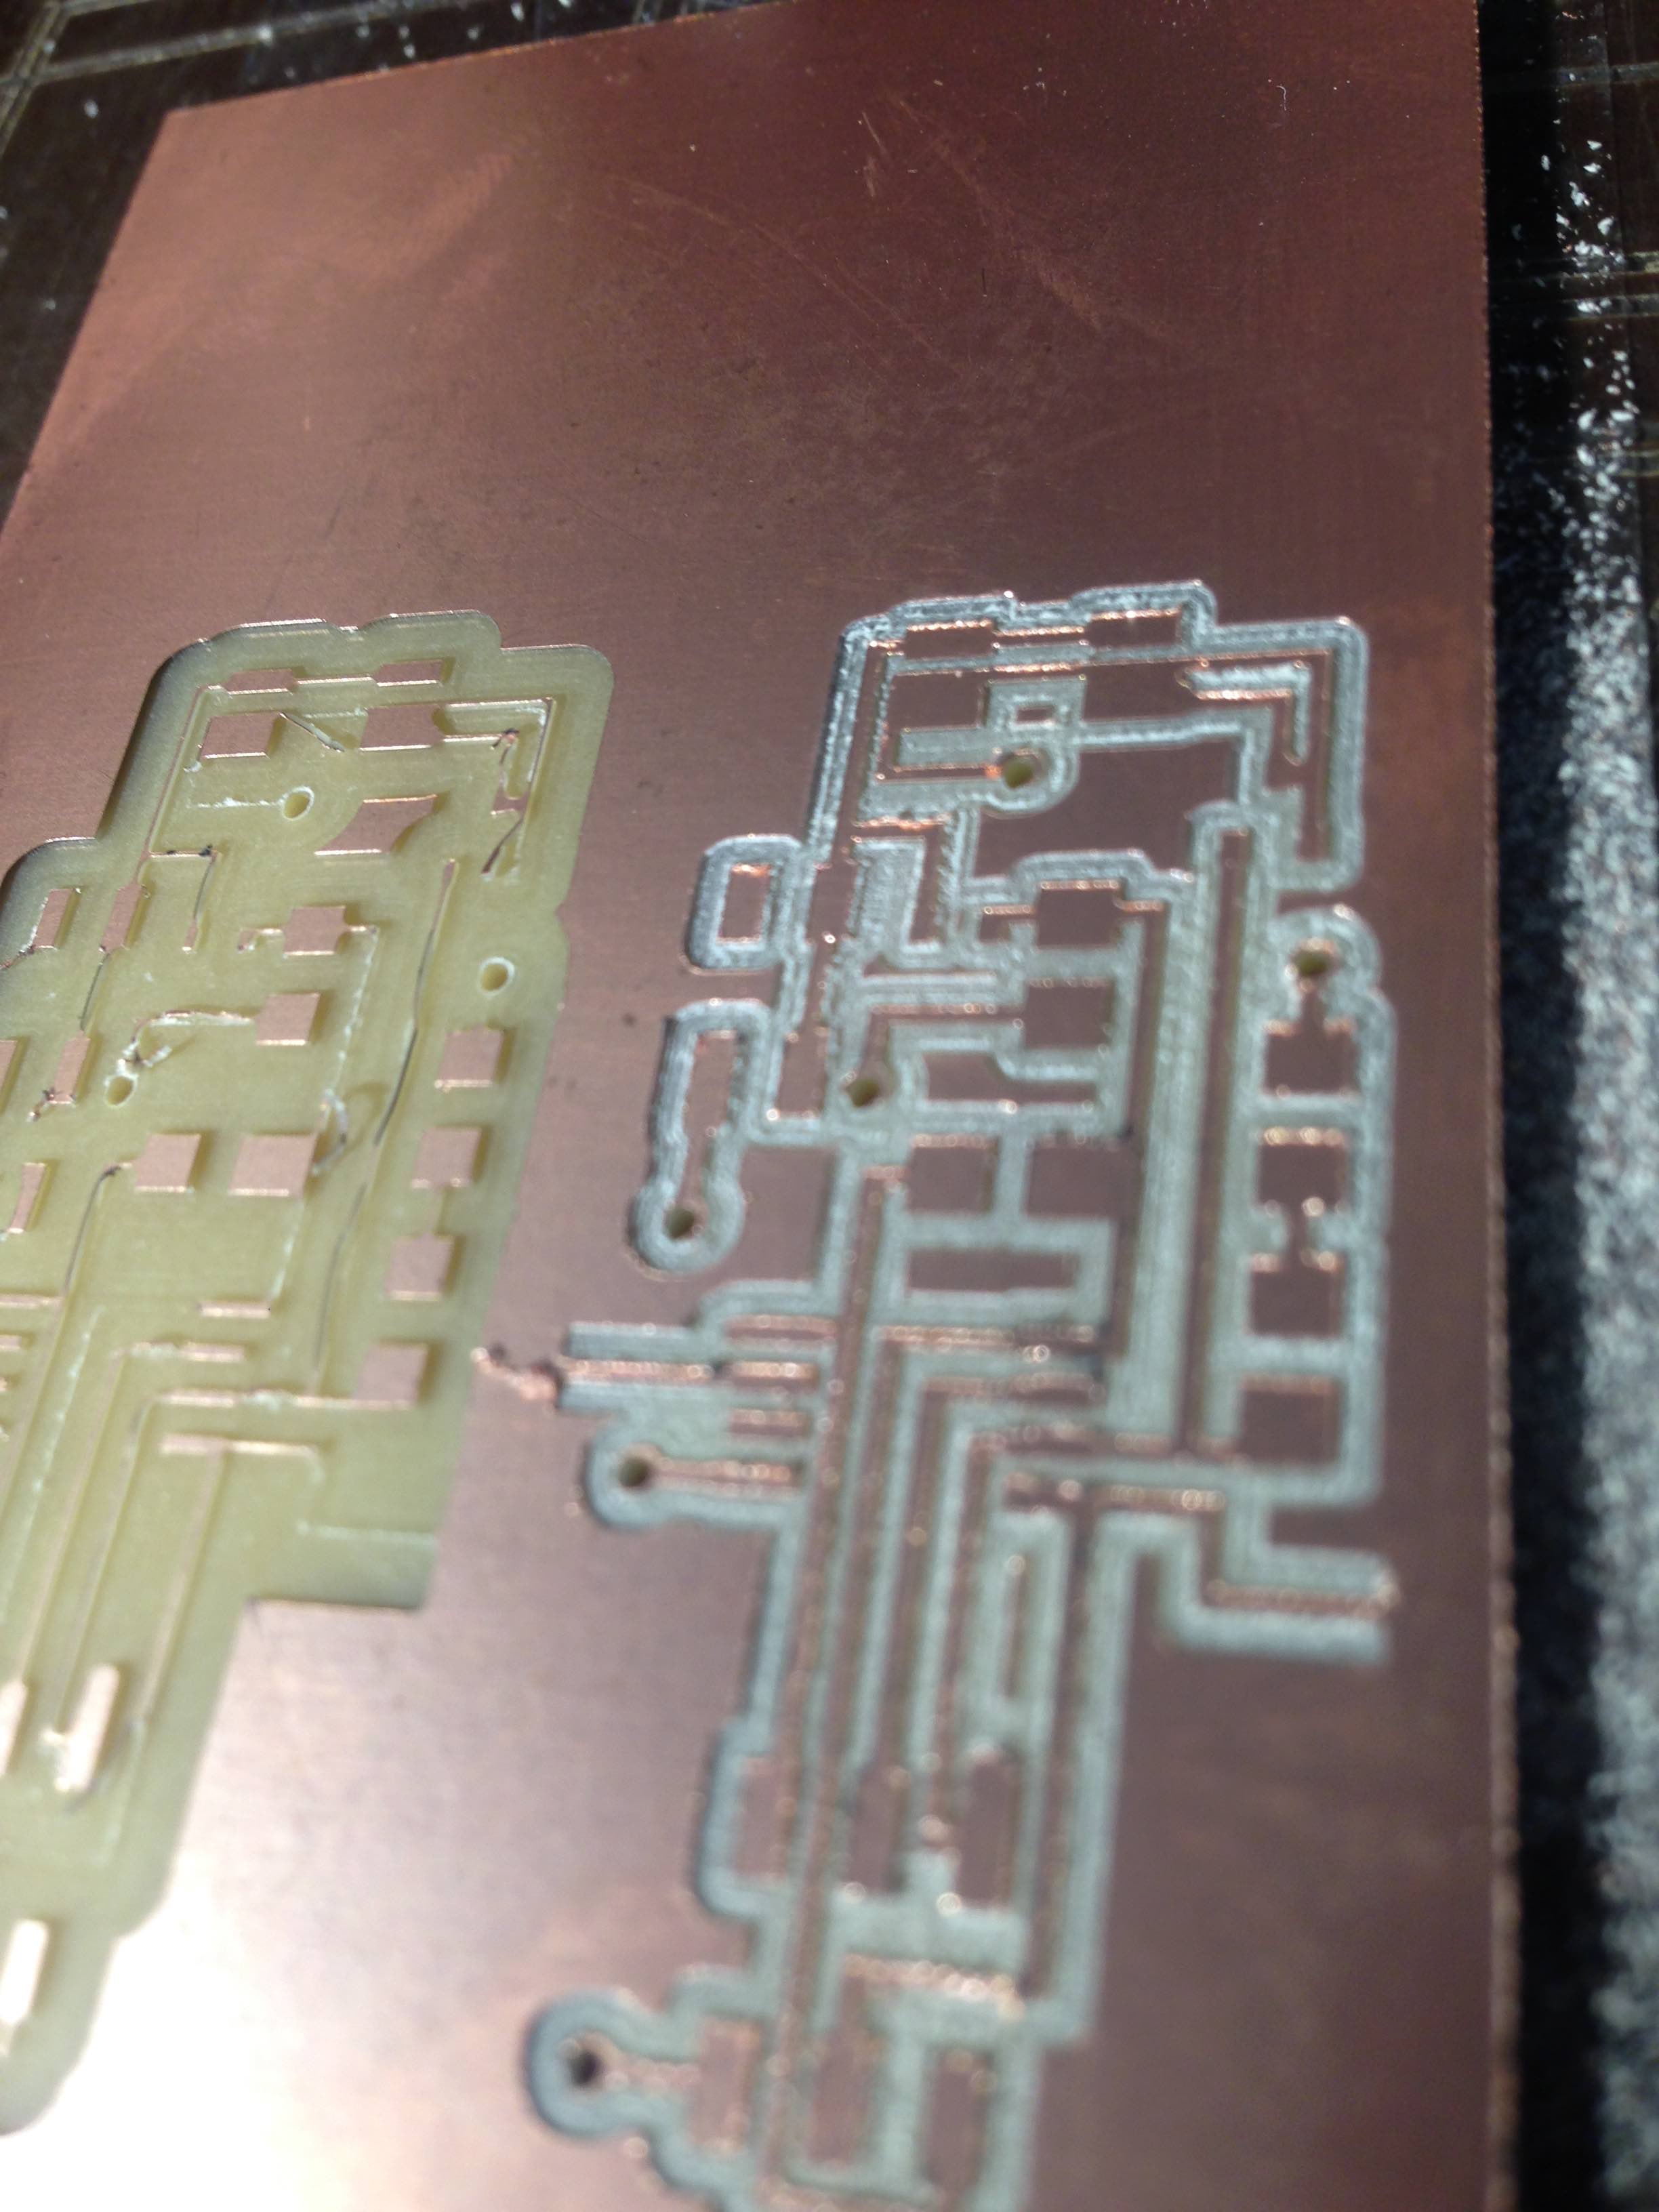
I ran into two other problems milling, rookie mistakes. One was leaving the mill that was on there without checking first. most of my material was cut away. The correct bot was also pretty old and the cuts looked in rough shape.
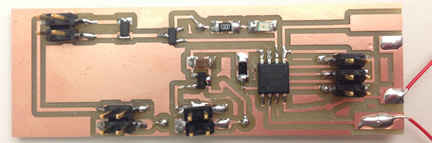
I stuffed the board, and all worked well. Thanks to Olga and Rob for advice along the way.
Next up will be adding and coding for the solenoid. Then add a button connected though wires onto the board to trigger the solenoid. I'm having it on wires instead of the board is so I can position it to be triggered by the piano key.
Another big thing I still have to figure out is how the sloenoid will strike the note (the end of the spine), hitting it once on the way up but not again on the way back down.
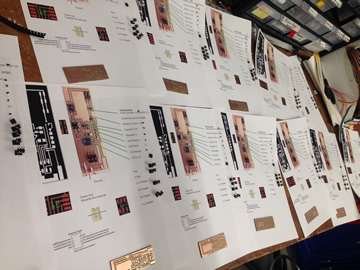
Dec 5: I milled two new boards and stuffed them. This is a process I feel I”m getting good at (which is nice, since I have to do 10 more).
Dec 8: Today I made a bid push and making all my individual boards. 6 straight with only 1 problem (a backwards diode, that base on experience was one of the first things I checked). Things are in a good place with the boards) .
Final Board:
switches that will go under each piano key:
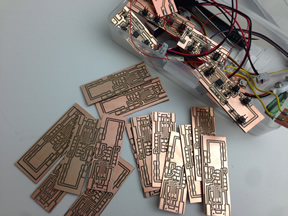
For each board I printed out a guide and parts to stuff:
Many boards:
I tried big boards, small boards, boxes, and all sorts of materials looking for something that gave the notes the best and loudest sound. It turns out this cigar box sounds really good: