Composites
Here is my brother doing what he loves most, circa 2005:
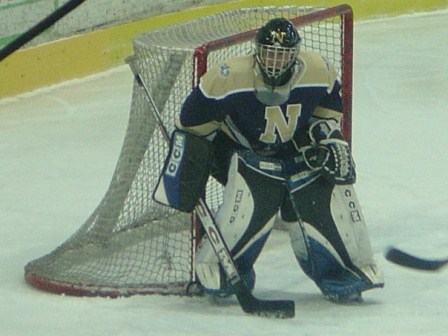
That's right, he loves having heavy disks of rubber shot directly at him at high speeds. My brother has played hockey since he was about eight years old, and he is very passionate about goalie equipment. I thought this week's assignment, composites, would be the perfect opportunity to make him an early Chanukah present: a hockey goalie helmet.
A composite is made of a fiber for tensile strength and a matrix for compressive strength. For this assignment I used linen as my fiber and epoxy as my matrix. I would have liked to use carbon fiber, but apparently I'd need to wear a gas mask or something to work with it, so I decided against it.
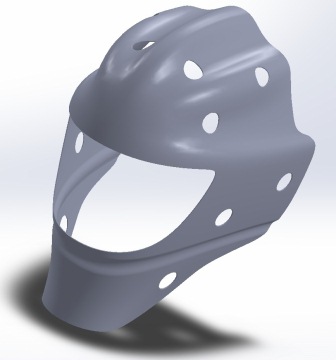
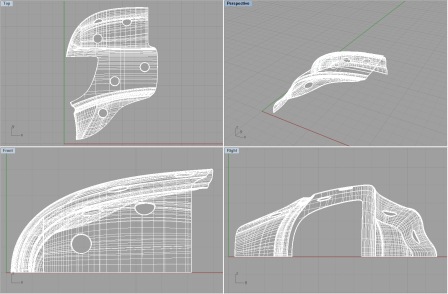
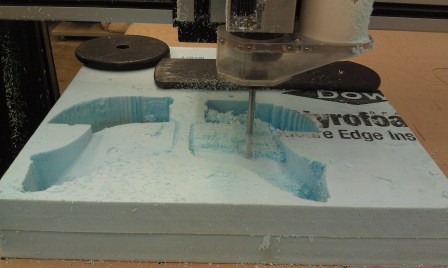
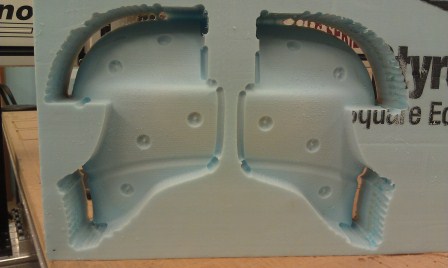
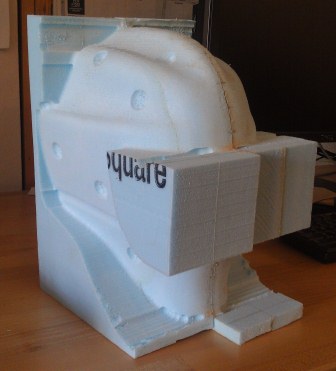
Since a hockey helmet has a fairly complex geometry, I thought I would save myself some stress by taking a CAD file of a helmet from grabcad.com (you can find the file here). Then I made some modifications in Solidworks: I removed the face cage and associated screws and scaled down the size so it could fit within the limits of the milling tools. In Rhino, I split the helmet in half and turned each half on its side in order to mill two separate molds, because the tall, steep sides of the complete helmet would not have been mill-able.
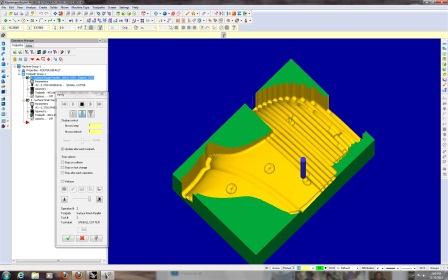
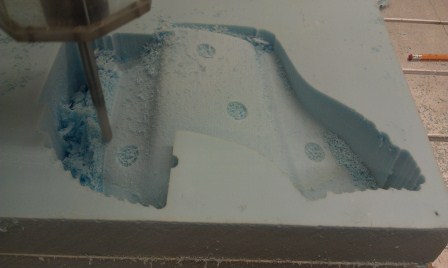
I converted my .igs CAD file into a g-code .NC file using Mastercam, with some help from Hayami and Brian in the Hobby Shop. I had some problems with Mastercam at first, because I had zeroed my z-axis at the bottom of my 3-D model rather than the top--once I moved my model below the z-axis, everything worked out fine. I used the 3/8" ball cutter endmill because it was the longest tool in the Hobby Shop (the tool was 5" and I needed 4" cutting depth). I programmed both a rough cut and a finishing cut.
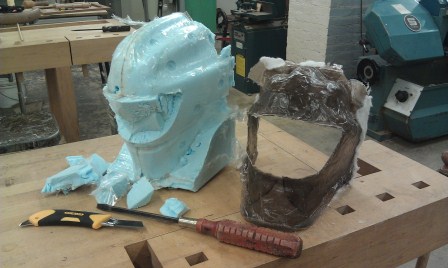
Each piece of foam is approximately two inches, so to get the necessary four inches I glued together two pieces with contact cement and laid some weights on top to make sure they really stuck together. I would repeat this process after everything was milled in order to put the two pieces of the helmet mold together.
Milling was the easy part. Preparing the mold and linen pieces was more difficult. One TA told me to first cover my mold with aluminum foil because the epoxy could potentially eat up the foam; the Hobby Shop guys suggested Saran wrap. Another TA, though, said that the epoxy would not dissolve the foam and I could just seal the foam with a heat gun or a layer of Gesso. I decided to play it safe and attempted to cover the mold with aluminum foil and then Saran wrap. In both cases, there was too much bunching of the material and I could not get a smooth finish. I opted to cover the mold in packaging tape instead, since I could have better control over the bumpiness. However, taping the whole mold carefully took a very long time (about 2 hours).
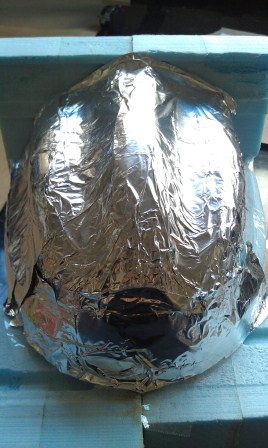
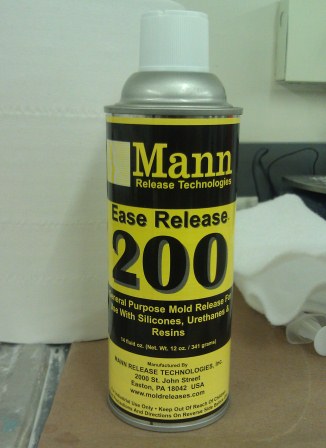
After taping the mold, I sprayed it with a few layers of mold release to ensure easy removal of the composite.
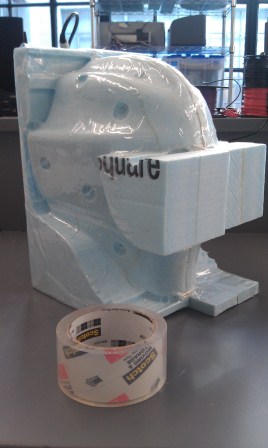
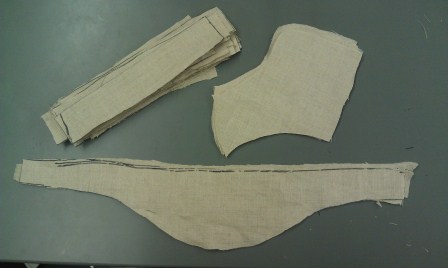
I quickly realized that I would not be able to cut a single piece of linen to smoothly cover my mold. Again, there was too much bunching of material. I experimented with different ways to cut up the linen and ultimately decided to go with strips for the complicated curvy top and large single pieces for the sides and bottom. I cut the bleeder film, which would allow the excess epoxy to squeeze off the composite, in the same patterns. After all my pieces were cut, I prepared my vacuum bag.

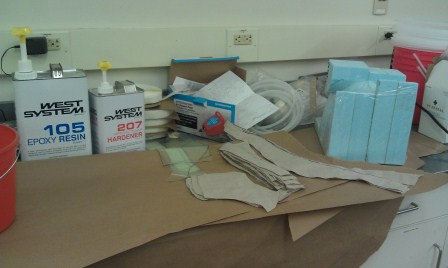
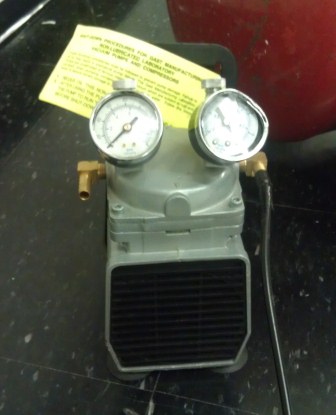
I mixed the 105 epoxy resin and 270 hardener in a one pump-to-one pump ratio and dipped my pieces of linen into the epoxy mixture. I squeezed out as much excess epoxy as I could before applying each piece to the mold. I put three layers of linen on my mold. I then applied my bleeder film and wrapped the whole thing in the breather fabric, which would absorb the excess epoxy after it passed through the bleeder. When the entire set up was complete, I put it into the vacuum bag and turned on the vacuum pump. The composite had to sit in the vacuum bag for at least 10 hours to cure.
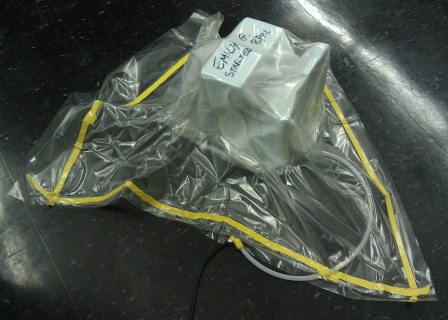
The next morning I returned to pick up the composite and, as expected, found that the surface finish was fairly wrinkly (I couldn't get the vacuum bag to stick smoothly to the object the night before). I also could not remove the composite from the mold by hand and there was some excess material around the edges, so I went to the Hobby Shop for post-processing.

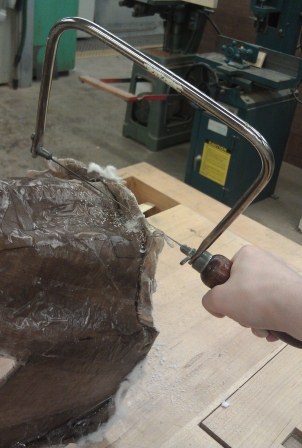
At the Hobby Shop, Ken and Brian helped me remove the composite from the mold by cutting off the block from the face opening and using a large slot screwdriver to pry off the helmet. Once I pried off the edges, the composite lifted very easily from the mold.
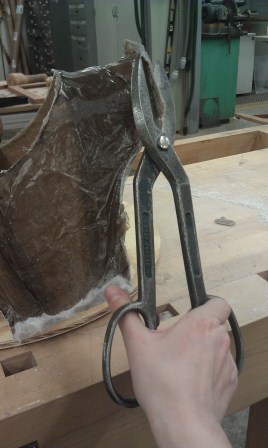
Trimming the excess composite from the helmet proved more difficult. I had to use a variety of tools to get the edges the right shape and decent-looking: hand saw, giant pliers, disk sander, mechanical bandsaw, oscillating drum sander, rasps, and files.


After all the trimming:

Once I finished all the trimming, I sanded the entire surface by hand with coarse-grain sand paper. I sanded for two hours but still could not completely smooth out all the wrinkles.

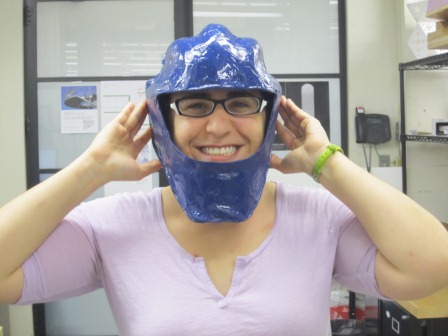
To finish off the project, I sprayed three layers of primer, three layers of "ultramarine" paint, and one layer of glossy varnish onto the helmet.


Here is the finished product:

Files
helmet side 1 CAD
helmet side 2 CAD
helmet side 1 Mastercam
helmet side 2 Mastercam
helmet side 1 g-code
helmet side 2 g-code