Embedded Programming
Remember that board I designed two weeks ago? This week I programmed it!
(If you don't remember, refresh your memory here.)
Blink Using Arduino
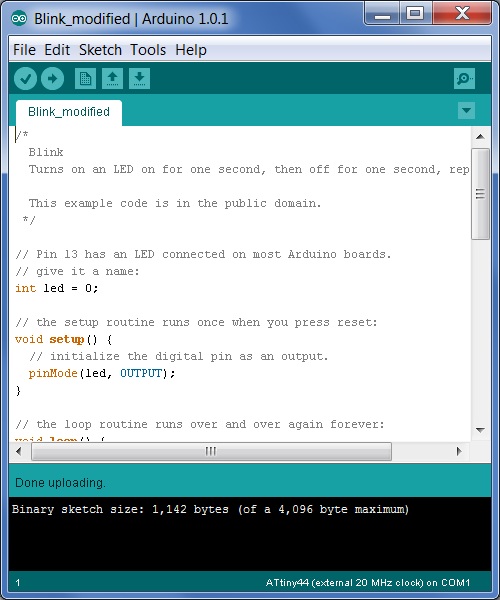
My first attempt at programming my board was through the Arduino platform. I modified the example blink.ino file to have varying LED blinking delays instead of the constant delay. I then tried to follow the tutorial here to put the program on my board via my FabISP. However, when trying to "burn bootloader," I kept getting the following error:
avrdude: initialization failed, rc=-1
Double check connections and try again, or use -F to override this check.
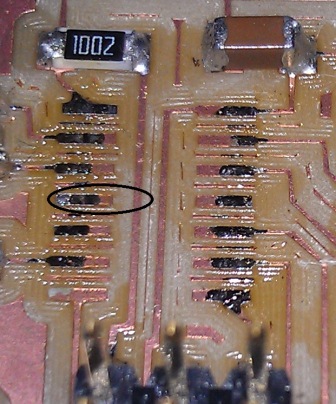
In order to get more details about what might be going wrong so I could debug my board, I tried connecting again using the AVR ISP. This time, I got this message: "RST failed." I went back to my original board schematic to figure out which pins corresponded to RST. I learned that RST was supposed to connect to pin 4 of my microcontroller.
Initially I thought this meant there was a bad soldering job. I de-soldered and re-soldered, but the voltmeter still read that there was no current flow. That seemed odd. I removed the microcontroller using the heat gun and discovered that there was no copper trace connected to pin 4:
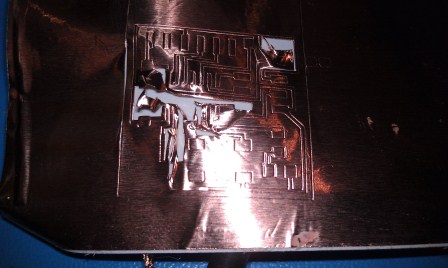
I tried to build a solder bridge from pin 4 to the copper trace, but I was having difficulty getting the solder to stick to the board substrate. When it finally did, the solder was too thick to allow the microcontroller to lie flat on top of the board, so I couldn't solder the microcontroller back on. I continued retrying and retrying to get a nice flat solder bridge, and I ended up both burning the board and completely removing the copper trace of pin 4 altogether.
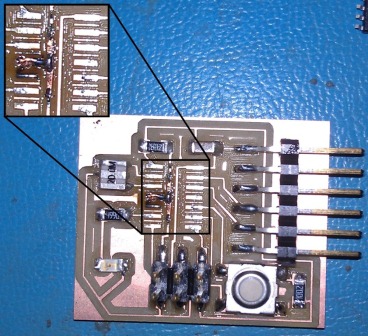
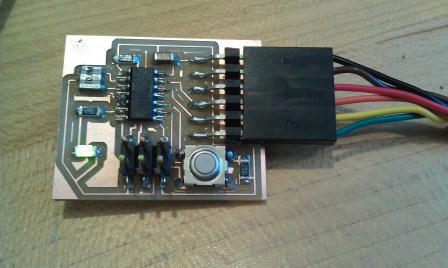
Time to get creative. I definitely did not want to start from scratch, mill a new board, and solder all new parts. Krista was in the IDC lab the same time as me, and she had used the vinyl cutter to create a new board. She had some leftover flexible, one-side-sticky copper, and I thought I could use that to rebuild my trace. I cut two very thin slices of it using an X-acto knife, stuck them in place on my board, and dabbed some solder on their edges to make sure they connected to the board's original traces and to each other. I checked all the connections with the voltmeter, and they worked! This set-up was flat enough for the microcontroller to easily sit on top of it, and I was good to go with my programming.
Arduino, Modified Blink, Take Two. To make sure my board did not need any more debugging, I first connected it to the computer using the AVR ISP rather than my FabISP. This time, the program downloaded successfully! I tried again with my FabISP, and that was successful too! Hurray!
....but wait. My LED is not lighting up. Why? I had set the LED pin to 0, as was given on the tutorial I linked to above. I checked my original schematic and saw that my LED was actually set to 7. I changed the LED pin number in the code, and it worked!
Here is a picture and a video:

Blink Using C
Now that I successfully programmed my board using Arduino, I wanted to try again with another environment. I modified the C code provided on the class website here using Notepad++. This time I added varying delays again but with different time steps than in my Arduino code. I also had to set the pin to PA7, the port to PORTA, and the direction to DDRA. I downloaded the make file provided here. I ran the following set of commands in my Cygwin terminal:
make -f blink_modified.make
make -f blink_modified.make program-usbtiny-fuses
make -f blink_modified.make program-usbtiny
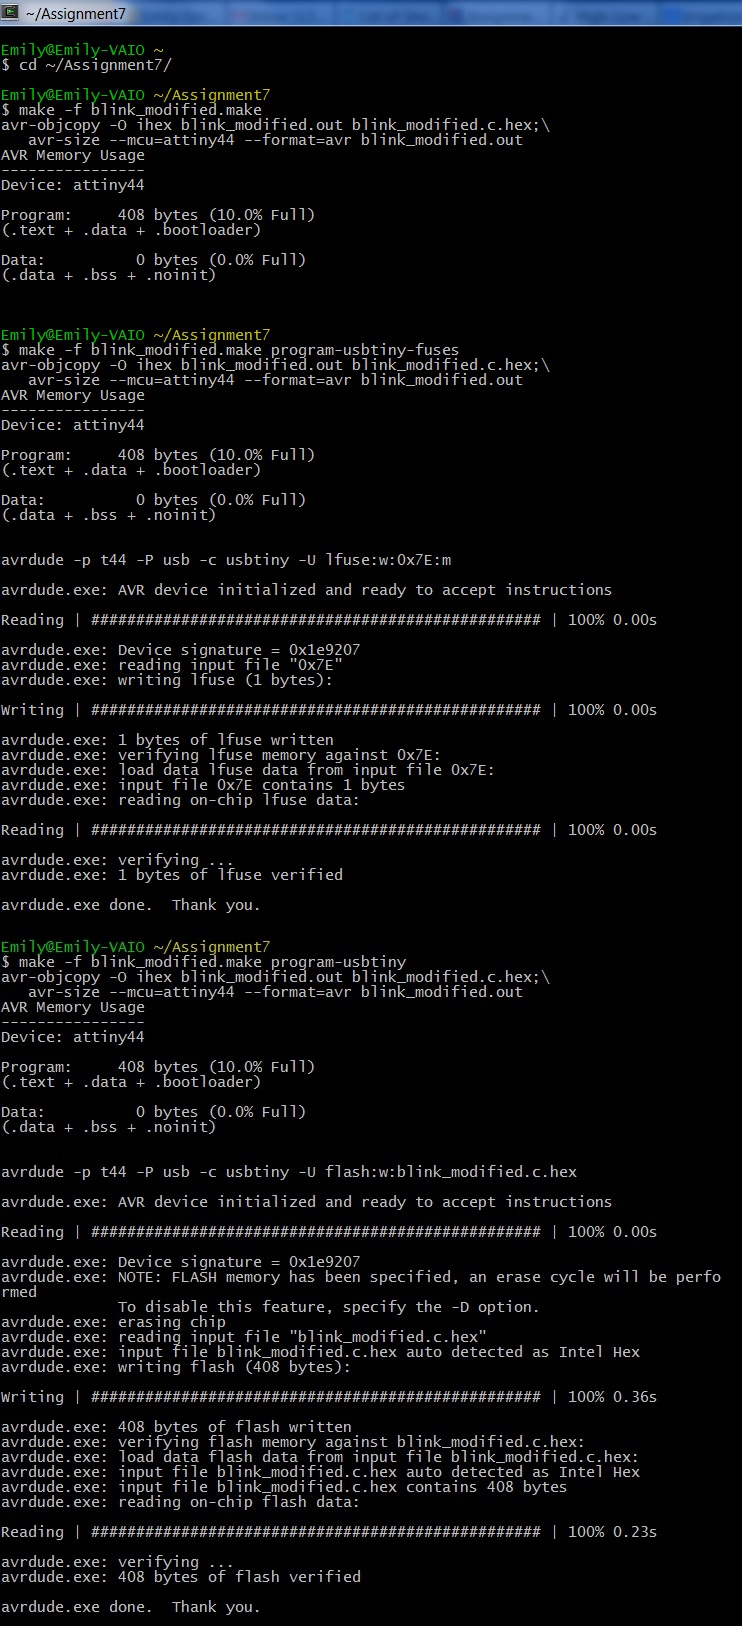
And it worked on my first try! Here is a picture and a video:
Hello Echo Using C
I felt pretty good about making the LED light up, so I moved on to the Hello Echo code. I actually preferred C to Arduino, so I decided to try this new code out in Notepad++. I actually did not modify this code; I just wanted to see if I could get the code provided here to work. I programmed my board using Cygwin on my Windows laptop, but I plugged it into the Ubuntu side of an IDC computer to test it out. It worked!
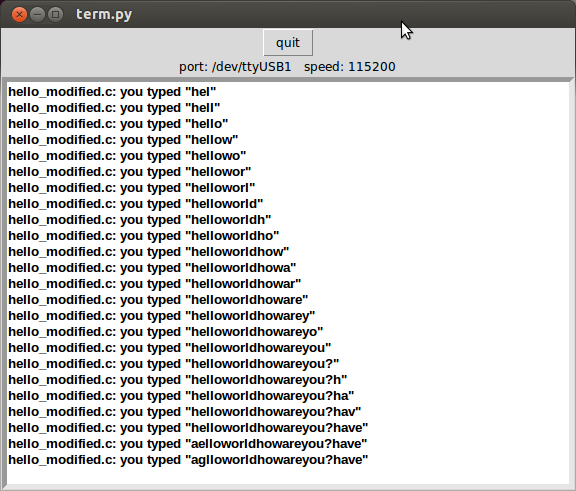
Hello Echo + Blink Using C
Admittedly there isn't much I can do with just a single LED, but I thought it would be fun to try something a little different and combine the two codes. I combined the Hello Echo and Blink codes in C in Notepad++ so that each time I hit a key, the board both blinks and spits back what I typed (sorry it's a bit hard to see in the video):

Files
blink_modified.ino [for Arduino]
blink_modified.c
blink_modified.make
hello_modified.c [blink + hello echo]
hello_modified.make