Molding and Casting
On the first day of class, Prof. Gershenfeld told us this course would involve a lot of floundering our way through assignments. This was definitely true for me this week. It seemed that everything that could go wrong did go wrong. I think I messed up so much because I had to miss lecture last week; I made some rookie mistakes that apparently were pointed out in class.
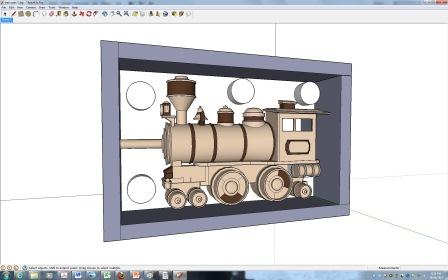
I tried (and failed, and tried again, and failed, and tried again) to make a toy train for my cousin's son. I wanted to learn Google Sketchup this week, because I thought it would be useful to learn a new CAD tool, plus I knew Google had a cool public warehouse of 3-D models I could build off of. This would prove to be a grave error...
I started with a model downloaded from the 3-D warehouse here. I modified the original model to make it easier for milling and molding. I split the train into two parts (for two molds), filled in all the holes, deleted extraneous features (such as the rails, car, and cow catcher), added a runner for injection and registration points, and built up walls around the train.
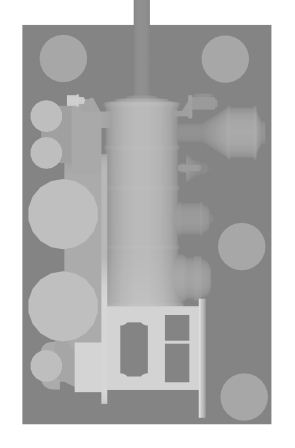
My problems began when I tried to open the STL file on the fab module. The fab module could not open the file at all. Apparently, Google Sketchup exports STLs as ASCII STLs, not binary STLs--and the fab module accepts only binary files. I opened my STL in Rhino and converted it from an ASCII to a binary file. On my second attempt, the file opened. I first converted the STL into a PNG using the fab module:
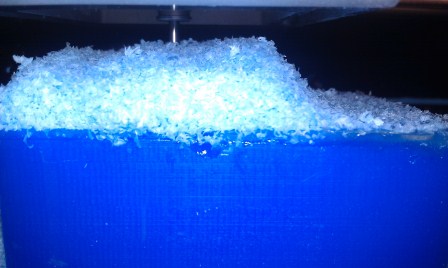
With the fab module I then converted this PNG into an RML and sent the file to be milled on the modela. I used a 1/8 inch endmill for the rough cut, and everything seemed to go fine. There were a LOT of wax flakes.
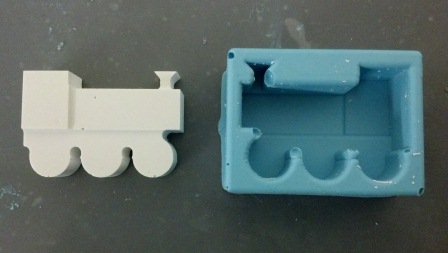
After the rough cut, I did the finishing cut with a 1/32 inch endmill. I did not anticipate how long this would take. I waited for about four hours. Because it took so long, at this point I decided to abandon my idea of making a two-mold toy train and stick to the single mold, leaving one side flat. When the milling finally completed (actually, it wasn't completed; it had only finished in one axis and I did not want to wait for the second axis finishing), I saw that the train was totally destroyed:
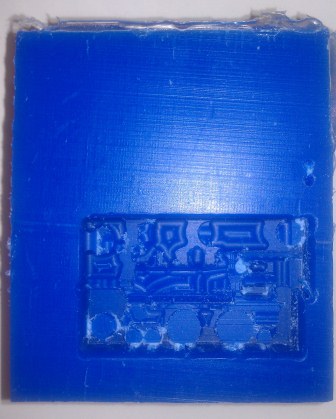
It turned out that I did not account for the length of the endmill versus the depth of my details. Apparently the short, thin endmill went so deep that the fatter tapered part above the drill cut into some of my train's features adjacent to what was being milled.
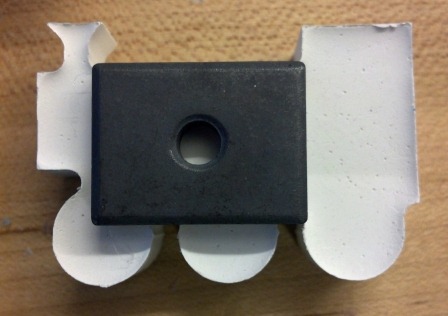
I thought my problem was only due to the size of the endmill and my deep details. I thought a way to fix this would be simply to 3-D print my train. Thanks to classmate Lindy, who has experience with the Dimension printer, I was able to do this. However, this failed as well:

Parts were missing, and there were holes between the train body and the bed (though that's hard to see in the picture)--silicone would have flooded the whole thing. Obviously the problem must have been with my CAD. I looked into it and discovered that when Google Sketchup extrudes, it does not create a solid structure. Instead, it creates a hollow structure with infinitely thin walls (unless you specify otherwise), which is why the 3-D printer had difficulty translating my STL into a solid object.
(A side note: I still think that Google Sketchup is a great CAD tool, especially for modeling buildings (and for those who know the program better than I do!). However, I don't think the program is as powerful as SolidWorks or as useful for creating STL files for digital fabrication.)
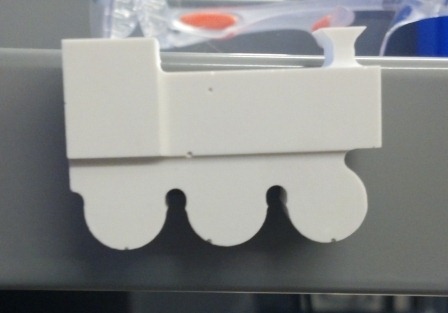
At this point the only thing I could do was start from scratch. I designed a much simpler train on Solidworks, and everything went more smoothly.
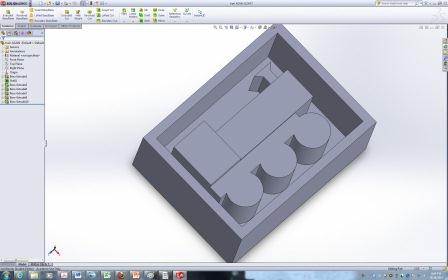
In order to save time during this second milling attempt, I did the finishing cut with a 1/8 inch endmill. This turned out to be good enough.


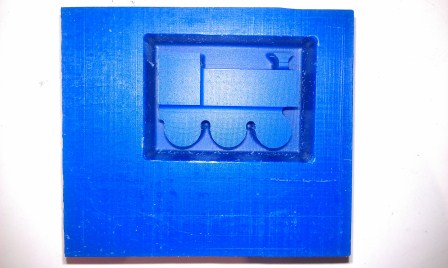
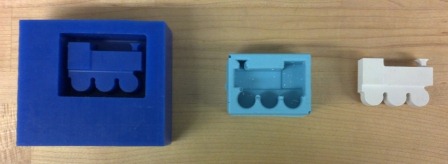
Finally! I have a nice mold! Yay! I moved on to the fun messy part: casting the silicone mold using Oomoo.

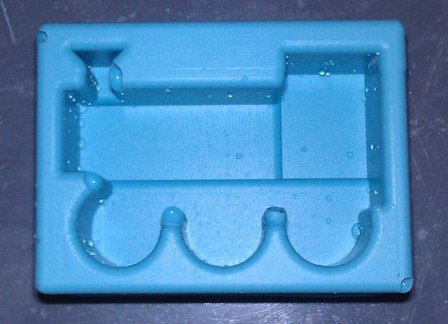
The silicone mold turned out ok, but there were a few air bubbles near the surface. Luckily, my train was deeper than it needed to be, so the holes would not affect my final product.
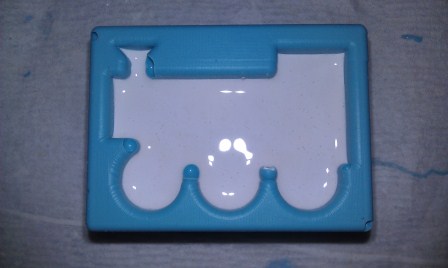
I filled up the mold with drystone for casting.
The train turned out pretty nice:
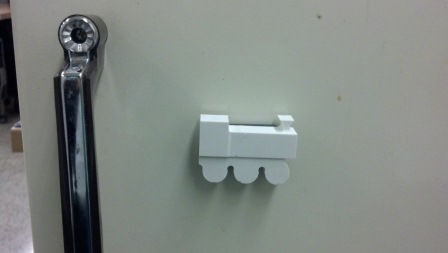
Since I had abandoned my idea of making a little toy train, I wanted to figure out something else fun to do with the one-sided version. A classmate, Adina, had the brilliant idea of turning it into a refrigerator magnet. I hot-glued a magnet to the back of my train:
And now the train gets to hang out on metal surfaces, such as on the lab bench in the IDC:
...and on the fridge in my lab:
To summarize the process: make a solid CAD model (preferably not with Google Sketchup), mill your model in wax, cast a silicone mold with your wax model, and then cast a drystone object.
Files
Sketchup Model, Part 1
Sketchup Model, Part 2
STL from Sketchup Model Part 1
STL from Sketchup Model Part 2
Solidworks Model
STL from Solidworks Model