Final Project
Context and Idea
For my final project, I want to build a "used items vending machine", for people to buy and sell used items without having to go through the hustle of coordinating a transaction.
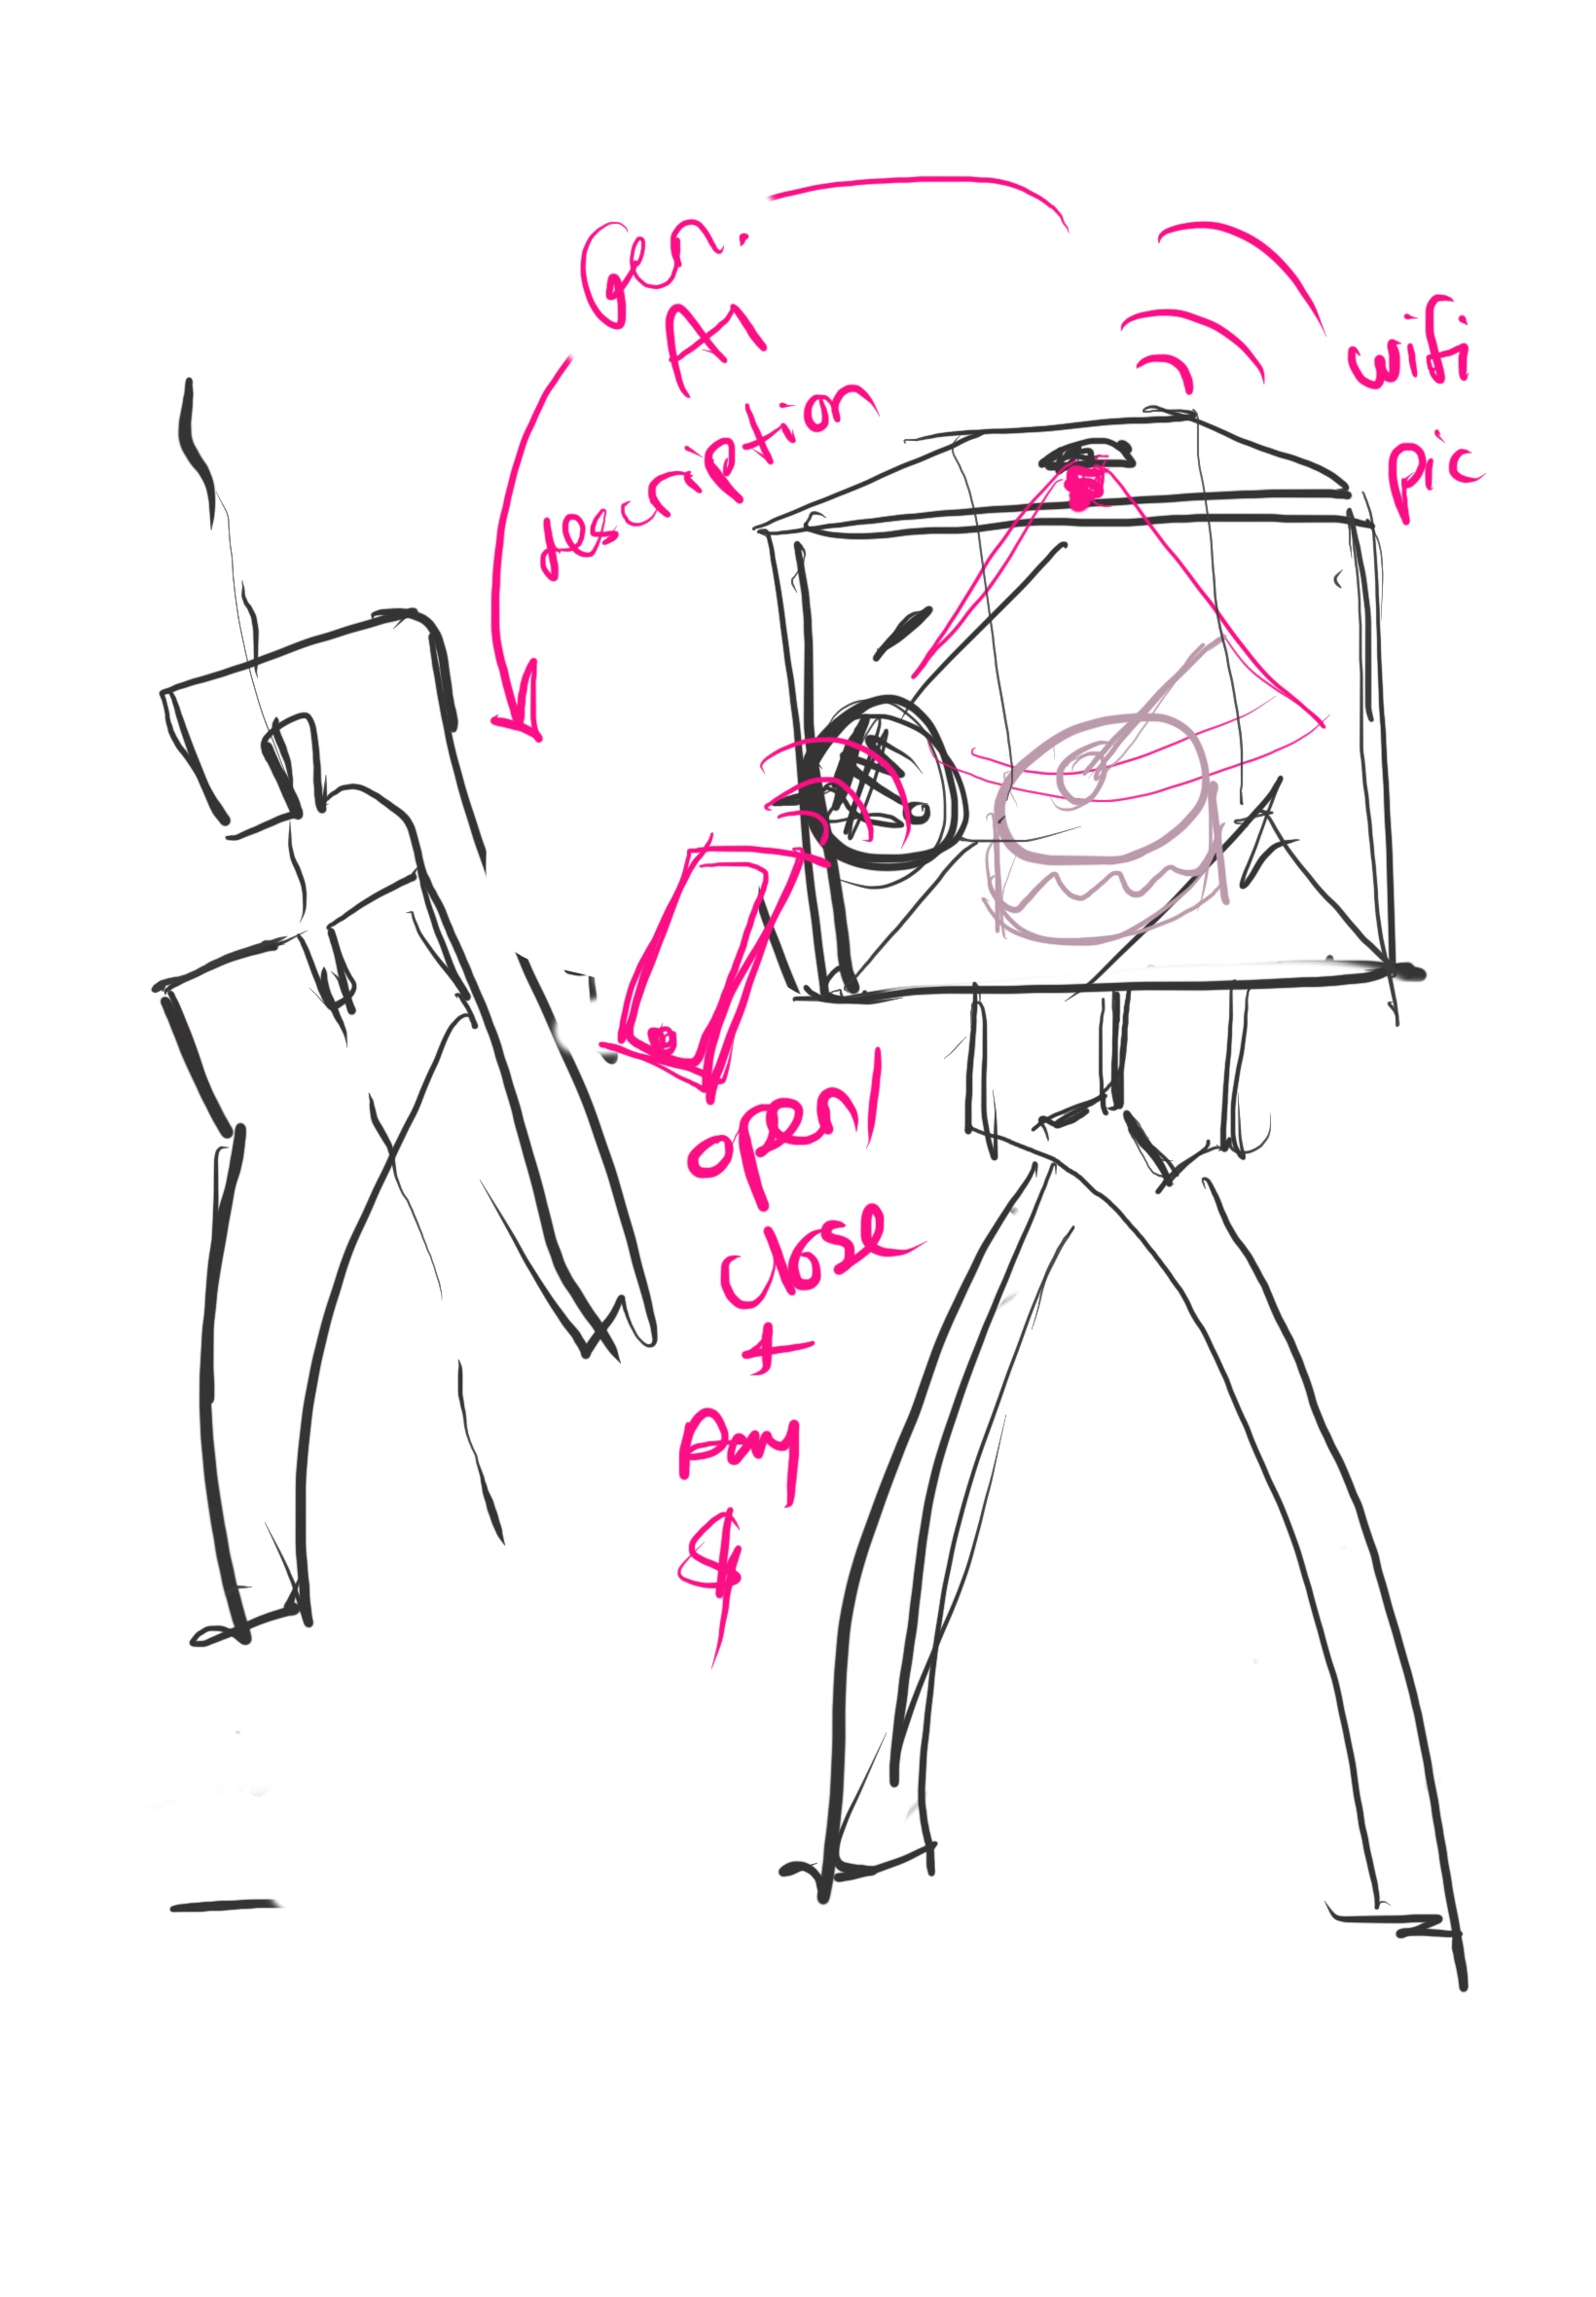
My first idea was to start off with one box, conencted to wifi so that it can be supported by a designated app, where people could leave an item they want to sell and others can get a notification in their app with a picture of the item, the price and some detailing. The notification will draw on an image captured by a camera that will be mounted on the ceiling of the box and ran through AI to get a description and a price tag.
I started making a parametric model of it when I decided it's ugly and I want more display comparments in my final design and abandoned it.
Concept Design
In next iterations, and as I was working on it in parallel to an entrepeneurship fellowship with DesignX, I realized I better start off with more than one item on display. The reason for it being I'd like to get more people involved on earlier stages, and also because I'd like to have a more dynamic display. I'd like to have a few items on display at all times, and have the items change every few days.
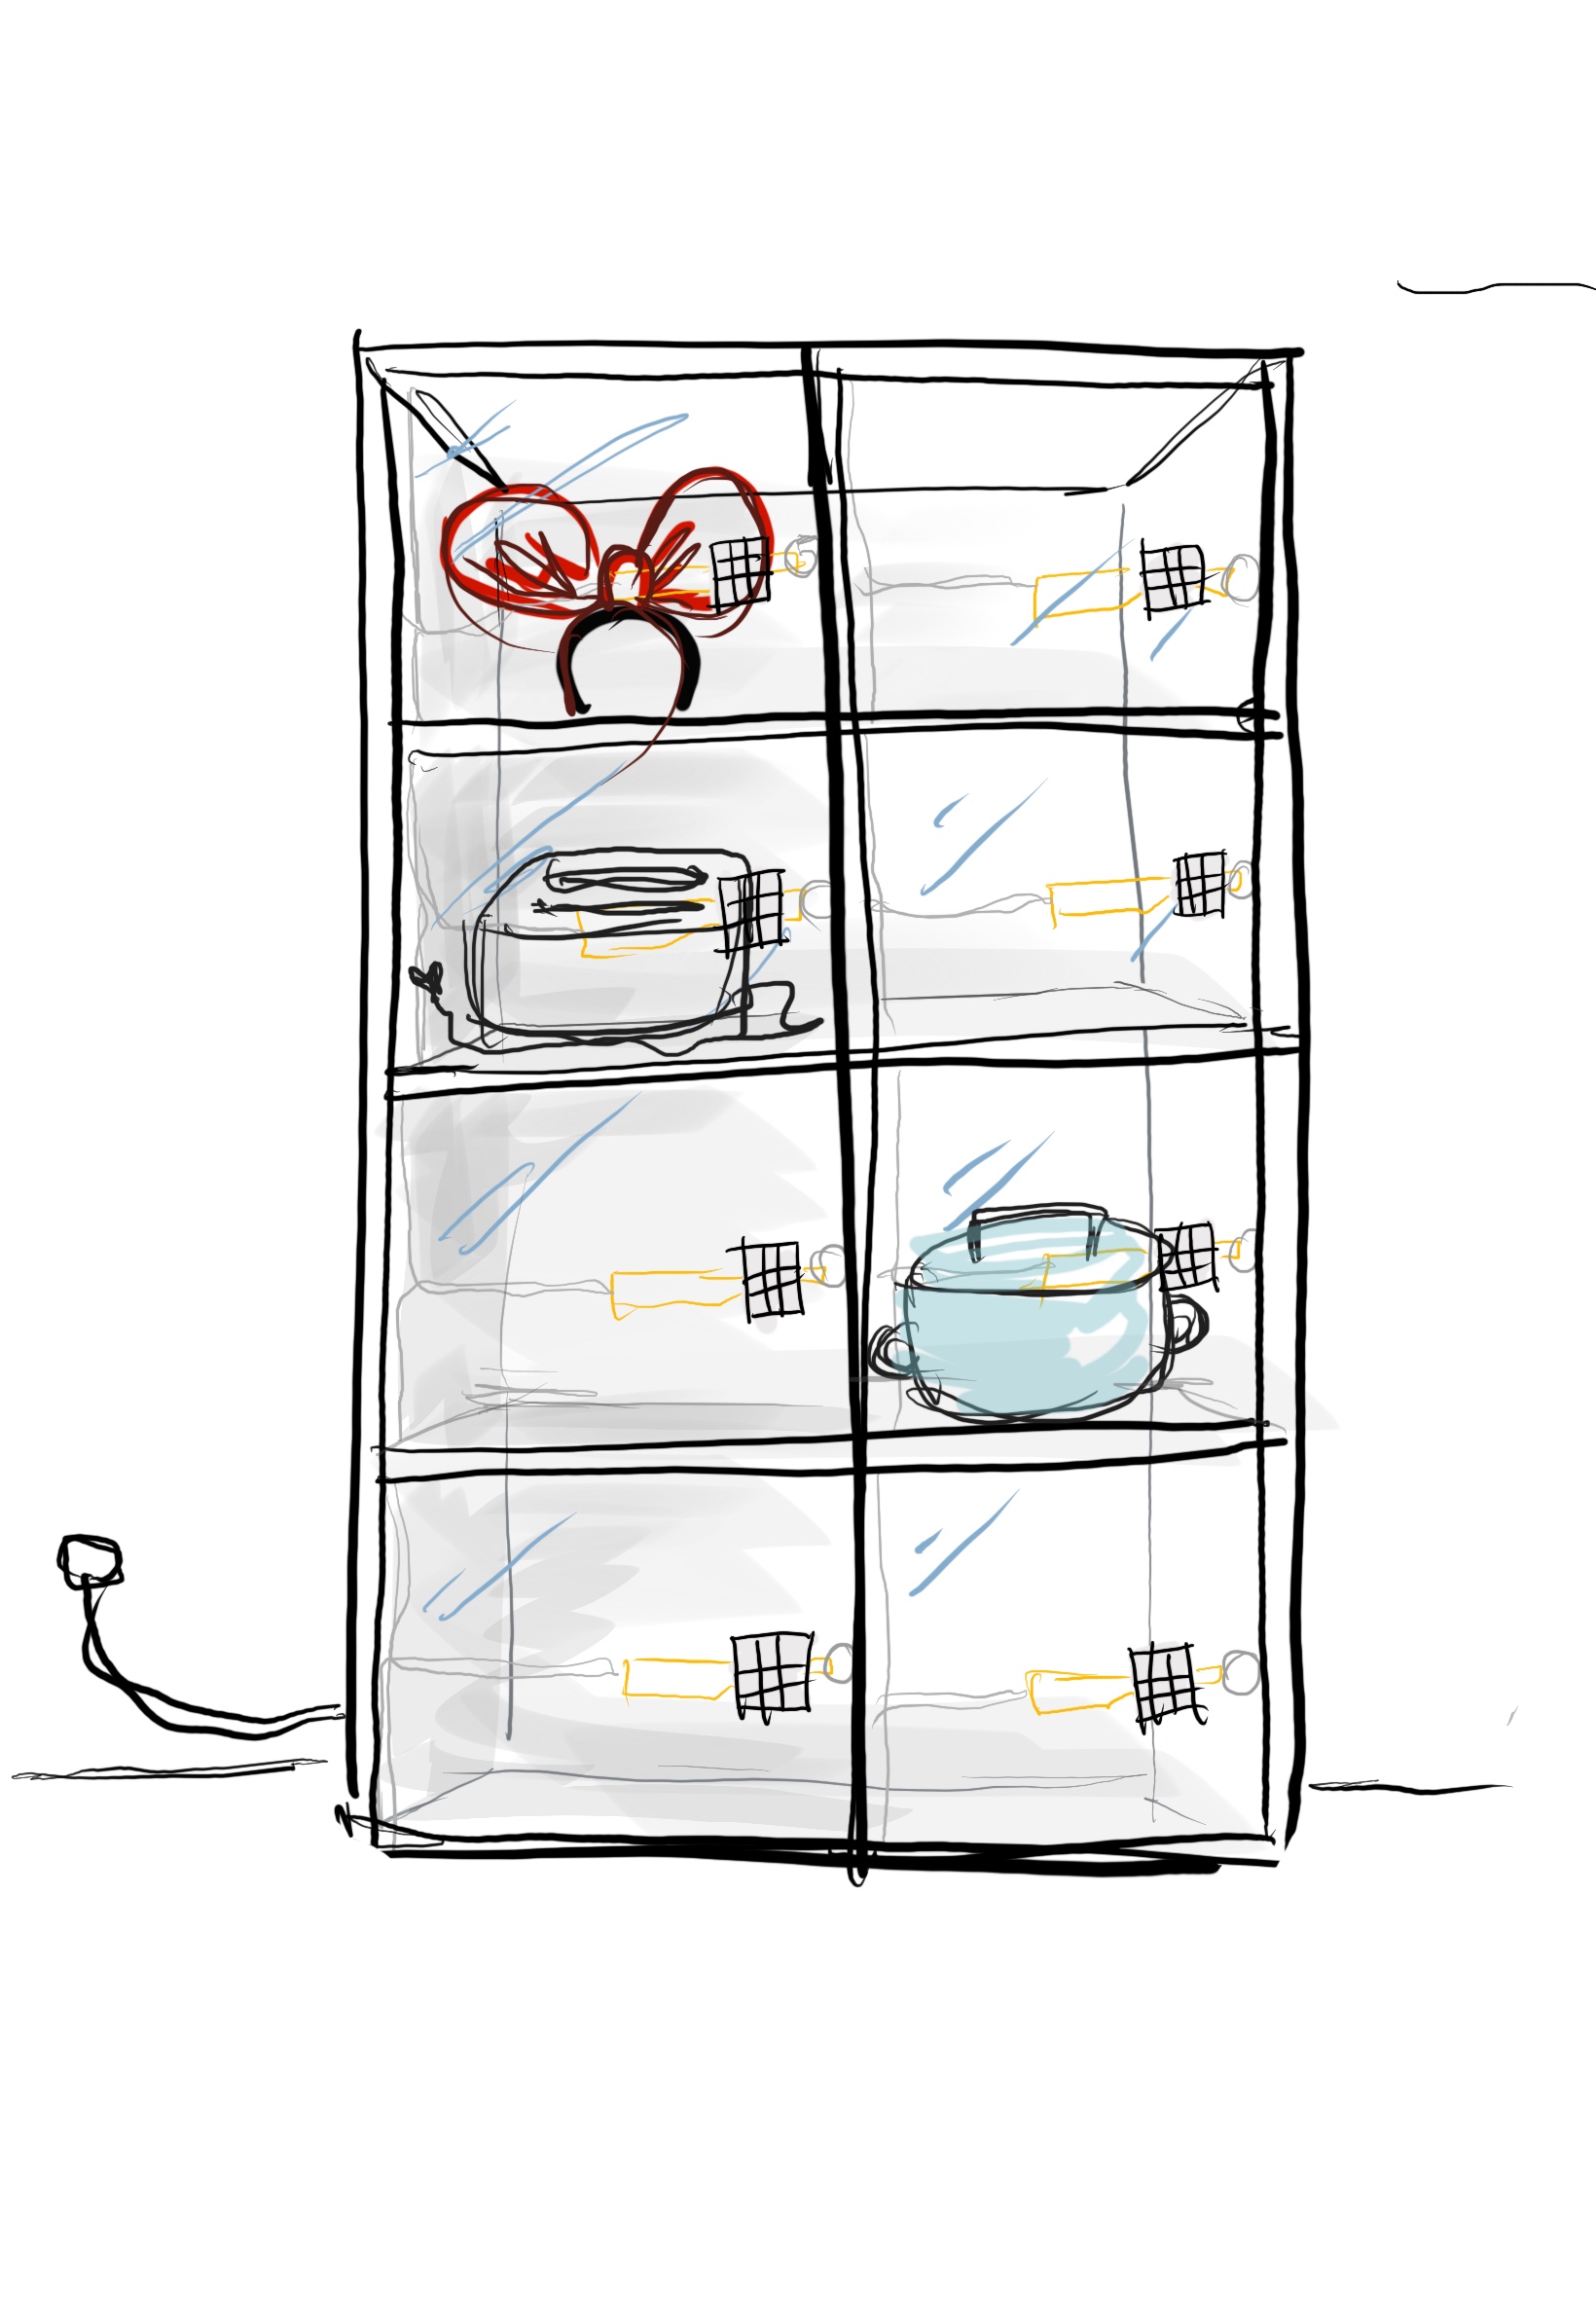
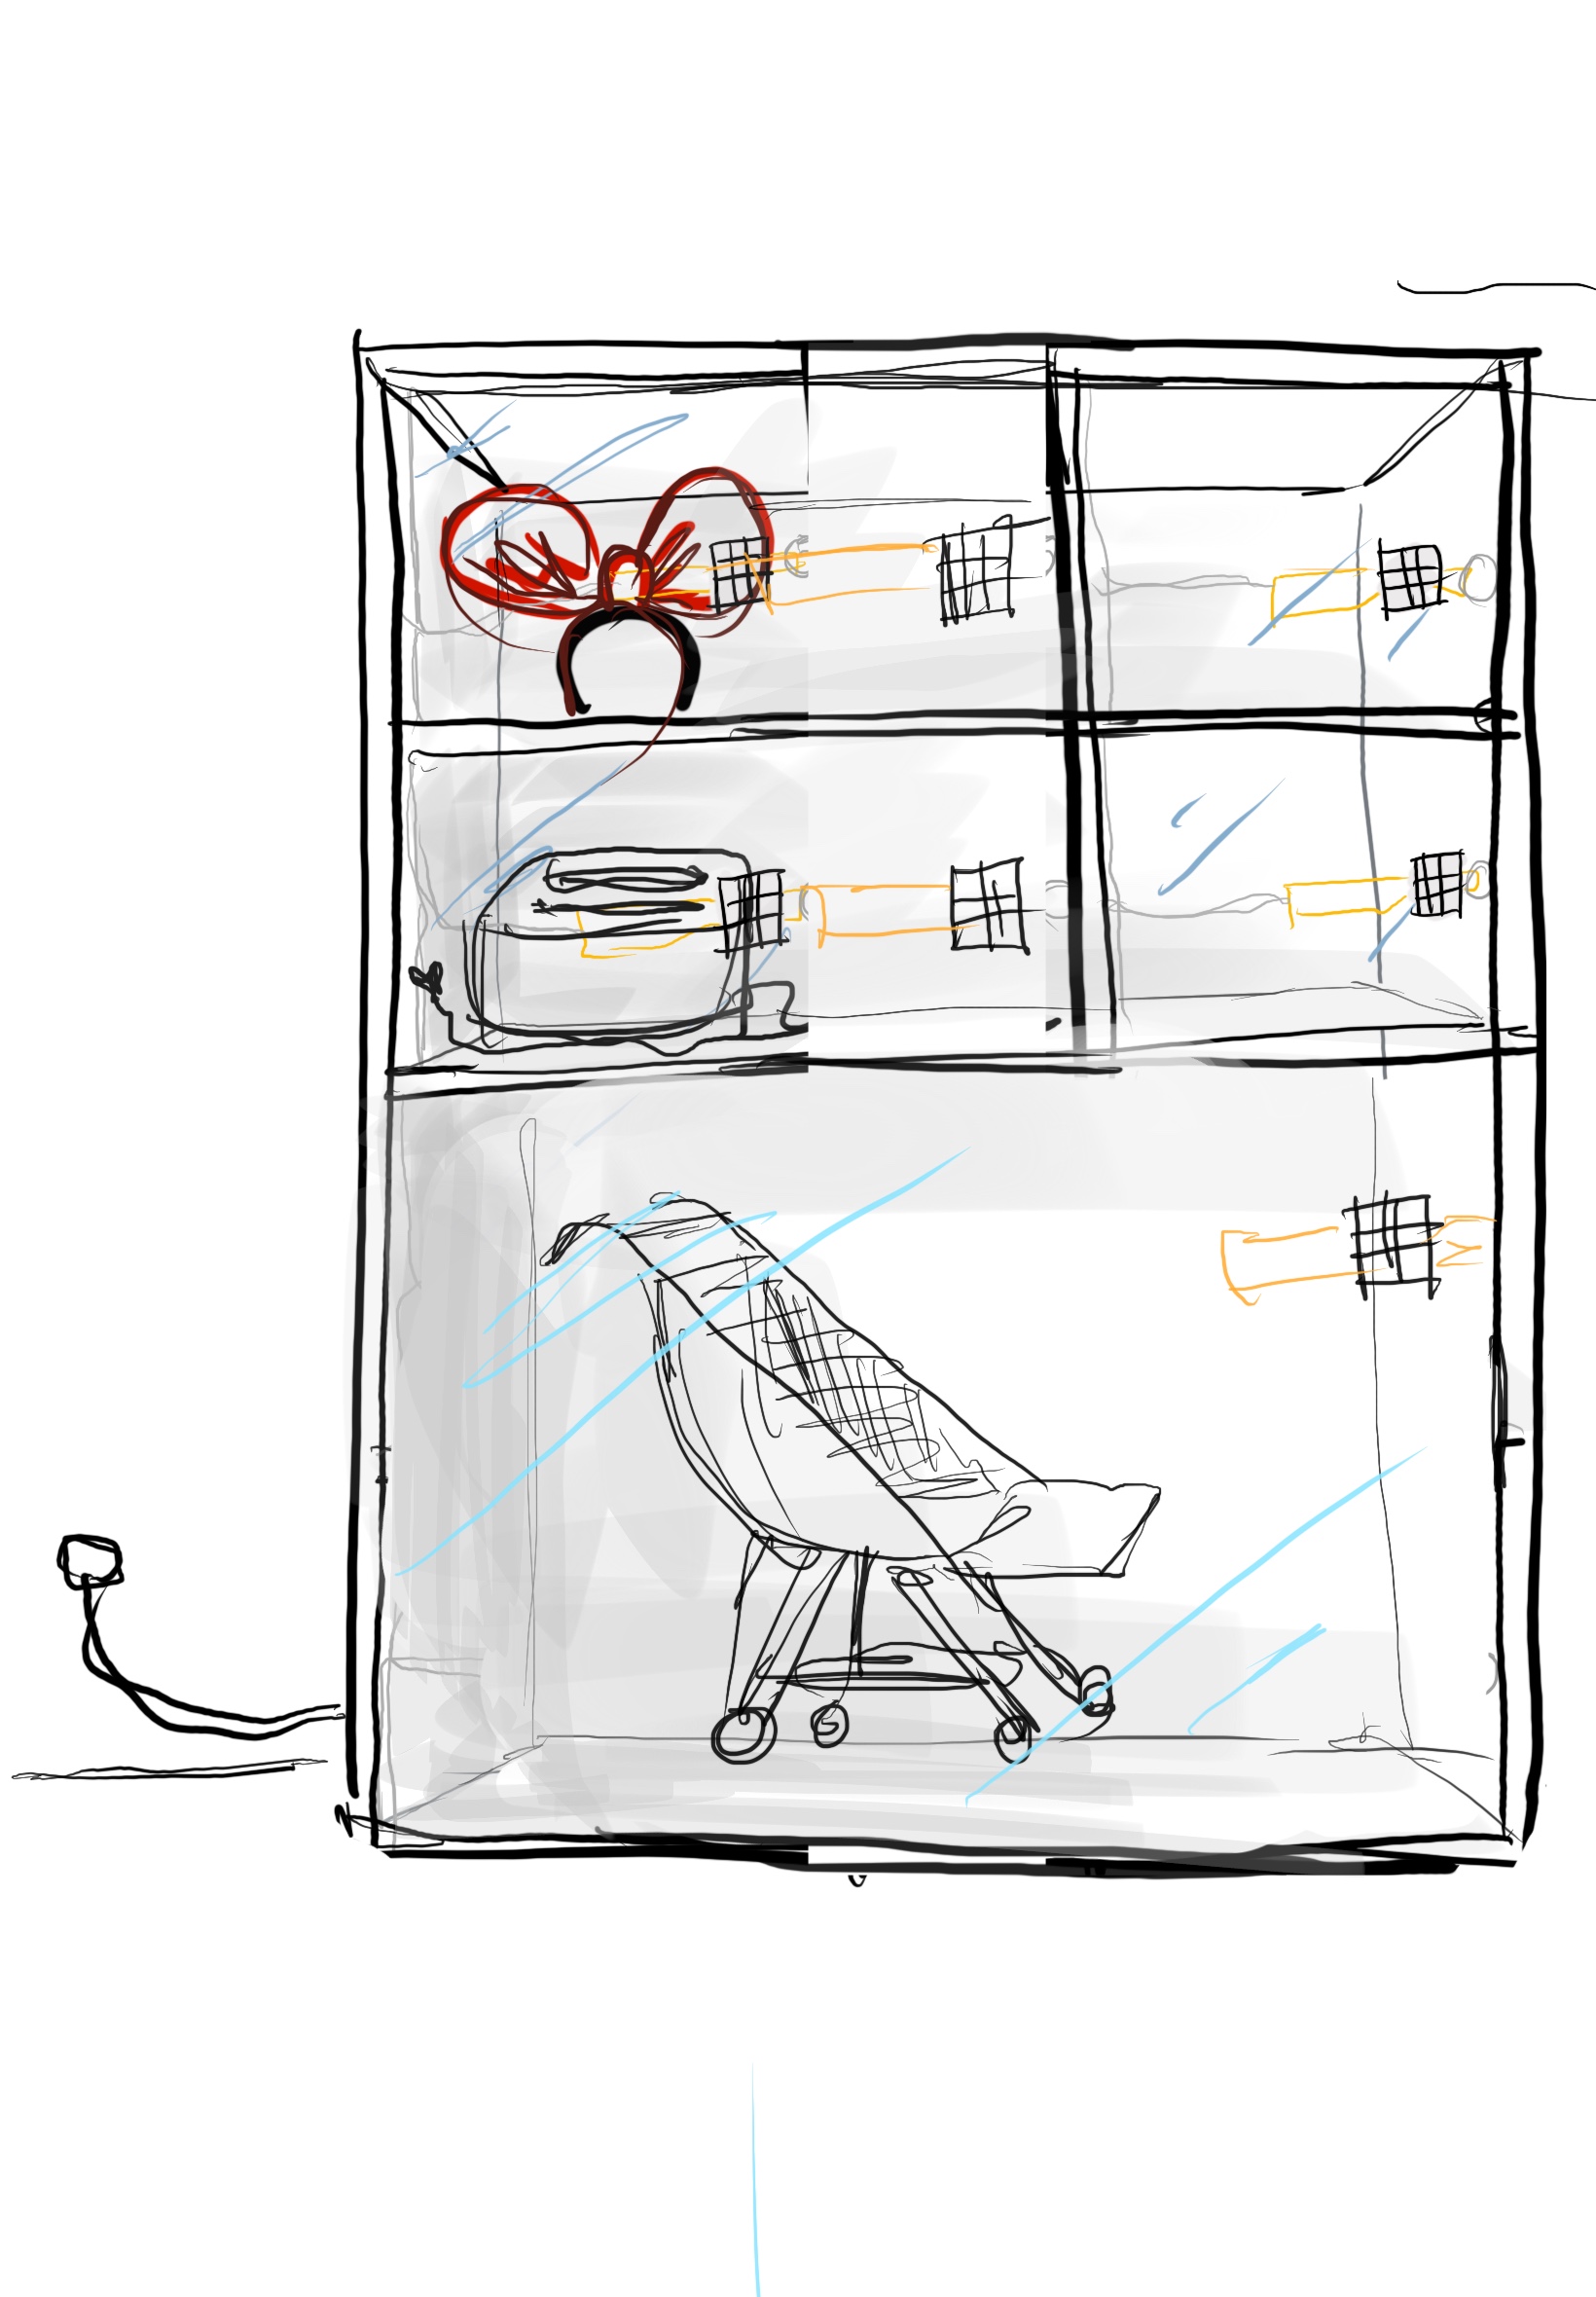
There were some discussions about the sizes of the compartments, but eventually I decided to go with a relatively compact 2x4 IKEA Kallax proportions, to make sure it is easy to adapt in our housing complex, knowing if it will be too big it will face more resistance in implementation.
App and UX
I'm thinking of a very basic app, where you could scroll through the current inventory and make a purchase through an out-of-app paying system.
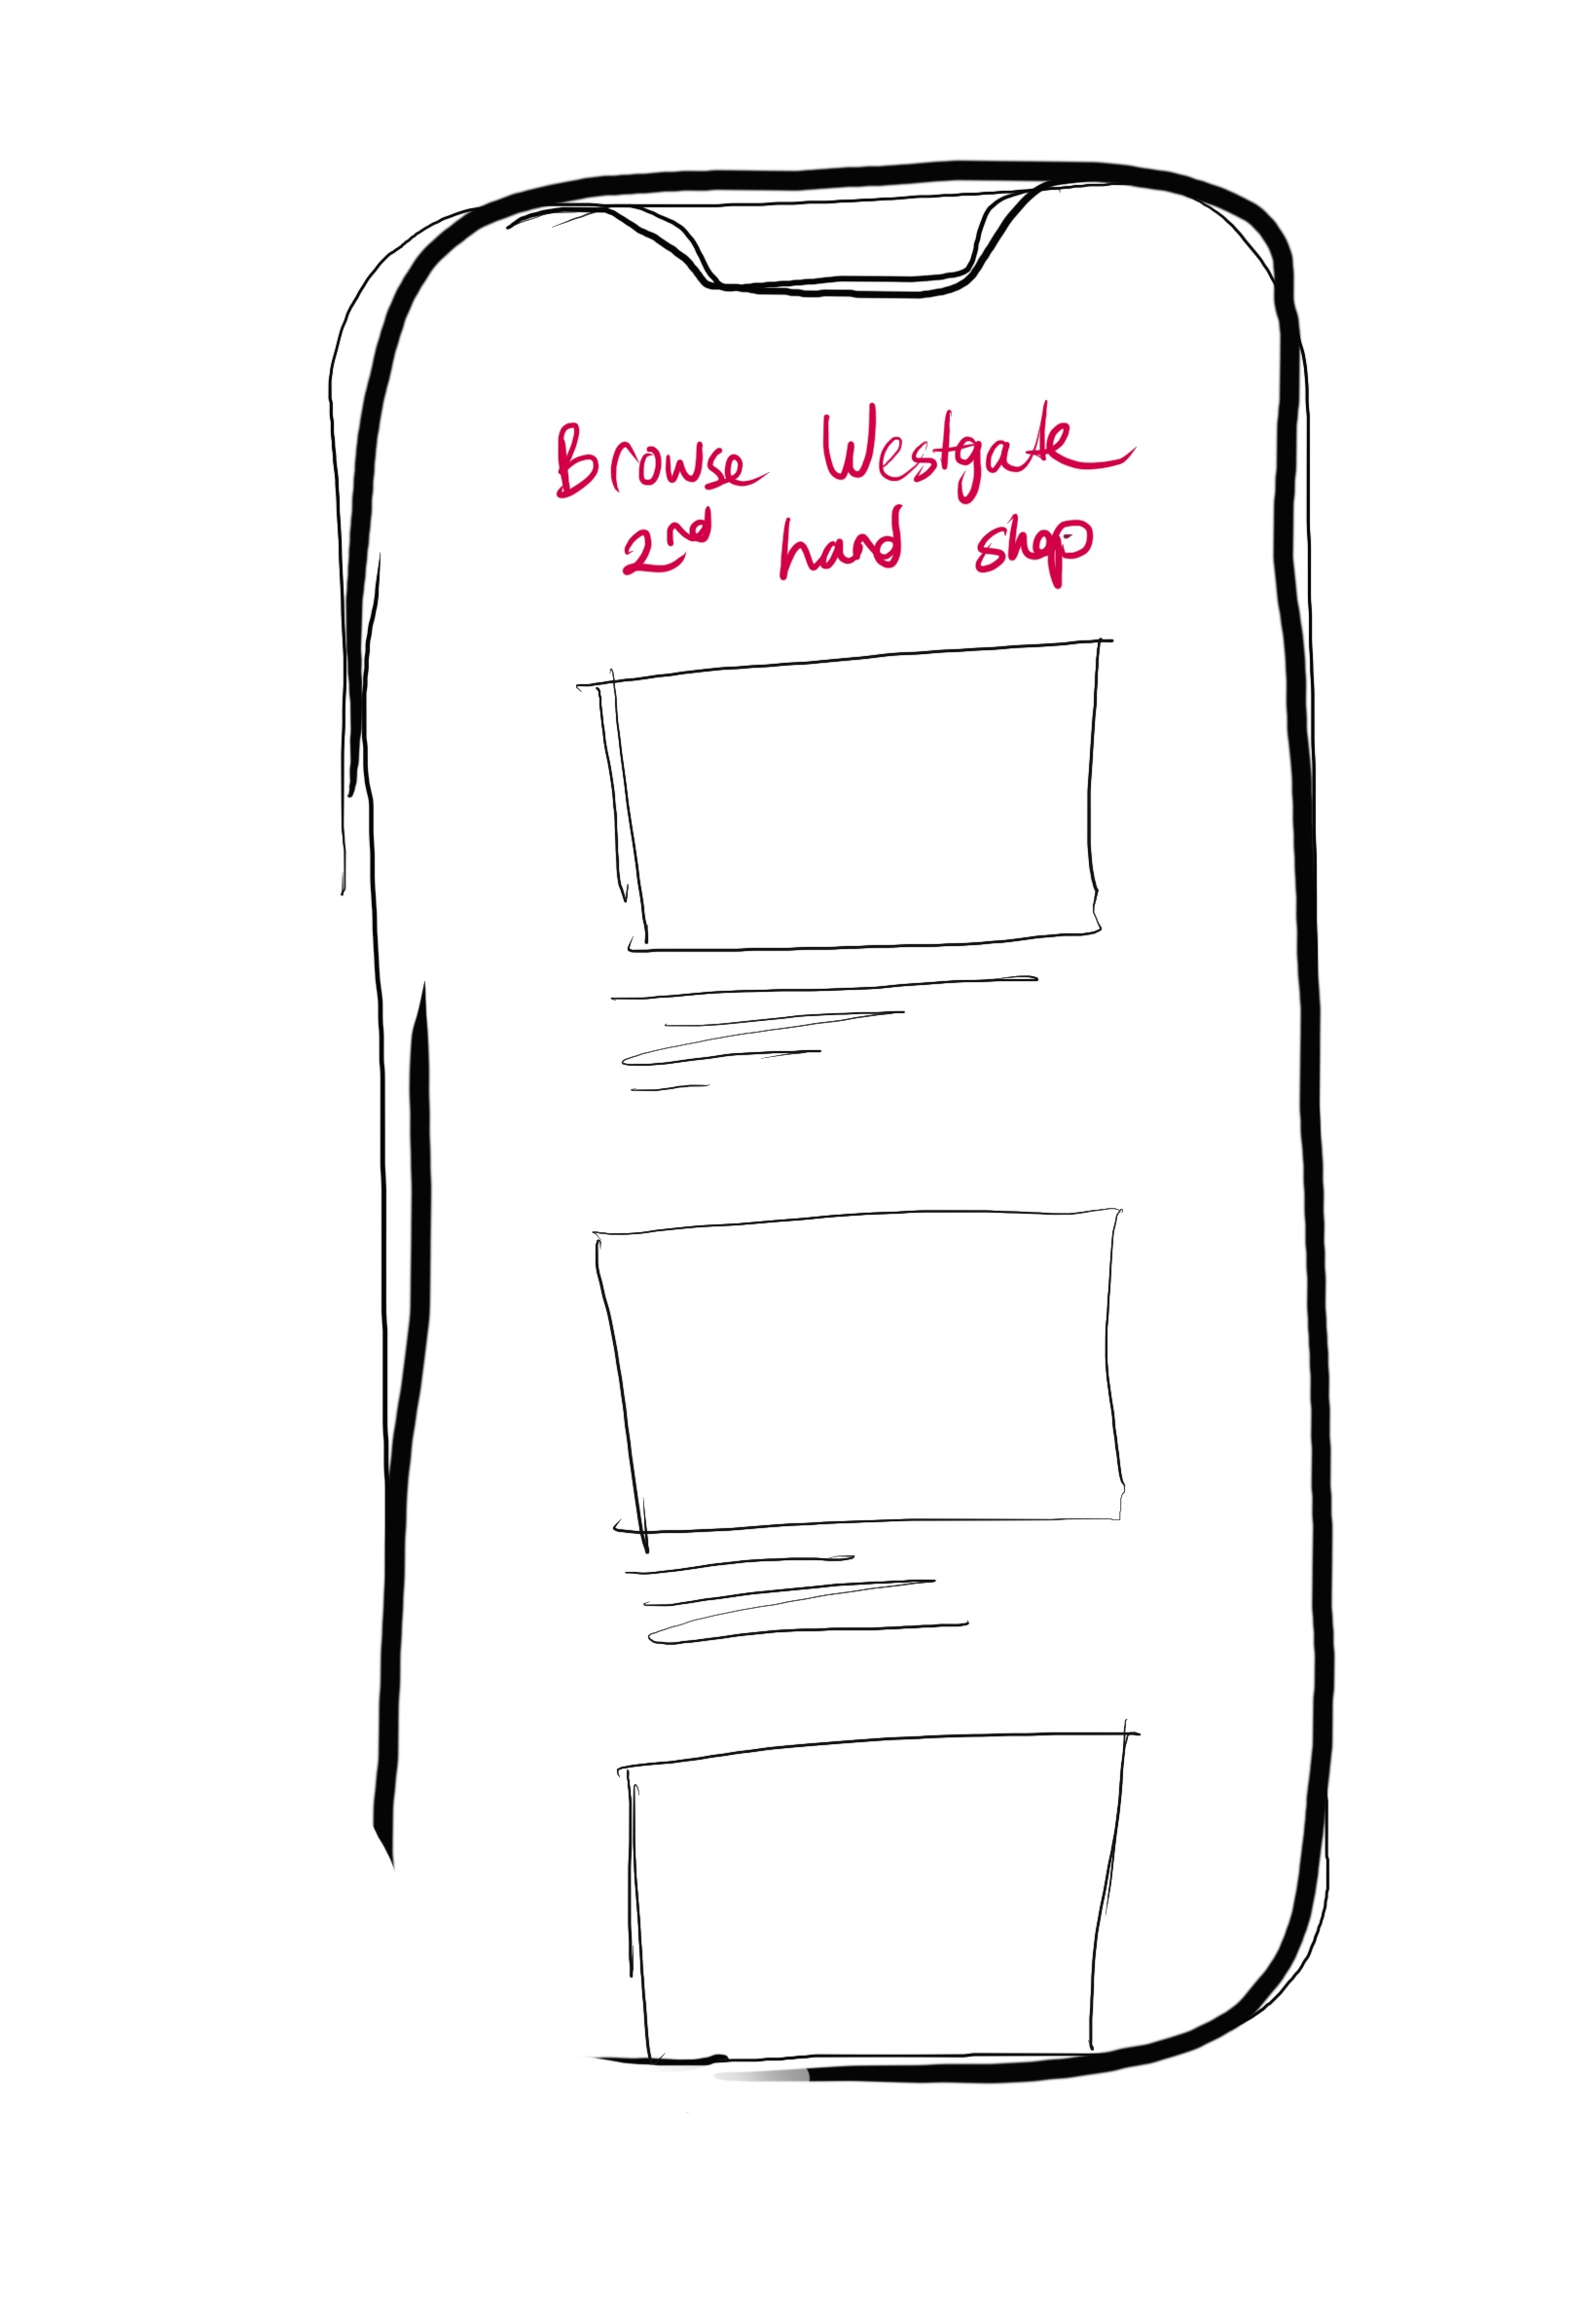
Scroll through the current inventory in the lockers.
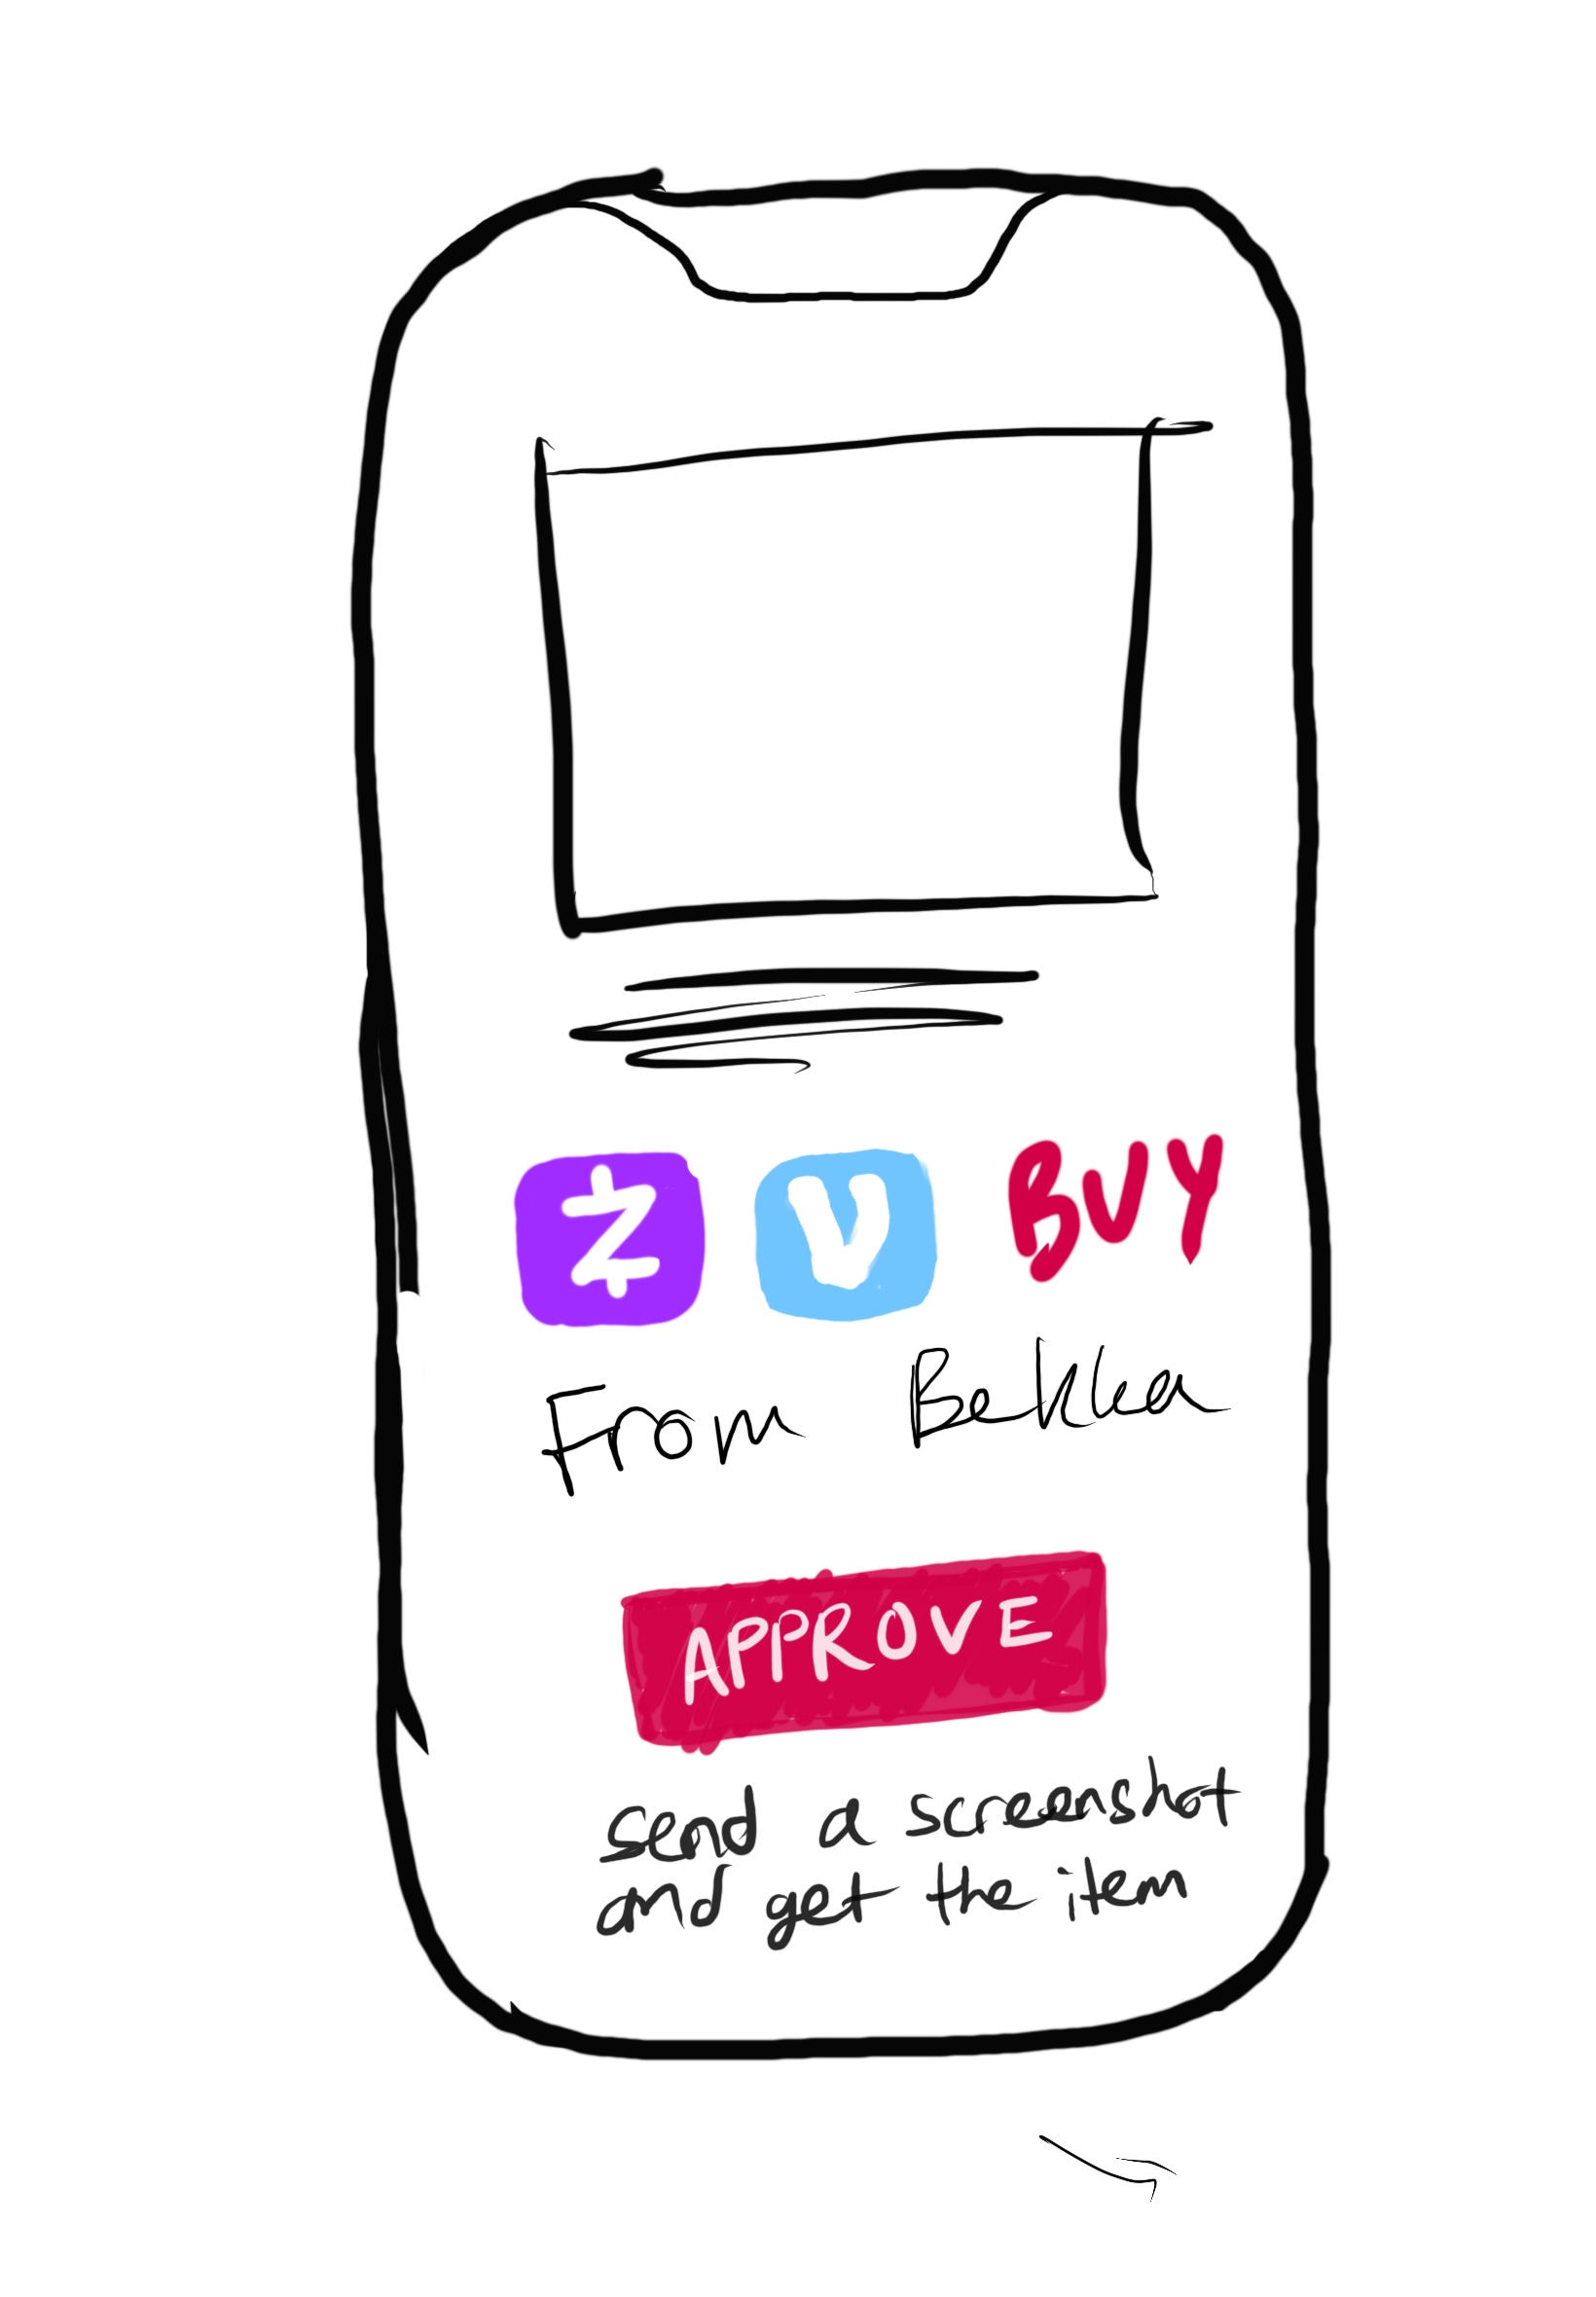
Buy something using an outside paying app and upload a proof-of-payment.
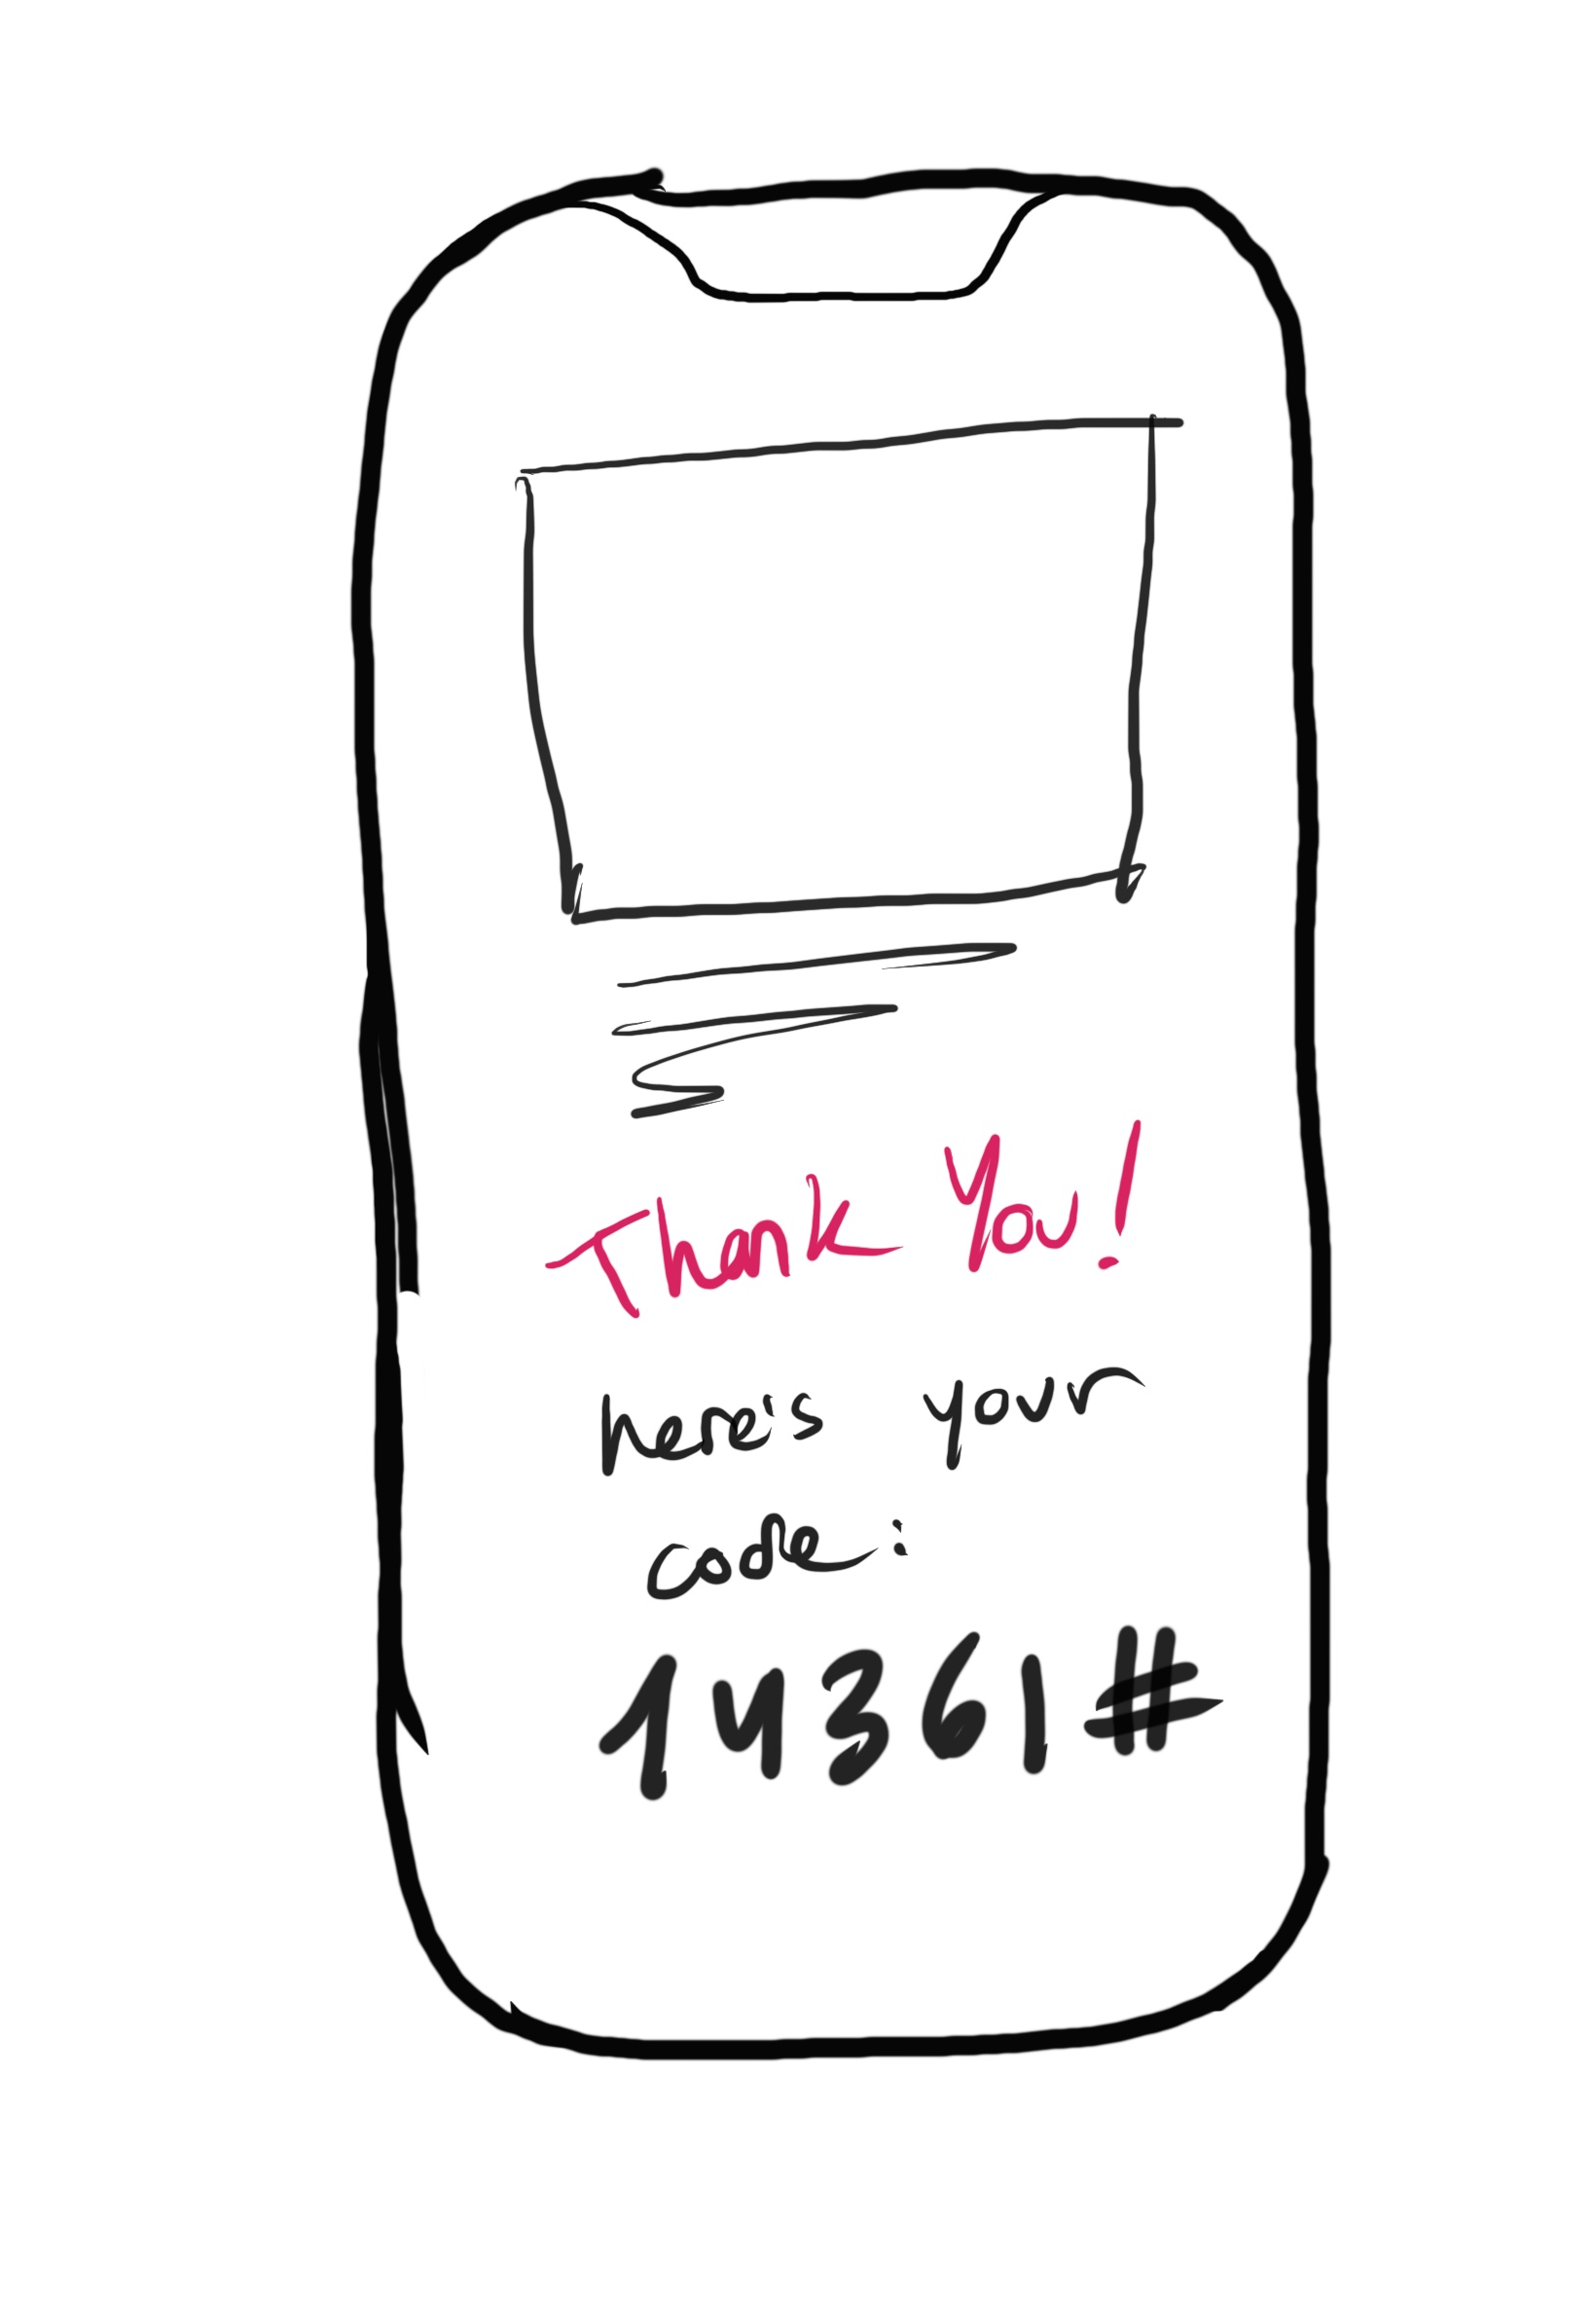
Get a code to retrieve your purchased item from the locker.
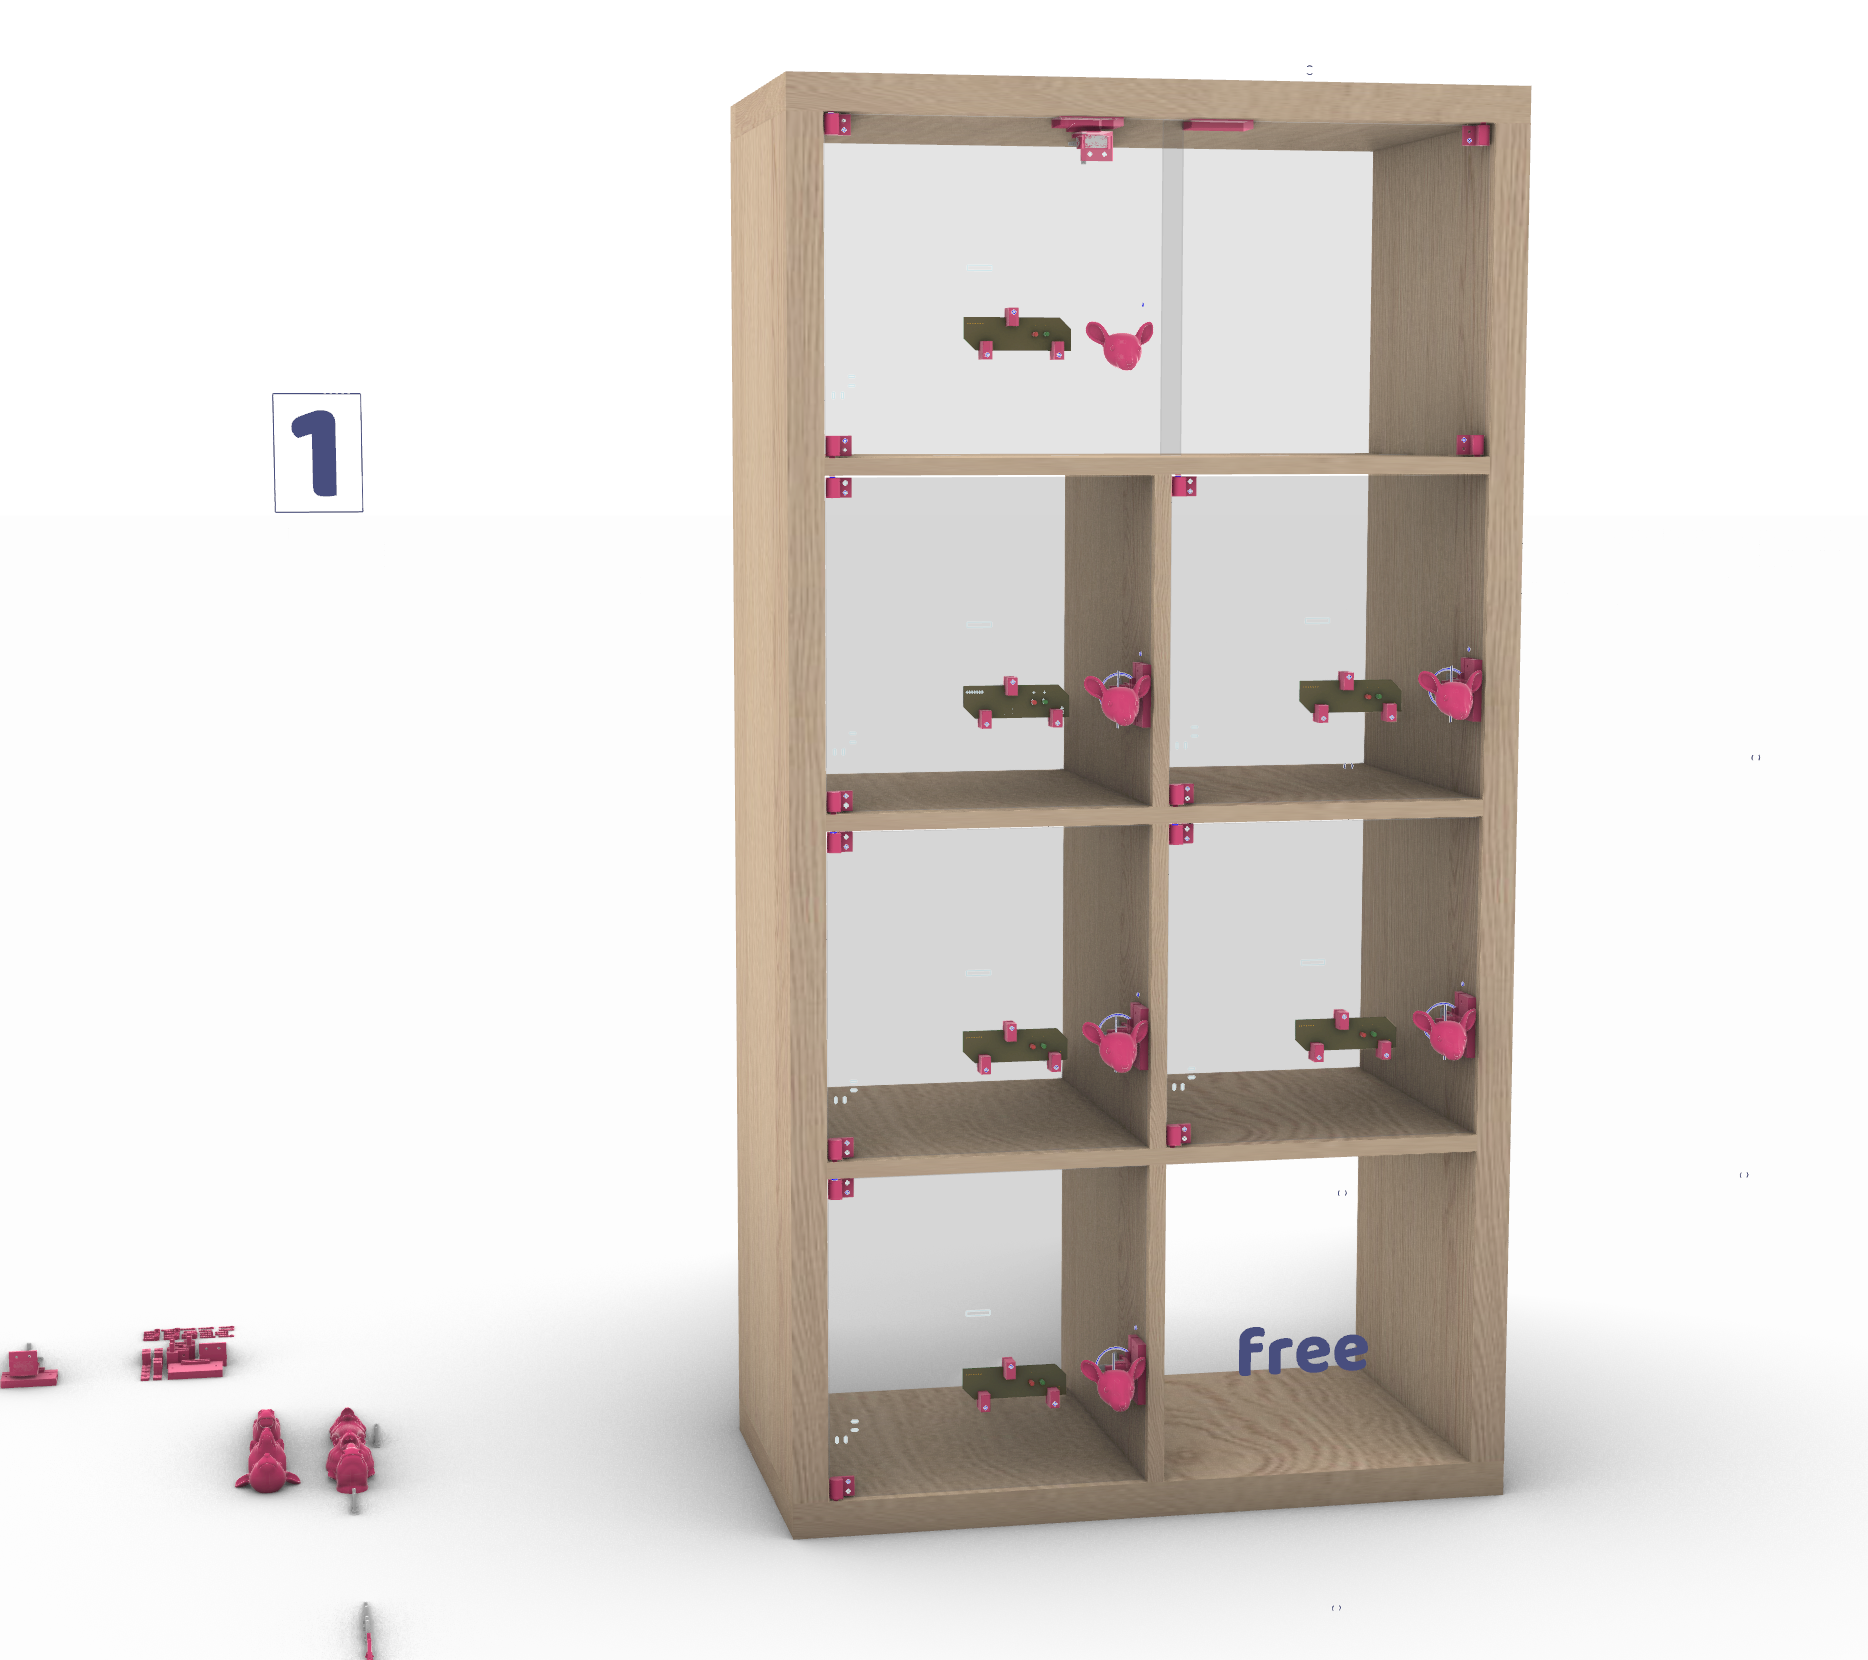
And here's a render of the final product:
Design Details - 3d printed connectors
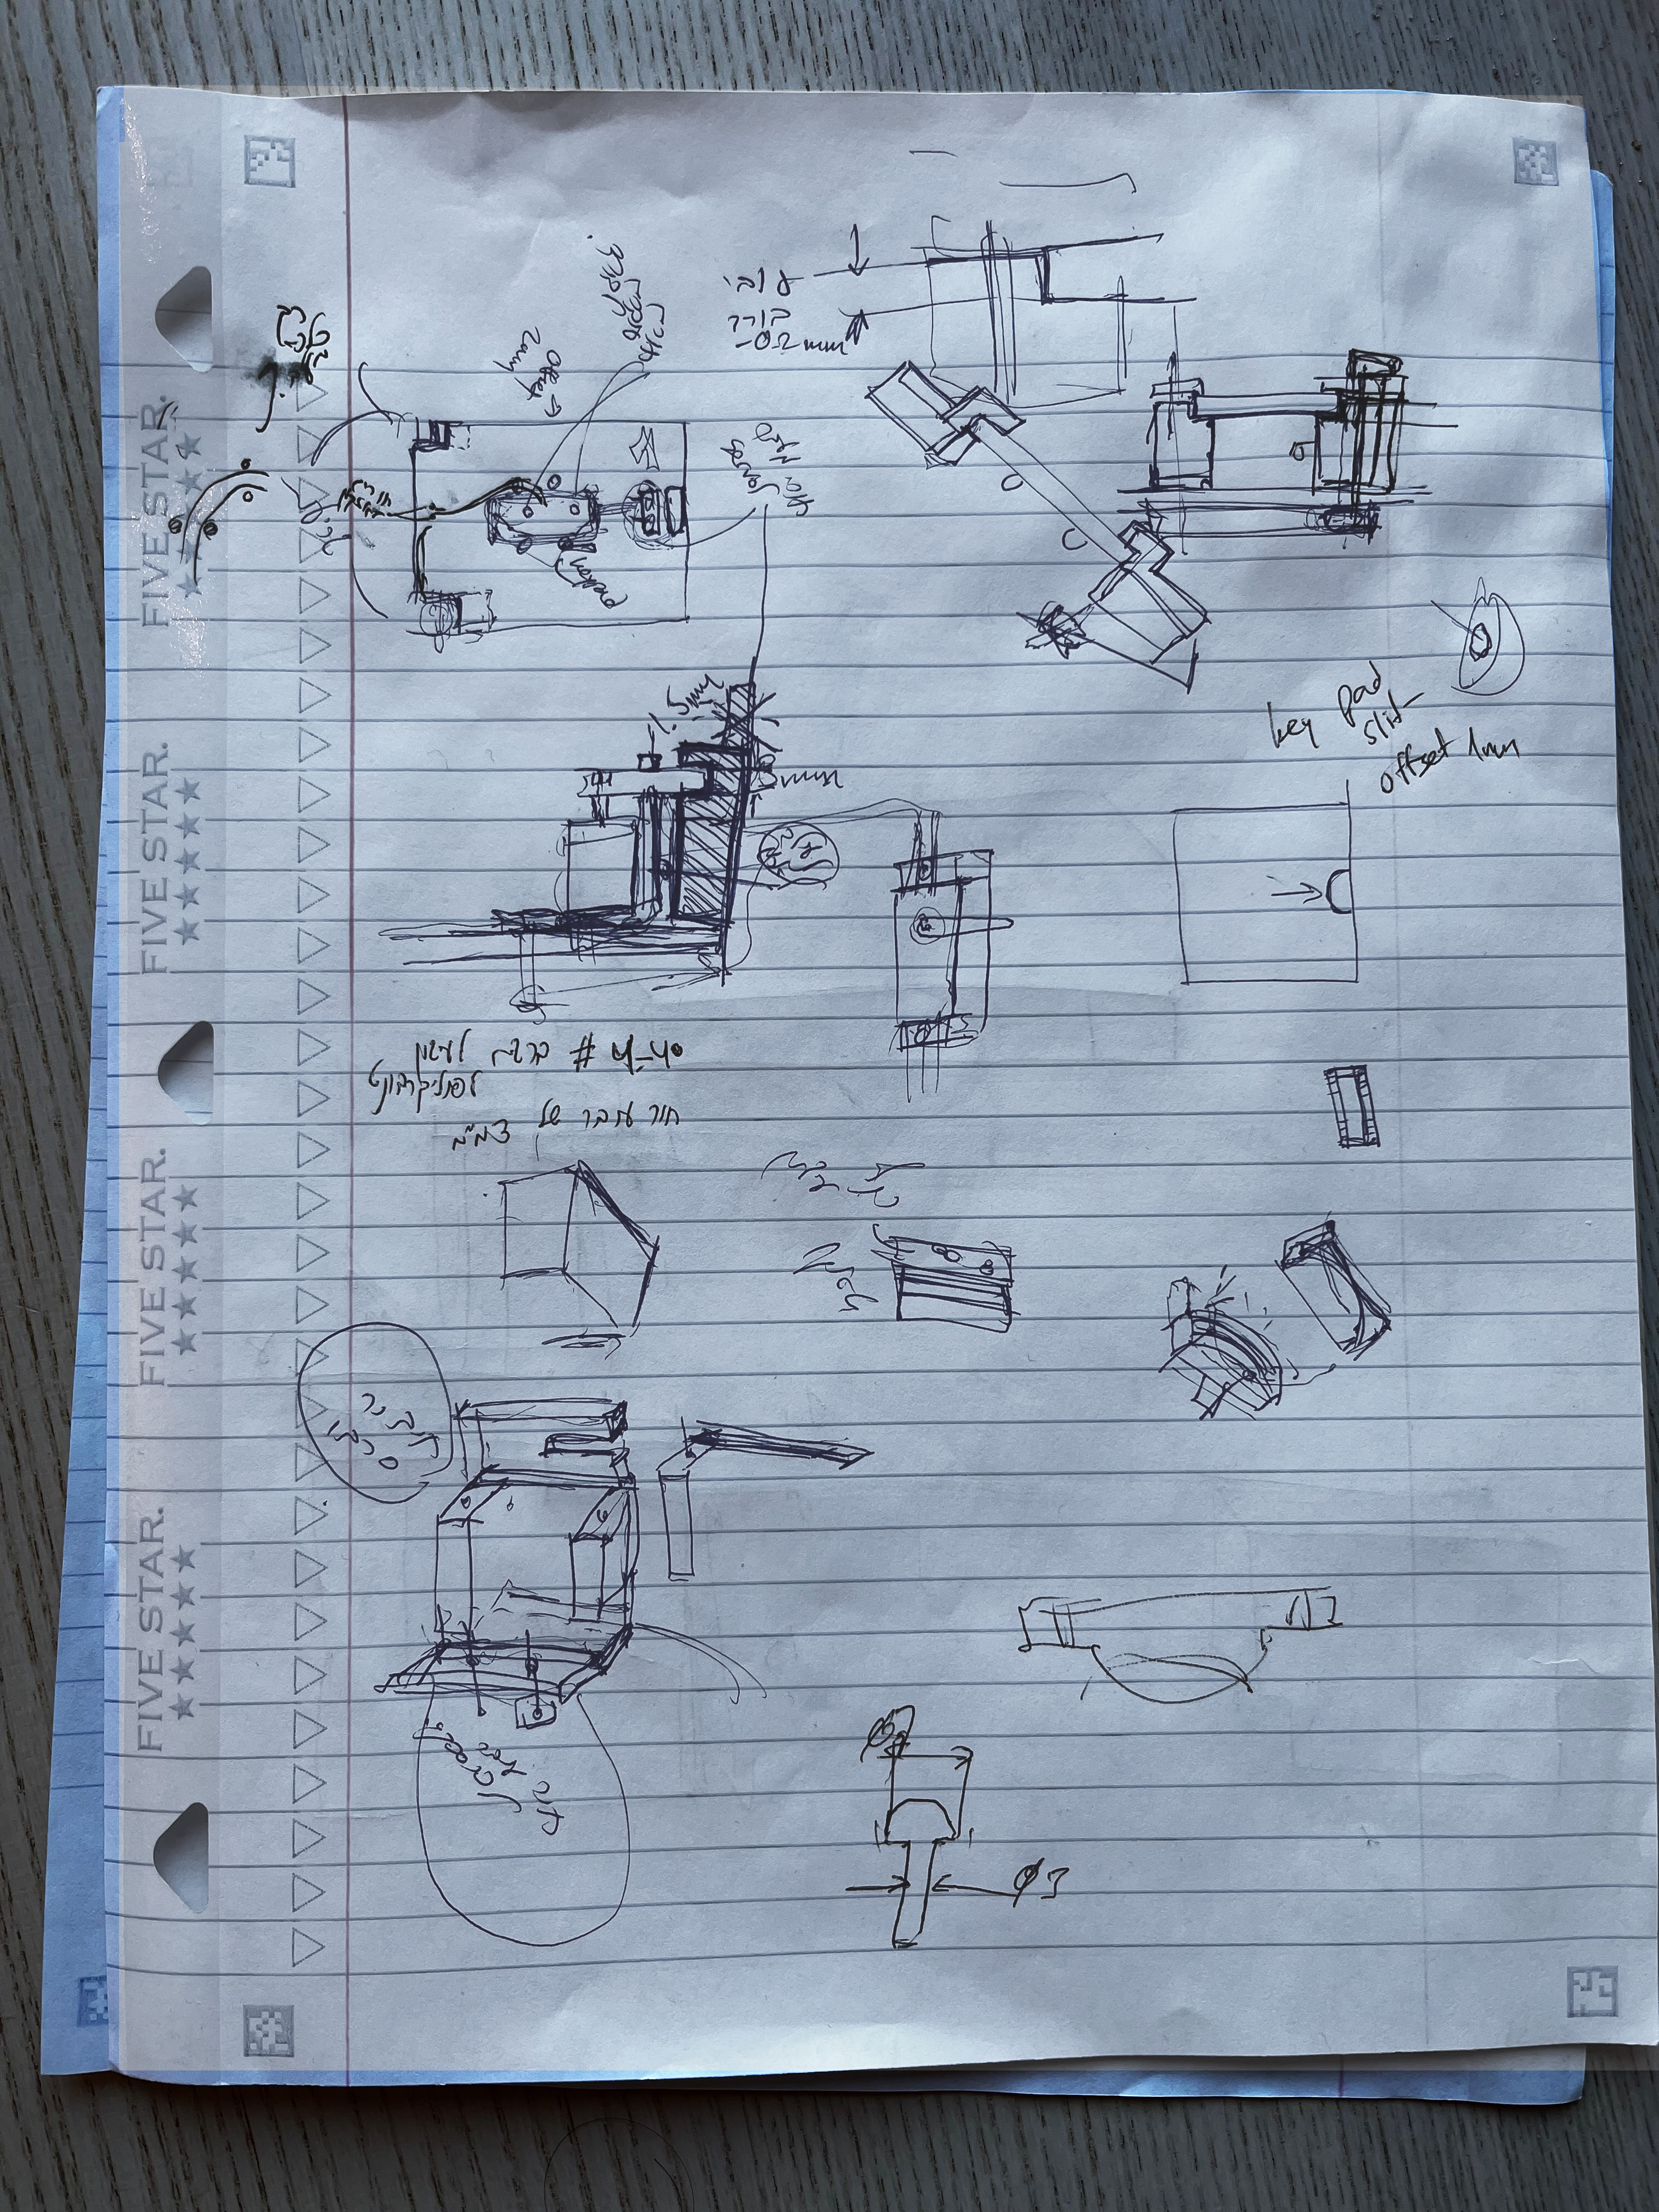
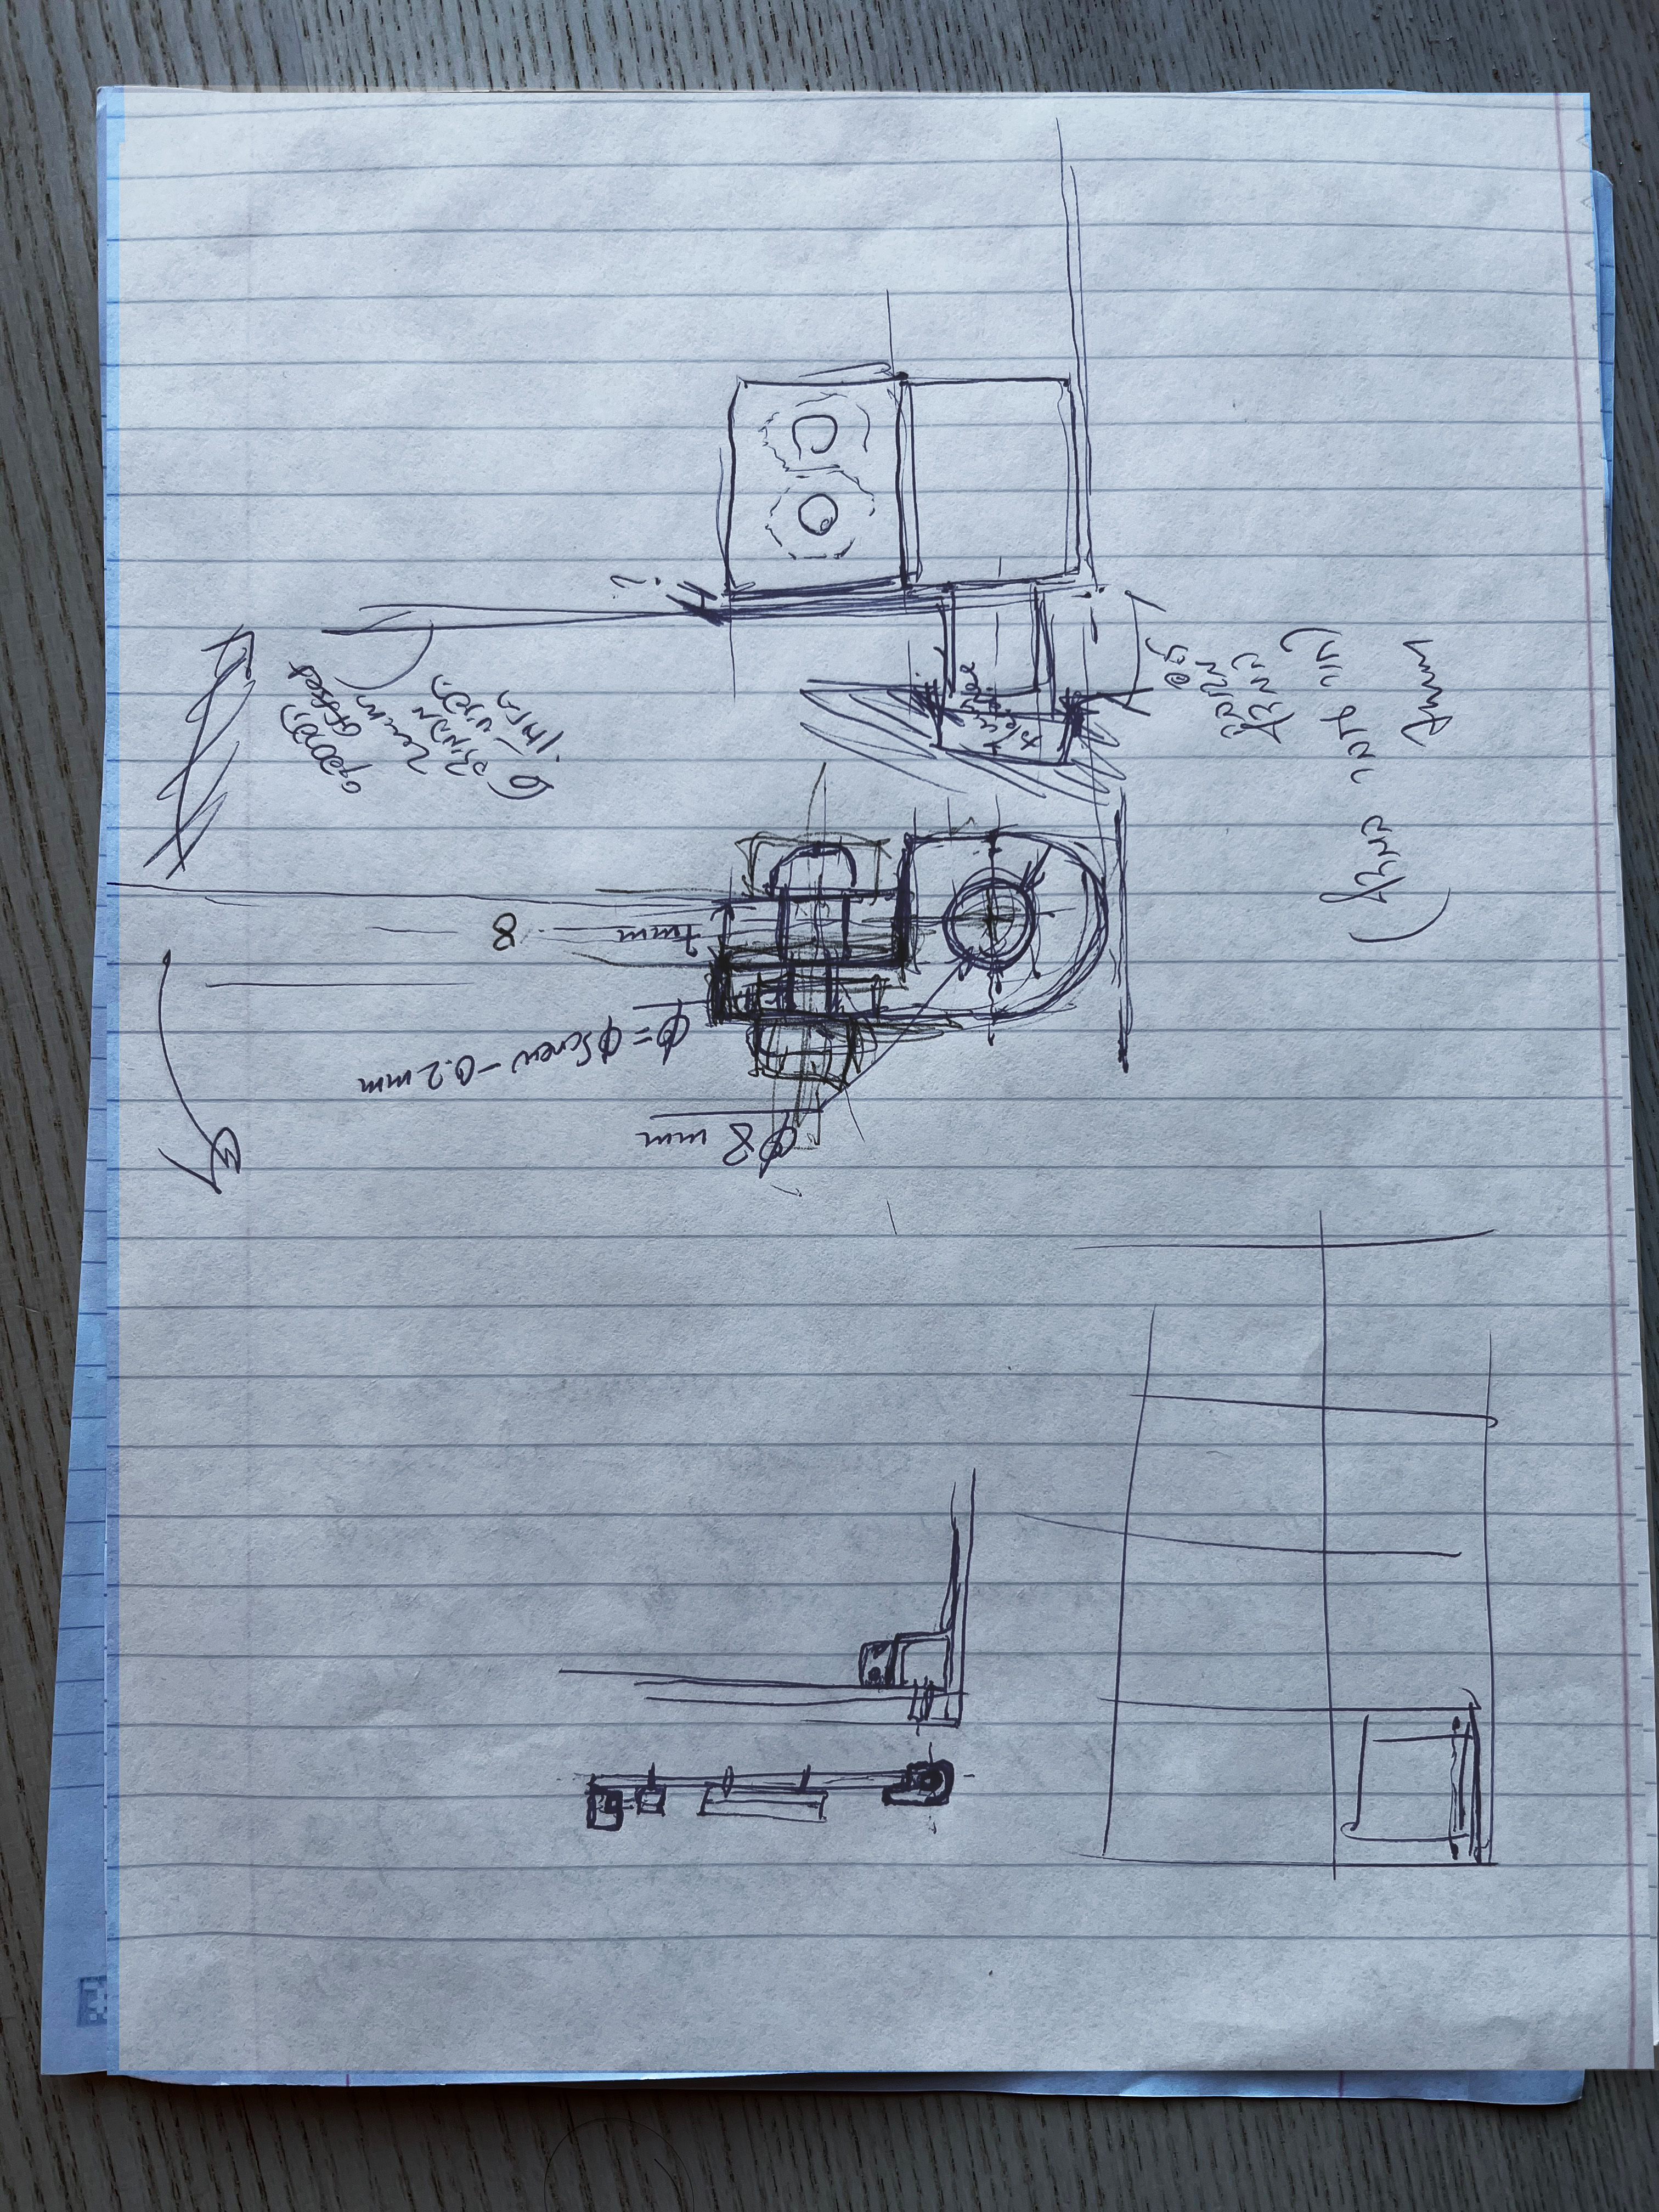
For the next step I started planning the details for the cabinet's locking mechanism, the hinges for the doors, and the framework for placing the board with all its components on a transparent door.
I had a long brainstorming session with my husband, who is a mechanical engineer, and we came up with a few ideas for design solustions I could 3d print.
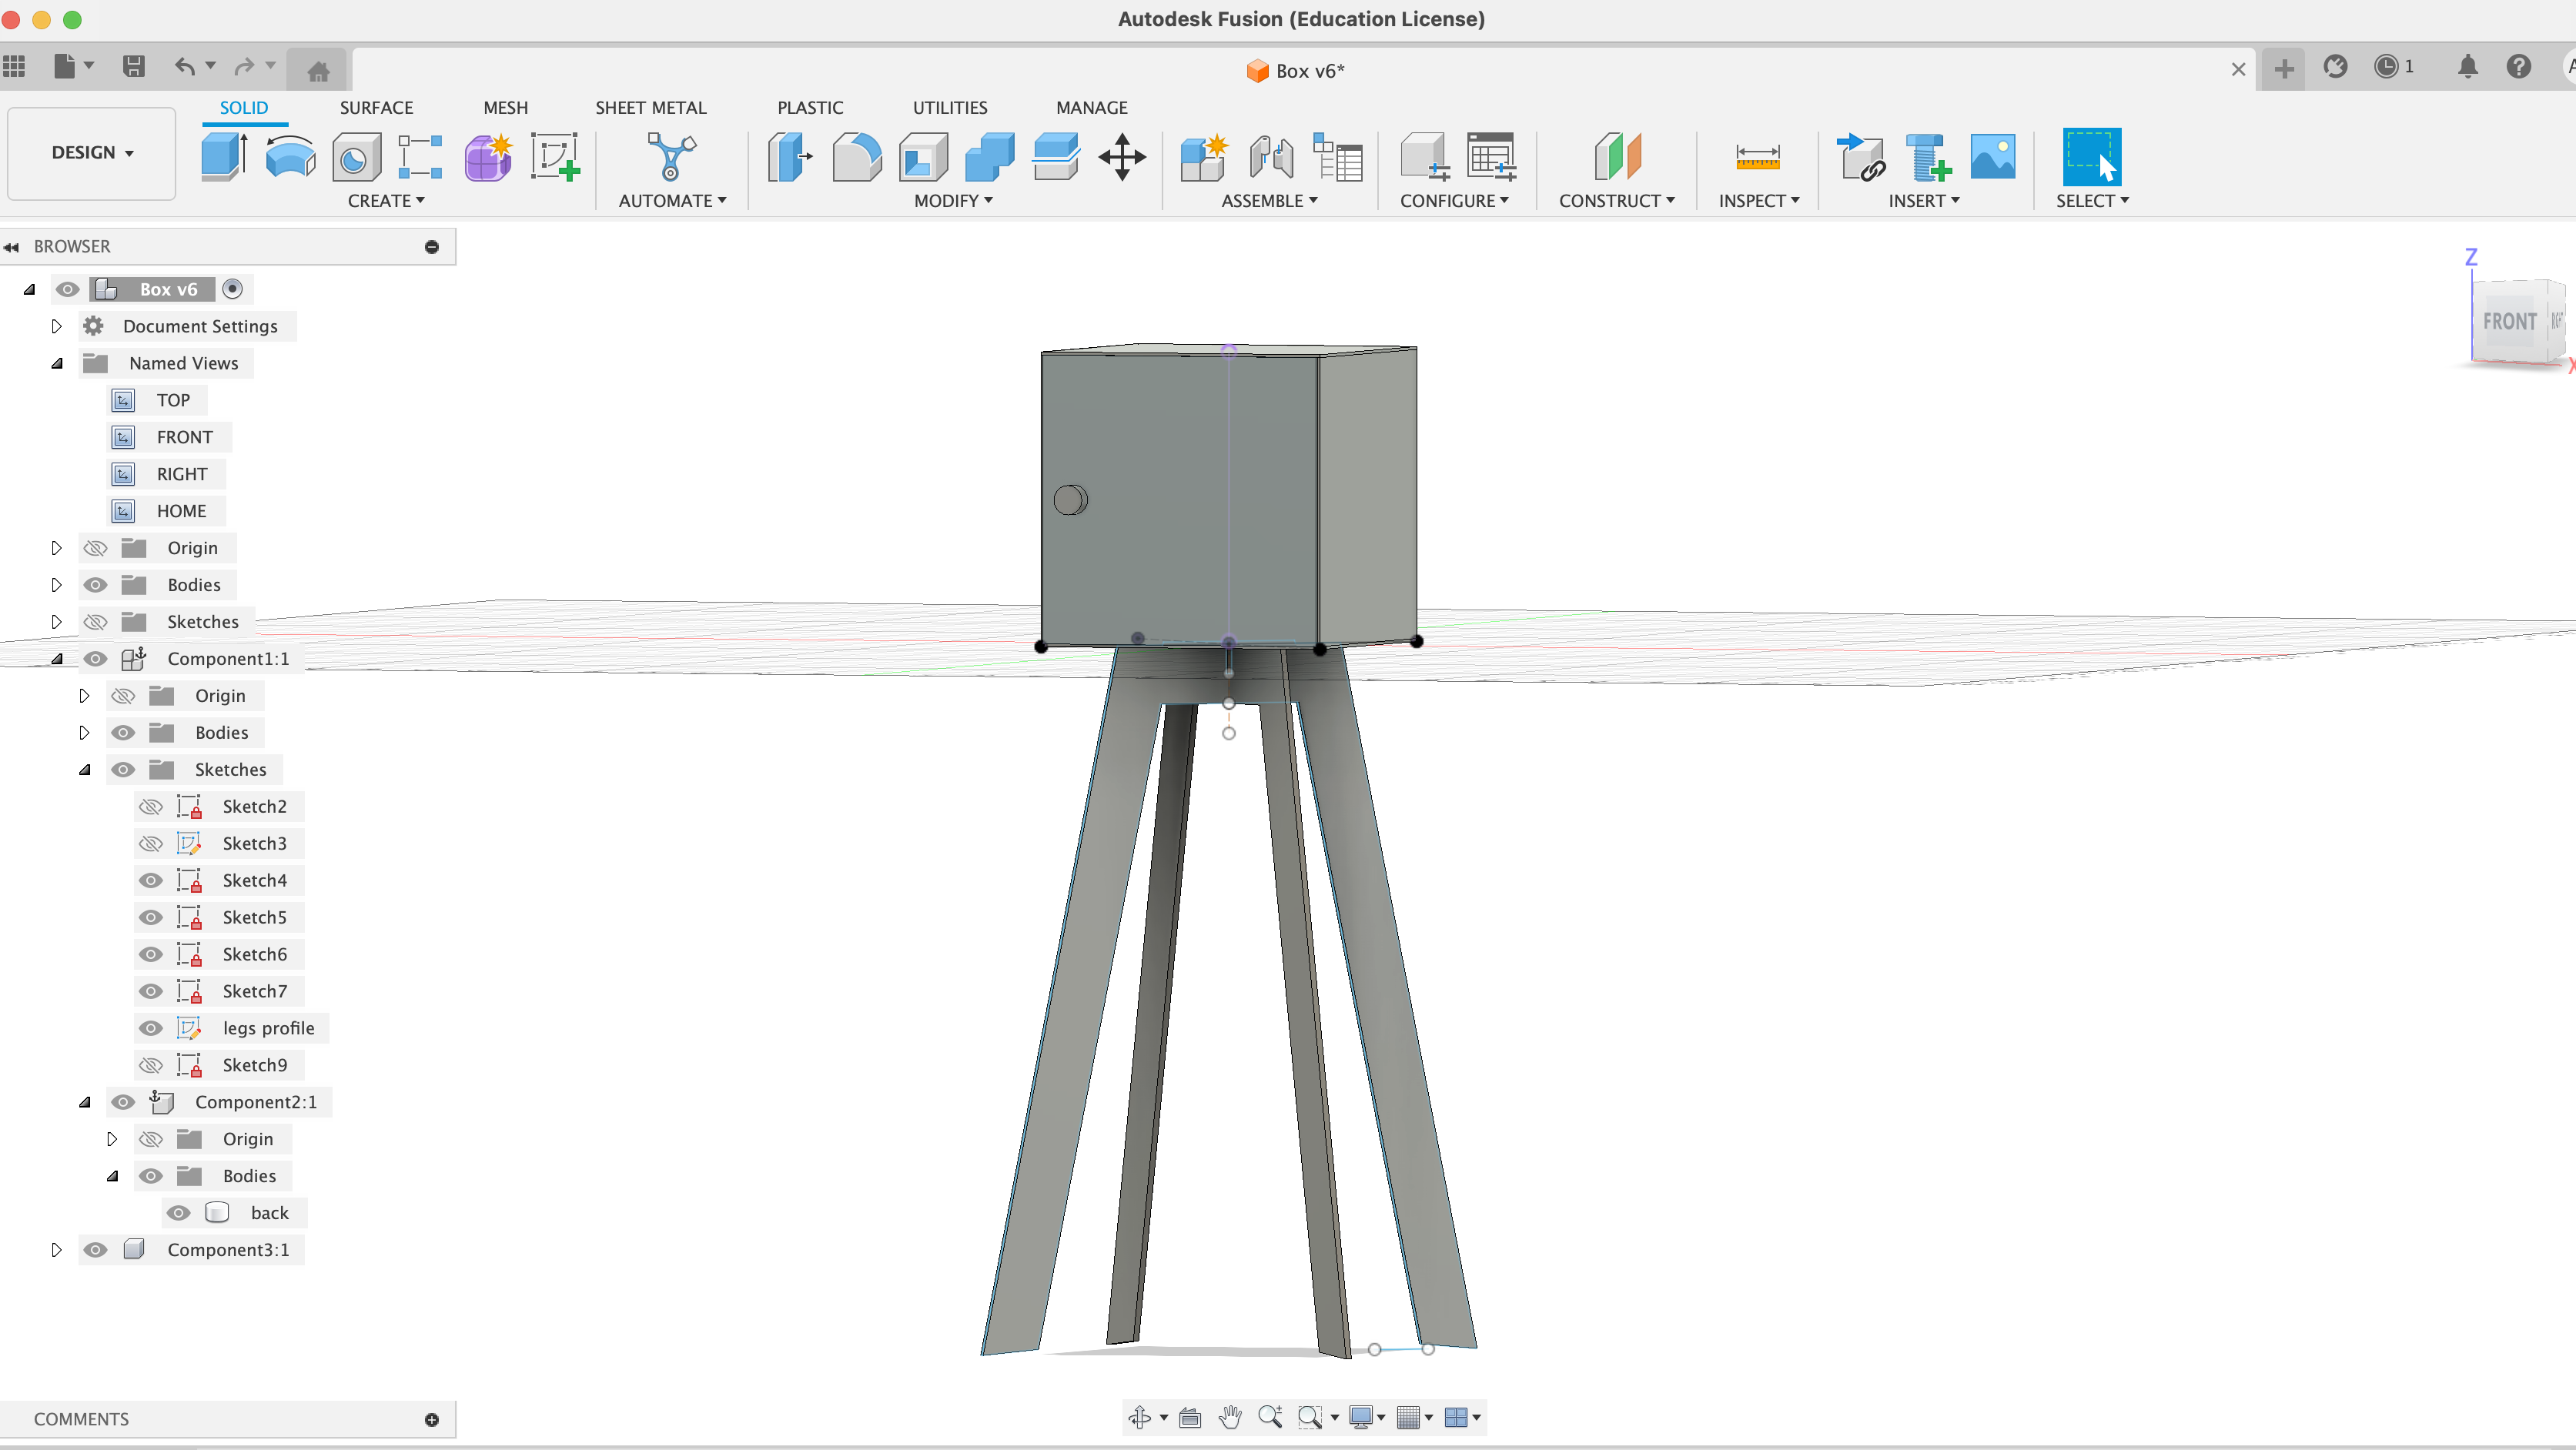
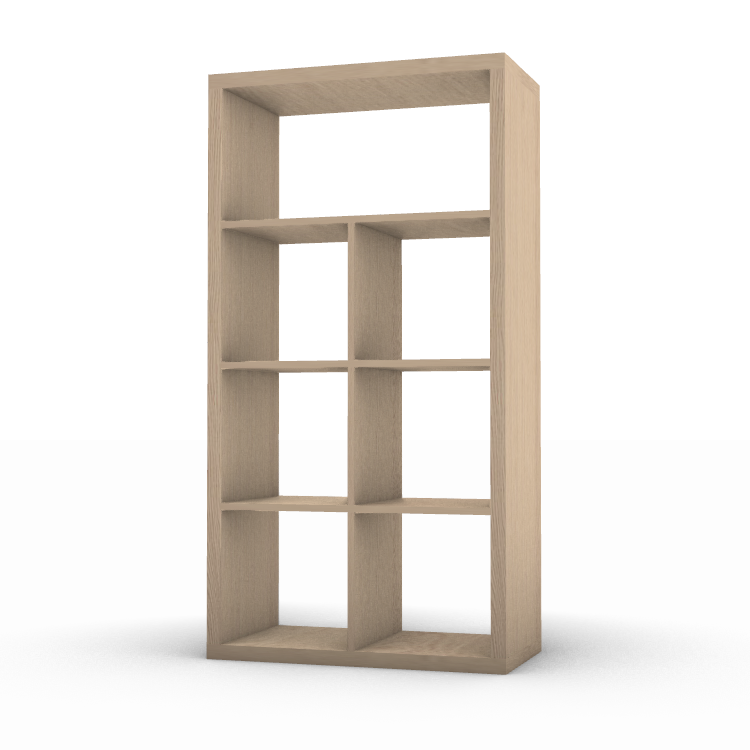
 Then, I modeled everything in detail. The idea is to start off of a ready-made Ikea Kallax cabinet and make doors for it. The top shelf will be double the
size to allow for the placement of bigger items, specifically a microwave. I started by modeling in Fusion, but then ultimately resorted to Rhino because the
snapping capabilities and overall accuracy in Fusion were driving me crazy and took me too long to model the simplest things.
Then, I modeled everything in detail. The idea is to start off of a ready-made Ikea Kallax cabinet and make doors for it. The top shelf will be double the
size to allow for the placement of bigger items, specifically a microwave. I started by modeling in Fusion, but then ultimately resorted to Rhino because the
snapping capabilities and overall accuracy in Fusion were driving me crazy and took me too long to model the simplest things.
This is the Ikea cabinet I'm counting on and its modeling, I also went to buy it so that I can make the doors for the "big thing" week's assignment. I actually tried to get it used but there were none available that I could find around Cambridge.
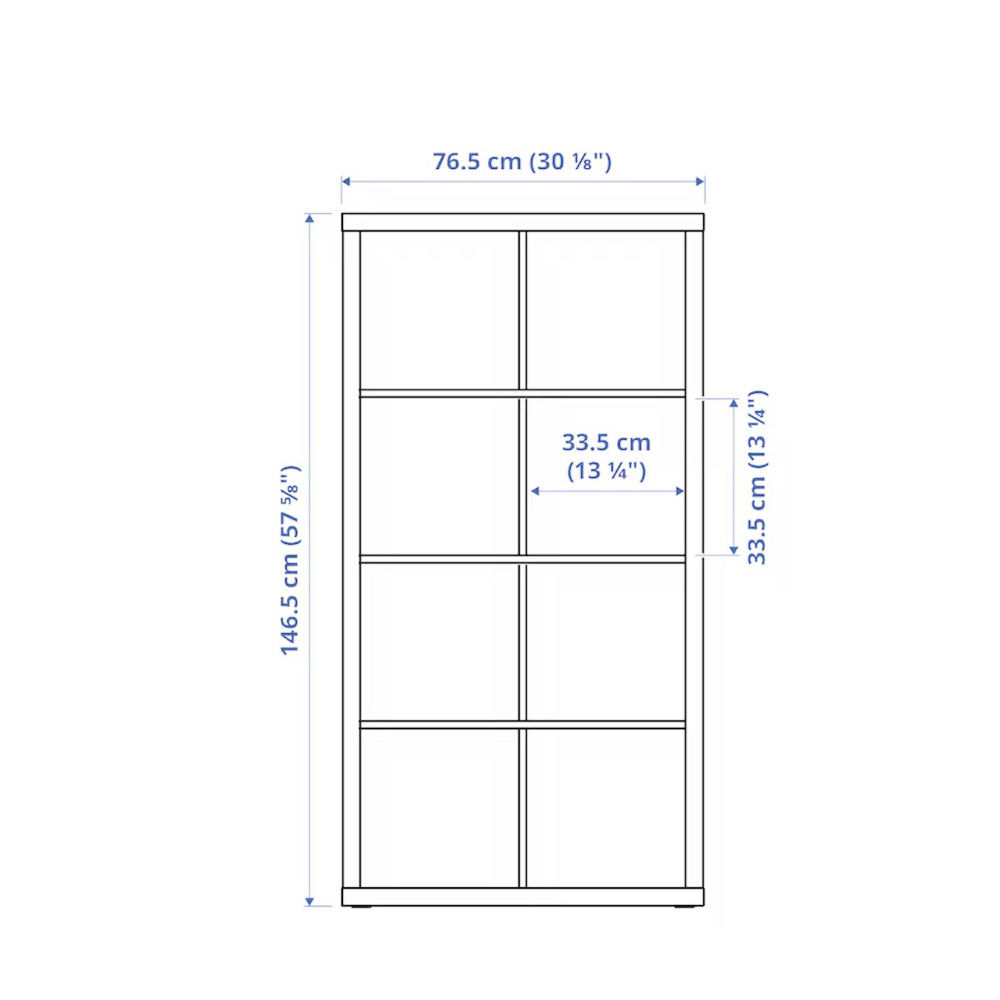
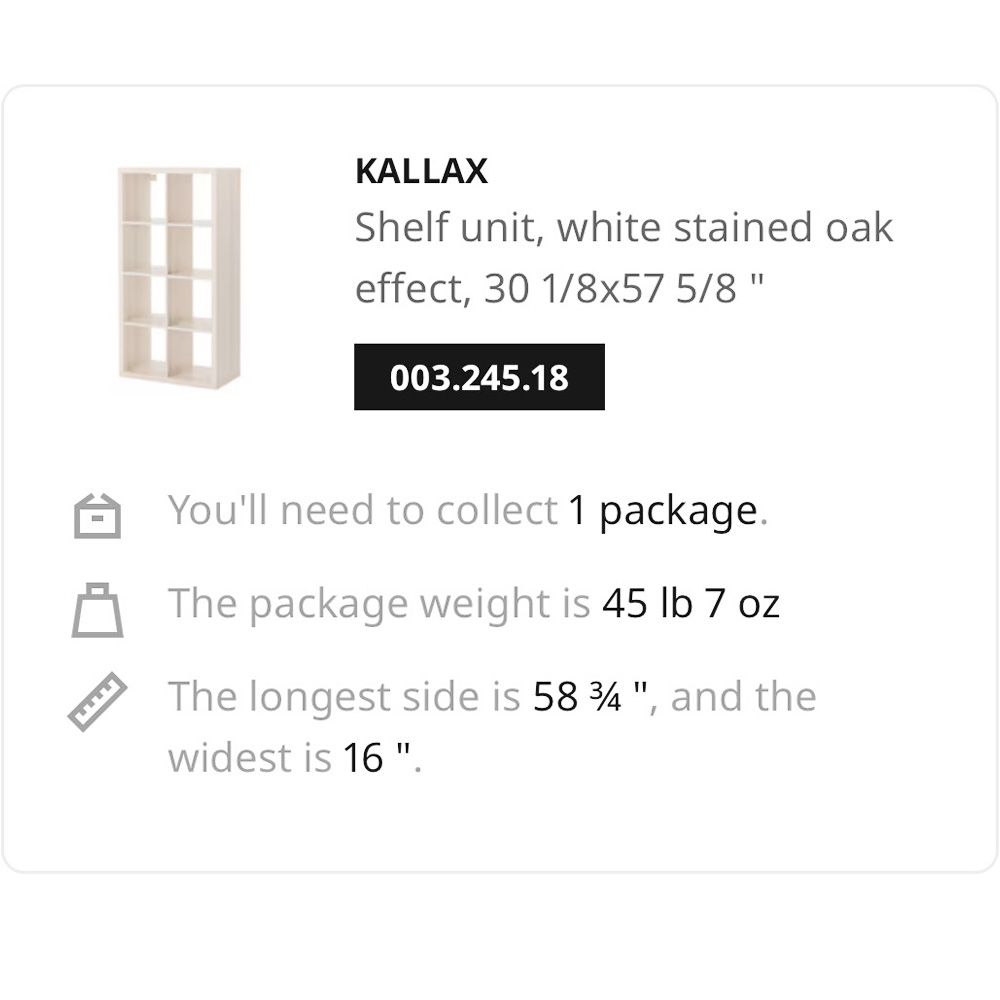
Ikea has great documentation of their products, which makes it easier to "hack" them and plan specifically for them.
The item I wanted was convenitently available at the nearest location.
I modeled it in 3d on Rhino so that I could work on the details.
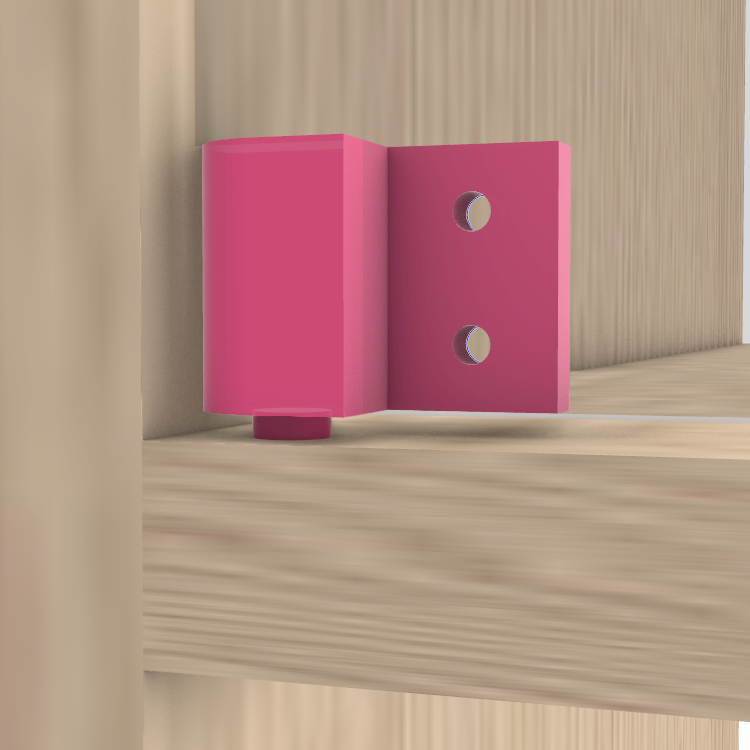
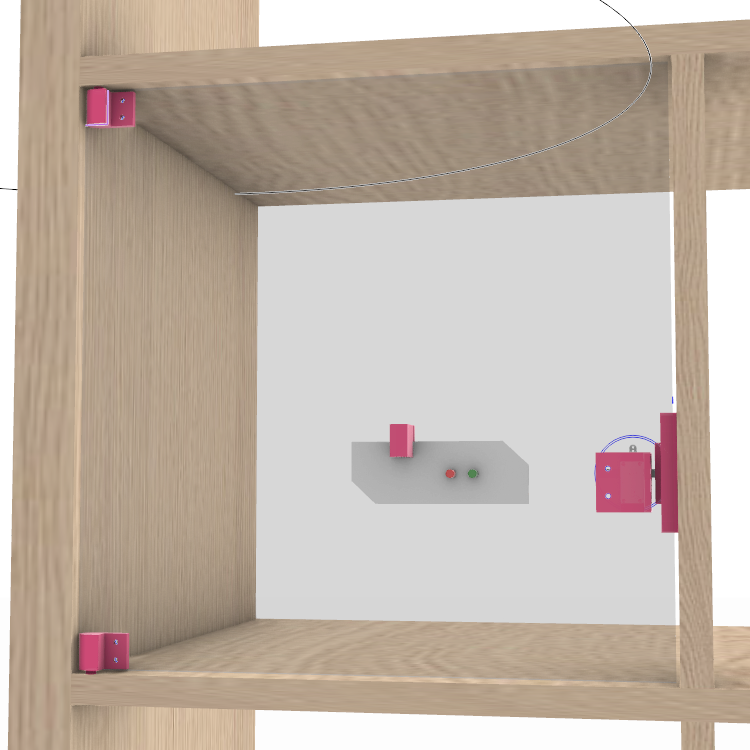
3D printed hinges will go into the shleves, leaving 2mm tolerance margins around the polycarbonate door.
The fasteners will hold the PCB in place leaving enough space for the leds - I'll connect them using a no. 4 screw with a fastener.
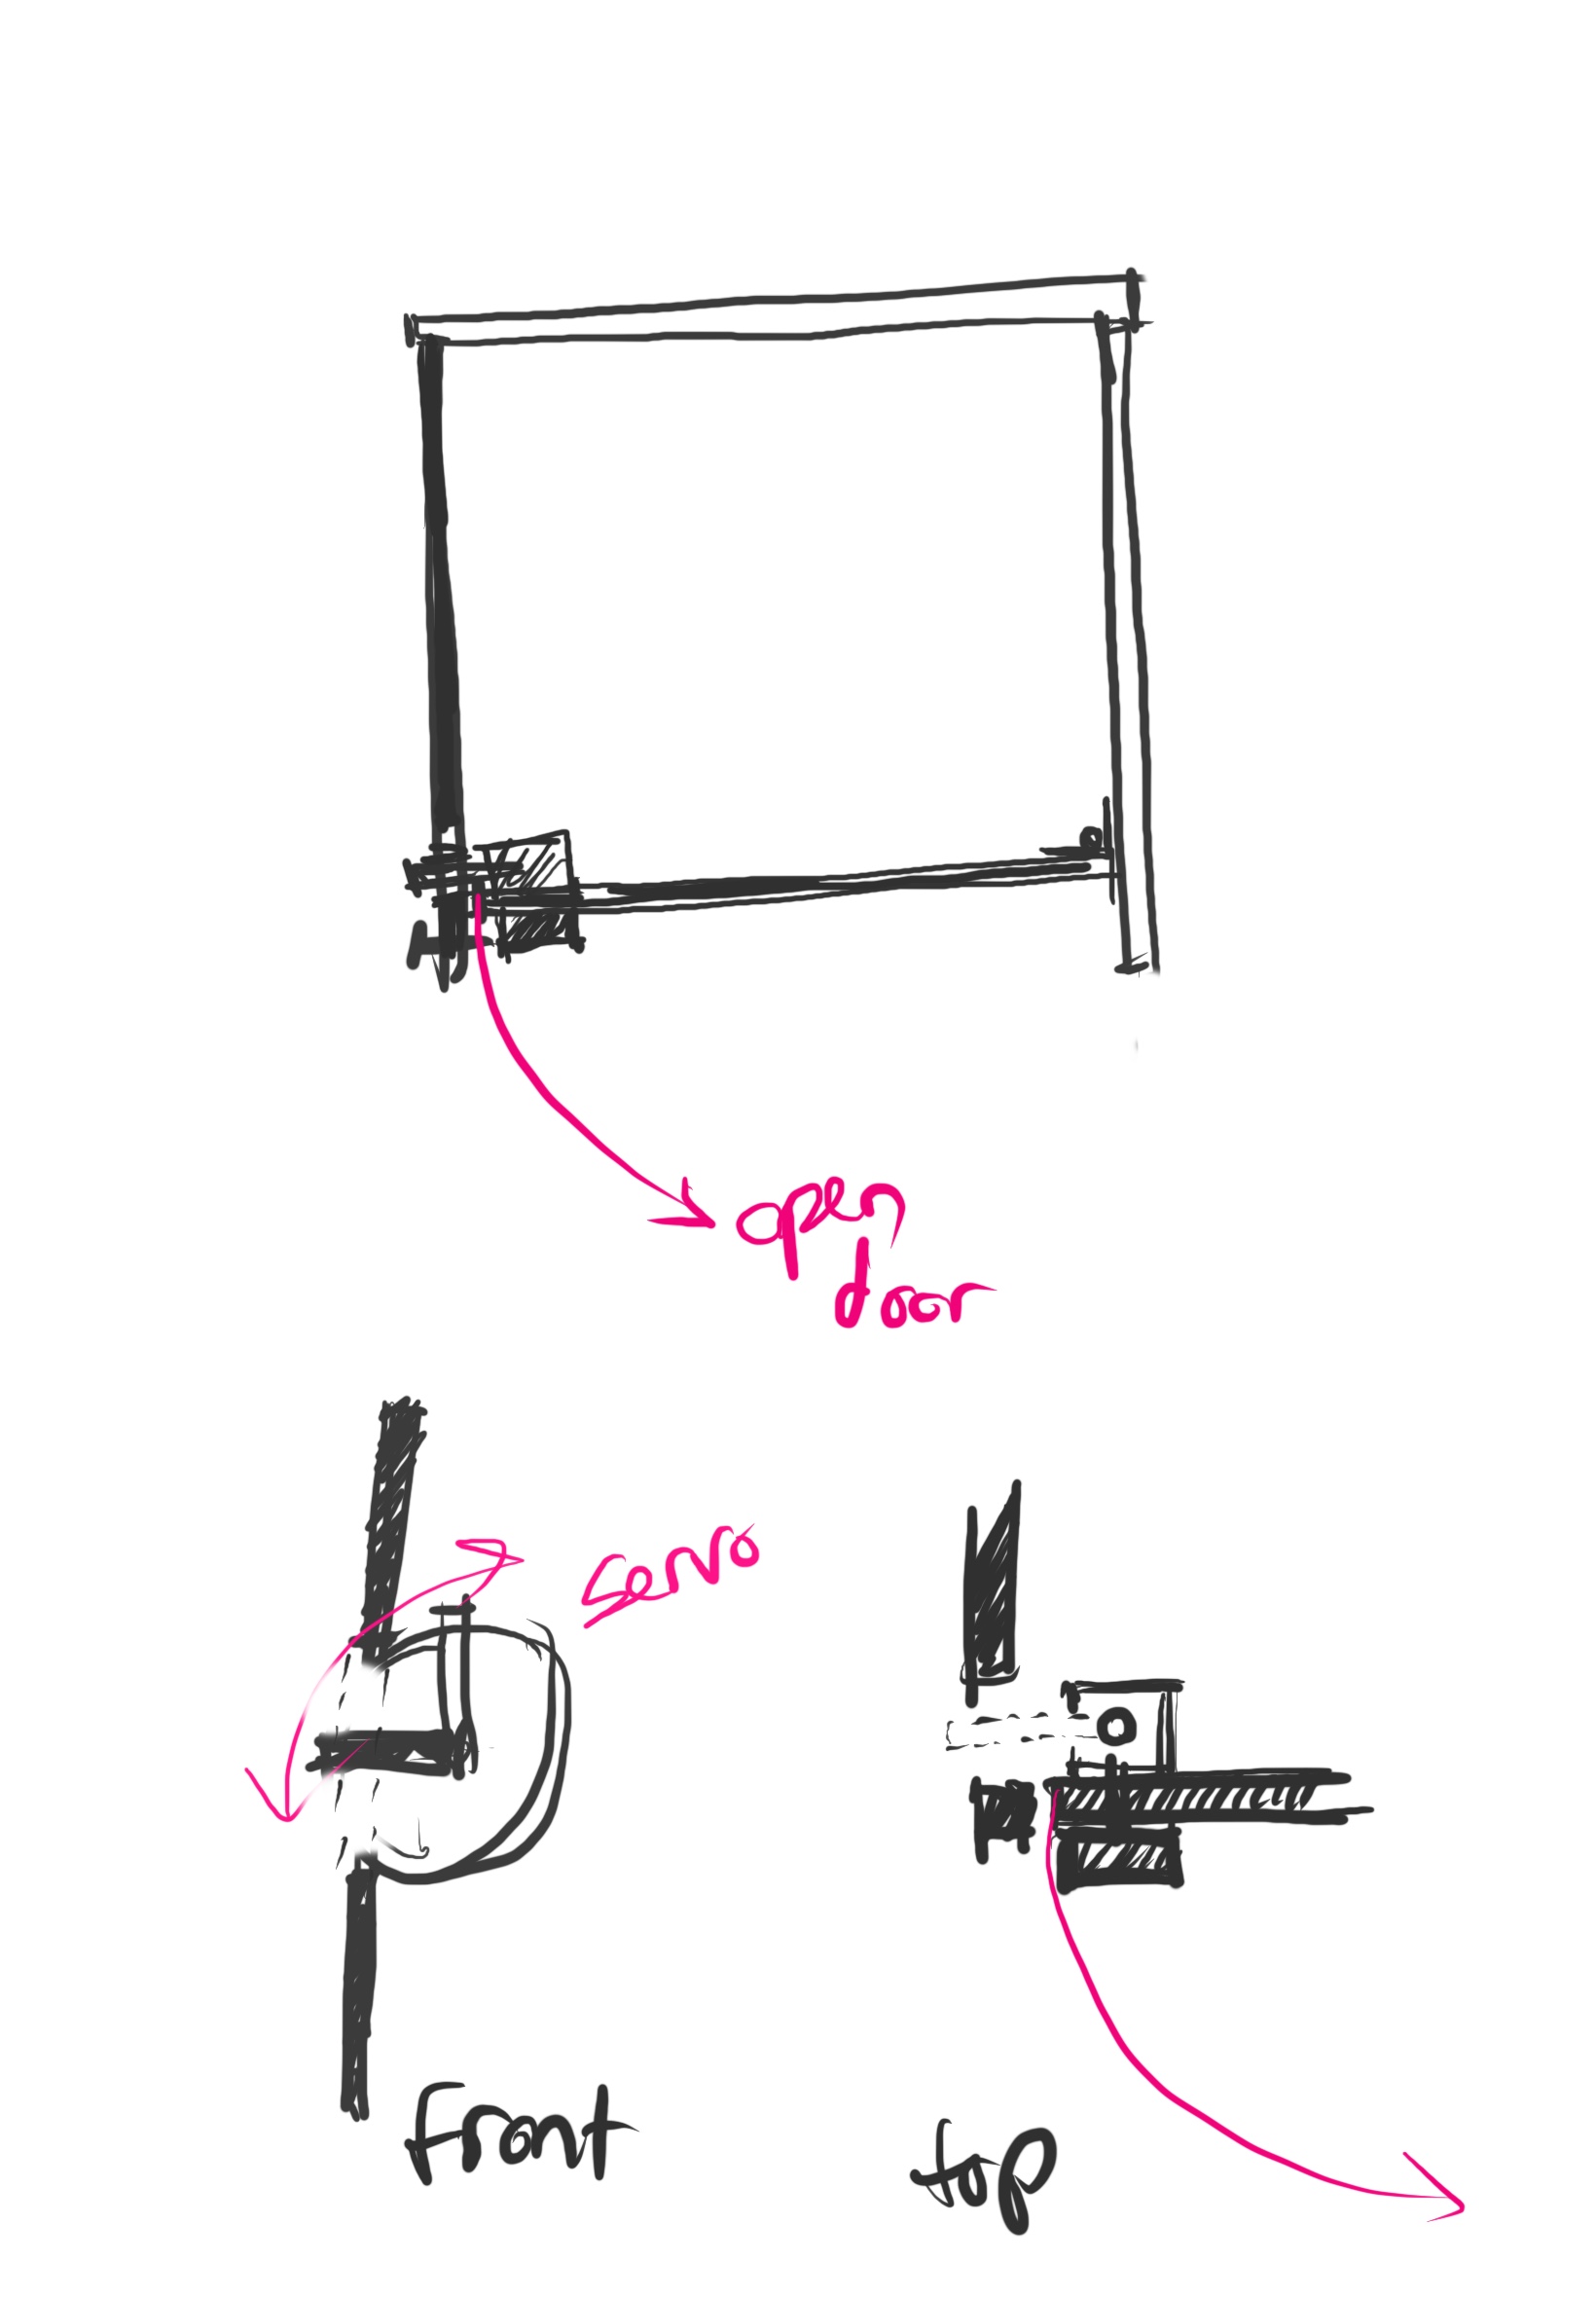
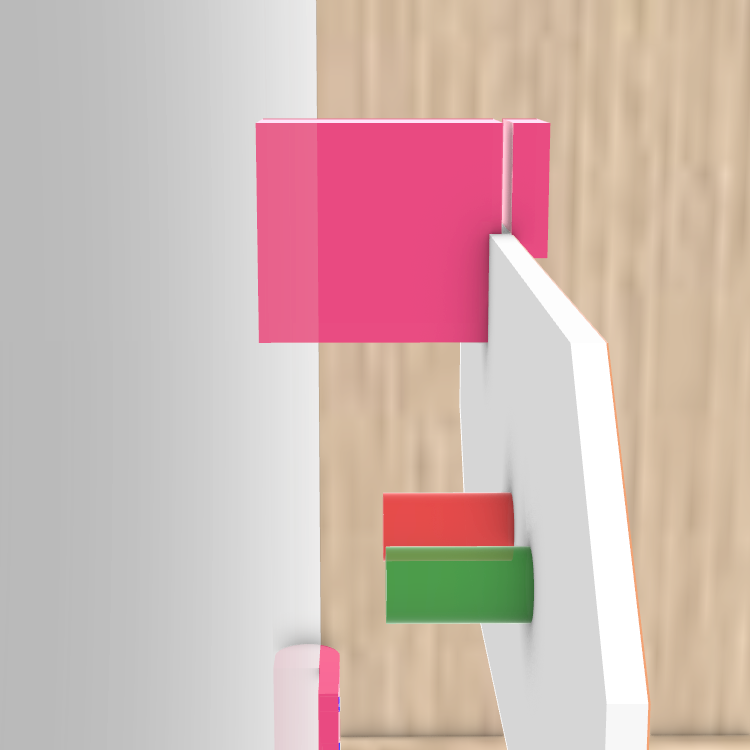
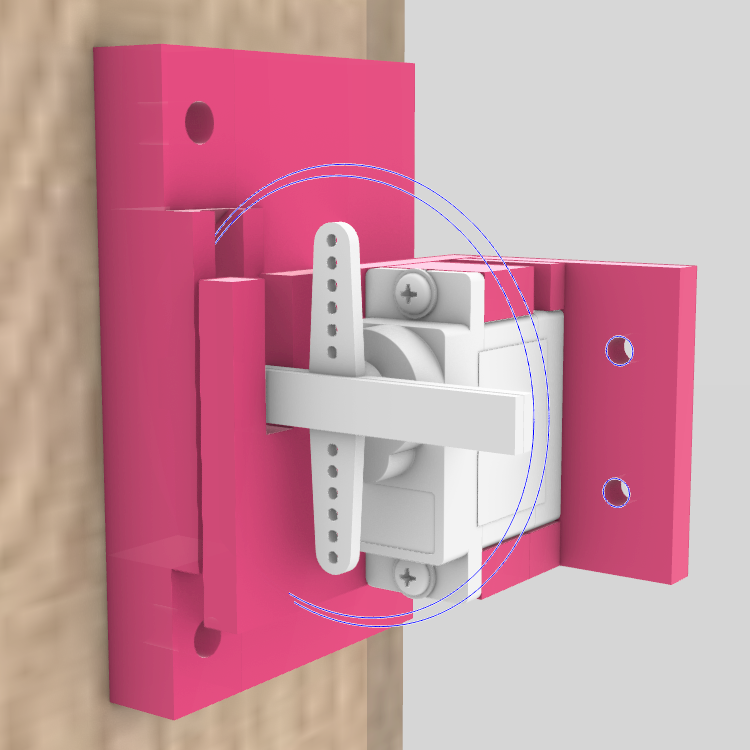
The locking mechanism is made out of a "house" for the servo fastened to the polycarbonate door and a compatible slit that will be fastened to the inner side of the cabinet. The servo will slide into the slit - locking the door
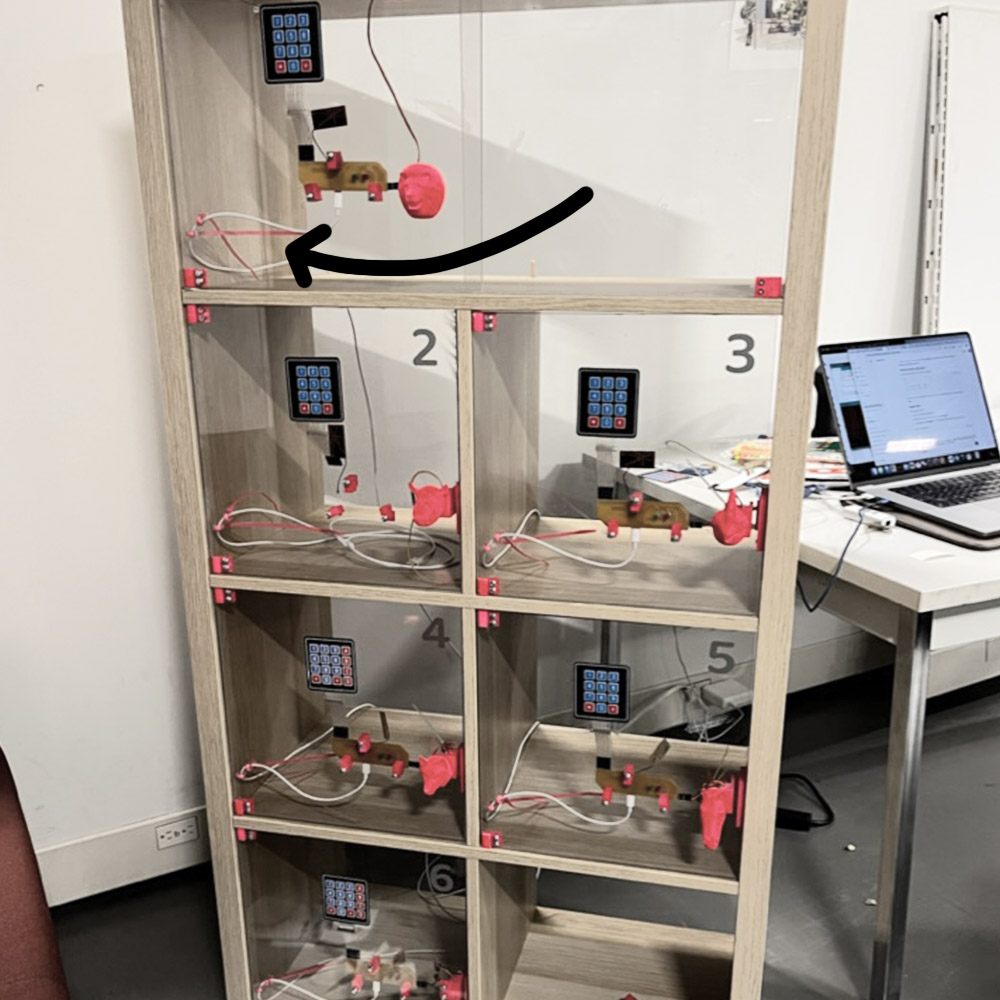
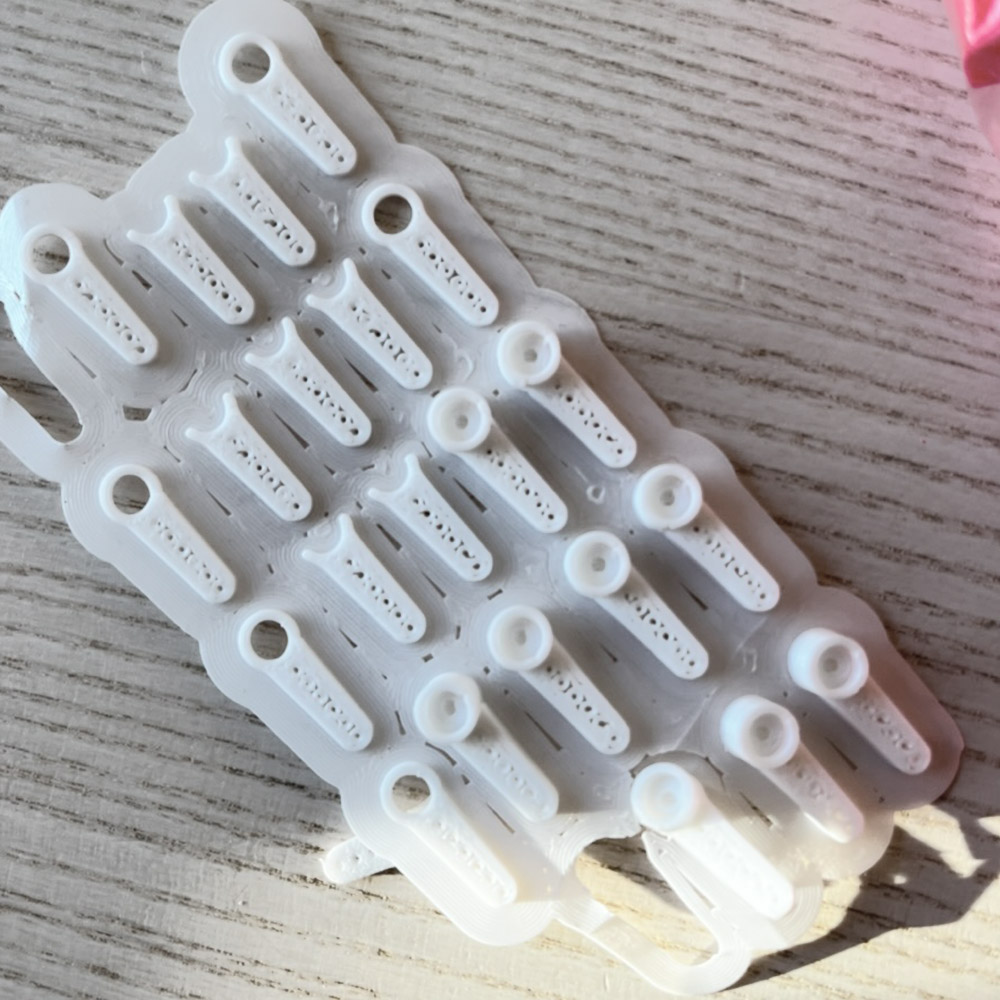
Here is a taste from the process of fabricating the 3d printed connectors on scale for all the lockers. You can see more about the integration of the 3d printed connectors with the polycarbonate doors and the frame, as well as the design process, on the "something big" week's page where I focus on watejetting the polycarbonate doors and assembling them onto the cabinet with the connectors.
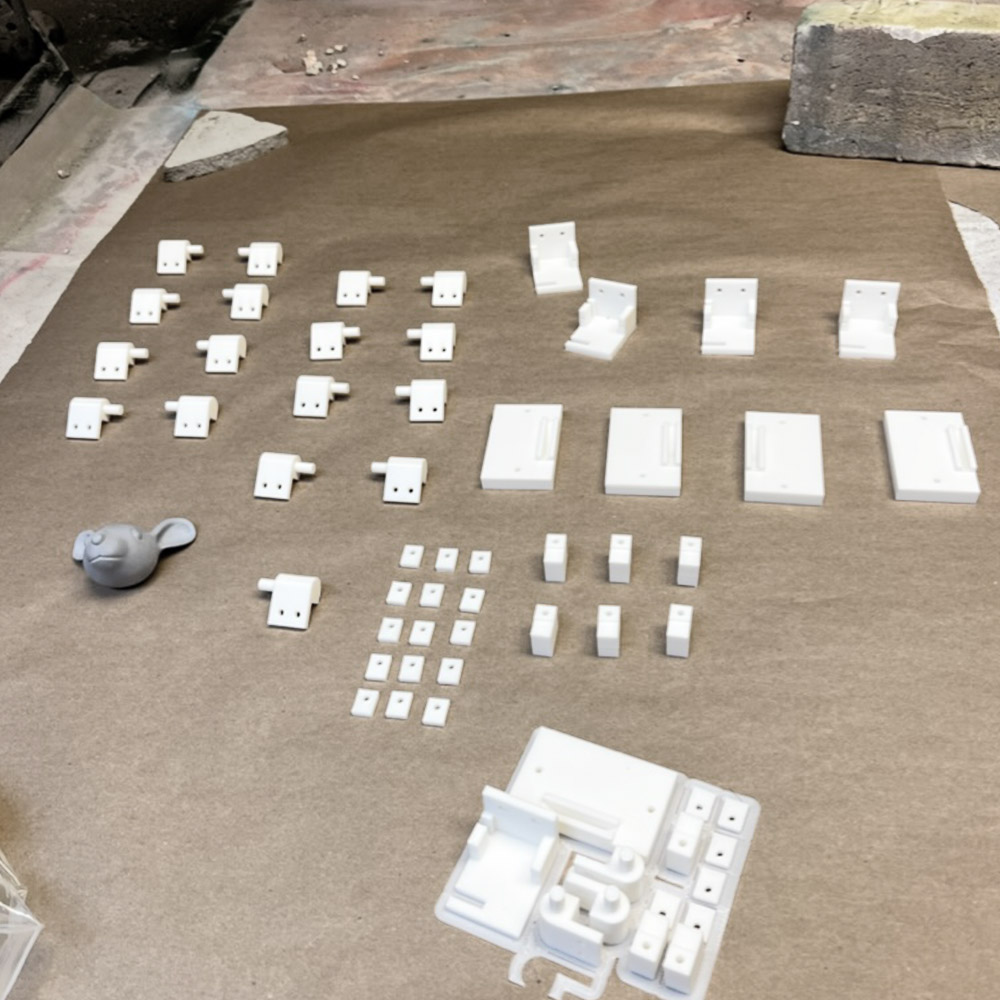
3D printing the connectors.
Making them fun and pink.
Now they can go on the doors and into the frame.
System Diagram
Here's a list of the electronic components I'll need for each locker's board:
- Xiao ESP32-S3 with a camera component - not sure I'd get to using the camera for the class's deadline, but would like to keep the option for later
- SG90 Arduino Servo motor - for opening and closing the lockers
- Samsung LM301Z+ Leds in a neutral white color (3500K), to light up the inner space in the locker when taking pictures - optional
- Keypad 3x4 matrix, for inserting the code by the user for opening/closing the locker
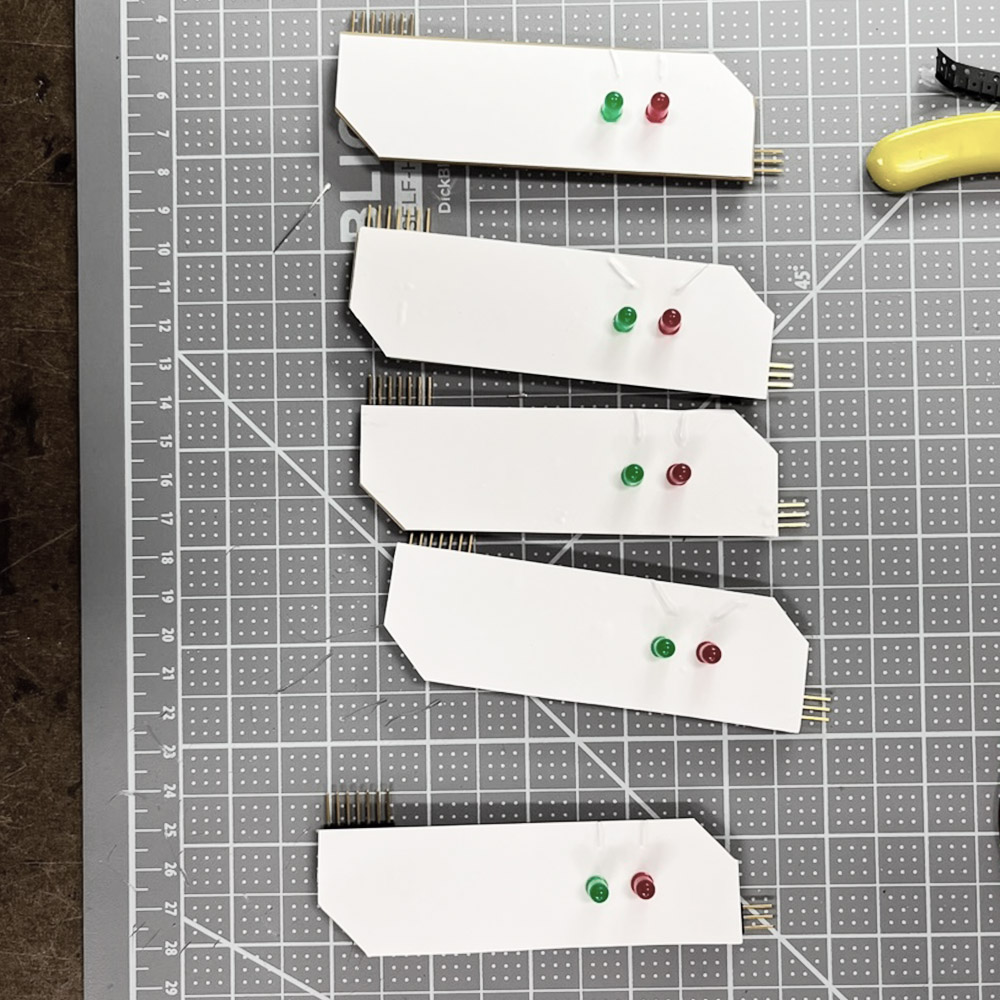
- Red and Green through-hole soldering led lights
- on-surface pin connectors (1x7 for the keyboard and 1x3 the servo)
- One 8.2 Ohm resistor (for the big flash led)
- Two small 100 Ohm resistors for the red and green lights
My kid was post-sick in one of the weeks and not allowed into the daycare, but she felt fine so we went shopping on Home Depot (which was fun but they didn't have the screws I was looking for). She's actually the one that found the cool pink ties I used in the integration.
For the integration and fastening the 3d printed connectors to the polycarbonate door, I need some machine and wood screws, Jen helped me and we ordered the machine screws from McMasters. The wood screws I got from Home Depot. For each locker I'll need:
- x4 Stainless Steel M3 14mm Elen head from McMaster, for fastening the hinges to the polycarbonate door
- x5 Stainless Steel M3 30mm Elen head from McMaster, for fastening the PCB and the servo to the polycarbonate door
- x9 Stainless Steel M3 Flange Nuts (3.7mm height) from McMaster, to avoid placing pointed pressure on the polycarbonate sheet
- x2 3mm Wood Screws to fasten the locking mechanism to the inner wall of the locker, I bought philips
After ordering all screws and exporting the 3d parts for print, I started trying out the integration, you can also check the output page to learn more about the design process of the final board.
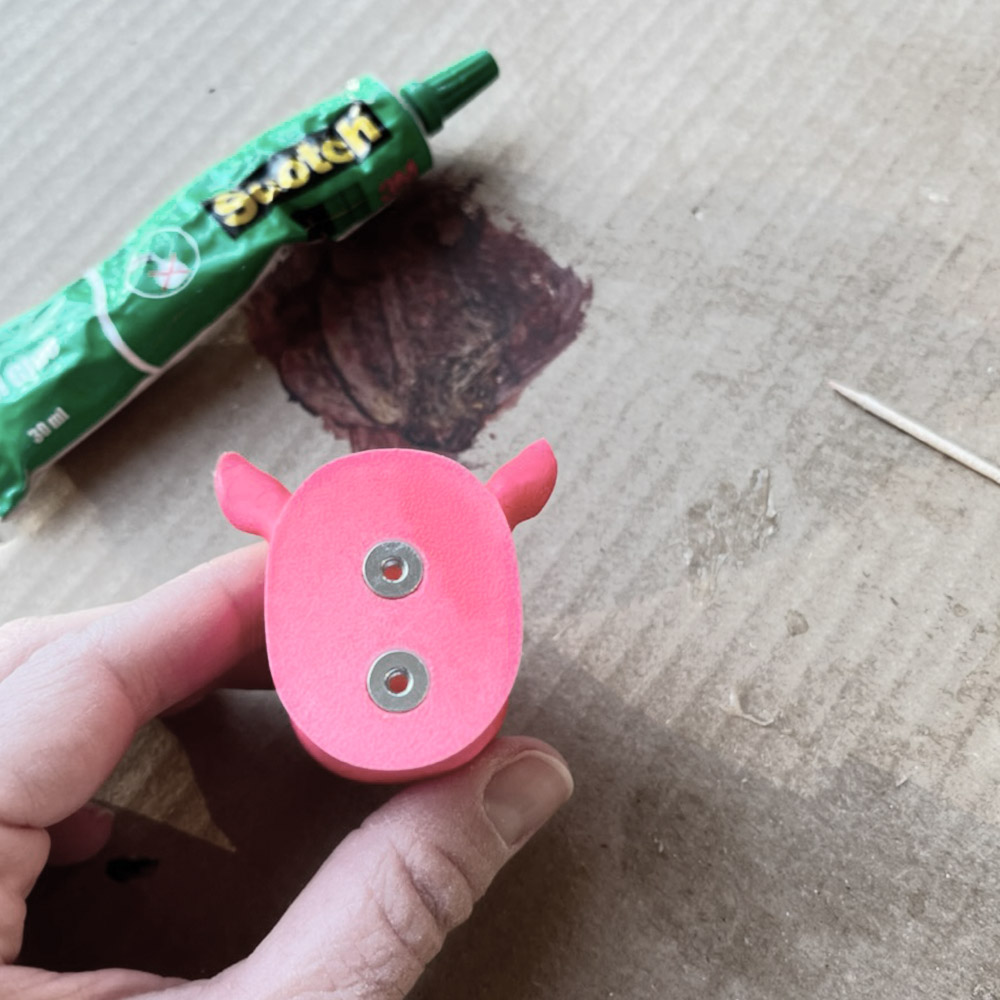
Door Knobs
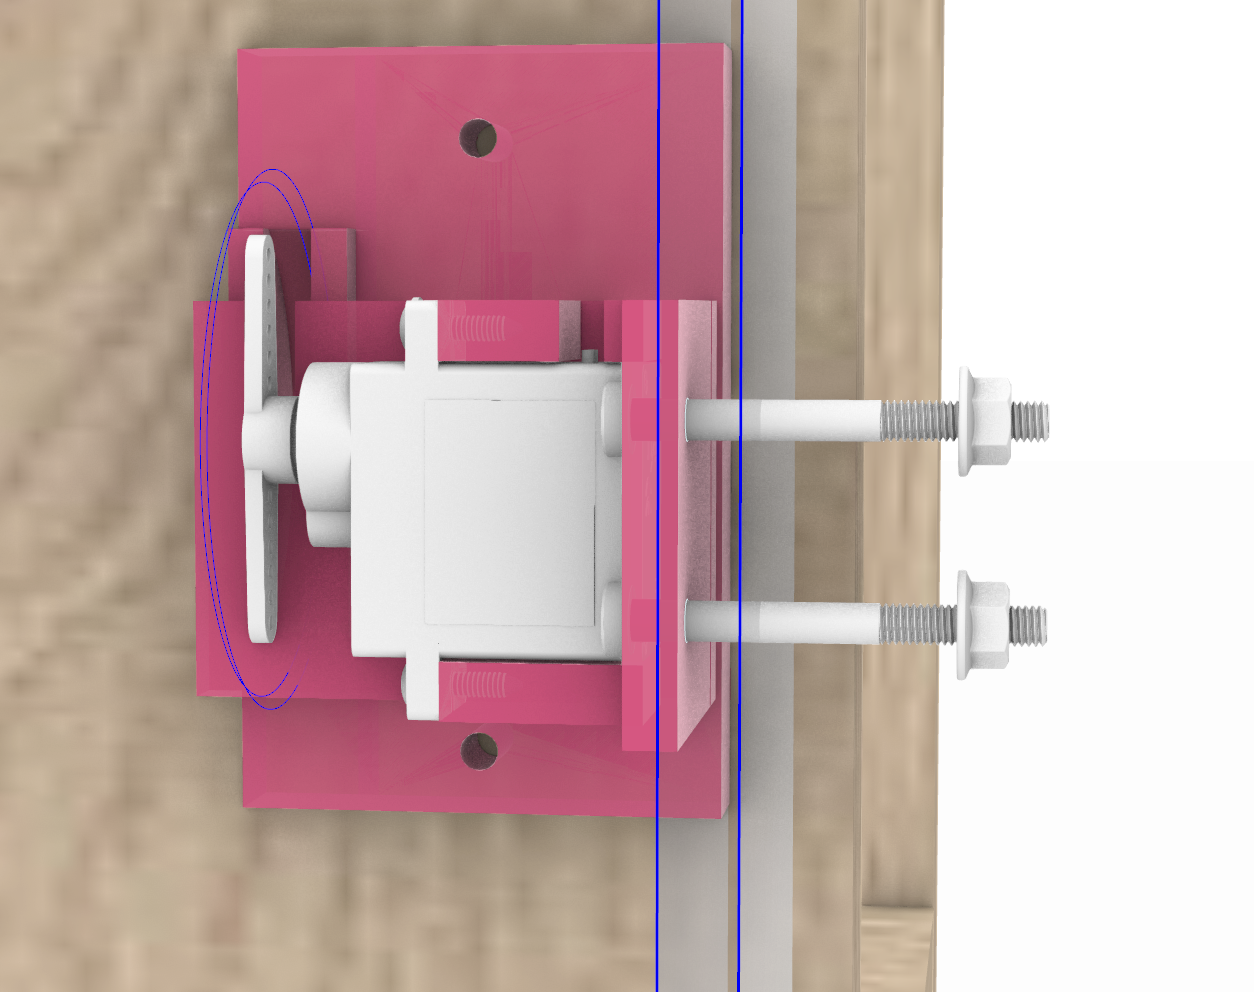
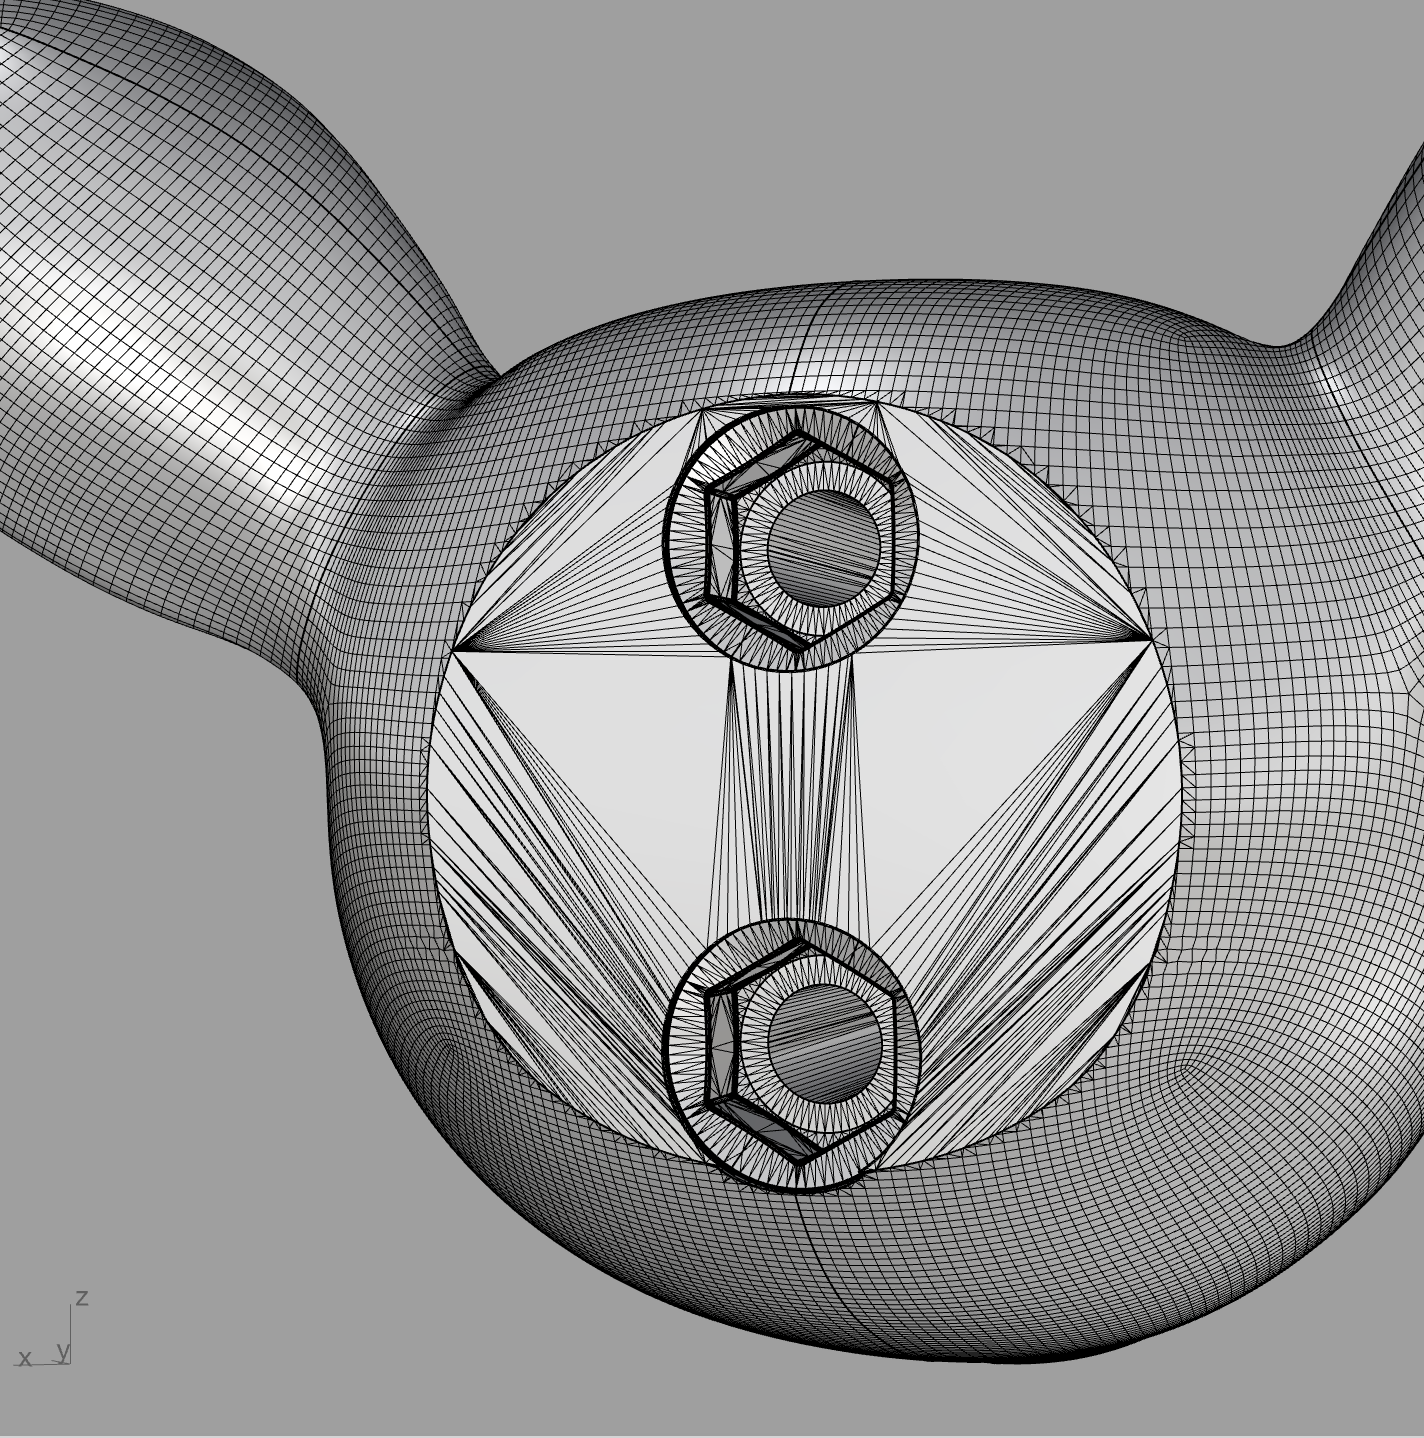
I also had to design the doors knobs, I connected them to the Servo's frame, to avoid more holes in the door. The screws are intentionally long and get into the knob, to add strength against a power tilting them up and down.
Here's how it would look with just the screws.
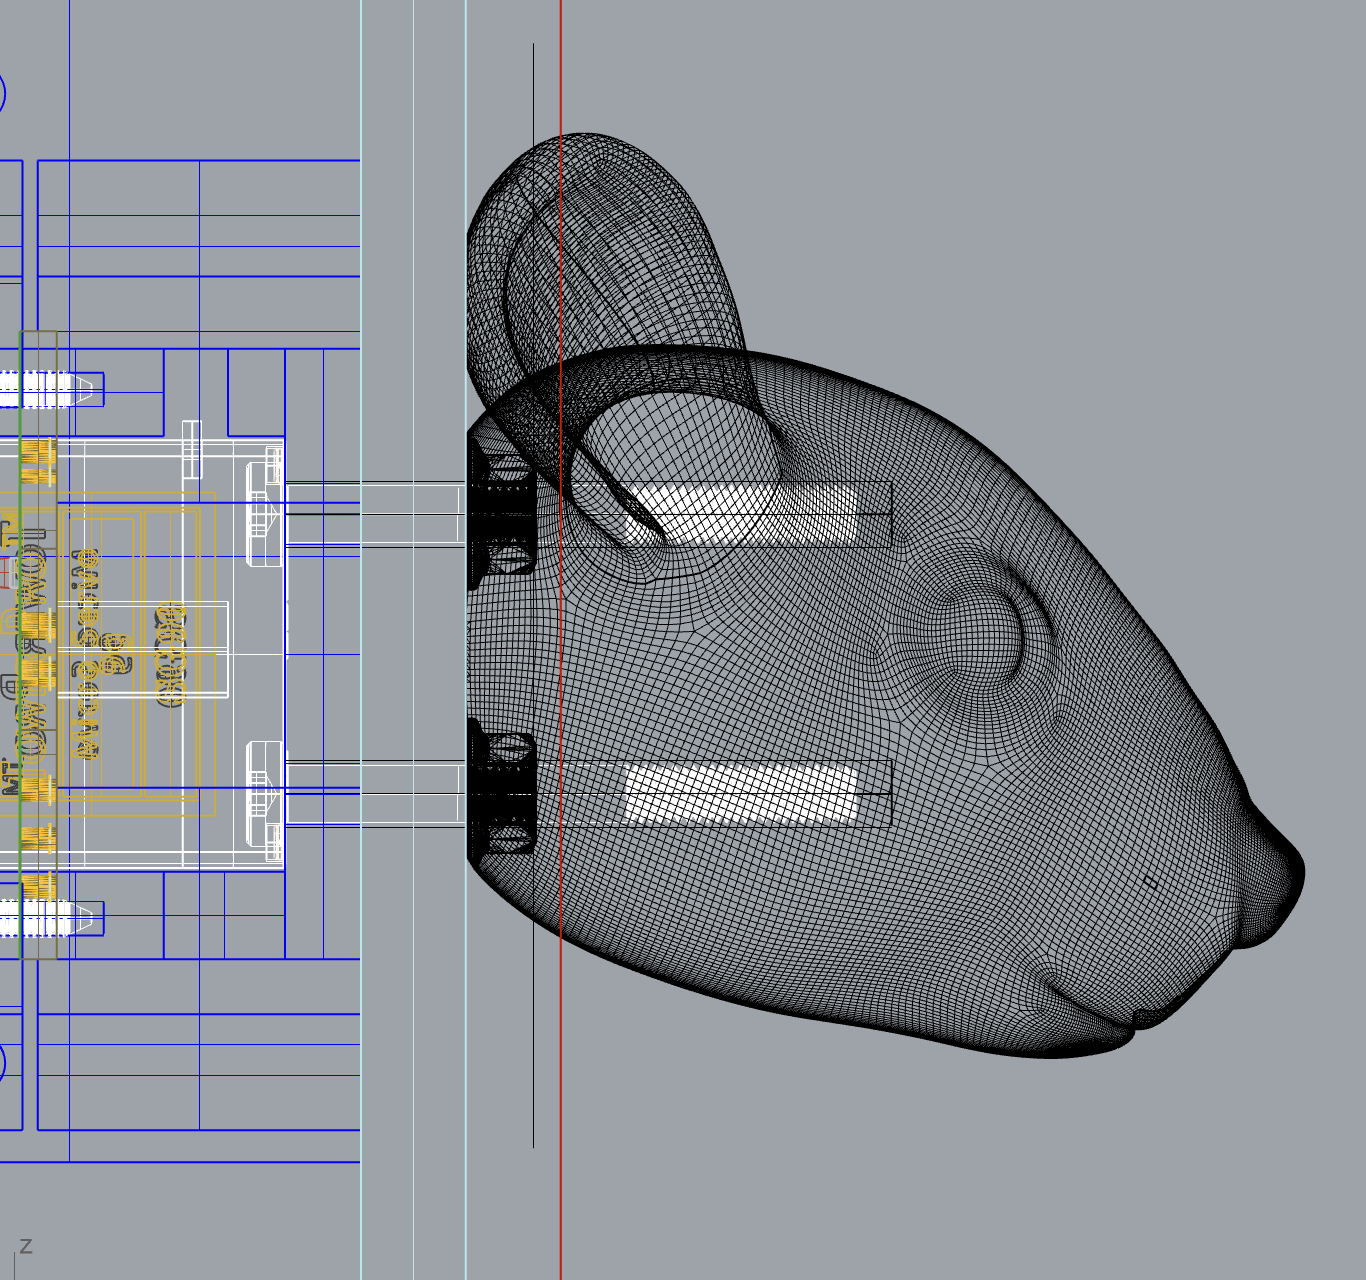
Then I found some cute animal heads and booleaned out a place for the bolts and the screw to go through (offsetting 0.2mm in all directions):
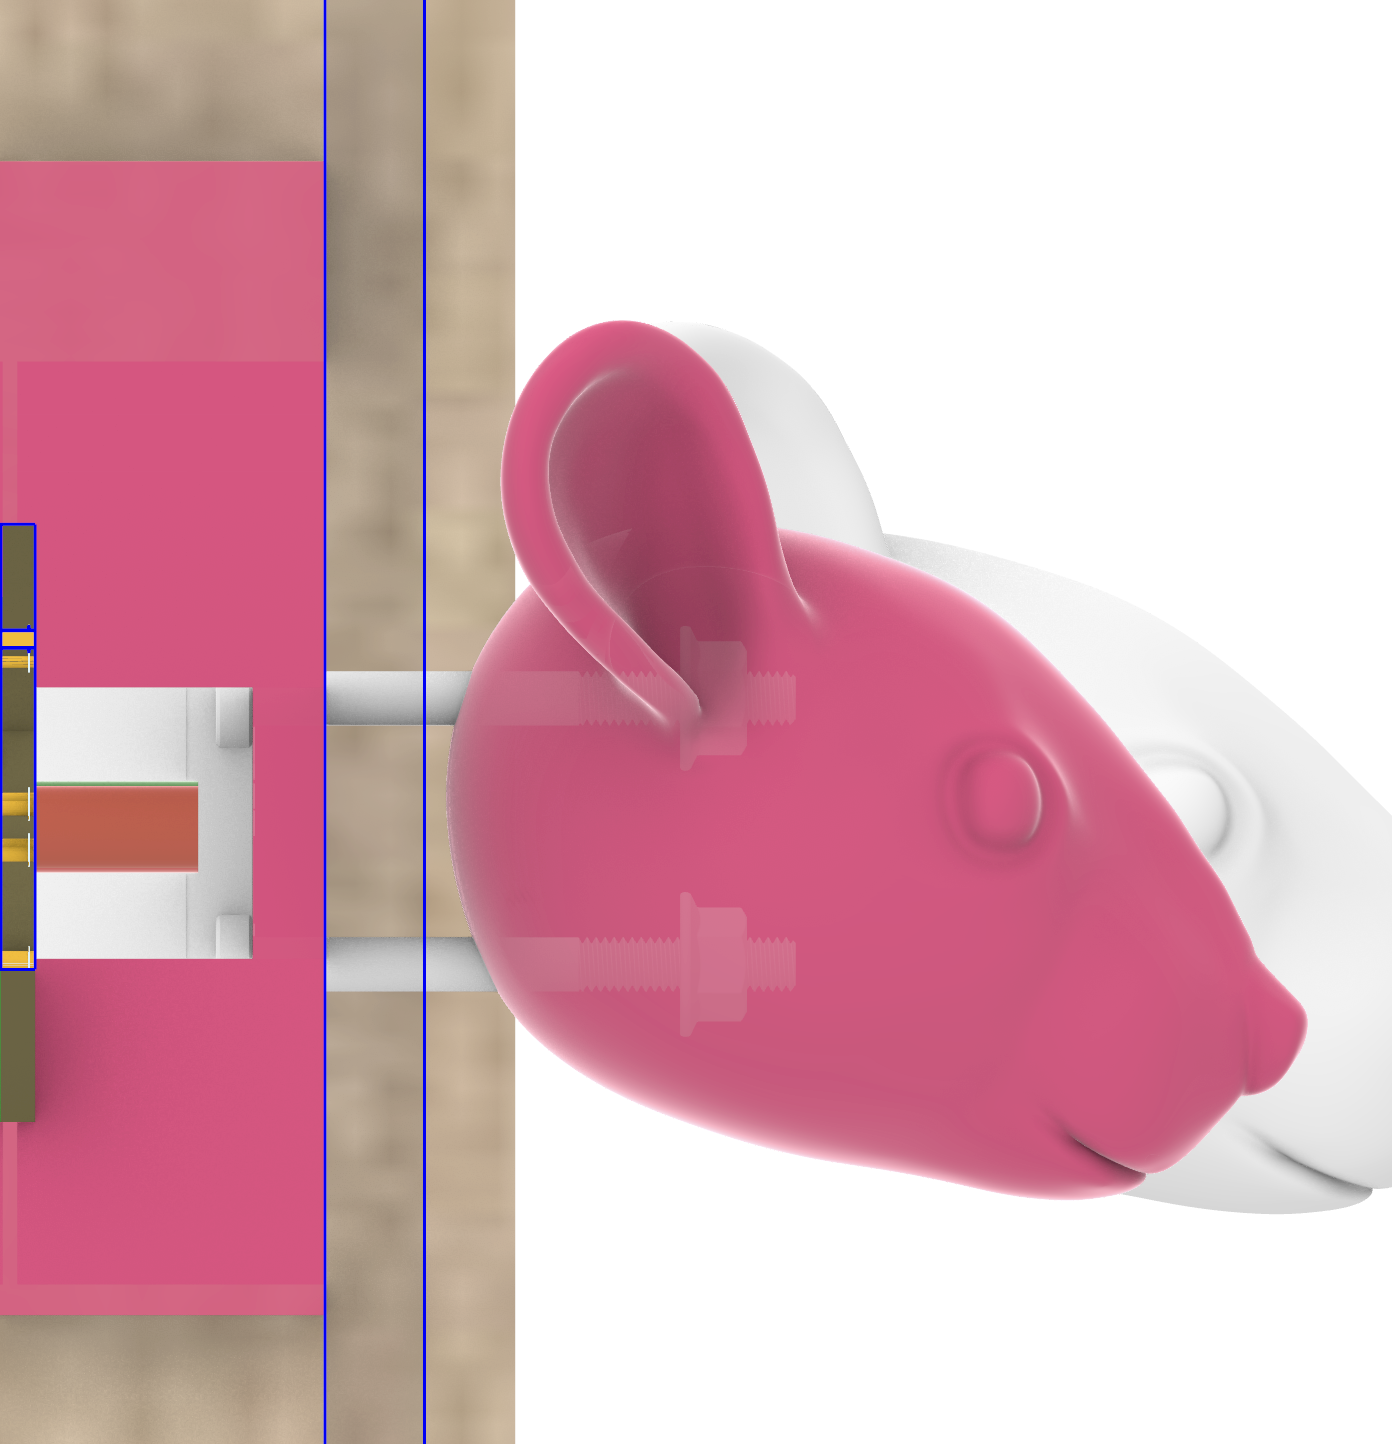
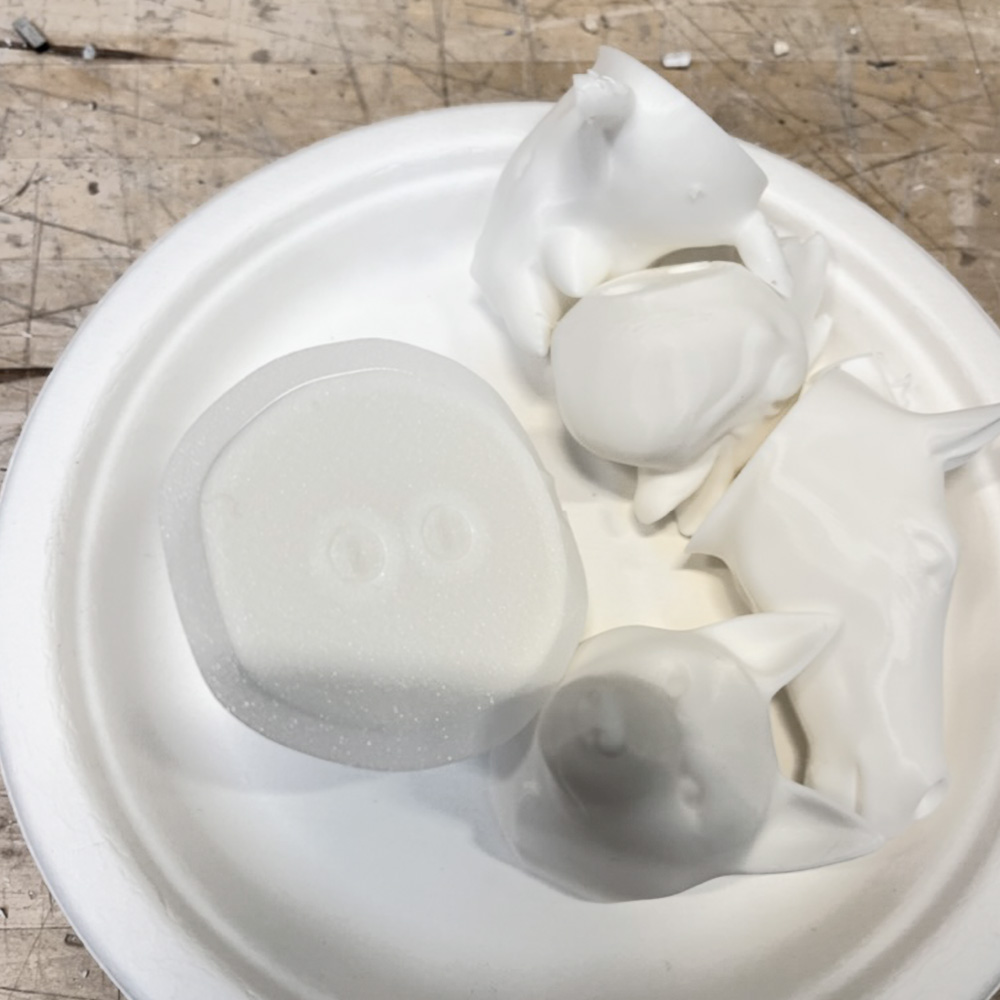
To make a clean finish for the print, I sanded, sprayed it with a primer, let dry for 24 hrs, and sanded some more with fine sanding paper, before spraying with color.
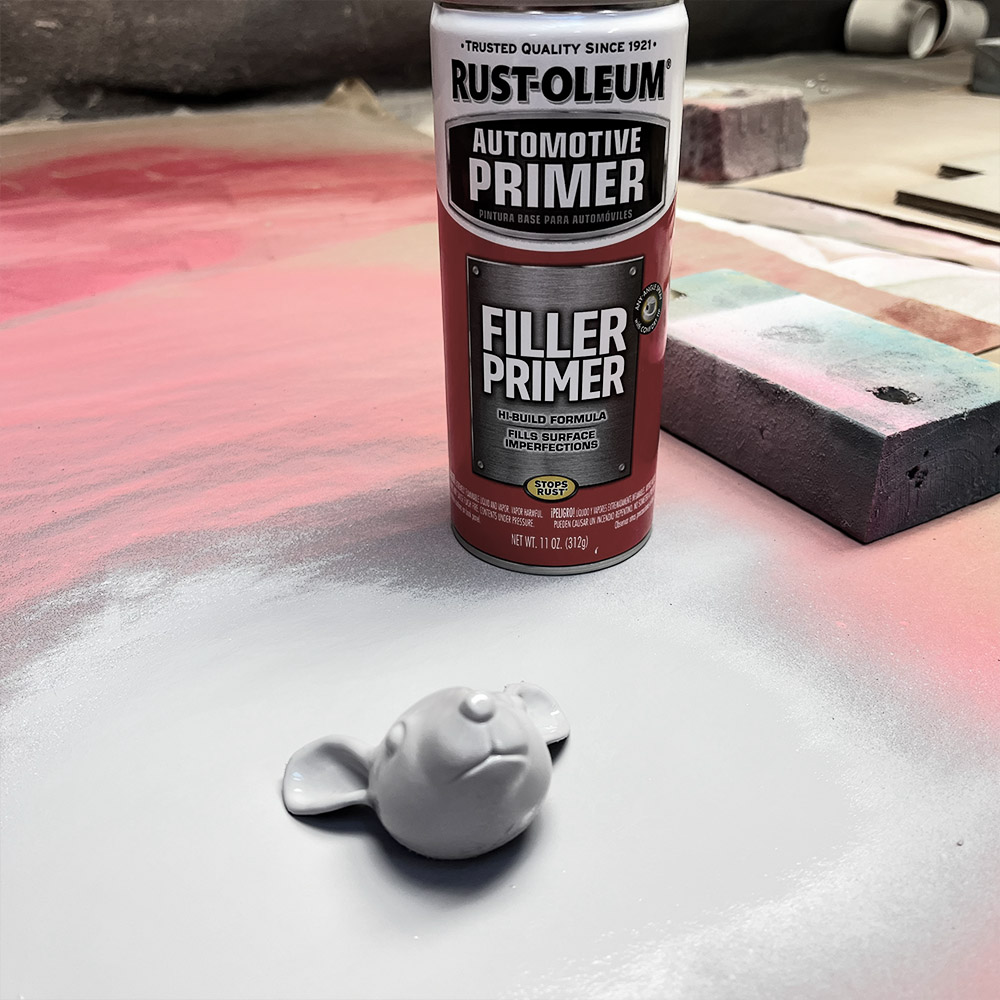

The primer looked nice but although it was recommended by other makers online (specifically this brand), I didn't like the result. You can see on the right the color was too dark for the pink finish spray to get over it (mouse at the top). So I eventually made the others with no primer and they looker much better.
Here are the other friends for the knob:
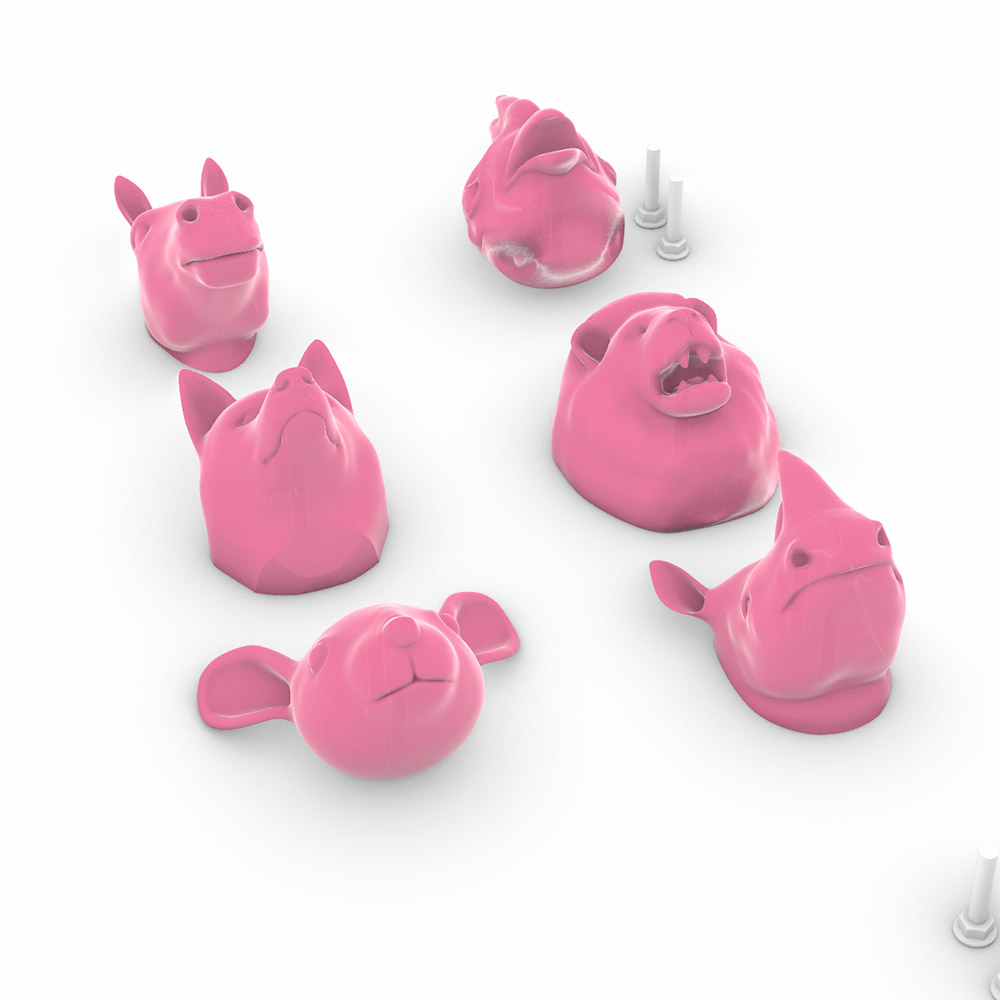
Animals farm.
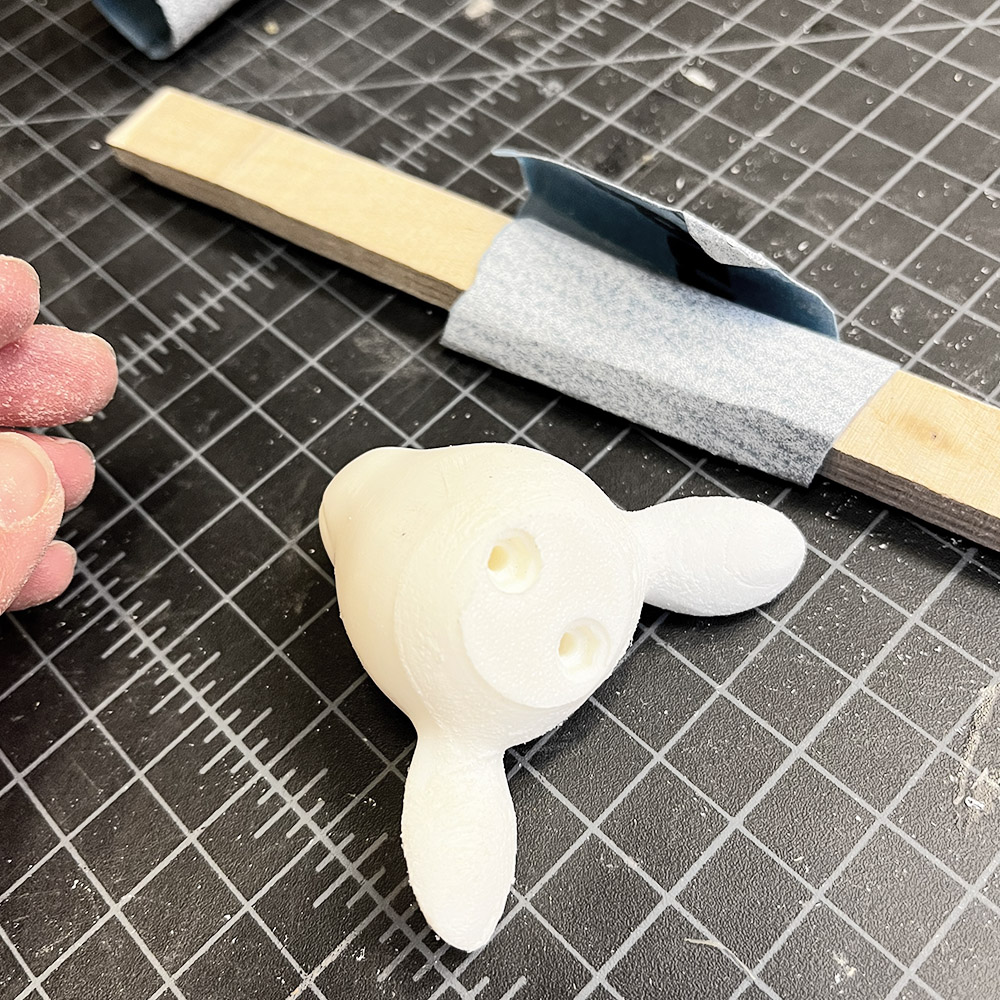
Out of the print - had to dig out the support with a flat screw
Bolts sitting nicely in their holes.
Scaling
I workshpped a PCB manufacturing for all the rest of the lockers, resorting to ESP32C3 since I didn't need the camera anymore. The pins stayed the same, thinking I could change the code a little to make them work with the new GPIO numbers on the C3.
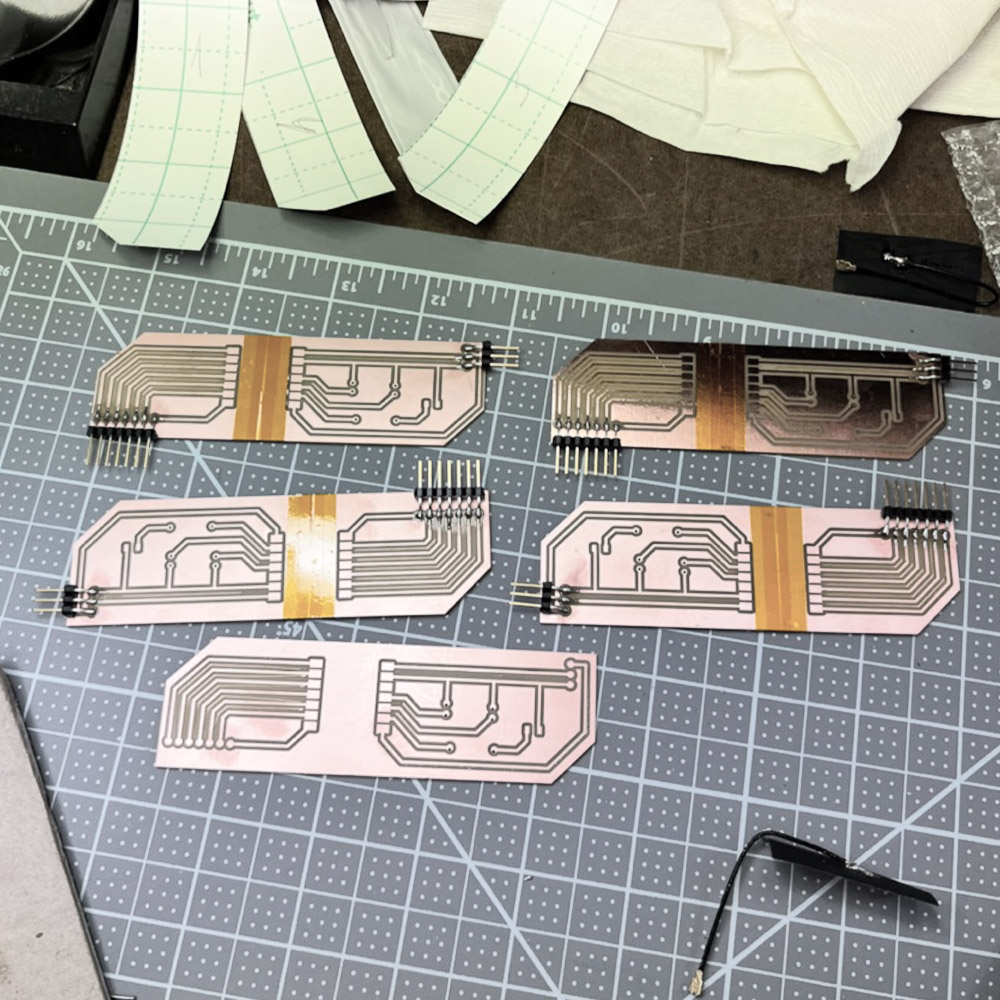
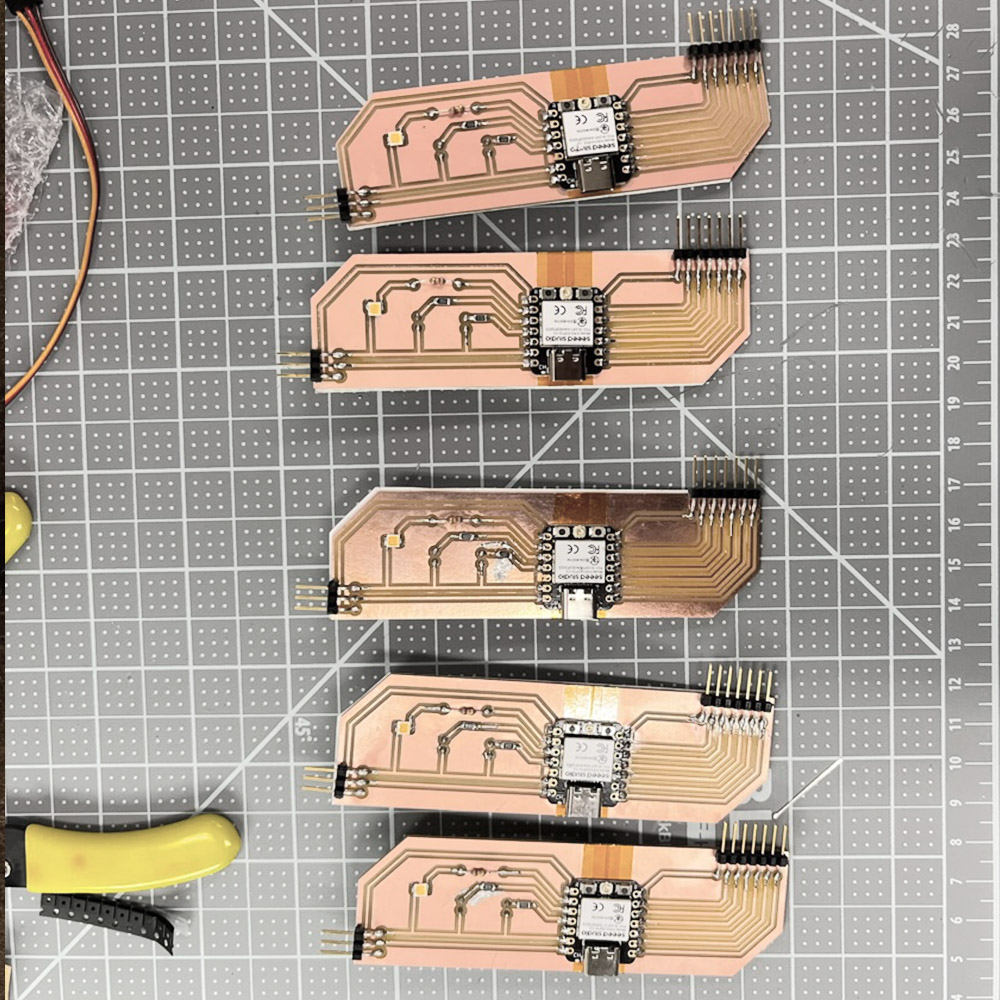
Allas, the Xiaos went crazy. They worked a few times and then spinned out of control, leaking electricity into the leds unanounced and being annoying. Anthony helped me realize I was using the strapping pins... That was hidden somewhere deep in the C3 documentation and I've missed it.
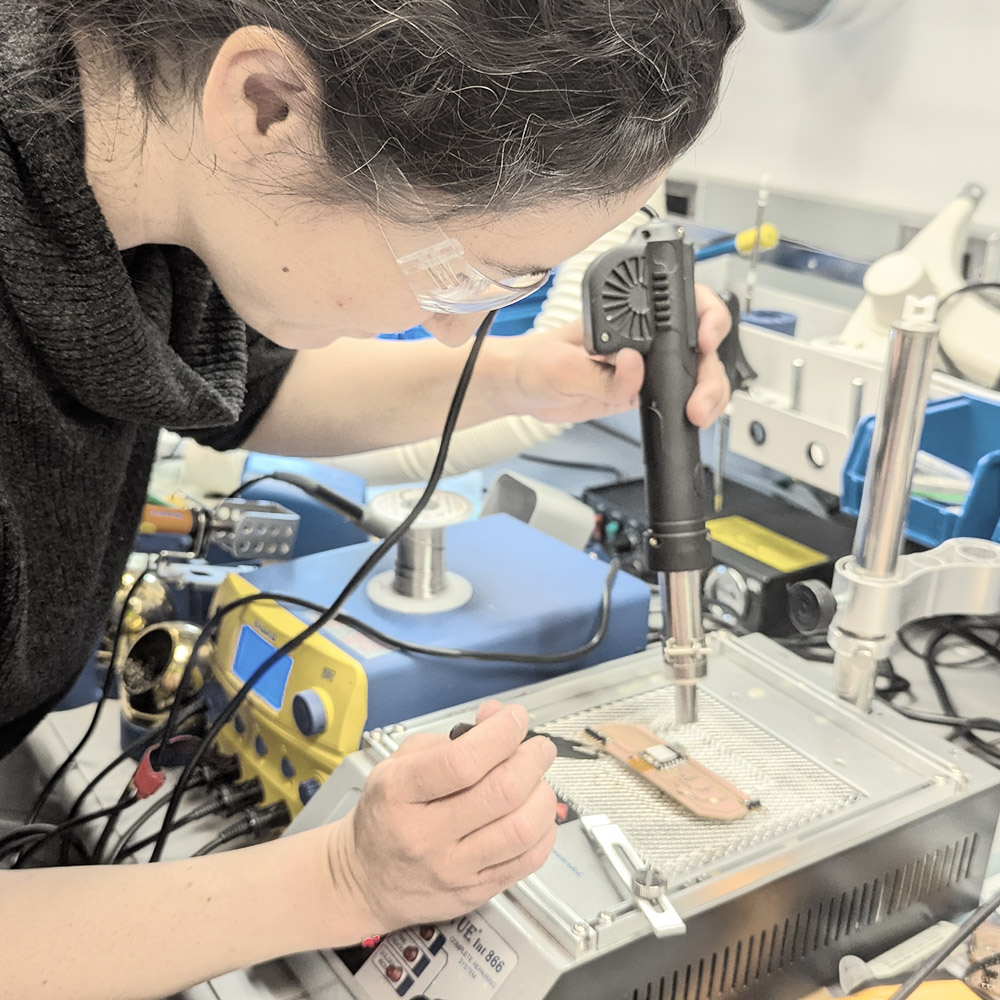
So, I soldered them all again. With S3s from the EECS lab. Apparantly it was affordable there :) ....
Upside was I learned how to use the heat gun
INTEGRATION
Honestly, I was working slowly on the integration for the entire semester, so in most of the pages on my website you can find a small step that I've made that week towards the final projet.
For the Embedded Programming week, I got to know the Xiao and wrote the first snippet of code to make the Xiao move the servo if a correct code is entered on a keypad
For the Electronic Circuit Design week I focused on the components and the microcontoller I'll need for the final project and made the initial design for it, without any indicator lights yet and with the bad connectors (through hole), also made a mistake with the Servo connections and accidentally connected the ground to the GPIO and vice versa. So I had to later manually replace them on the Servo's connector, on the next week - Electronics Production, in which I struggled a lot and couldn't make it do anything by the end of the week. Also did a lot of stupid mistakes and wasted a lot of good material, not a great week but I learned a lot.
In the Input week I realized I have shortened my previous Xiao from previous weeks, because I forgot to tape the board anderneath it. I managed to save it and finally get it to work - inputting the code from a keypad and outputing a light and a servo spinning
For the following Output Week I decided to take a step back and re-design the PCB, the right way, with my final components, and it worked with the embedded code - I was very happy - I had my final PCB for at least one of the lcokers!
Then I had some unexpected delays and didn't really get to the Something Big Week until later, but eventually that's the week in which I waterjet the polycarbonate doors and assembled them using 3d printed parts.
For the Network Week I worked on the connection of the Xiao to the webserver, started a skeleton for the frontend with SvelteKit (without any nice template yet), deployed everything to Render puclib host and was very thrilled to see the pipleine working. Later on I resorted to local host again because everything became very buggy in the final integration and I wanted to clean some complexity, but for a moment there it worked and it was very exciting. That was also the point in which I realized it might be too ambitious to have the Xiaos take pictures of the lockers and stream them, as well as Jen saying it'll be too expensive for the class to cover. So I decided it really isn't a must-have in terms of product requirements and that people can just take a picture of the thing they want to sell themselves - maybe even better this way?
Then, in the Interface Week I was fighting an incredible amount of different adapters for SvelteKit, web servers and all sorts of hosting possibilities for integrating the new cool interface I was working on (with a template that changed the app from relying on a static-adapter to a vercel-adapter) and it didn't load on the Render host anymore. Of course I only realized it after failing to upload, and not beforehand. I read about Vercel, GitHub Pages, SvelteKit with vercel adapter, with static apdapter, node-adapter.... In the end I felt like I'm running out of time and focused on running it locally - to first get it working without deploying it all to a public host.
Waterjetting, and interfacing, mostly happenned in retrospect - I had some work on those during the semester, but a huge push in the last two weeks before the deadline.
After the integration I realized it would be helpful to have a magnetic close of the door, to make sure it stays in place after closing, and doesn't swing slightly open again, so that the Servo will slide into its place easily. I found these adhesive magnets sheets which I hope will work, if I stick them to the door and waterjet a piece of scrap metal to glue to the locking mechanism that touches it when the door closes. Or maybe just let the magnets "stick" to each other?
I tried it out and it was too much - adding that 0.3mm or so didn't really help because the magnet wasn't strong enough and it blocked the 3d printed parts from perfectly aligning to close the door
Considering the power supply to the cabinet, I realized I'll have to decide between connecting the PCBs with a USB-A or a USB-C cables to a power adapter. I decided to go with USB-A cables, because their adapters are sginificantly cheaper. Here are the cords and adapters I'll have to buy:
Another small change I made for the integration is replacing the Servo blades with printed ones, that are twich as thick for more robustness:
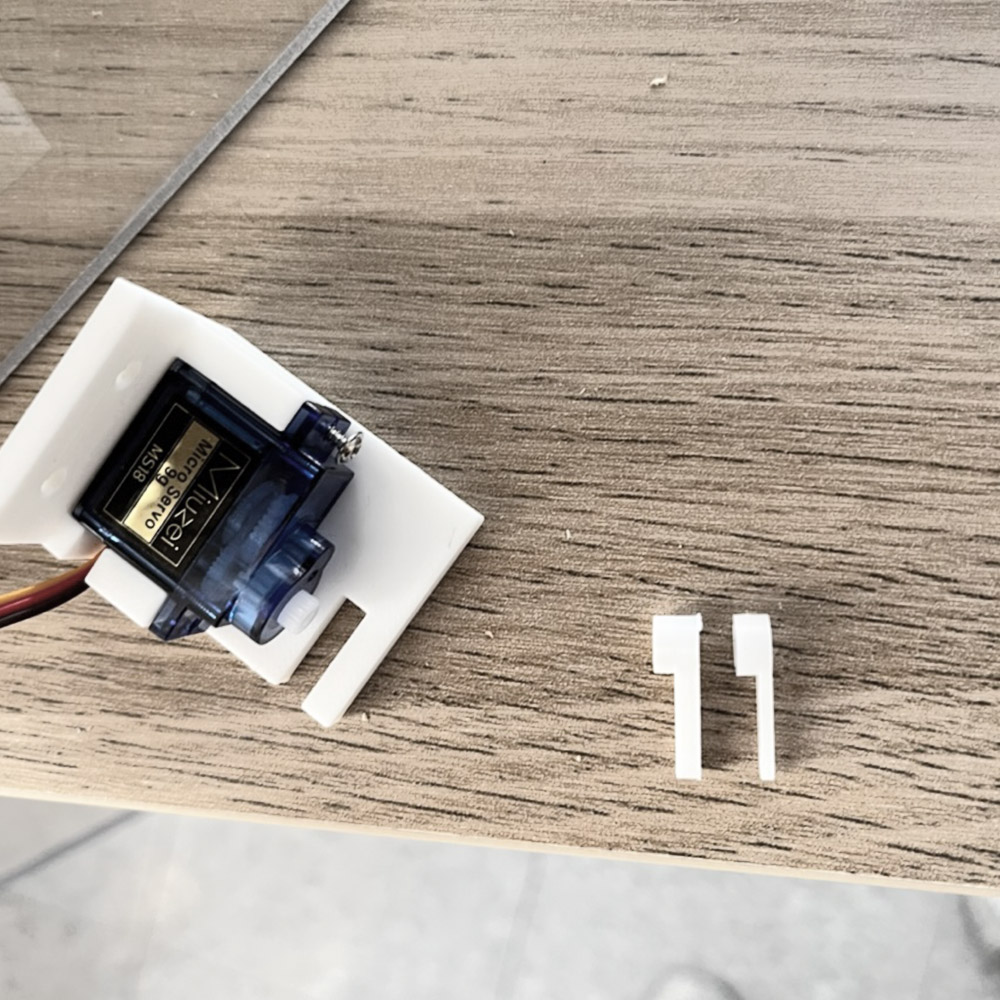
I printed multiple options, also ones to glue over the original blades in case they won't fit the connectors. But it turned out fine and I used the Servo's connectors - just attached the thicker blade.
In the final integration I have now a video of one locker working perfectly (my insurance policy for passing the class?):
Stability
Two days before the deadline my Xiaos (the S3s brand new ones) refused to connect to wifi they already met before. I tried rebooting in all sort of ways, connecting to inner networks and my personal cellphone hotspot, I tried debugging with many TAs, I treid uploading a code snippet for connecting to wifi straight out of the Seed Xiao website - didn't work either. So I admitted defeat for the deadline and decided to run a mock demo without actual connection to the internet, hard-coding the password into the locker. Here are some thoughts for how to move one:
- Try to look online and dig deep into forums to understand what might be the problem, maybe this is a good start in the GitHub issues from Espressif library.
- Talk to IS&T from the dorms and see if they know a fix - not super potimistic about that
- Think about an offline solution, first that comes to mind is inserting a series of passwords into the embedded, that rotates and shifts +1 everytime the locker successfully opens. The website will have a similar mechanism to advance the list of passwords after every successful transaction. Each item on the list will contain a series of passwords itself, so that there will be some overlapping in cases people try to open the locker twice for some reason? Don't know yet. Have to think about this some more.
- Change the PCBs... Really really don't feel like it. However, change them into a different architecture, probably the one I should have went with to begin with - like a RaspberryPi controlling smaller simpler PCBs in the lockers. I really really wish someone would have suggested it earlier along the way before the Xiaos completely failed me.
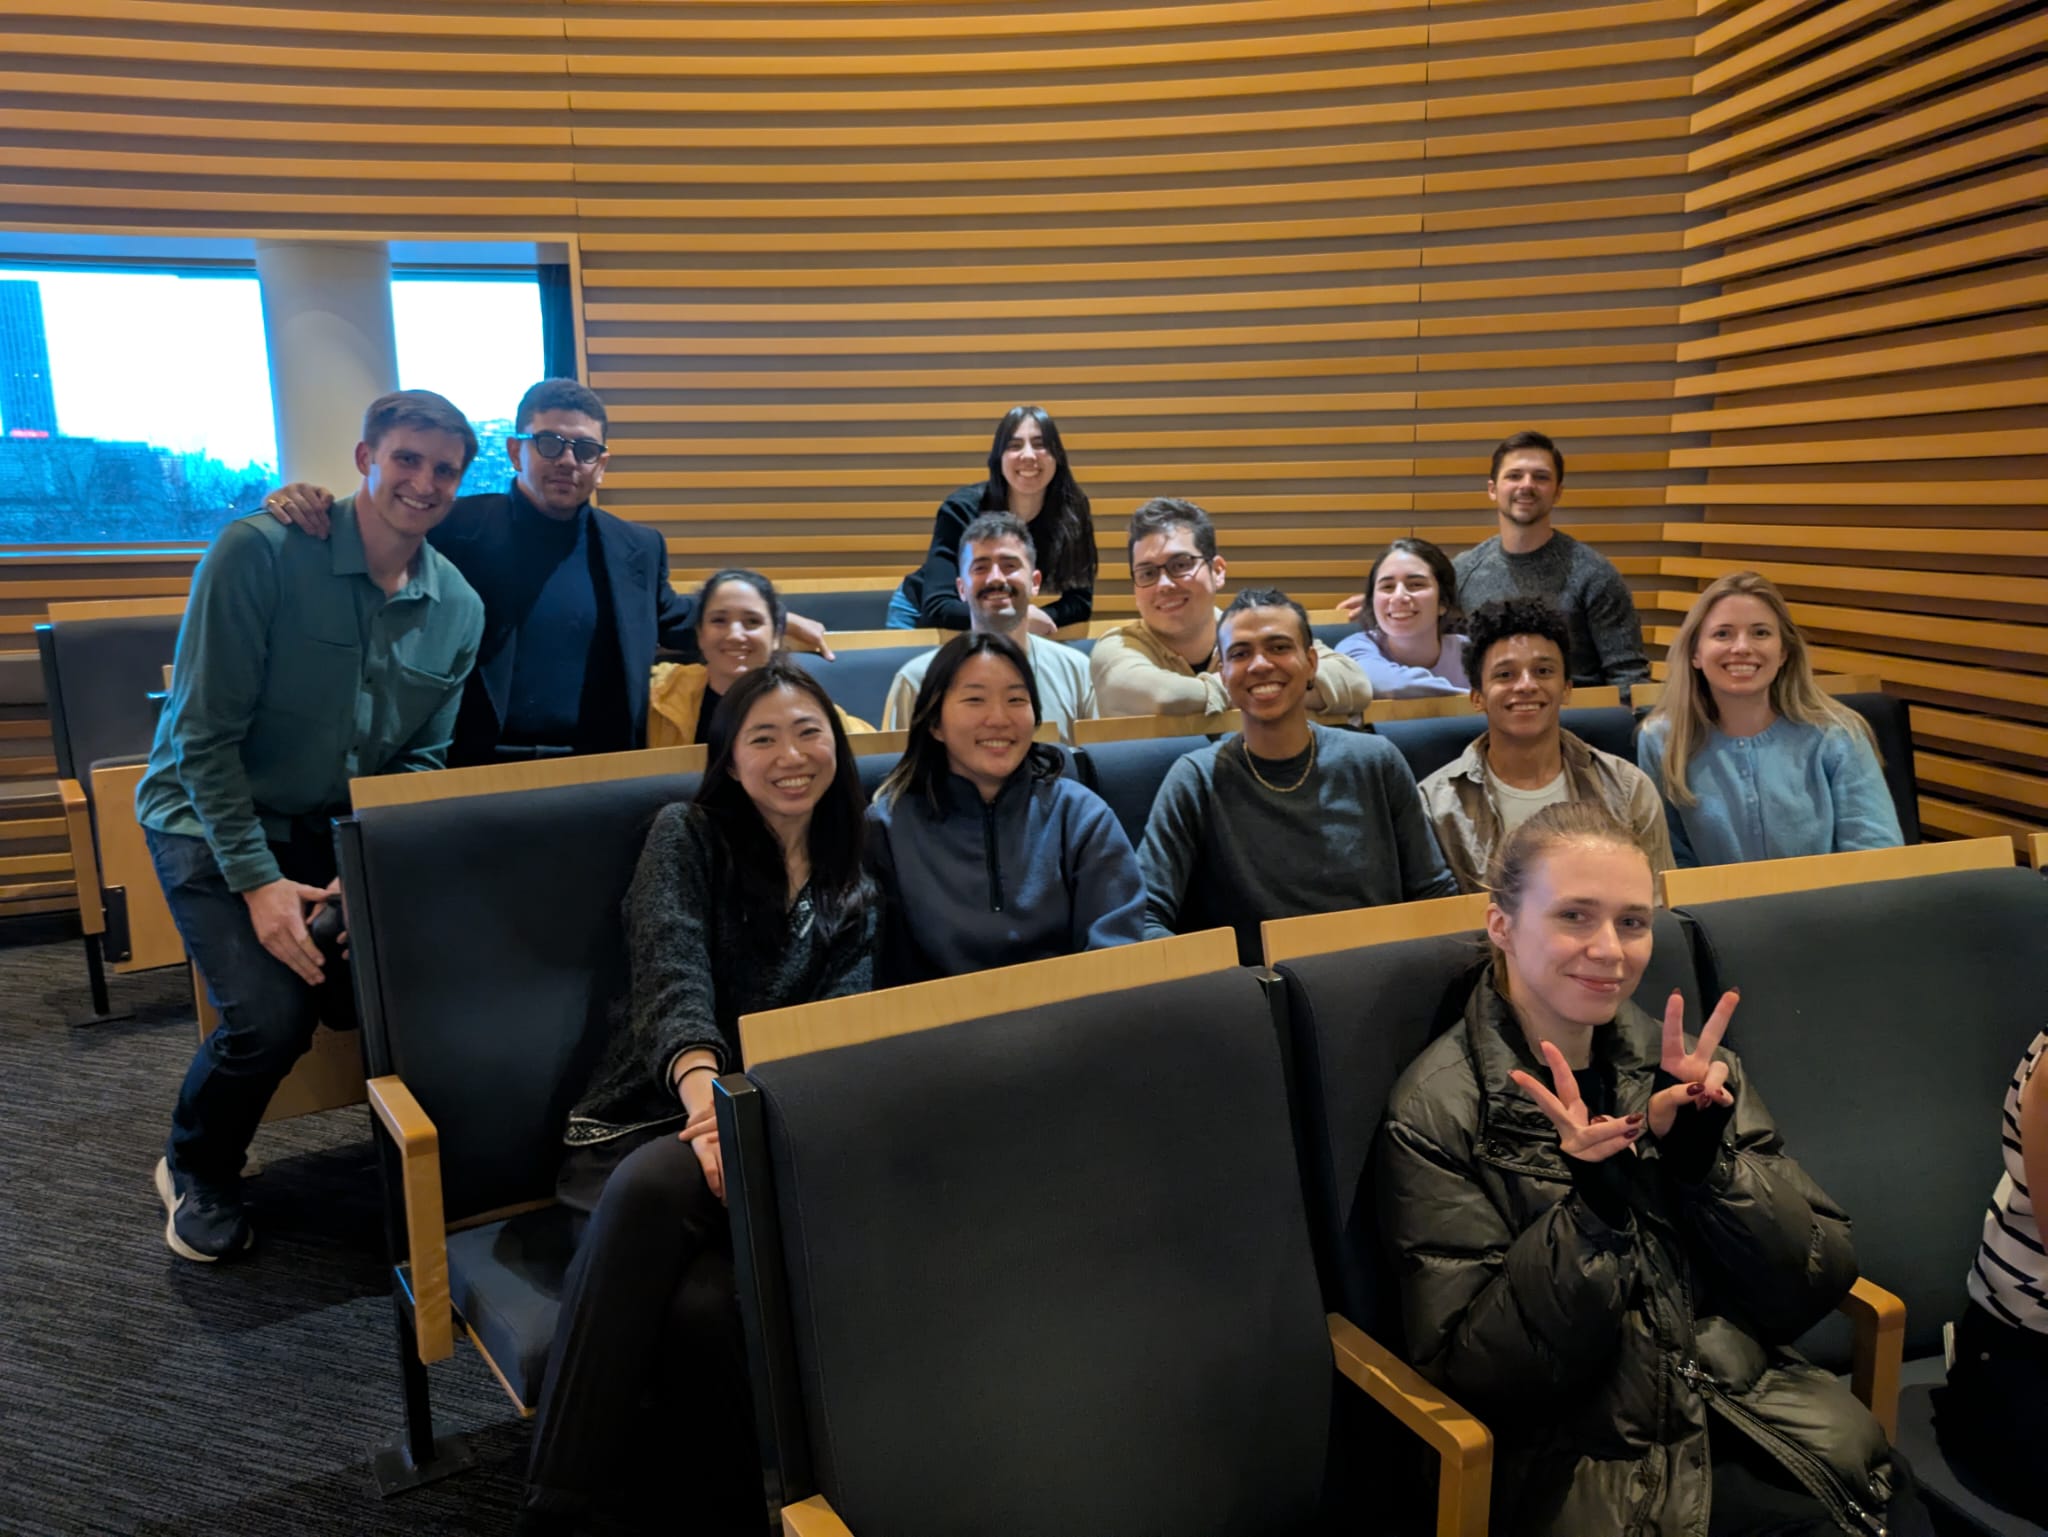
Fun
This was great fun overall. We really bonded as a group and learned a lot from one another. Plus, spending time out of a screen was super refreshing.