Assignment 4: Make something 'BIG' from something very 'SMALL'
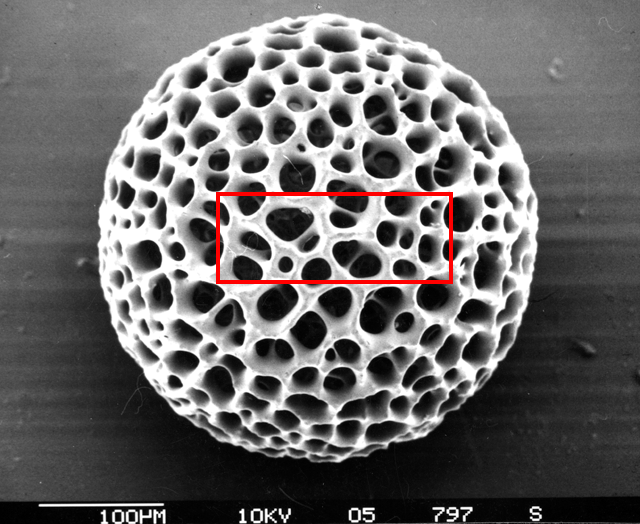
This week we were asked to make something 'BIG' with the CNC mill and/or the water jet cutter. What could be better than to make something very big from something that is very 'SMALL'. I've always been fascinated with the skeletal patterns of Radiolarians (a family of microscopic protozoa that float along the ocean floor). Here's a wikipedia link for more information. These creatures (perhaps "fossil" is a better word) were made popular by some amazingly detailed and beautiful drawings made by German biologist Ernst Haekel.
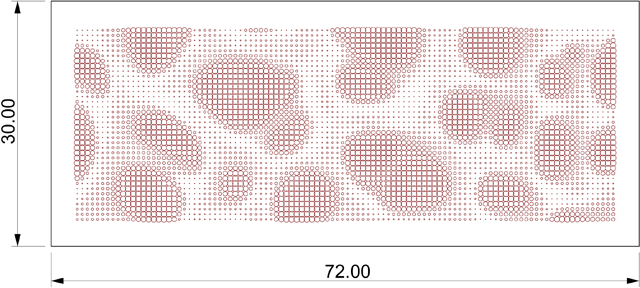
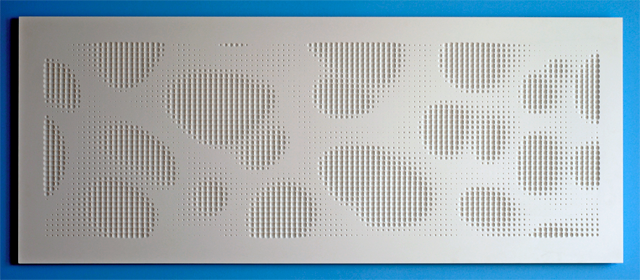
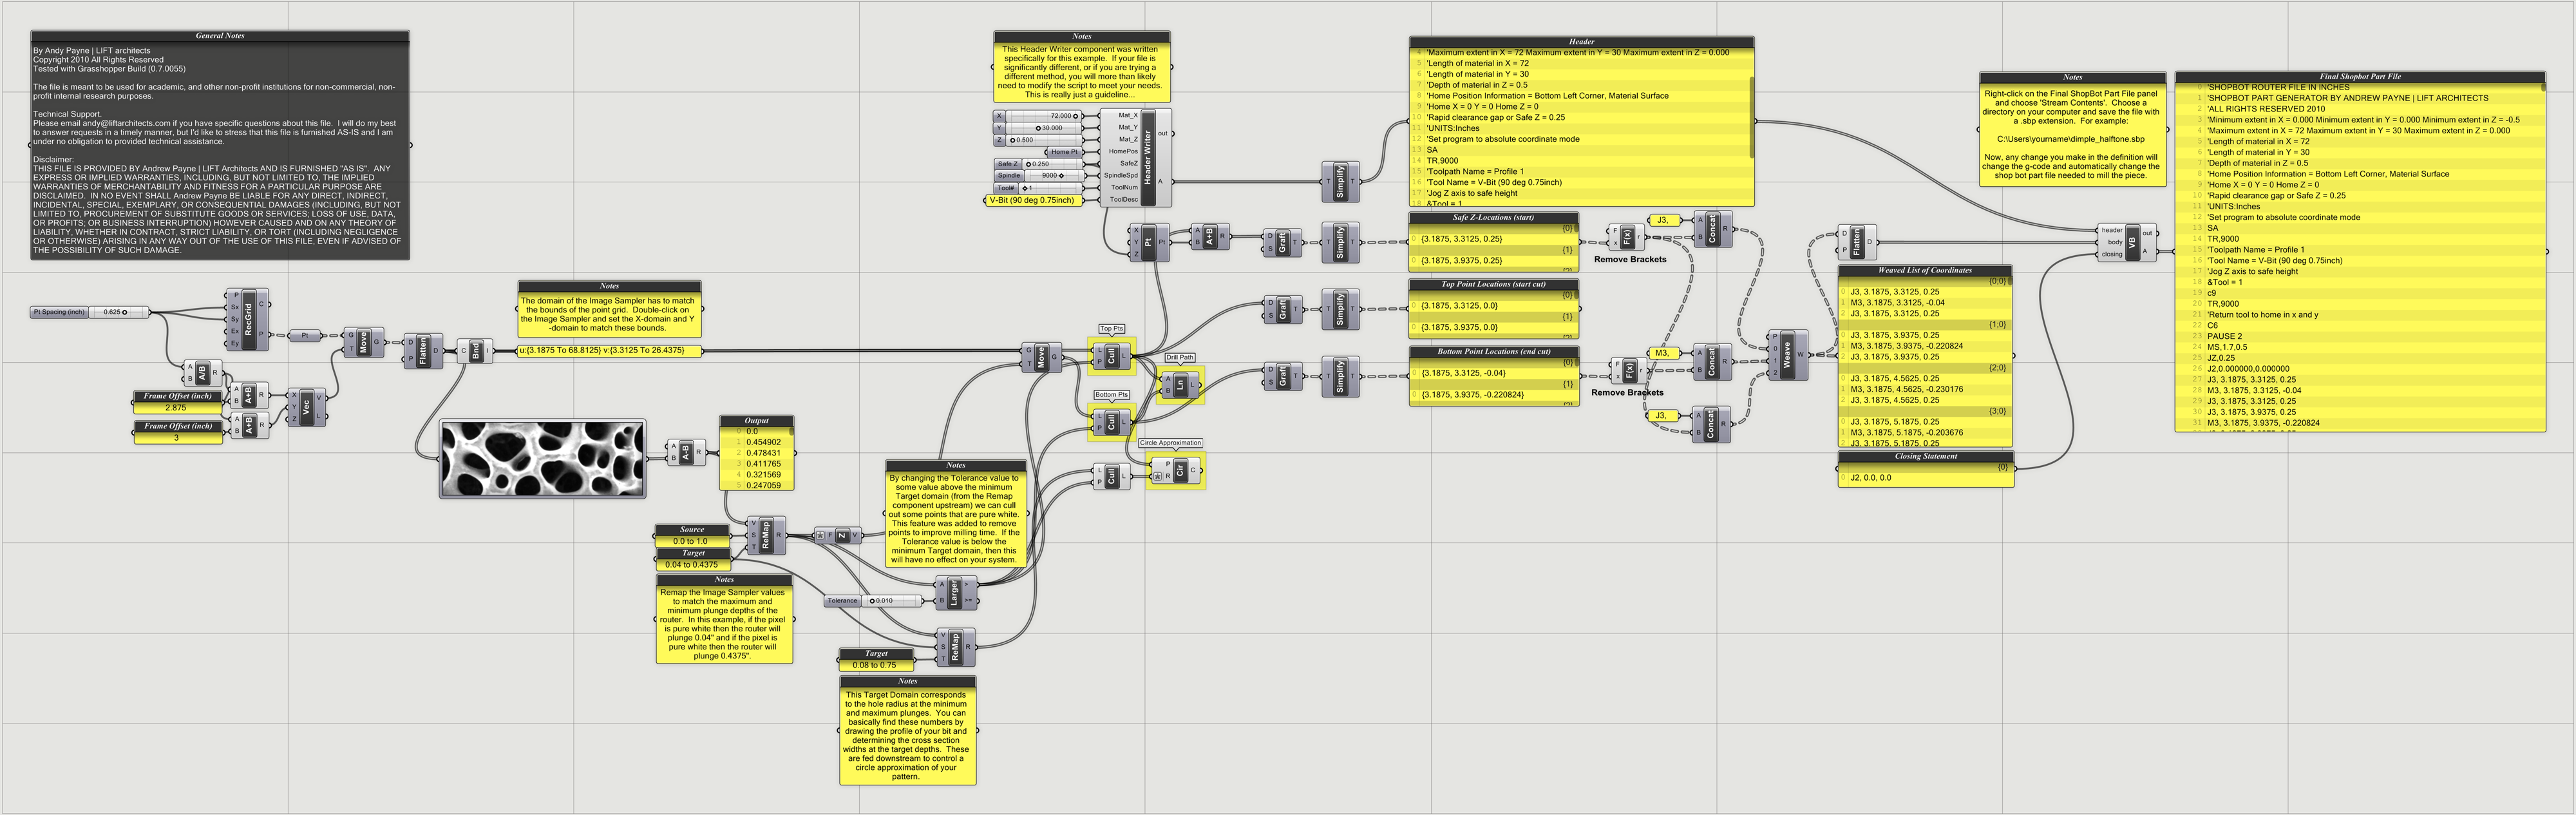
The final piece is milled out of a half size sheet (72"x30") of Corian which is a artificial material made by DuPont. As part of the assignment, I decided to write all of the g-code for the pattern directly from Grasshopper. The file has been setup so that it writes the entire Shop Bot Part file directly to a directory on your computer... and I was really amazed at how fluid the process was using this method. It took some time to figure out the header portion of the shop bot code, the rest worked like a charm and I was up and running in no time. The entire process is documented below.
Original Image (source can be downloaded here)
Cropped and Zoomed In

Gaussian Blur and Highlight Sampling (blur added to reduce noise in original image)

Grasshopper Approximation of Milling Pattern (automatically generates Shop Bot g-code in real-time)
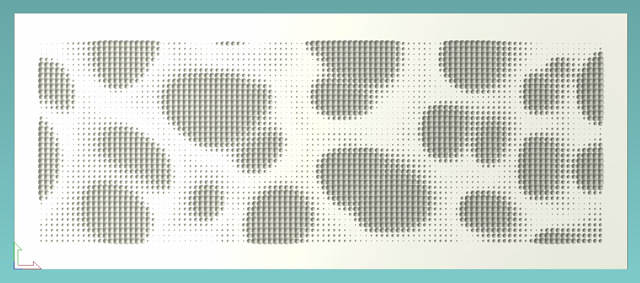
CAD/CAM Preview of Tool Path from Shop Bot Controller (simulation of final cut)
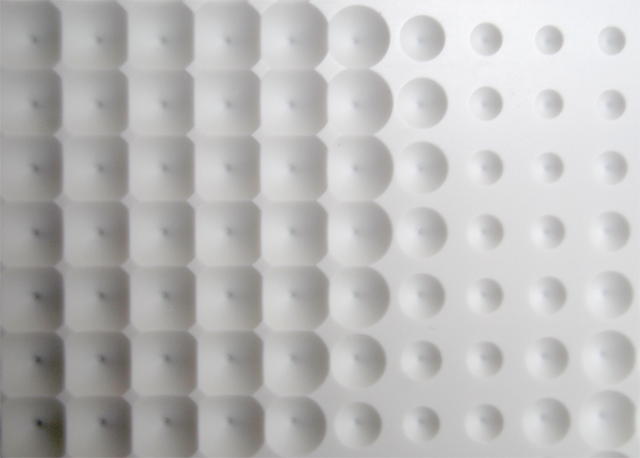
The Final Installed Piece (72"x30"x1/2")
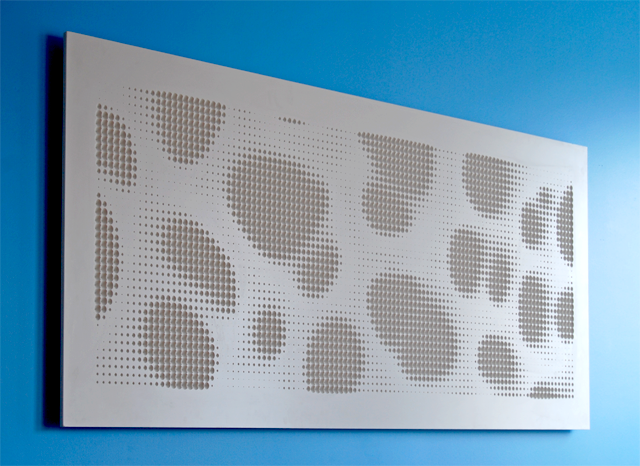
The image becomes more pronounced on the oblique
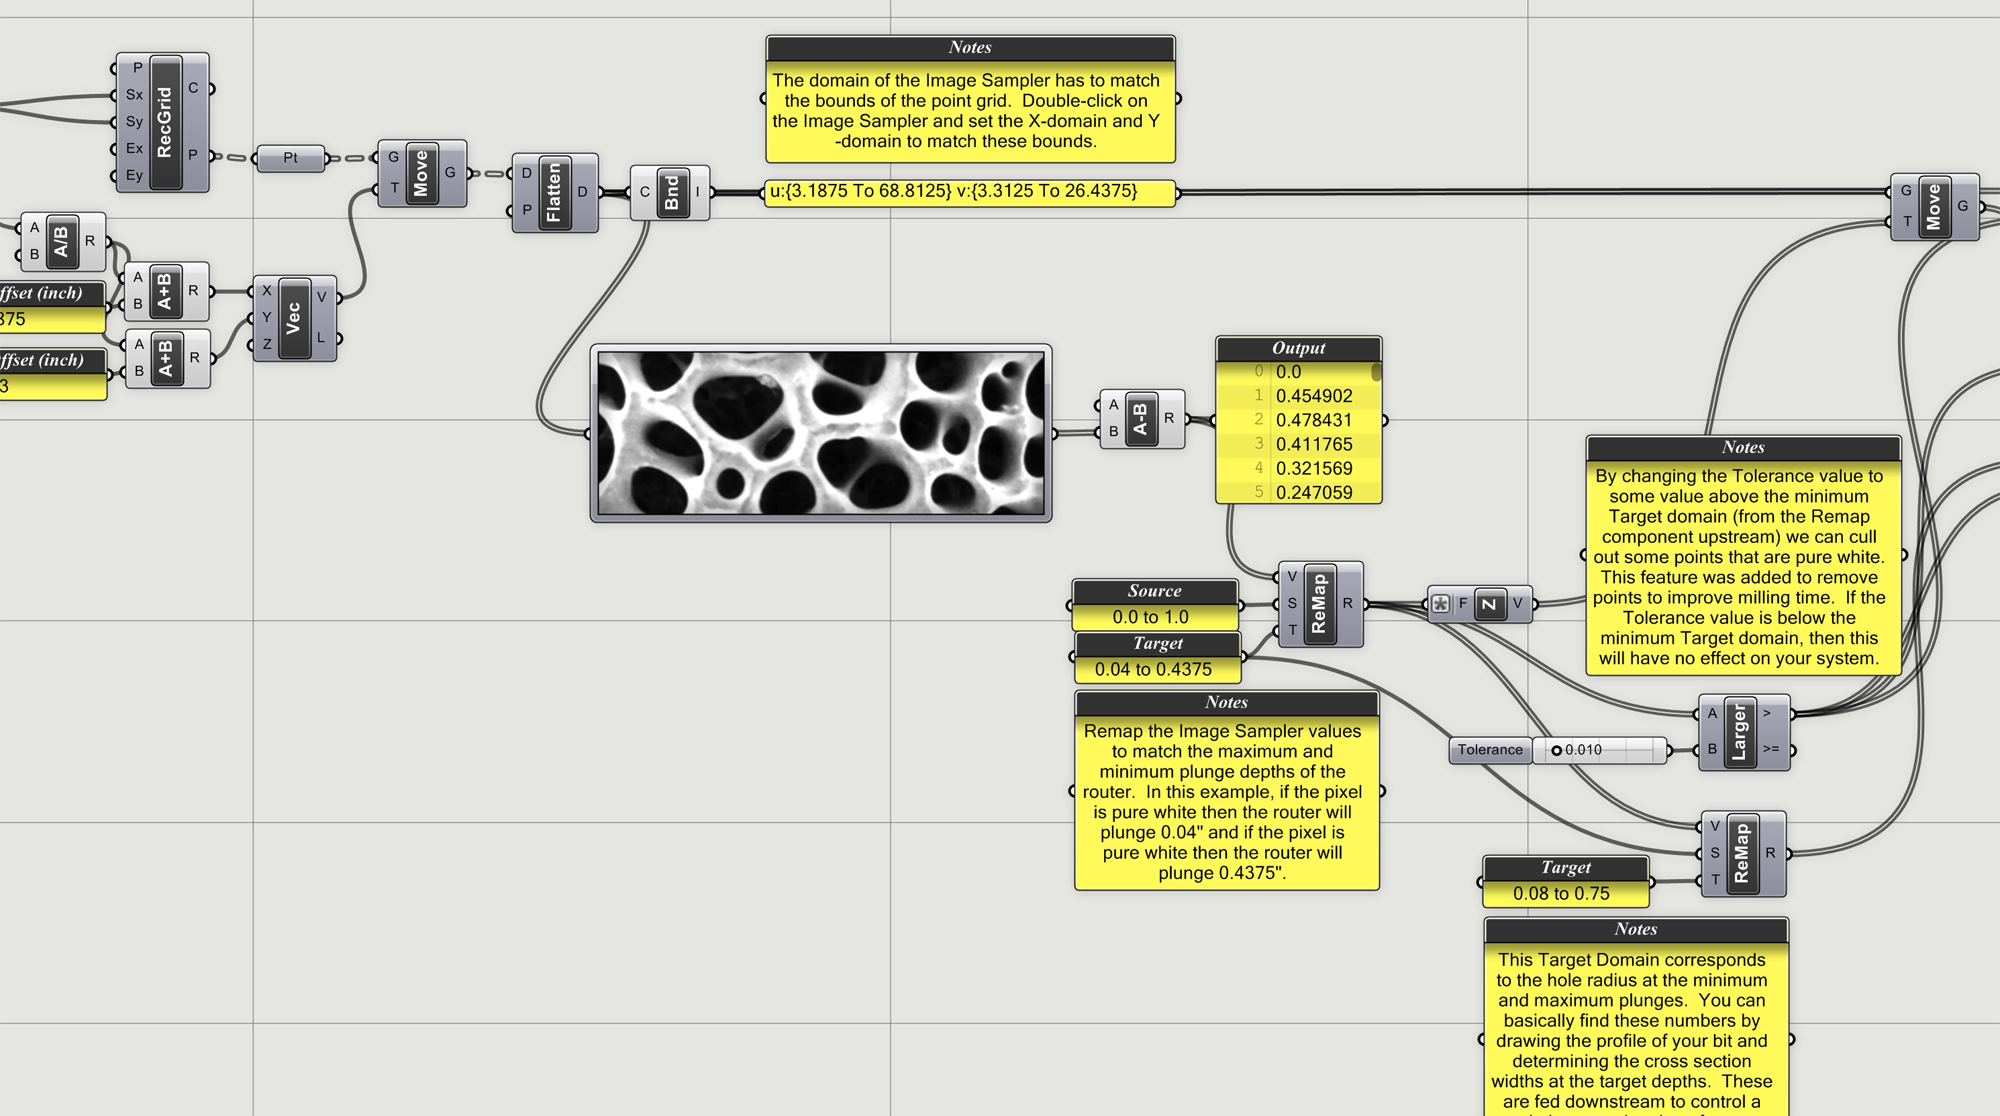
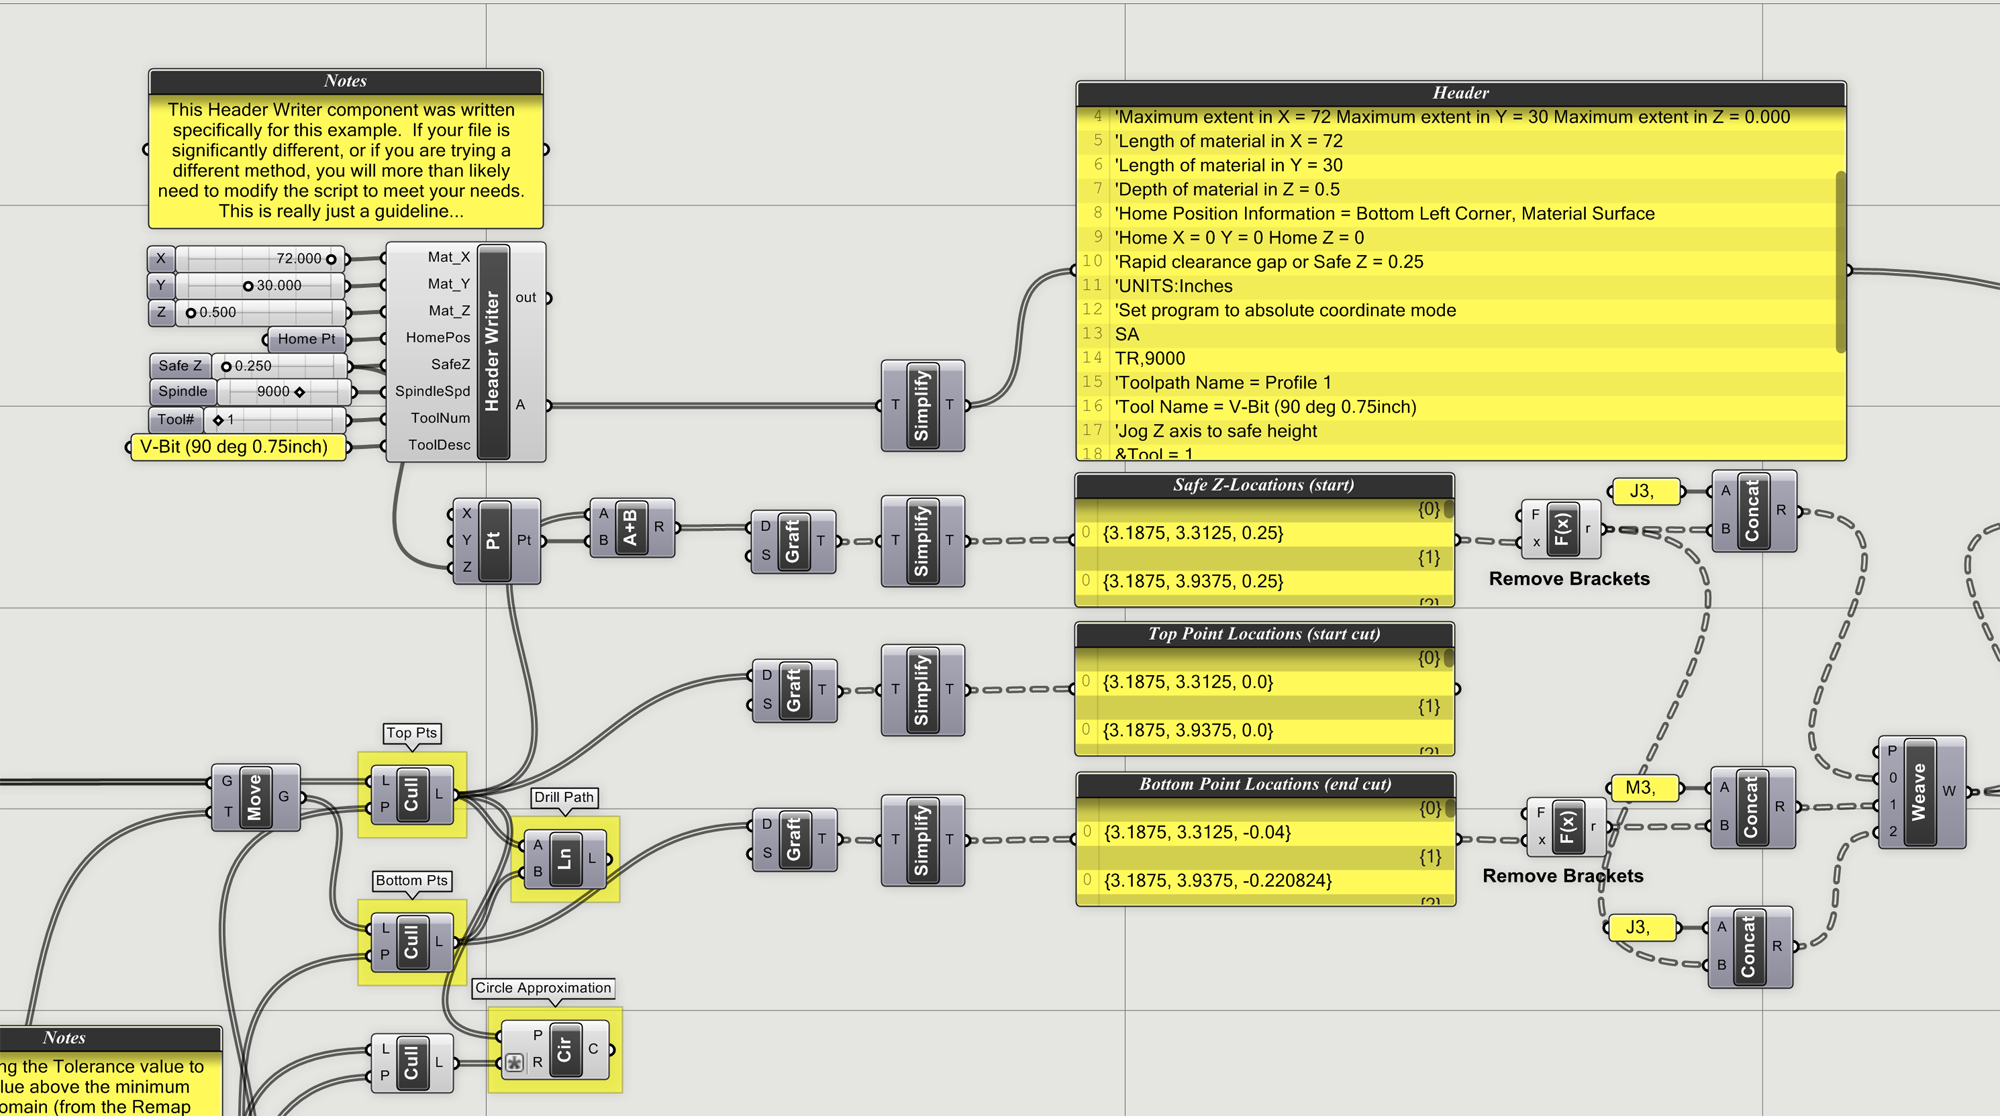
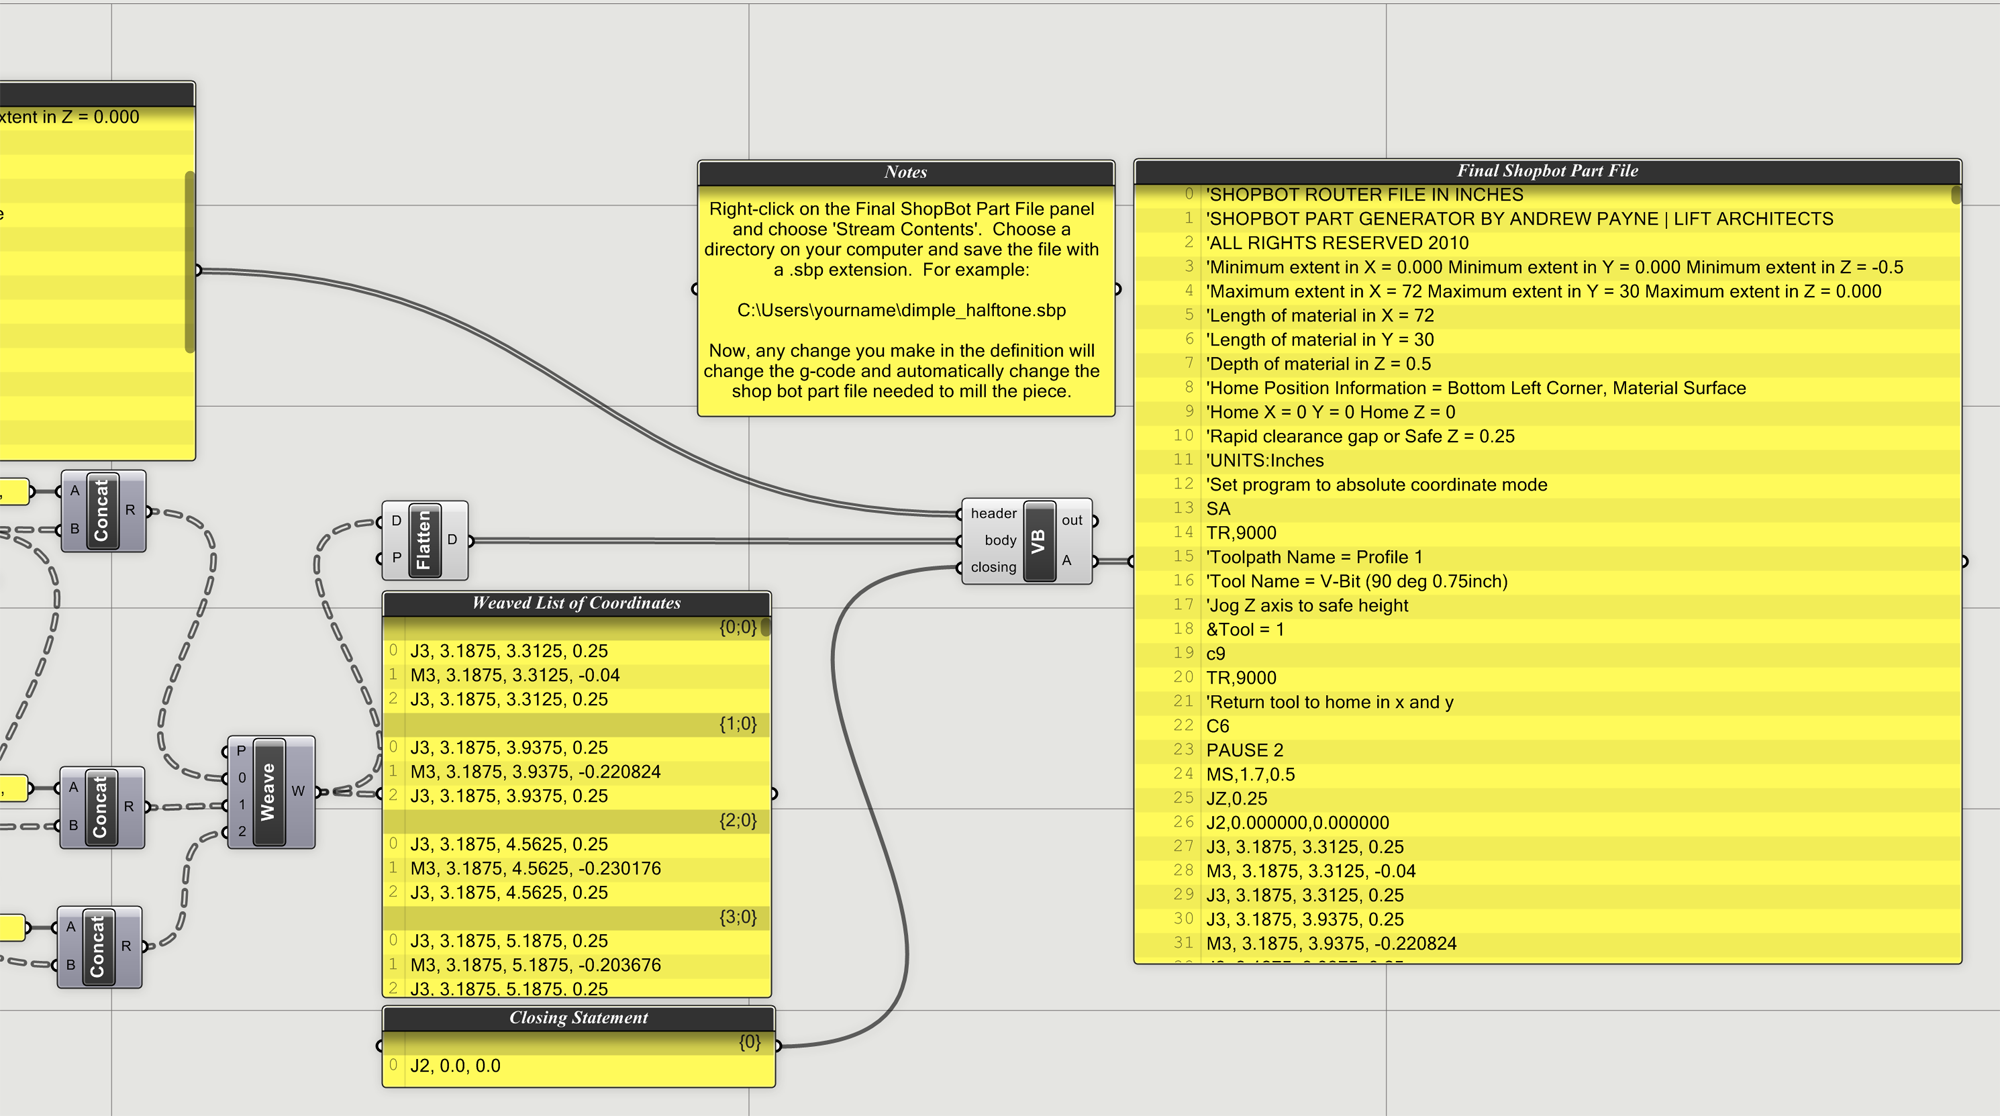
The Grasshopper Setup
The parametric process for this project was relatively straight forward. There have been many examples of patterns generated using the Image Sampler component, and this one is pretty similar to those, so I won’t go into great detail about how that part is set up. The Shop Bot Part file format (.sbp) is essentially just a text file with commands about how the machine should behave. The trickiest part on this entire project was learning the exact command prefixes that are needed to drive the machine. Since these are proprietary (for the Shop Bot), the commands are slightly different than traditional g-code. I found two helpful manuals on the Shop Bot website.
- Command Reference V3 - How to use individual commands in the Control Software
- Programming Handbook - How to program part files
With these two manuals as my guide, it was quite easy to setup the entire tool path part file. I found that the Weave component became very handy when joining together the movements needed for the plunges. I did write a little custom code to deal with the header file, although I mainly used a generic part file for a guide. This header works for this specific application (using a V-bit 0.75" dia.) but might need some minor modifications if the method of milling were to change (such as surface milling, or profile cutting as opposed to direct plunging). Below are a few screen captures of the Grasshopper definitions.
The Finished Definition (click to enlarge)
The Image Sampler (click to enlarge)
The Shop Bot Header Writer (click to enlarge)
VB Component to Compile the Shop Bot Part File (click to enlarge)
Download the File
The file is meant to be used for academic, and other non-profit institutions for non-commercial, non-profit internal research purposes. This file was created (and tested) in Grasshopper version (0.7.0055). Results may vary is using a different version.
- Grasshopper Shop Bot Writer (369kb - right click and 'Save Link As'
Disclaimer: This file is provided by Andrew Payne | Lift Architects and is furnished "as is". Any express or implied warranties, including, but not limited to, the implied warranties of merchantability and fitness for a particular purpose are disclaimed. In no event shall Andrew Payne be liable for any direct, indirect, incidental, special, exemplary, or consequential damages (including, but not limited to, procurement of substitute goods or services; loss of use, data, or profits; or business interruption) however caused and on any theory of liability, whether in contract, strict liability, or tort (including negligence or otherwise) arising in any way out of the use of this file, even if advised of the possibility of such damage.
The Fabrication Process
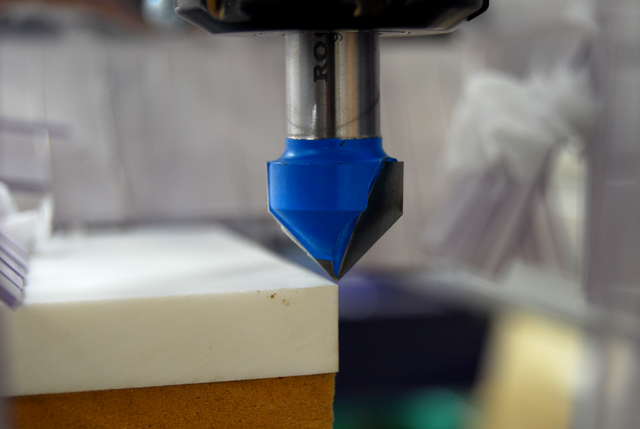
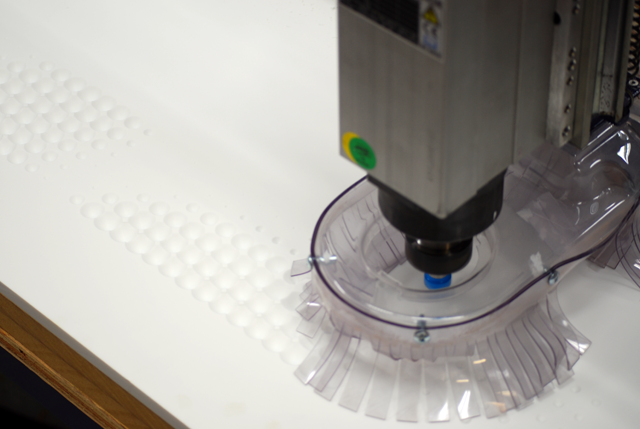
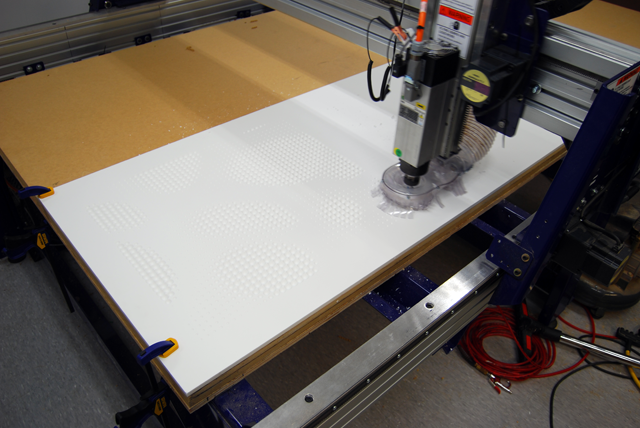
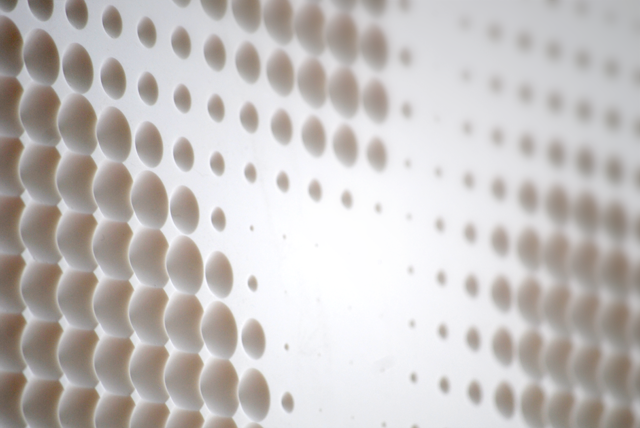
As I already mentioned, the fabrication process was very fluid given the part file was automatically generated in Grasshopper. Other than loading up the part file and running a quick simulation to verify the correct path file, the mill handled the code quite seamlessly. I did run a test pattern on a scrap piece of Corian and found that I was getting quite a nice cut when running the spindle speed at around 9000rpm. I decided in my part generation that a 3/4" diameter 90 degree V-bit would give me the largest possible diameter without plunging all the way through my material (only 1/2" thick). So, after I ran the test piece and was comfortable with the settings, I re-zeroed the bit for the larger run. The key here was to verify that not only the bit was directly at the corner of my material (which I specified in my part generation) but also that the piece was square relative to the mill. To test this, I first set my zero point at the corner of my material. Then, I raised the bit 1/16" just enough to clear the material and then moved the bit in the X and Y axis (do this separately) to check whether or not the bit is directly over your piece. Luckily, I found the shop bot table was quite square relative to the bit. After that, it's just a matter of getting a good book to read, as it took me almost 3 hours to mill out each of the 4,028 plunges. Below are a few process images.