Assignment 8: Casting and Molding
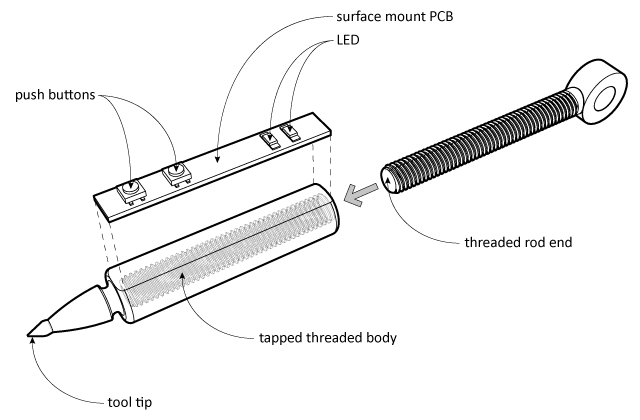
I have to admit, that I wasn't necessarily looking forward to this week's assignment when asked to design a mold and to cast an object. But, by the end I had learned a lot about the process and I can say I have a different appreciation for the entire process. I decided to re-design the tool-tip for the 5-axis scanner I'm making as part of my final assignment. I had already bought the 3/8" - 16 threaded rod end (as part of the scanner construction) so I wanted to design a tool tip that I could tap after it was cast so that it could be screwed onto the rod end. I decided to make a small portion of the tool tip have a flat surface so that I could mount a PCB that holds two push buttons and two LED's. Below are the steps I took to casting the tool-tip, but most importantly there are tips that I learned that will significantly help the next time I choose to cast something.
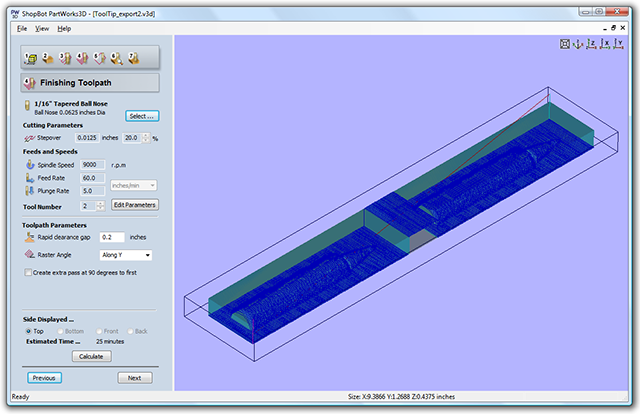
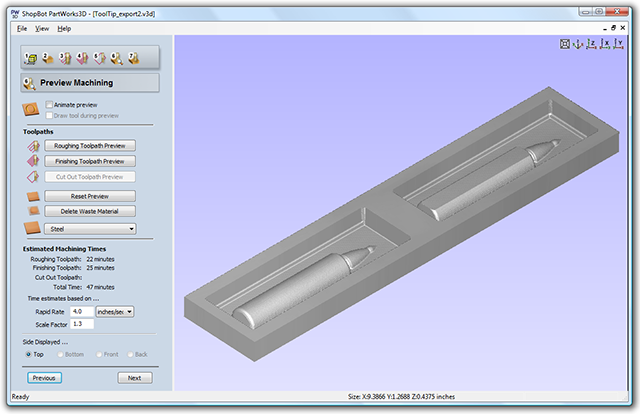
After designing the tool-tip, I decided to mill the mold formwork using the ShopBot. So, I imported an STL file (from Rhino) into Partworks 3D and created the tool paths for a Roughing Pass (using a 1/8" end mill) and a Finish Pass (using a 1/16" bit). I had some Corian left over from the "Make Something Big" week so I chose to mill the mold out a scrap piece since I was really impressed with the milled surface quality. It probably took close to 1-1/2 hours to mill both passes, but the final quality was really nice. Below is a screenshot of the Finish Pass tool paths and a simulation of the final cut.
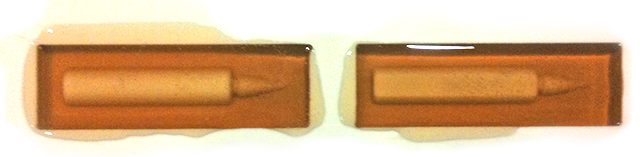
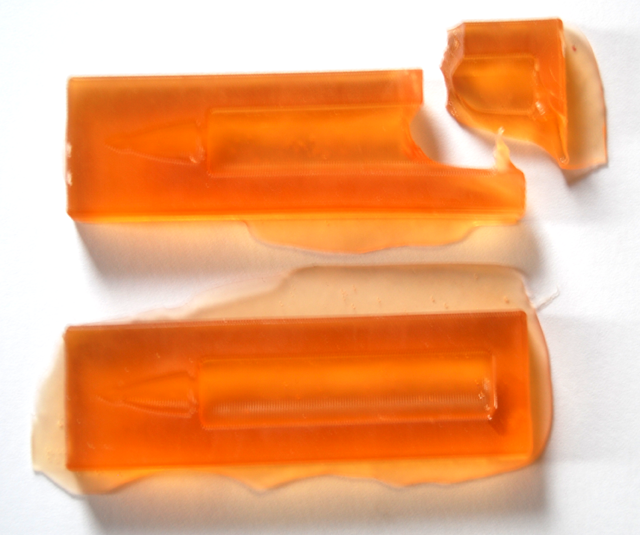
Next, I wanted to cast rubber (using Smooth On 121/30) into the Corian mold so that I could have a flexible negative mold with which I could cast the final positive into. During our casting demo, it was mentioned that we could probably get away with casting the rubber directly into the molds without using a mold release agent... Very bad decision on my part. I don't know if the rubber had a different reaction to the Corian, or if it was the fact that I decided to use the 121/30 Dry (instead of the Wet) but I had a very difficult time getting the rubber mold to release from the Corian. In fact, I pulled so hard to get it to release that I ripped the end off one of the pieces. This made for one very sad panda. But, there was no real damage done to the Corian mold, so I decided to re-cast the rubber part, only this time I chose to use a mold release AND I used the 121/30 (which has an embedded oil compound which helps with mold release). This time, everything worked perfect, and the rubber piece came out beautifully.
Now that I had the final rubber parts, I next had to cast the black plastic compound to make my final piece. This is where things really started to break down. First, I learned two critical flaws in my mold design. First, I never considered adding any sort of registration geometry, so I had an almost impossible task trying to line up the two halves so that matched up perfectly. There are a number of ways to do this, but probably the easiest would have been including two half spheres (one dimple and one hump) so that the pieces would line up perfectly. In the end, I had to insert six metal pins to hold the pieces together (but I was mainly relying on eye sight to line up each piece). My second mistake was that I forgot to include the sprue hole (pour hole) and vent holes in my original mold design. I figured I could simply drill out a sprue and vent hole after the rubber was cast, however this ended up being more difficult than originally expected because the rubber wanted to move out of the way from the bit. Eventually I was able to drill a pour hole and two vent holes using a dremel, but the vent holes were a little larger than I would have liked.
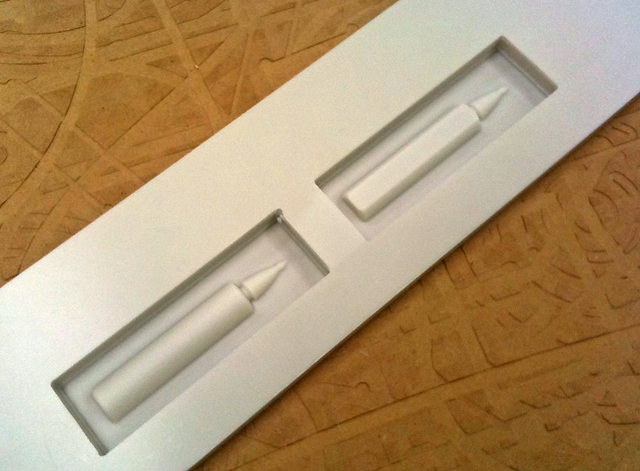
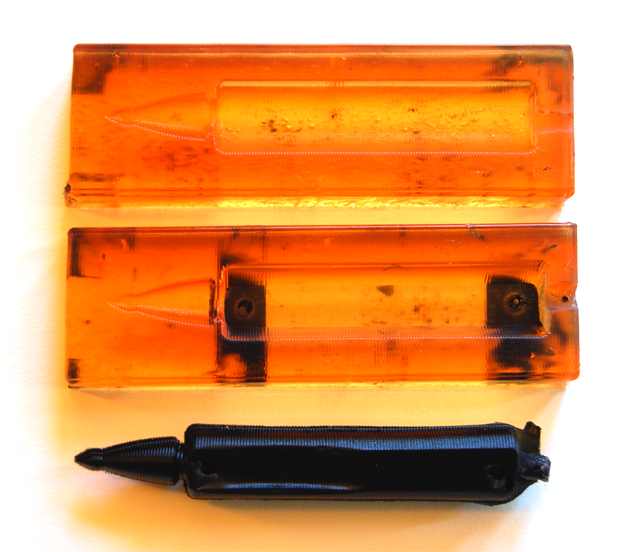
Pigmenting the liquid plastic was pretty straight forward, but pouring it was a little tricky. It was definitely more liquid than I had originally expected (It was more like water and less like yogurt). Because my vent holes were larger than I had wanted, the plastic compound kept wanting to ooze out of the vent holes. Ultimately, I got it all setup, but found out that some of the compound had indeed leaked out of the vent holes and I had a small indentation in my final piece (not intended). Below is a photo of the two rubber molds and the final piece (before clean up).
As I mentioned above, I learned a lot this week about the process of casting objects. Below are some of the key tips that I learned that would have made the final piece much more successful:
- Design your mold with registration marks. You can use half spheres (dimple and hump) or through holes (for dowels), but creating some sort of registration mark when using two or more molds is crucial if you want your pieces to line up correctly.
- Design your mold with sprue and vent holes. Again, this may seem obvious, but it's much easier to plan ahead of time where your pour holes and vent will be in your piece, than trying to retroactively locate these on your mold
- Always use a form releasing agent. I found this out the hard way, but make sure to use some sort of form releasing agent when casting. Whether it's a spray on releasing agent, soap, or if it's embedded in the casting material (Smooth On 121/30 Wet), it's critical to use something to help the rubber release from the cast..
- If using the liquid plastic compound, it probably isn't a great idea to try to sand the piece after it's cast. I was surprised at how 'soft' the plastic compound was. I'm sure smooth on makes a lot of different plastic compounds, but I chose to use the Smooth On 326 plastic because it had a slightly longer pot life than the 325 product. When the piece came out, I tried to sand down the seam (left over from where the two mold pieces had been joined together). Ultimately, I ended up sanding the whole piece and I was very disappointed with the surface quality. I should have probably just trimmed it down using an exacto knife and left the surface quality exactly as it had been out of the mold.