«Previous Project Back to Index Next Project»

2. Cutting


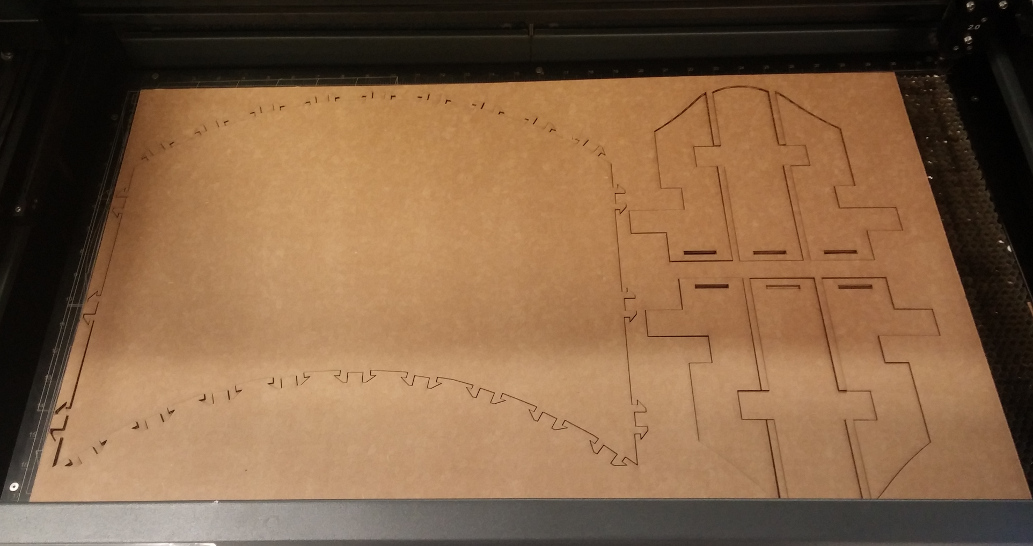
Compared to the modeling, cutting the desk was straightforward and quick. Nathan Melenbrink helped me upload and prepare my Sketchup Model.

Firstly, we had to revert the filetype to Sketchup 8 so Rhino could import it. We also made sure to import the file as trimmed planes, not as meshes. This was the first time I saw someone using Rhino. Nathan told me a few commands to type in, and which options to select. The Sketchup components each became singular flat closed polygons. I didn't understand it at the time, but after 50 hours of using Rhino (and using the laser again to make a Halloween Costume), I understand what happened.

In order to cut the patterns correctly with the laser cutter, each of the imported shapes needed to be converted from a collection planar surfaces into single polylines, which the laser cutter would trace while cutting. First, we used the SelSrf (select surfaces), which selected all planar surfaces. Unexpectedly, this only selected about half of the shapes. No matter, we used the DupBorder command, which created new, single polylines around each of the planes. With that done, we then deleted all of the planar surfaces by using SelSrf then delete. When we clicked on one of the shapes which wasn't selected, Rhino identified it as a "Block Instance". I still have no idea what the distinction is here, but typing SelBlockInstance and then DupBorder had the desired effect. We then deleted the remaining block instances. And there you have it - all of the imported planes and blocks were consolidated into single outlines of each shape, in just six typed commands. I began to see the appeal and efficacy of Rhino - this might have taken hours to do in Sketchup.

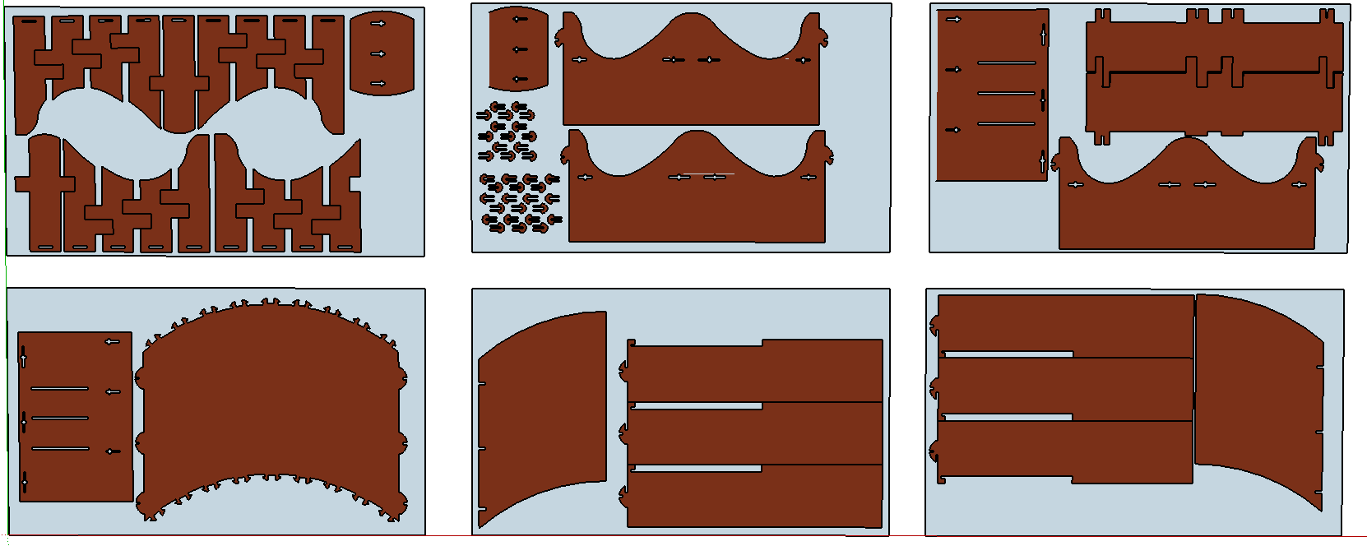
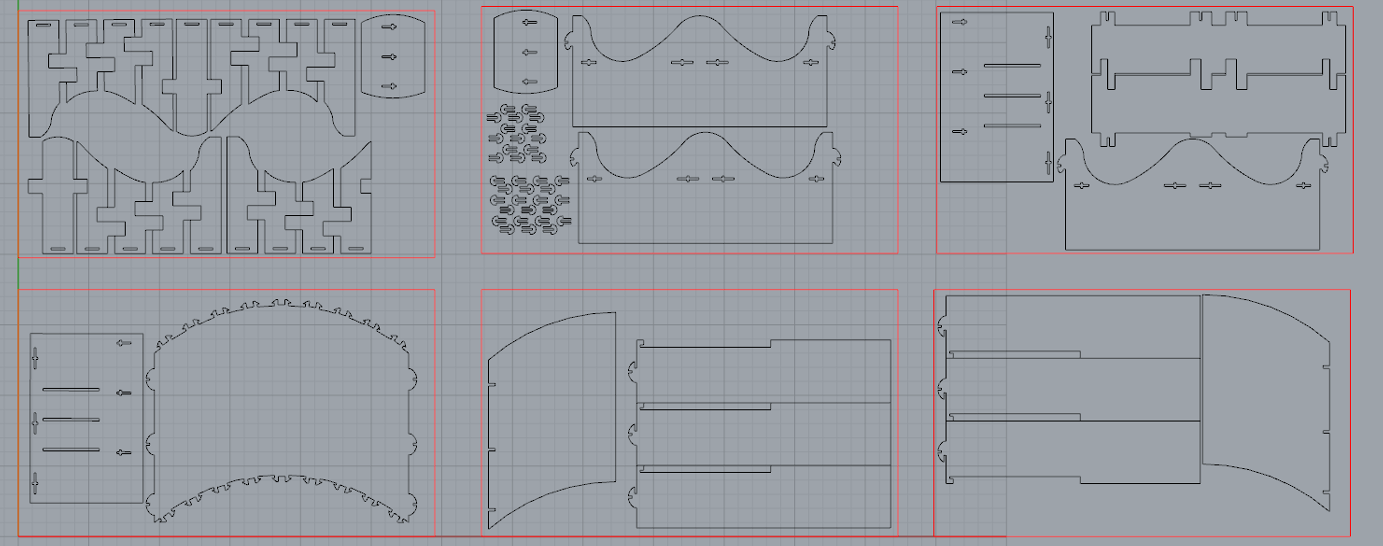
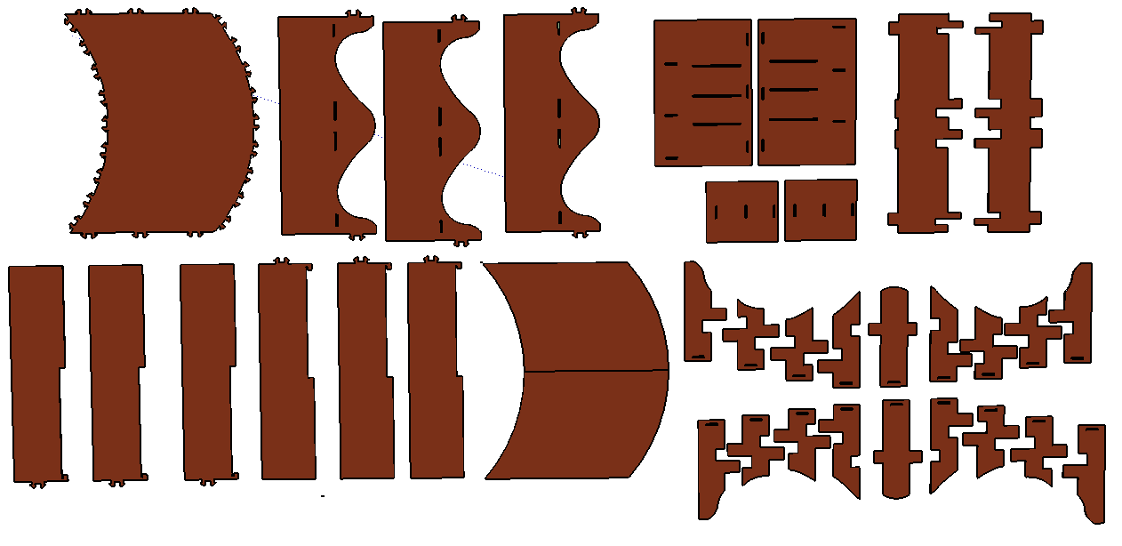
Note: images below are from second design. Details on next page. Original cutouts used these pieces.

All pieces of model in Sketchup, layed out flat on 6 boards.
All pieces, as rendered in Sketchup.
All pieces of model in Rhino, layed out flat on 6 boards.
All pieces, in Rhino, after importing and converting to polylines. Ready to cut!

With that done, we were ready to cut. We used the alignment tool to adjust the height of the laser, and cut the boards to the appropriate size using the shearing tool in the GSD fab lab. The width of the pieces was not enough to allow full coverage of the 18" x 30" bed, so we needed to adjust the spacing of the component to be closer together. Using the Rhino file pictured above, we used the laser to cut only the black layer, with a power=50% and speed=7%. We had to test this several times before we got it right - Nathan and I were both surprised that the cardboard appeared to require relatively high settings to cut, and I wondered what levels would be necessary for cutting through wood or acrylic.

Top of desk and 6 panels inscribed in sheet in laser cutter bed.
Cutting out the top of the desk and 6 panels. You can see on the right the boards did not quite fill the cutting plane.

The cutting went smoothly, other than a few pieces which were cut "off the board" due to improper alignment and the fact that the boards didn't fill the whole bed. As a final note, I also noticed at this stage in the schematic I used (an older version than in the photos above), I assumed that because the cardboard could be flipped over, it wasn't important for me to "mirror" shapes which were reflections of each other (such as the two halves of the top of the desk.) However, this failed to take into account that, as with plywood, there is definitely a more "desirable" side of sheet. One side is smoothly textured, solid brown, while the other has visible striations from the corrugations in the board, as well as a waxier texture (which I discovered while making my Halloween costume, is much more resistant to accepting paint.)

Go to next section: 3. Assembling

Download Schematics