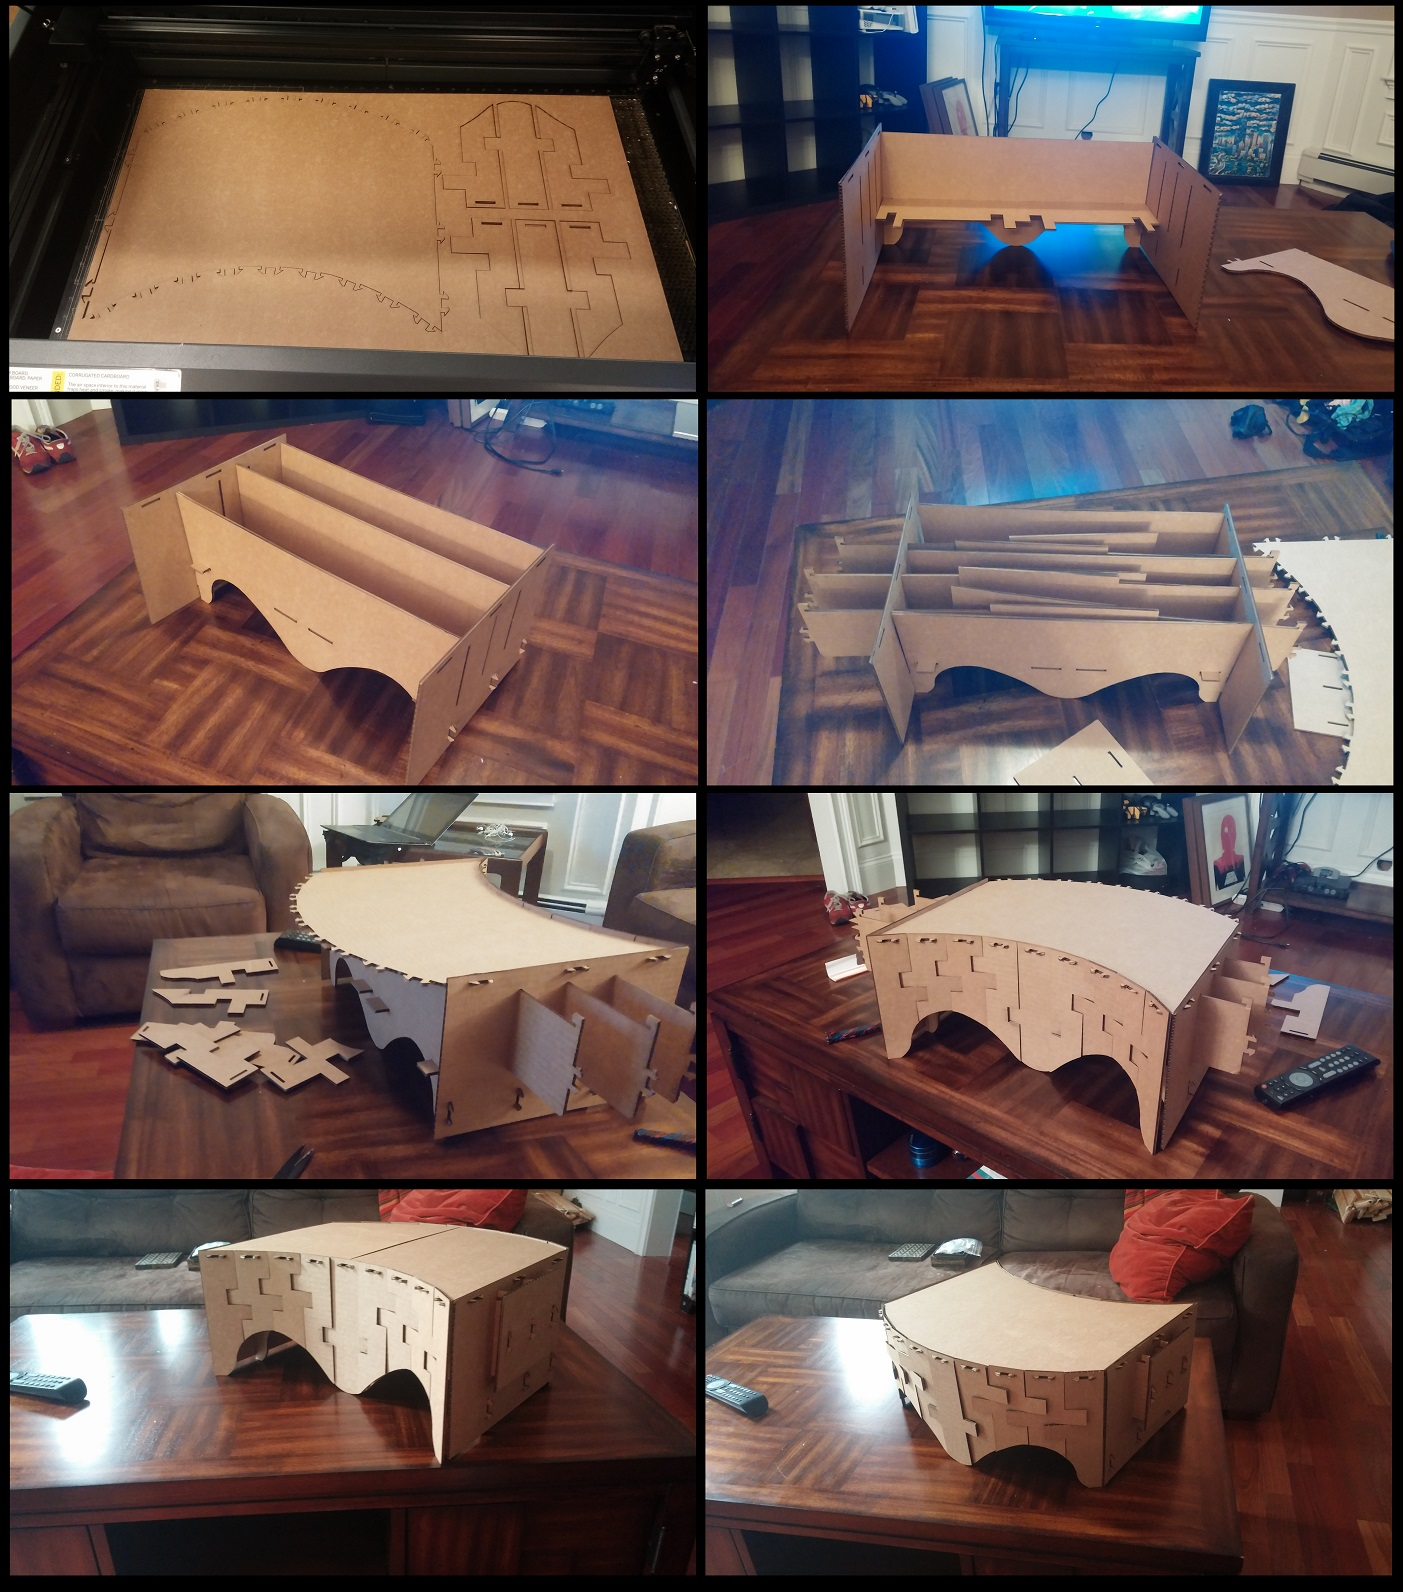
Finally, the moment of truth. I'd like to say assembly went without a hitch, but for the first design I made it became immediately apparent that the gaps I made for the joints were too tight. I could still force the tabs into them, but in general it was a somewhat of a struggle. Additionally, the toothed tabs were not at all as flexible as I'd hoped, and I ended up mangling most of them in the process of inserting them into the appropriate notches.
| «Previous Project | Back to Index | Next Project» |
3. Assembling
|
||
| Assembling the desk, prototype 1. | ||
With the desk assembled, another issue emerged. The slots I had made fot eh arms to slide through in the next wre too narrow, and extending the arms was practically impossible without pulling half of the desk with it. I could have stopped here, but I decided to made a few modifications and make a second prototype.
Designing Prototype 2
First off, I changed the width of the slots and notches to be slightly greater - I've forgotten the exact amount I increased it by, but the models linked on this page (and previous pages) are correct.
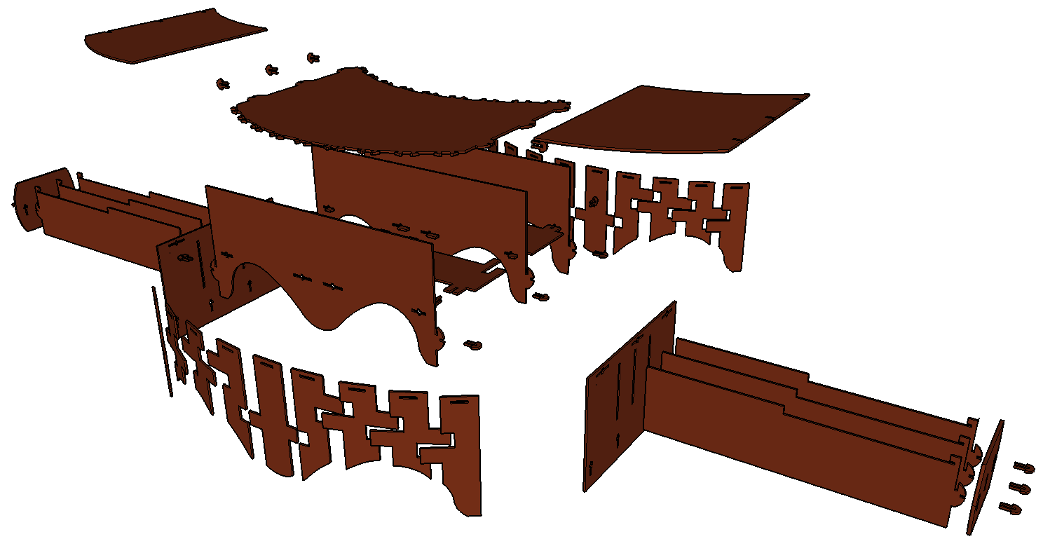
Additionally, I conceived of a new way of affixing the components of the desk together. Instead of having rectangular slots, I decided to increase the friction by adding an additional small clip-like affixing component to most of the joints. This clip lies perpendicular to the inserting tab, and is inserted through two small square apertures on the side of the rectangular slot. In addition to adding more friction, the teeth were meant to add another axis of constraint to the pieces they straddled, hopefully giving the desk a more solid and less wobbly construction.
|
||
| Exploded view of second desk design. Note the small clip pieces, and the cross-shaped slots. | ||
Assembling Prototype 2
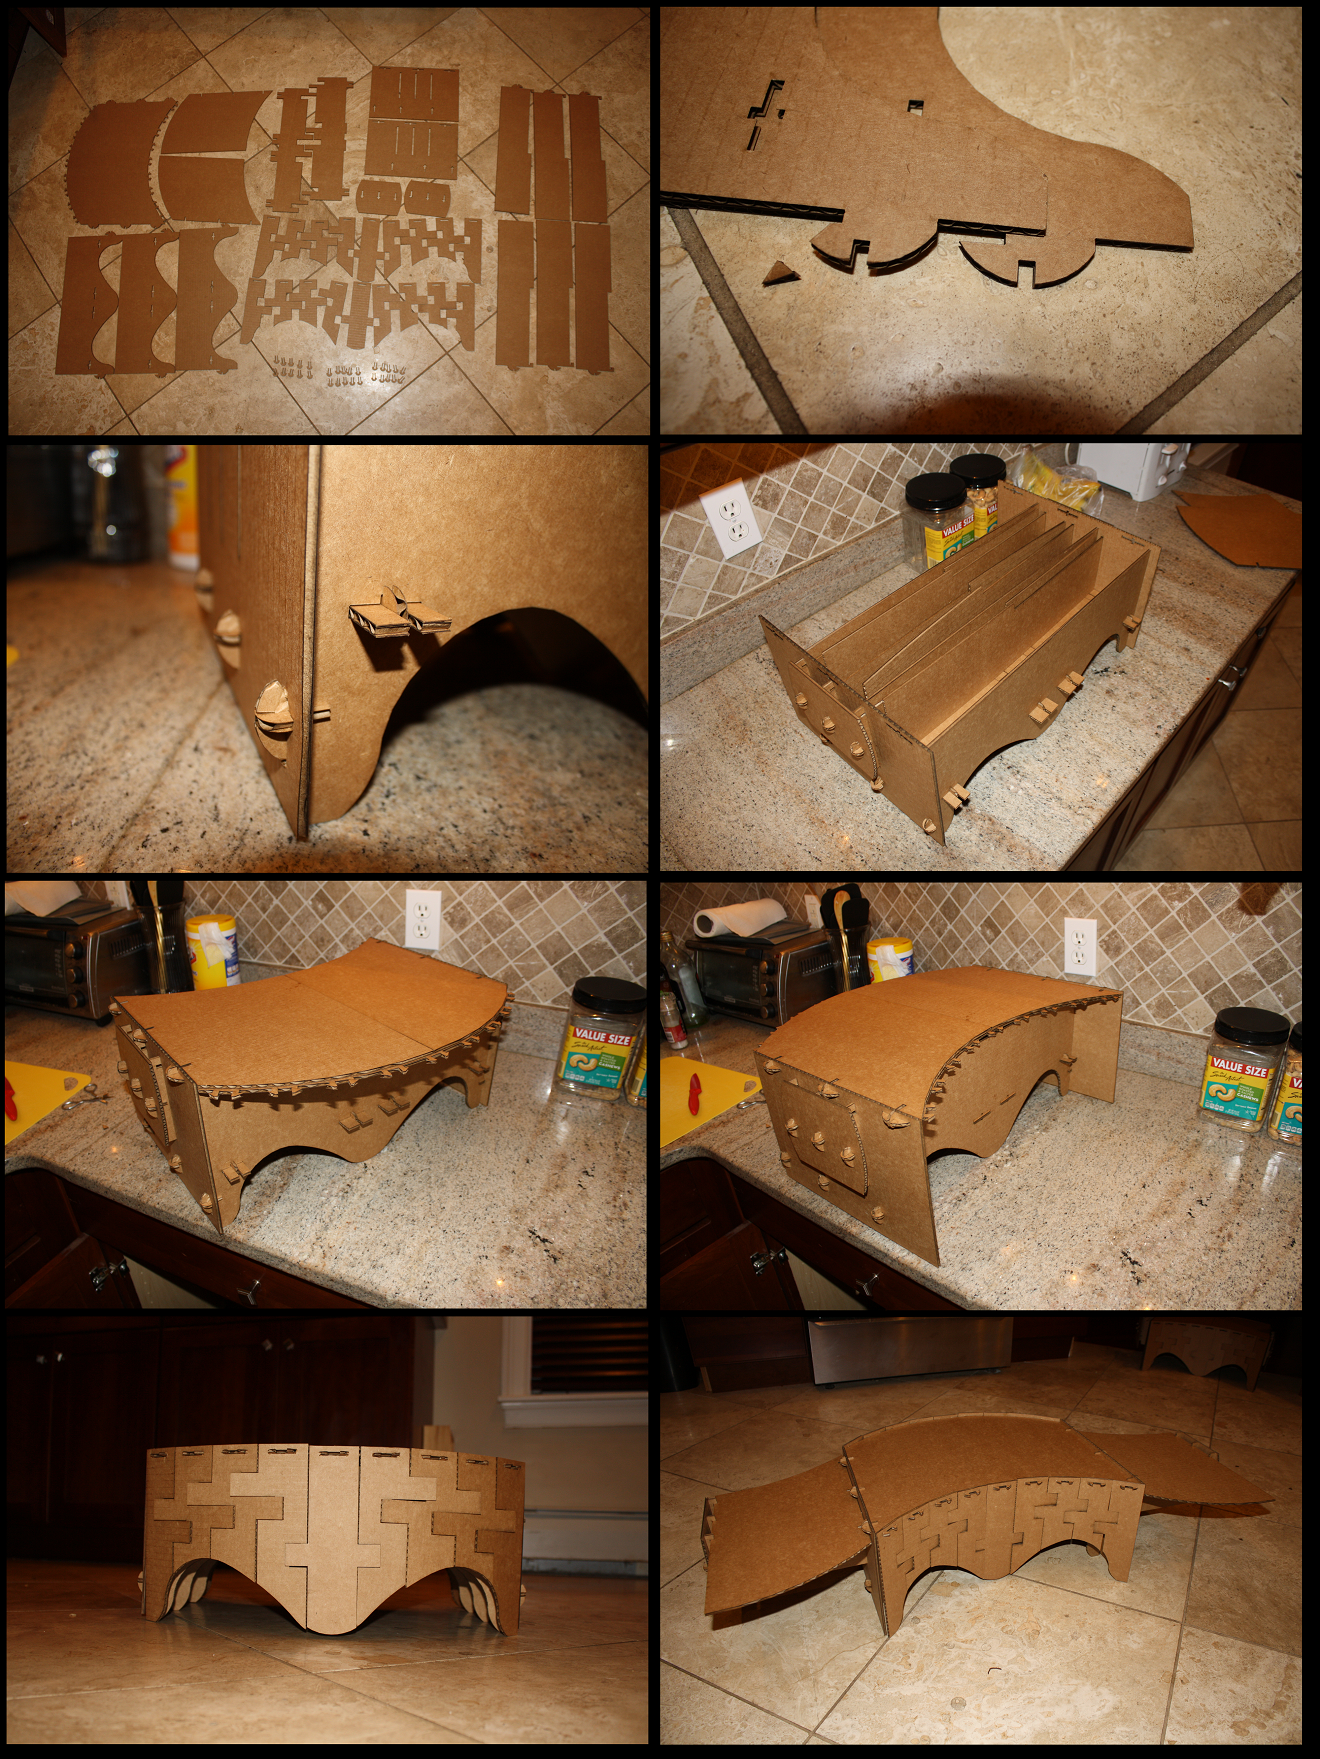
Second time was the charm. The desk went together almost without issue. One of the redesigned tabs was still to wide to fit through the slot, and so I used a pair of scissors to cut off a small corner (see photos below). The clips were somewhat fragile because of how small they were, and wavelength of the cardboard corrugations was great enough that some of them did not have corrugations and thus lacked integrity. Regardless, they definitely gave the desk a more solid construction. Additionally, the arms slid out smoothly, and were strong enough to support my hand with a mouse without any difficulty (though I would definitely hesitate putting anything much heavier than a few books on there).
|
||
| Assembling the desk, prototype 2. | ||
UX
A final word on using the desk. It fits well on my lap and is solid enough to hold my laptop with my arms resting on it. The middle, main desk component in particular is strong enough to support significant load. A few ergonomic things could be improved, including reducing the overall height of the desk so that it aligns with my elbow joint, allowing my arms to extent horizontally during use - in its current form, my arms have to reach up a few inches, which is less comfortable and makes the desk feel overlarge. That said, I'm very happy with the final results!
Download Schematics
- Download final "cutting" schematic (Rhino file ".3dm").
- Download final "cutting" schematic (Sketchup file ".skp").
- Download final "assembled" schematic of desk (Sketchup file ".skp").
- Download "design progression" of desk (Sketchup file ".skp").