This is a log of my weekly ideas and progress regarding the final project for this class!
This week I've mostly just been toying with the idea of making a dragon-staff that responds to how fast it's moving in each plane/rotational plane.
Earlier this week, I was woken up to the beautiful noises of the Media Lab loading dock. The blaring horns and roaring engines of the trucks started singing their tune at 6 in the morning, and I couldn't fall asleep again in the noisy surroundings. What a shame, because that had been my sleep-in day. That same night, I was super tired because of said morning tragedy, so I decided to go to bed early. But alas, I was not meant to get sleep that day because my dorm decided to have a screaming war - at midnight, people literally started yelling up and down the halls and across the courtyard.
I'm a princess when it comes to sleeping, in the sense that I need the perfect sleeping environment to get some good shut-eye - chilly room, a blanket (not too hot inside the sheets though), dark room, I have to be on my back, the mattress should play nice with my body, the pillow can't be too fluffy or too thin or my neck gets sad, and most of all, I need a fairly quiet environment.
Given that I absolutely love living in East Campus, there isn't too much I can do about the noise level of my surroundings. So I decided that maybe I could do something about it. What if I just wore noise-cancelling headphones to bed? That would be slightly uncomfortable, but I could probably make do. But would that make me miss my morning alarm? What if I created a headphone that would drown out surrounding sounds, but vibrate on my face to wake me up? This sounds like a great project for my How To Make class!
So I did some research.
There are two types of noise cancellation: passive and active. Passive noise cancellation is the most common and easiest type of sound reduction; headphones simply have a padding or some material that absorbs sound before it reaches your ear. It works well for things with unpredictable things and varying pitch, such as talking. Active noise cancellation works because there's something in the headphone that emits sound waves exactly 180 degrees out of phase with the incident sound wave. Because the two waves are out of phase, they cancel each other out. This works best on long, loud, low frequency sounds, such as an airplane's drone. There are a lot of details that go into making such a device work.
For my purposes, I would probably use passive noise reduction. I could maybe make some headphones during the molding and casting week. I also need a way to make the headphones vibrate at the right time. The crystal might be good for keeping track of time, which I will try to encorporate into my next circuit.
This week I've been thinking about going back to my original idea of a speech therapy device. I thought that maybe a phone application would be a better implementation of the idea, but creating a device for it could also be cool, especially because it would give kids a physical object to hold and use.
Apraxia of speech is a speech impediment that makes the person switch up letter sounds, and oftentimes, they can't tell that they are doing it. For example, my brother used to mix up his hard "c" sound and his "t" sound. So "toy" would become "coy", "Tarzan" would become "Carzan", and "talk" would become "calk". I worked with him to overcome this (now he can say all those words perfectly!), but a lot of times, he couldn't hear that he was doing it wrong until I recorded him and made him listen to it.
So my idea is to make a device that will play some words - either given or user defined - in a Siri-esque way maybe. Then, the user is recorded repeating those words. Both the original prompt and the user's recording is played back, and a correlation score is given (out of 100%) to show how similar the two are. The data is tracked over time so the person can see their progress.In my next circuit, I might try using a microphone to see if it can pick up and record words.
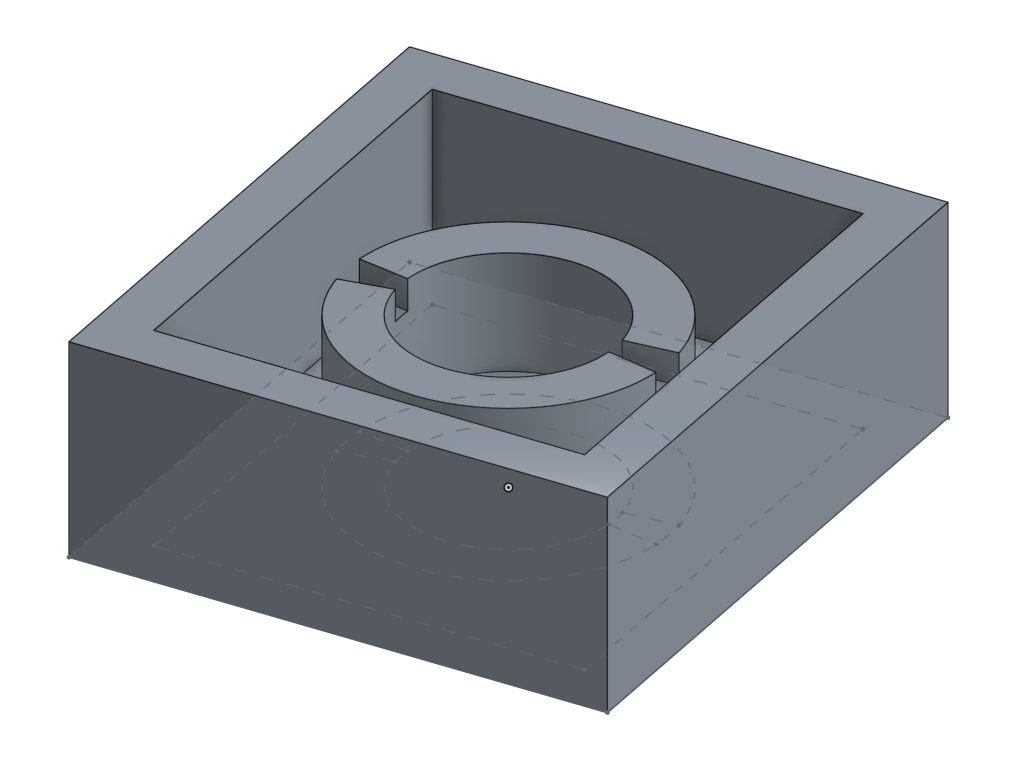
This week for Molding and Casting I was going to make an endcap for a dragon staff; I didn't realize that the amount of wax we get would be waayyy to small for this purpose. This is also the week that I started getting behind in the class. I'll talk about how I encorporated a mold in my final project later on, when I actually did it.
I've been thinking a lot about my work in this class, and how I would do a lot of things differently this semester if I could do it again. Having a lighter courseload overall would've given me more time to spend on this class; right now, all of my classes require a lot of time, and while I was able to mostly keep up, I didn't fully delve into any project as much as I'd have liked. Also, I really should have been better about documentation; that I can fix by documenting my final project progress better. Of course, I should have also kept up with the class, but I can catch up by making sure I encorporate everything into my final project from here on out. If I take a class like this in the future (self-driven and project based), I will choose a project at the beginning so that I have a lense with which to look at everything, and I'll document it as I go.
I had an idea a few weeks ago to make a scent-based alarm clock; instead of waking you up by beeping, it'll wake you up with the aroma of mint. For me, this would be a gentler way to wake up, and since I have a sensitive nose (and love good smells!), it could hopefully be powerful enough to wake me up. And since I have trouble falling asleep, maybe I could make it have a sleepy-time smell at night (EDIT: the internet tells me that lavendar is the most effective sleepy-time smell).
One way I could implement this is to melt a candle a few minutes before the wake up time. Prior experience tells me that a flame is not necessary for a candle to emit its smell; melting the wax is enough.
I'm finally starting my final project today. I've decided to go with the scent-based alarm clock and to stick with it - even if I doubt its coolness or my ability to implement it midway, I'm going to push through until the end. I have a lot to get done, because I've fallen behind with the electronics weeks. Unfortunately, the lab is not open this Thanksgiving weekend, but I'm going to spend the next few days 1) planning what still needs to be done, 2) Design some boards for the input and output projects, 3) Order supplies for the project, 4) Catch up on documentation.
I looked into things that have been done, and surprisingly (or unsurprisingly? who knows), not a lot has been done. The most significant clock that does what I want to do is the SensorWake , which uses capsules of different scents that you can choose from to wake you up. This clock has a backup alarm in case you don't wake up in 3 minutes, but doesn't have a scent to help you fall asleep. I looked into ways for me to emit a scent, including capsules, reed diffusers, candles, air fresheners, and essential oils. Since I want something that I can make myself, I think I will go with my original idea of melting a candle.
Final Project: A-Scent Out of Bed Concept: An alarm clock that, instead of noise, emits a scent of mint to help the user wake up. Additionally, it smells like lavendar when the user wants to fall asleep. Technique: heat up candles at specific times For full functionality: I need a hot plate to heat the candles, and a way to heat the plate. Also, it would be nice to have a time display, and a way to monitor the temperature. It should also be able to turn off at a certain time. A control board on the clock would be nice so the user can more easily set the time and wake up time. Ultimately, I might want to make a mobile interface with it, given I have enough time for any of these things.
I looked over past projects to see what could be useful for mine. The sous-vide cooker heats things up, which I'll need to do. I also like Morgen Sullivan's remote heat sensor ; for my input, I'll probably do something similar. And according to Ben Yuan from my lab, I'll probably need a MOSFET to control current to a simple heat circuit. As for the heat pad circuit itself, I could do something like this, although I don't know how hot that would get - candle wax melts at 100+ F.
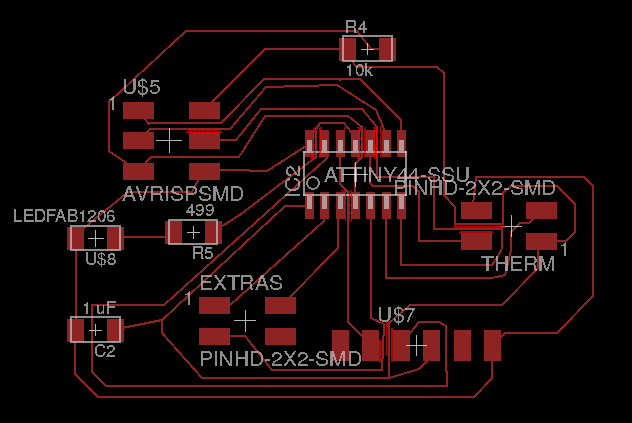
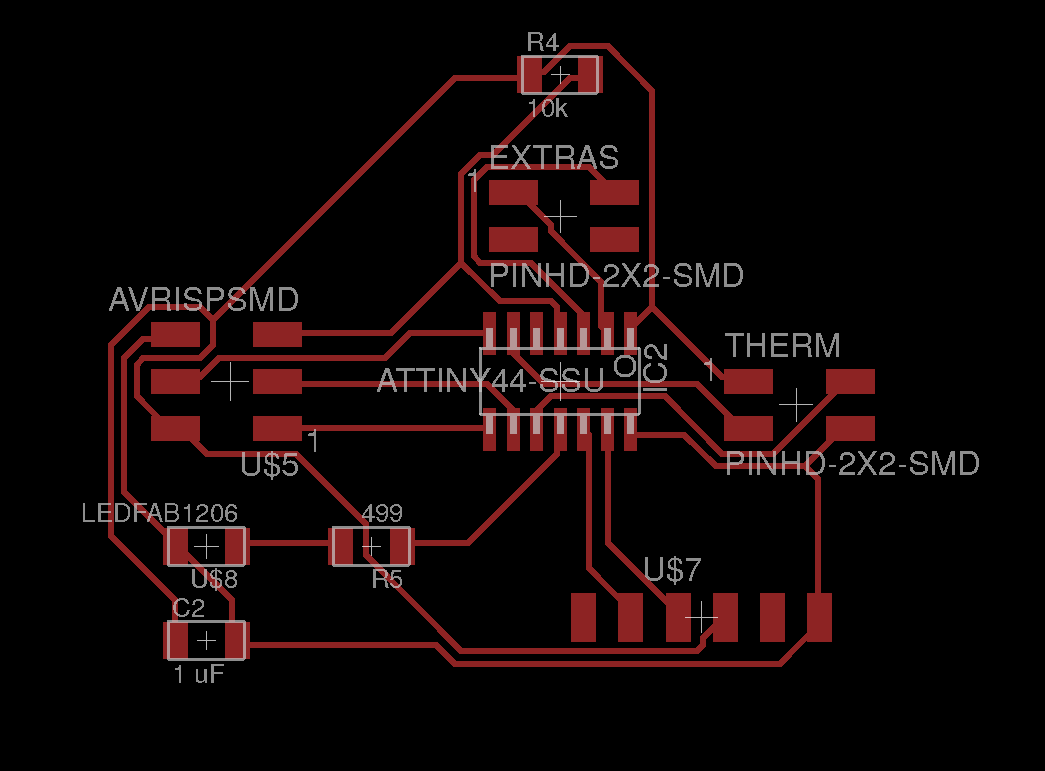
Spent the entire day (again) trying to program my thermister. It didn't work. And then, somehow, it did! I almost started crying.
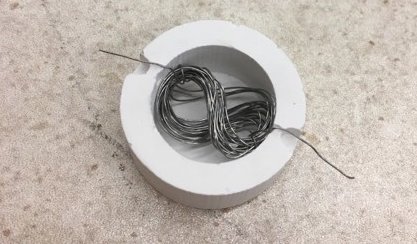
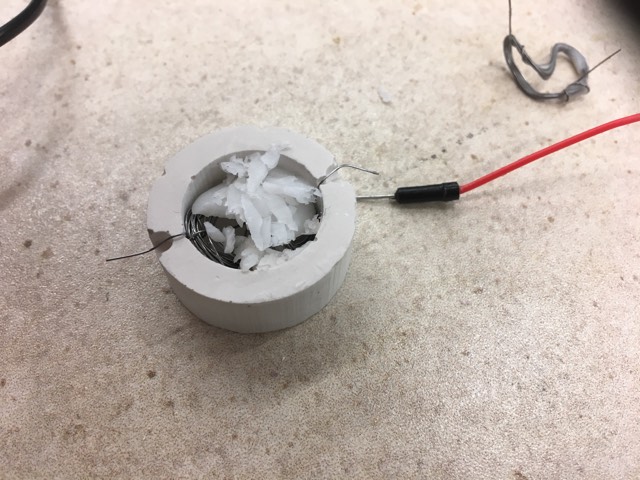
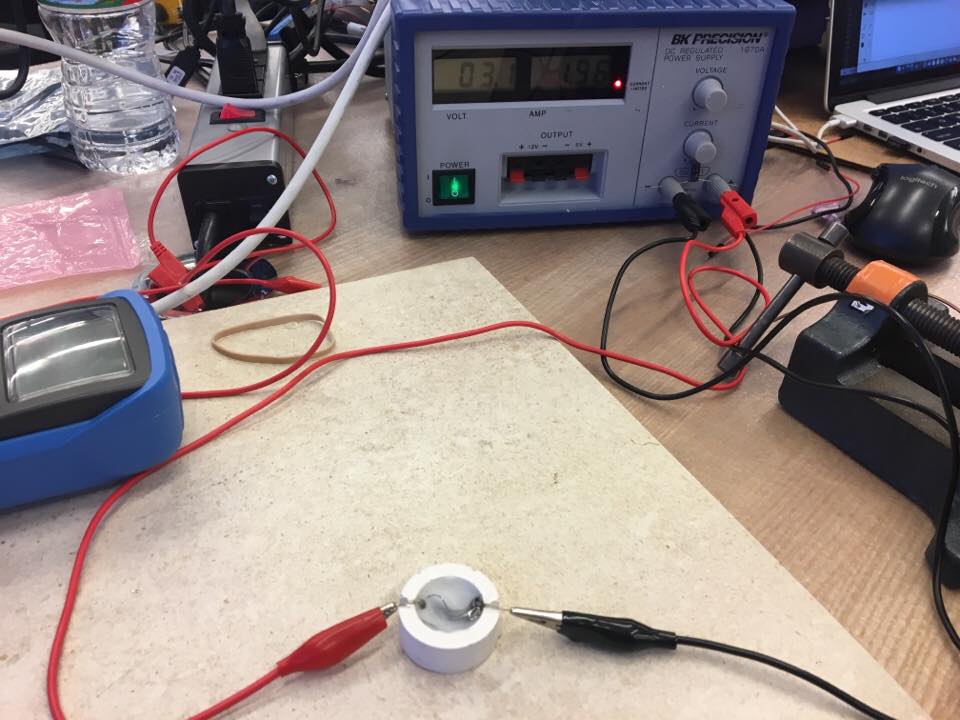
The thermister took a LOT longer than expected - two and a half weeks in total! In hindsight, maybe I did suffer from demand-side time management. I have a lot left to do - get the LCD screen to work, make a board to control melting wax, create a physical case for the alarm. I'm afraid that the LCD will take just as long.I worked on the output device for most of the day. Then, I started doing some tests with the wax to see how much current I would need to melt it. This was really fun, and the melting candles smelled so nice! People around me said they would love waking up to it, so that's definite a win. Today was a really good day.
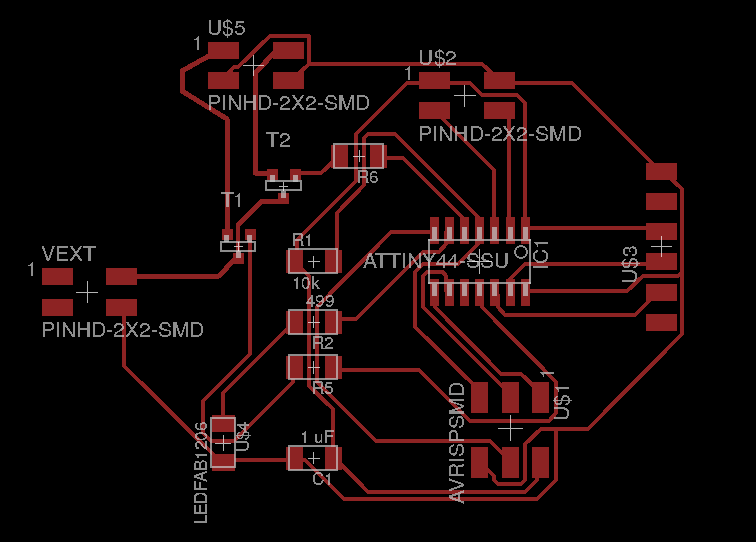
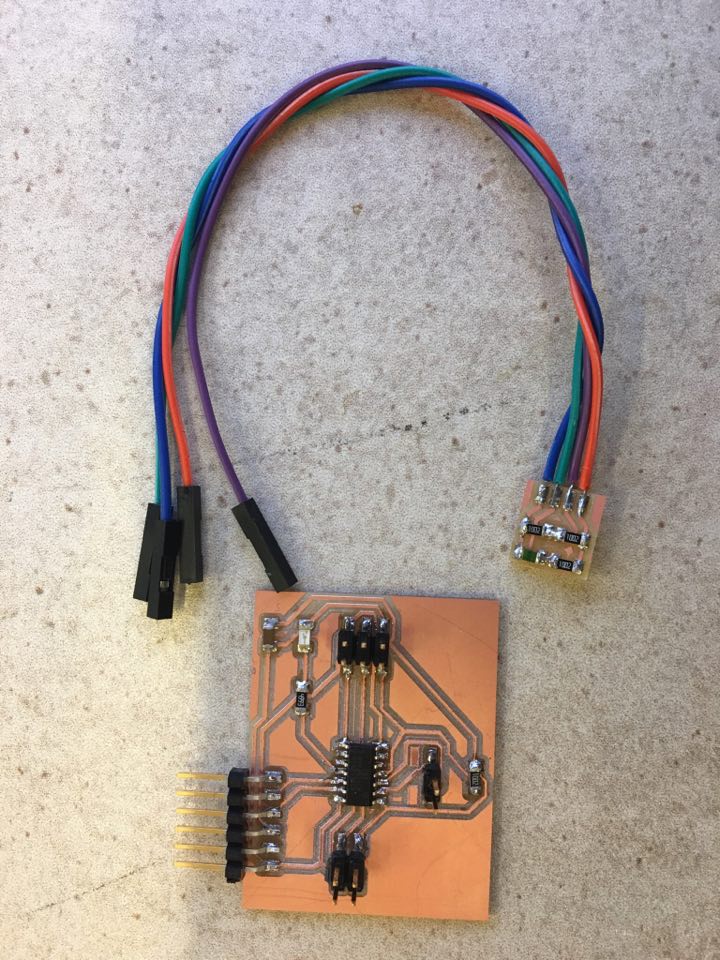
 Then I stuffed the mosfetboard. This time, I checked all the connections before even trying to program it; I felt like I've really grown as an engineer throughout this class. Sure enough, I found an unconnected GND pin. After fixing everything, I got the wiring set up for the entire project - it took a little longer than expected, but was kinda fun. When I tried the board however, it didn't work. I debugged for a little while, but then decided to call it a night on the project - I still needed to finish documentation and study for a final.
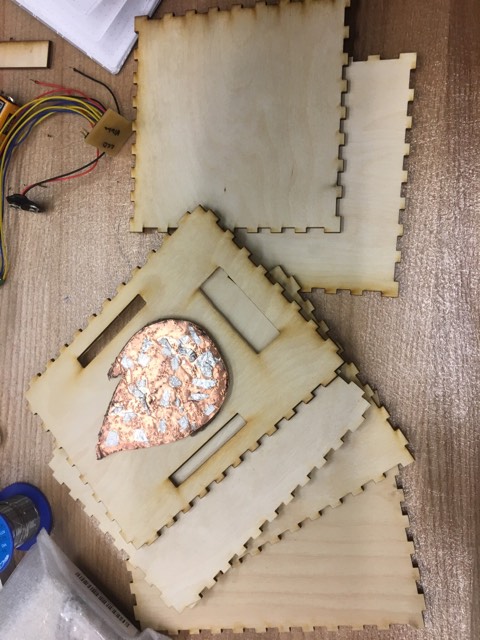
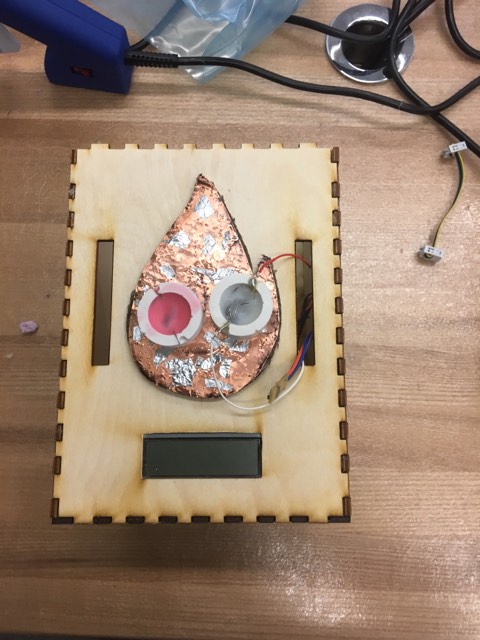
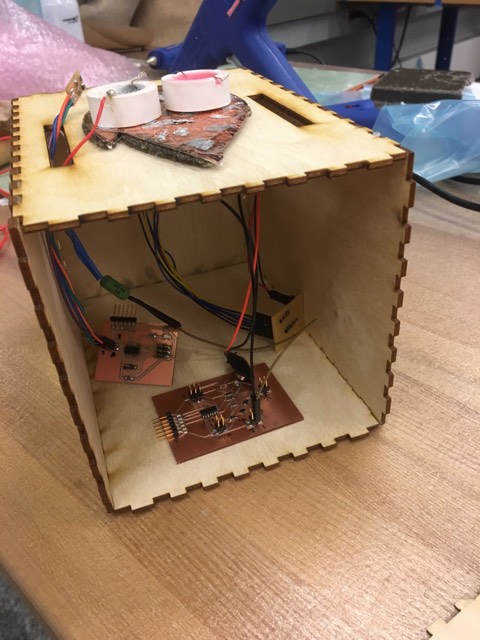
The final thing I did on this day was to assemble everything. This project doesn't look like much, but it represents a lot from this semester. It shows how I've grown as an ideator (the final project idea is simple yet unique), and how I learned to stick with an idea. I learned a lot from this class, and especially from this project, even though I don't have a ton of "cool things" to show for it. I also now have a more project-oriented mindset, and have a better approach for future projects - which I definitely plan on doing!
Then I stuffed the mosfetboard. This time, I checked all the connections before even trying to program it; I felt like I've really grown as an engineer throughout this class. Sure enough, I found an unconnected GND pin. After fixing everything, I got the wiring set up for the entire project - it took a little longer than expected, but was kinda fun. When I tried the board however, it didn't work. I debugged for a little while, but then decided to call it a night on the project - I still needed to finish documentation and study for a final.
The final thing I did on this day was to assemble everything. This project doesn't look like much, but it represents a lot from this semester. It shows how I've grown as an ideator (the final project idea is simple yet unique), and how I learned to stick with an idea. I learned a lot from this class, and especially from this project, even though I don't have a ton of "cool things" to show for it. I also now have a more project-oriented mindset, and have a better approach for future projects - which I definitely plan on doing!
| Component | Source | Cost |
|---|---|---|
| candles | Amazon | $10.00 |
| wood | scrap pile | $0.00 |
| composite material | EDS | $5.00 |
| Plaster of Paris | EDS | $5.00 |
| Kanthal Wire | Amazon | $8.00 |
| Batteries (9V and 3V) | EDS | $5.00 |
| Circuit boards (including 3 Attiny44's and assortment of small components | Digikey/EDS | $20.00 |