Week 10: Composites
This week, our assignment was to make something out of composite materials. In lecture, I was thinking about composites and the idea of taking two materials which together become very strong. And I thought it would be cool to make something very strong/hard out of something seen as weak. So I thought I'd make 'brass' knuckles out of thread. It would look like thread had been wound around your fingers, when in fact it was very rigid. I did not succeed in this, but I did succeed in finding new ways to not make composites.
Designing the Knuckles
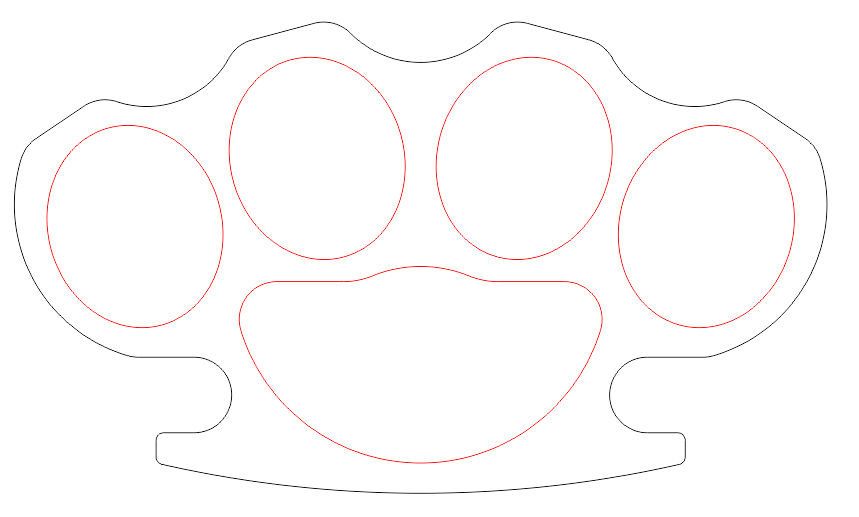
I found the design on GrabCad. It was more detailed (with fillets, etc.) than I needed so I intersected the cross section with a plane to get the outlines, and then used that to make the .stl files for cutting my molds. All files are at the bottom of the page.
Method 1: Silicone Molds and Thread
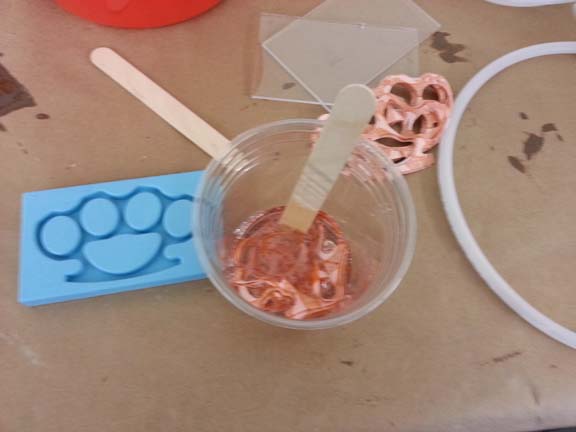
Because of the shape of the knuckles, and wanting to make multiple iterations, I wanted to make silicone molds. I used Week 6 methods to cut the wax mold negative (so, part positive with some edges) and then cast a silicone mold out of that.
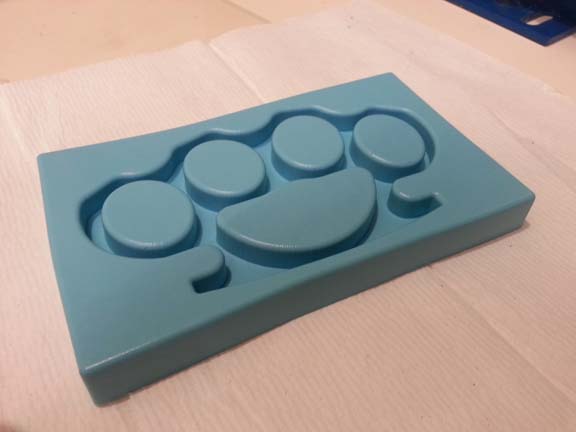
The fiercest paw print
I went to Gather Here to get some thread for winding into the mold. I had wanted silk because the idea of silk knuckles appealed to me, but chose embroidery thread because silk was way too thin, and would have taken forever to fill the mold. The embroidery thread still took several hours. My first choice would be to impregnate the thread with epoxy then fill the mold, but this wasn't reasonable within the pot time of the epoxy. So, I used a syringe to put epoxy into the mold, and a tongue depresser to push it further in and make sure there was epoxy throughout the mold
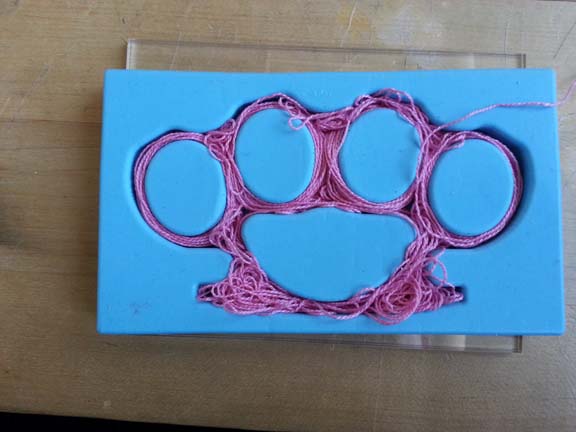
A (several hour) labor of love
Kneading epoxy into the mold with thread
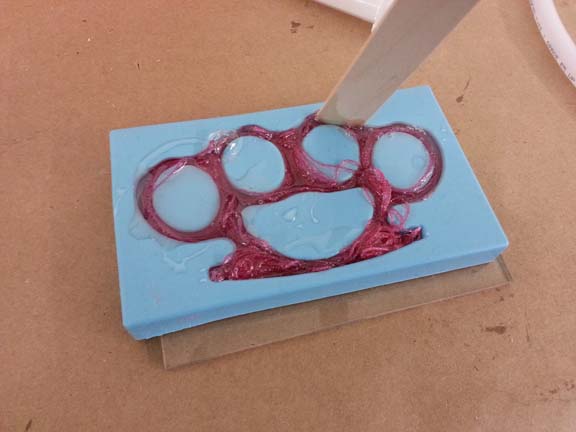
I wrapped the mold in breather and bleeder fabric, put two pieces of acrylic on the outside, and weighted it town with two containers of hydrostone in the lab. I left it for about 24 hours, but had very poor results. The excess epoxy hadn't been wicked away, it was still quite mushy. I left it for several more days with breather, bleeder, and pressure, but not much changed. I did not bring these in for show and tell because it's still sticky and will probably make your kids come out with like seven fingers.
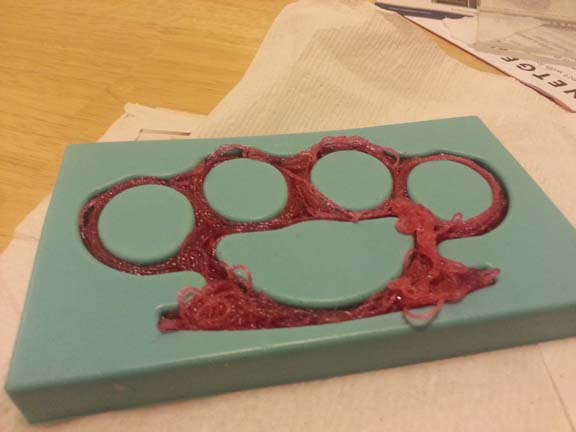
No vaccuum, too much epoxy
Method 2: Silicone Molds and Fabric
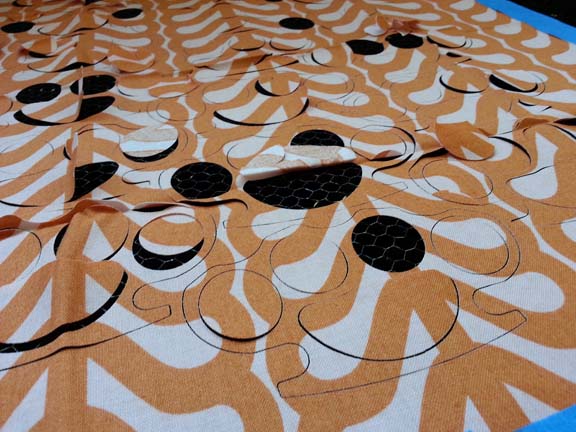
While winding the thread into the mold, and thinking, "this is a fool's game", I decided to try this with fabric. So I went back to Gather Here and got a few 'fat quarters' which are the end of bolts of fabric - like scraps. But I found that one of these gave me enough layers to more than fill the mold, which was handy. I had never cut fabric on a laser cutter before, and had to do some new setup for it to work. I made sure to tape the sides taut since it wouldn't stay in place. I also needed to cut out the inside features before the outside ones. To do this, I used color mapping; both colors had the same settings of 75% speed at 10% power.
Colormapping helps you cut things out in the right order
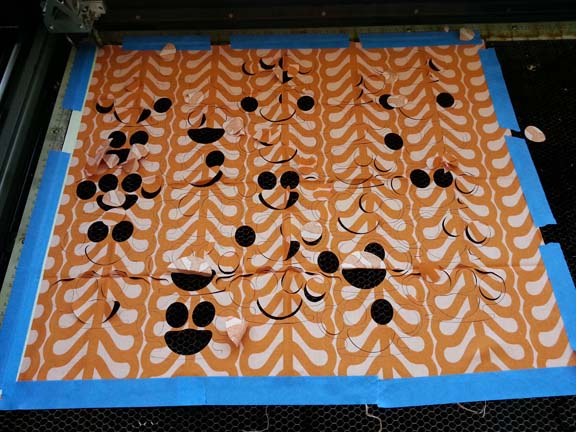
Tape the fabric taut to prevent terrible things (iron it for even better results)
Fabric will fly away because of the vacuum
I layered these, and put them into another silicone mold by impregnating them with epoxy first, wringing the layers, then pushing into the mold using a tongue depresser.
Martha Stewart would be proud

Still difficult to get out excess epoxy
Like the thread, I wrapped this mold in breather, bleeder, two pieces of acrylic, which I pressed together with weights and left for about 24 hours. When I took this one out, it had done better than the thread, I think because I was able to get rid of more of the epoxy. But it still hadn't set sufficiently, and at time of this presentation isn't ready to be used by any craft store thugs.
Better than the thread, but still not as rigid as I want
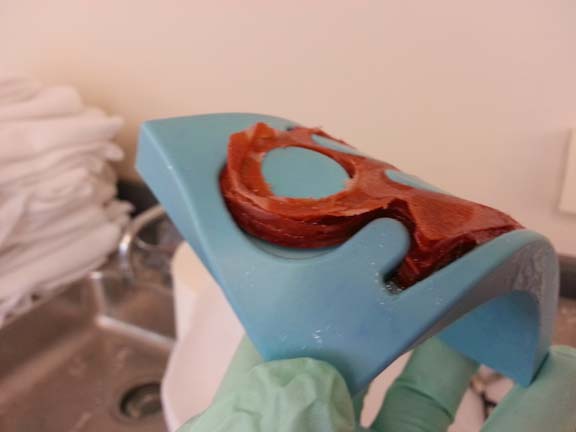
Method 3: Wax Mold
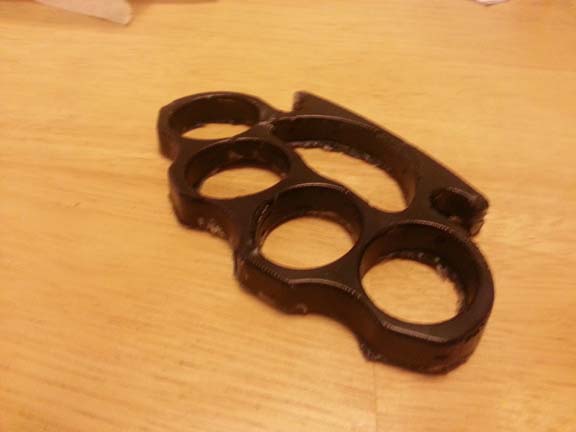
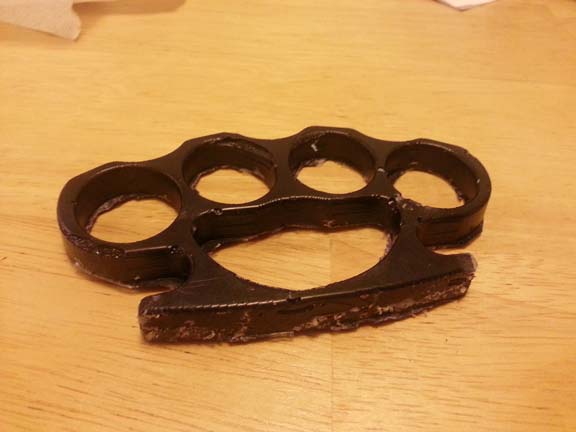
Finally I came to my senses and admitted I needed to pull a vacuum on my part for it to work. I cut another wax mold (a negative of my part) on the Modela, and used the same fabric method as before. This time I did more fabric layers at the same time - putting the layers on my fingers (like knuckles), rubbing my gloved hand around in the bucket with epoxy, and then squeezing the epoxy out by making a fist and using my other hand to squeeze the fabric outside my fist. I put these layers in a wax mold, wrapped it in breather and bleeder, and put it all in a bag to vacuum seal for about 15 hours. When I took it all out, it was clearly more set than those in silicone molds, but I had to hack away at the mold a little to get the knuckles out, despite drafting the mold sides and using mold release.
You've got to ask yourself a question, "Do I feel lucky?"
Well, do ya, punk?
Untried method 1: a Smarter Mold
While my silicone molds had been curing (or, not curing as the case became) I thought about how to make a better mold. Something flexible so I could get the part out. Something rigid so it would keep its shape in the vacuum process. I thought - I could have a mold that sandwiches smaller and smaller - on pins, with a compressing spring pushing the sides together as vacuum sets in and epoxy is pulled away. I did not have time to design or make this mold, and I think I'd want to try this second method (below) first.
Untried method 2: Cut after molding
On Tuesday, after seeing Sophia's project, I realized I had done things in the wrong order. I wasn't able to adequately vacuum bag the mold, and this prevented my piece from being very strong. I should have vacuum formed a sheet of material (fabric layers, bunched thread) and then laser cut the shape I wanted. This would have saved time threading in a mold, and I'd have a much better part. I know this only works for flat pieces, but it would have worked for my project. Sophia said the piece got a bit 'melty' - so it had to cure longer. I imagine this would work best with thin pieces, not just those that take an extruded shape.
Files
- Molds
- Laser Cutter file (75% speed, 10% power)