Week 11: Output Devices
This is my little brother Tom... (celebrating the Giants World Series win)

This is how I see him...

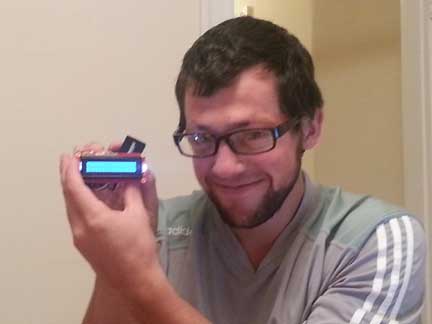
Clearly he needs some sisterly advice. Wouldn't it be great if he could carry me around in his pocket all the time? Well now, he kind of can! Introducing the INSTA-SISTER 5000.
*middle brother not included
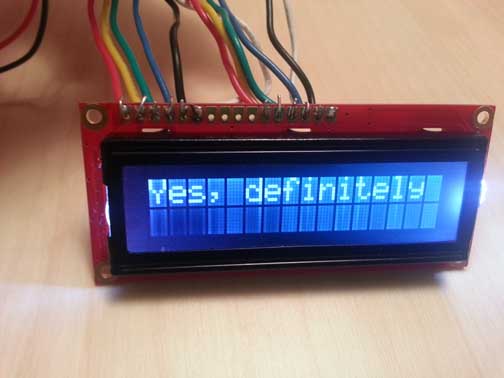
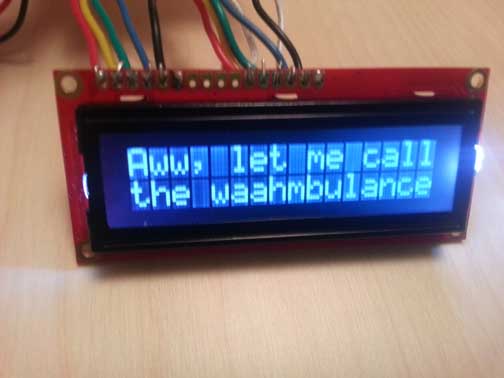
The INSTA-SISTER 5000 fulfills three of the most important sisterly duties. Push the right-most button and it's an all-purpose magic 8 ball, ready to answer all your yes or no questions.
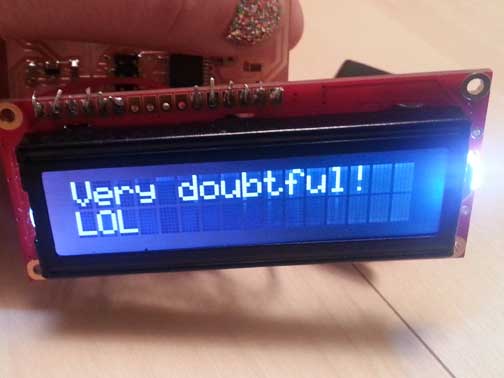
Push the left-most button, and it will give you little peptalks when you're feeling down or unsure about yourself.

Warning: peptalks are not always positive and uplifting, because sometimes you're just being a little whiner baby, Tom.
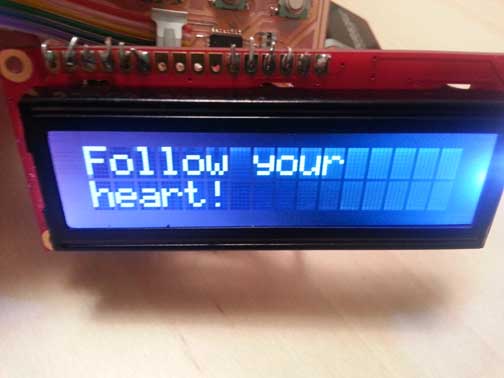
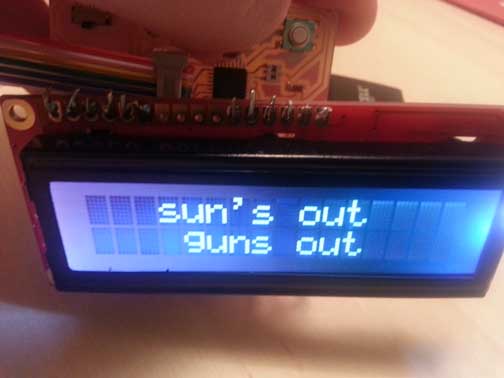
Lastly, are you going out in that? Not with the INSTA-SISTER 5000 you aren't. Middle button gives you wardrobe advice.

INSTA-SISTER 5000 now available to anyone with a sibling who knows how to fab and program a PCB
How I made this bad boy
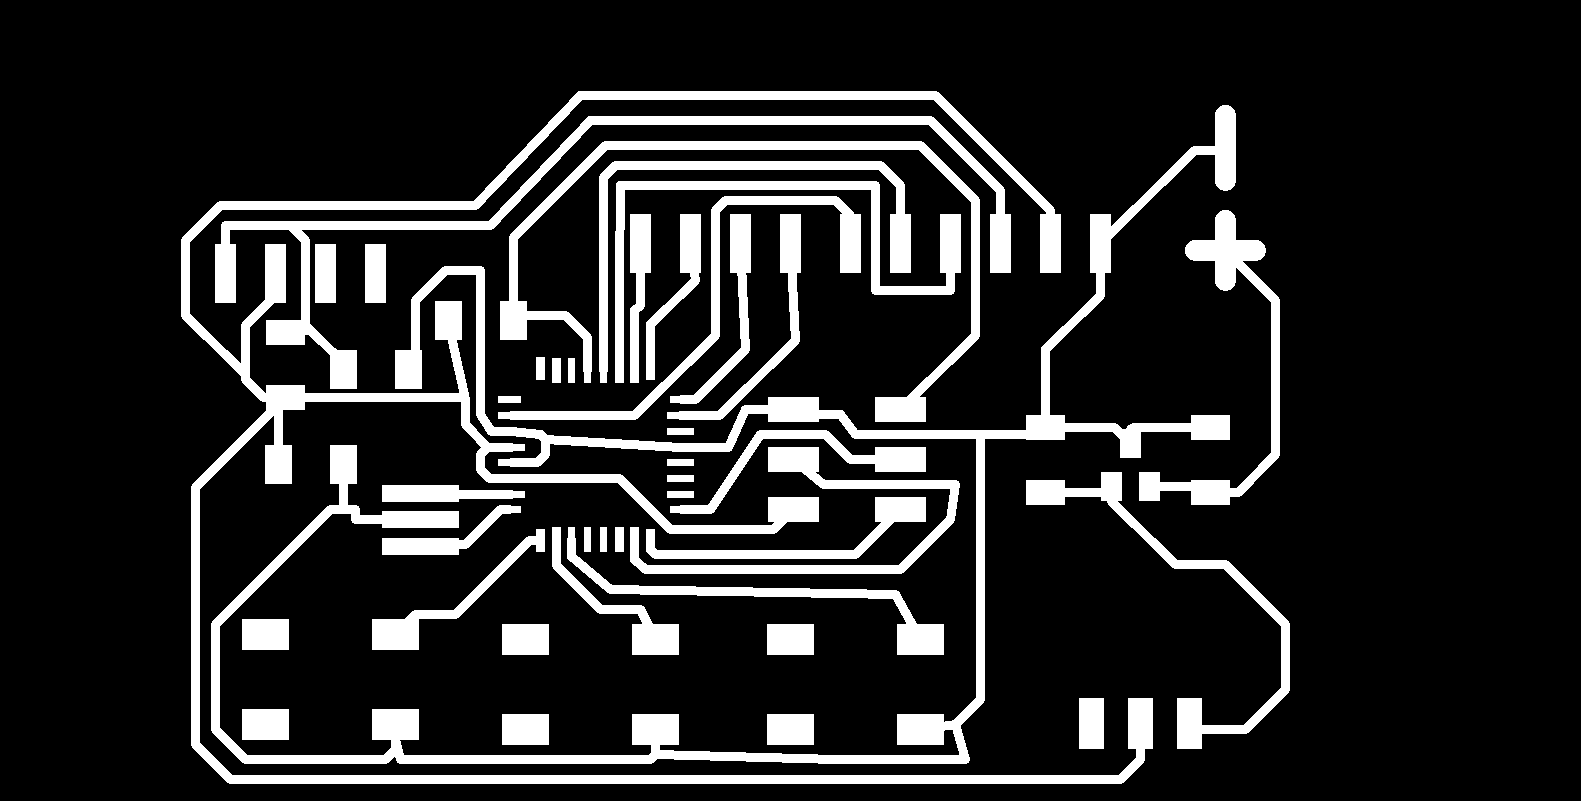
Well, I had some help. I worked off a very similar project. This person used a common LCD library published by Peter Fleury, and I read a lot of this tutorial. I have attached all the eagle files and code you might need, which I have heavily commented so you can see what I changed in the LCD library (it needs to be changed for your hardware). I used three buttons, like I learned for Week 9. And outputting LCD messages was a matter of configuring the lcd.h and lcd.c files correctly. I used Atmel Studio to compile the programs, then make to put it on the board (since I don't have an avrisp mkII of my own). I tried to use makefiles but was unable to compile the libraries correctly using it.
What I would change
First - contrast! The data sheet calls for 4.2V on the backlight, and 0.6V on the contrast. Using resistors to make voltage dividers, I was able to do contrast, but clearly 4.4V was too much for the backlight. I should have ordered potentiometers, to make it easier to set those voltages and read the screen, though it works marginally now. Or better yet - maybe add potentiometers to the fab lab inventory?? Second - I wish I'd been able to use Makefiles for the whole thing rather than Atmel then running in make:
avrdude -p m328p -P usb -c usbtiny -U flash:w:Magic8.hex -F
I've linked some Makefile tutorials below that I'd been working on to figure out how to link the lcd.h and lcd.c libraries to my c file. Third - use better connectors! I had trouble routing the board with those 2x5 headers, so I just used long connectors and soldered directly. As a consequence, the board is quite fragile and leads can become dislodged. I need better cable management. Lastly - make this look much nicer, like with a case and larger buttons, etc. I'm proud of it now, but I had hoped to be done sooner so I'd have time for fit and finish.
Tutorials (for my own reference later) on Makefiles... I really should be able to figure this out
Files
- Eagle
- Programming (done according to Embedded Programming, with Week 9 adjustments for ATmega328)