Off-axis angle sensor
Motivation
For Baksi 3, I need to make my own angle sensors for the RZ-axis motors. The reason is that the lead screw goes through those motors. The AS5048 magnetic angle sensors I've been using need to be on-axis.
Attempt to hack the existing sensor
This is as far as I could take the AS5048 sensor off-axis and still get a reading:
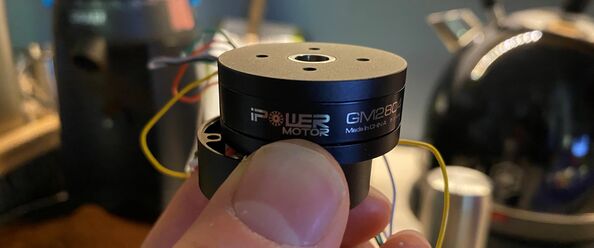 The sensor is in the center of the bottom casing. This is almost far enough to get the lead screw through, but the signal was unreliable in this location. It's far outside the spec in the AS5048A sensor datasheet.
Goal
I'll make an off-axis optical angle sensor using an infrared emitter and receiver.
According to this video, the magnetic sensors that I'm currently using have a 0.35° or 10-bit accuracy and 0.022° or 14-bit resolution. That's what I'll aim for with my custom made sensor.
IR sensor board
Here's a simple test board to get started with optical sensing.
Design
I used the IR phototransistor from the fab library twice, to represent both the IR emitter and the phototransistor. For this board I'm using obsolete parts from the 2012 Fab Lab inventory that still work really well; the OP280KT IR emitter and the matched OP580 phototransistor. They are have a more square shape than their modern counterparts, but I checked the datasheets and their footprints are close enough to what I have in the KiCAD library now.
I looked at the phototransistor board on the Xiao page of the Fab Academy web site of Adrian Torres. It has a 1kOhm resistor on the IR emitter diode and a 10kOhm resistor on the IR sensor. I did the same here.
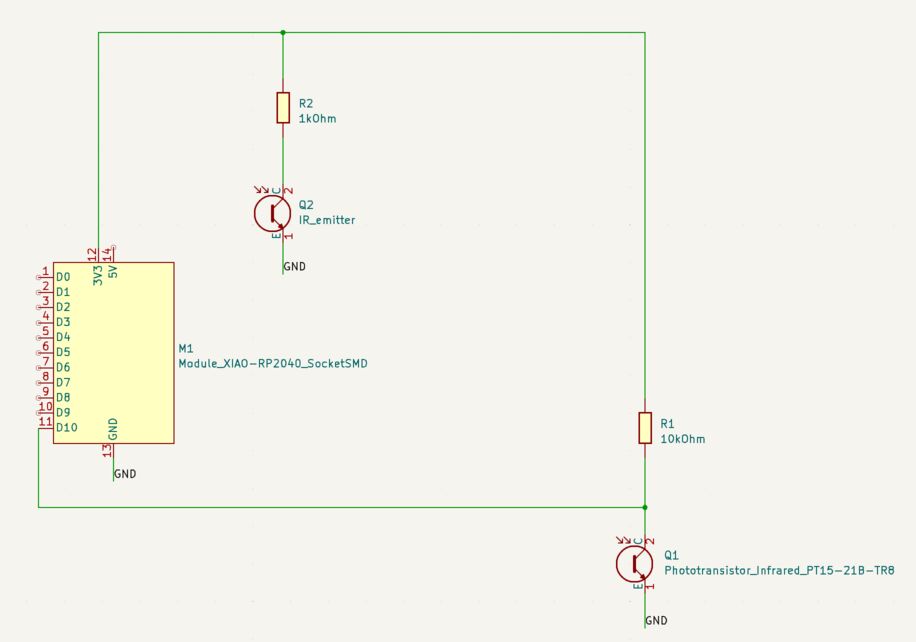 My Xiao IR sensor schematic.
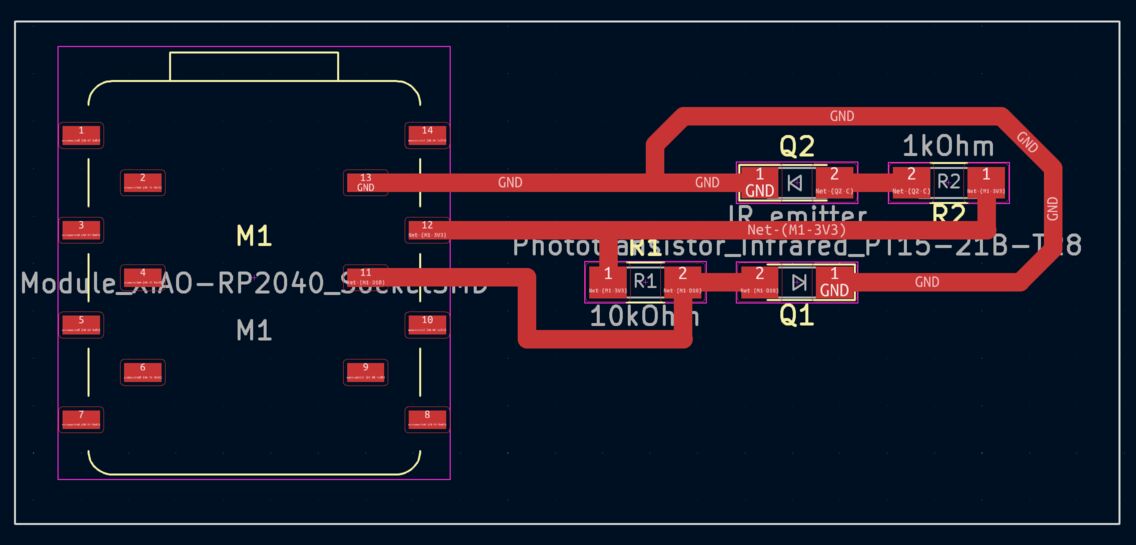 My Xiao PCB design for the IR emitter and sensor.
Fabrication
The milling went well using Fab Modules and the Roland Modela MDX-20, but the edges of the traces are a little bit rough. That's a sign of wear on the 1/64 inch bit.
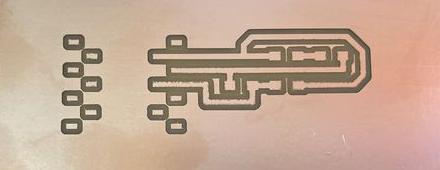 Milling the traces of the IR sensor board.
Then I milled the board outline with the 1/32 inch bit.
 Milling the outline of the IR sensor board.
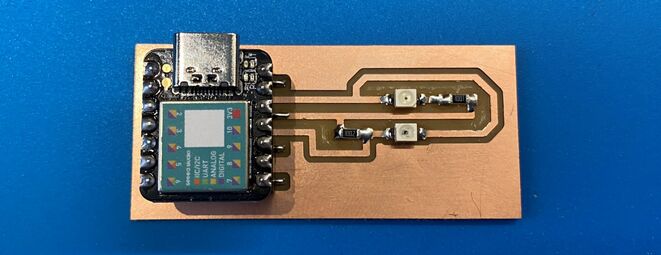
Here's how the board looks:
 The IR sensor board. Instead of soldering the Xiao onto the board I'm using pin sockets.
 With the Xiao SAMD21 on board.
Test
Here's a video of the sensor readings. It works quite smoothly:
The only problem is that the IR emitter isn't affecting the reading very much. I got similar readings when reflecting the IR light off a white and a black piece of paper. I guess that the IR light is leaking out of the sides of the emitter and straight into the light sensor.
Todo
Put a 3D printed silo around the IR emitter so that only the reflected IR light hits the sensor.
Design files
PCB milling files for mods CE: