Sam Spaulding
How to Make (almost) Anything
Week 10: Input Devices - Capacitive Touch Sensor
Input Devices
Another week of programming! This time we were developing sensors - an important topic for any aspiring roboticist. I decided to work on one of Neil's "suggested projects" - a capacitive touch sensor based on step-response.
Basics of Step Response and Capacitive TouchThe basic idea of capacitive touch is that capacitance is a function of both the area of the plates and the distance between them. Therefore, if we can measure the capacitance of a component, we can measure when that component is slightly depressed (i.e. touch) by looking at the change in overall capacitance. In practice, this is accomplished by something called a step-response - the controller sends out a step pulse and measures either how long it takes for the capacitor to charge or how charged a capacitor is after a fixed amount of time. This works because the charging time is proportional to the overall capacitance.
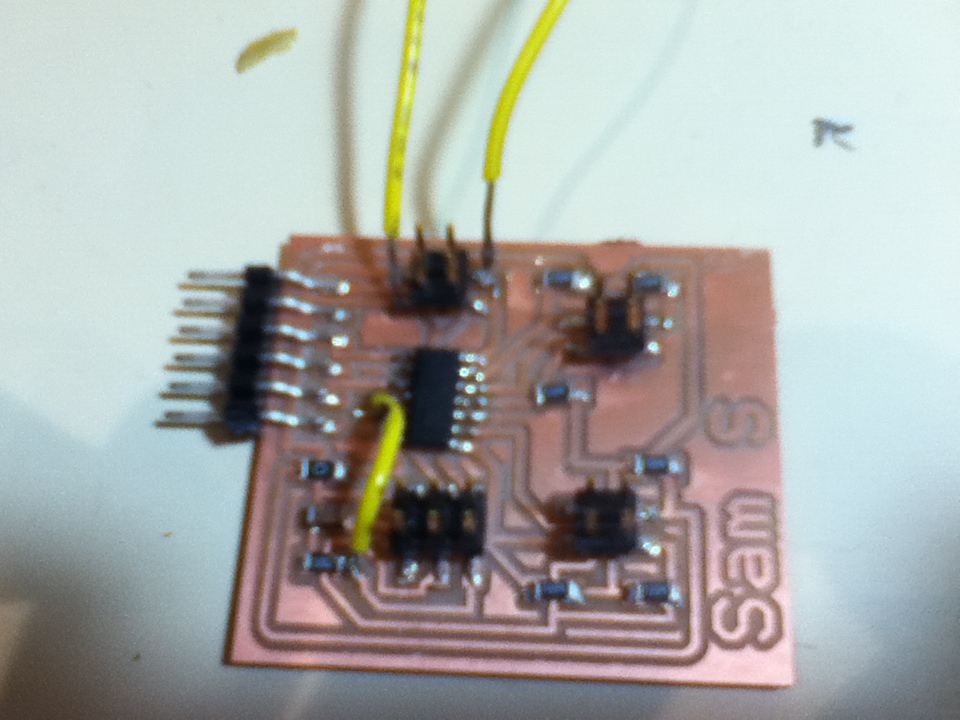
I milled and stuffed Neil's demo board with relative ease. When I think back to how long it would have taken me to do something like this at the beginning of the year, I can really appreciate how far I've come in just a few short weeks!
Programming and Debugging
Of course, it's never THAT easy. I ran into a few weird bugs when programming my board, but thanks to Jeff and Siggi's expert EE advice, I eventually got it to run. The main problem was that the Python program listening for the serial data coming from my board would just hang and hang and never display any information. Using the oscilloscope (my first time! new tools! yay!) I deduced that the trouble wasn't on my board, which was pumping out serial data nice and regularly. I used a debugging script on my computer to see what the computer was picking up and immediately realized the problem. Due to a timing mismatch, the computer wasn't receiving every packet the board sent out, it was dropping about every 4th one. Because of this, it never got the full "start" signal from my board and would endlessly wait for a signal that never came.
To fix this, I simply edited Neil's code to extend the bit delay to 103 instead of 100, slowing down the transmission speed enough so that the computer could accurately identify all the packets. And just like that, everything worked! Check out the video of the sensor in action
Download Video
Final Project Update!
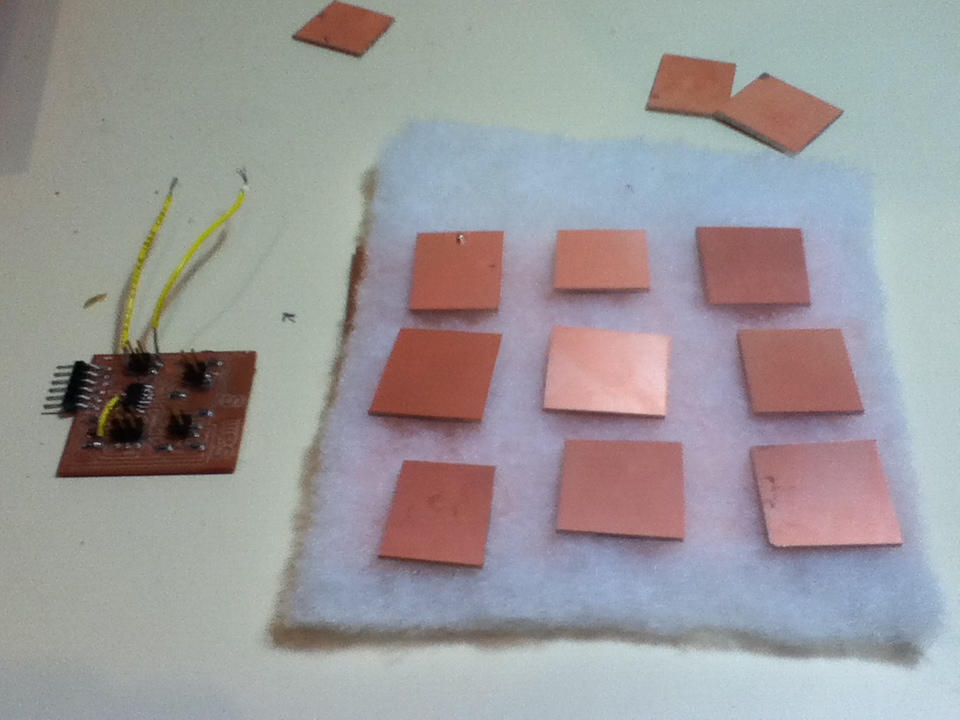
I've been doing a lot more thinking about my final project, and it's now evolved into developing a robot arm that can learn to play Tic-Tac-Toe with a human. I thought a capacitive touch board would be a good place to start, giving the robot the ability to sense what and when "moves" have been made in the game.
I started by modifying Matt Blackshaw's awesome touch sensor to fit a 3x3 grid. I removed two sensors, re-routed a few traces, milled and stuffed the board. Unfortunately, I ran out of time to properly wire up everything and program it all...guess it'll have to wait until final project week! I did, however, learn some important design things. I'll probably use the vinyl cutter, wiring a bunch of separate squares together is a pain!