Milling the board
Electronics are new to me, and I'm still trying to get a handle on programming the micro-controllers. I decided to keep it simple and focus on the workflow for this week. So I decided to make the Hall Effect Sensor based on Neil's design
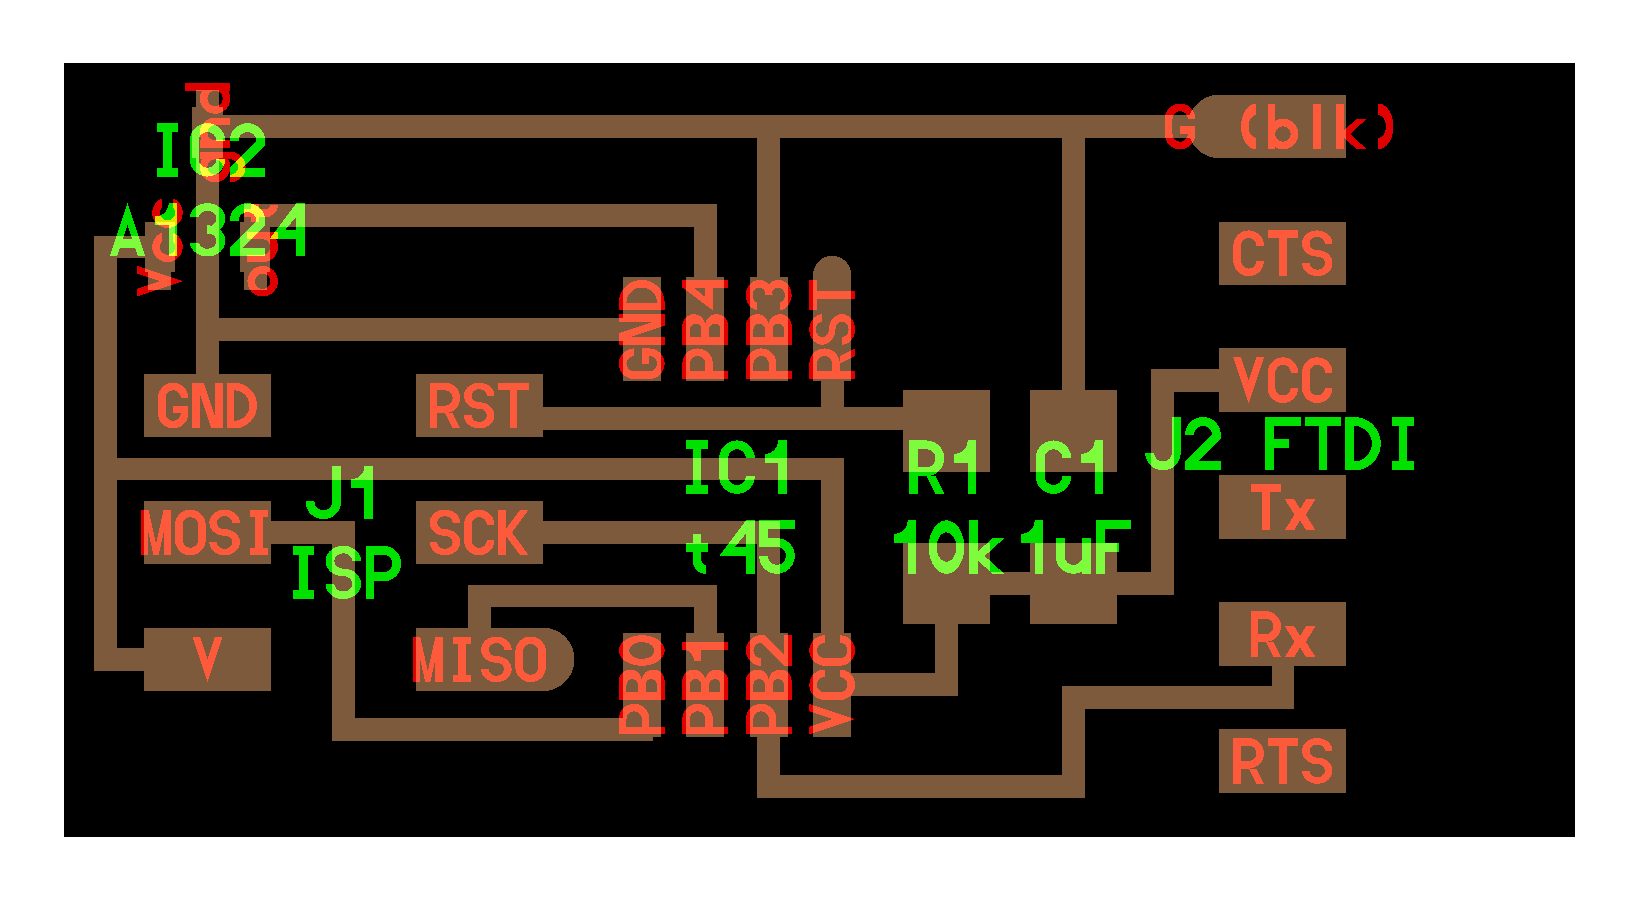
Milling and stuffing the board went on without much issues.
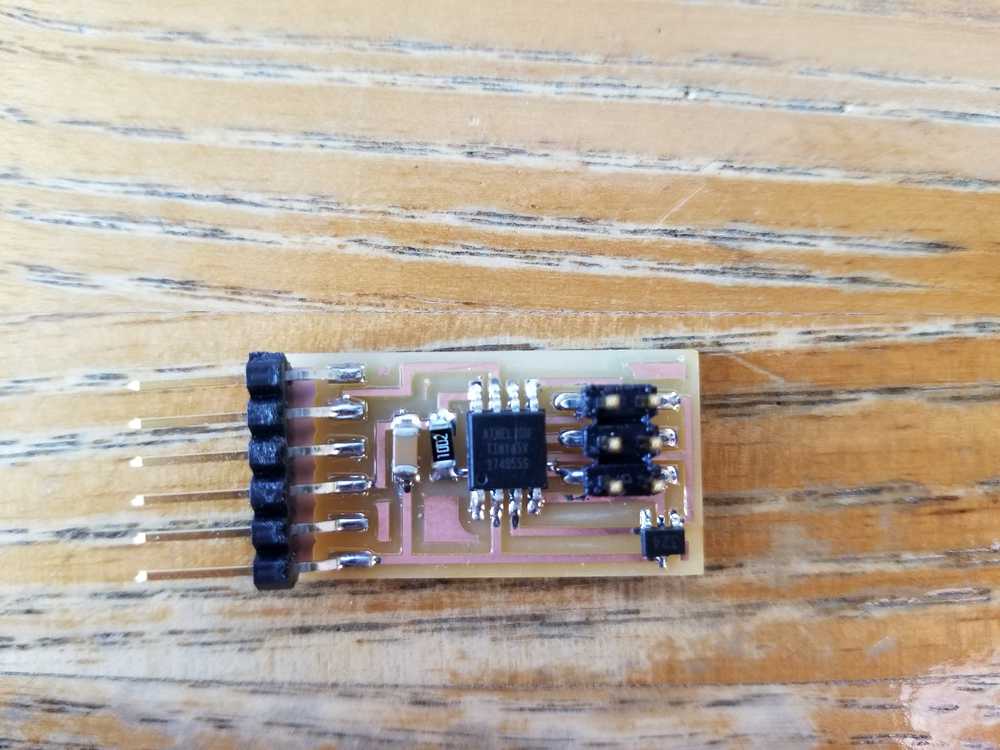 Shown here is the finished board after I poplated all the components.
Once this was done, it was time to program the board. Fortunately that went smoothly and I was able to write the code onto the ATtiny45.
Shown here is the finished board after I poplated all the components.
Once this was done, it was time to program the board. Fortunately that went smoothly and I was able to write the code onto the ATtiny45.
hcp-18-30-48-12:InputDevices Prashanth$ sudo make -f hello.mag.45.make
Password:
avr-gcc -mmcu=attiny45 -Wall -Os -DF_CPU=8000000 -I./ -o hello.mag.45.out hello.mag.45.c
avr-objcopy -O ihex hello.mag.45.out hello.mag.45.c.hex;\
     avr-size --mcu=attiny45 --format=avr hello.mag.45.out
AVR Memory Usage
----------------
Device: attiny45

Program:     662 bytes (16.2% Full)
(.text + .data + .bootloader)

Data:          6 bytes (2.3% Full)
(.data + .bss + .noinit)


dhcp-18-30-48-12:InputDevices Prashanth$ ls
hello.mag.45.c        hello.mag.45.c.hex    hello.mag.45.make    hello.mag.45.out    hello.mag.45.py
dhcp-18-30-48-12:InputDevices Prashanth$ vim hello.mag.45.make
dhcp-18-30-48-12:InputDevices Prashanth$ sudo make -f hello.mag.45.make program-usbtiny
avr-objcopy -O ihex hello.mag.45.out hello.mag.45.c.hex;\
     avr-size --mcu=attiny45 --format=avr hello.mag.45.out
AVR Memory Usage
----------------
Device: attiny45

Program:     662 bytes (16.2% Full)
(.text + .data + .bootloader)

Data:          6 bytes (2.3% Full)
(.data + .bss + .noinit)


avrdude -p t45 -P usb -c usbtiny -U flash:w:hello.mag.45.c.hex

avrdude: AVR device initialized and ready to accept instructions

Reading | ################################################## | 100% 0.00s

avrdude: Device signature = 0x1e9206 (probably t45)
avrdude: NOTE: "flash" memory has been specified, an erase cycle will be performed
         To disable this feature, specify the -D option.
avrdude: erasing chip
avrdude: reading input file "hello.mag.45.c.hex"
avrdude: input file hello.mag.45.c.hex auto detected as Intel Hex
avrdude: writing flash (662 bytes):

Writing | ################################################## | 100% 1.05s

avrdude: 662 bytes of flash written
avrdude: verifying flash memory against hello.mag.45.c.hex:
avrdude: load data flash data from input file hello.mag.45.c.hex:
avrdude: input file hello.mag.45.c.hex auto detected as Intel Hex
avrdude: input file hello.mag.45.c.hex contains 662 bytes
avrdude: reading on-chip flash data:

Reading | ################################################## | 100% 1.38s

avrdude: verifying ...
avrdude: 662 bytes of flash verified

avrdude: safemode: Fuses OK (E:FF, H:DF, L:62)

avrdude done.  Thank you.


Reading the serial output of the board
So far I had no issues, here's where my woes began. After writing the code on the ATtiny45, I wanted to be able to read the serial output data from the board. When I tried looking for the board on my computer it shows up as an FTDI device in the "About this Mac" section, but I wasn't able to get the port address. It took me a while to figure out that what my computer was detecting was simply the FTDI cable, It wasn't able to talk to my board.That's when I realised that I needed some sort of driver to be able to talk serial to the board. After going through this installation guide on the FTDI drivers, I was still having issues. Finally I realsied that I had, sometime in the past installed a D2xxx driver to talk to a custom 3D printer. In the troublshooting section one suggestion was to disbale the D2xxx and re-start the Apple FTDI Driver that comes with the Mac:
sudo kextload –b com.apple.driver.AppleUSBFTDI /dev/tty.usbserial-FTFRJE6S
With all that done, I was able to understand the workflow and get talking to the serial port and use the python (and js) to be able to read the data.
Another note to self is that in Python 3+ be sure to
import tkinter and not import Tkinter .
I'm definitely feeling more confident about the workflow now, so I'm going to redo another input device, this time probably in line with my finial project for a "somewhat" smart watch.