Final Project: Posture-Nudger
Project Presentation
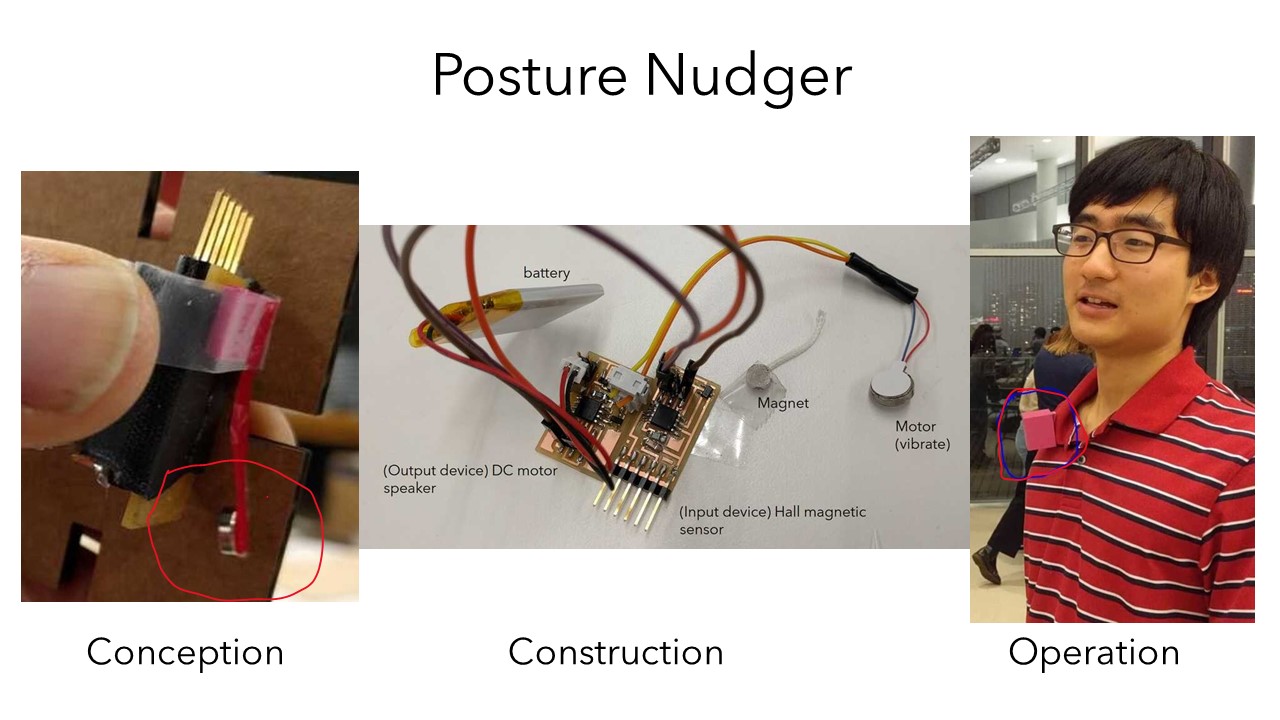
What: For my final project, I created a mini posture-correcting wearable device that vibrates when users slouch.
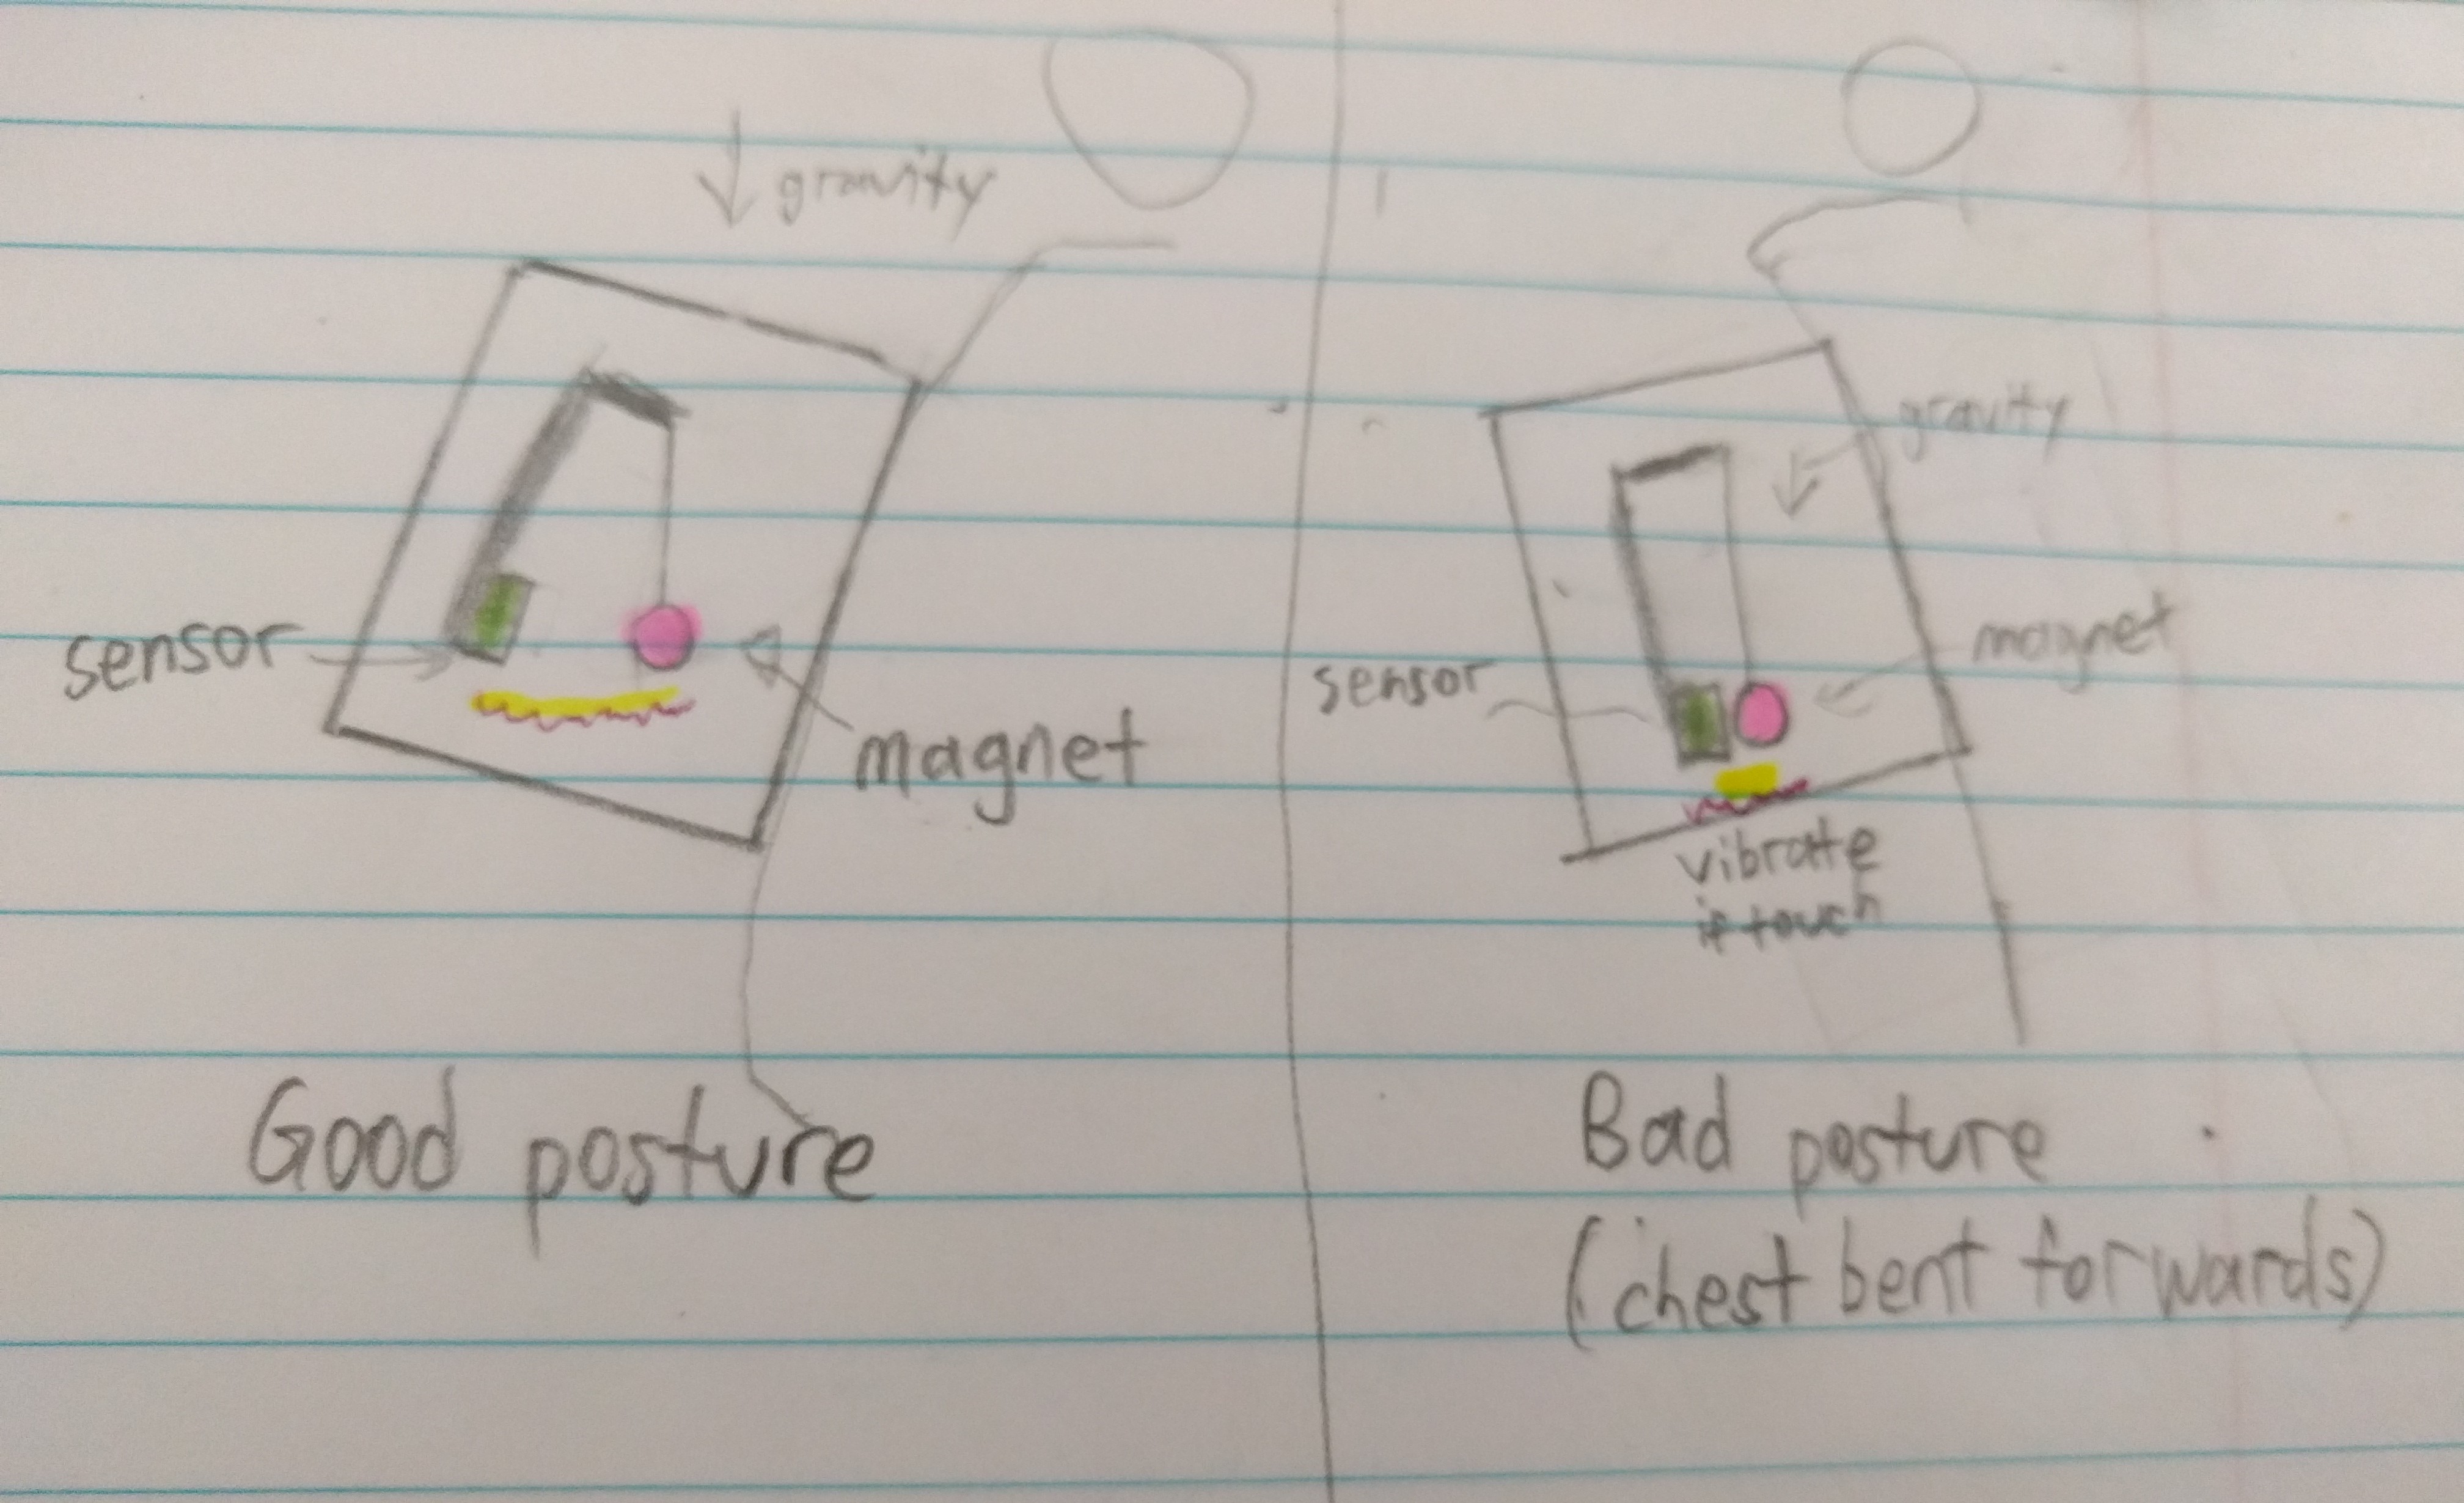
How: When the user’s chest leans forward from poor posture, the magnet falls over toward the Hall magnetic sensor, which signals the DC motor to vibrate.
Why: Research has shown that good body posture contributes to better health, confidence, and attractiveness. However, I often forget or feel tired about maintaining good posture, particularly when mentally preoccupied. Hopefully the vibrations should nudge mindfulness for good posture and motivate or annoy me enough to stand or sit straight. Although there’s similar posture-correcting devices on the market and some made by past students, I’d like to make my own that’s simple and low cost. Though such tech gadgets are unlikely to solve a habitual problem, at least my efforts should remind me to care about my posture.
Who: This device and the sensitivity of the magnet angle was designed for my body posture. Yet if there’s enough interest, I could design it for others, including children.
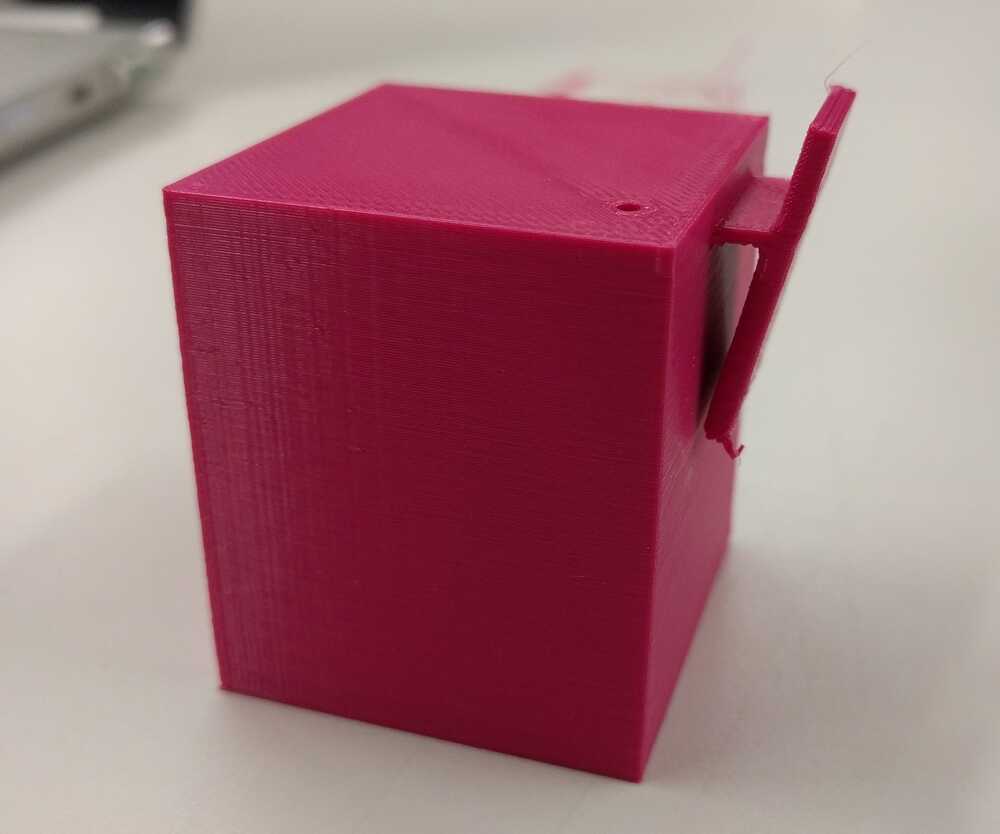
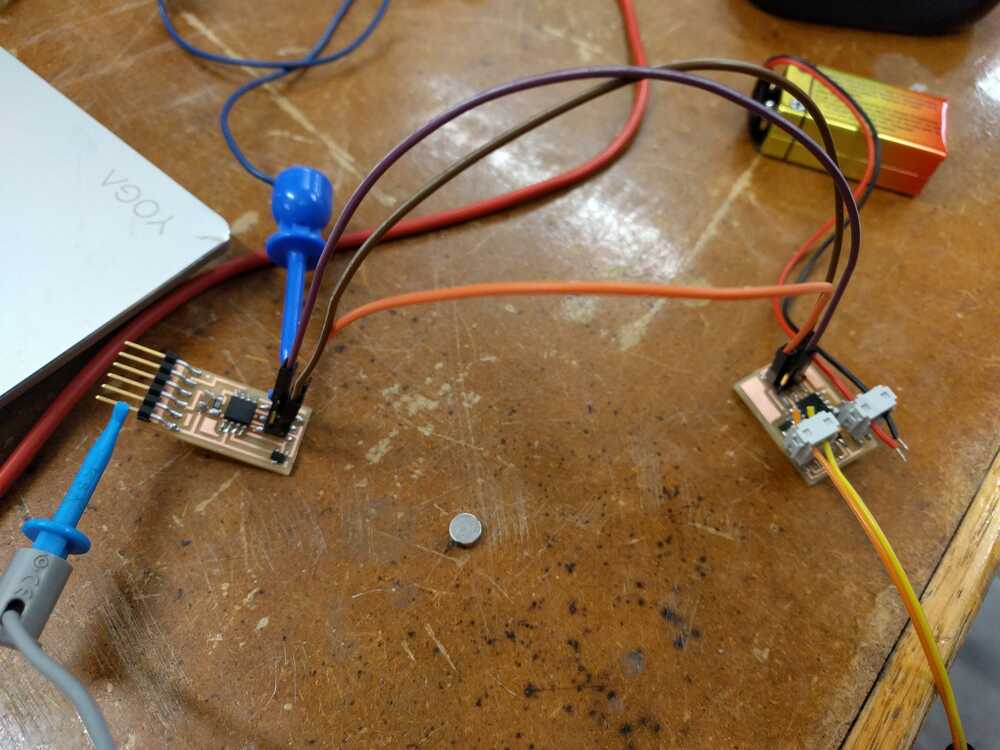
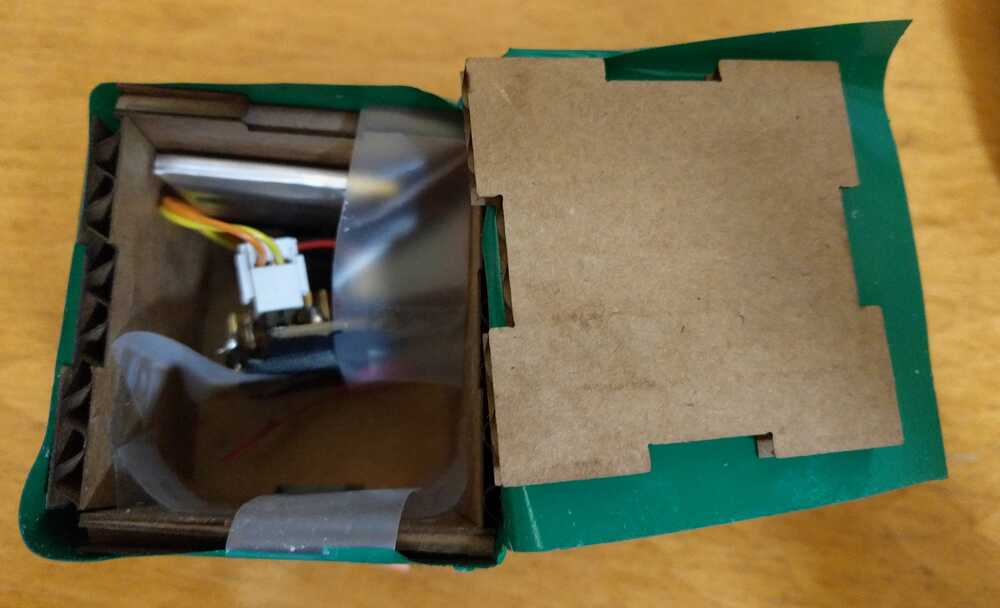
Process: In developing the final project, I’ve used most of the skills I’ve learned each week, particularly starting from the Input Devices (8th) week. During the input device and output device weeks, I’ve made microcontroller boards with a magnetic sensor and vibrating motor. During the communications (10th) week, I connected the two boards via wires. With skills from Embedded Programming week, I’ve programmed (using the programmer I’d made in Electronics Production week) the boards to transmit voltage when it detects a certain magnetic signal to the output device to run the vibrating motor. During the app interface (12th) week, I visualized the magnetic signals into a progress bar. For system integration and packaging, I designed and 3D printed (via additive process) an enclosure box to stably house all the parts. I also created a box enclosure by laser cutting parametric shapes (via subtractive process).
Materials: 3.7V rechargeable battery, tiny magnet, vellum paper, DC vibrating motor, heating pads, strip wires, wire clamps, 3D printing materials, mill boards, input device (Hall effect sensor, 2x3 ISP header, AtTiny454, FTDI header, 10k resistor, 1 uF capacitor), and output device (2x2 header, 5V 100 mA regulator, transistor, 2x3 header, AtTiny45, 10k resistor, 1 uF capacitor). The total cost of materials is around $10 and came from the lab.
Evaluation: The product is useful as it correctly alerts users when they are excessively leaning forwards. The product has a nice and simple outer enclosure box, though I could have better organized the inner parts. The product size could be reduced by making the parts fit in more compactly on the board and in the package.
Implications: I’ve learned that it is possible to use simple, low-cost magnetic sensors to create products that are important for physical well-being and improved posture. However, integrating all the components into a user-friendly package that’s personalized may be difficult.
Reflections: Things tend to take three times longer than expected, so follow early deadlines. Document regularly. Make more time to learn concepts, ask staff and friends, and try independently. Engineering is slow and difficult yet rewarding products. This is a beginning of a new journey.
When and Where: I create the device in the fall of 2019 at the Harvard Science Center FAB lab.
Acknowledgements: Along with classmates and course staff, I’d like to thank Rob Hart and Nathan Melebrink in particular for their extensive help with developing the project.
Project Development
As I've worked each week towards building the final project, its documentation is a compiled culmination of the skills learned throughout the course. Please follow the links to each of these weeks ordered below to see the detailed documentation of my final project.
Week 8: Input Device - Magnetic Hall Sensor
Week 10: Networking/Communications - Wiring and Programming
Week 12: Interface App Programming - Visualizing Progress Bar
Week 1: Laser Cutting - Parametric Box Enclosure
Week 3: 3D Printing - Designing and Printing Enclosure