Final Project Proposal
Can we make guidance systems for construction?
Haptic Feedback for Manual Actions
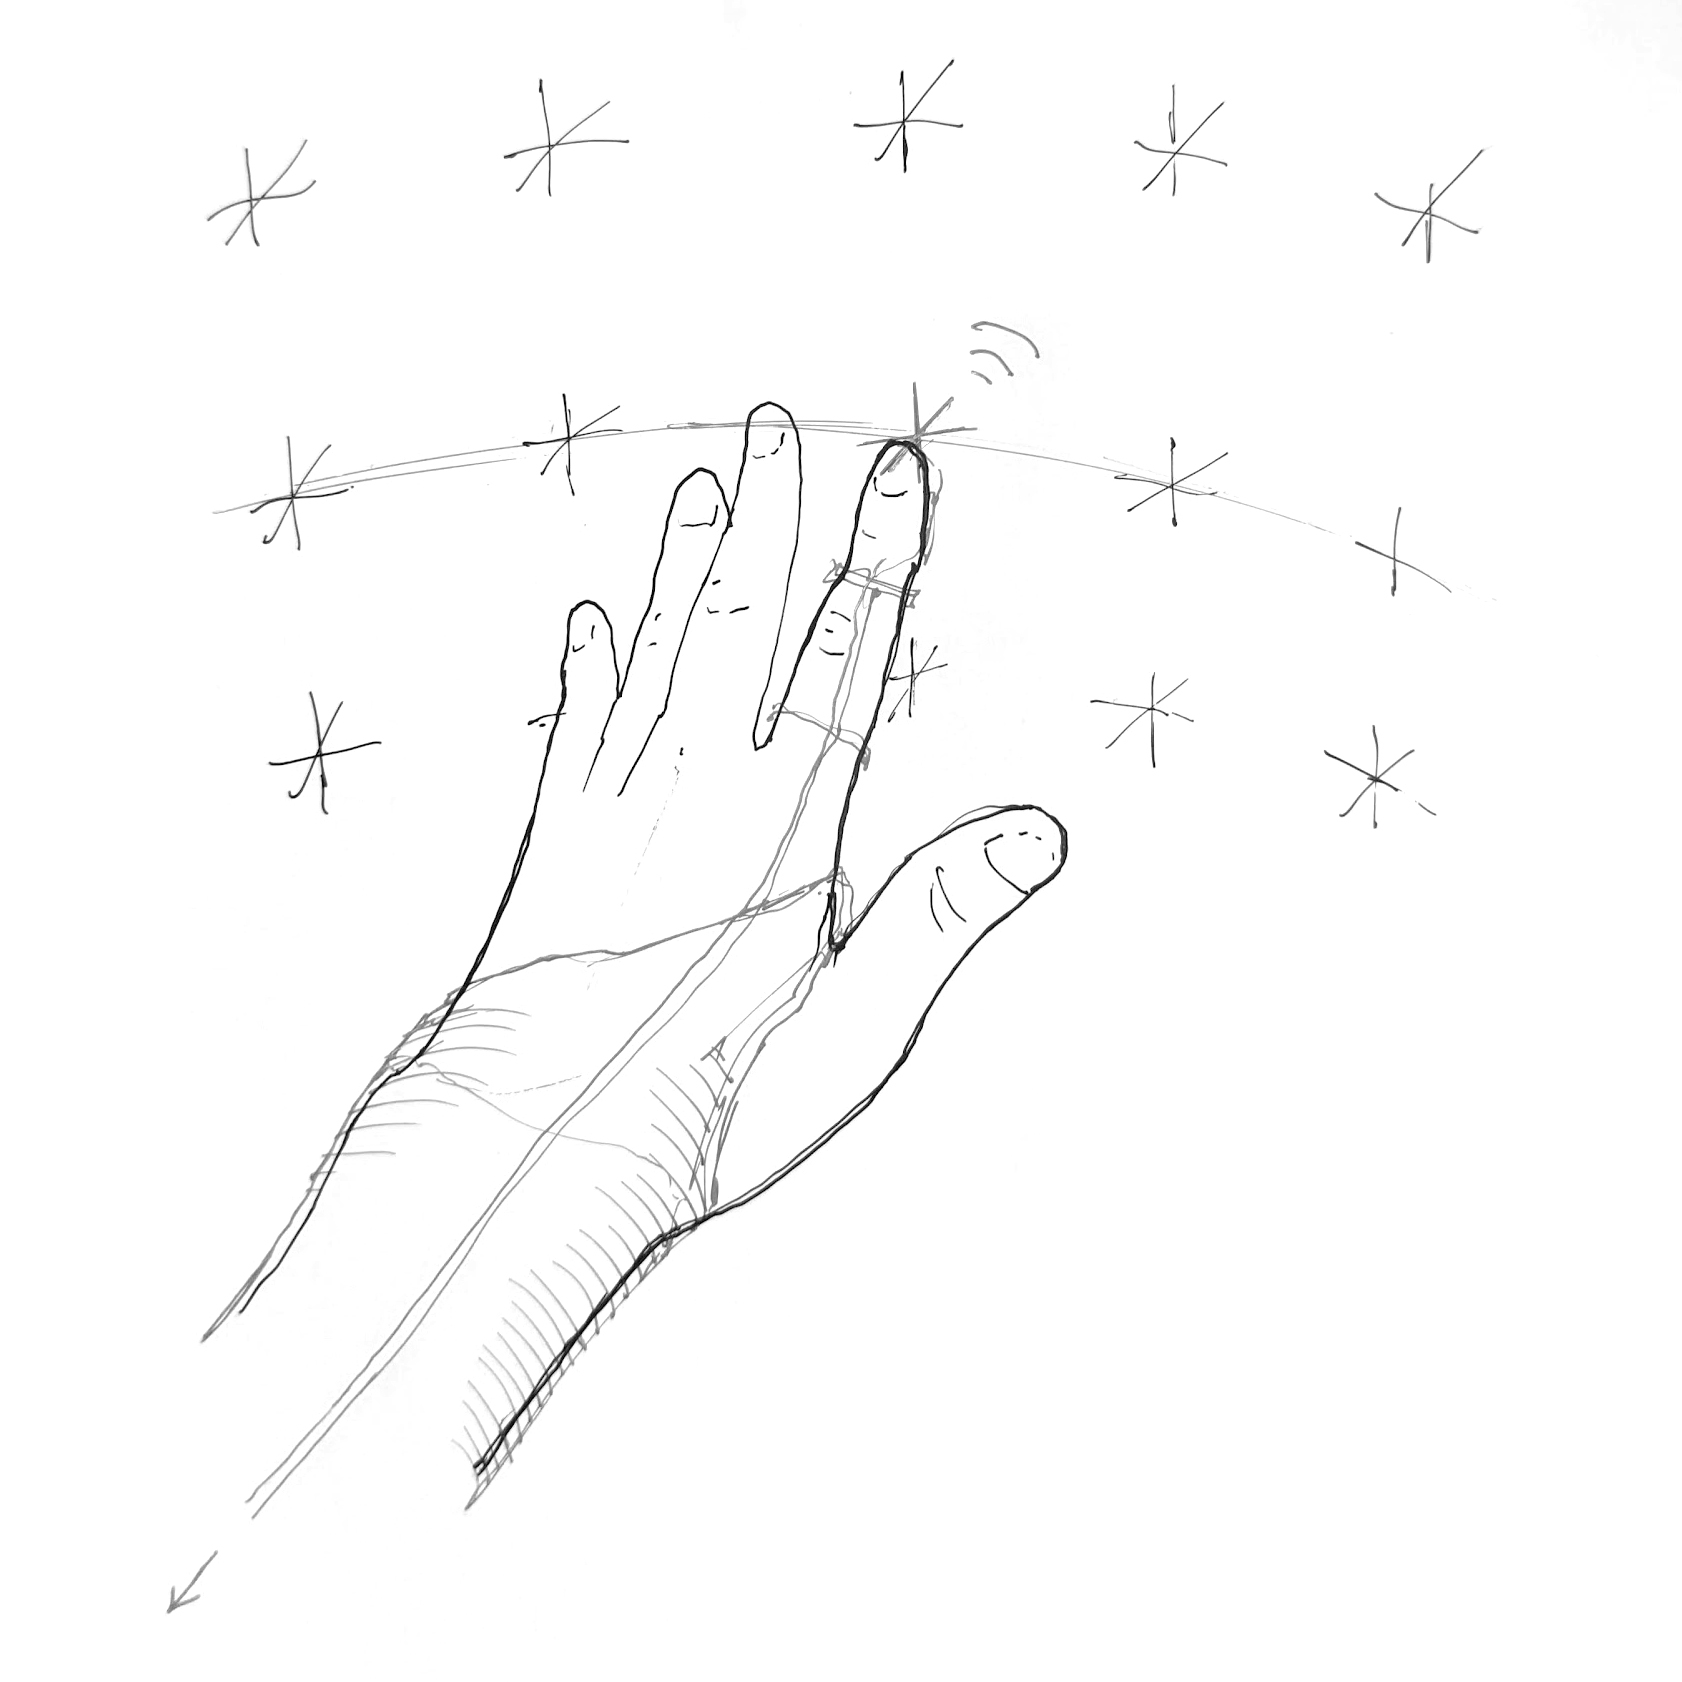 Sketch: Imagining the possibility of feeling points in space.
Final Project Proposal
For my final project, I'd like to explore a different way for architects to convey instructions to builders. Traditionally, drawings are how we convey everything about position, dimension, and relation of elements.
However, I don't think drawings are responsive enough to capture the complexities of a construction site. Instead, I'd like to skip drawings, and try to convey a design to someone using only signals and feedback loops.
Key components of the design:
1. Wearable structure to attach devices onto a body.
2. Haptic feedback integration - to send signals to the body.
3. Motion tracking - to orient the body in relation to the digital model.
4. Sensors to communication information back into a digital model.
Really, what I want to explore here is a different feedback loop for building. Can I send data back and forth, between digital model and physical site, throughout the construction process?
CAD
I have never designed a wearable before, so I'm not familiar with how CAD procedures work when designing for a body. After consulting with wearable designers at the Self Assembly lab, I decided I'll be using Rhino 7 to model this project.
My first challenge is to look at a 3D model of a mannequin, and strategize where I might be able to place different elements.
The goal here is to find locations where I can mount electronics without impeding motion of any joints.
Week 02 Update: Learning to design with Embedded Programming
After learning some basics about microprocessor selection and the challenges of interfacing with peripherals, I wanted to start scouting what devices I might need to use to reach my final project ambitions. Specifically, I want to find out what type of peripherals are required to send vibration pulses for haptic feedback.
In the following weeks, I hope to start prototyping to understand the limitations and requirements of these elements.
Week 03 Update: Scanning and Printing
This week I made progress toward the eventual construction of my wearable device. I used Metashape to 3D scan Inez Ow's arm, and 3D printed a scale replica which I can use to test-fit my device in future weeks.
Week 04 Update: Electronic Design
 It's overwhelming to me to think about these networks of things without understanding the physical analog for each component.
I'm using Adobe Illustrator to paste graphics and move them around on a canvas, which is helping me imagine how all of these parts are connected in space.
More importantly, this process is helping me realize the gaps in my knowledge. In this case, I realized that if I intend to use ESP32-CAM modules for computer vision, then I need a microcontroller with compatible communication protocol to control my output devices.
Tentatively, ESP-NOW seems like the link I'm looking for, but I'll have to try it to see.
Week 05 Update: Electronic Production
This week I troubleshot the bootloading process on the ESP32C3, confirmed serial communication to an IO port, and tried to incorporate a vibrating DC motor.
While I don't have these elements working together yet, I'm starting to have a more clear picture for how their integration together should work.
Week 07 Update: 3D Printing Assembly
Thinking about wearable construction, I want to try using the scanned hand as a workpiece for robotic fabrication.
For this purpose, the texture of the sindoh print is undesirable, so I printed the same pieces on RPL's ZCorp powder printer.
The porous powder material can be soaked with adhesive to harden the surface, and then sanded to a smooth finish.
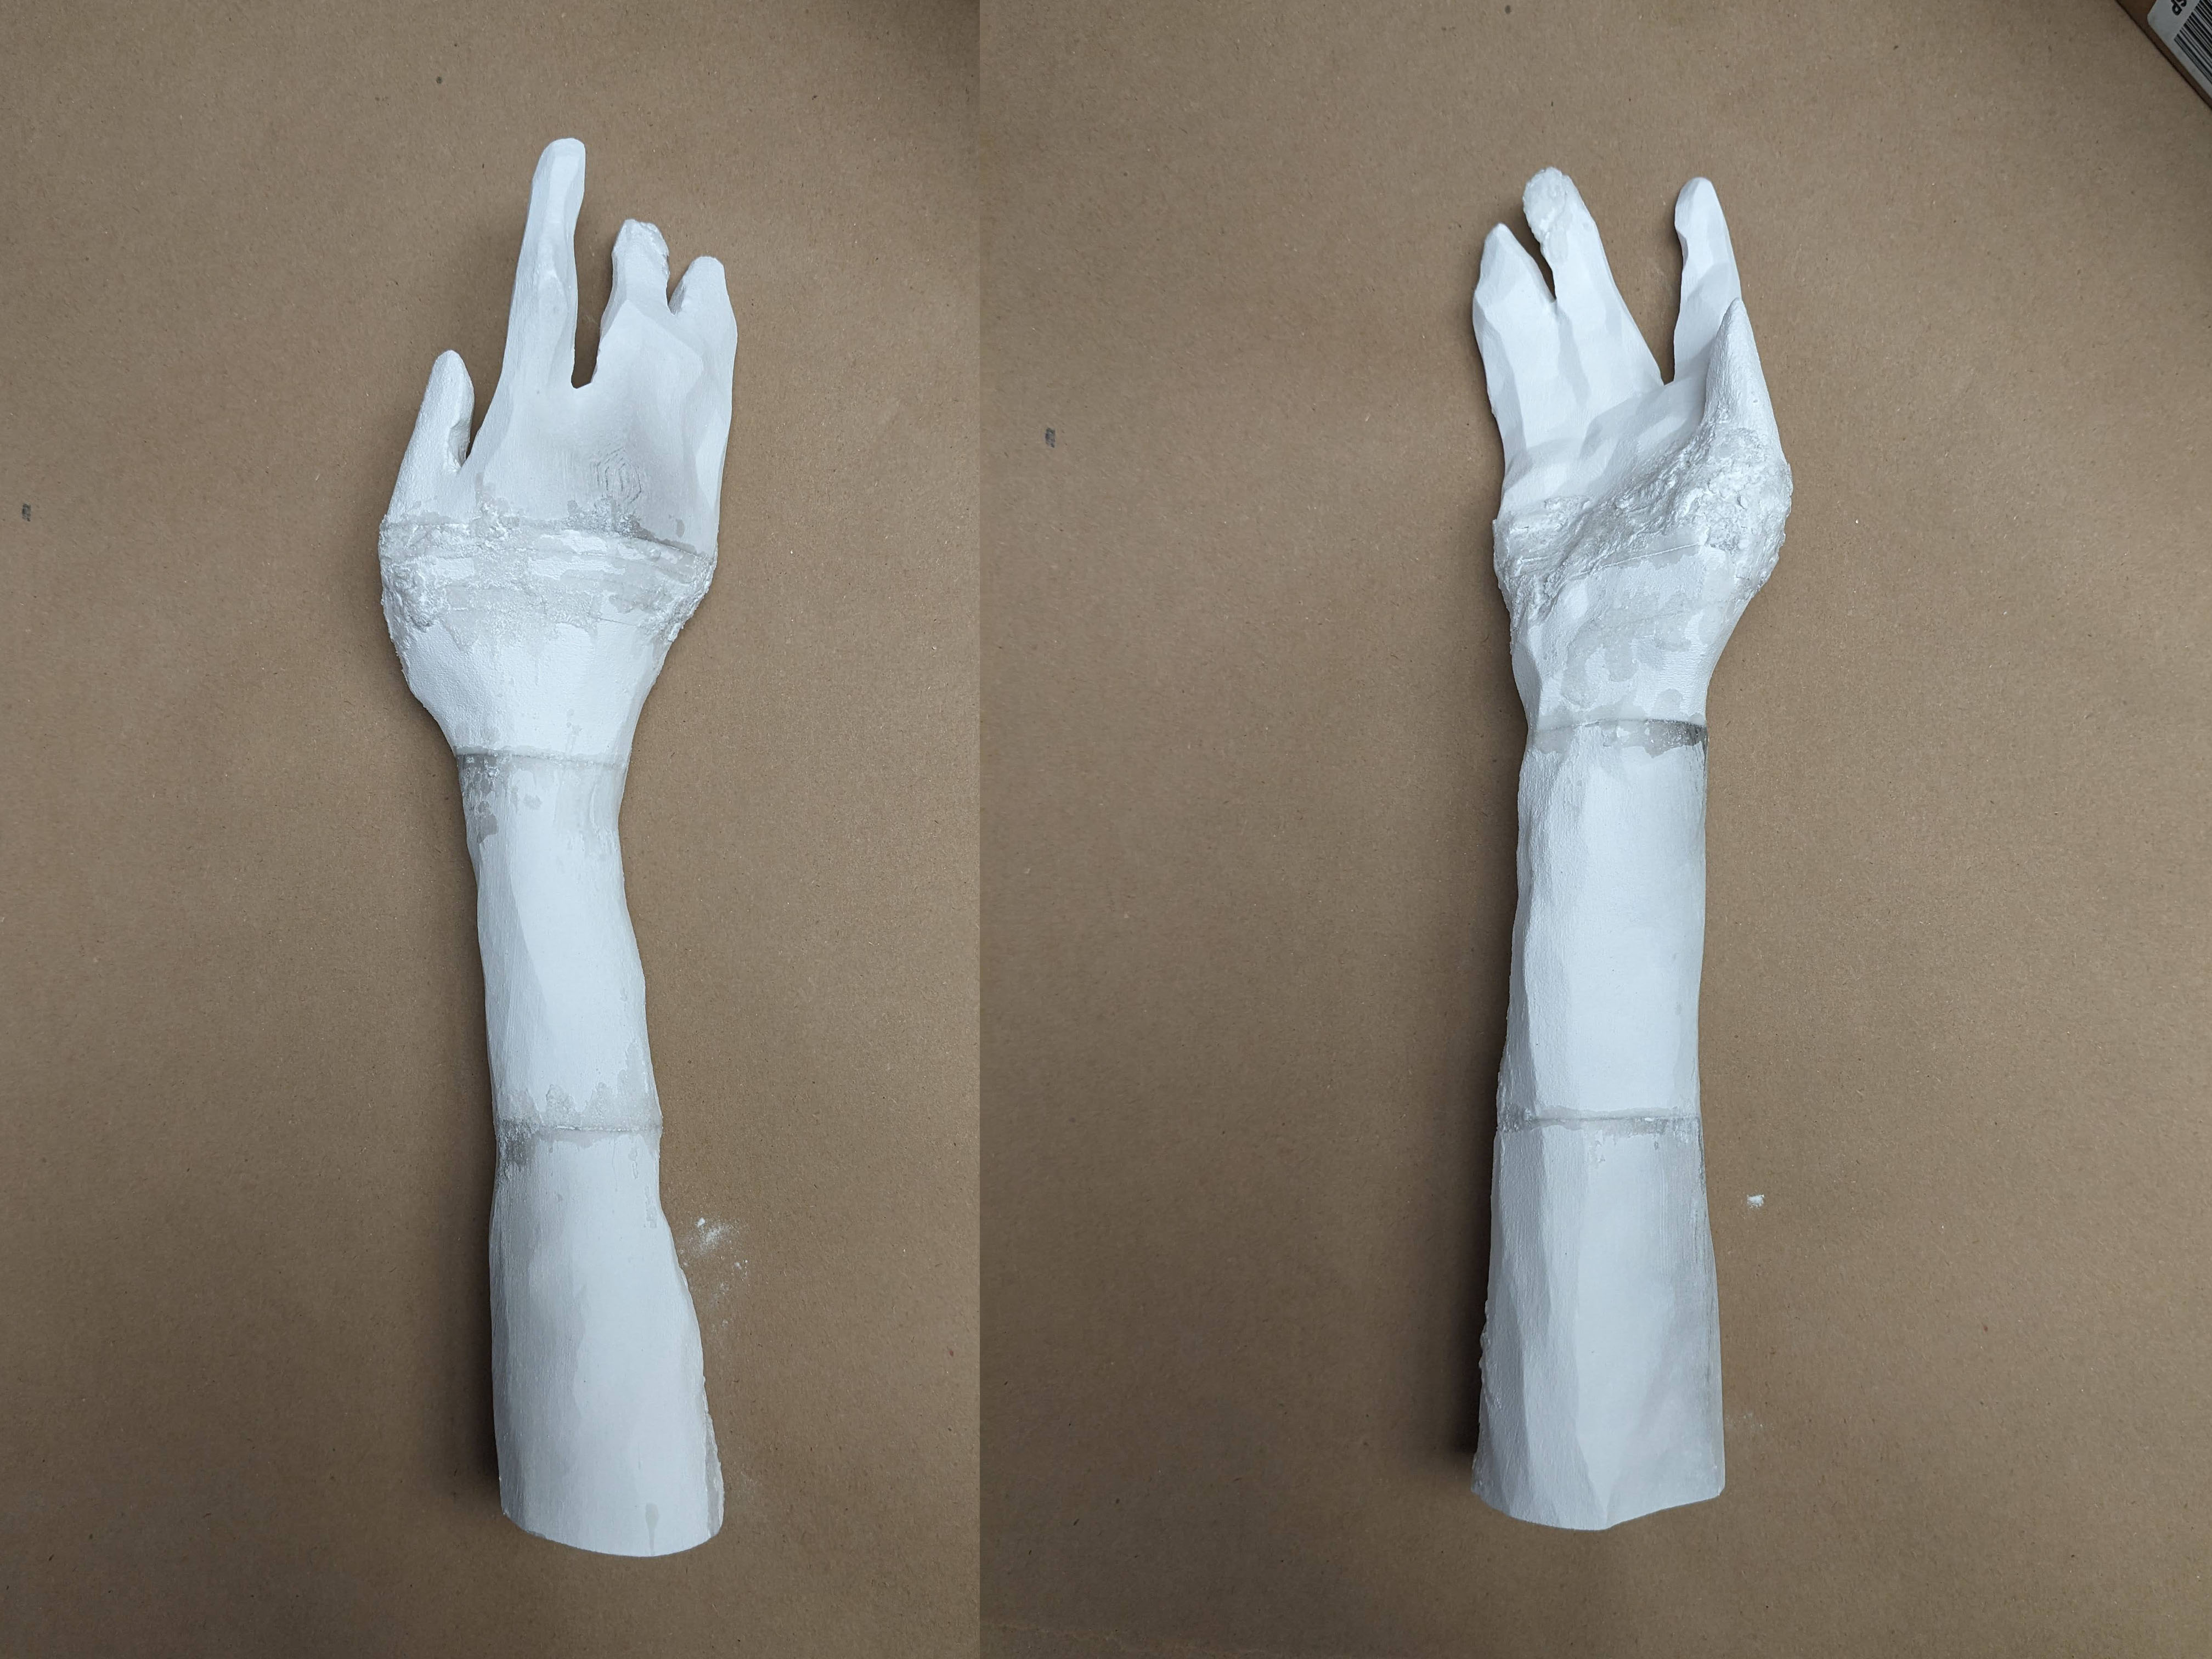 Four Zcorp prints assembled. Gluing the pieces together is a two part process. First, superglue is allowed to soak in, hardening the edges.
When two edges are hardened, they can then be glued to each other. This leaves grey discoloration at the seams.
Four Zcorp prints assembled. Gluing the pieces together is a two part process. First, superglue is allowed to soak in, hardening the edges.
When two edges are hardened, they can then be glued to each other. This leaves grey discoloration at the seams.
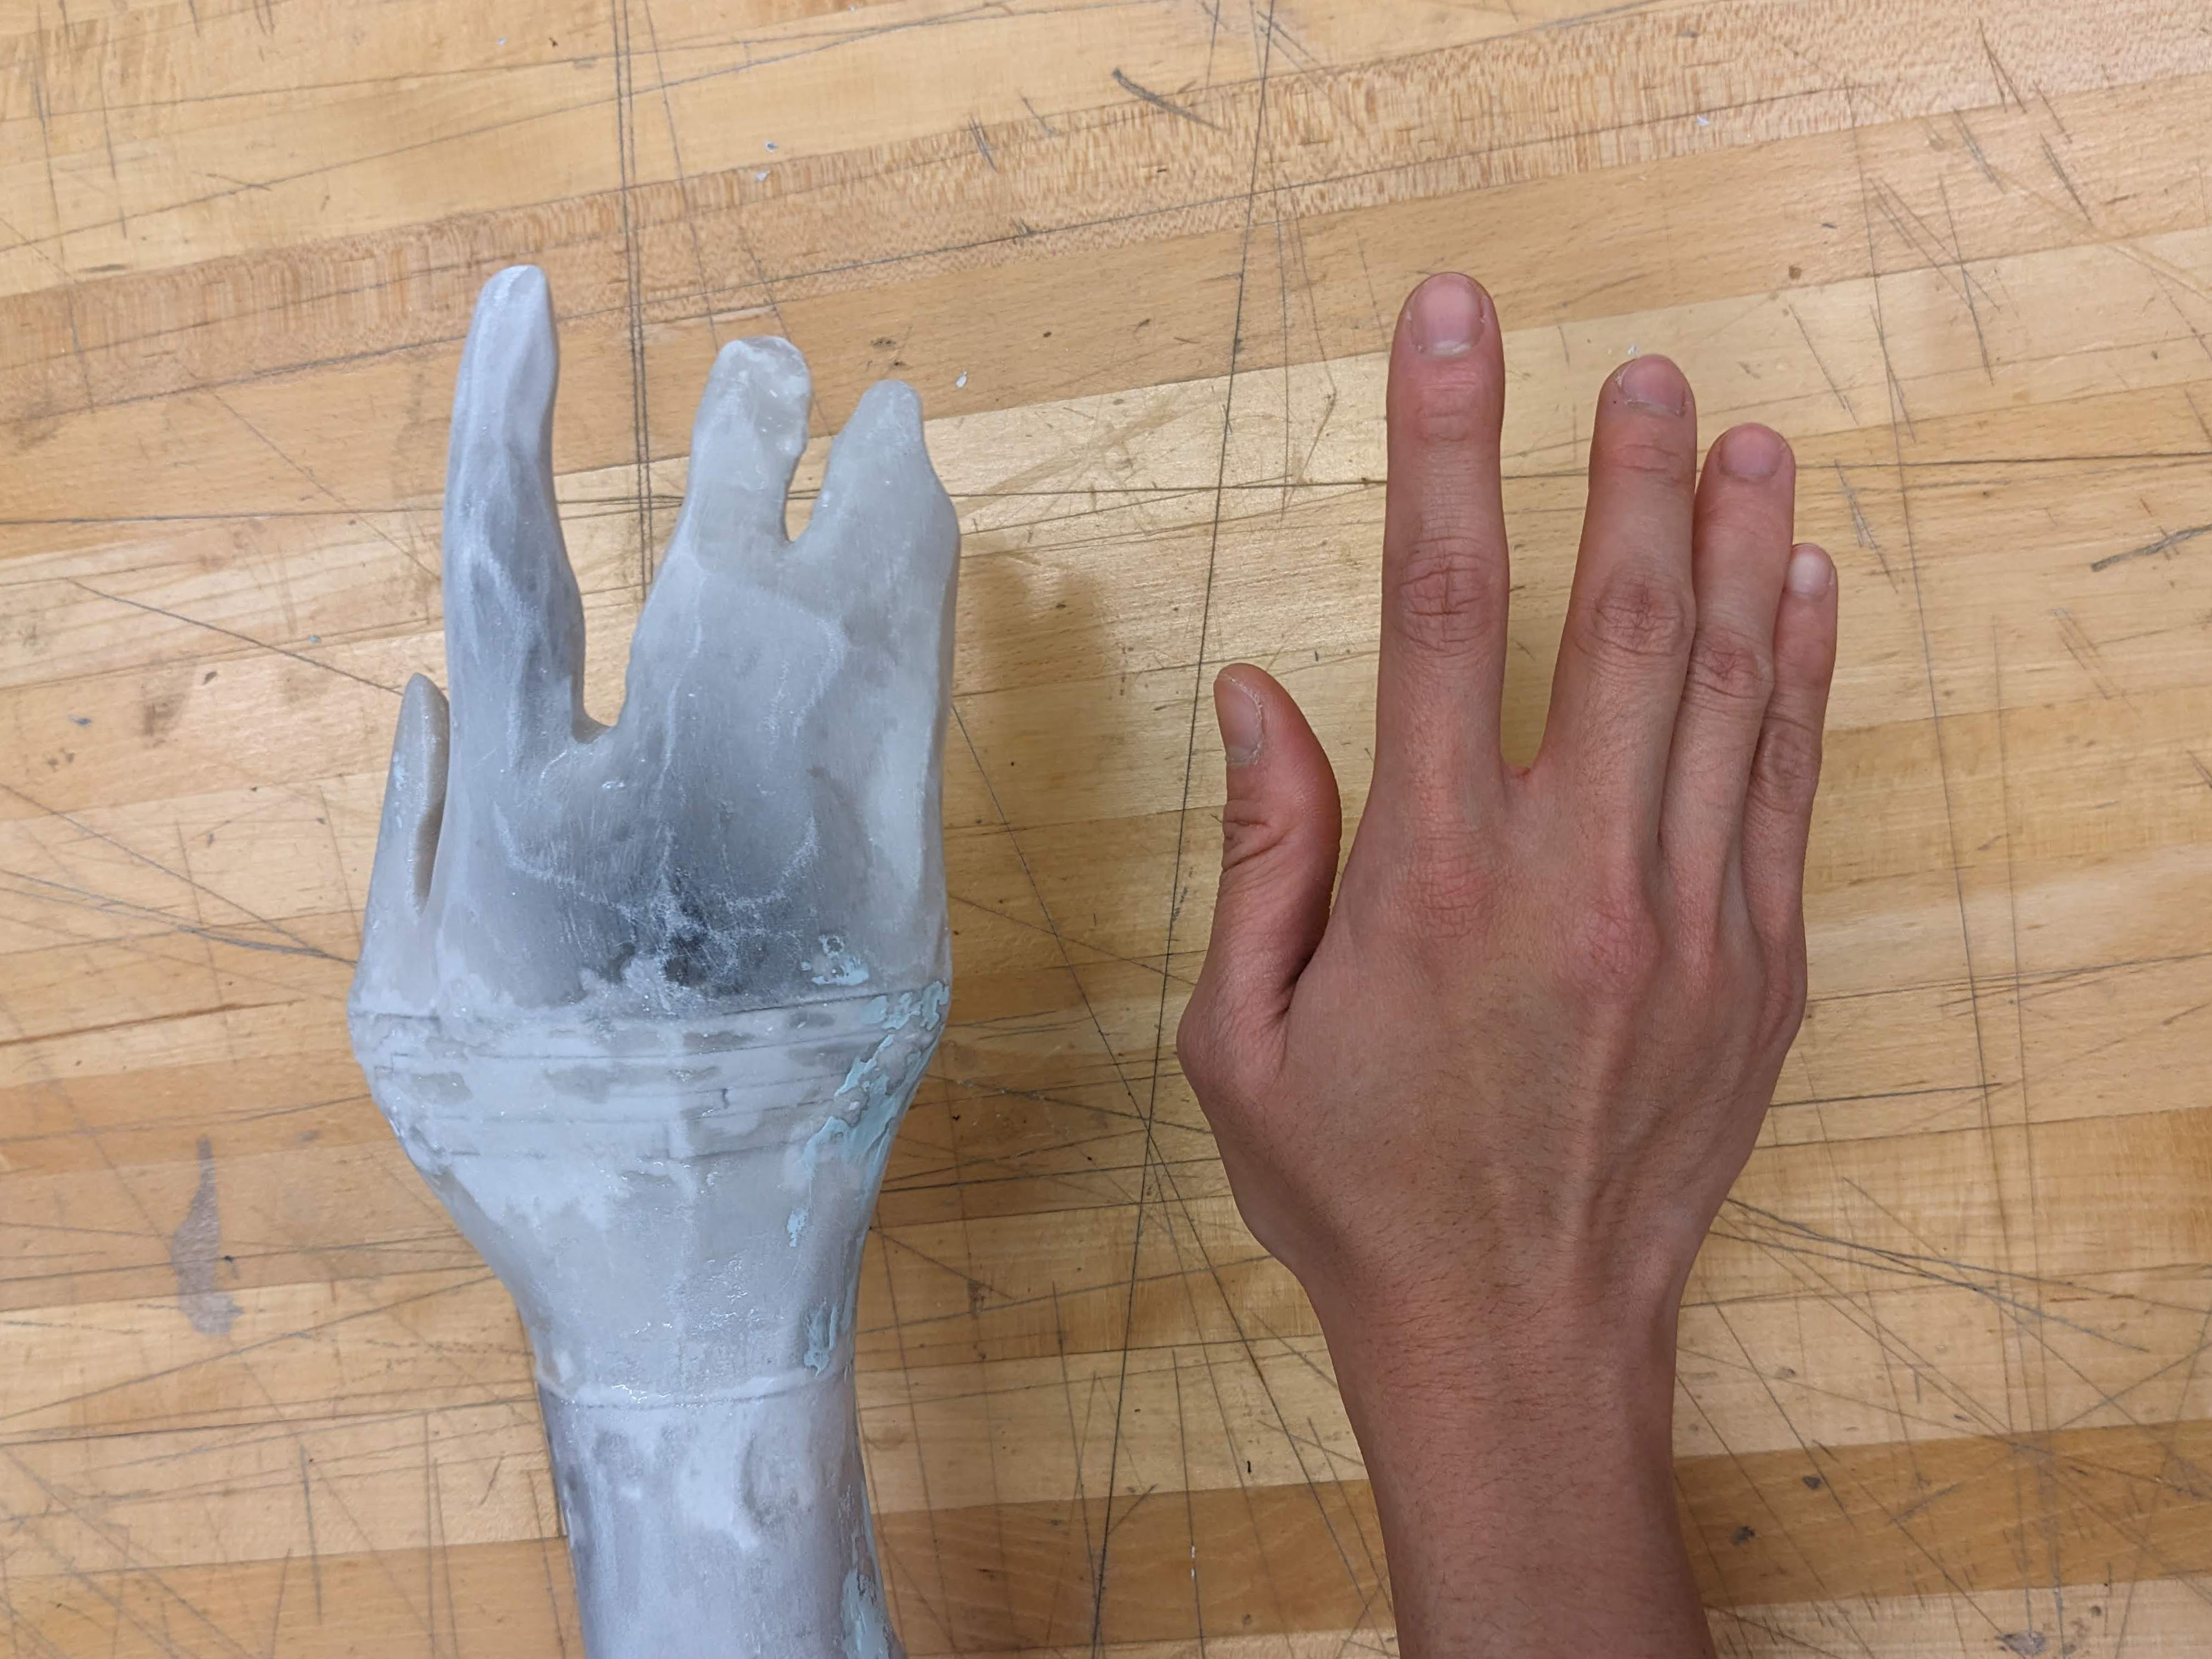 Comparison for scale.
Preparing a 3D print for eventual wearable fabrication.
Week 09 Update: 3D Print Finishing Progress
Week 09 Update: Schematic Check-in
Neither the input or output devices are working 100% as intended, but I am closer to understanding how the parts need to go together. The goal for networking week is to get the camera and the vibration motor to talk to each other, hopefully via the ESP-NOW feature on ESP32 boards.
Week 10 Update: Schematic Check-in
 Revisiting my schematic diagram.
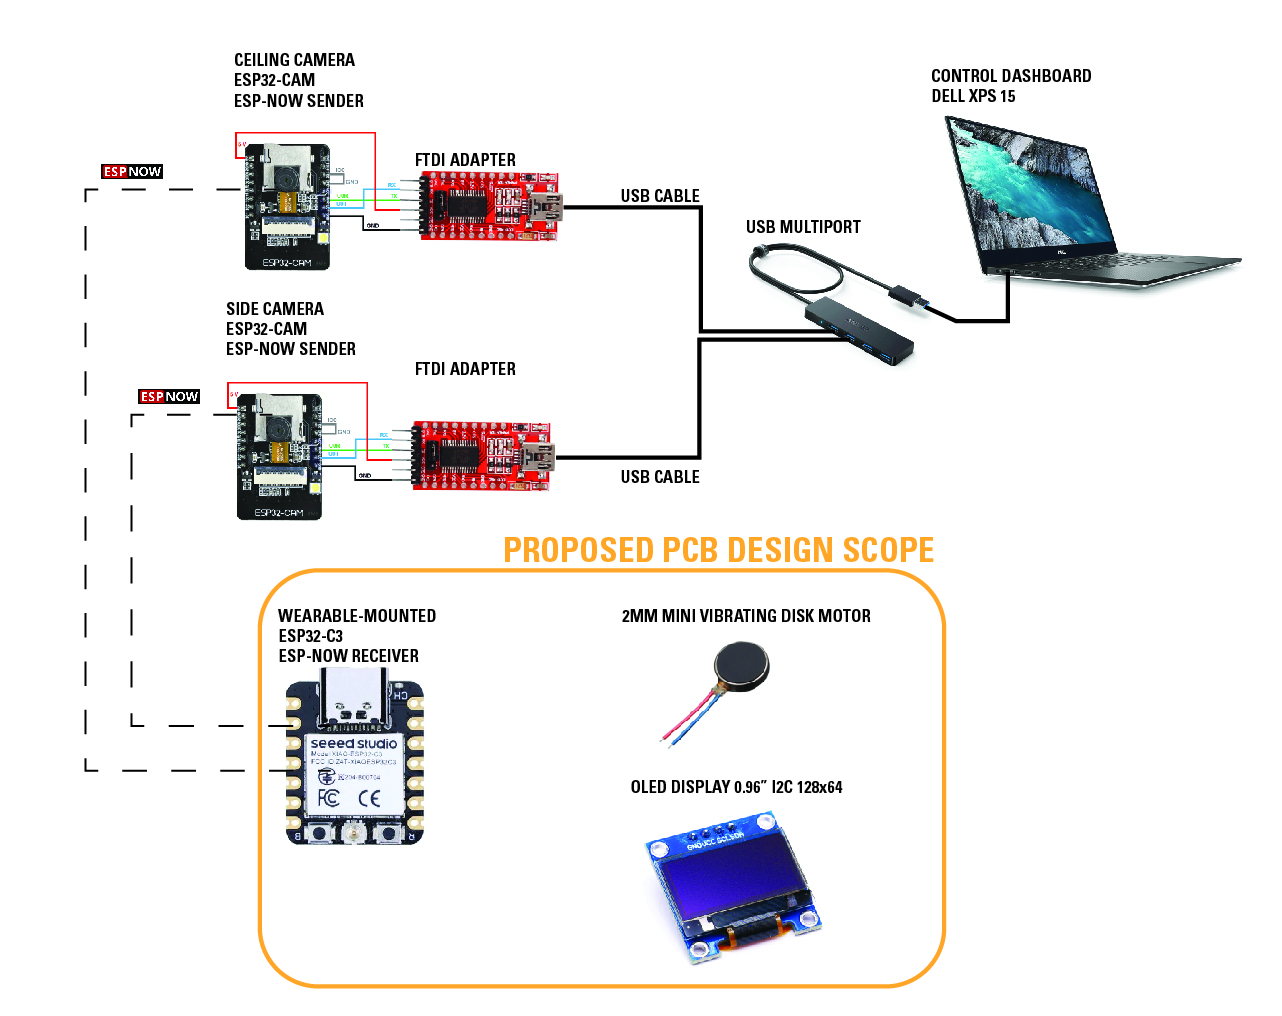
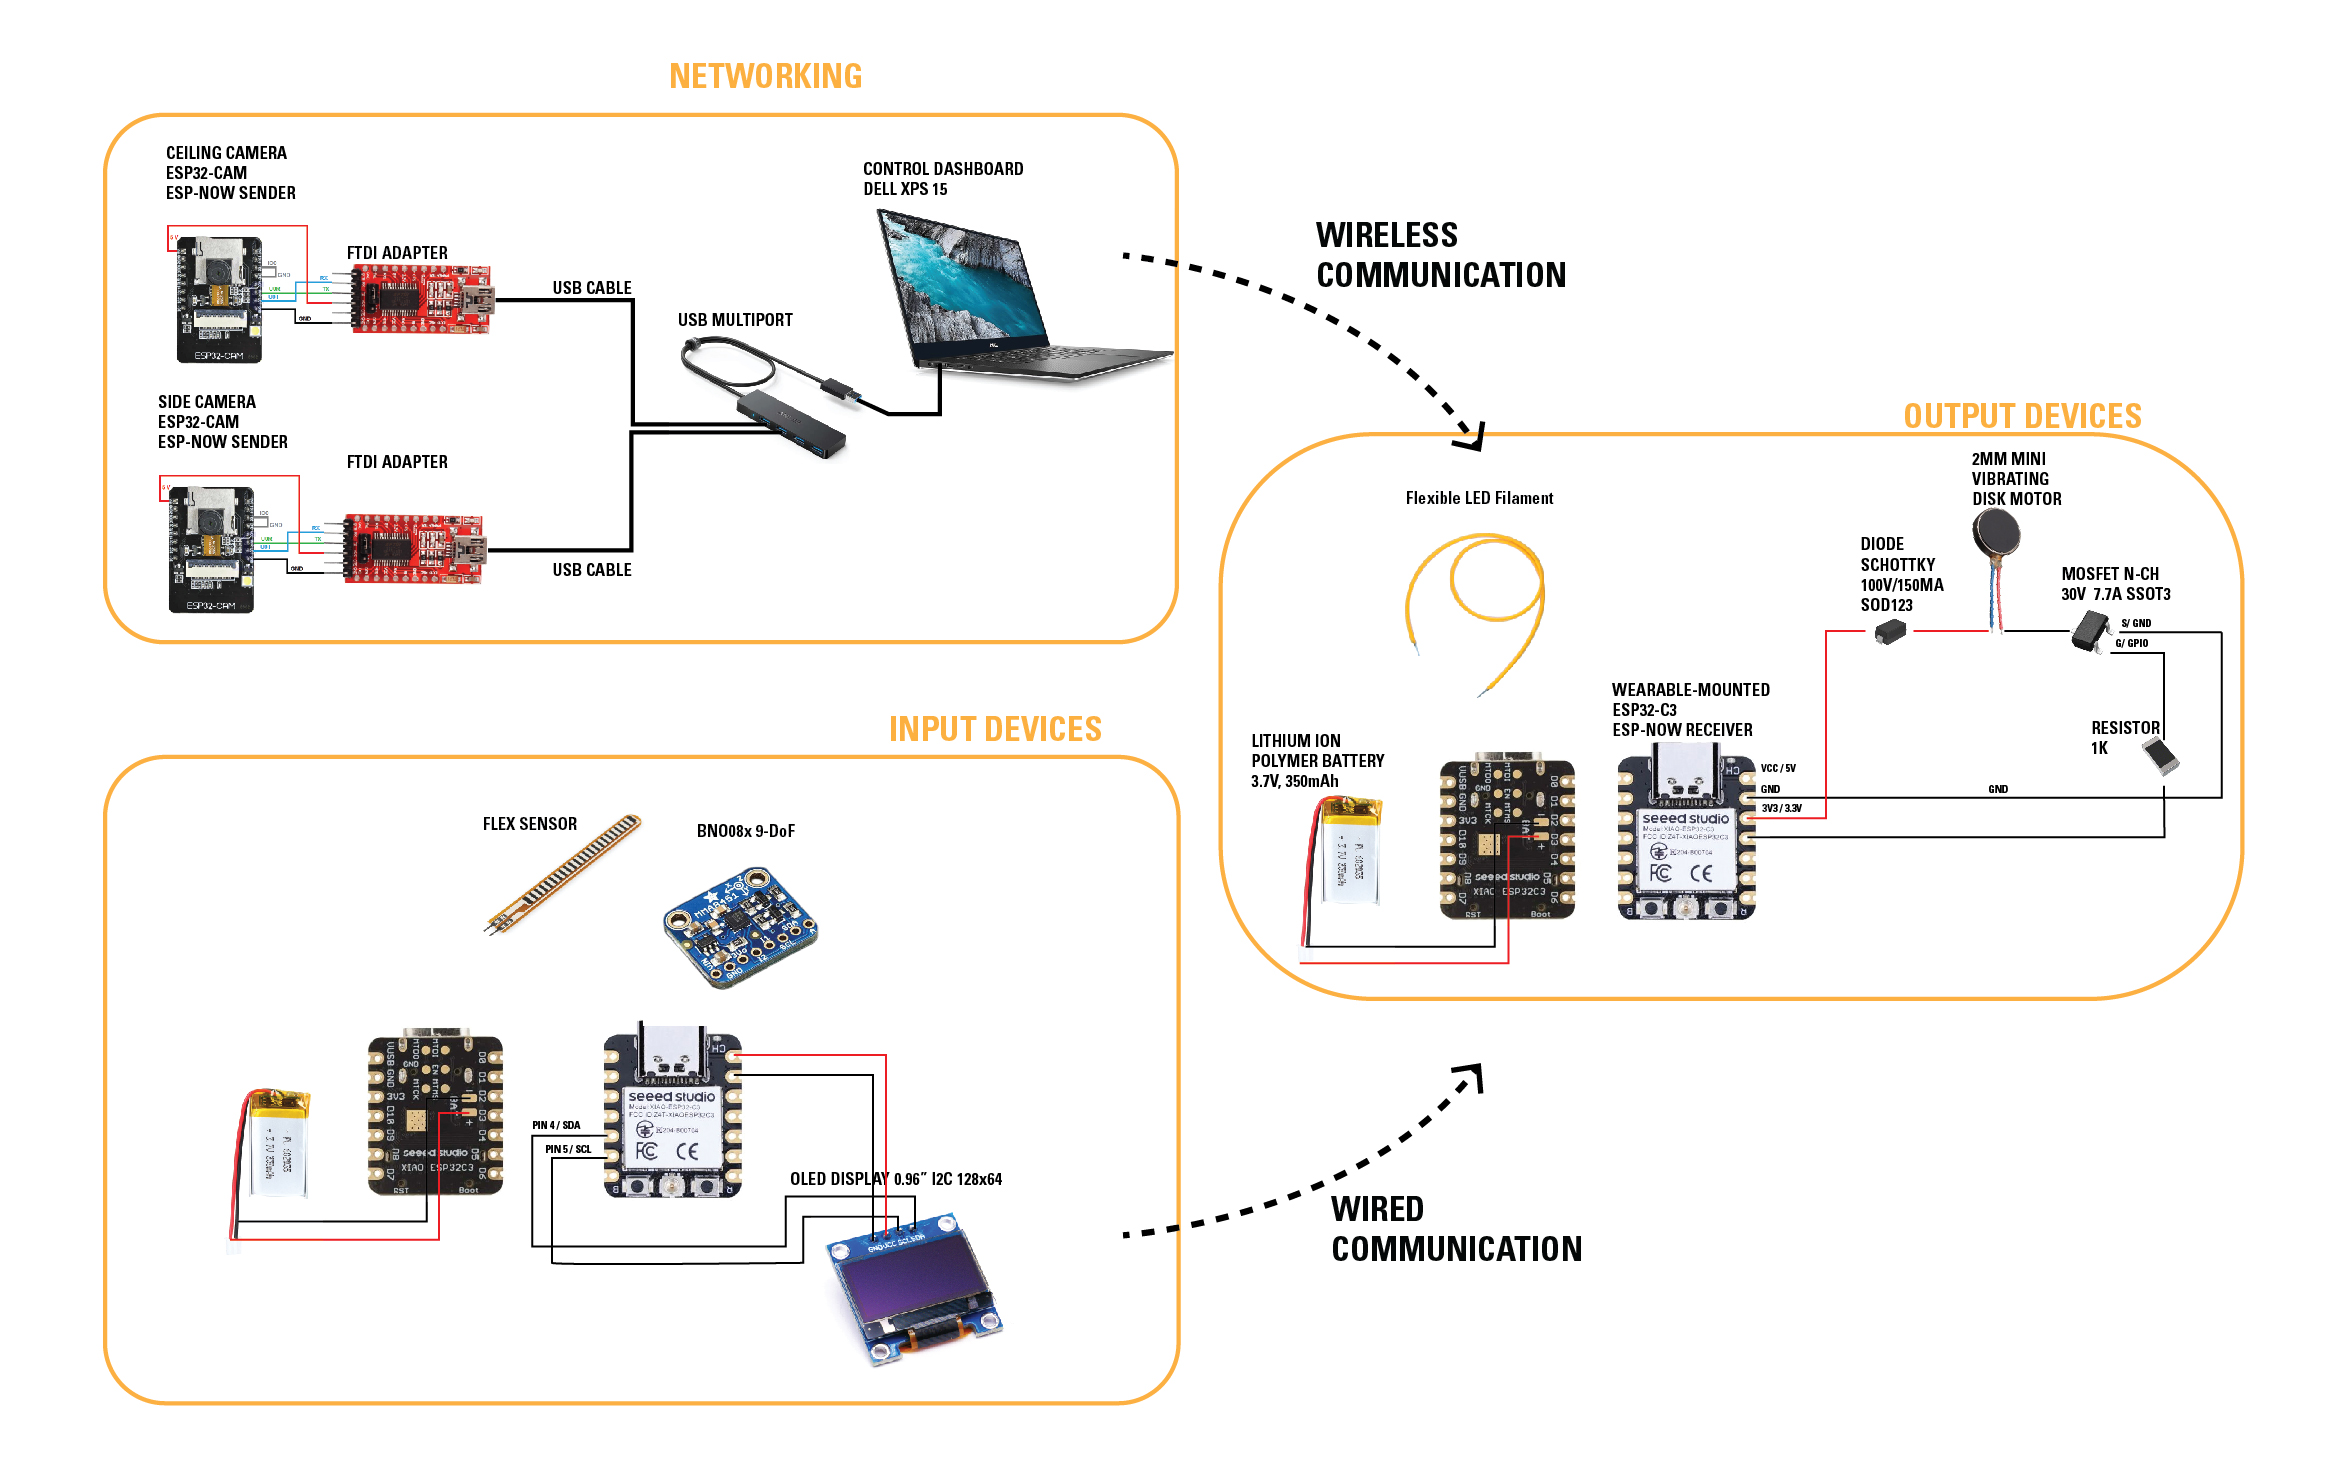
Thinking about networking and communication this week, I've started to reorganize my schematic diagram.
The computer vision network of cameras will transmit video to my laptop. OpenCV processing will be done through Python.
Two microcontrollers will be embedded on the wearable:
One microcontroller will process incoming signals to control output devices.
One microcontroller will control sensors to gather biometric data.
Originally, I thought I would need to connect the ESP-32CAM to an ESP-32C3 on the wearable. Now, I think it makes more sense to send data from the laptop wirelessly to the ESP-32C3.
I thought that I might be able to use one microcontroller only, but if I want to scale the design to incoprorate more sensors, I need a more powerful controller like the XIAO RP2040.
Therefore, I need a wired communication protocol to send sensor data to the output device controller.
Week 11 Update: Schematic Check-in
Revisiting my schematic diagram.
development notes:
Trying openframeworks for interface design this week, I realized that my schematic needs further revision.
Rather than networking microcontrollers together, it seems simpler to have a wired serial connection from microcontroller to my laptop.
I did some large format milling to prepare a camera stand.
I 3D printed a jig to hold the wearable in front of a robot in preparation for wildcard week.
I test-fit a wrist attachment to the arm.
Final Development: Board Integration
While I was fabricating the board, I was simultaneously trying to troubleshoot all of the features I wanted.
One thing I was attempting was to use serial connection to read and write to the microcontrollers from openFrameworks, as seen in this video from Dan Buzzo
Final Development: Wearable Construction
In collaboration with Inez Ow.
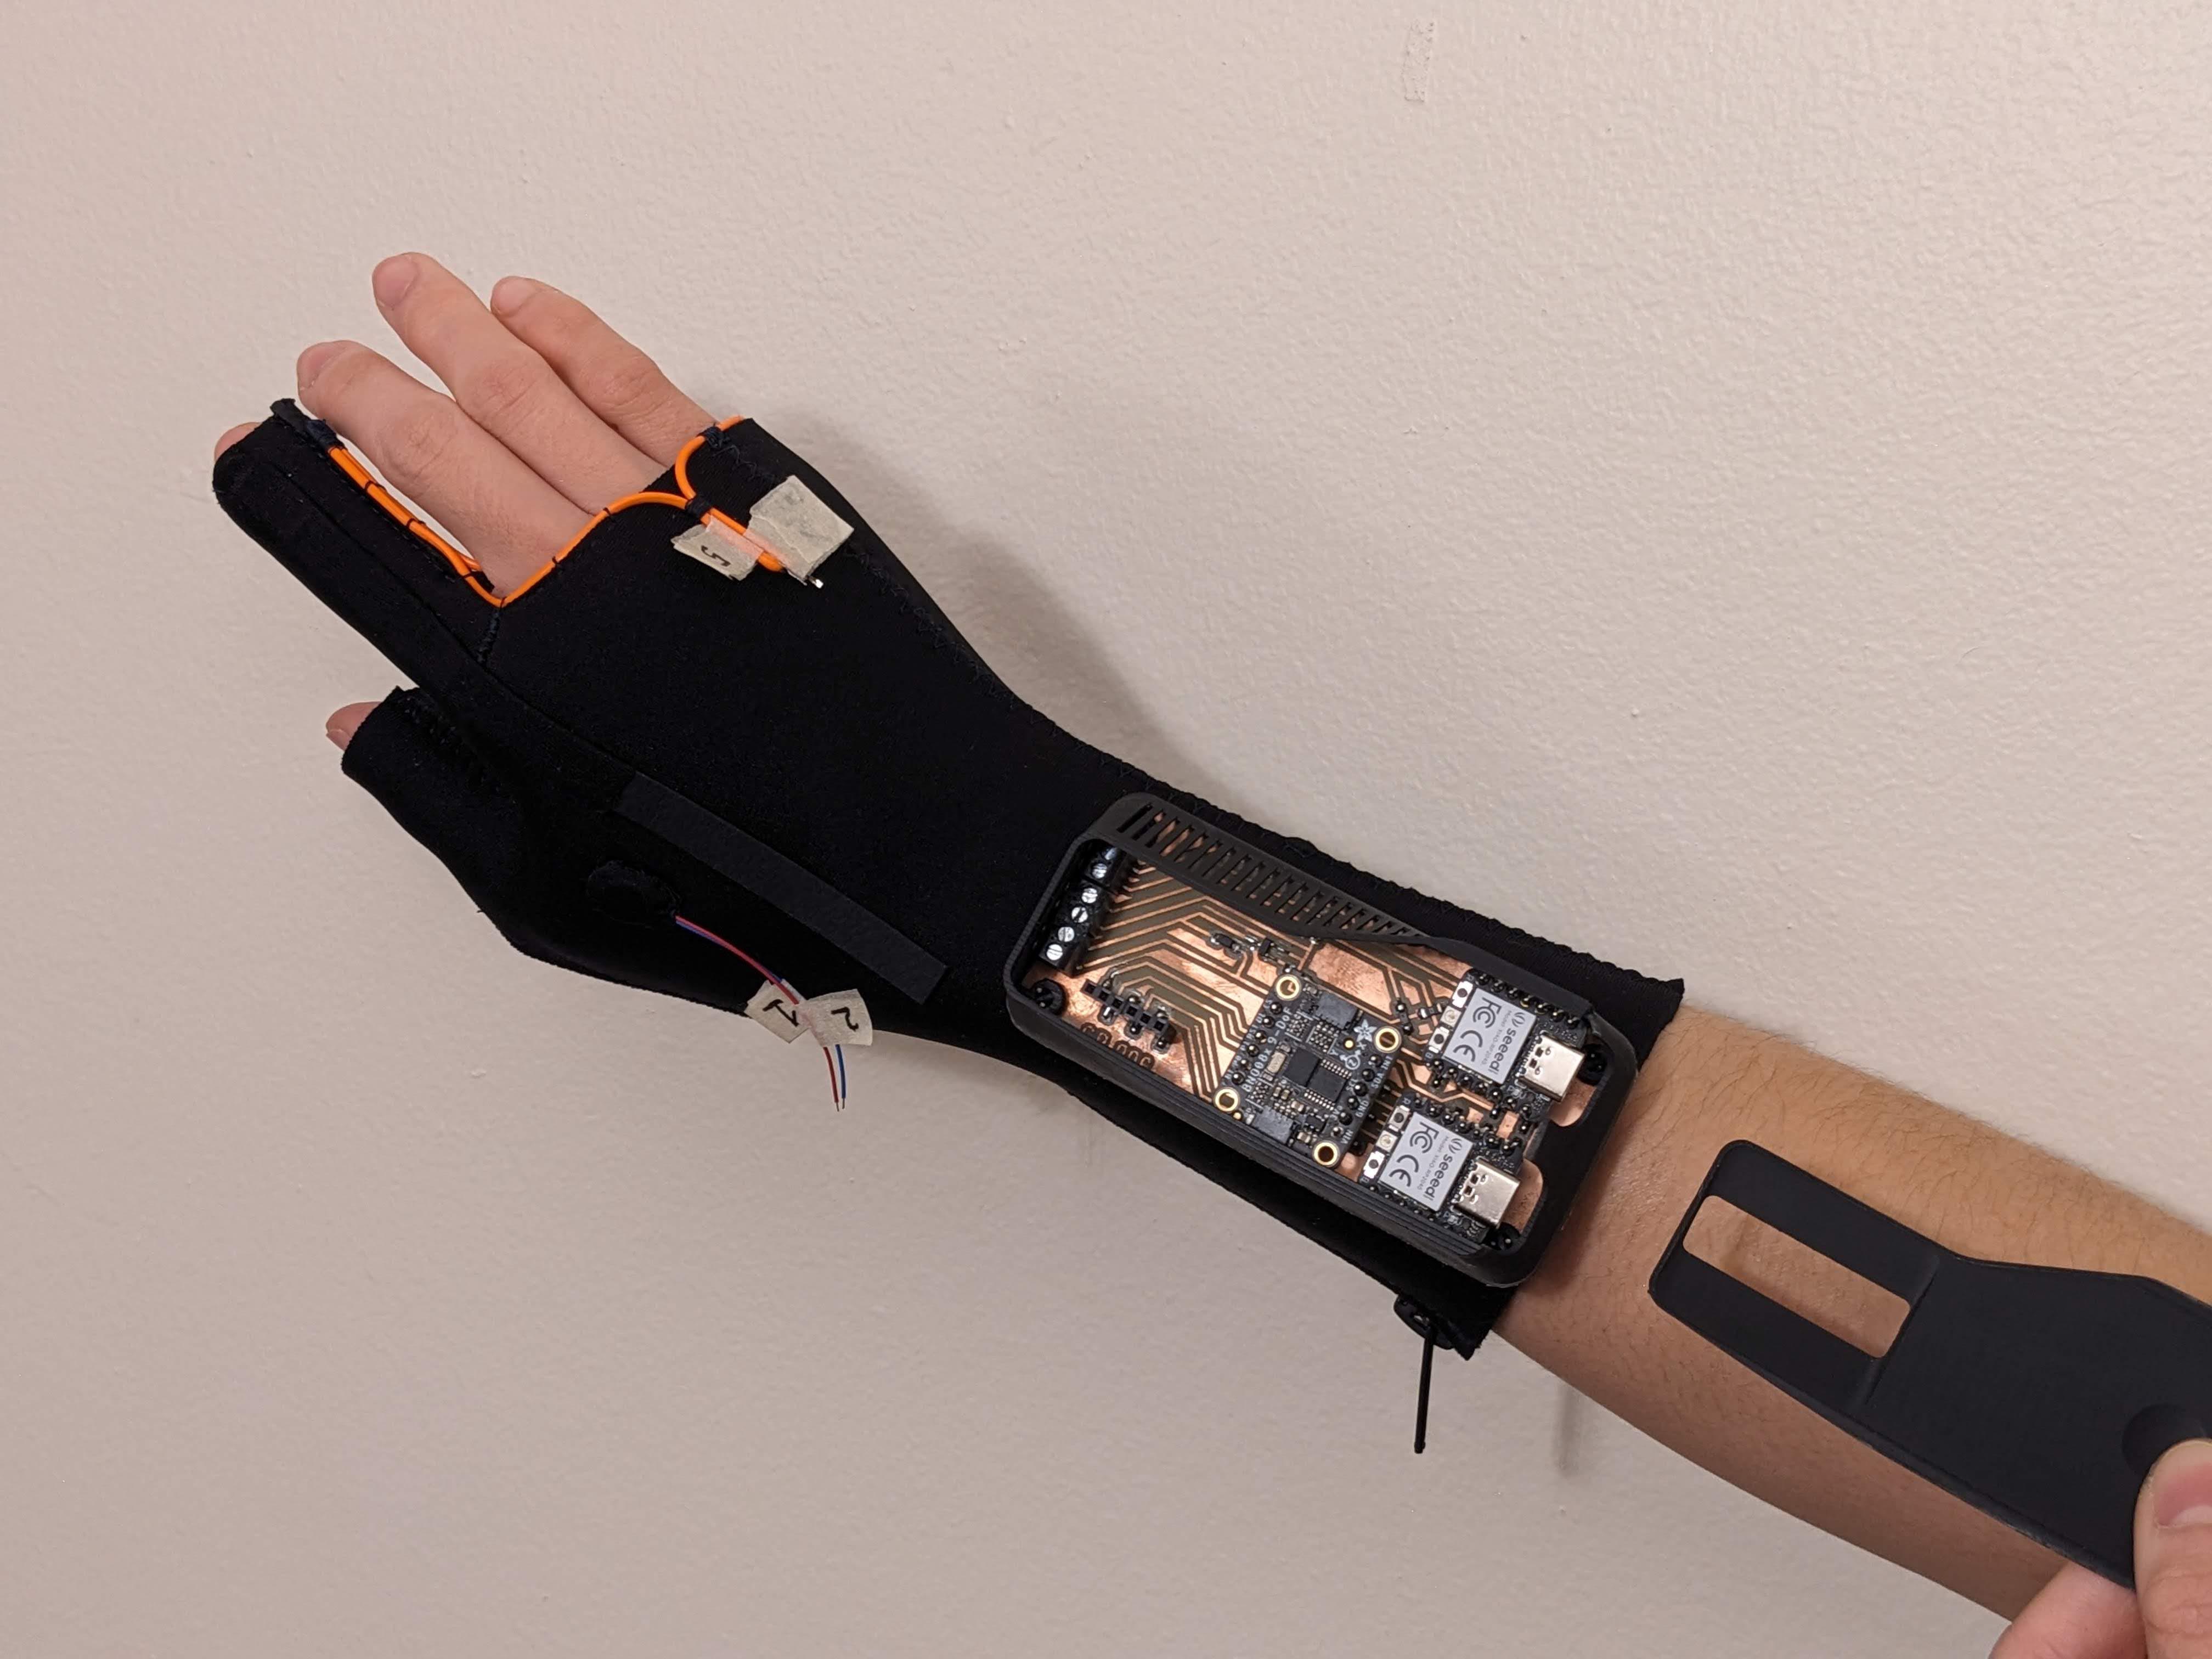
Circuit housing on wearable.
Final Development: Camera Setup
Final Systems Integration
In the rapid process of getting to this point, I've realized so many possibilities I want to explore.
For the time being, to see how these came together within the scope of the class, please see my Final Project