Week 01 :: Computer-Controlled Cutting
How do we use machines precisely?
1. Vinyl Cutting
This week was a warm-up in machine callibration. I used the vinyl cutter for the first time, and learned to be more precise with the lasercutter.
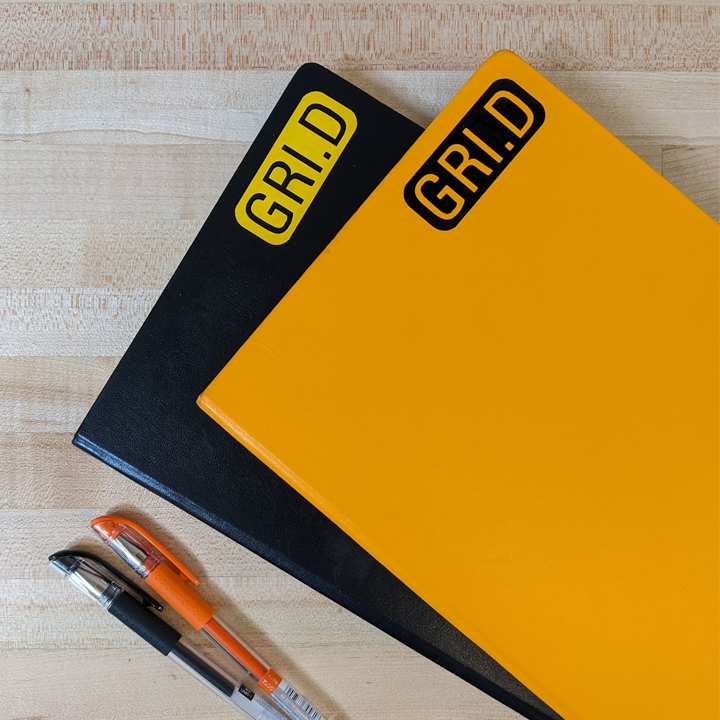 Two sketchbook labels prepared by vinyl cutting.
2. Group Work: Laser Characterization
With Mateo Fernandez
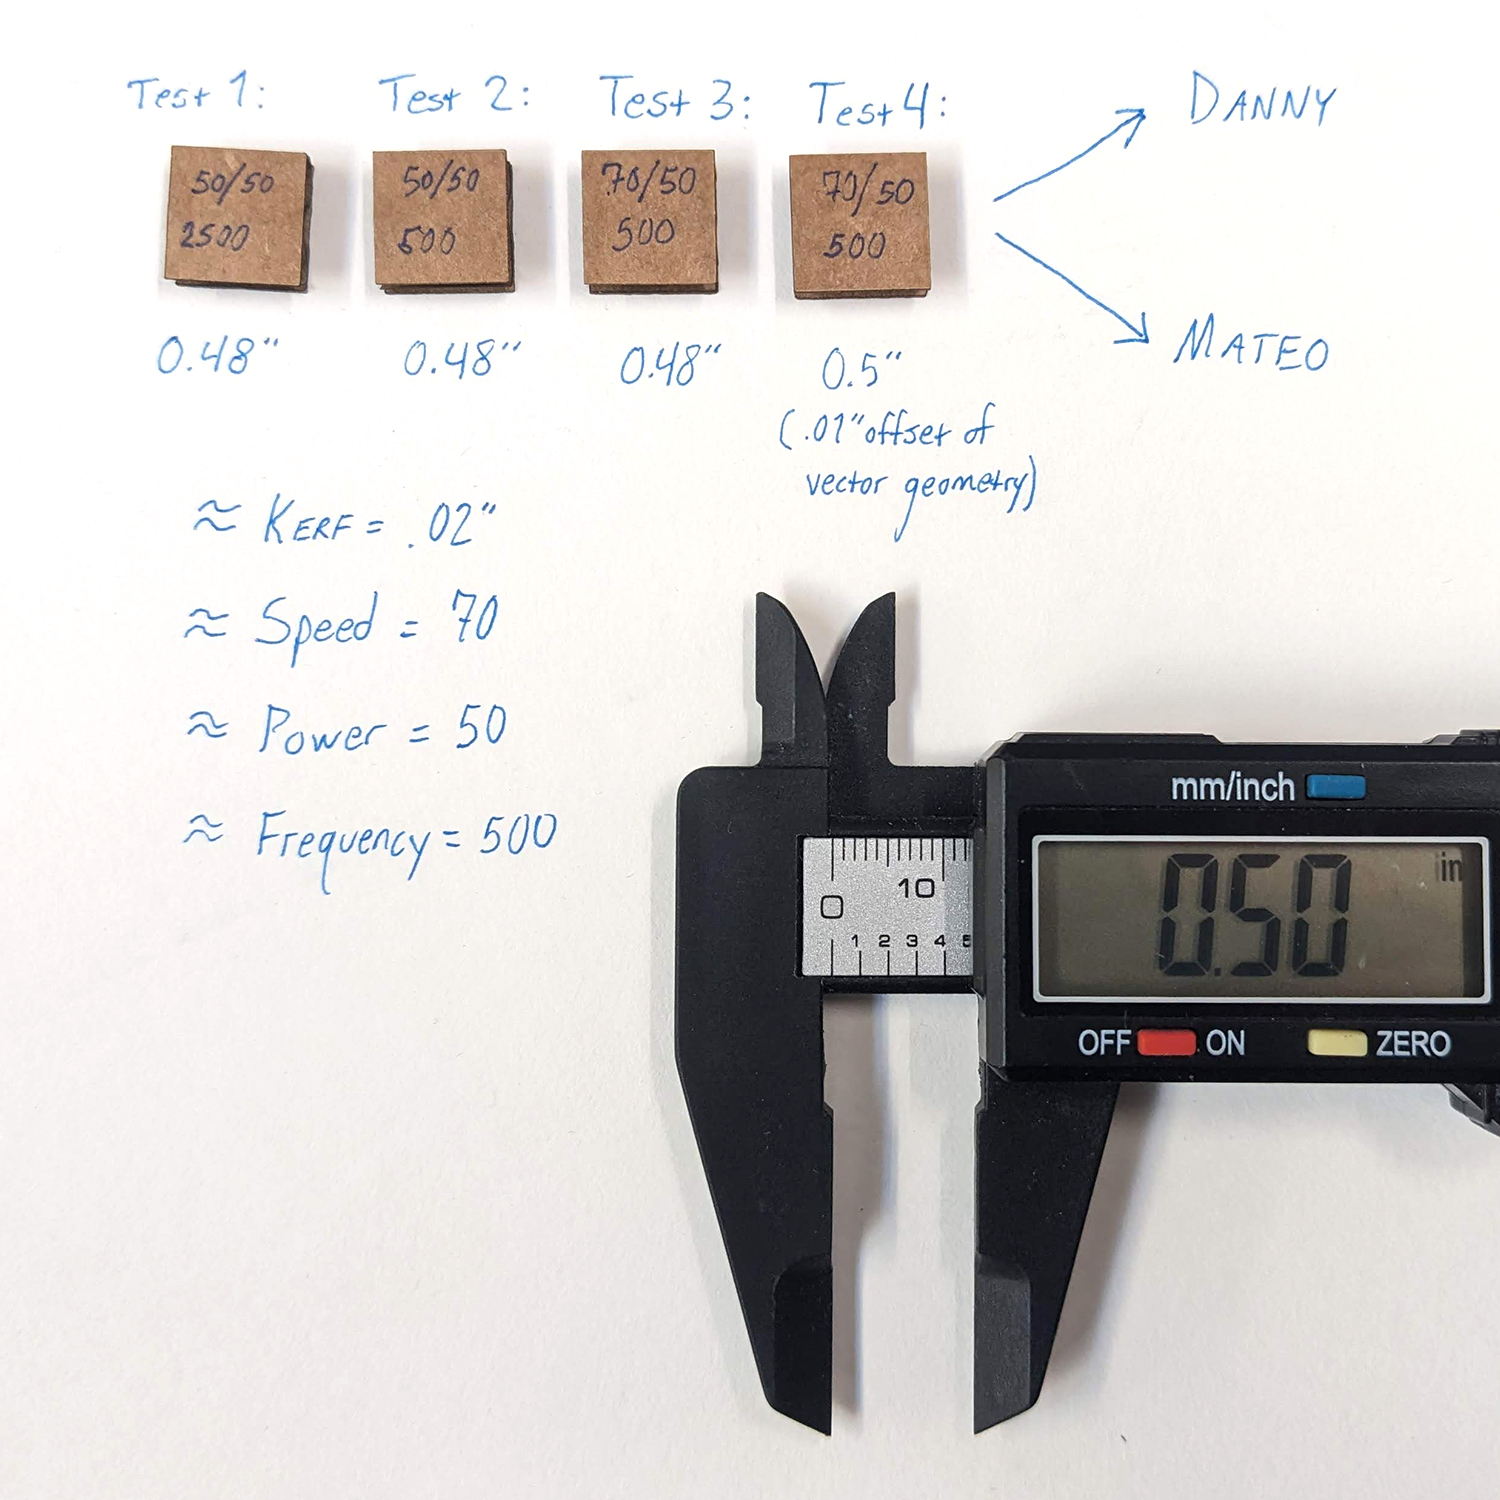 Characterization notes with Mateo Fernandez. Cutting 0.5" squares and adjusting settings incrementally. Once we reached settings suitable for cutting tolerance, we went on our own paths to get results suited to our specific projects.
In my case, I found a 1/96" offset of the vector geometry would result in a square that was nearly 1/32" larger than 0.25", enough so that when pressed together, the cardboard would slightly compress and friction fit snugly together.
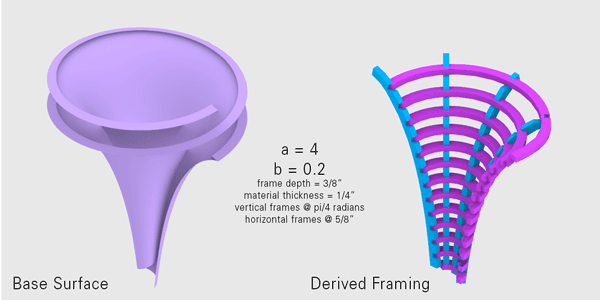
Modular Construction Kit-of-Parts
I'm fascinated by the discrepancy of ideal digital geometry versus constructed reality. Therefore, I'd like to use this exercise to test a workflow for constructing a precise surface using lasercut material.
I decided to start by plotting the function of Dini's Surface, a geometry whose equation can be found on Wolfram Alpha
Version 1 of this process uses the following Grasshopper script and Rhino file.
 I built my parametric model using grasshopper for Rhino 7. Here, the script is shown flexing one parameter, the input "a" in the 3D plot equation of the Dini's Surface function.
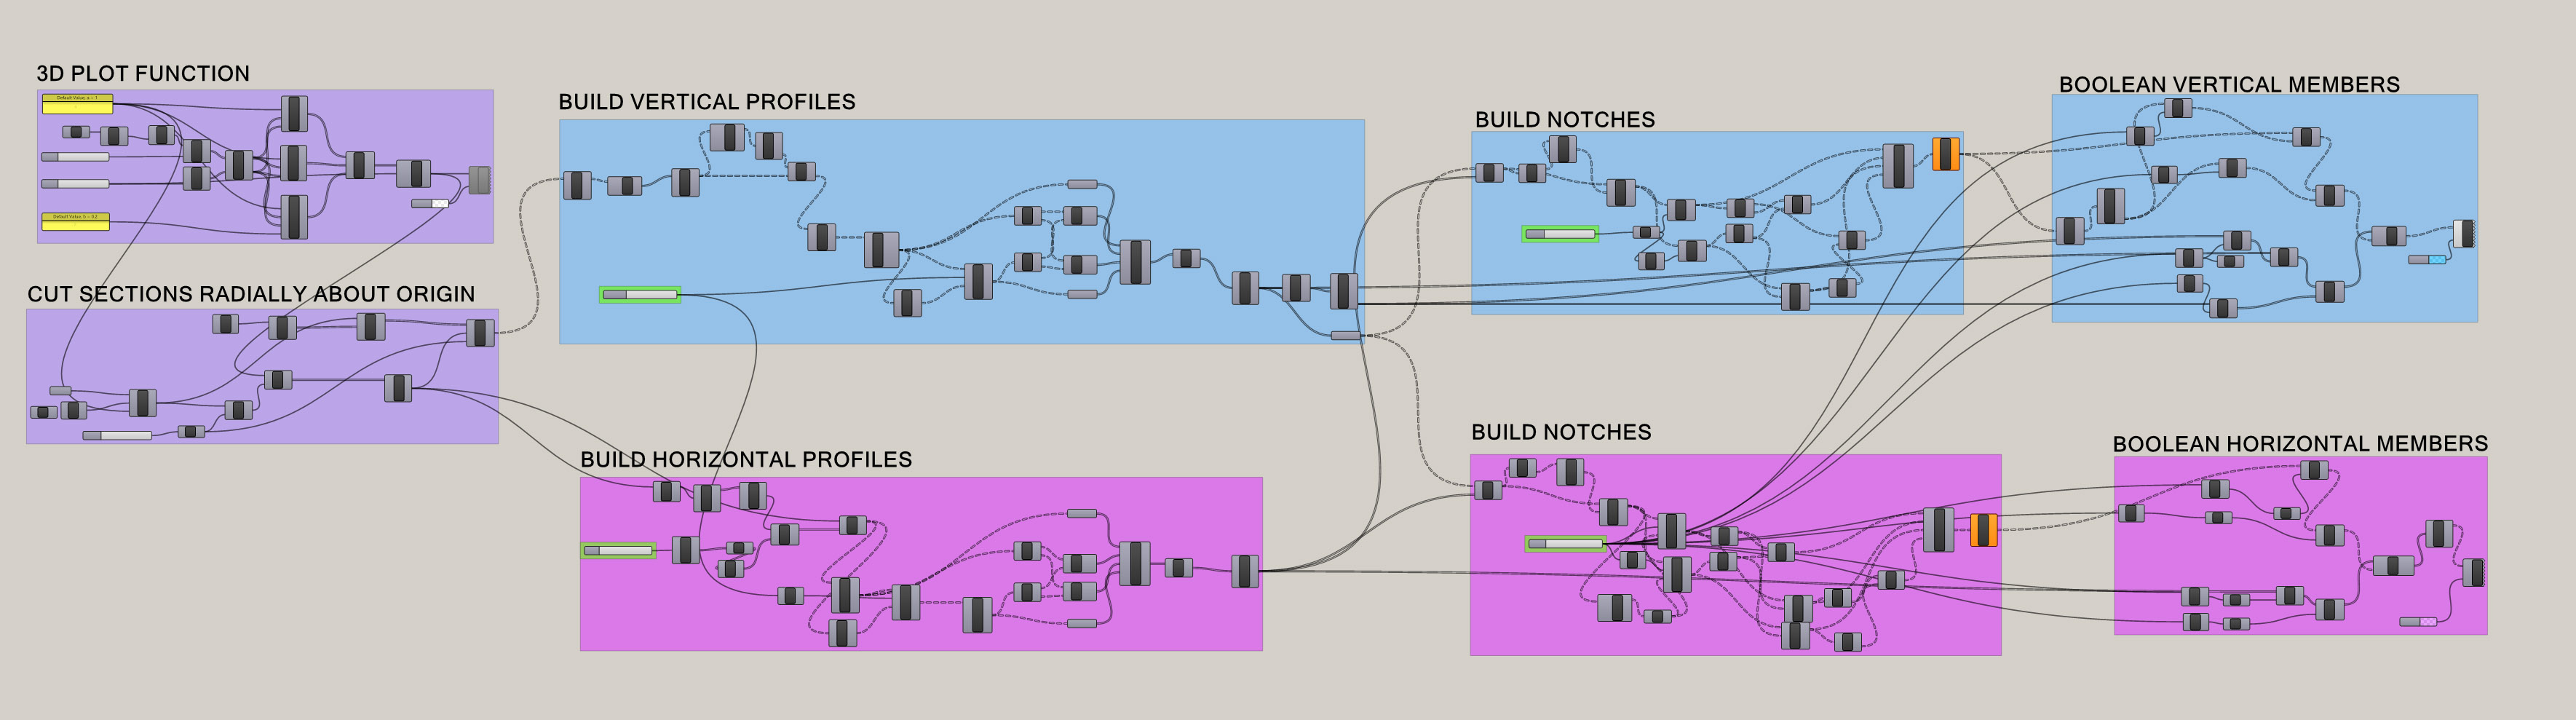 Grasshopper script color-coded to correspond to the geometries above.
I built most of the script framework without knowing the actual material I would use. When I got to the shop, I chose my stock material, measured, and updated my values accordingly.
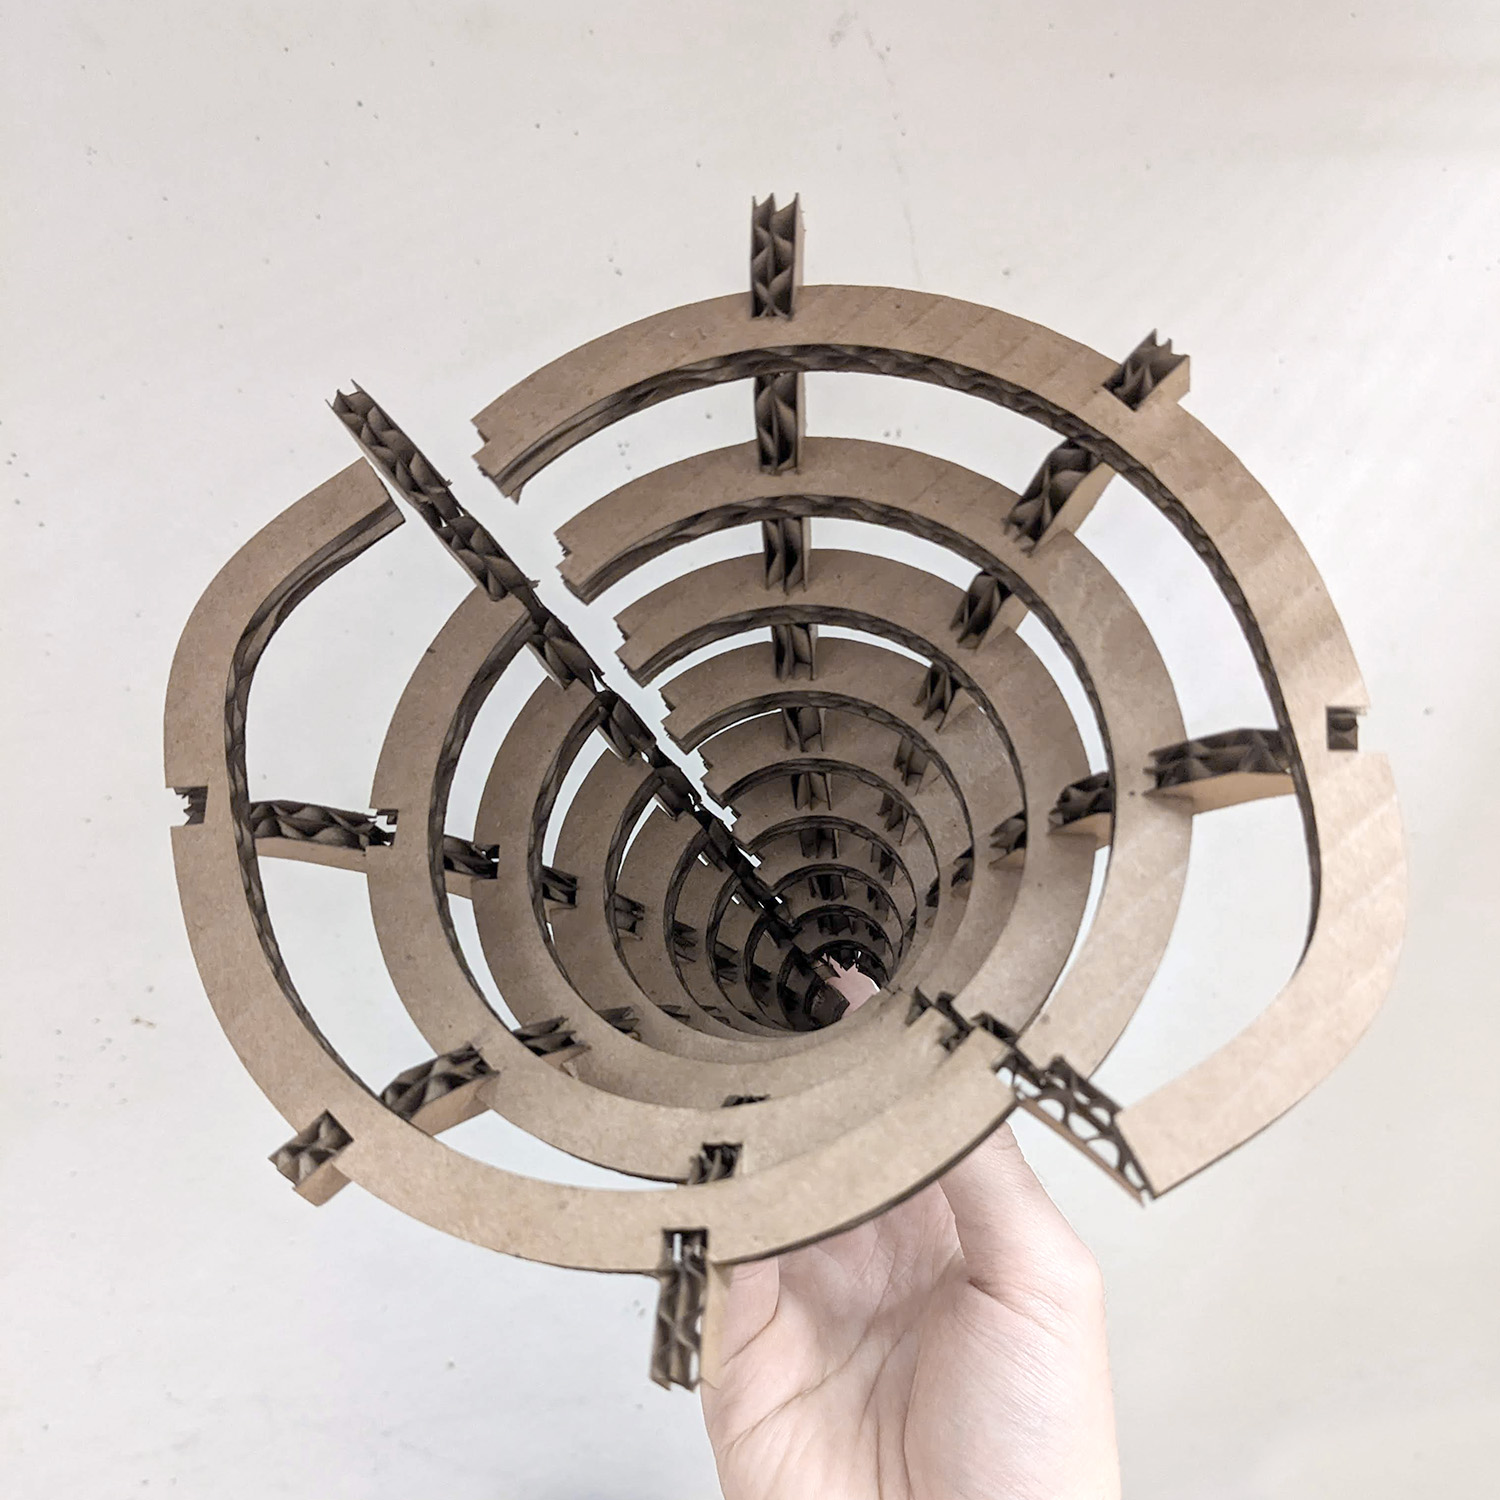 Top view of the assembled framing.
At this point, I realized that I made an error in my process. The four segments are identical, and the surface repeats in a rotationally symmetric pattern about the origin. In theory, I should be able to fit together each of the four segments in sequence to extend the spiral.
My mistake is due to an oversight on my part. I initially planned to use thinner cardboard, but ended up using double-ply cardboard, with a thickness of 0.25". I updated this value in my script, but I did not simulate the assembly to check for collisions. In the end, the segments collide with each other at the tightest point of the spiral, making the full assembly impossible.
Eventually, I'd like to refine the workflow a bit more to automate this process, specifically building features to test constructability of complex geometries.