3D Scanning and Printing
"3D scanning is the process of analyzing a real-world object or environment to collect three dimensional data of its shape and possibly its appearance...3D printing or additive manufacturing is the construction of a three-dimensional object from a CAD model or a digital 3D model." -Wikipedia
Group Assignment
1. With my group I tested the design rules for fused deposition modeling and stereolithography 3D printers.
There is an FDM 3D printer in my dormitory that I have used before (Fig. 1A). I worked with Suwan Kim to analyze a test print that was previously made from the machine and read more about the particular model, Lulzbot TAZ, online to gain a better understanding of its capabilities (Fig. 1B).

Fig. 1A. LulzBot TAZ 3D printer.

Fig. 1B. FDM printer test print.
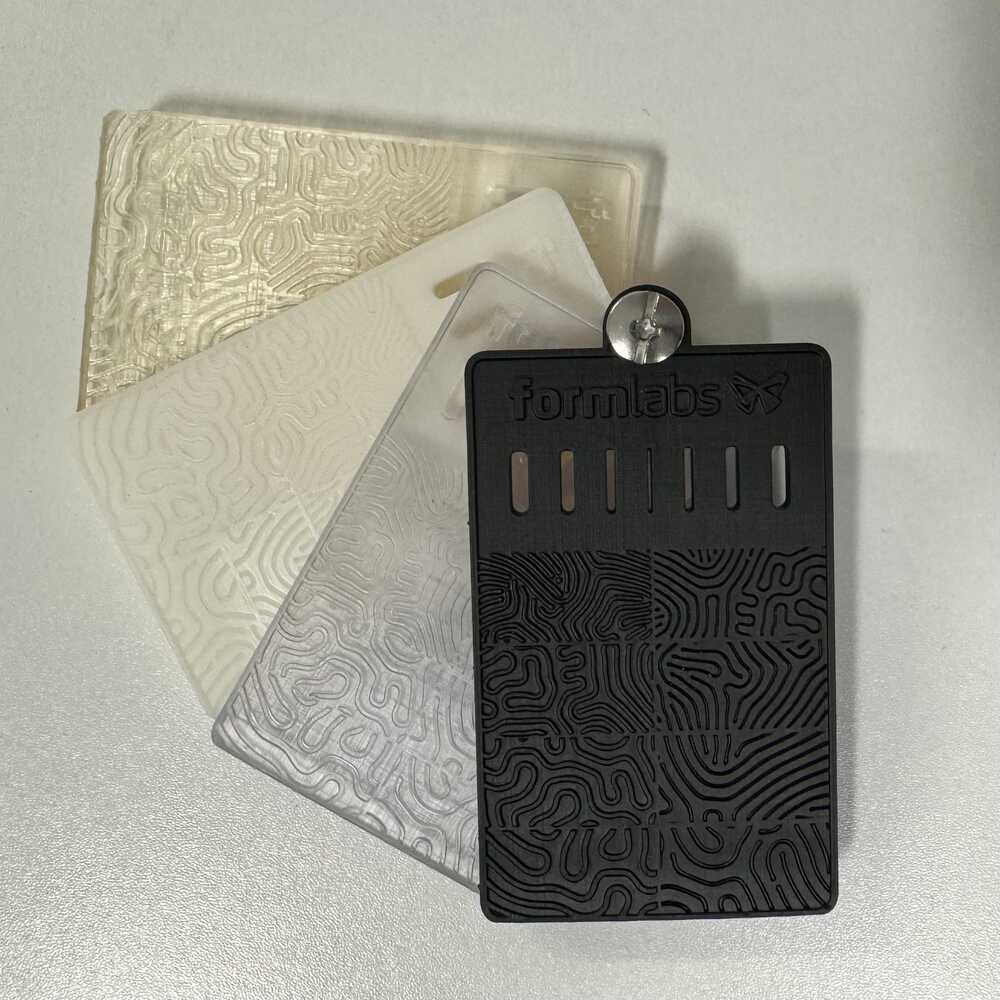
My lab recently purchased an SLA printer, Formlabs Form 3+, that I have been using for my research projects (Fig. 1C). This machine also came with a test print showcasing its functionality printing different resins (Fig. 1D).

Fig. 1C. Formlabs Form 3+ printer.

Fig. 1D. SLA printer test print.
Comparing the technical specifications of the FDM printer and SLA printer, I found that the latter provides higher resolution. Additionally, the FDM printer seemed to fail at printing a bridge structure, which I aimed to incorporate into my structure. For these reasons, I opted to 3D print using the SLA printer.
Individual Assignment
2. I scanned and 3D printed my head.
Looking for a convenient way to 3D scan an object, I came across the iOS application "polycam" (Fig. 2A). This software offers LiDAR and 3D scanning capabilities that can create a rendering of any object from a toy to a room. I wanted to scan an object that I could then 3D print, and I decided it would be neat to scan my head. My goal using this app was to generate a CAD file I could then edit to my desired specifications and then 3D print as a smaller-than-lifesize bust.

Fig. 2A. polycam app interface.
As I could not physically hold the phone and scan in 360 degrees around my head, I got my friend to scan while I stood still. The result, as displayed in the app, looked pretty good, and with a few additional scans to patch up holes, I was left with a model suitable for opening in CAD (Fig. 2B). Some colors in the model are distored (for example, the white in my hair) as an artifact of the scanning process, but as I was to print in a single color, this was not an issue.
Fig. 2B. Scanned head.
The app allowed me to export the scanned head as an ".stl" file, which I opened as a mesh in Autodesk Fusion 360. I had to convert this mesh into a body in order to edit it. Following this conversion, several bodies were actually made, but I noticed there was only one main body with the rest being artifacts that could be deleted. The result was a realistic scan of my head that would be suitable for 3D printing (Fig. 2C). In order to have this print displayed on a flat surface, I added a post that could connect to a base, which I also designed (Fig. 2D). A reduced file size version of the head can be downloaded here, while the base can be downloaded here.
Fig. 2C. 3D model of my head.
Fig. 2D. 3D model of a base for the head.
After printing with the SLA printer and assembling, the Shonit bust is complete (Fig. 2E). It is printed in two sizes (Sharpie for scale). At 0.025 mm resolution on the SLA printer, the larger print took 18 hours to complete while the smaller print took 4 hours to complete.

Fig. 2E. Shonit bust.
I have been 3D printing for a while, but I have never printed something that I scanned, so this was an informative and fun project!