1.2 PARAMETRIC DESIGN & CUTTING
1.1 WEBSITE
Softwares: Figma+Dev, PhotoShop, VS code
Files: ClassWebsite.fig
ChatGPT: Website.Prompt1 ,
Files: ClassWebsite.fig
ChatGPT: Website.Prompt1 ,
Softwares: Rhino 8, Grasshopper
Devices: Lasercutter Arch Shop - 500/200 PSI (find name and exact calculations used)
Files: AstroChain.3dm , AstroChain.gh , AstroSigns.svg
Devices: Lasercutter Arch Shop - 500/200 PSI (find name and exact calculations used)
Files: AstroChain.3dm , AstroChain.gh , AstroSigns.svg
01

TRIALS & TRIBULATIONS AND THE LESSONS LEARNED


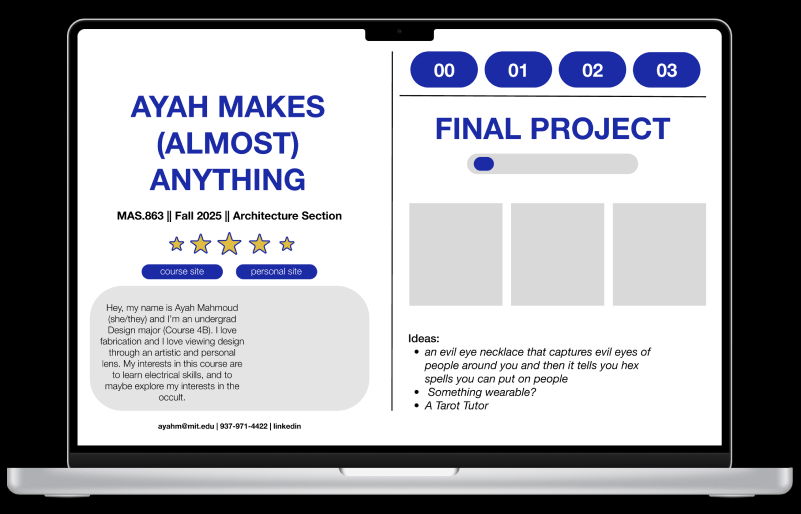
Attempt 1


Attempt 2


I was
extremely
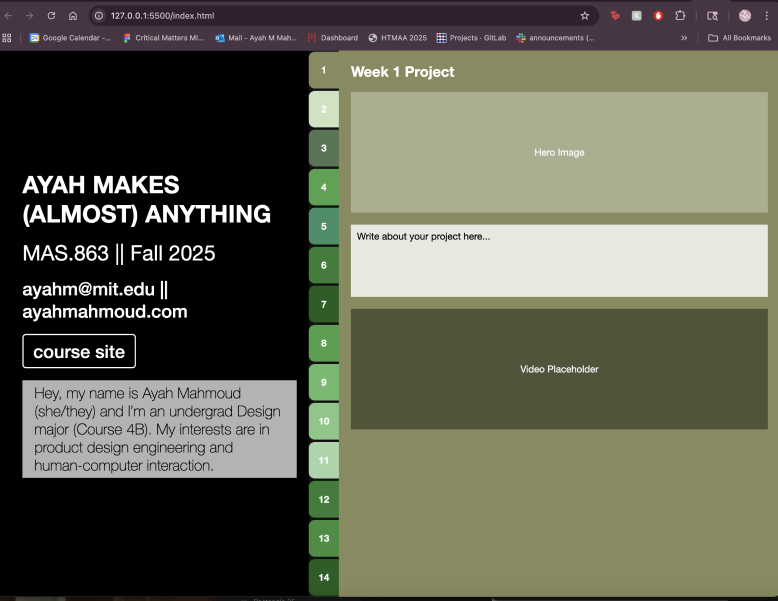
indecisive about how to make this website at first. My initial idea was
I really wanted to create a tab system for going through the
assignments, to remind me of digging through a binder.
I made an initial sketch of this idea on Figma and wrote this prompt into ChatGPT to create the website. But upon going live, it looked a bit too retro for my liking. The color pallet also didn’t resonate with me. So I went back to the drawing board.
I made an initial sketch of this idea on Figma and wrote this prompt into ChatGPT to create the website. But upon going live, it looked a bit too retro for my liking. The color pallet also didn’t resonate with me. So I went back to the drawing board.
For this project, I wanted to test the limits of cardboard prototyping.
I’ve used cardboard for prototyping physical UI in the past, and most of
them not only felt structurally unstable but looked
horrendous
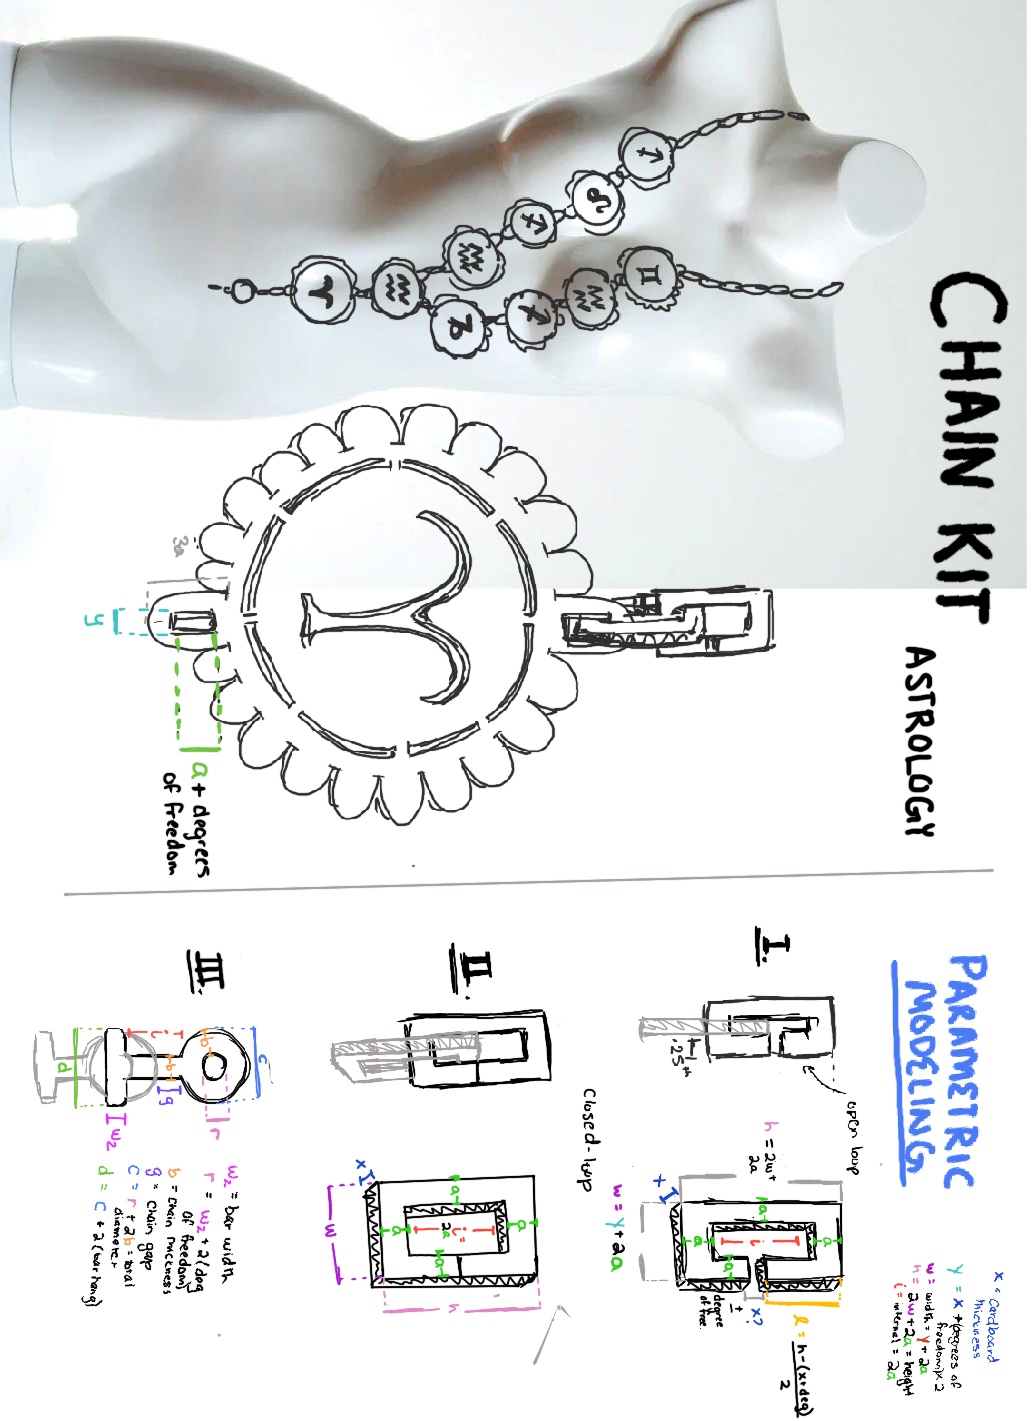
. So for this week, I wanted to make a wearable jewelry/decor piece, and
made a sketch for a chained necklace with zodiac embellishments. The
idea is, since remembering your zodiac chart can be hard, with this
necklace, anyone can assemble their own birth chart using the chains and
charm pieces as a visual reminder.
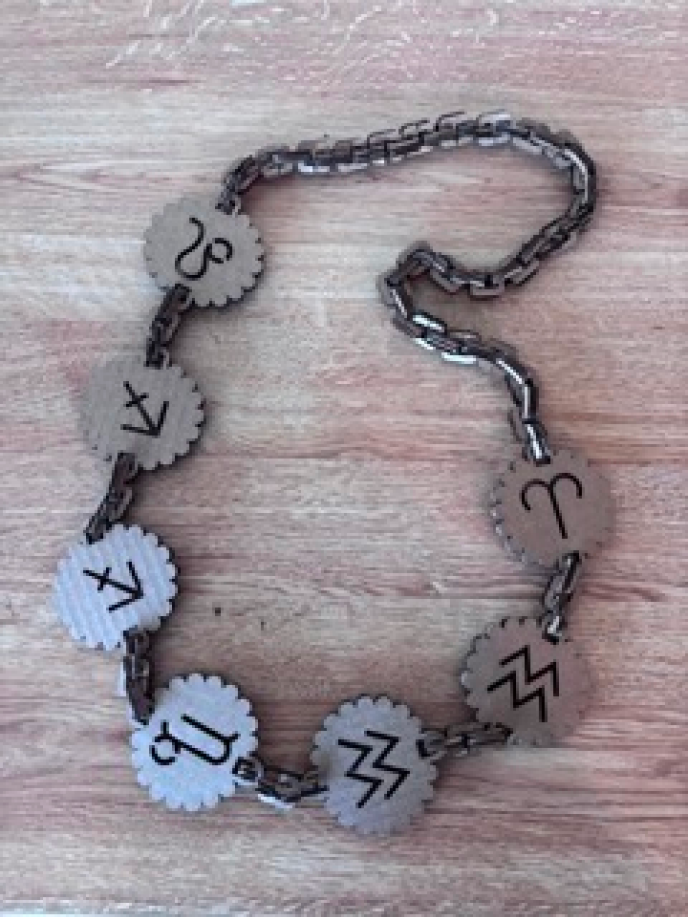
- When designing wearables, its always important to pay attention to the measurements
- : after finishing the project, I realized it’s a bit too long to wear as a necklace, hence it becoming a decor piece ;-;... In hindsight I should’ve also set a parameter for what sizes are visually appealing to influence the sizing.
- Use parametric modeling for more than just complex geometries:
- I actually really loved using grasshopper for this project because it made it extremely easy to model multitude of types of chains, without knowing the exact specs of my material as I CADed from home.
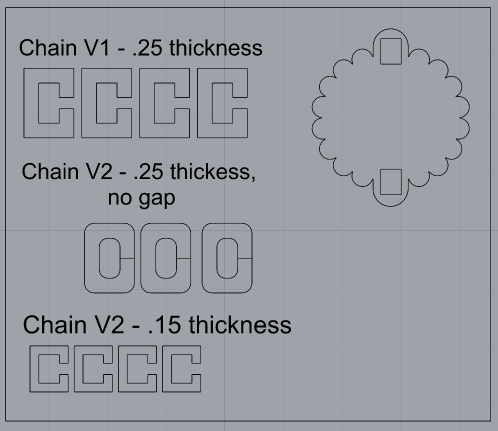
To start thinking about my parametric design process for the chains, I first
drew out a few versions of the chain links that could be visually appealing,
but also structurally sound and fit together well. I didn’t want the chain
coming lose with movement, and I also didn’t want it breaking apart into
separate layers because the chain is too thin.
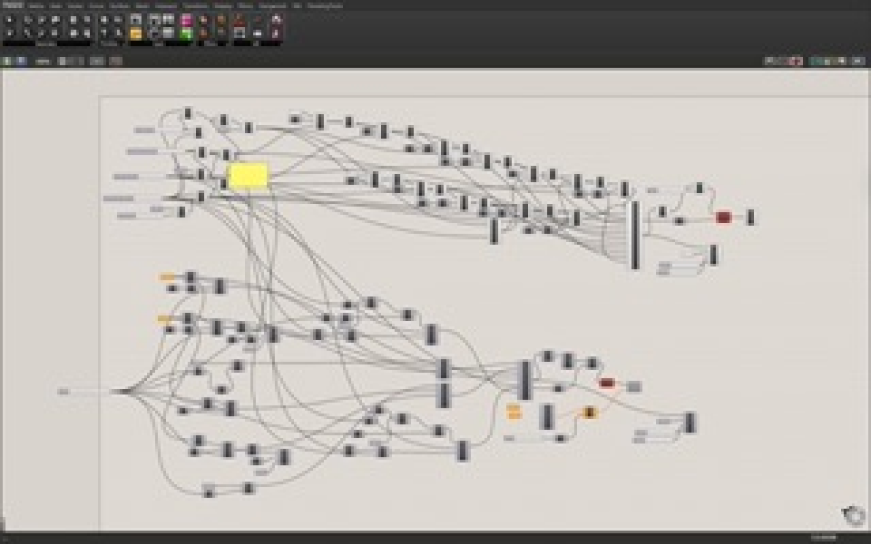
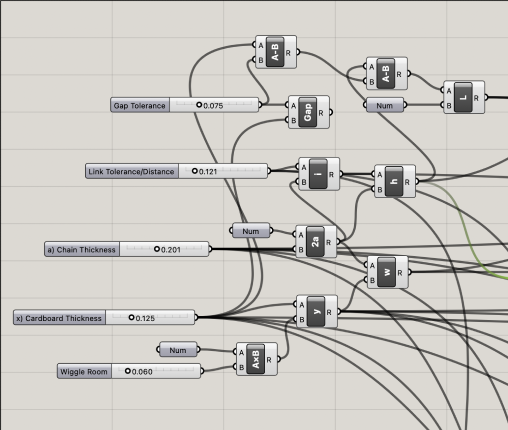
I created some variables and set some basic algebra equations to parametrize my design from my sketches above.
I created some variables and set some basic algebra equations to parametrize my design from my sketches above.
The variables I set were..
x - cardboard thickness
a - chain link thickness
g - chain gap size
derived variables ...
i - chain internal gap size
w - chain link width
h - chain link height
With these variables hoped to influence characteristics such as the thickness, fluidity/movement, and durability of the final chain.
x - cardboard thickness
a - chain link thickness
g - chain gap size
derived variables ...
i - chain internal gap size
w - chain link width
h - chain link height
With these variables hoped to influence characteristics such as the thickness, fluidity/movement, and durability of the final chain.
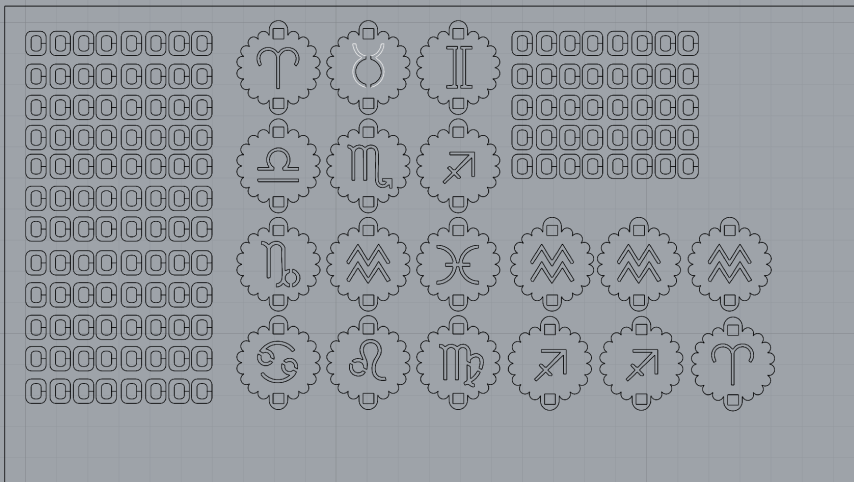
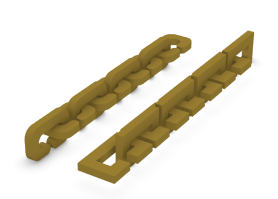
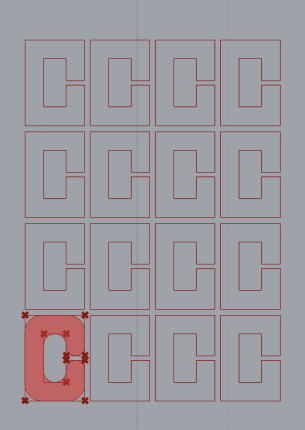
I laser cut two plates, a test plate with multiple versions of the chain and
charm to test tolerances and a second plate of the final chain and charm
plate.
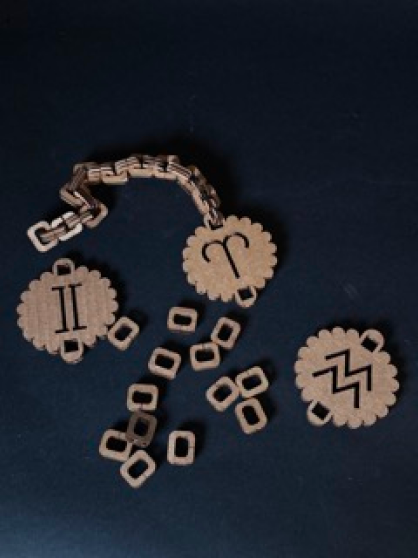
Assembly was fairly easy, and the chain ended up being very fluid and
versatile with movement. Chain links would occasionally knot together if a
link became horizontal though. I noticed that in assembling (my process was
simply twisting the links open and fitting a closed one within), the twisted
cardboard piece was a lot weaker than the unopened links.
I liked the rounded chain with no gap the best. It swung freely, and felt
secure. It also was the easiest put together due to the curved edges. With
this information, I made my final adjustments to the sizing and made an
array with grasshopper for the final laser cut.
PARAMETRIC DESIGN
PARAMETERS
LASERCUTTING
ASSEMBLY
FINAL PIECE
Chain arrayed (sorry I think the fillet wasn’t on preview for the array when
I took the picture!!)
Test 1 - Thin Square Chain with Gap
Test 2 - Long Rectangle Chain with gap
Test 3 - Rounded Chain, no gap
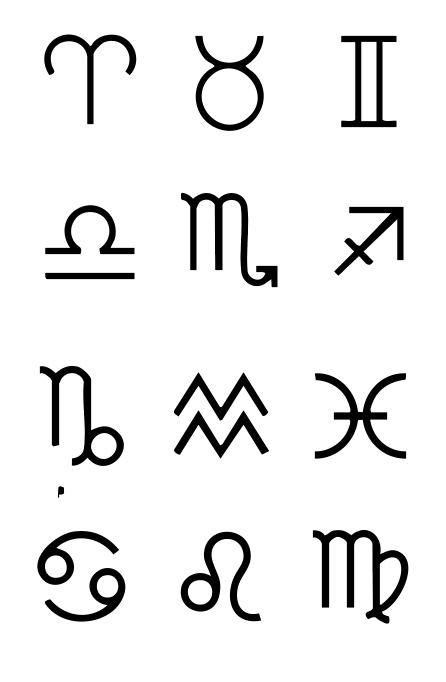
Finally, I took this image of all the astrological signs from google and
added it to Adobe Illustrator, converted it to a vector through image trace,
then exported it as an .SVG file.
In Rhino, I modeled the charms as drawings, setting the connection opening to the grasshopper parameters. Lastly, I attached the signs to the charms that just manually drew on rhino.
In Rhino, I modeled the charms as drawings, setting the connection opening to the grasshopper parameters. Lastly, I attached the signs to the charms that just manually drew on rhino.