Week 6- CAM
Or how to get splinters almost everywhere

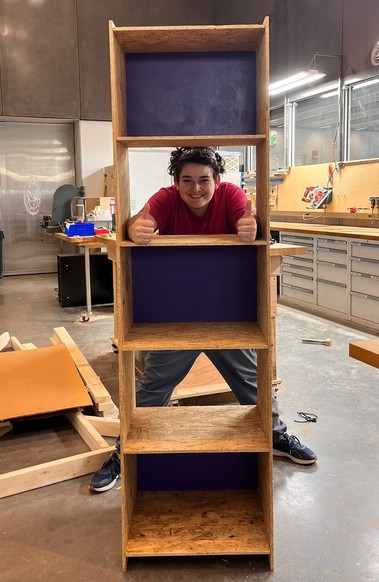
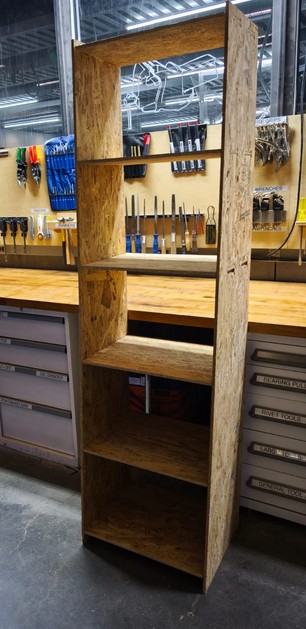
This week we had to make something BIG. And I am chained to functionality and the first thing I thought of was that I've been looking at shelves for a while, my lab desperately needs some extra storage solutions. So I decided to make a shelf. I wanted to make something much bigger to hold some bins that are just stacked on top of each other, but their lids are breaking and bending. However, I had to work with the material available, which was one OSB sheet of 8x4, and that limited me a lot.
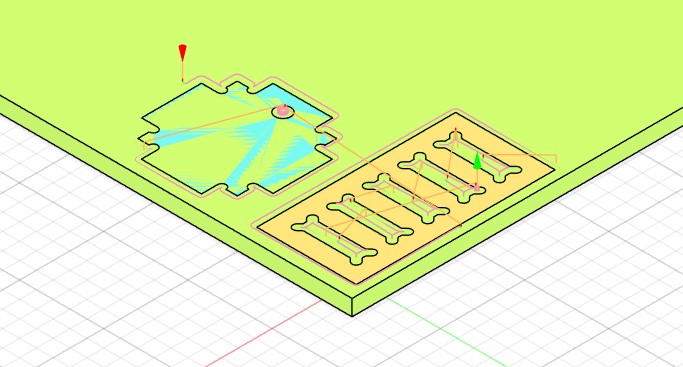
My design was done in Fusion 360. Before diving into my shelf, however, I made a deisgn. to test the kerf. There were several tabs and a square with four different widths to test how they would slide together. I found a 0.1 mm kerf provided the bets fit. However, this was not super consistant due to the way OBS is made, with chips of wood glued together. It was not entirely flat and consistent.
My design was done in Fusion 360 and fully parametrized. This way, I could adjust the different dimensions to fit the 8x4 sheet once I set all the pieces in the board.
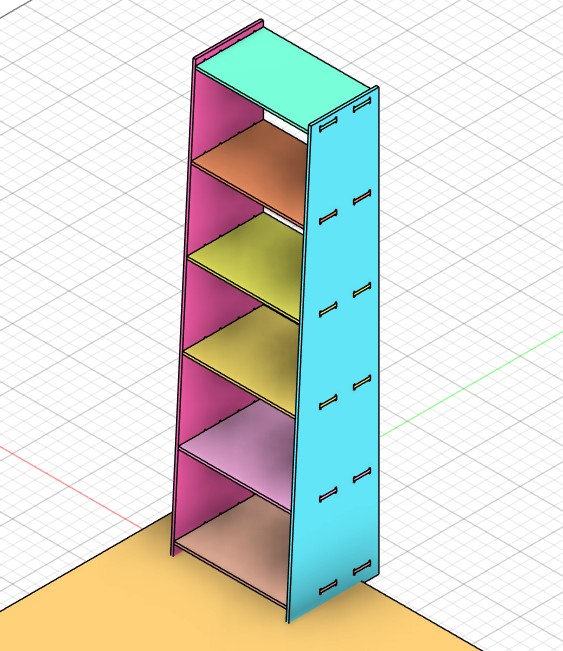
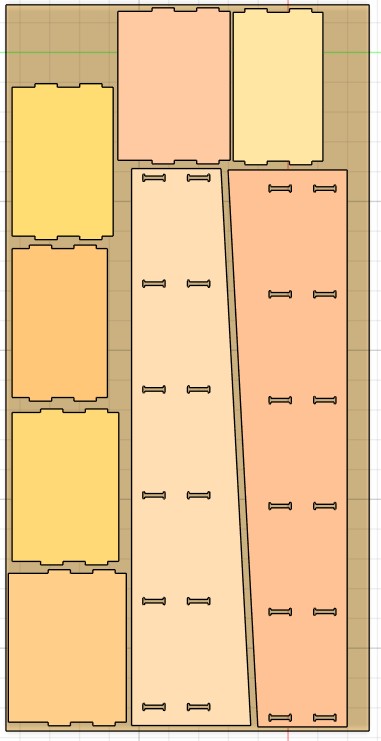

The design is in this file. It has 6 shelfs and a slight taper, with the higher shelfs a bit narrower than the lower ones. I wanted to cut a backing, but I would need a lot more material. I manually created a dogbone on all the inside coreners
I made a 2D contour in all the edges using the manufacture tab. I chose a 1/4 inch endmill and a feedrate of 1000 mm/min and a speed of 12000 rpm, with a ramp down so it would slowly work its way inside. I checked the entire simulation and everything appeared to be fine.
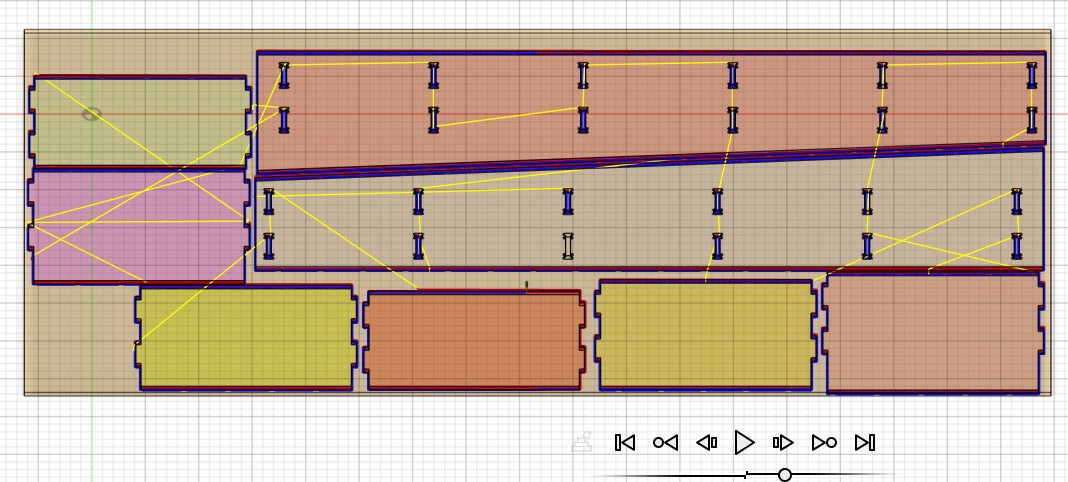
This means it was time to get to work. I hauled the board to the CNC bed. I used screw on all corners to keep it secured. I zerod it, using the plate and manually checkin X and Y, so it was all lined up and perfect.
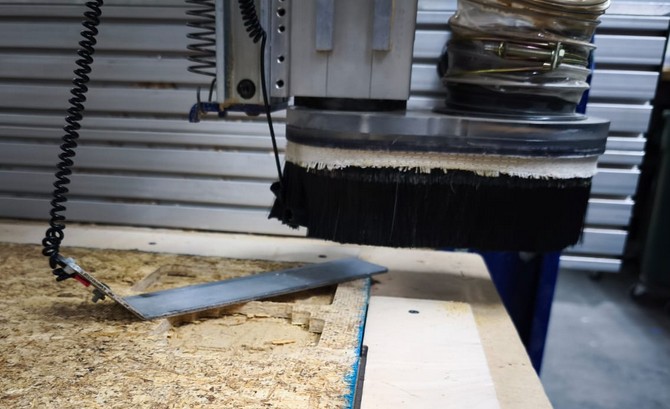
Actually zeros were wrong. I didn't chececk how much clearance I designed in the other end of X, which is unfortunately hard to monitor from the front of the machine. So the first cut was a bit off, cutting all the way to the edge and beyond.
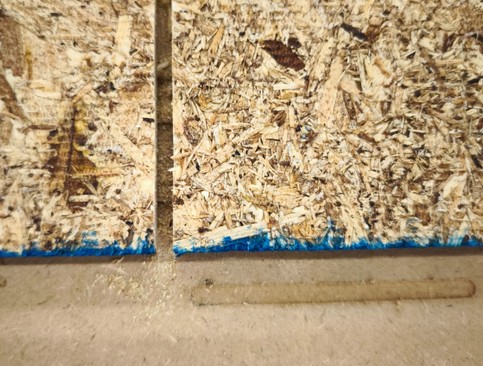
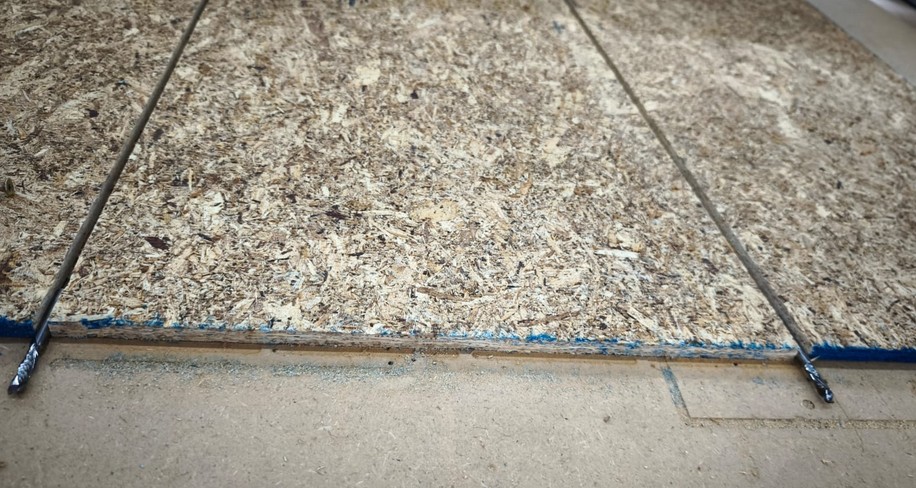
From the picture you should see my other issue. I thought I was doing multiple passes, but clearly the first pass cut all the way through. I fixed this mistake in Fusion, but now I needed to secure this part of the design to the table so it wouldnt shift when I tried to cut the holes in the middle. In order to realign with the board, Dan suggested I used two endmills with the same thickness to stand in as the wood that had already been cut away. This proved to work perfectly, allowing me to secure the board aligned to the previous spot. Without this, I would have had to redo the entire cut. With no extra material, this would have been impossible. With a modification to the 2D countour to add passes and not cut all the way through on the first pass, I was ready to try again. This time, it worked perfectly
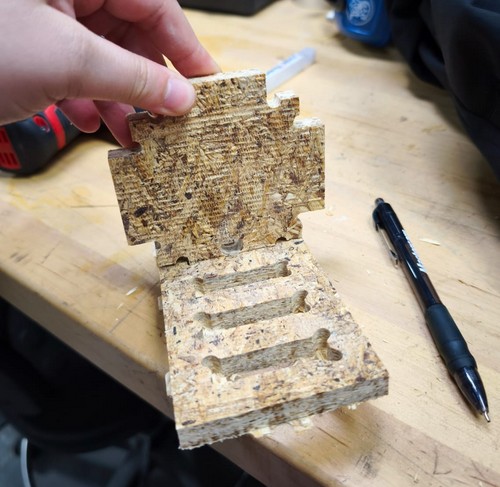
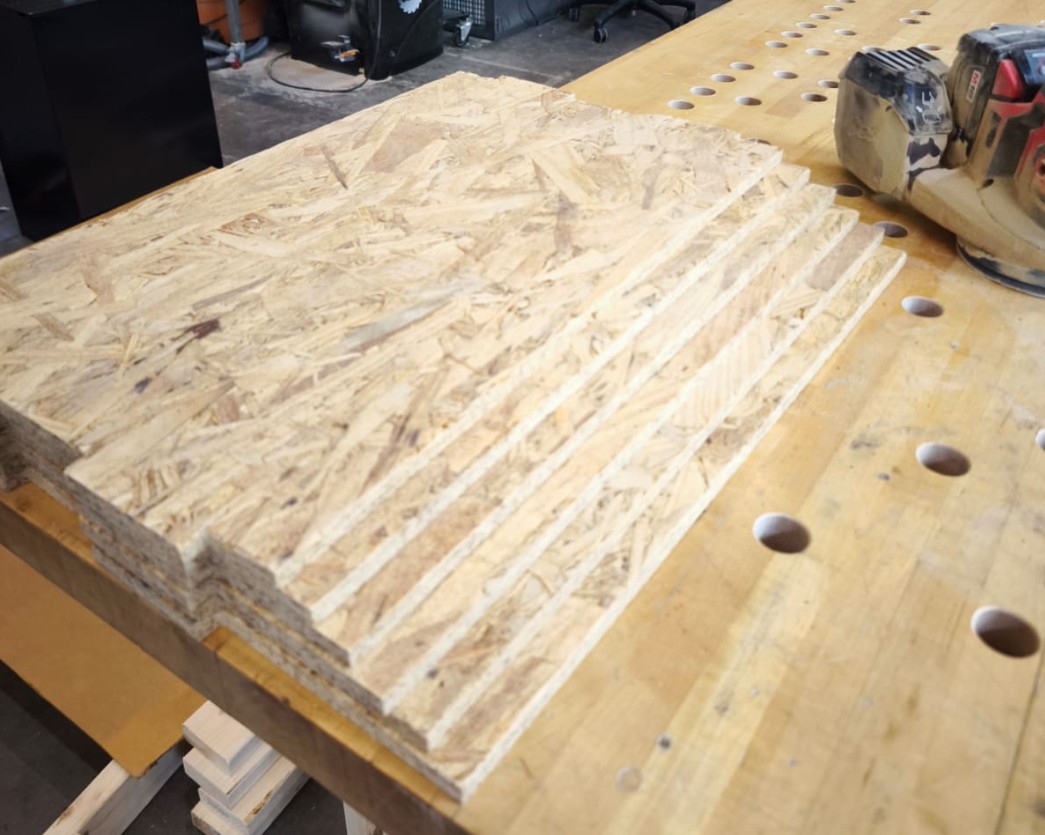
I had all the pieces of my shelf cut out. Now it was time to finish them. I started with sanding all the edges, which were super rough due to the nature of OSB.
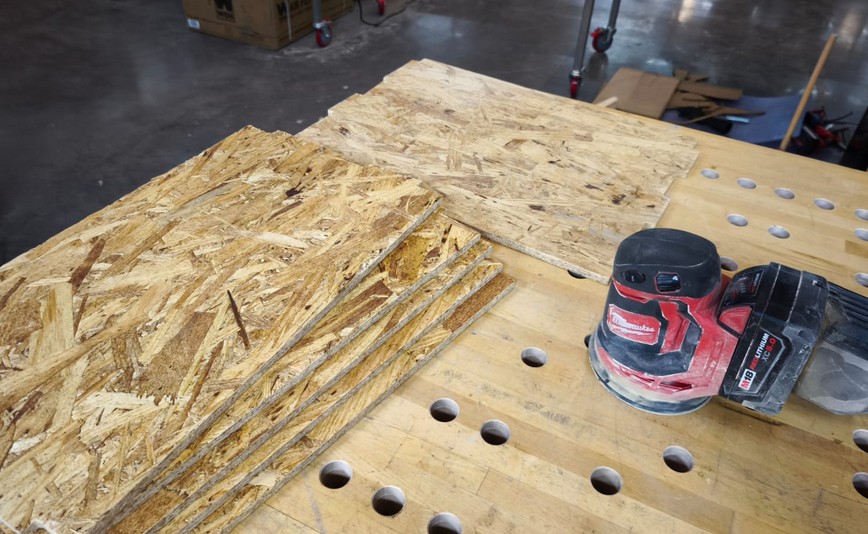
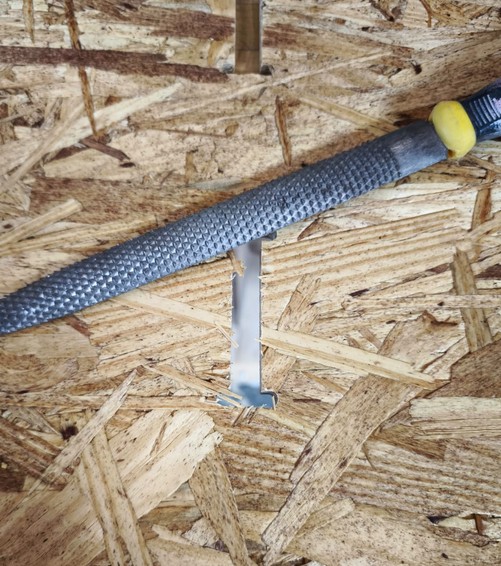
The inside holes were particularly rough with splinters and all, so I used a file to get them smoother.
I made two extra passes of sanding to get everything as smooth as possible. With that, I was ready to assemble.
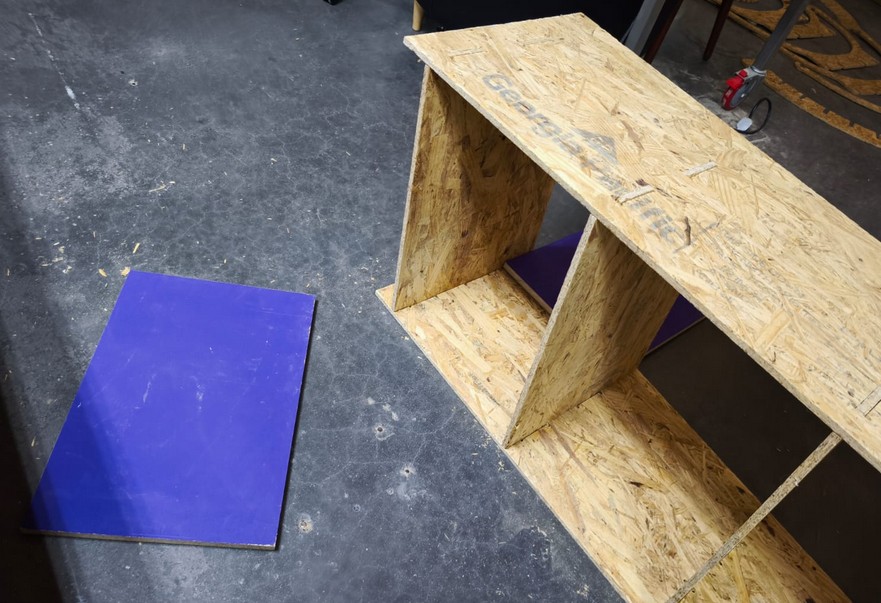
All the pices fit together pretty well, although some were a bit tight due to the inconsistency of the material. I used a rubber mallet to help them fit together without damaging the wood. However, all together was a still wobbly. This makes sense because i am not restricting that degree of freedom. This is why i wanted to make a backing board in the first place, but I was out of material.
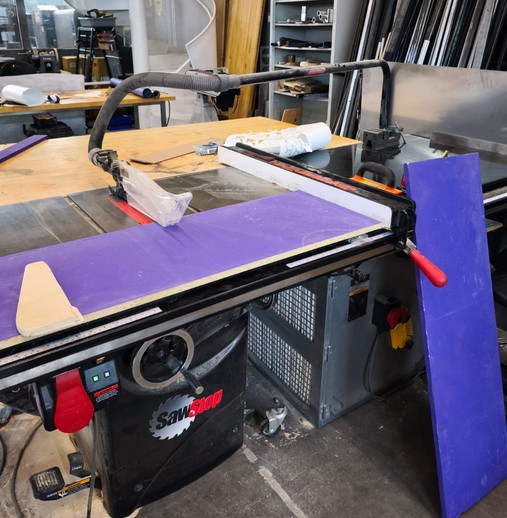
However, this is where the beauitful concept of re-use, reduce and recycle comes in. I found some scrap wood pieces in the loading dock that were perfect to use as backing supports. They were already painted purple with a nice finish, and I only needed to cut them to size. I used the table saw to accomplish this after measuring everything 10 times.
I managed to get the perfect fit! But also, not really, as it continued being woobly enough to force it to snap off. I tried changing the size but eveyrtime I would insert the next board it would fall apart. I realized I was not going to get the perfect tight fit with this design, so i went on to use somethine else.
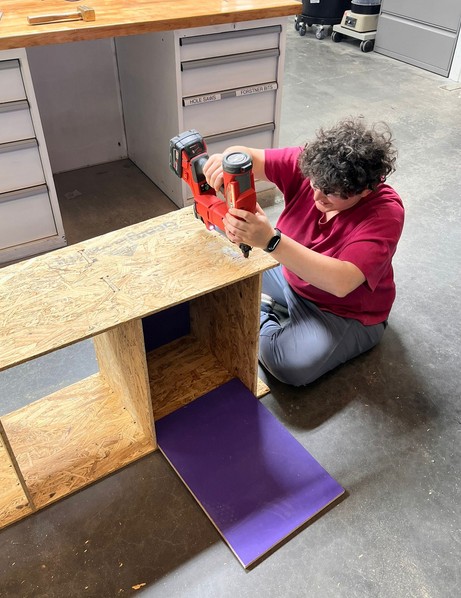
It's not glue though! That's all I can say in my defense. With a fun nail gun I just made use the backing was secured to the shelf and everything was nice and sturdy. I added more to the sides for good measure.
it is a shelf!
Also OSB is terrible and I got splinters everywhere even through the gloves. Beware. I would highly recommend and suggest and implore future classes to use MDF or plywood instead. It makes for a much nicer experience overall.