Tools used: sketching paper, FreeCAD, AutoCAD, CorelDRAW, Illustrator, Inkscape, vinyl cutter, CO2 laser cutter, Gitlab, Git Bash, Sublime, HTML, CSS
For building this website I decided to work solely in HTML and CSS, using the amazing w3schools tutorials as guidelines. Earlier, I made websites in Wordpress and Wix, and for the course How to Grow (Almost) Anything I downloaded a template from Bootstrapmade.com and edited this in Sublime. For this week's assignment I was up for the challenge to deeply engage with HTML and CSS instead of using templates or incorporating more advanced coding languages such as Javascript, SQL and PHP. This was definitely not the best decision in terms of 'time management', because I ran into some critical problems which prevented me from getting the content below up in time.
The first issue is related to Gitlab. It was a bit of a pain to work in the Web IDE on Gitlab, and I accidently made a new branch. It also took a long time to write the code, because in the IDE it is not possible to visually inspect the work, so I had to commit each time I made changes. Luckily, a couple of days later it succeeded to install git locally, which is much easier to work with and it drastically increased my productivity. I could now work offline and check the changes in the browser, which ramped up my design iteration process. As a note-to-self for future website building endeavors:
git workflow
cd ‘/d/4. HTMAA/cbasite’
git pull
git status
git add .
git commit -m "message"
git push
The second reason for the delay is definitely due to the fact that I had close-to-zero coding experience. Figuring out the div classes took a while, and setting up the overall grid structure of the website was not easy. But it succeeded! In terms of the content, Neil emphasized many times the importance of reducing the file size of pictures. After first doing everything manually (-.-) I found Picresize a useful tool for batch resizing. It is unfortunate that my Adobe licence just ran out, which is a good opportunity to learn open-source software. Inkscape is relatively user-friendly in my experience, though it cannot output file types other than .png which is annoying.
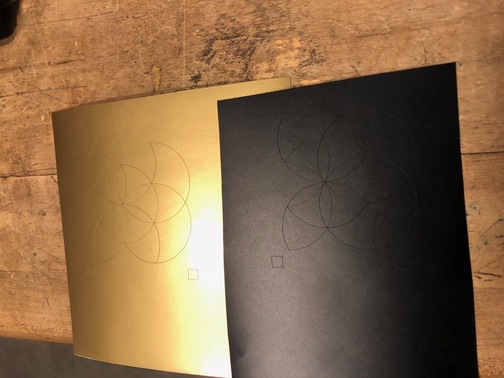
For the vinyl cutting assignment, I wanted to make a sticker of the logo I designed for the Global Community Bio Summit, which is organized by our Community Biotechnology initiative. Last year, this logo was printed on a large vinyl sticker, and professionally applied to the curved wall across the elevators on the 6th floor of the Media Lab.

The first step is to make sure that the logo consists of only two colors. A background color is added in the last two images to indicate transparency.


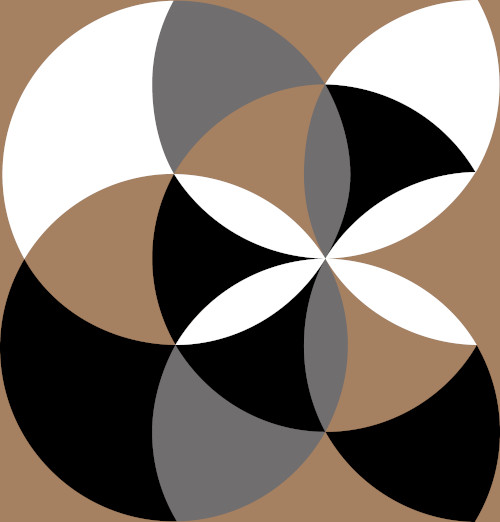

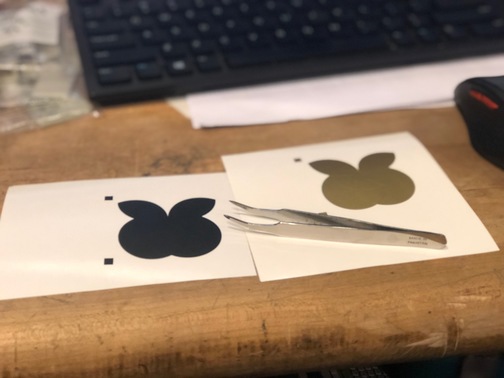
The last iteration resulted in a design with only two colors. After this step the file is transferred into CorelDraw.
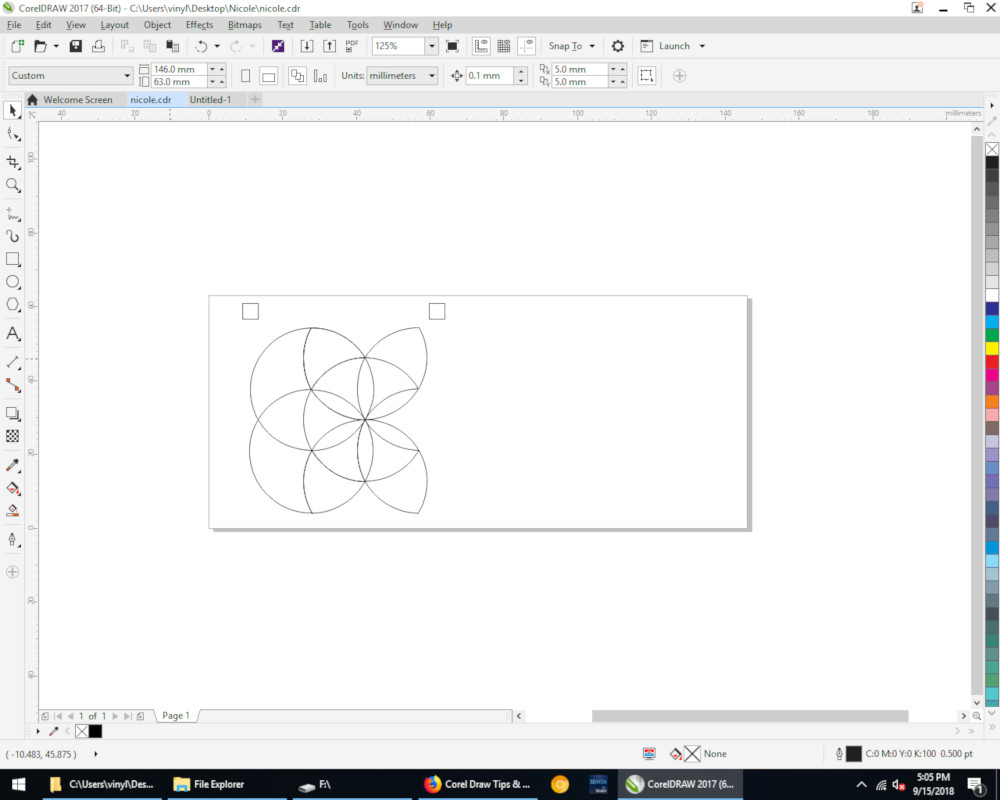
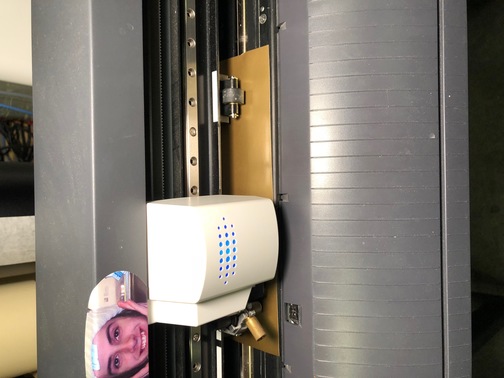
Sending the file to the vinyl cutter (left), and the result after cutting (right).
Next, the background is removed with a tweezer.
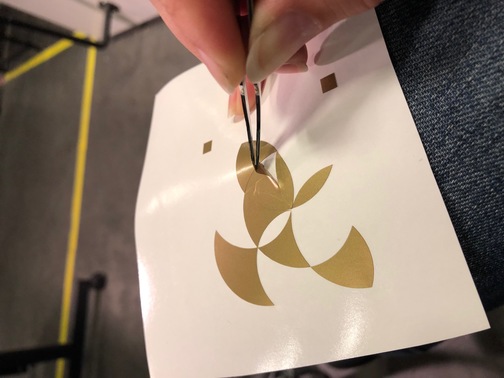
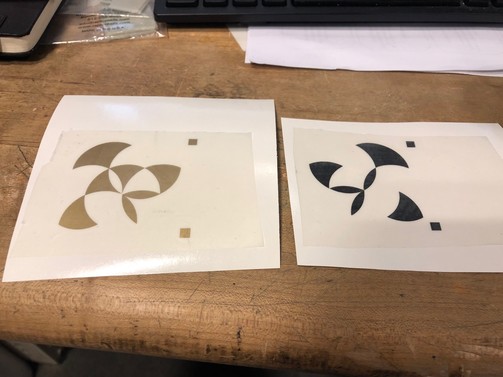
Then the undesired parts in between, this is called weeding. The next step is to take a piece of transfer paper and stick this to the vinyl.
Stick the entire piece to the wall.
The final result!
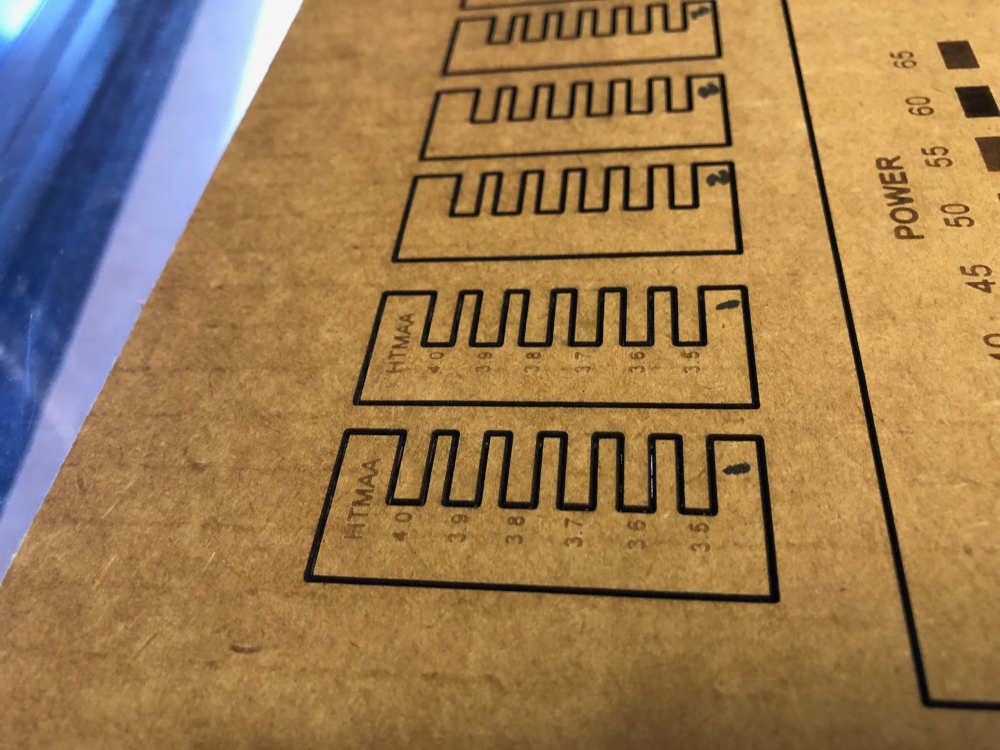
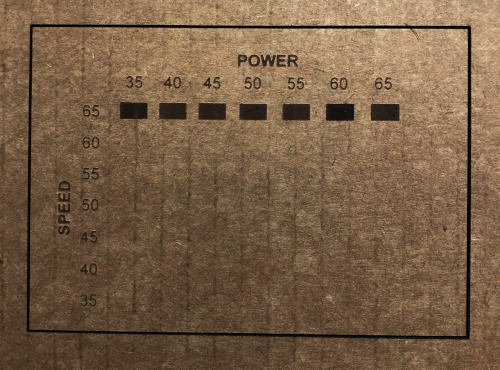
When working with a new laser cutter, it always takes some time to get to know the machine. For characterization purposes I made three test products. The first is to determine the influence of the laser kerf and the second is to find out what the visual output is of various power and speed settings. Unfortunately both experiments failed. The first one because the laser did not fully cut through the material. This was resolved by lowering the PPI from the recommended 3 to 2.2. The second image shows another failure, because the grid was supposed to be nicely hatched in a gradient. This did not succeed because there was an error in the file which caused a mismatch between the location of the rectangle on the screen and on the physical output. Sometimes the laser would go to exactly the same spot, or skip a rectangle. I hypothesized this to be a result of an asynchronicity between the drawing layout and the print preview, and incorrect dimensions of the workspace. John later confirmed this and we were able to fix it!
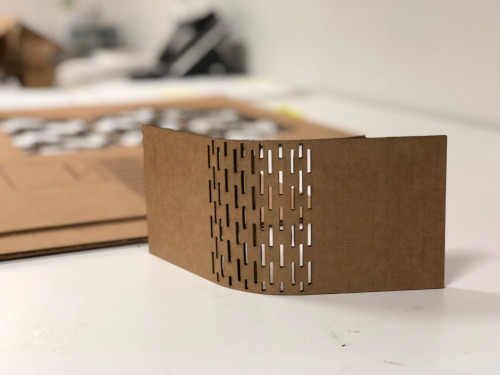
Next, I was interested in exploring the concept of torsional stress in relation to induced bending of perforated cardboard. This worked, as can be seen below, although the perforations could've been made much smaller. This exercise sparked my curiosity to experiment more later, with other materials and geometries.
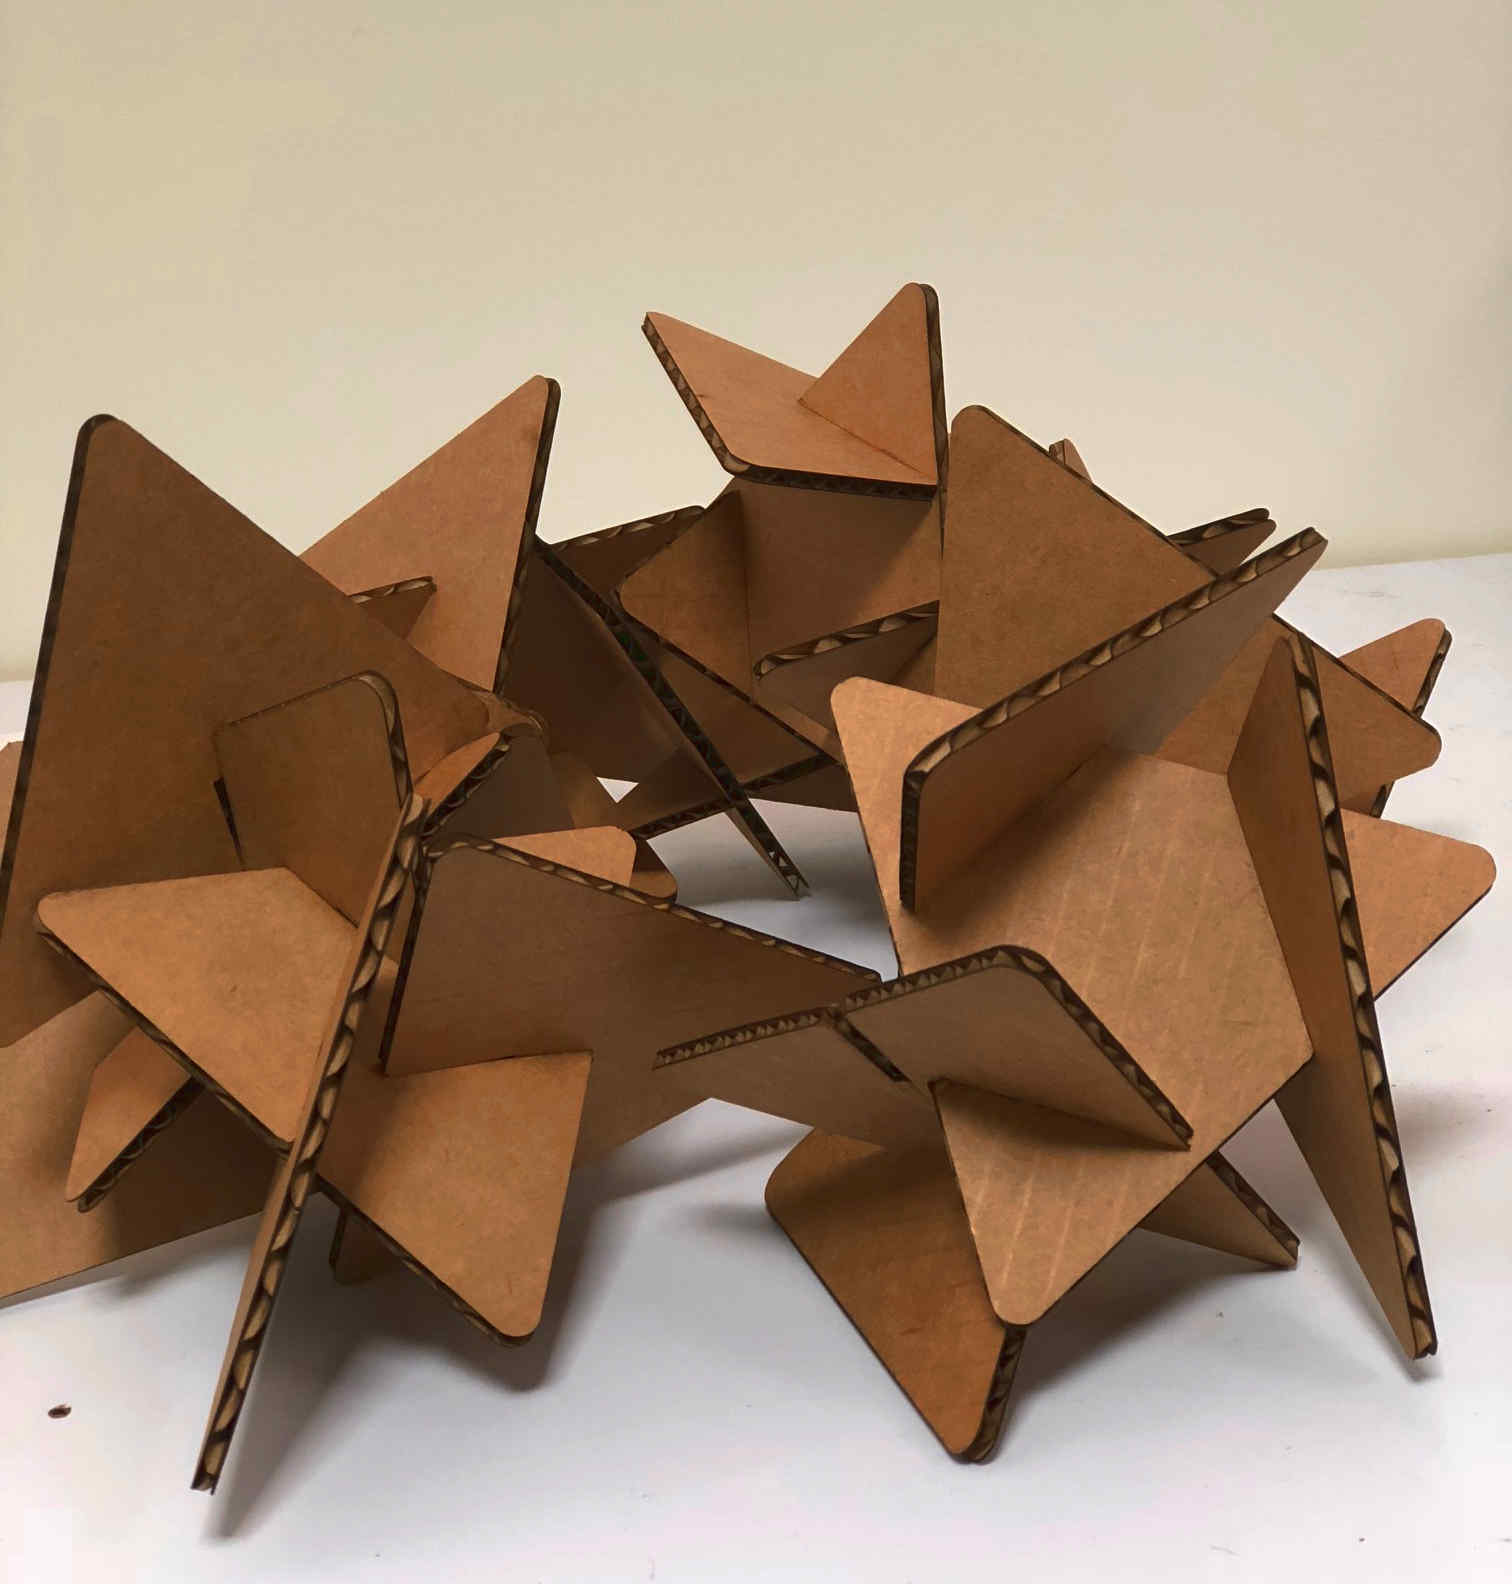
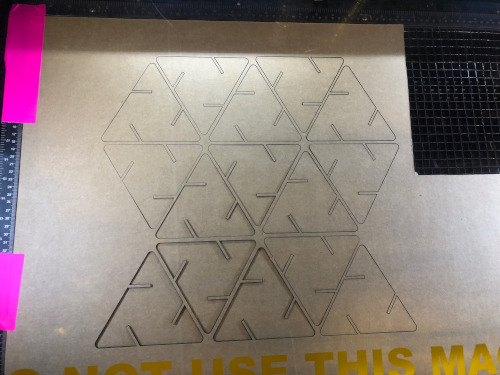
For the cardboard press-fit kit, I decided to make a game with geometric elements. The initial parametric design was made in FreeCAD.
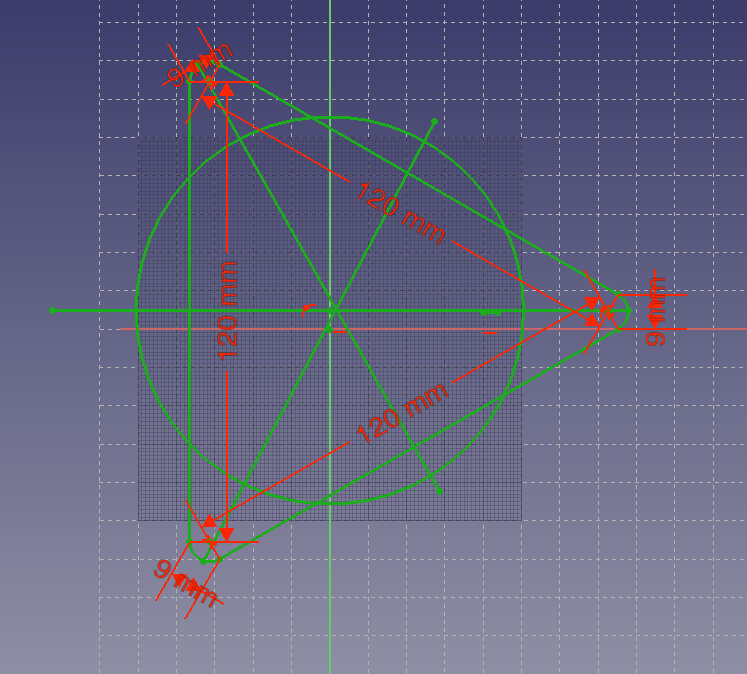
This worked relatively well and I appreciate the possibility to set conditions. However, the program had some difficulties with adding lines under weird angles and deleting lines in a quick manner. For the sake of time I decided to export the file to AutoCAD and draw the lines manually. The command line in AutoCAD is extremely useful and I missed this in FreeCAD.


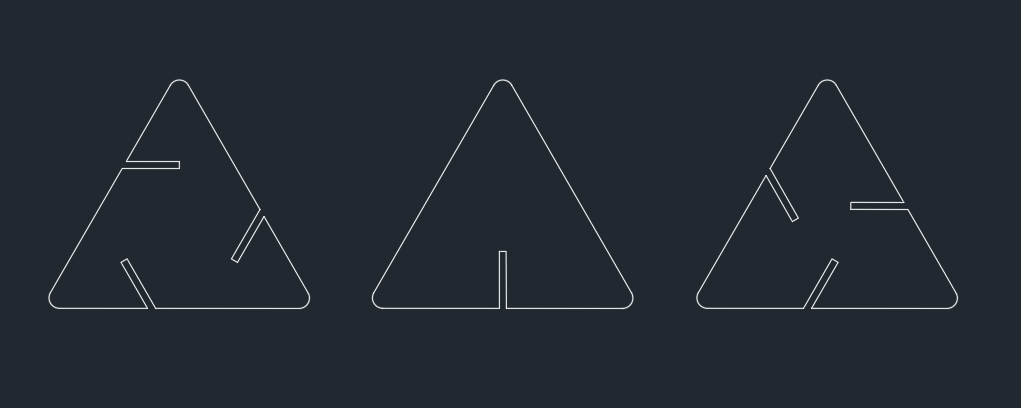
The game consists of three types of triangles, displayed below. The third is a mirror image of the first and the center piece closes off the structure. The main idea is to build a structure with as many pieces as possible, while still being able to close off each edge. This can be played alone or with multiple players, with or without time constraints.
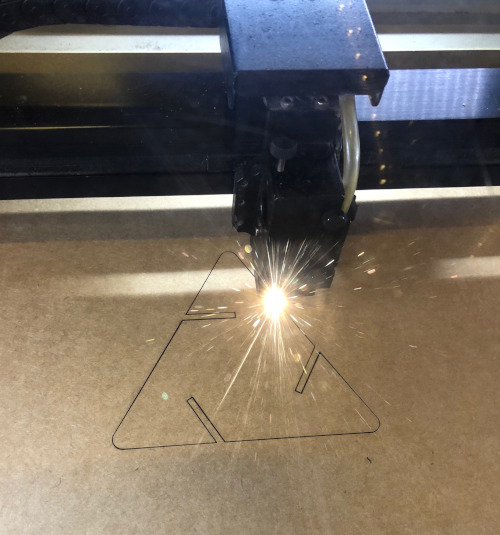
The laser cutting process. This time everything went well in one try!
The result after laser cutting! It is actually a pretty challenging game, because you easily get stuck when the mirror pieces overlap. Playing with this almost has a meditative feel to it.
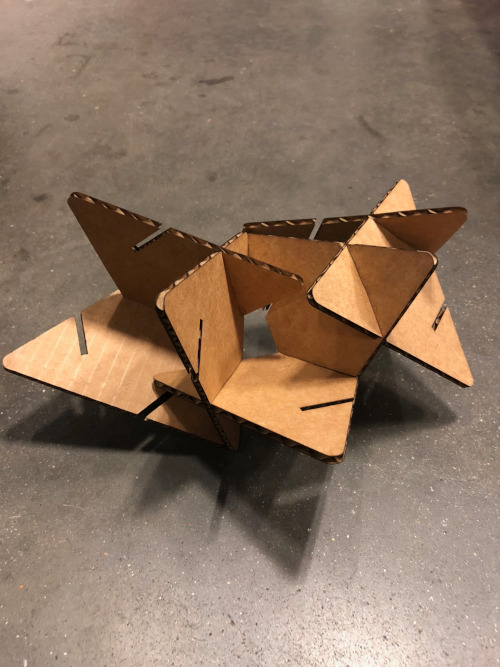
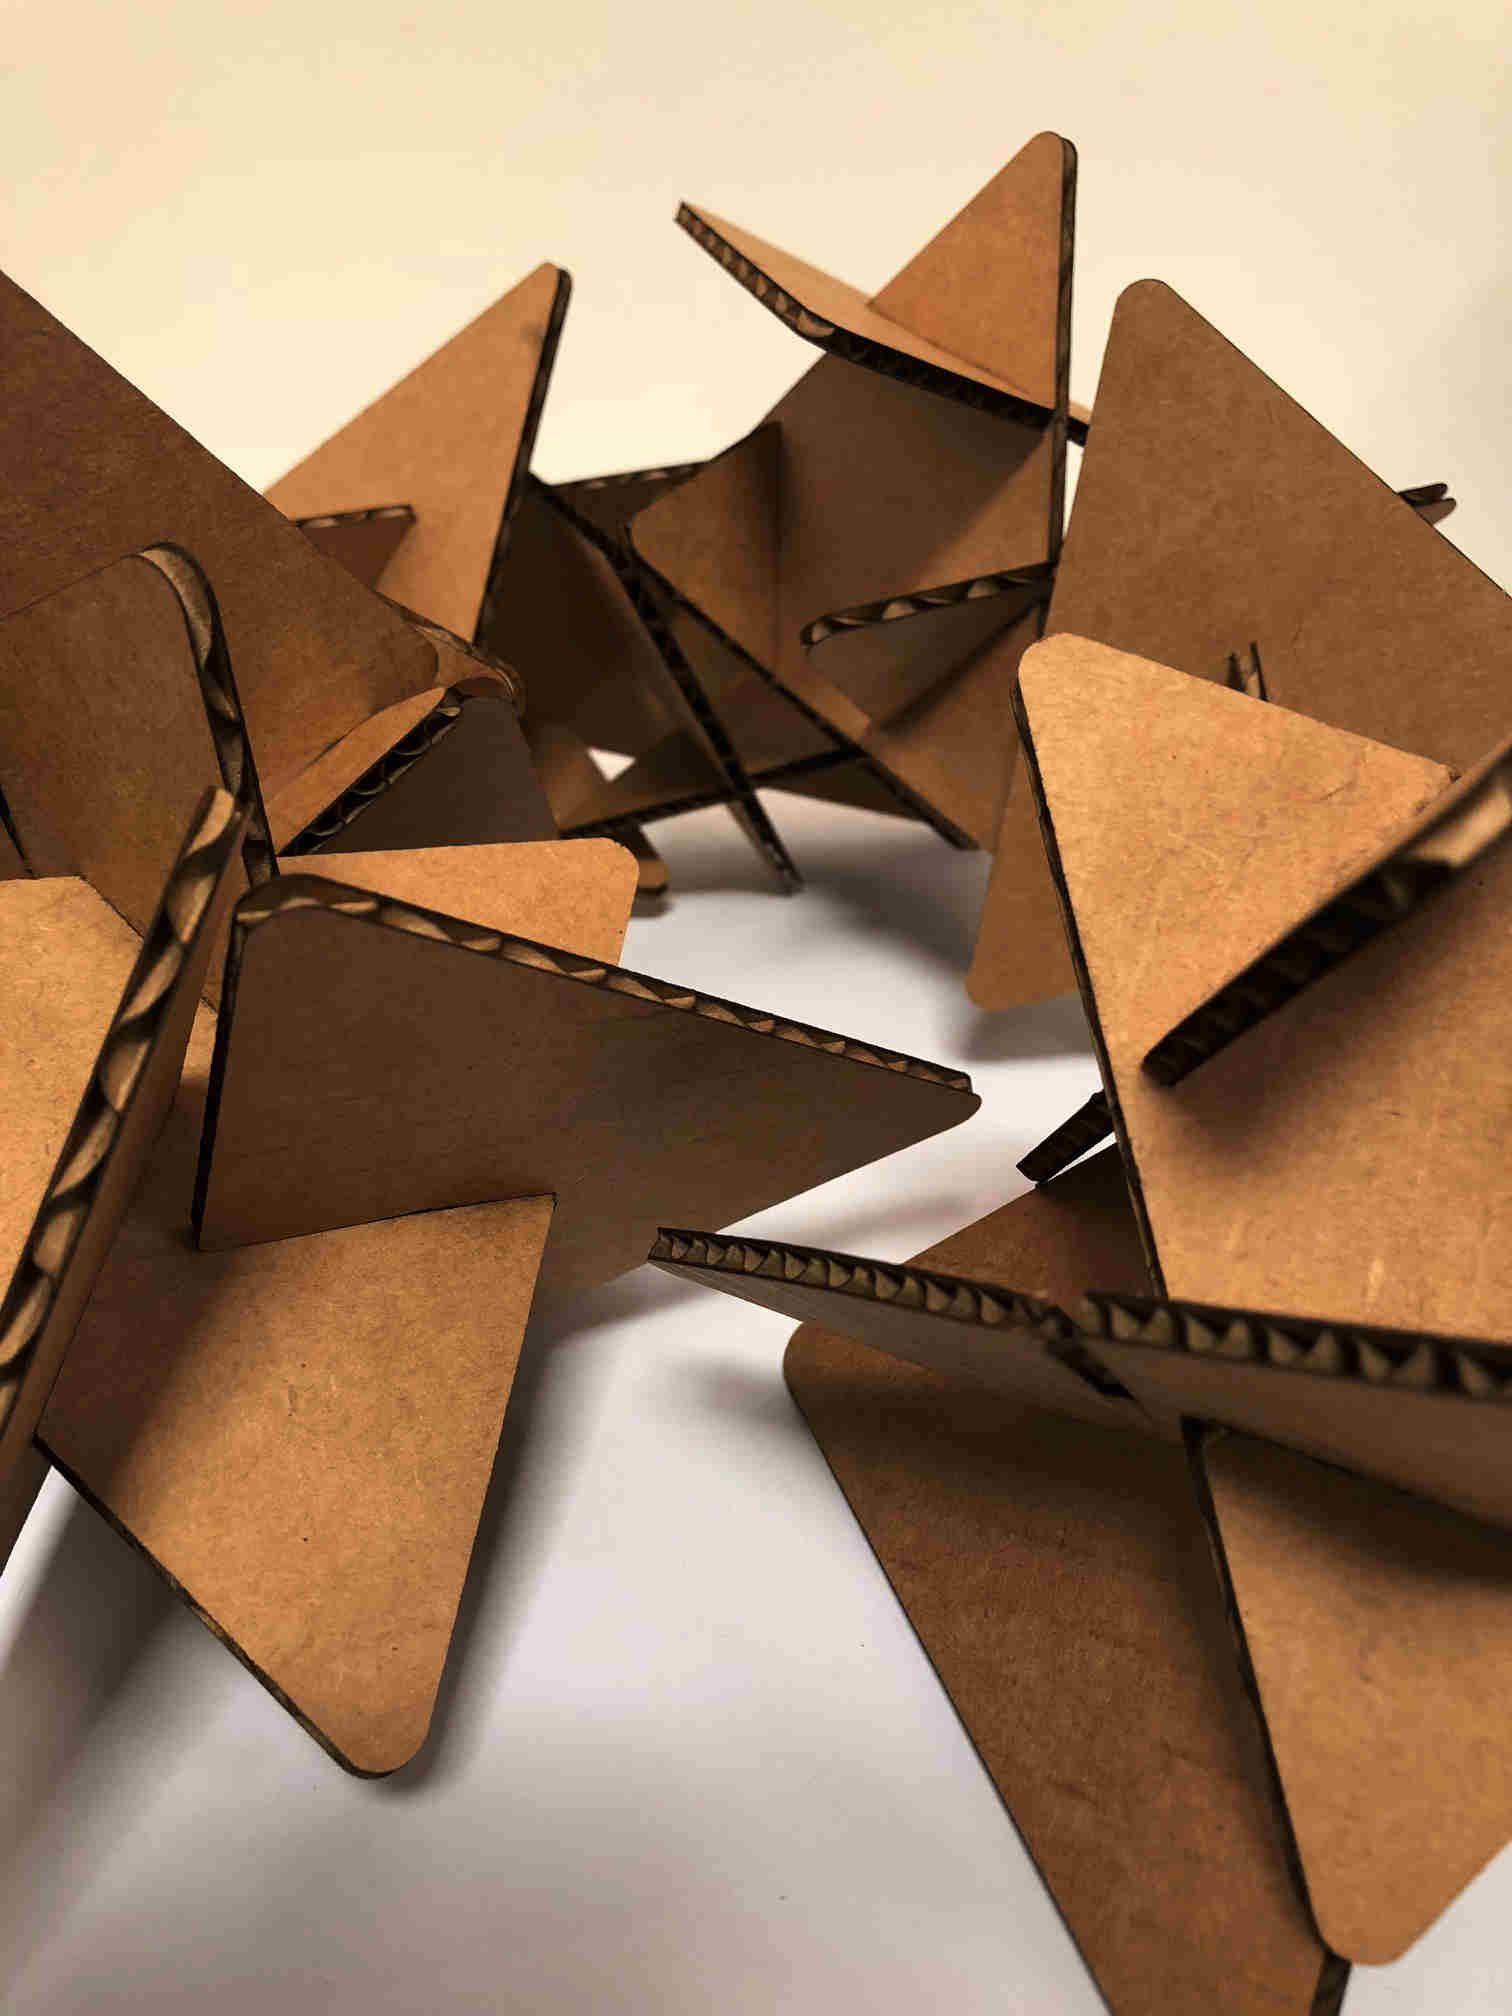
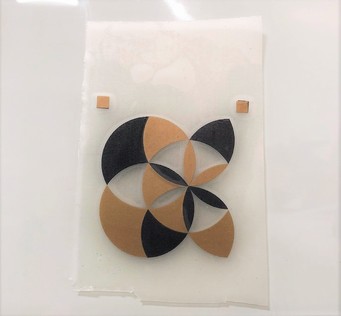
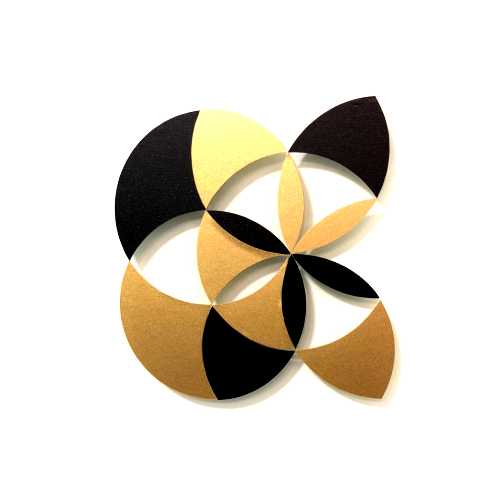
The result is a rather useless and somewhat good-looking desk decoration.