Embedded Programming Week

For this week, I decided to learn how to program my ATTinty44, which I made in week 4, using C. In th epast, I have programmed with Arduino, which is very straightforward, but was curious to learn the C behind the actual Arduino IDE.
Before actually starting with C, I made sure to understand the terms associated with this week's topic. My TA Ben was very helpful in explaining many of terms that confused me (exmaple, difference between microcontroller and microprocessor) during office hours. Below is a compilation of a summary of my notes:
Microprocessor: Environment that contains the program memory. The program memory is stored as commands (the program code/recipe) in the register and fetched one at a time. Commands are executed after being fetched. Example of microprocessor is computer's CPU.
What makes a microprocessor a microcontroller? A microcontroller is composed of a microprocessor and many other chips. A chip is a packaged IC or Integrated Circuit. Unlike microprocessors, microcontrollers have data memory, which means that they can read and write, but that is only valid when the microcontroller is connected to power.
EEPROM and FLASH : Similar to storage. Used to allow data to be stored for microprocessors even when power is off. Some FLASH memory is used for data memory. EEPROM reads/writes 1 bite at a time.
Bit/ word size: Size of data that a microprocessor can operate at. If word size is 1 digit, and I try to do the operation 46 +33, I won't do the whole operation (of finding 79) in one step, because this is a two- digit operation. If I have have an 8-bit microcontroller, I can do operations for any number from 0-(2^8 -1) in one step. 16 bits would be single operation for any number from 0- (2^16 -1), and so forth.
Comparator: A peripherel that takes the results from an analog to digital conversion and compares it to some value. The function of a comparator can basically be done in code (with a microprocessor), but a comparator does this for us without the need of going through a microprocessor loop.
Families: Families are similar to microcontroller brands. However, different families are incompatible to one another. If, for example, you design a system for an AVR, you cannot recycle the code and use it as is for a another family.
Wy pick one family over the other? - familiarity, pricing, one family could have peripherals/capibalities that the other doesn't.
Packages Materials and Geometry. How an IC is packaged.
Additional Notes If I wanted to read python code for AVR, I would need an interpretor that converts python code to a language the microprocessor understands. In the case of C, C is a compiled language, so there is a method for C code to be turned into an assembley language without the need of an interpretor.
Coding attiny44 with C: A wonderful place to begin learning how programming with C for avr families cwould be here . I have also created a summary below of important steps and terms.
Steps:
Coding in C For Avr (Terms and More)
Below is a summary of the terms you would use in your c code, what they correspond to, and how their values mean different things according to nature of I/O pin.
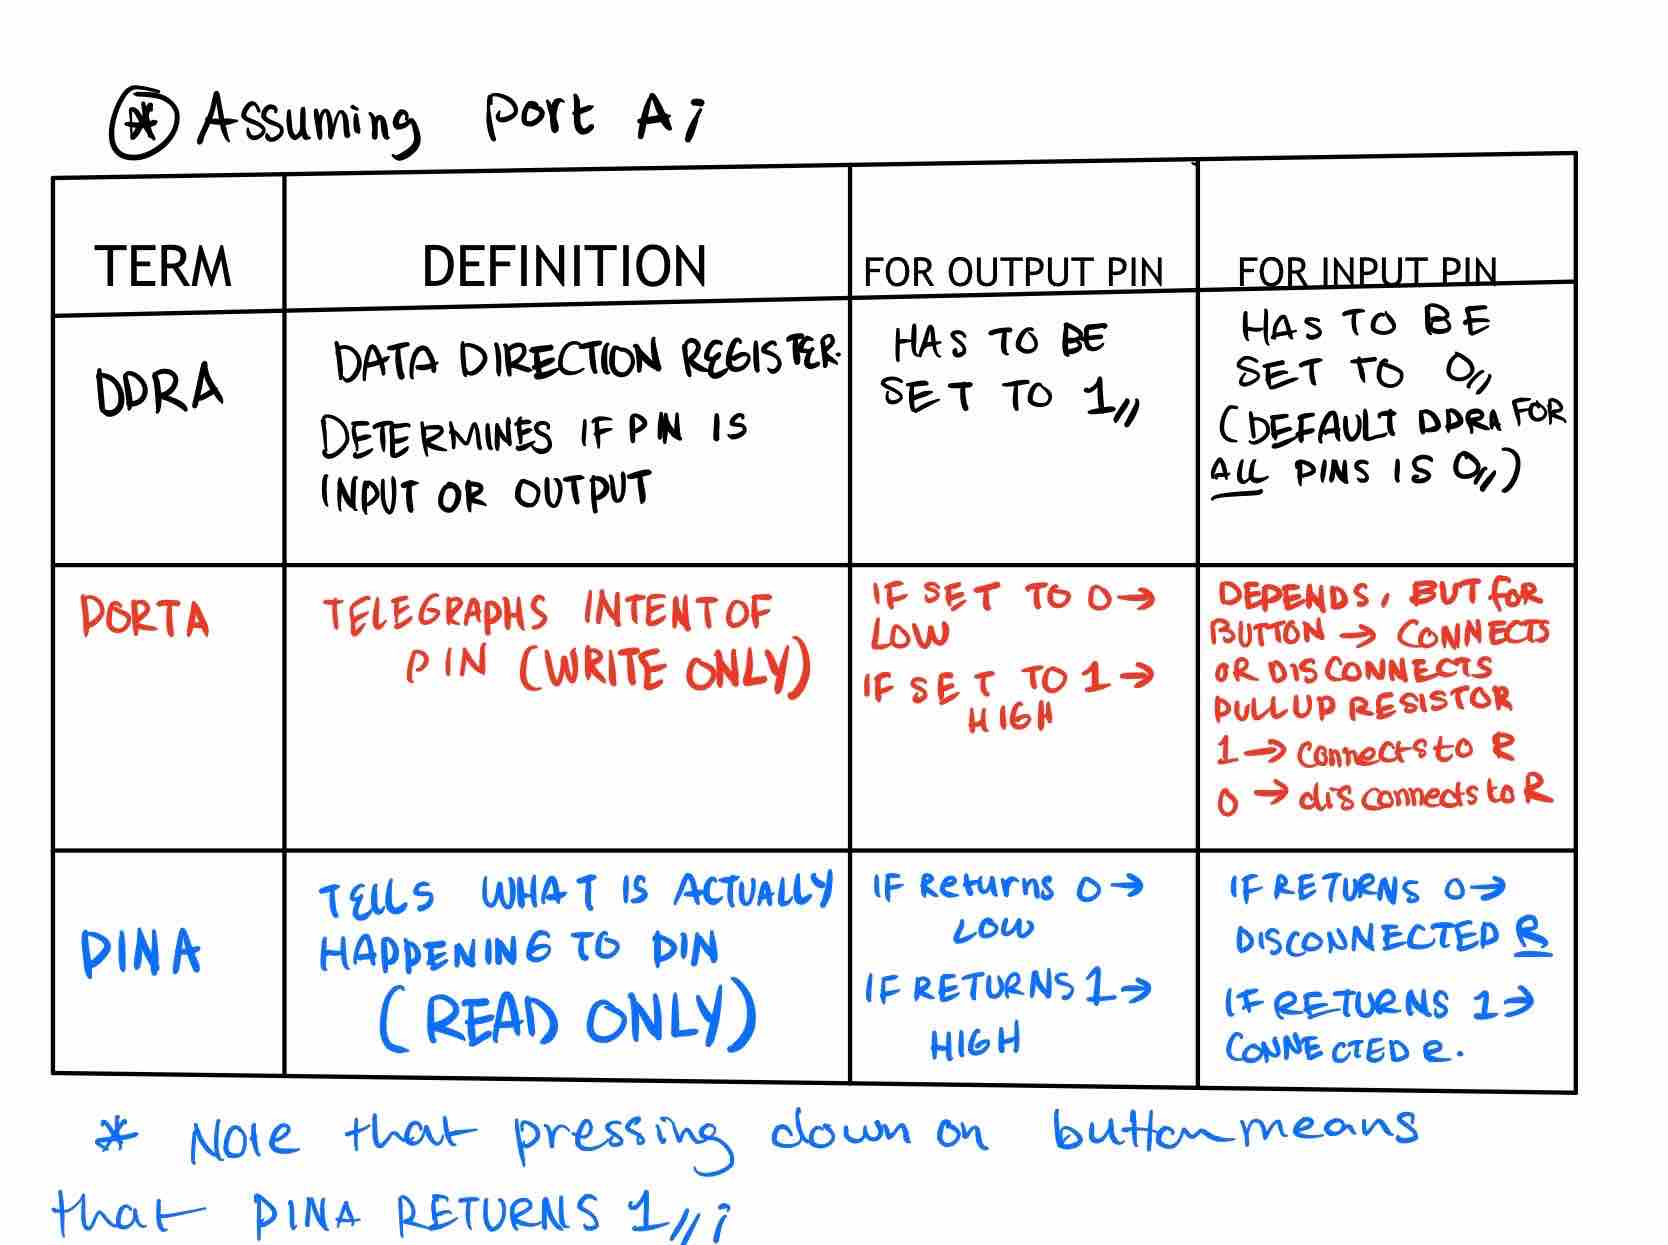
Summary of terms
Instead of reading or writing 1,0 in binary numbers according to pin location,(for example, pin 2 on a some port would be 00000100. This is because a port has 8 pins, with pin 7 as the leftmost pin, and pin 0 as the rightmost pin), we can simply use the function "_BV()" included in the C library for avr. To illustrate its use, say I would like to assign output to pin 7 on a port B, then I would type the line DDRB= _BV(PB7).
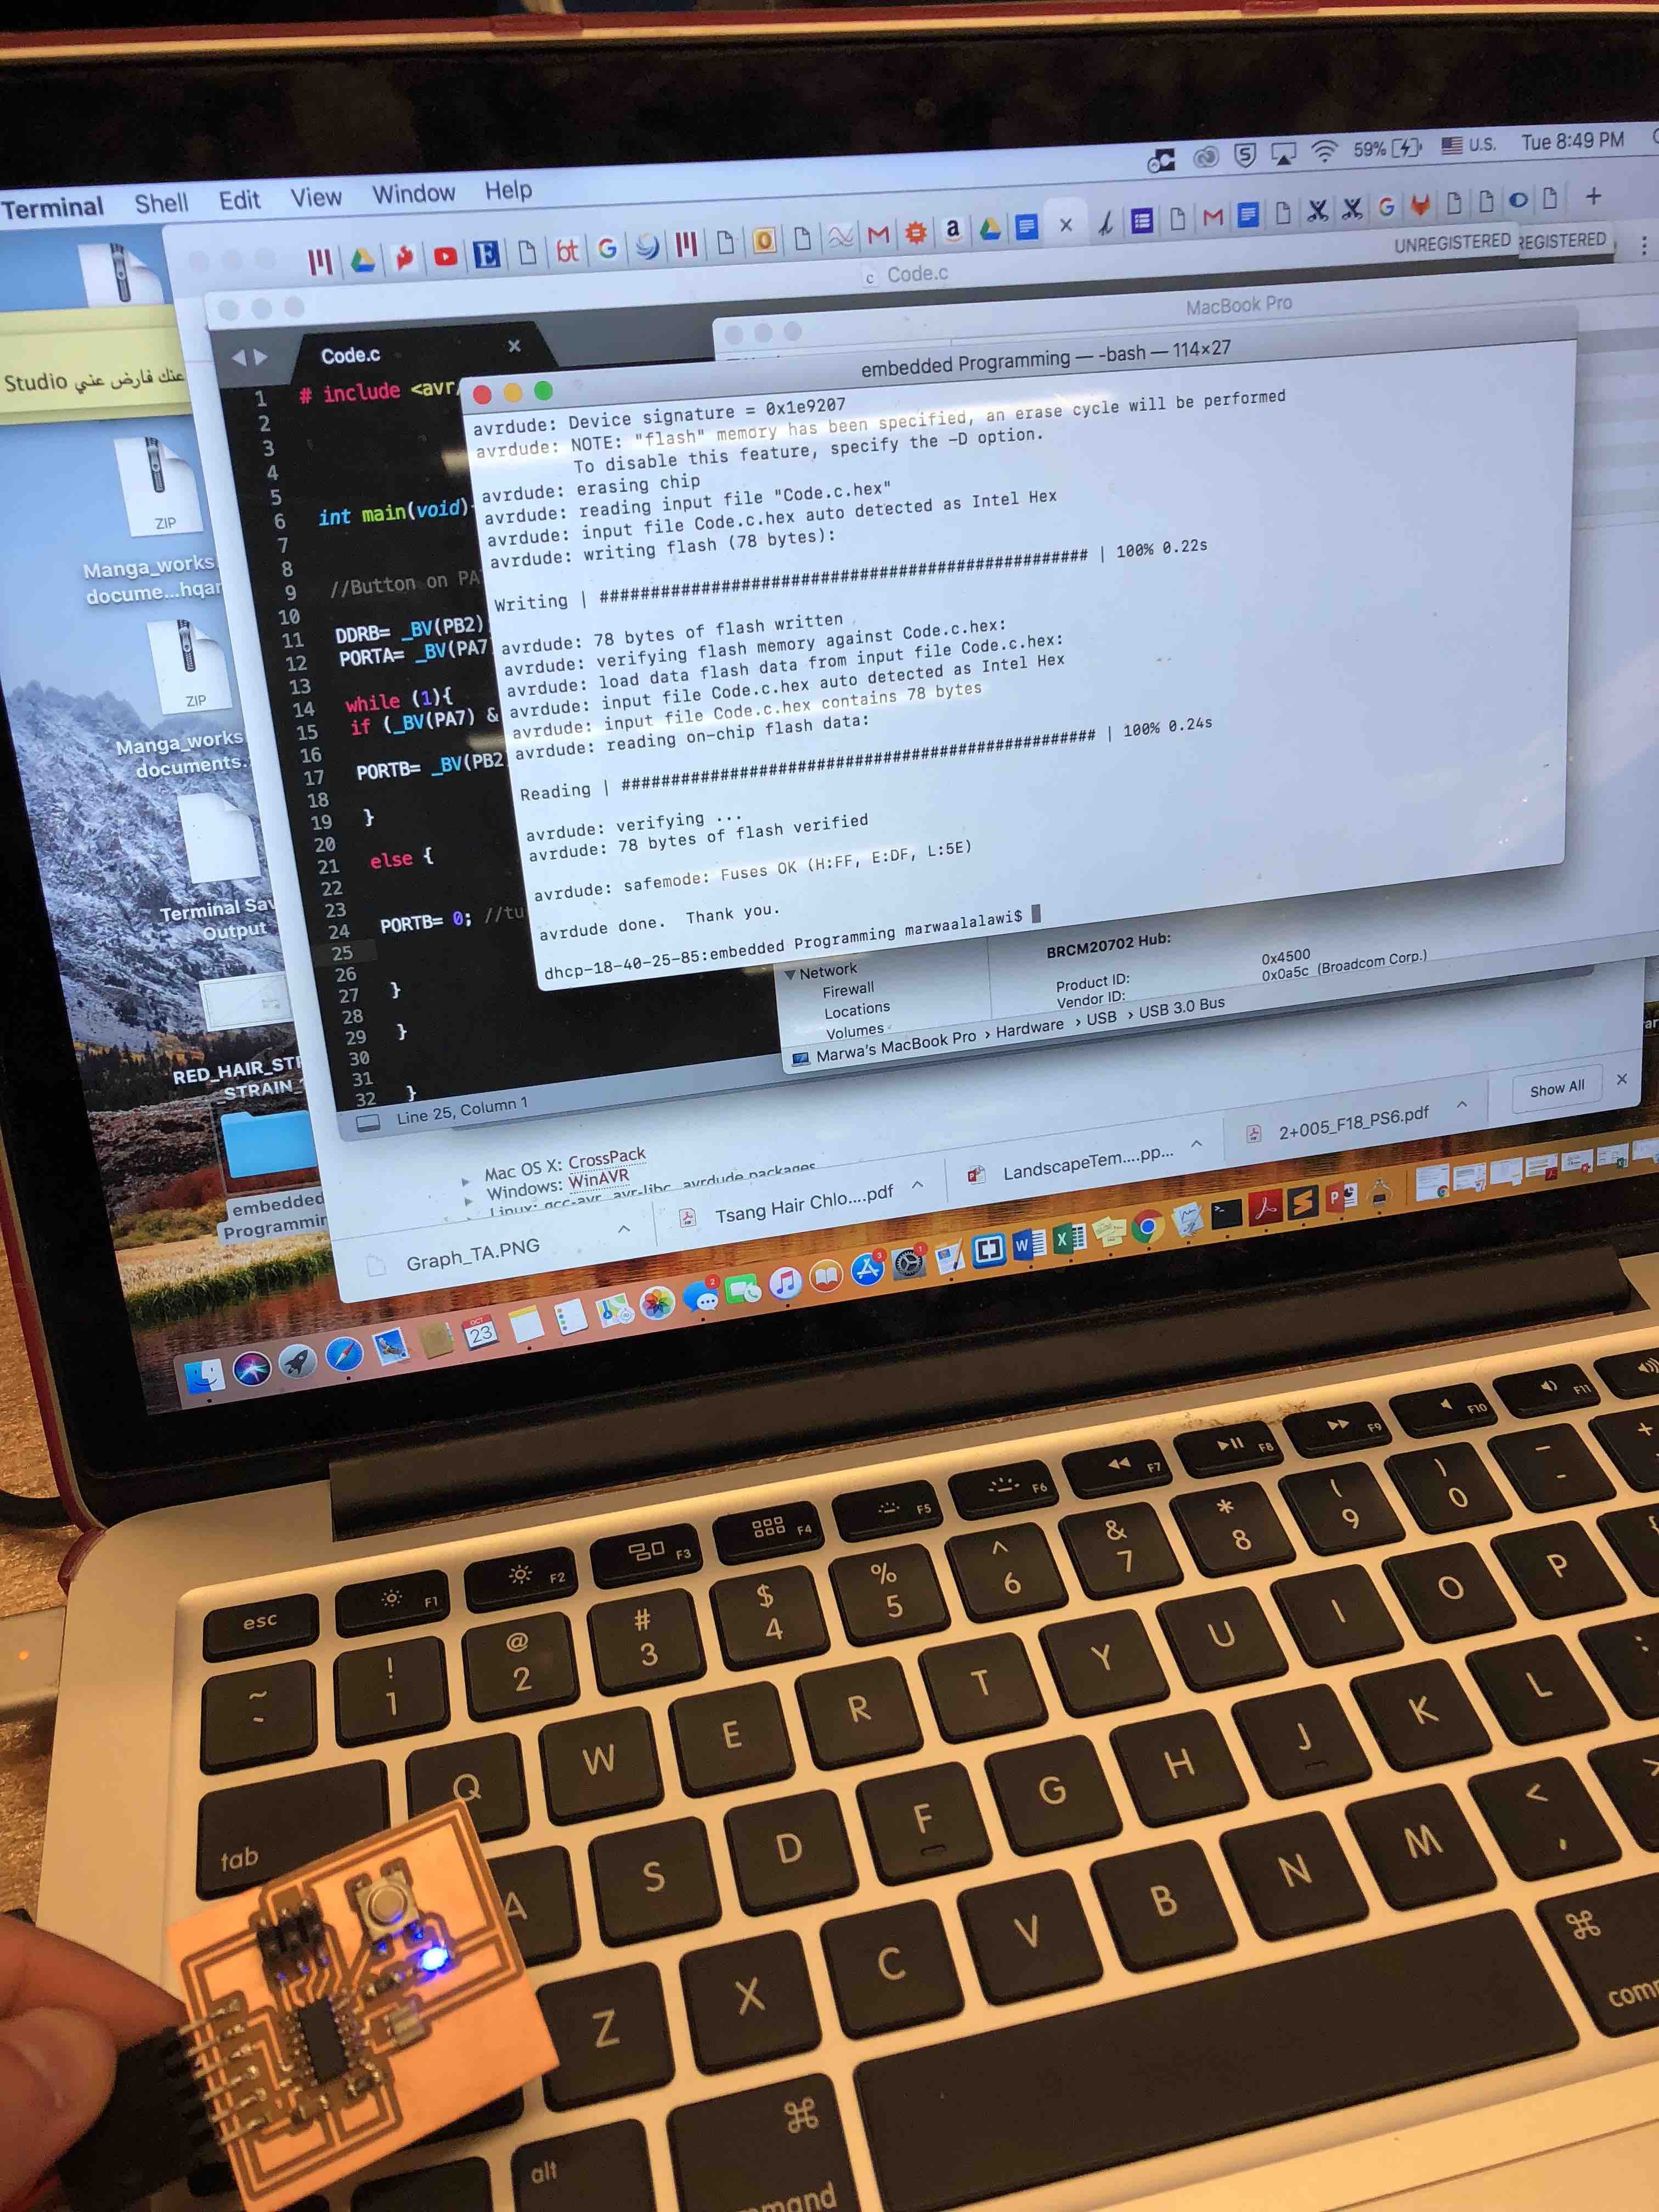
Below is the code I developed for today's week. It is a simple code that turns the LED on my PCB on when the button is pressed.

.