how to make (almost) anything
Wildcard Week: Inflatables
The making of Sausage Fingers
Say hello to Sausage Fingers
Week 14 Tools/Resources:
Rhino & Kangaroo
Singer sewing machine
Ripstop nylon (orange)
Thread (orange)
Inflatables Workshop
One of the main reasons I picked inflatabes this week, was that Agnes made me laugh during her presentation in class. Laughing felt nice, and I realized I don't do it enough lately. There's a underlying ridiculousness to inflatables that can't be avoided and is very entertaining. We first met as an inflatables group with Agnes to go over the basics of what we would be doing this week, as well as learning how to thread and opperate the Singer sewing machines in the lab. We made small forms to be inflated, so we could get the feel for the process. Since we had the option of working in pairs this week, Lavender and I decided to collaborate on something "spatial" and "layered".
Testing the workshop cylinder Lavender and I made
Design
Lavender and I met to think through possiblities for our project, and settled on a repeated grid of layered tubes that would be connected in their middles for airflow. Our sketches looked a lot like a disturbing set of chubby sausage fingers (hence the name). It made us laugh, so we must be on the right track!


We parametrically modeled our idea in Rhino and Lavender used the plugin, Kangaroo, to do test inflations of the volume. Based on those tests, we made changes to the profiles of layers, lowering the 'belly' connections and tapering the resulting longer (eww...), top fingers. An additional goal for us this week was to avoid creating fabric scraps--cutting as little as possible and wasting as little as possible. By layering the front and back fabric for each finger layer, and sewing the entire form outline, we were able to make single cuts to separate each digit. All excess material will be hidden in the interior when the sewn forms are pulled inside out.

Sewing & Sewing Prep
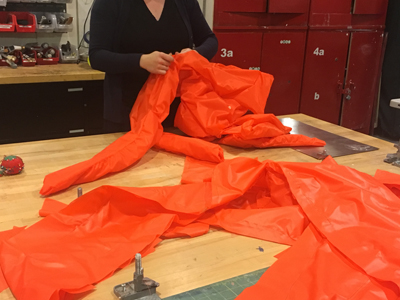
We set the dimensions of project based of the width of the nylon (60"), and then tuned the results to achieve a result we were happy with, while staying under the fabric cap per person (8 yards of length). We measured and cut out the front and back layers (38"x60") for each set of fingers, and then marked the sew and cut lines on the top layer with a pencil. Tape loops keep the layer pairs fixed together for sewing. On we go!


Separating the fingers and cutting out the belly air connections
Turning the layers inside out through the air connections

Layers being joined and air tube ready to be attached

All sewn and ready to inflate!

