how to make (almost) anything
Electronics Production
Week 3 Tools/Resources:
Roland SRM-20 Mill
Soldering Equipment
Building the FabTinyISP
With absolutely no electronics or soldering experience under my belt, I was pretty intimidated by the thought of making the FabTinyISP this week...
But. I. Absolutely. Loved. It.
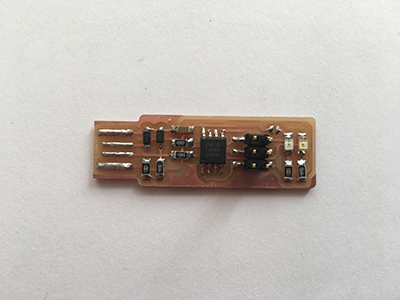
I found soldering quite relaxing and this fabrication process really satisfying. The final programed board is shown above.
(Isn't it beautiful?) Pre-milling board prep/cleaning below.


Overall, milling gave me the most trouble. When I tried to set up the machine, I wasn't able to secure the 1/64" bit properly to cut the traces; the screw wouldn't tighten and the bit kept slipping out. It was a sad showing, and I began to wonder how I possibly have been able to put together all that IKEA furniture over the years. Luckily, Paloma came to the rescue, discovering that another screw was blocking the bit, which kept the collar from being tightened around it properly. Once that was removed, the bit went in without a problem, and milling went smoothly.

Organizing the components made it a lot easier to keep track of where I was in the process, and gave me the opportunity to orient everything properly. I also drew a simple diagram locating everything on the board so I had a quick reference while soldering.
Programming the Programmer
The first area I had to troubleshoot was making sure the removable device connections weren't disconnected under the VM menu on the lab computer. Overall, I found the virtual machine was really difficult to navigate. It wasn't always clear what window belonged to which machine, and it seemed to overly complicate the process.

Even though I built up lines of solder along the USB contacts, I still needed a few layers of tape on the back of the PCB to help keep it stable while it was plugged into the USB extension cable. This helped a lot, but the connection was still a little tenuous, and I think this slight instability is what caused an error when I made my first attempt to program my PCB (see below). A friend held
the board steady and the next attempt was a success.


The last step was to break the bridge on the programmer by sucking up the solder with the copper wire braid. This was a little tricky, and I ended up soldering the wire to board on the first try. Adding more solder to the braid helped it eventually flow off the board.

Ready to go!