how to make (almost) anything
Embedded Programming
Week 7 Tools/Resources:
Arduino IDE
C tutorial
Blink tutorial/Adding ATTinys to Arduino IDE
HTM: Justin Gallagher
HTM: Molly Mason
HTM: Kelly Shaw
Set Up
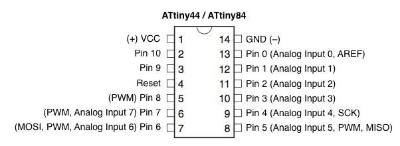
I was in a pretty good position starting out this week thanks to Anthony's help during electronics design; Anthony had loaded--and we tested--a button program, so I knew that my board, programmer, led, and button all worked. With absolutely no programming background, most of my effort this week went towards gaining a (very) basic understanding of what was happening in a few of the programs preloaded into the Arduino IDE, and to become comfrotable with the process of loading them onto my board. My first step was to download/install the Arduino IDE on my computer. The ATTinys are not pre-loaded as options, so I followed a High-Low Tech tutorial that walks you through the process of adding them to Arduino IDE. They will then be options to select as the board and processor. I set the clock to match the external 20 MHz on the board, "USBtinyISP" as the programmer, and the ports to "USBserial".
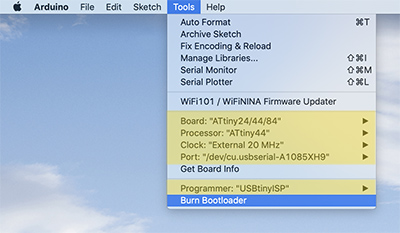
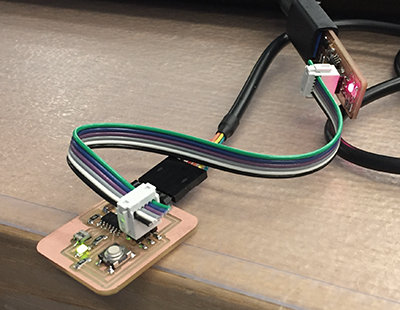
I had purchased my own FTDI cable so I wouldn't need to rely on the lab computers, but I don't have a USB to USB cable. I wasn't sure how happy the programmer would be directly plugged into the USB ports on the back of my iMac, but luckily, the connection stayed pretty stable. It would be worth picking up a cable for the future programming so everything is easily accessbile from the desk surface; it was a little difficult to access the programmer and to get the board connected correctly with the space restrictions. One everything was connected, I ran "Burn Bootloader" under the Tools menu.
Programmer uploading to board
Blink
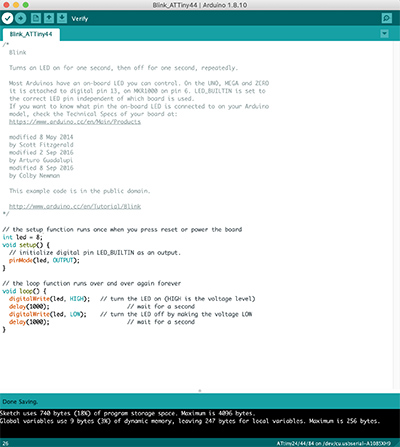
As I mentioned, the Arduino IDE has a selection of pre-loaded programs (File>Examples). I opened up the "Blink" program (File>Examples>01:Basics) and edited it to reflect the correct pin location (8) for the led on my board. You click the "check" button on the upper left corner of the file window to compile the code. If there are no errors to be fixed, clicking the "arrow" button uploads the code to the board.
Blink SOS
Help...By adding more blink instances to the Blink code loop and changing their timing, I was able to create the morse code pattern for "SOS". It took a few tries to get the timing to read clearly visually, but not bad.

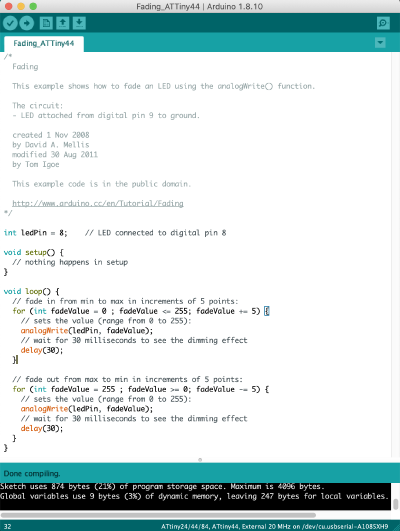
Fade
The next program I uploaded was "Fade" which slowly and incrementatlly changes the brightness of the LED. I changed the pin number, and uploaded it to the board.
Button
Full circleThe last program I edited/uploaded was the "Button" program that had been on my board to begin with. I changed the pin number for the LED and assigned the Button pin (6), then uploaded it to the board (again). This time, I got an error that the USBtiny could not be found:
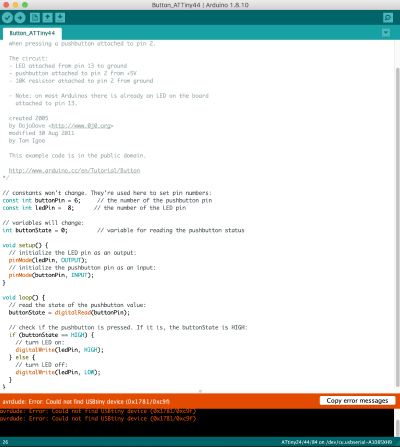
I double checked that the programmer was still connected to my computer, and it seemed fine. Another attempt to upload the program gave the same error warning. I fully unplugged the programmer and reintserted it in the USB port, which fixed the uploading problem, but pushing the button didn't turn on the LED. With a quick check of the code against the ATTiny pin diagram, I realized I had assigned the button to the incorrect pin--changing it to pin 7 did the trick!