how to make (almost) anything
Computer-Controlled Machining: Japanese Joinery Tables
Week 6 Tools/Resources:
Rhino
Mastercam
C.R. Onsrud
Woodworking tools
Japanese Wood Joinery
Design Development
I began this week knowing that I wanted to design and fabricate a piece of furniture. I also liked the idea of making something that is typically small really big. Playing with Japanese joinery provided an interesting opportunity to do both. My co-habitator and I discussed joining forces and collaborating on the design of a series of small tables that would utilize traditional Japanese joinery, and that could be reconfigured into different pieces of furniture for our apartment.
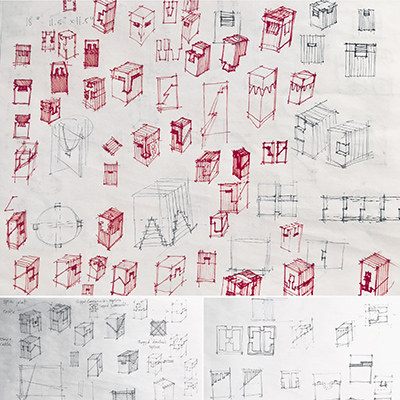
A deep internet dive into the Japanese joinery world revealed a wide range of beautiful and interesting possibilities.
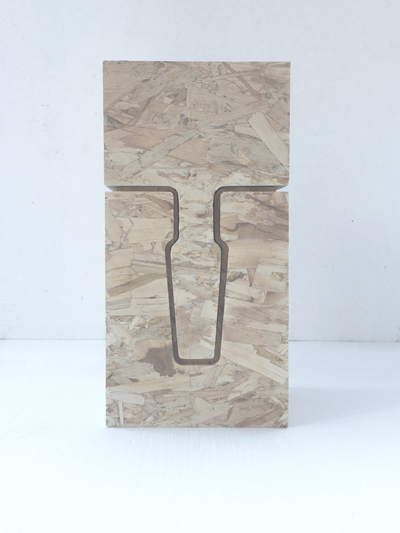
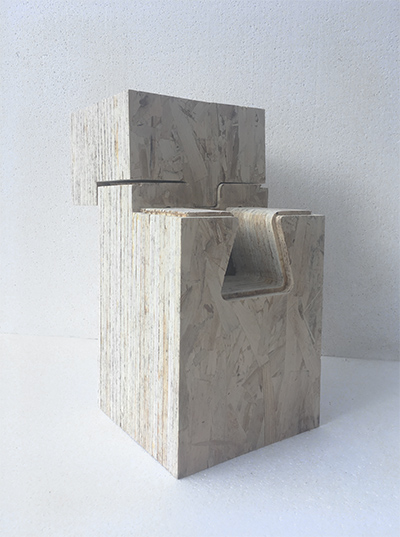
In particular, the dovetailed and goosenecked splice joints were self-locking, and
could be fabricated through milling and lamination, with no additional milling/cuts needed post lamination. We also noticed
that these joints were flexible in how they could be rotated/flipped, offering the possibility of various table configurations beyond their traditional use.
We planned on making two tables each that were scaled to be able to work as side tables, stools, or to combine
altogether into a mega coffee table.


Designing joint options in Rhino
CNC Milling
Before we headed to the CNC, we got word from another student that she had used one sheet of OSB for her piece of furniture, and that it was pretty heavy. We discovered as we were setting up our files for the CNC that each of our table/stools currently took almost two sheets to make(!). We felt it wise to rethink the scope, scale, and solidity of our project. We ended up scaling down to one smaller table each (9”x18”), and found more strategic ways of nesting the parts we needed to cut. This enabled us to fit the two tables on 1.5 sheets of 4’x8‘OSB while also removing some of the interior material of the tables to help reduce their overall weight. Zain was very patient and helpful as we figured out the tool paths necessary for our “creative” cut sheets.
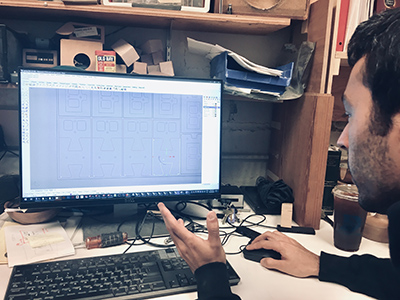
Discussing tool paths with Zain
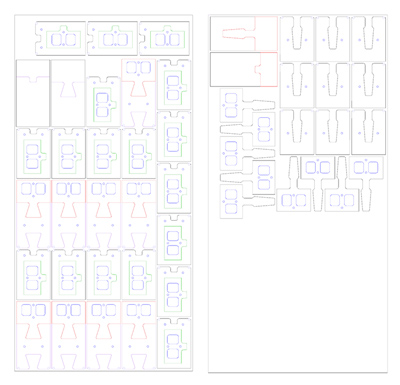
Cut sheets ready for Mastercam
There were a few points where we had to stop the mill to remove small scrap pieces that popped off the table, but otherwise the milling went smoothly. We also realized after we had finished milling both sheets that we had forgotten to update our redesigned tables with proper tolerances around the joints. We decided to press ahead anyway, but that ended up being an unfortunate error...
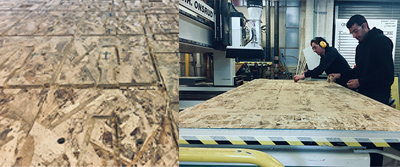

Cleaning up onion skins post milling
Laminating
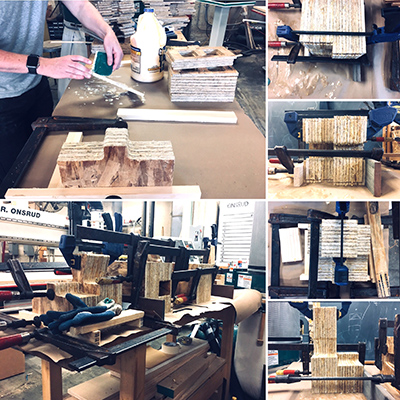
I don‘t have a lot of experience laminating wood, but we were able to figure out a decent work flow and method to square the pieces using a couple of straight/square scraps to help align the layers as they accumulated. After everything was glued and clamped, we left it to dry overnight, returning the next afternoon.
Finishing the Tables
Our tolerance oversite made this phase WAY more labor intensive than it should have been in order to get table halves to nest properly. There also were a few areas where the lamination layers didn't glue perfectly square, which didn't help. In the future, spending a little extra time creating a more stable and robust jig would be worthwhile for a project like this. After several hours of filing, sanding, filing, sanding...
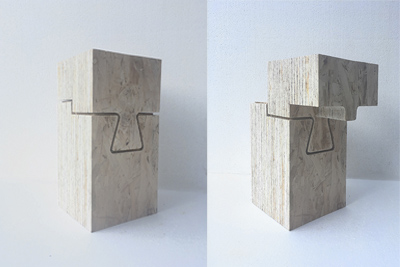
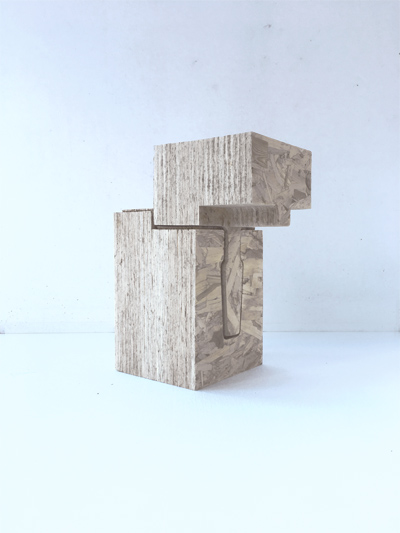
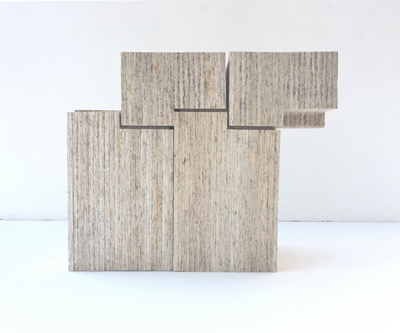
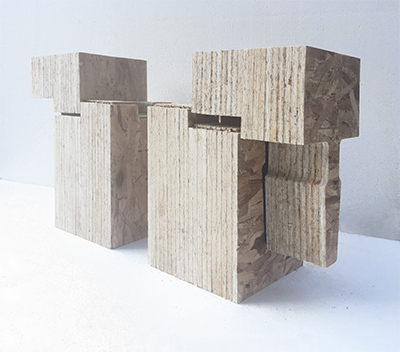
Various configurations of the dovetail table
It was a great feeling to get the first table to this point. There's still work to be done to get the gooseneck table to the same level; I'll update this week with details as it's completed. I'm looking forward to have them as a working set.

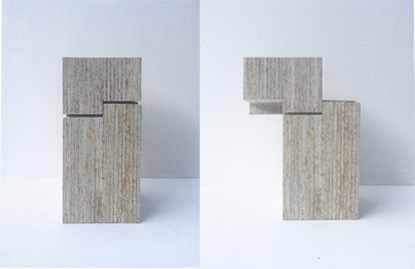
Gooseneck table coming soon!
Gooseneck Update
The second table is finished--it took a lot less time (thankfully) than the first table. We used the ban saw to to shave off incremental slices of the areas that were sticking.