Week 9: Composites
The goal for this week was to "design and make a 3D mold (~ft2), and produce a fiber composite part in it".
Concept
I love biking, but I hate flats! For whatever reason, I fall in the category of bikers that get lots of flats. Lots. On my
commuter bike I partially solved my problem by using Continental Gatorskin tires. They are known as one of the best puncture
resistant tires on the market. On my better road bike I went one step further; I'm running tubeless.
I thought that I was finally ok, but 2 weeks ago when I went to buy urethane plastic for the Molding and Casting week I
made a flat on my Gatorskin. When I changed the tube, I realized that my tire was broken; the bead separated from the rubber.
Shit! I had to push my bike for 4 miles to get back to the lab.
So, this week I decided to build an airless bike wheel. Buying foam core tires is one solution, but I wanted to experiment
with an integrated wheel + "tire" combination.
Britek is making a product that they call the Energy Returning Wheel. They have
a mountain bike version. It will soon hit the market.
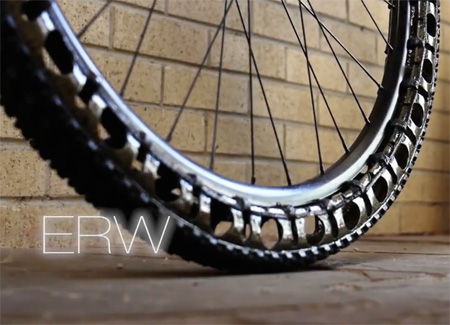
My goal is not to replicate what they made (there is no way I can do that in a week!) but rather to explore a simpler
construction technique that would allow me to build super cheap airless wheels.
Design & Fabrication
To keep everything simple, my idea is to buy an off-the-shelf wheel hub and to build the composite wheel around it. The
wheel will be two parts (two halves). It's a really simple planar construction that only requires the simplest construction
technique: one mold, one vacuum bag.
Here's what I've designed in Solidworks:
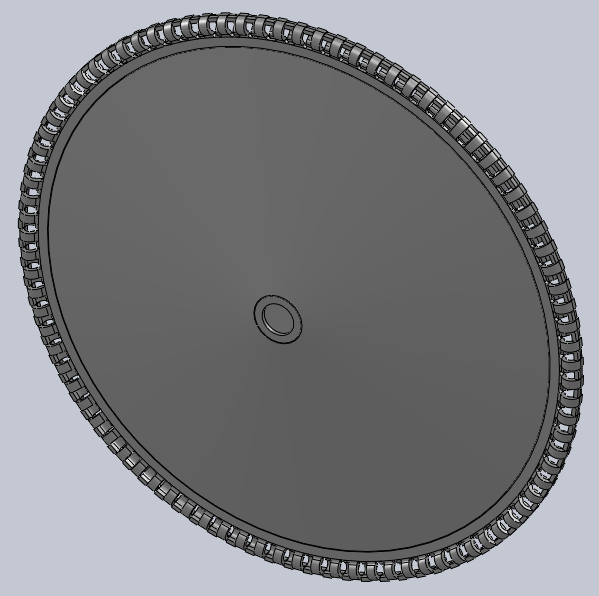
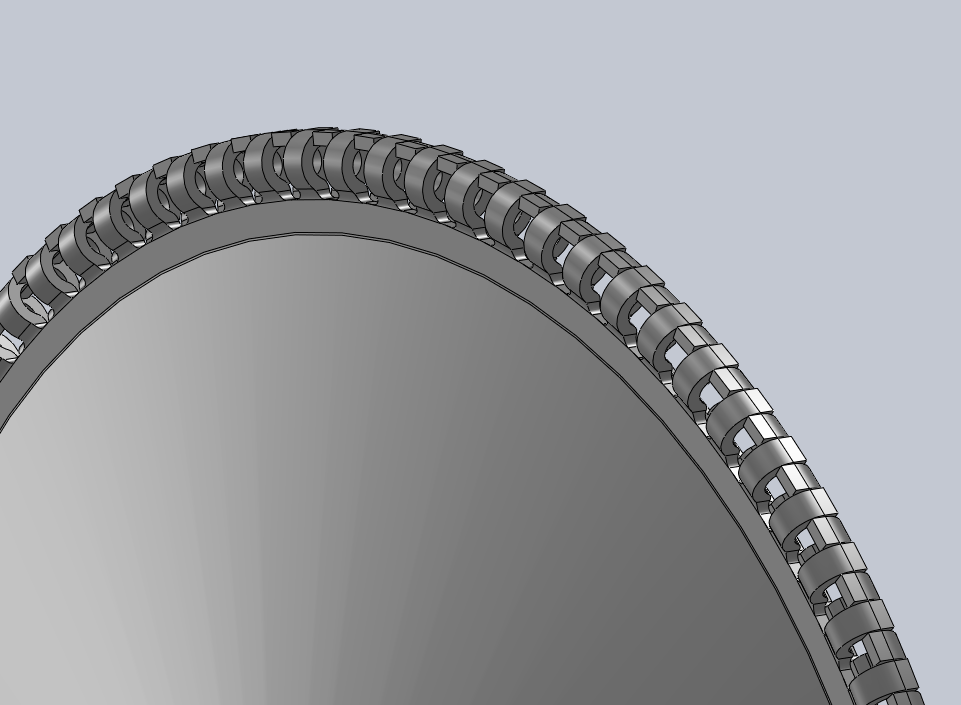
The idea is that the little "fingers" will flex under load and emulate the effect of an inflated tire. A thin coat of hard rubber will need
to be casted on them to provide better traction.To keep this project manageable I cut the wheel in 4 and I made a mold. Making 1/8th
of the bike wheel will be enough to test my idea.
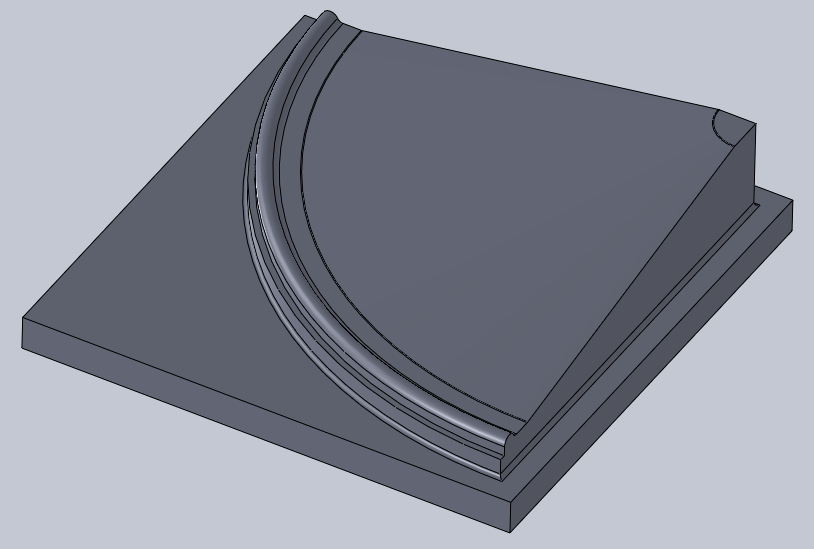
I milled the foam on the big ShopBot using a 1/2in end mill, federate of 200 in/min and spindle speed of 6000 RPM. It took 50 minutes.
Neil walked by and told me I could run the machine much faster. Next time I'll crank it up closer to 600 in/min.

I laser cut the 4 burlap layers (75% speed, 20% power, 500Hz):

Tested the fit:
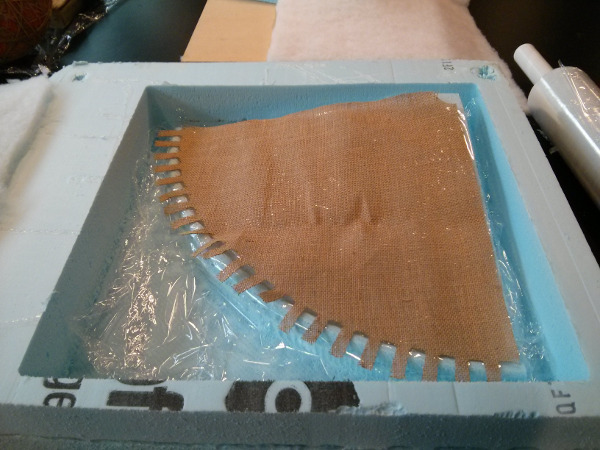
I then started to wet and stack my layers. Thanks to Matt and
Will for their help.
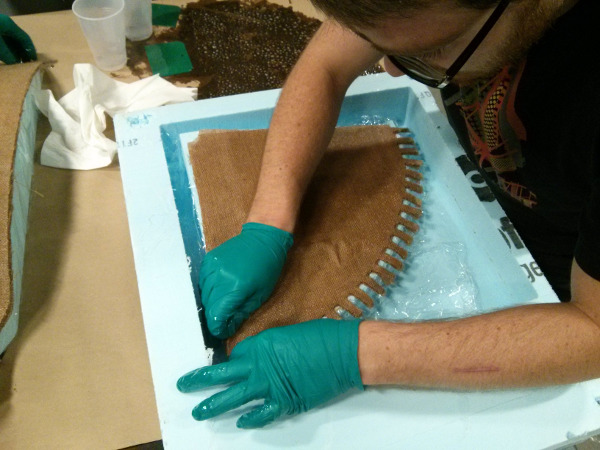

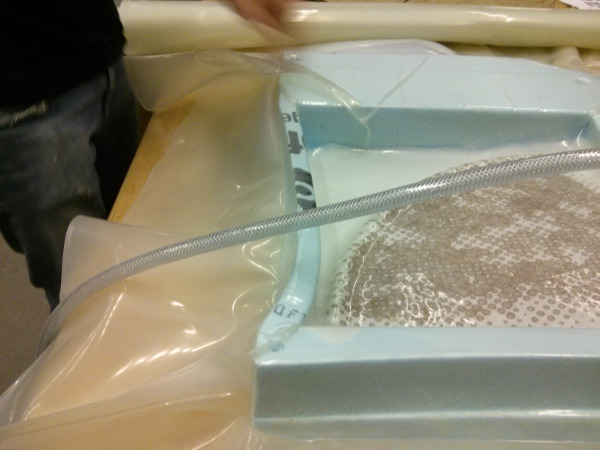
The "box" around my mold is an artefact from the machining. I was too lazy to cut it… but I should have done it. It prevented some
parts of the bag to really clamp my burlap. As you can see on the next picture, it also almost broke when we applied the vacuum.
This is the result after 36h of cure and some trimming with the scroll saw and band saw:
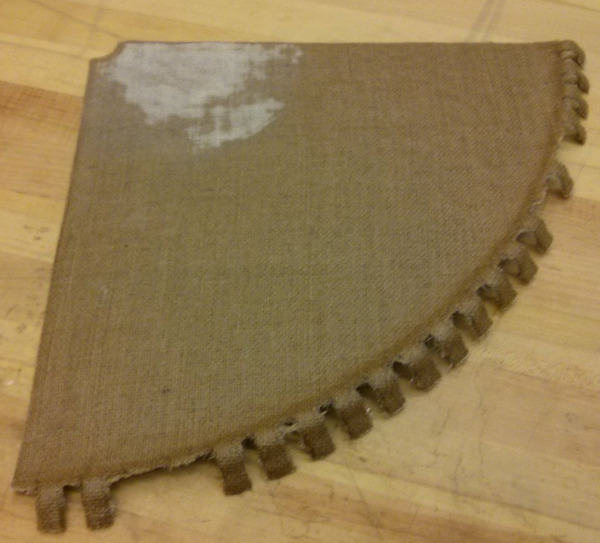
The white part is from sanding. The mechanical properties are really bad. There is no way this would support my weight. Just with the scroll saw I broke some of the "fingers".
I still think that this concept could work, but with better materials, way more layers and more design time.
Anyway, I wanted to see if I could at least get a good cosmetic finish so I sanded parts of the wheel and applied Gesso to it. My first coat was somehow
thick. I let it dry for 3 or 4 hours. It didn't cover nearly as well as I expected so I applied a second layer. I used less Gesso and I
spread it with a paper tissue to get an even surface. Still no luck, the fiber shows. I applied a 3rd coat and let it dry for an hour. Not much
better… That product isn't great (euphemism). In the past I’ve used Bondo for that task: it's way way better!
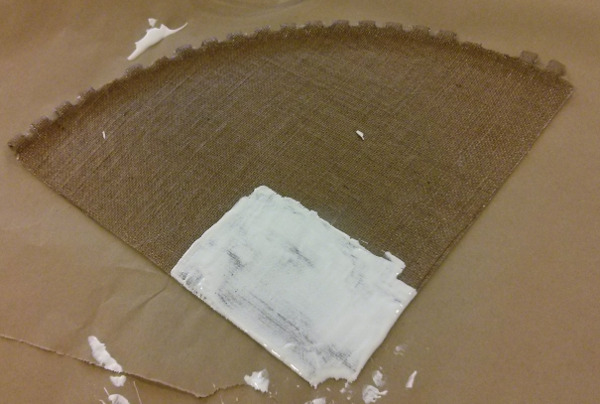
(The picture was taken after I applied the first coat of Gesso.) Time is running out so I sanded and painted on top of the uneven Gesso
covered fiber. The following picture is after 3 coats of black paint.


Jean-Francois (Jeff) Duval - jfduval(@)media(.)mit(.)edu - 2013
Top | MIT Media Lab | How To Make (almost) Anything 2013 | Index
"Hidden" keywords: Jean-François Duval, JFDuval, Jeff Duval, PCB, Dishpenser, MIT Media Lab, Biomechatronics, Electronics, Robotics, DIY, Hack, Hacker