Margaret Tries to Make (almost) Anything | 2020
Margaret Sullivan | Undergraduate
Mechanical Engineering | MIT
Margaret Sullivan | Undergraduate
Mechanical Engineering | MIT
Succulent Success
The Plan
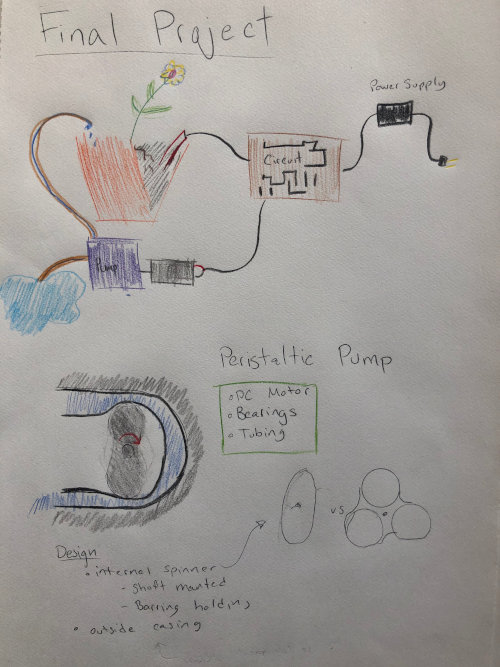
I have had to do a little bit of a 180 on my final project. As an undergrad I am being kicked out of my dorm before thanksgiving. Unfortunatly I will have to fly home, and then will have to move again because my family will be. This means that I want to be able to bring my project on so I am downsizing. My new plan is to create a watering system that can assess the need for water and then bring the water to the plant until it is properly watered.
There will be two main systems for this project, the sensing system and the watering mechanism. I hope to control both with a 1614 microcontroller on a homemade custom board. I plan to measure the soil moisture using capacitance and plan to make a peristaltic pump to deliver the water. Combined they should incorperate every component from this semester.
x
Components
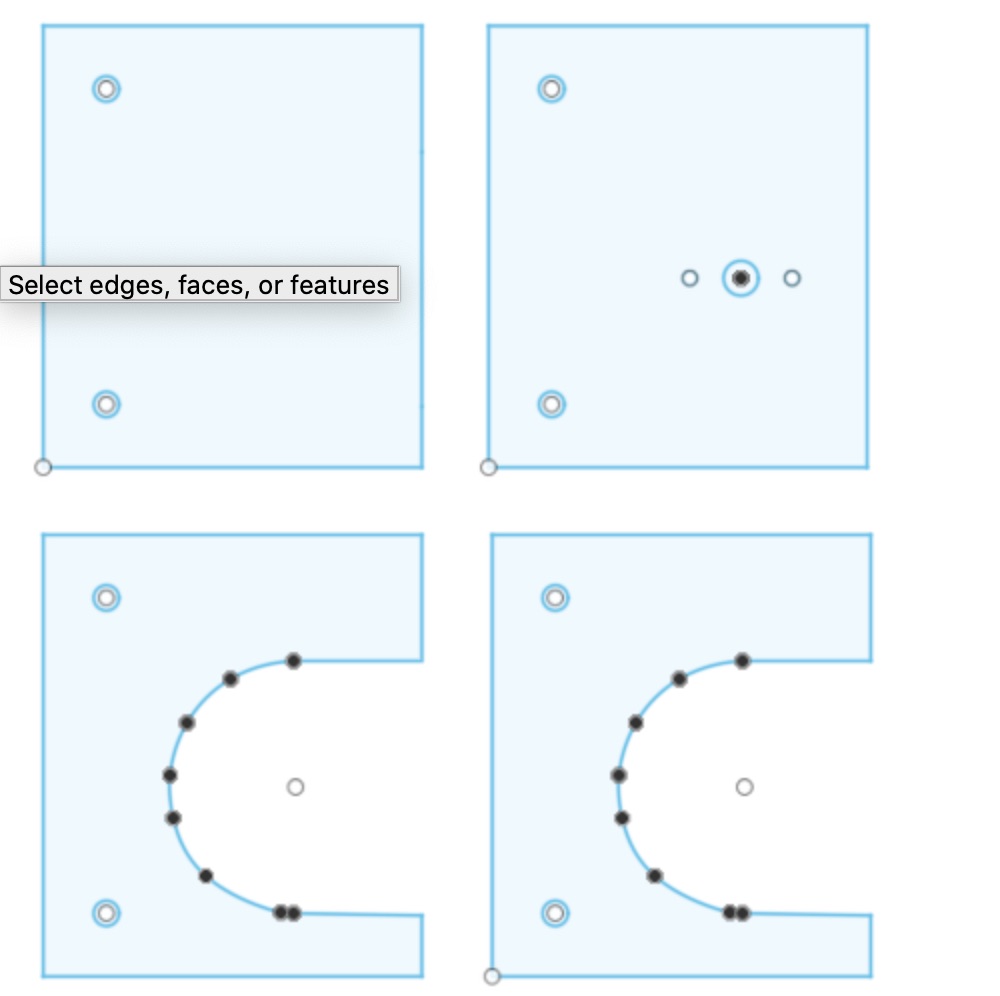
>2D and 3D design Pump will be composed of pieces design in CAD (fusion360)
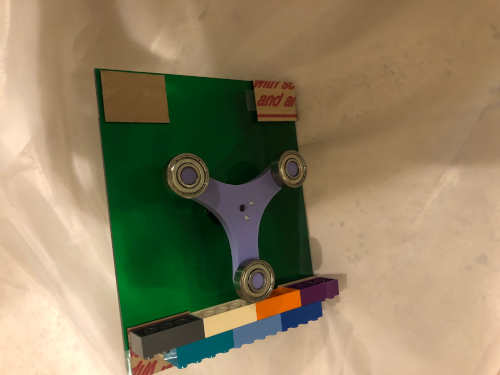
> Addadtive fabrication Process 3D printed motor mount and fixture
> Subtractive fabrication Process Laser Cut acrylic will encase the pump and create stand for plant
> Electronic Design and Production Board controlling this processs will be made on Clank and designed in KiCad
> Embedded microcontroller interfacing the ATtiny 1614 will control the motor and interface with the capcitance sensing
> Embedded microcontroller programming the moisture in soil will trigger a response through the board
> System Integration and Packaging Both systems will be integrated and contained in a small portable set up.
Peristaltic Pump
The goal of the pump is to get water from one place to another. In this case the cup water source to the soil. I have aquired some supplies already. A DC motor, bearings, and some tubing, both flexible and more rigid.
CAD design ready to go for fixture, outside and plate, but fusion is resetting and I didnt get screenshots of it thus far, but hope to cut and print today and then machine mold tomorrow.
Now that I am out of the lab I have to be a little more creative. I accidentily left my spacing pieces I cut in my dorm, so I have replaced them with legos (which have amazing consistancy!)
Moisture Monitoring
One method of measuring the moisture within soil is measuring the capacitance between two probes. I will use this method to determine it the plant needs to be watered
Here I got the capacitance measuring and responding via an LED. I created various thresholds that would cause the LED to flash at different rates or patterns to idenitfy what number the board was recieving. Here you can see it changing as I touch it.
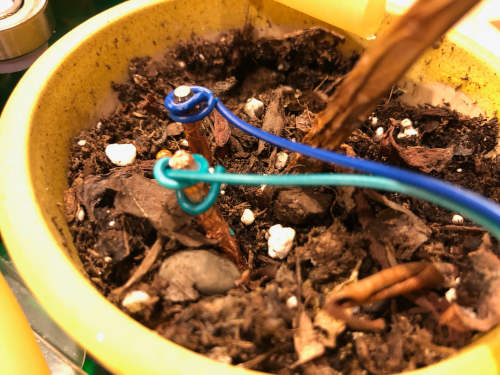
To monitor the moisture I made two probes that will be placed in the soild apart from eachother.
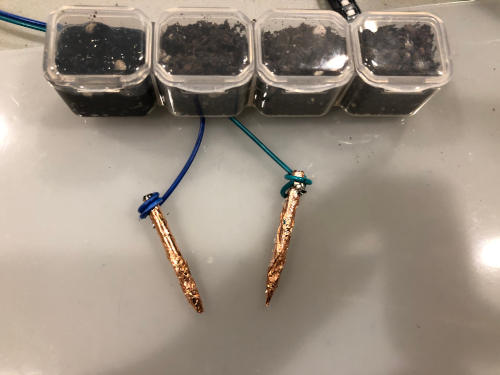
To get a sense of the measurements I created several differently watered soils and sampled them to create a threshold. I am not a gardner so I estaimated but further research should go into the optimal moisture for various soils and plants.
Circuit Designg
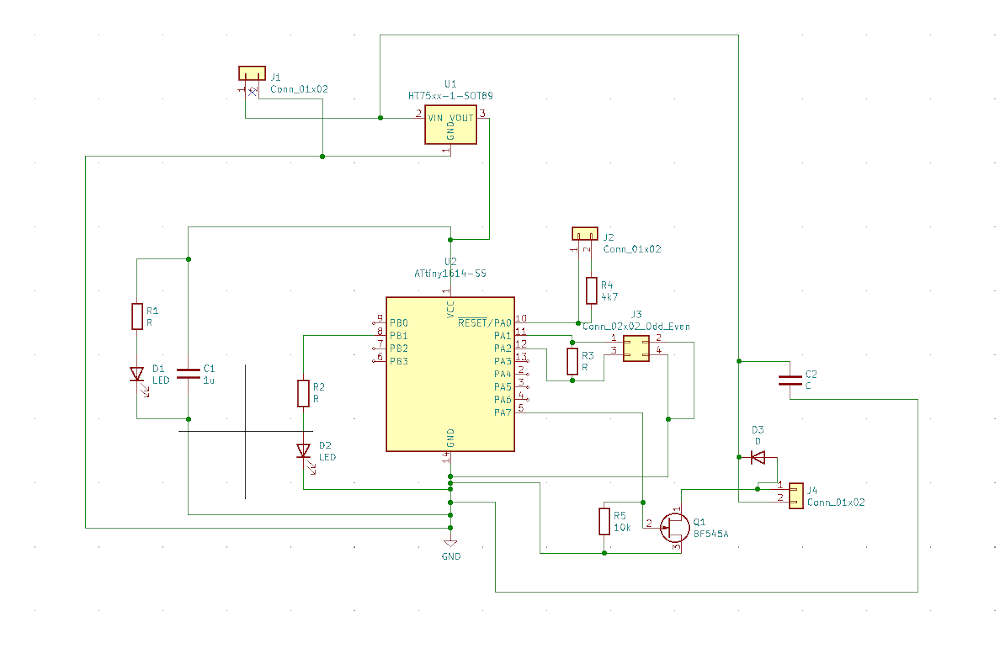
The circuit must provide serve to measure the capacitance, drive a motor, and logically understand when to do both. The three main segments of my board will be broken up to the capacitance measurements, motor driving, and power.
With these functions in mind I decided to go with the aTtiny 1614 which provides enough pins for the funcitons while being the simplist board to use. In addition to the funcitons I wanted to add aprograbable LED to test function as well as an LED to indicate power.
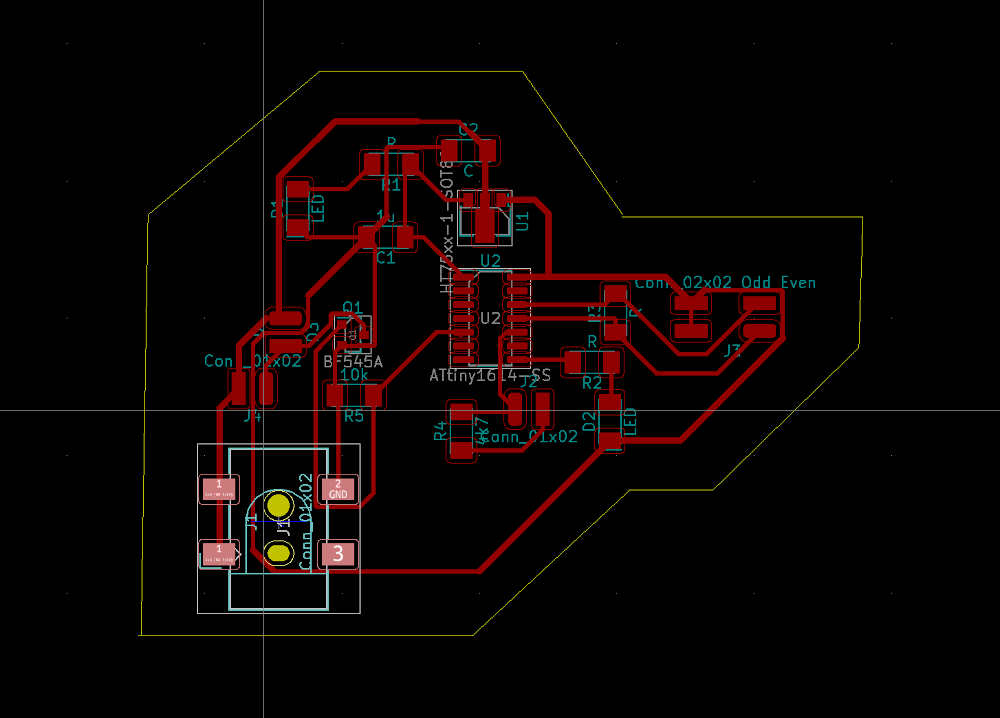
Using KiCad I designed the board and mapped out the traces. There were special considerations made in the design for the Motor Driver and capacitance that you can read more about in Week 10 and Week 9 respectivly. I made an error in my choice for the Voltage regulator, but was able to adjust another piece to make it work.
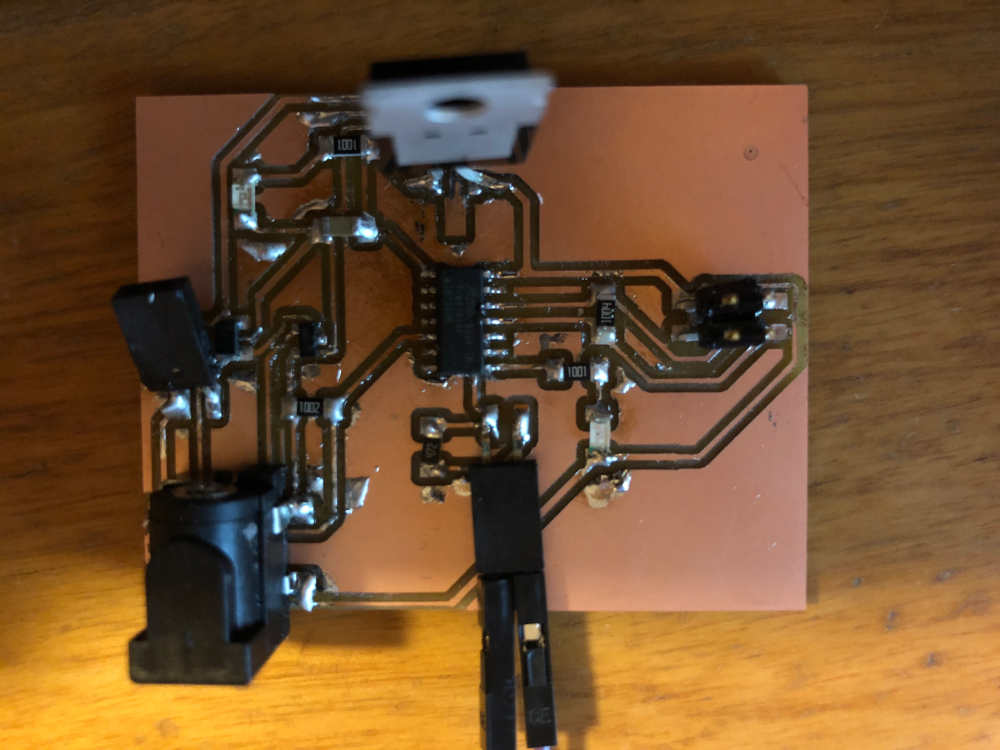
Using the aTtiny data sheet I got each pin necesary and began programming. My board is currently working as a motor driver, and shows promise at measureing capacitance.
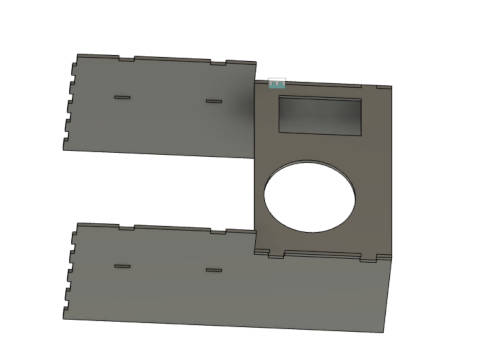
Packaging
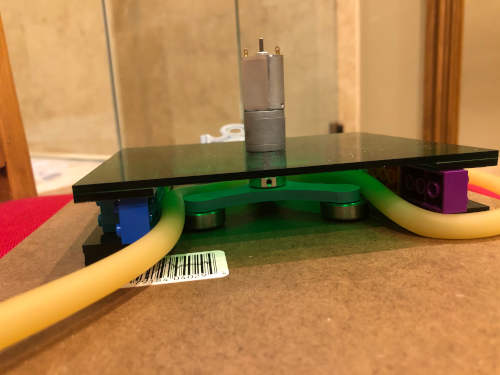
Unfortunatly during my final weeks my design changed so my intiail packaging plan did not work. Below is the final project. The packaging is made from cardboard which is not ideal for a lot of reasons. However I have CADed up the packaging that I would use. Without access to a lab I was unable to make it but I would laser cut my design with acrylic.
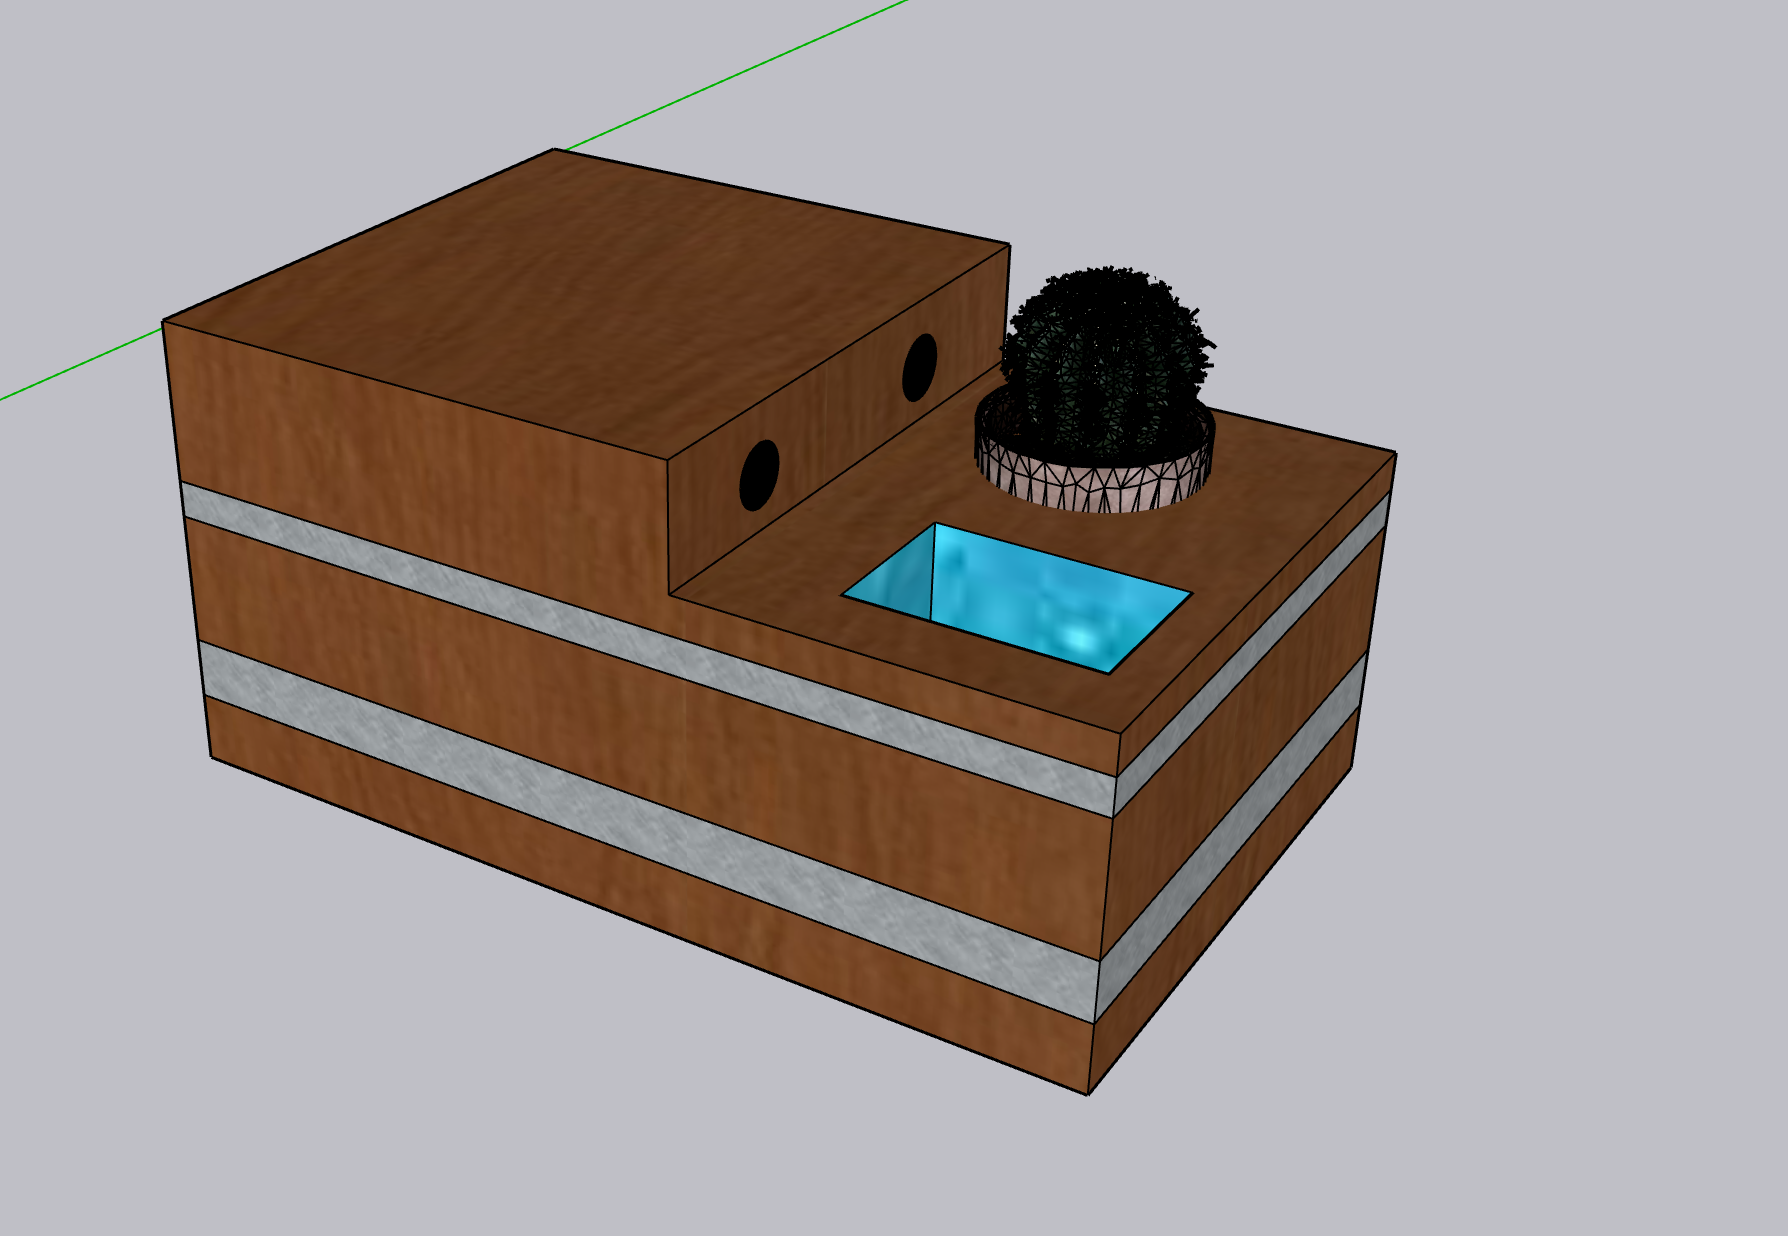
One of the main goals of packaging is seperating the electronics and the water. As an ocean engineer I understand how probelematic water can be. With such exposed circuits the threat is even worse. Currently the water sorce, the tubing, and the plant are all seperated from the circuit. The closest interface is the wires soldered to the motor which is under acrylic and only touching the water through the medical tubing.

As requested I made a rendering of the packaging! I used sketchup I decided to use wood with metal accents to make the outside because I am imagining this sitting on my desk.
Coding
My code was extremely simple, but the two things that I think are helpful is that it only waters a little bit at a time and it gives a rest period to allow the water to soak in. This should give a better reading of soil moisture.

The Result
I am proud of the final result, although there is so much I would want to do and improve on. I would find a better capacitance method which is more sensative to better assess the soil. In additoin the packaging would be more professional given more time and lab access. Overall this class was a joy and I learned so much. Please enjoy my final video!
Questions
What does it do? This device keeps your plants watered. It measues the moisture in the soil and adds water through a peristaltic pump if deemed necesary.
Whos done what beforehand? Nothing was groundbreaking (even if I was probing soil). Almost all aspects have been done in the class before which helped me determine its feasibility.
What Materials and Components were used? Where did they Come from? How much did they cost? DC Motor - From CBA basement - estimated $4 // Switching Adapter 12V - One from CBA, ended up using Monitor power supply - $10 // Medical Tubing - Amazon - $5// Motor Hub, Bearings - CBA Basement - estimated $5
In addition to those parts I 3D printed the rotating part of the pump and cut from acrylic the ouside of the pump. For electronics I used the Attiny 1614 and various resitors, capacitors, and LEDs estimated to cost less than $5 total.
What process were used? 3D printing, Laser Cutting, Milling, Soldering, Drilling
What questions were answered? For me, it was whether I was able to put everything we learned into a project!
What worked and what didn't The pump actually worked surprsingly well. It was able to give water a rate that was perfect for its function. It is limited to a certain amount of water because as the cup gets emptyer the pump is less effective. The soil measurments worked to an exstent. It can basically tell if it is in water or in completely dry soil there is not a lot of nuance.
How is it evaluated? Probably the best way to evaluate it is to see if it can keep a plant alive for an exstended amount of time.
What are the implications I think it is actually pretty cool thing to have. I would need to improve one or two things, but I would definitly use it!