Margaret Tries to Make (almost) Anything | 2020
Margaret Sullivan | Undergraduate
Mechanical Engineering | MIT
Margaret Sullivan | Undergraduate
Mechanical Engineering | MIT
Assignment
Make an in-circuit programmer Milled, stuffed, and tested board
Buckle Up! And get ready for a rollercoaster of emotions and outcomes. The past two weeks we have worked on the electronic production and design. I have decided to combine them because I wanted to be accurate in my timeline of events but I worked on both simultaniously. This page will document my successes but mostly all of my failures and problems.
Building CLANK
Early into week 06 I started building my dear friend CLANK. For about 3 hours on Friday, Saturday, and Sunday I worked to complete the build of CLANK. The construction was slow, but very manageable. I found the videos to be very clear, and the only thing that would have been helpful is a document identifying the names of the screws (That may exist, but if not I would volunteer to do it). Here is a list of tips/ struggles that I had in the contruction of CLANK.
Some of the slots for the Nuts were too small, so really had to push it in. After getting a good tool it went smoothly but initaly I was using my full body wieght.
To add the circuit boards we had to remove screws from the motors. I did not have the right screw driver which made it impossible to do. I stripped the screws on the first attempt with the wrong screwdriverand. I got the right screwdriver from a friend and it went smoothly but I did have to rotate my board due to the stripped screws.
I didnt realize this until later but the rigid coupling for the tool changer I had was deffective. Pictured below the ridge is on the inside and prevented the coupling from sliding on to the shaft past the initail 1/8 of an inch. I ended up getting a new part! THANK YOU to Alfonso and Jake for responding so quickly!

The defective coupling! It is tough to see but I measure it to be .240" diameter where the ridge is protuding
Overall I was able to build Clank without too many issues but it did take a lot of time. I would estimate it took 10 hours total! I think the video instructions were really good it was just a really slow process
Production
Building CLANK was one thing, but getting it moving was a whole other ball game. I think my lack of familairty with terminal and gitlab led me to struggle with the controller directions. I was initally unaware of downloading the repository on gitlab. I thought that the Nodes.Js was the repository the controller docomentation reffered too. For a few hours I tried to run Clank (it was not gonna happen becasue I didnt have the repository). Timi stepped up big and helped set me straight and I was able to download the repository and get to the web browser.
During W06 my computer crashed which stalled my progress as I borrowed laptops and rewrote my 17.263 paper.
With the broweser and everything plugged in I tired to jog the machine. But alas it did not work. After redowndlaoding and retrying everyhting in almost every order imaginable I posted on issues. Camron offered to zoom to help walk me through it! The errors were inconsistant on the browser window which led me to think that it might be a wiring issue. I made sure I was using the currect USB cable. I have a Mac Laptop with a lightning port, and I realized that maybe the connection issue could be from that. I commadered my podmates usb connector and we finally had success.
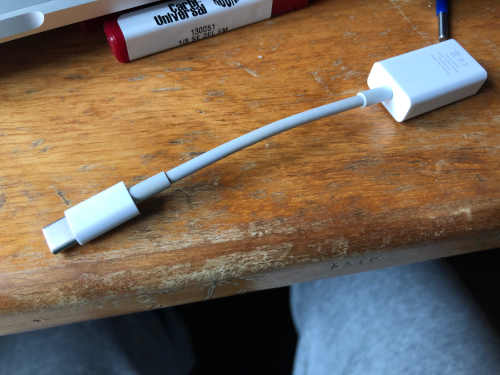
Here is the Culprit
Now with the machine on the move I was ready to begin. After starting the facing operation it began smoothly. About 5 minutes in, the spindle stoppped spinning but the carriage kept moving. Forutnaly I was able to disconnect the power prior to the bit breaking. I resecured all wires, reset everything and then was able to run the operation smoothly. My best guess is the wires to the spindle motor got pressed up aginst the right front post and became disconnected briefly.
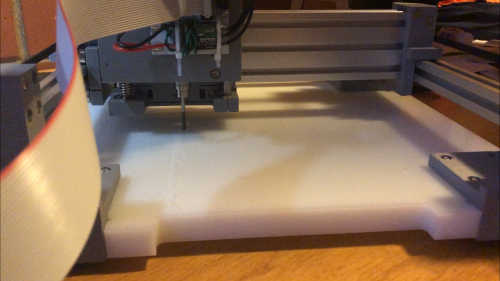
The facing operation beign completed!
With the machine bulit, controlled, and faced I was ready to start! I decided make ATiny 412. The next few hours were me messing up every way imaginable. Below I will share pictures of many of my failed attempts.
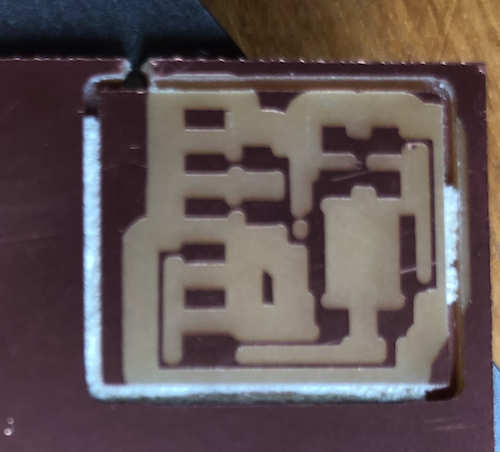
This was my first attempt where I thought I was using the smalles possible but it was just the 1/32. The results were decent the trace was very smooth and it followed the path designated for it perfectly. However, the path and therefore the board, left out a lot small details that the 1/32 was to big to mill. I then tried to cut out hte board but the board was not properly secured so after the 2nd pass through the board became dislodged and spun. I was able to shut off the machine and avoided damage to anything but the baord.
Next I tried with 1/64 engraving bit. This worked well and again the lines were clean, but it left a lot of unwanted copper there which would have made soldering really tough. When I tried running it again but with more offsets the machine turned on and ran off into the Y direction. I stopped before anything broke
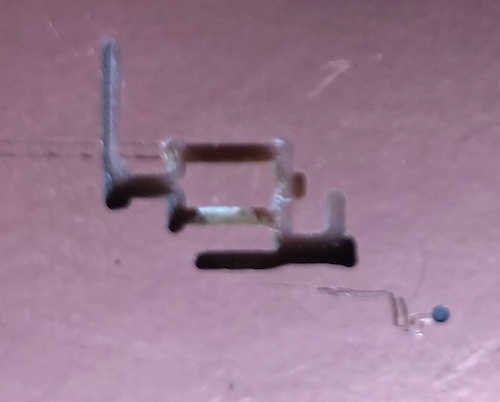
My next attept was going to be start with 1/32 to clear than do the fine details with 1/64 then cut the secured board with 1/32. However I must ahve messed up the zeroing and it dug way to deep and made terrible noises so I stopped it
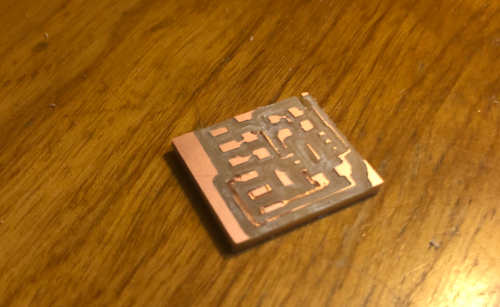
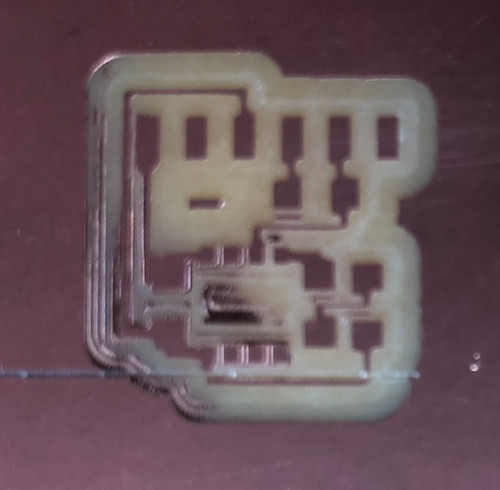
My next attept I tried milling with a 1/64 two flute flat bit. The results were soldi but not perfect. I was able to cut out the board with minimal issue and decided to continue on with this board
Soldering
This week taught me a lot but if nothing else it taught me that despite my love of Greys Anatomy I am not cut out to be a surgeon. I have decent experience sodlering but nothing close to this small. And I really struggled with it. I was able to reconginize that my soldering iron was too cold when there were peaks. You can see my results below. Some are ok but some are just downright bad. I am going to contineu to practice this skill.
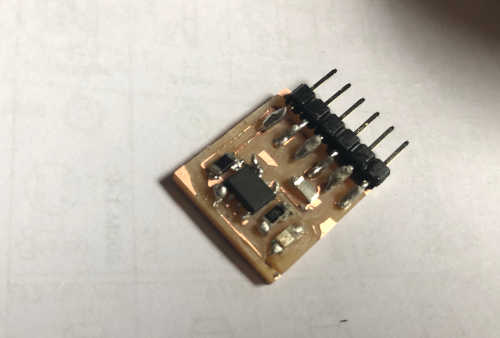
After working for a while the board is functional. My setup to program from my laptop was not functional. Thank you Zack for your help!