Weekly Progress
Week 3: 3D Scanning and Printing
3D Reconstruction (with Structure-from-Motion Photogrammetry)
Part 1 of this week's task was to scan a 3D object.
I have some experience with 3D reconstruction using a variety of techniques -- photogrammetry, LiDAR, structured light, time-of-flight, etc. I've been really impressed with the improvement in desktop photogrammetry in recent years and the ability to produce high resoultion 3D geometry and textures using relatively few photos taken with a mobile phone.
I had never used Meshroom and was excited to try this open source project which Neil had recommended. It requires an NVIDIA GPU (which I luckily have) but can be run remotely using a server.
Step 01: Importing Photos
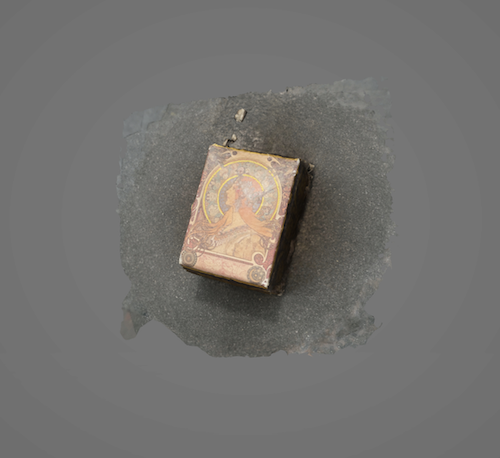
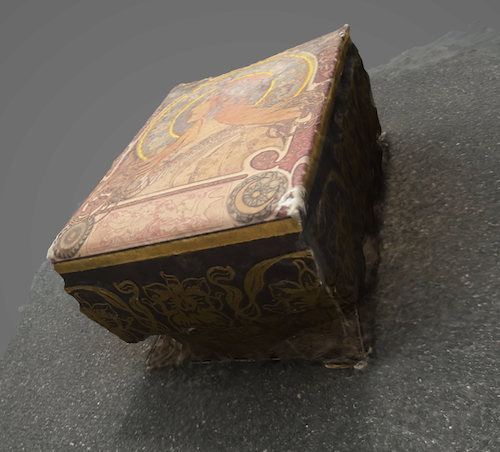
I took 24 photos with my iPhone 11 Pro of this small music box I got while travelling in Europe several years ago. It has a nice print of an Alphonse Muscha illustration that I thought would provide detail for for making a nice reconstruction. The box also is also a bit weathered and I was curious how those details may appear in the reconstruction. There is a reflective handle that could possibly pose a problem as that tends to be one of the downsides reconstruction techniques that rely on feature extracture from images to produce geometry.
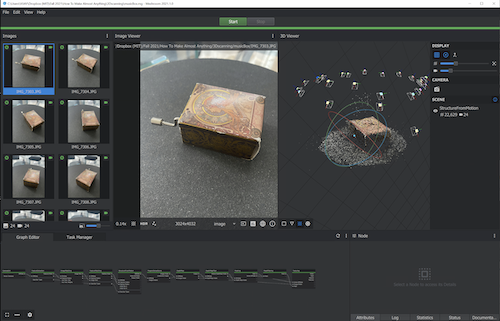
Step 02: Producing Geometry using Meshroom
Meshroom really makes it easy to produce geometry from photos. It automatically estimates your camera settings in order to place position where each photo was taken in 3D space. After generating a point-cloud from this information (I noticed in the log that they use the SIFT algorithm for feature matching), Meshroom generates a mesh (which can later be refined in Meshroom or using another software like Meshlab) and creates a texture map. While I am happy with the results from just a few cursory photographs, it is clear that if I had taken a few more images from different (lower angles) we'd get a significantly better result.

3D Printing
The second task for this week was to use a 3D printer to print something that could not be produced subtractively. I decided to use the Sindoh 3DWOX printers available to architecture students as I had (surprisingly) never used the self-service printers.
The group assignment was to first assess the design rules for the 3D printer.
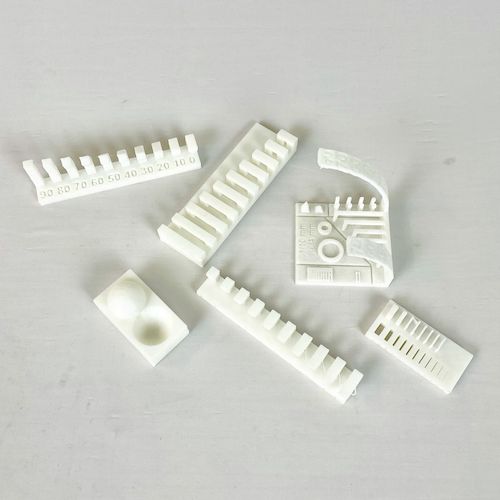
These tests show that the Sindoh can print a clean cantilever 6mm long, rotational overhangs of 80˚, holes as fine as 0.2mm wide, walls as thin as 0.4mm, and bridge 20mm wide gaps. (Image borrowed from classmate Sasha McKinlay)
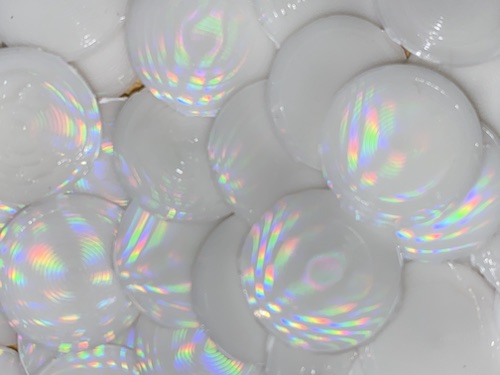
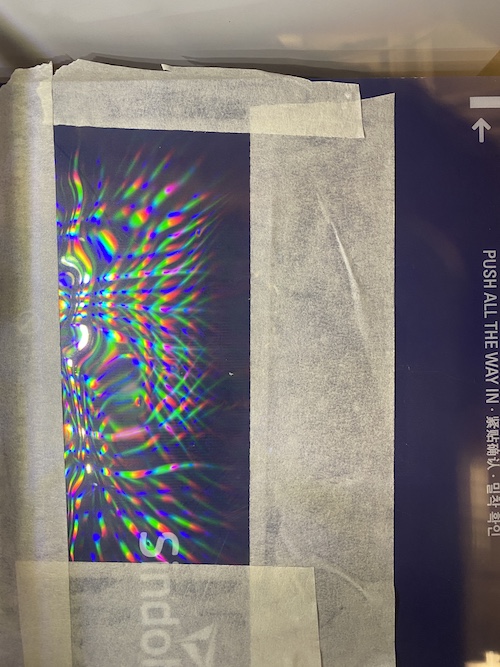
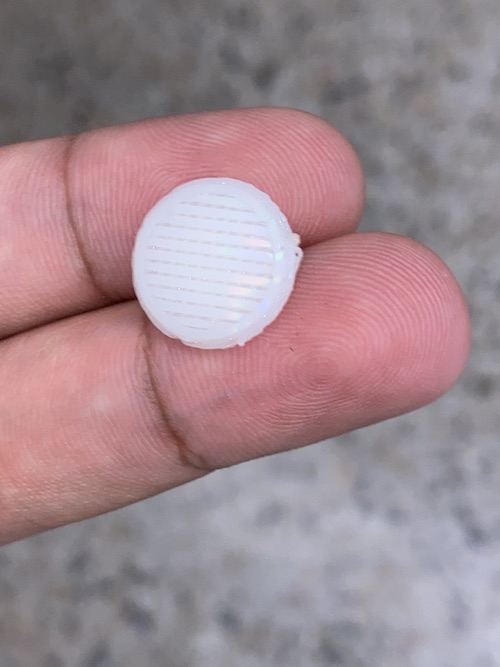
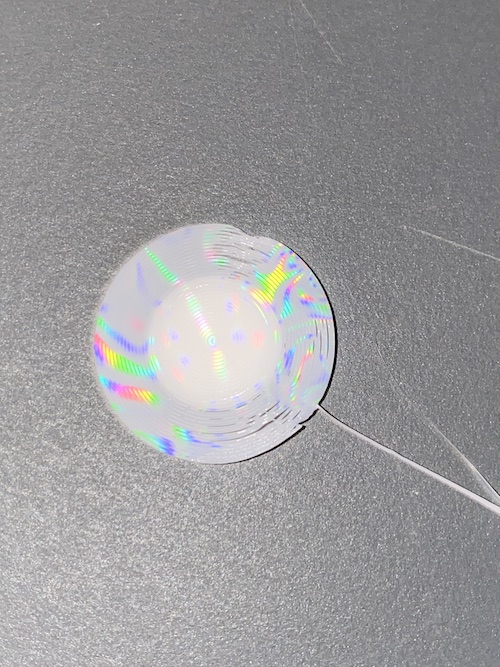
For my personal printing job, I wanted to play with the the settings a bit to see what I could do diffently than the default. I have been quite fascinated with diffraction grating recently and came across this video in which they show how making adjustements to the print bed can affect the finish quality of the flat side of the printed part. A diffraction grating sheet can be applied to a print bed to give the print a iridescent finish. I may write more about how this works in future weeks. I wanted to print iridescent sequins, which I modeled in Rhino. They have a rounded side and a flat side to clearly distinguish which side should be iridescent.
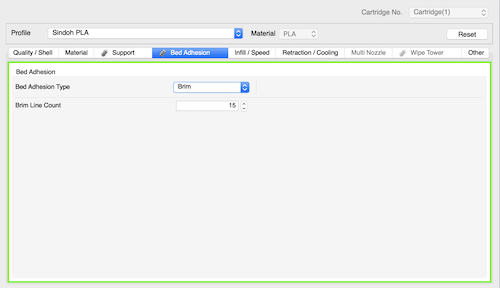
Key to a getting this effect to work is printing without a raft (i.e the typical support structure that adheres a print to the base plate). So instead of raft, I set the bed adhesion setting to Brim. This would give some adhesion to the plate, while still giving the printed part contact with the base plate.
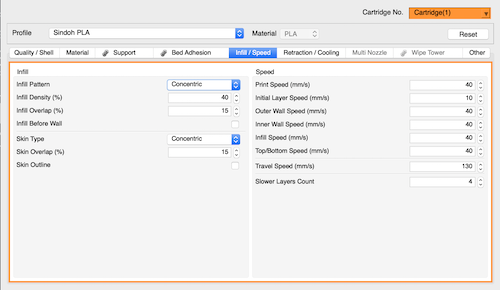
After some trial and error, I realized that a concentric skin pattern/infill made senese for the ciruclar print part I was printing -- making the brim easier to remove and the part to come out a lot cleaner.
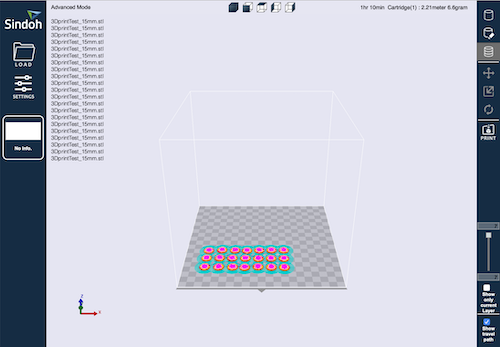
Once I had the settings working well (by testing individual parts that took ~2min to print), I prepped the file for a larger print where I would print several parts and exported the G-Code.
The parts were relatively easy to clean though some detail was definetly lost in the process. I am quite happy with how my iridescent disks turned out.