HYEMIN.BAE
How to Make Almost Anything 2021
How to Make Almost Anything 2021
Week_1: Computer Controlled Cutting
Vinyl Cutter

This week’s assignment was to ‘cut something on the vinyl cutter.
Since my old sketchbook has a huge coffee stain on its back, I decided to cut some stickers to cover it.
I picked one of my favorite artists’ works, Theories, Models, Methods, Approaches, Assumptions, Results,
and Findings, by Damian Hirst.
It is basically a white ping pong ball with some writing silkscreen in black color.
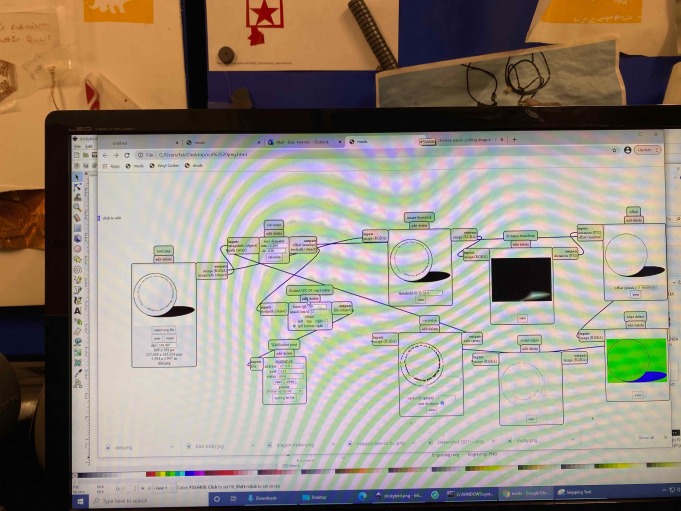
Only black and white image files can be uploaded into the mods, and the mods translate the file where the cutter
needs to go through the line between the black and white area.
As we learned in the tutorial section, I uploaded the png file.
However, some of the fine details were lost when I selected to preview.
Scaling up the picture, adjusting contrast, and increasing lightweights using photoshop helped solve the problem.
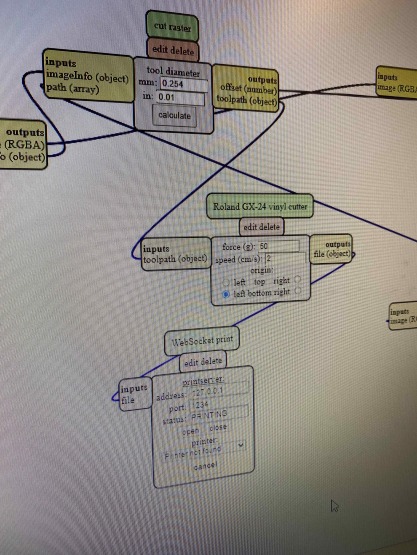
I used a Roland CAMM-1 GS-24 with a pen force of more than 1.5.
Setting up the machine was easy; just put the desired paper or sticker materials under two rolling feet,
put the lever down to hold the material firmly, and hit the ‘sent to the device’ button in the mods.
Stickers came out better than I expected. It was a little painful to take off from the original backing materials.
The tweezers with fine ends helped me a lot to do so.
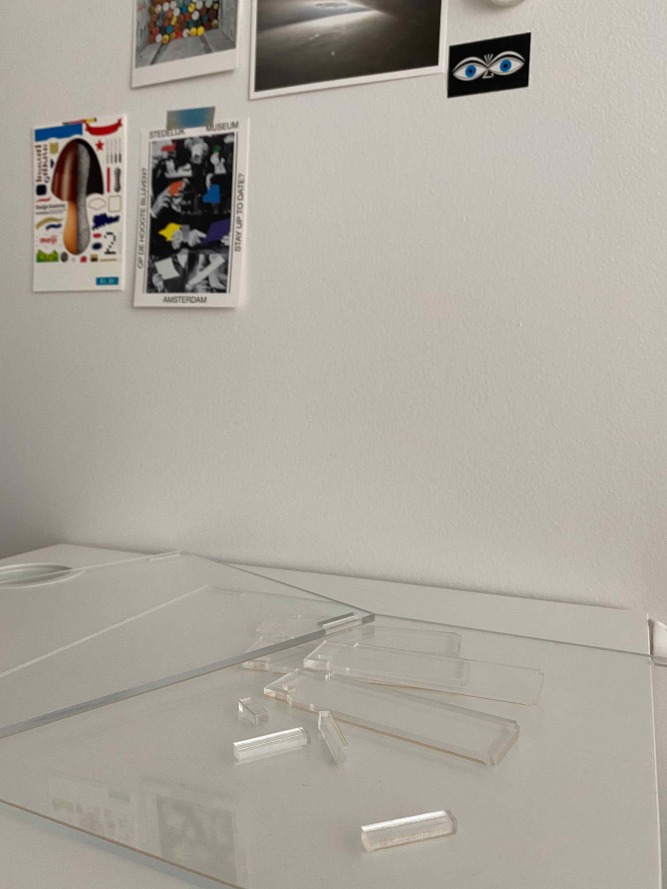
Laser Cut

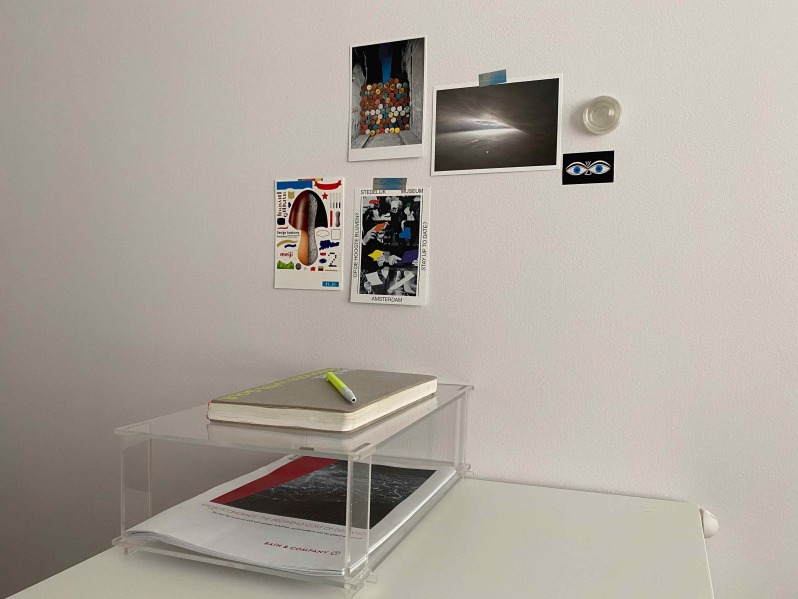
First, I wanted to design something I could keep in my room and something useful.
Since the semester had just started and I was expecting more papers to come soon, I made a paper tray using no fixed joints.
The sketch shows how the joint works. A leg goes through the main body piece in the y axis through the hole;
then the tiny rectangle piece goes into the leg in the x-axis to hold.
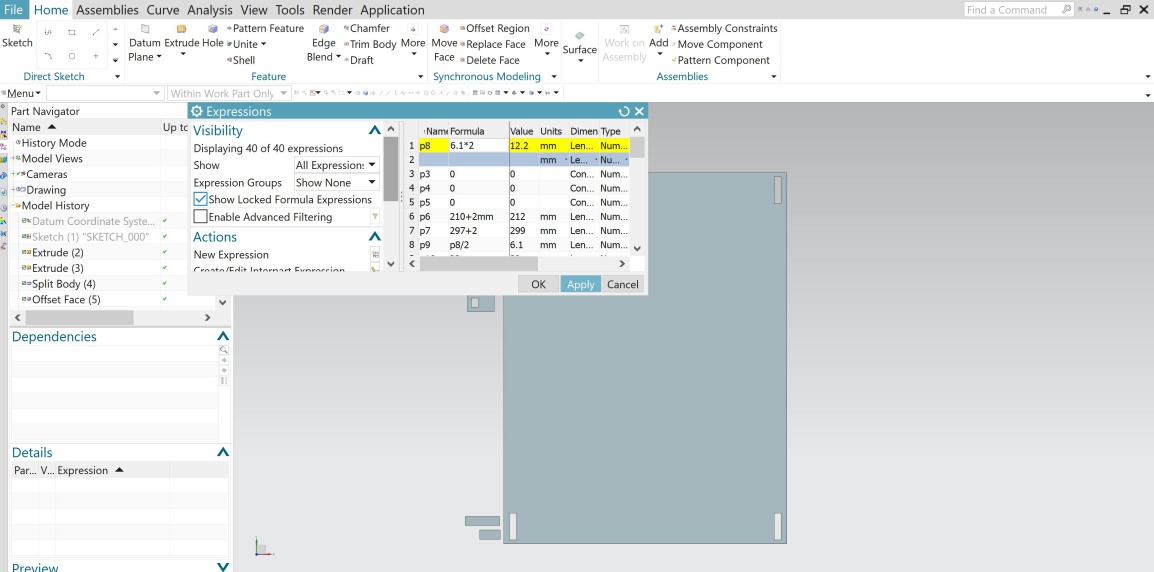
Using NX software, I designed a parametric model.
Creating some constraints where each piece meets and linking pieces that take reference of others for the measurement
can be edited easily in the future when there are needs of changing due to material thickness or kerfs.
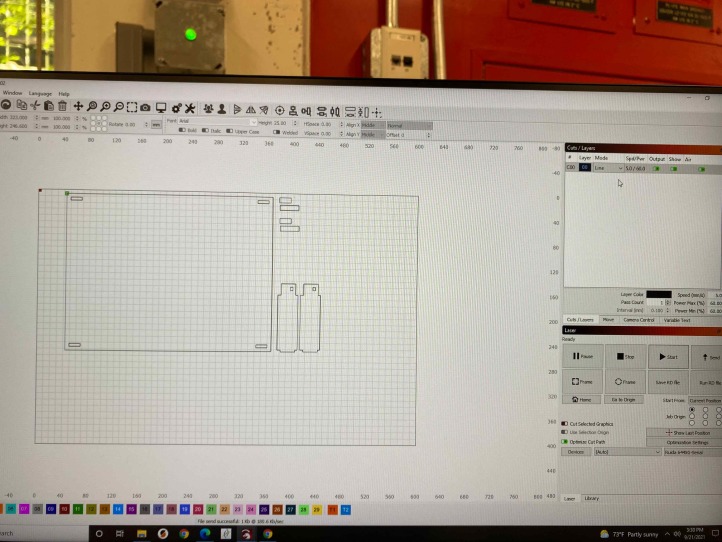
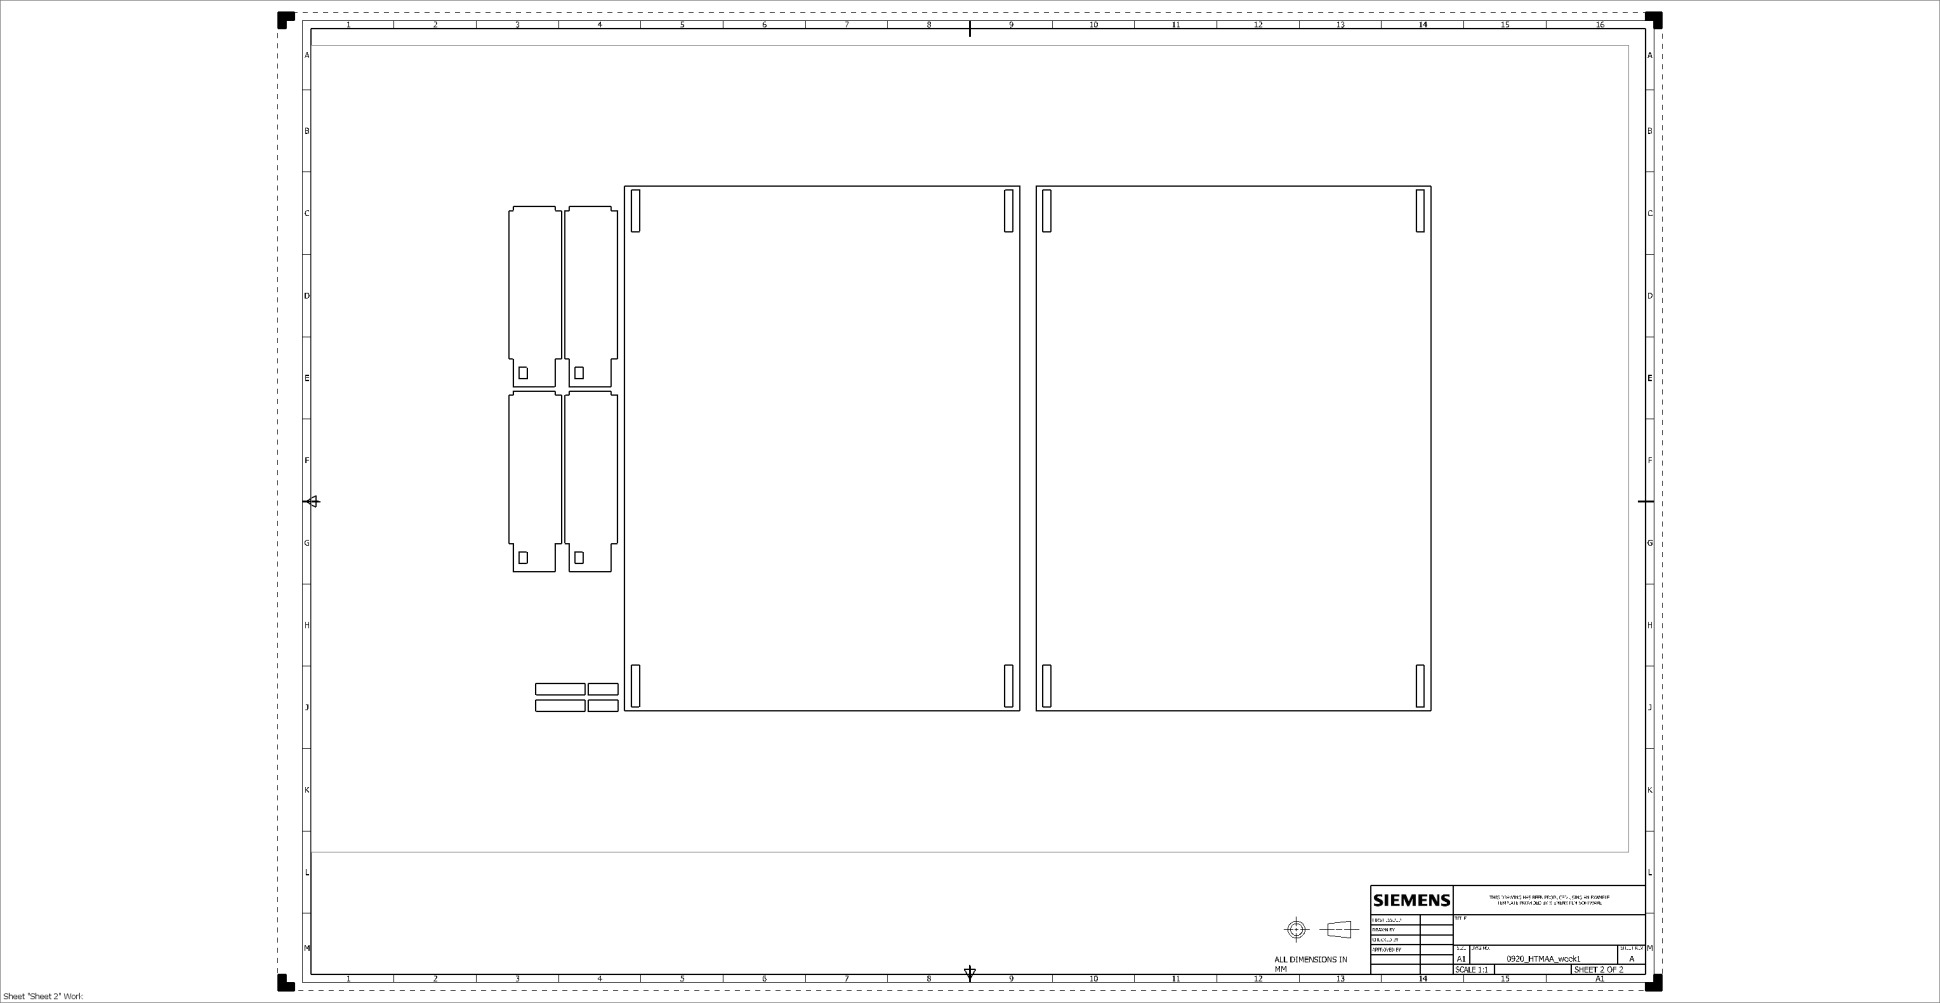
Once I was done with the 3d modeling, I layout them in a plane and exported them as a dxf file.
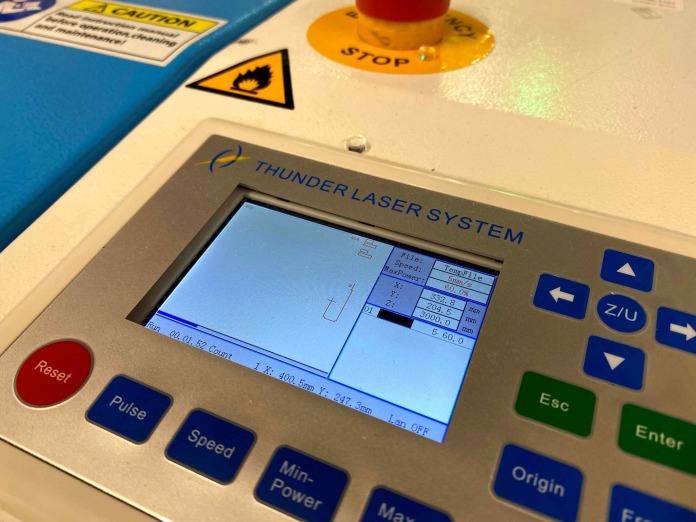
In the Harvard Section, we used Lightburn software to communicate with the machine.
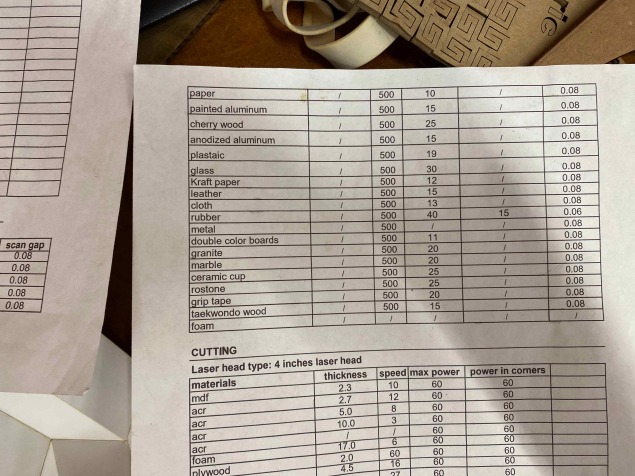
We had a guide that tells the right speed and power to cut different materials in different thicknesses.
I chose acrylic with a thickness of 5mm; therefore, the power was 60, and the speed was 60.
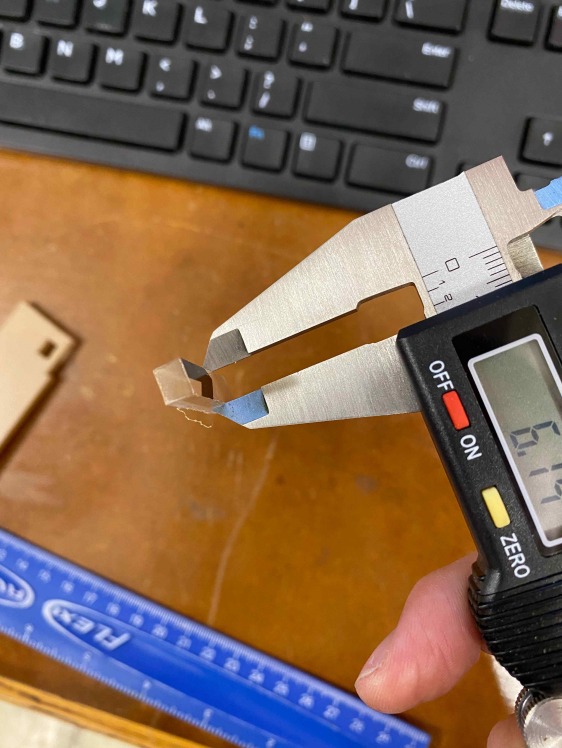
I cut a test piece to see the kerf since it was a different material with different cutting speeds and power;
I assumed the kerf would be other than the cardboard. It lost about 0.21mm of the material; I had to change the model accordingly.
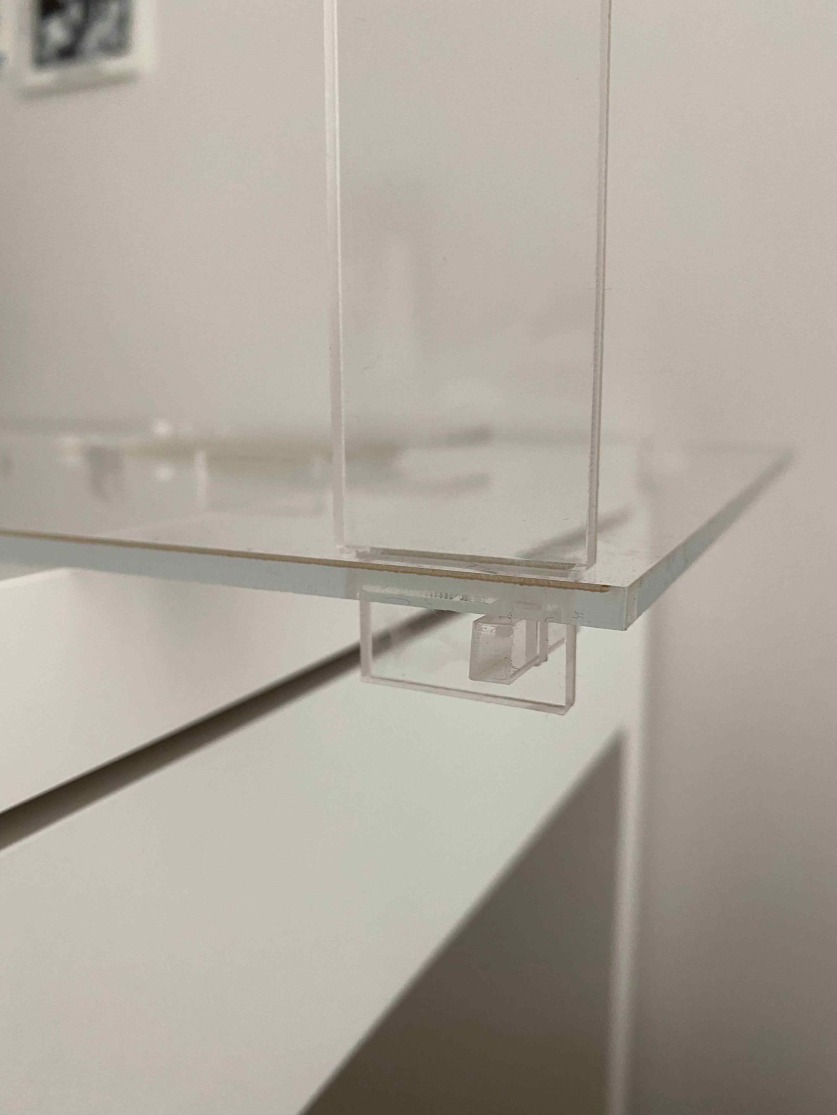
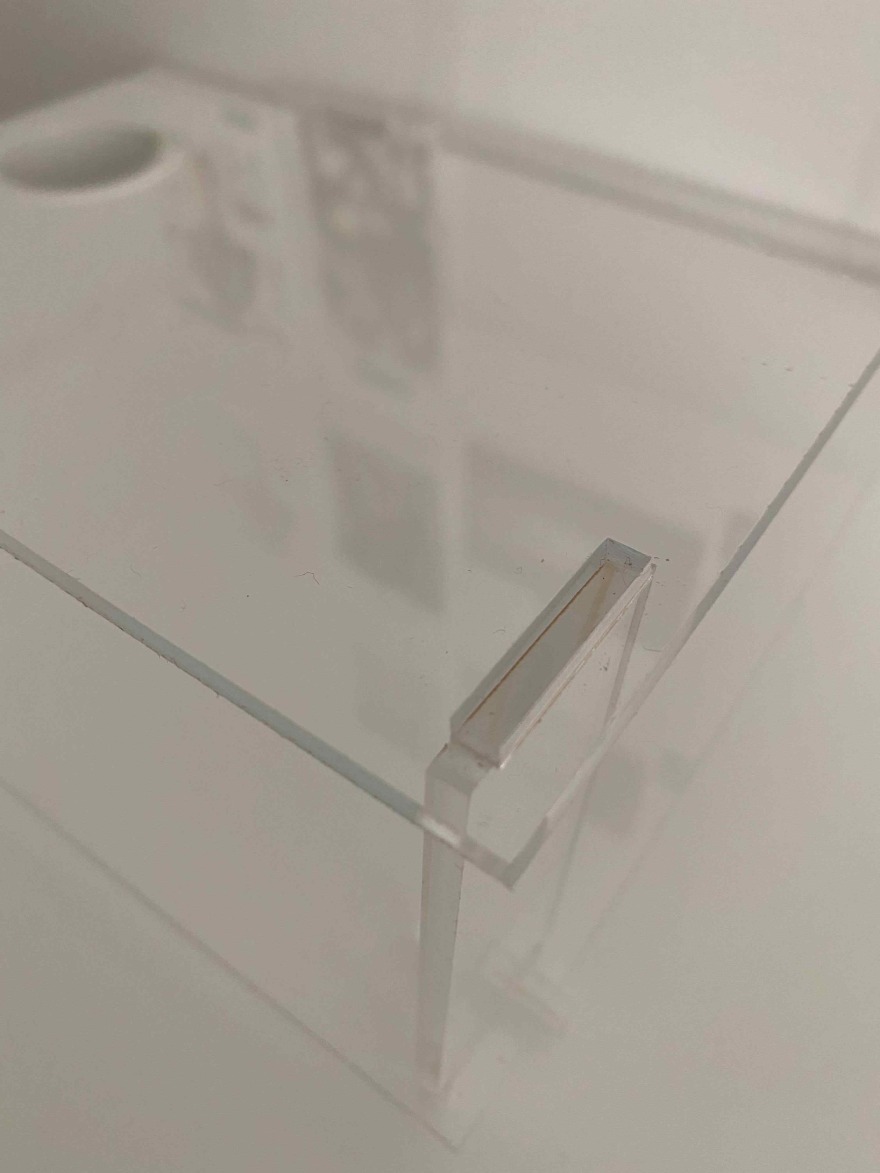
Finally, I put them all together.
You can see how tight each piece fits each other.
The design is stackable, so it can be extended to accommodate more papers in the future.