HYEMIN.BAE
How to Make Almost Anything 2021
How to Make Almost Anything 2021
Week_8: Input Device
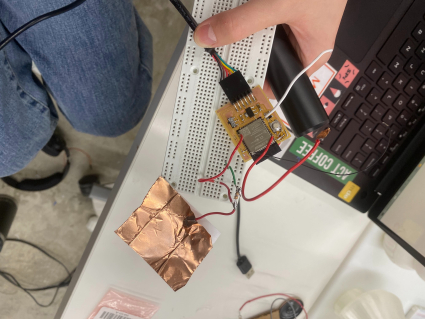
I was drawn by the look of the capacity sensor, which is a couple of copper sheets connected through a few wires.
It seemed promising to be achieved by a novice like me, and its simplicity would allow me to hack easily for the final project. Soon I realized that… I was a fool.
The biggest mistake I made was following other tutorials with other microcontrollers and assuming it wouldn’t be so different.
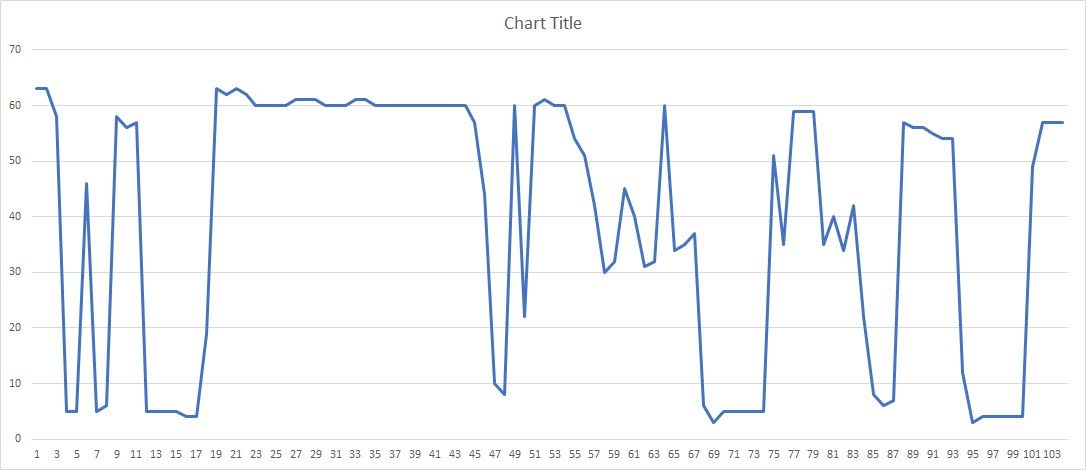
I followed Rob’s documentation of tx-RX sensing, Rosalie and Kels’ steps. It helped me understand the logic: capacitance multiplied by resistance is time.
We are reading time of capacitance changes when the resistance is the constant value.
Luckily, I found several tutorials for capacitive sensing using esp32.
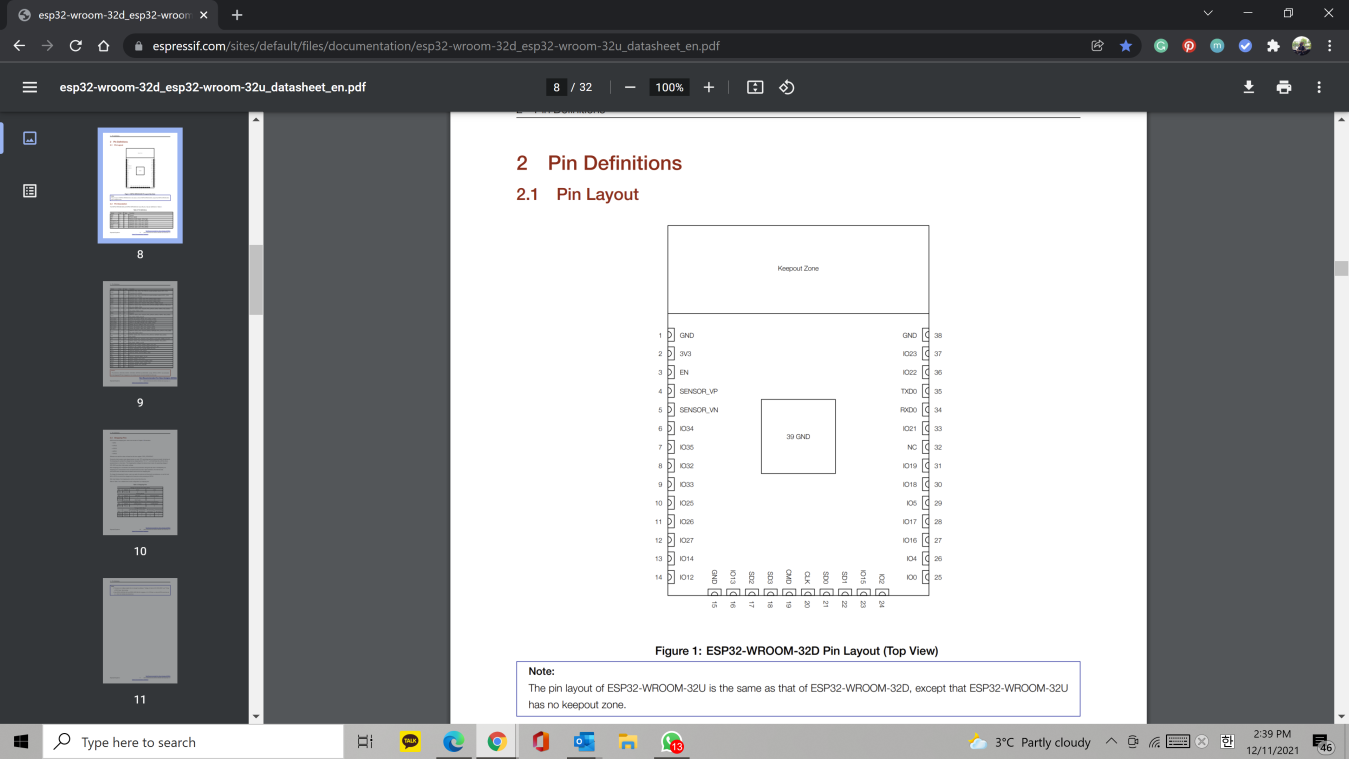
Picking the correct pinout to connect the copper foil was the next challenge. Many of the tutorials were based on premade boards such as feather ESP32,
so pinouts were different from my board. I kept trying 4, 5, 23, and 24 pinouts because their function descriptions were either ‘TOUCH’ or ‘SENSOR.’
Maybe there is a way to do it using those pins, but they didn’t work out for me.
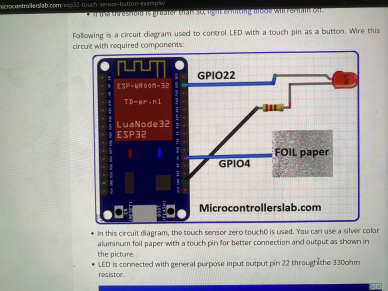
GPIO4, which is PIN26, was the right one to connect. According to the datasheet. GPIO4, ADC2_CH0, TOUCH0, RTC_GPIO10, HSPIHD, HS2_DATA1’.
Connecting PIN26 through a 100~200 ohm resistor to copper foil allowed me to monitor capacitive changes when I press or release my finger to the foil.
ESP32 back png
ESP32 exterior png
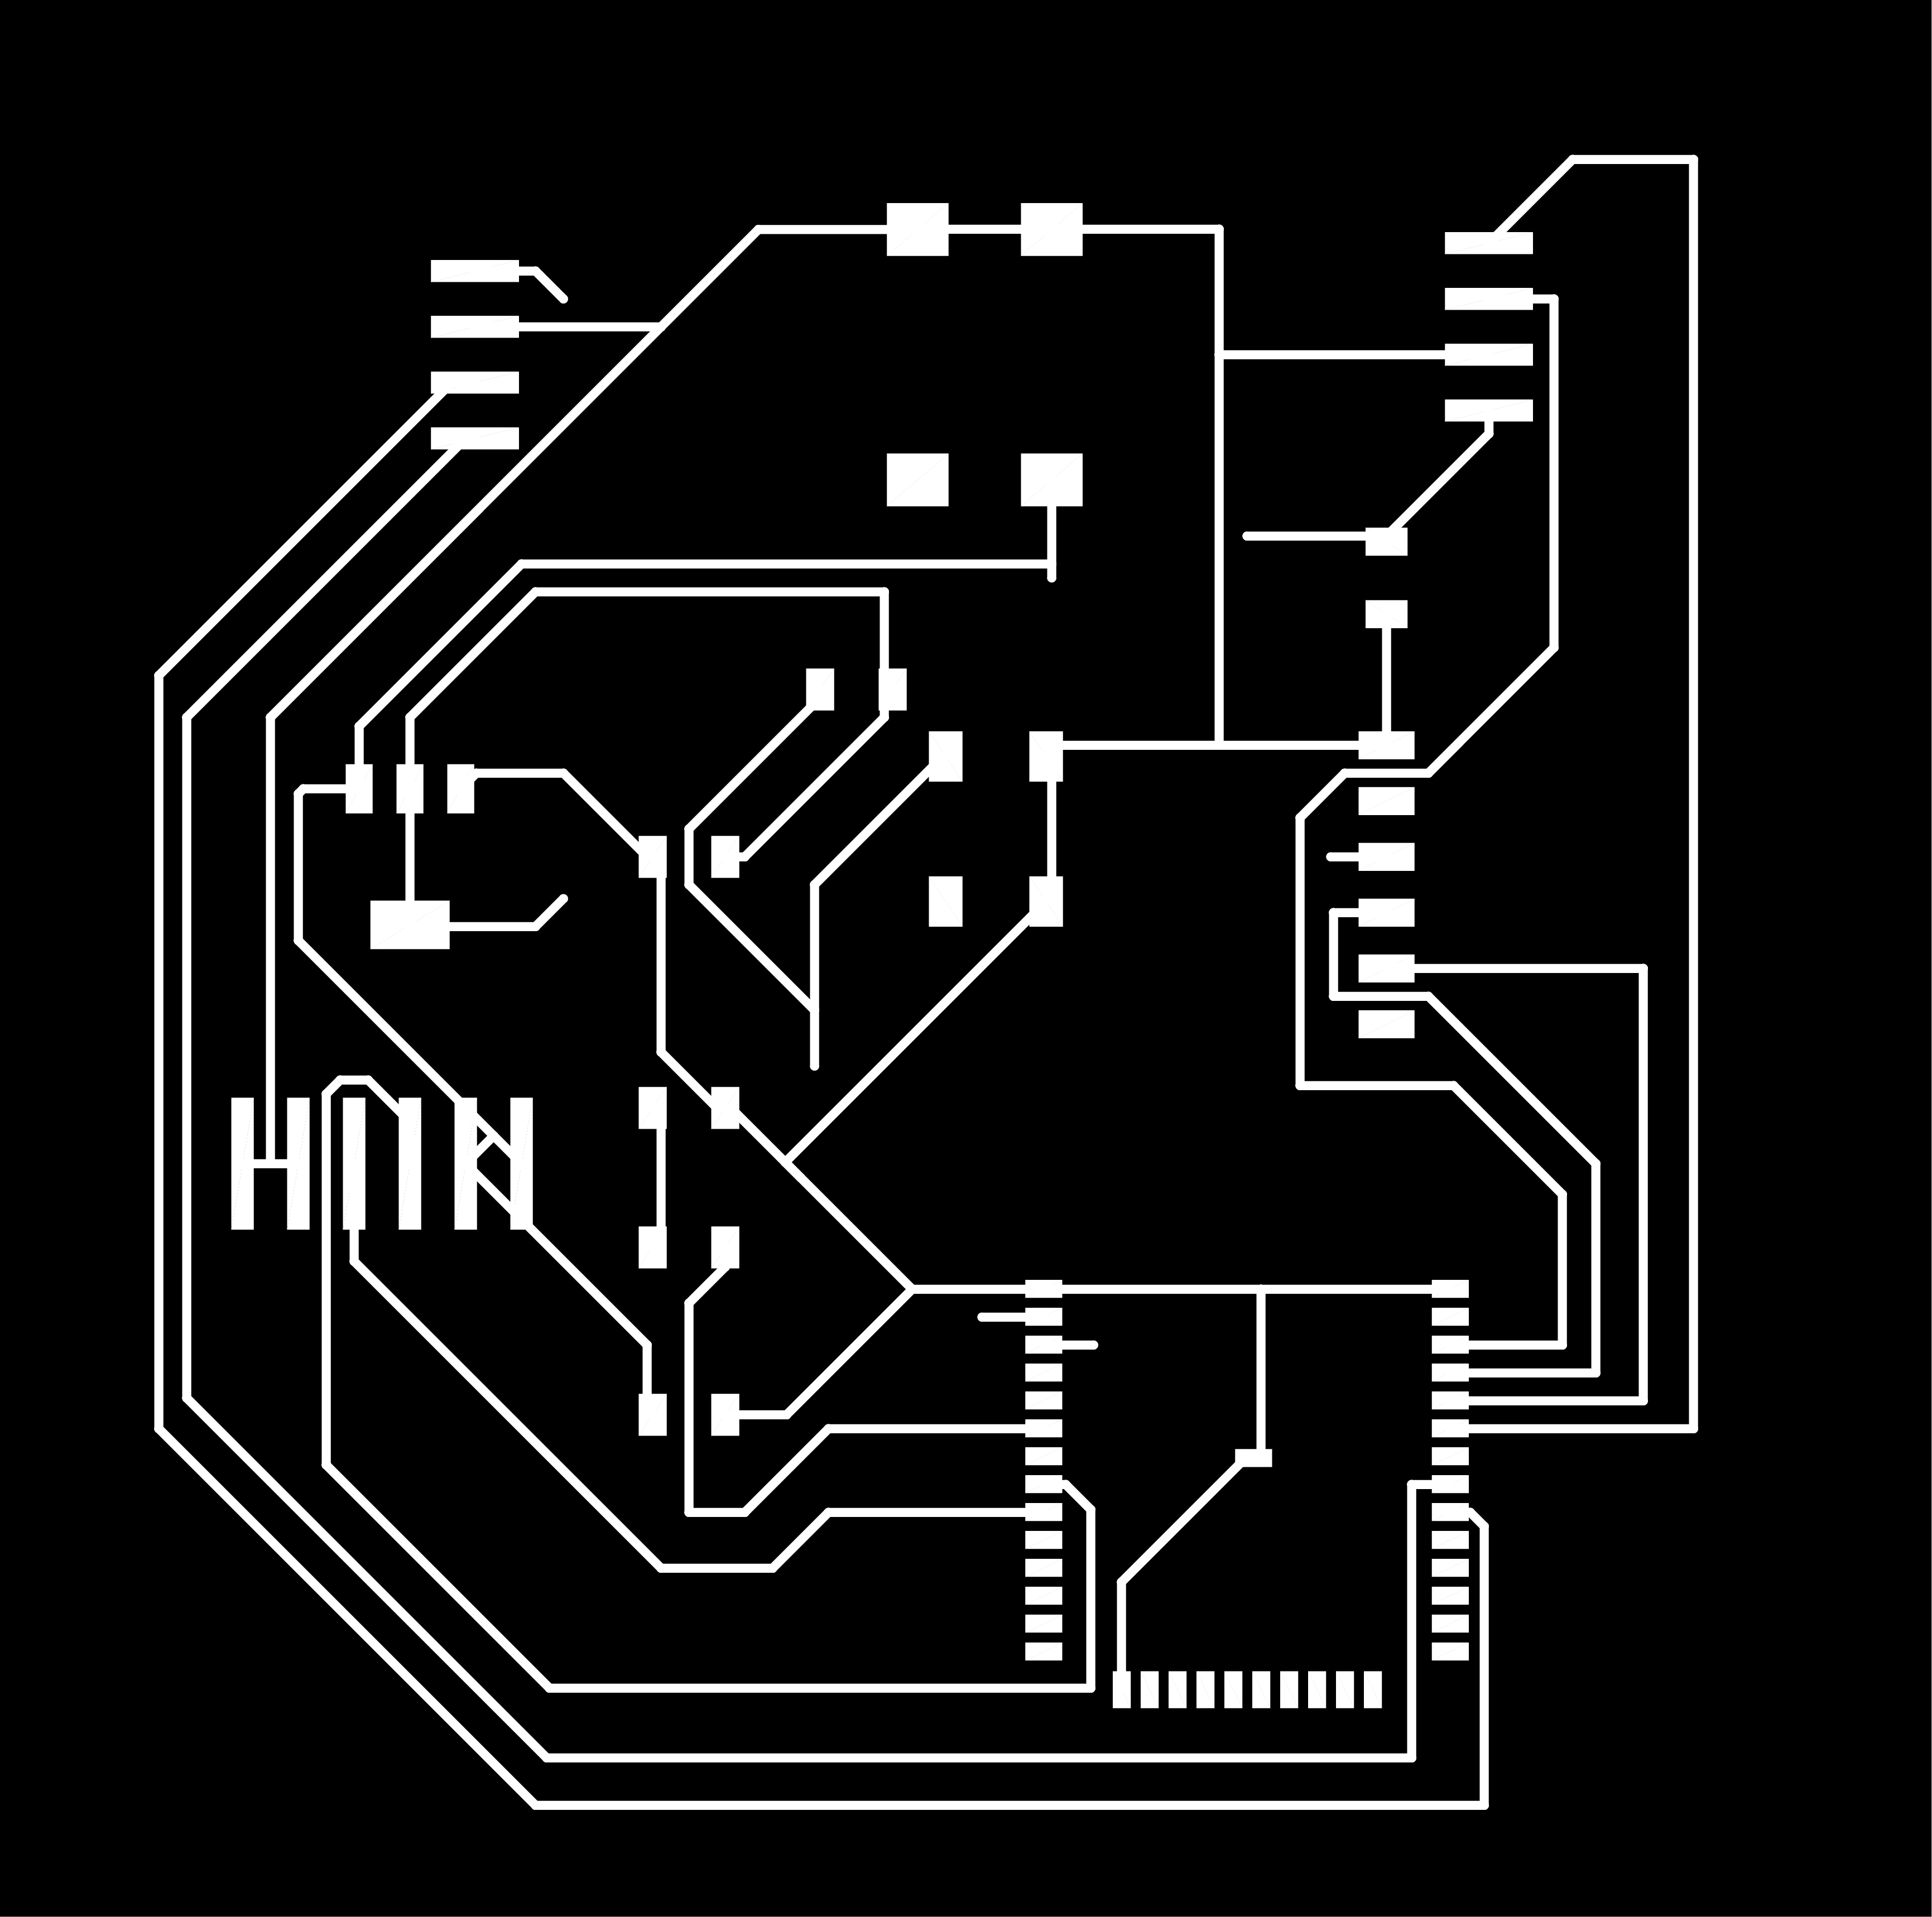
ESP32 trace png
ESP32 eagle_attept 1
ESP32 eagle_attept 2
ESP32 eagle schematic_Final
ESP32 eagle board_Final
touch(sender)_arduino code