Week 13: Wildcard Week

AR/VR
This week I chose to participate in the AR/VR workshop for wildcard week. I created a "game" in unity that connects a gyroscope via Uduino, a Unity plugin that interfaces Arduino with Unity.
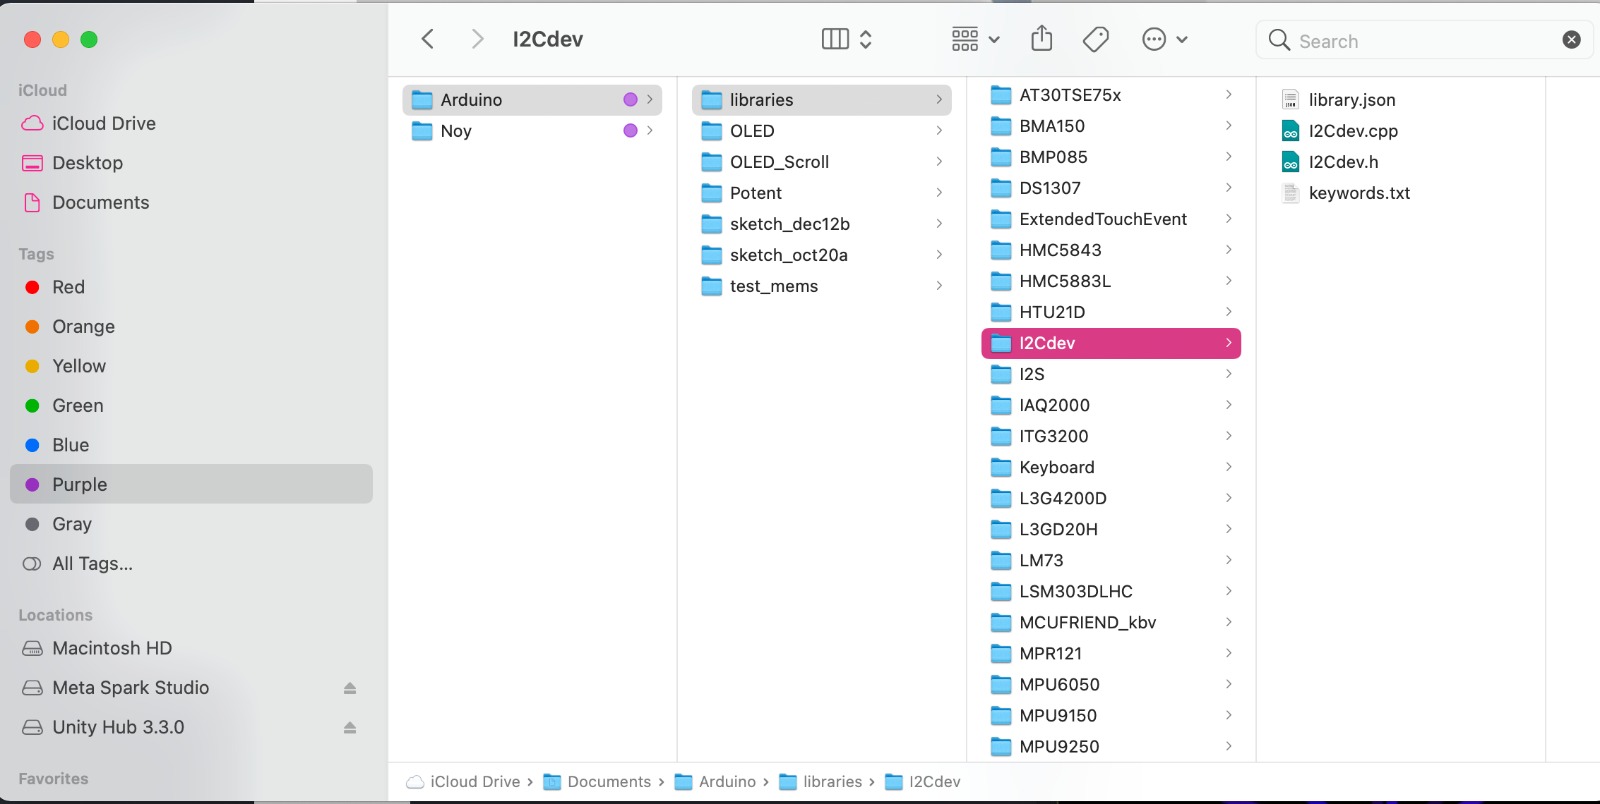
I had never used Unity before, so I first opened the program to familiarize myself with it. nice. I then went to Uduino and opened the projects page. There I found the libraries that allow me to connect an IMU sensor to Unity. The library I used is i2cdev. This library is found on GitHub. You'll need to download the zip file and unzip before manually inserting it in your Arduino libraries. Inside the master library, you'll need, the i2Cdev and MPU6050 Source code. Take both those folders out and place them inside the Arduino library folder.
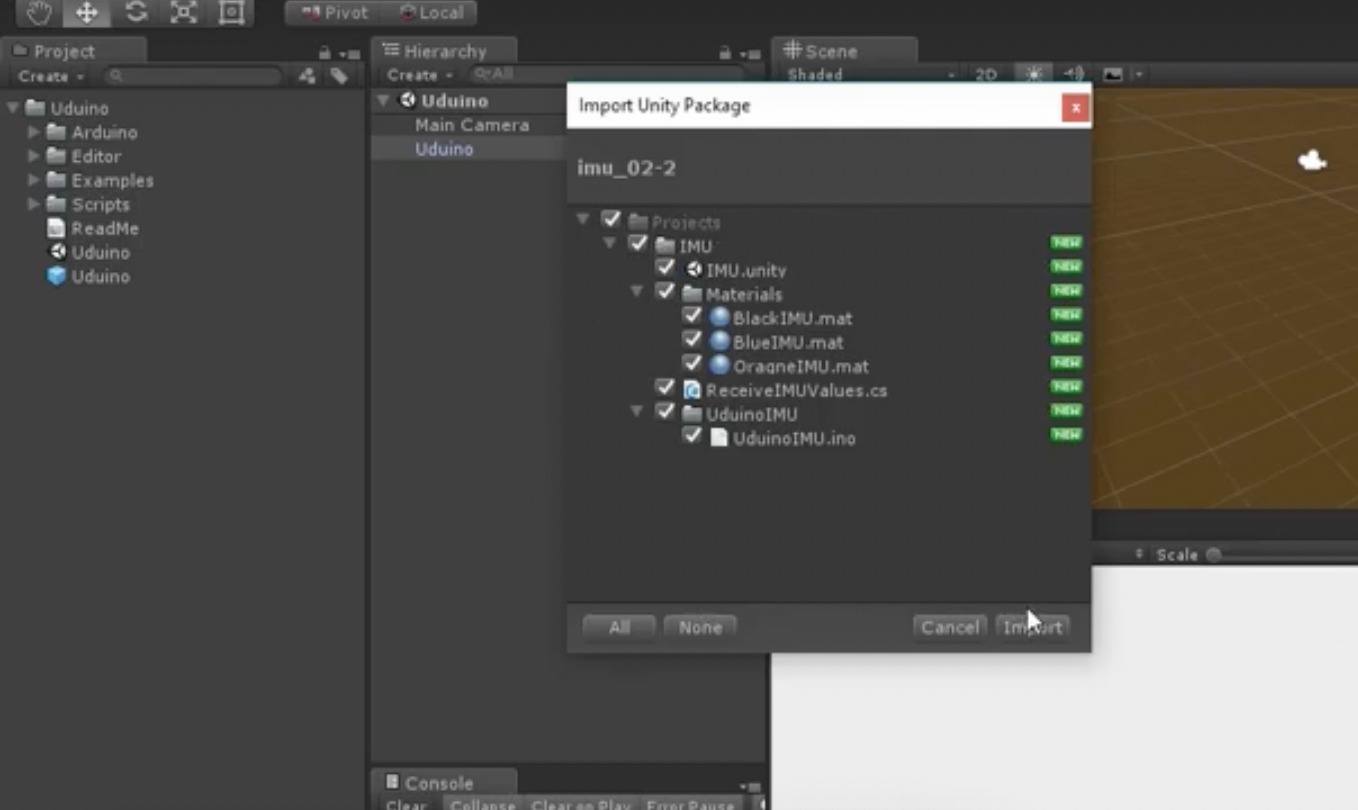
Import the Uduino plugin in Unity and the IMU package.
Open up the Arduino sketch in Unity and choose the correct board and port.
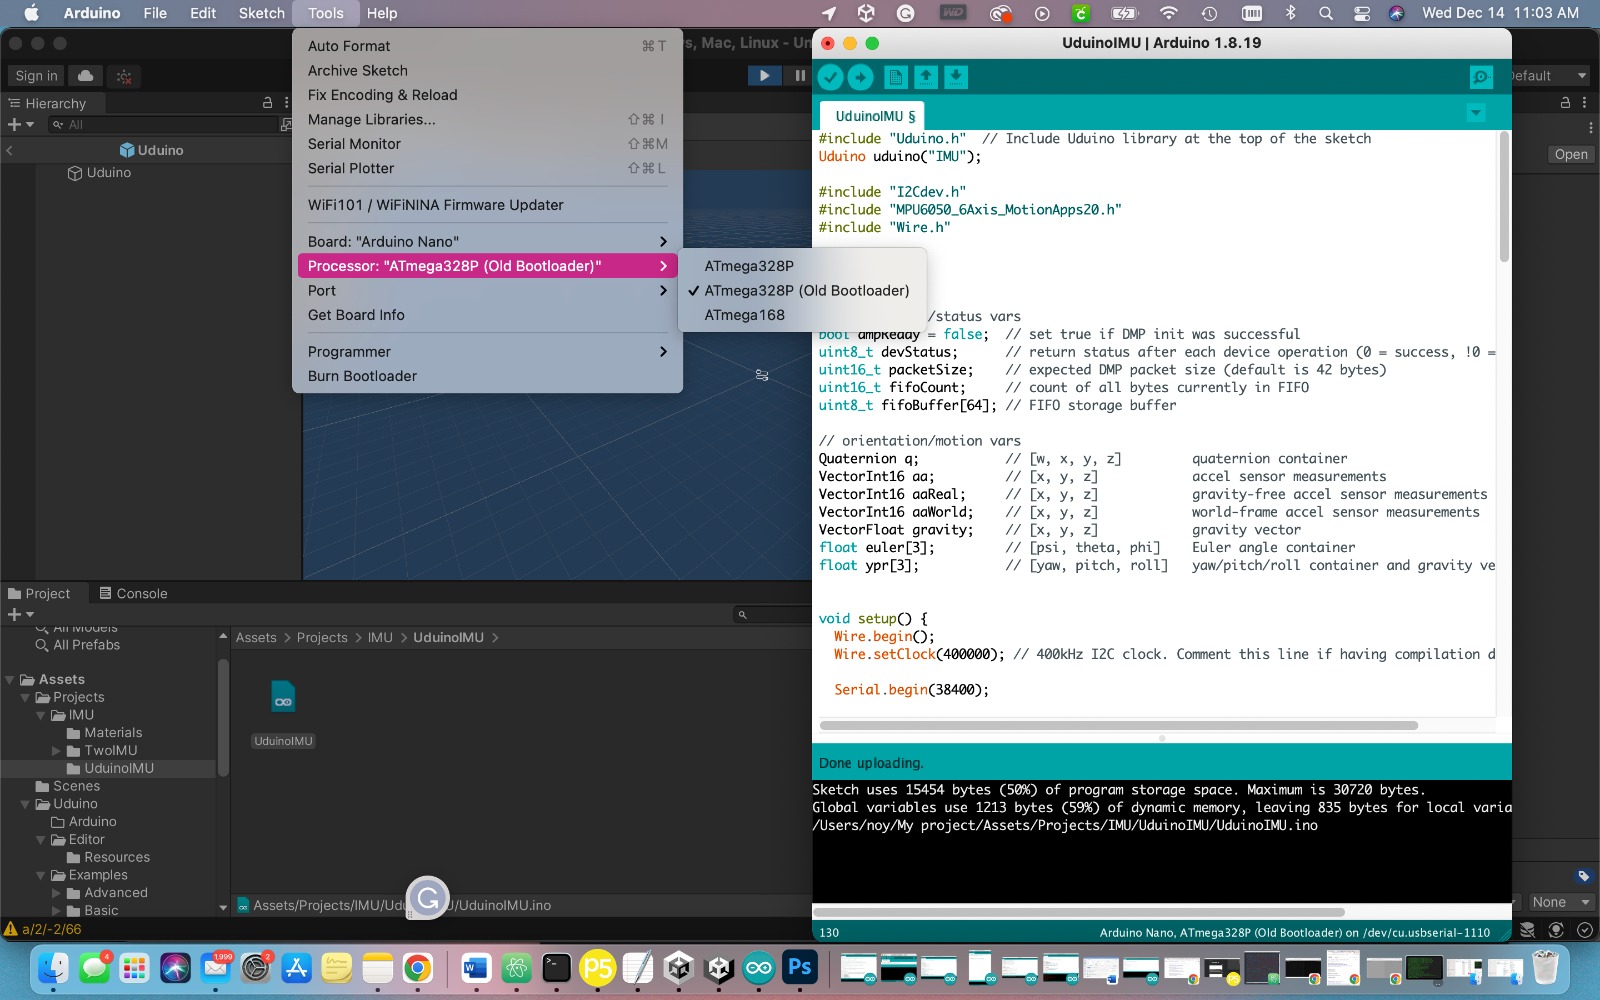
I had some issues at this point since I was using a possibly older Arduino Nano. I chose the (Old) Bootloader from the Processor menu and the avrdude error was gone. Hate that guy.
HEY! I caught you looking at my open tabs. Stop that.
Code is below:
#include "Uduino.h"  // Include Uduino library at the top of the sketch
Uduino uduino("IMU");

#include "I2Cdev.h"
#include "MPU6050_6Axis_MotionApps20.h"
#include "Wire.h"


MPU6050 mpu;

// MPU control/status vars
bool dmpReady = false;  // set true if DMP init was successful
uint8_t devStatus;      // return status after each device operation (0 = success, !0 = error)
uint16_t packetSize;    // expected DMP packet size (default is 42 bytes)
uint16_t fifoCount;     // count of all bytes currently in FIFO
uint8_t fifoBuffer[64]; // FIFO storage buffer

// orientation/motion vars
Quaternion q;           // [w, x, y, z]         quaternion container
VectorInt16 aa;         // [x, y, z]            accel sensor measurements
VectorInt16 aaReal;     // [x, y, z]            gravity-free accel sensor measurements
VectorInt16 aaWorld;    // [x, y, z]            world-frame accel sensor measurements
VectorFloat gravity;    // [x, y, z]            gravity vector
float euler[3];         // [psi, theta, phi]    Euler angle container
float ypr[3];           // [yaw, pitch, roll]   yaw/pitch/roll container and gravity vector


void setup() {
  Wire.begin();
  Wire.setClock(400000); // 400kHz I2C clock. Comment this line if having compilation difficulties

  Serial.begin(38400);

  while (!Serial); // wait for Leonardo enumeration, others continue immediately

  mpu.initialize();
  devStatus = mpu.dmpInitialize();
  mpu.setXGyroOffset(54); //++
  mpu.setYGyroOffset(-21); //--
  mpu.setZGyroOffset(5);

  if (devStatus == 0) {
    mpu.setDMPEnabled(true);
    // set our DMP Ready flag so the main loop() function knows it's okay to use it
    dmpReady = true;
    // get expected DMP packet size for later comparison
    packetSize = mpu.dmpGetFIFOPacketSize();
  } else {
    // Error
    Serial.println("Error!");
  }

  //Serial.println("working!");
}


void loop() {
  uduino.update();

  if (uduino.isInit()) {
    if (!dmpReady) {
      Serial.println("IMU not connected.");
      delay(10);
      return;
    }

    int  mpuIntStatus = mpu.getIntStatus();
    fifoCount = mpu.getFIFOCount();

    if ((mpuIntStatus & 0x10) || fifoCount == 1024) { // check if overflow
      mpu.resetFIFO();

    } else if (mpuIntStatus & 0x02) {
      while (fifoCount < packetSize) fifoCount = mpu.getFIFOCount();

      mpu.getFIFOBytes(fifoBuffer, packetSize);
      fifoCount -= packetSize;

      SendQuaternion();
      //SendEuler();
      //SendYawPitchRoll();
      SendRealAccel();
      SendWorldAccel();
    }
  }

  //Serial.println("looping!!");
}


void SendQuaternion() {
  mpu.dmpGetQuaternion(&q, fifoBuffer);
  Serial.print("r/");
  Serial.print(q.w, 4); Serial.print("/");
  Serial.print(q.x, 4); Serial.print("/");
  Serial.print(q.y, 4); Serial.print("/");
  Serial.println(q.z, 4);
}

void SendEuler() {
  // display Euler angles in degrees
  mpu.dmpGetQuaternion(&q, fifoBuffer);
  mpu.dmpGetEuler(euler, &q);
  Serial.print(euler[0] * 180 / M_PI); Serial.print("/");
  Serial.print(euler[1] * 180 / M_PI); Serial.print("/");
  Serial.println(euler[2] * 180 / M_PI);
}

void SendYawPitchRoll() {
  // display Euler angles in degrees
  mpu.dmpGetQuaternion(&q, fifoBuffer);
  mpu.dmpGetGravity(&gravity, &q);
  mpu.dmpGetYawPitchRoll(ypr, &q, &gravity);
  Serial.print(ypr[0] * 180 / M_PI); Serial.print("/");
  Serial.print(ypr[1] * 180 / M_PI); Serial.print("/");
  Serial.println(ypr[2] * 180 / M_PI);
}

void SendRealAccel() {
  // display real acceleration, adjusted to remove gravity
  mpu.dmpGetQuaternion(&q, fifoBuffer);
  mpu.dmpGetAccel(&aa, fifoBuffer);
  mpu.dmpGetGravity(&gravity, &q);
  mpu.dmpGetLinearAccel(&aaReal, &aa, &gravity);
  Serial.print("a/");
  Serial.print(aaReal.x); Serial.print("/");
  Serial.print(aaReal.y); Serial.print("/");
  Serial.println(aaReal.z);
}

void SendWorldAccel() {
  // display initial world-frame acceleration, adjusted to remove gravity
  // and rotated based on known orientation from quaternion
  mpu.dmpGetQuaternion(&q, fifoBuffer);
  mpu.dmpGetAccel(&aa, fifoBuffer);
  mpu.dmpGetGravity(&gravity, &q);
  mpu.dmpGetLinearAccel(&aaReal, &aa, &gravity);
  mpu.dmpGetLinearAccelInWorld(&aaWorld, &aaReal, &q);
  Serial.print("a/");
  Serial.print(aaWorld.x); Serial.print("/");
  Serial.print(aaWorld.y); Serial.print("/");
  Serial.println(aaWorld.z);
}
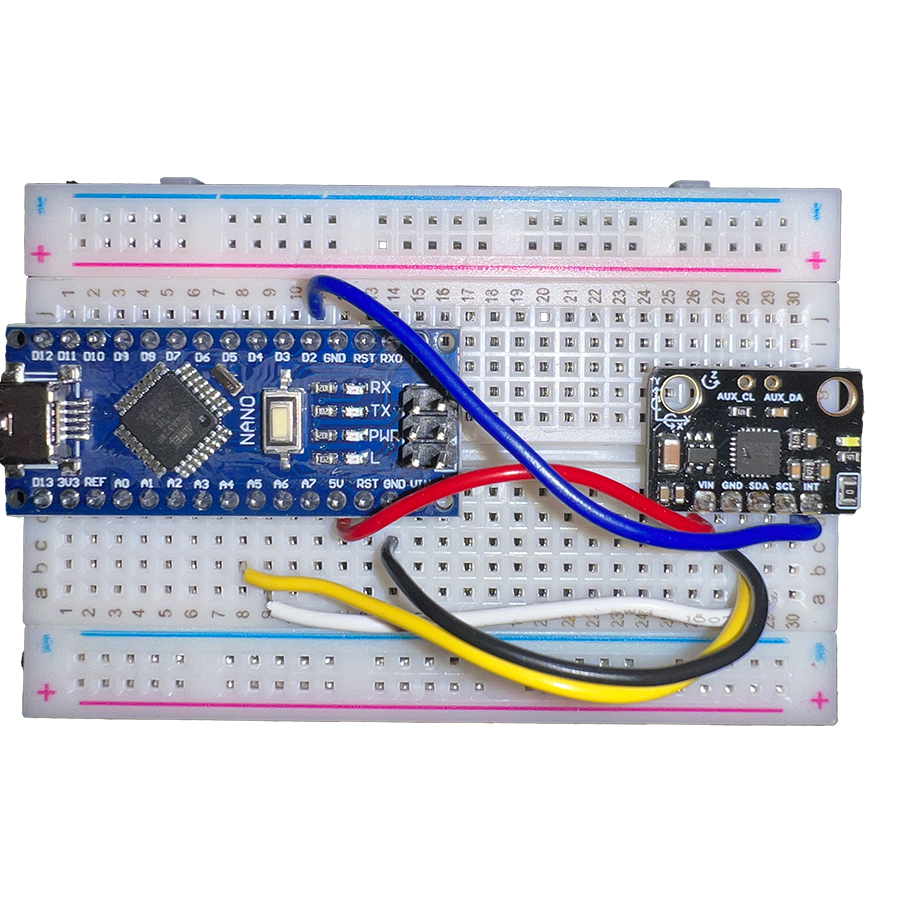
Now that you have the libaries and Code, you can wire your Arduino and Gyroscope. Easy stuff. For the sake of this exercise, I used an Arduino nano. I looked to see if there was a way to connect the gyro to my samd21 dev board, But Uduino does not include the samd in its Board options. There is a way to connect the gyro with an ESP32 to Unity over bluetooth, however, this requires a different plugin. (it costs $20)
You're gonna have to do some funny stuff in Unity. Since the code includes a baudrate of 38400, you'll have to set the same in Unity. This is done in the Inspector window.
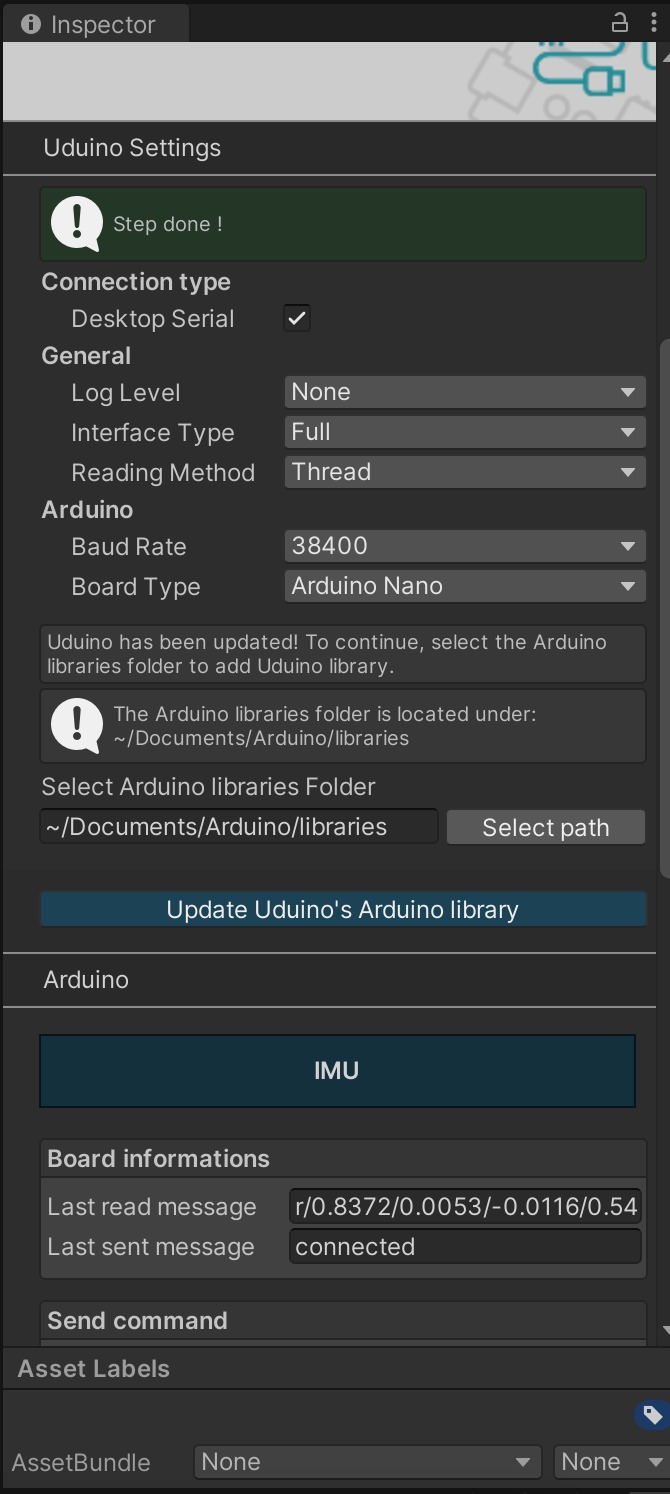
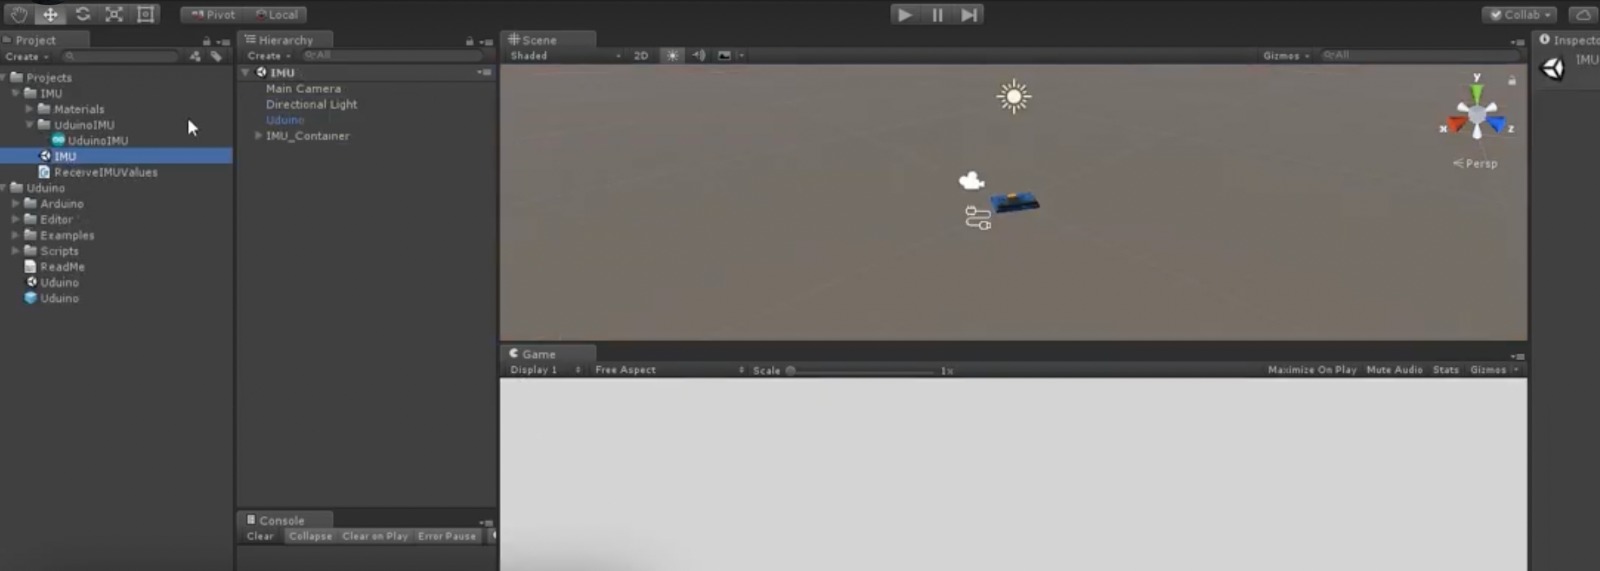
Run the code. Yay it works! Since we're using an example, there should already be a model of the gryoscope on your screen. If everything is connected in the inspector window, hit play in Unity.
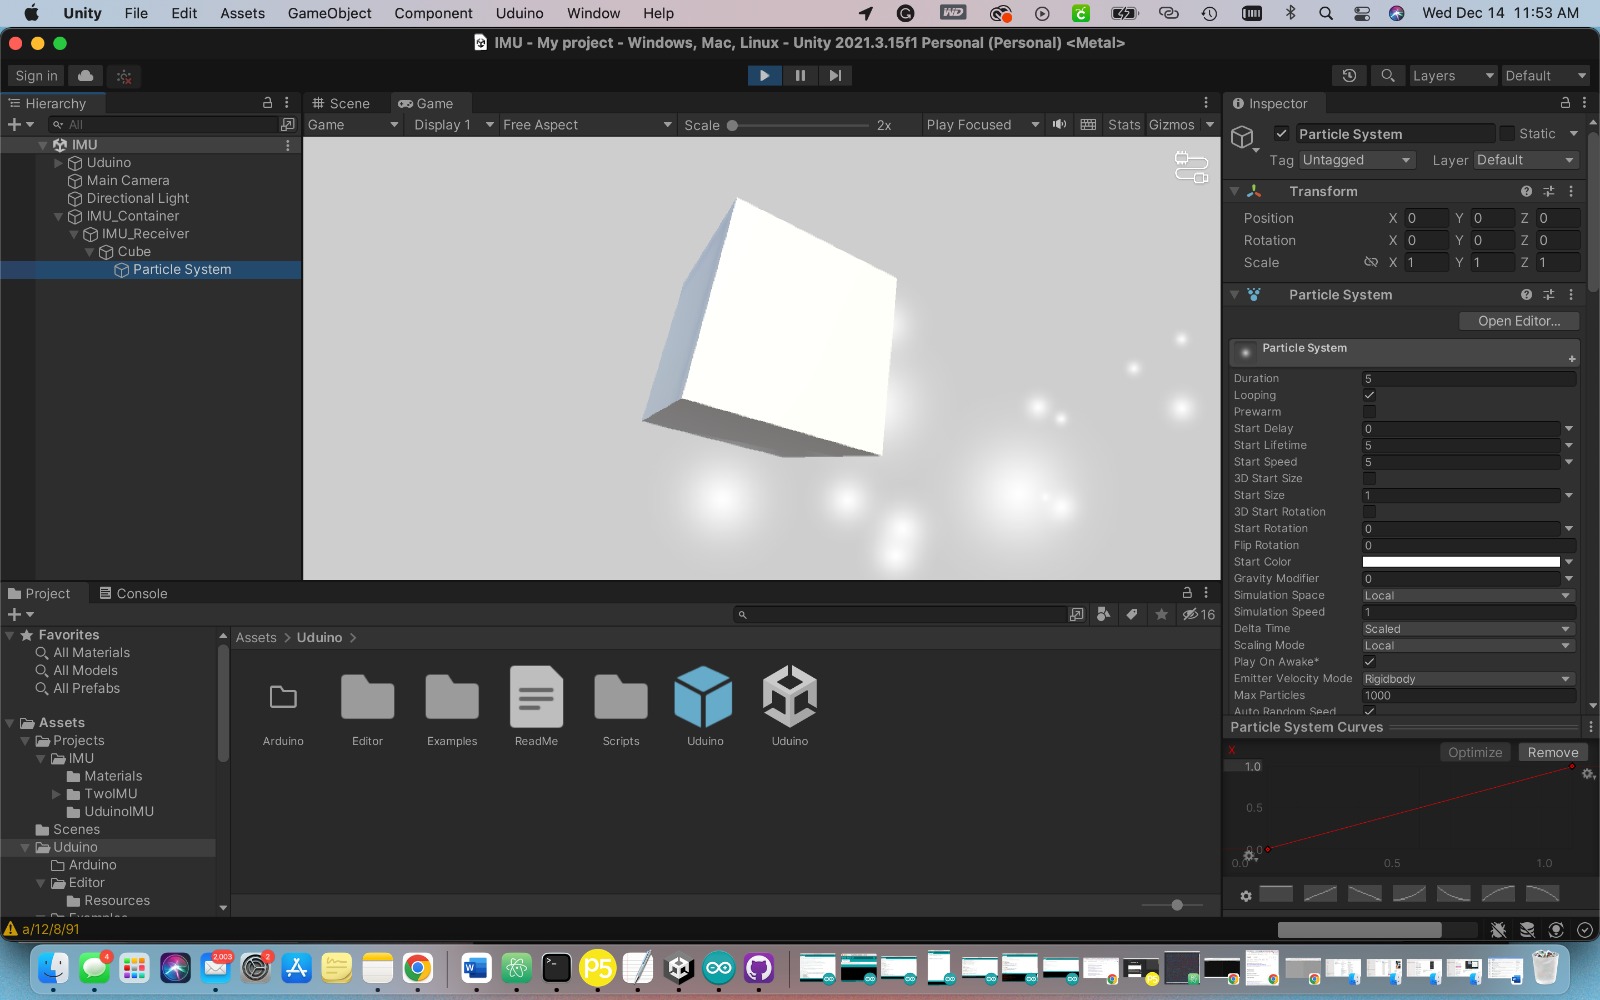
You got yourself a working gyro in Unity! A world of opportunities is now open to play with. WOOO. Sadly, at this point I had not much time to play with those opportunities. I made a cube and added a particle system in unity. I ended up with a magical looking cube. In the future I'd like to make an hourglass object using he particle system as sand with a 3D printed counterpart encasing the gyro.