Week 7: Molding and Casting
"You're an idea machine! but some of them, Honey..." -Rehana
This week was stacked because I was still working on something big for the GSD Halloween party. I had the idea to make a keycap for the esc key on my mechanical keyboard. Which I believed to be easy enough.

We were tasked with milling a mold out of wax, in order to create a silicone mold, in order to cast a material and achieve a final molded object. I took a look at other artisan keycaps to see what material I'd want to cast in and how to design it. I predicted the toughest part to be molding the side that connects to switch on the keyboard (i was right).
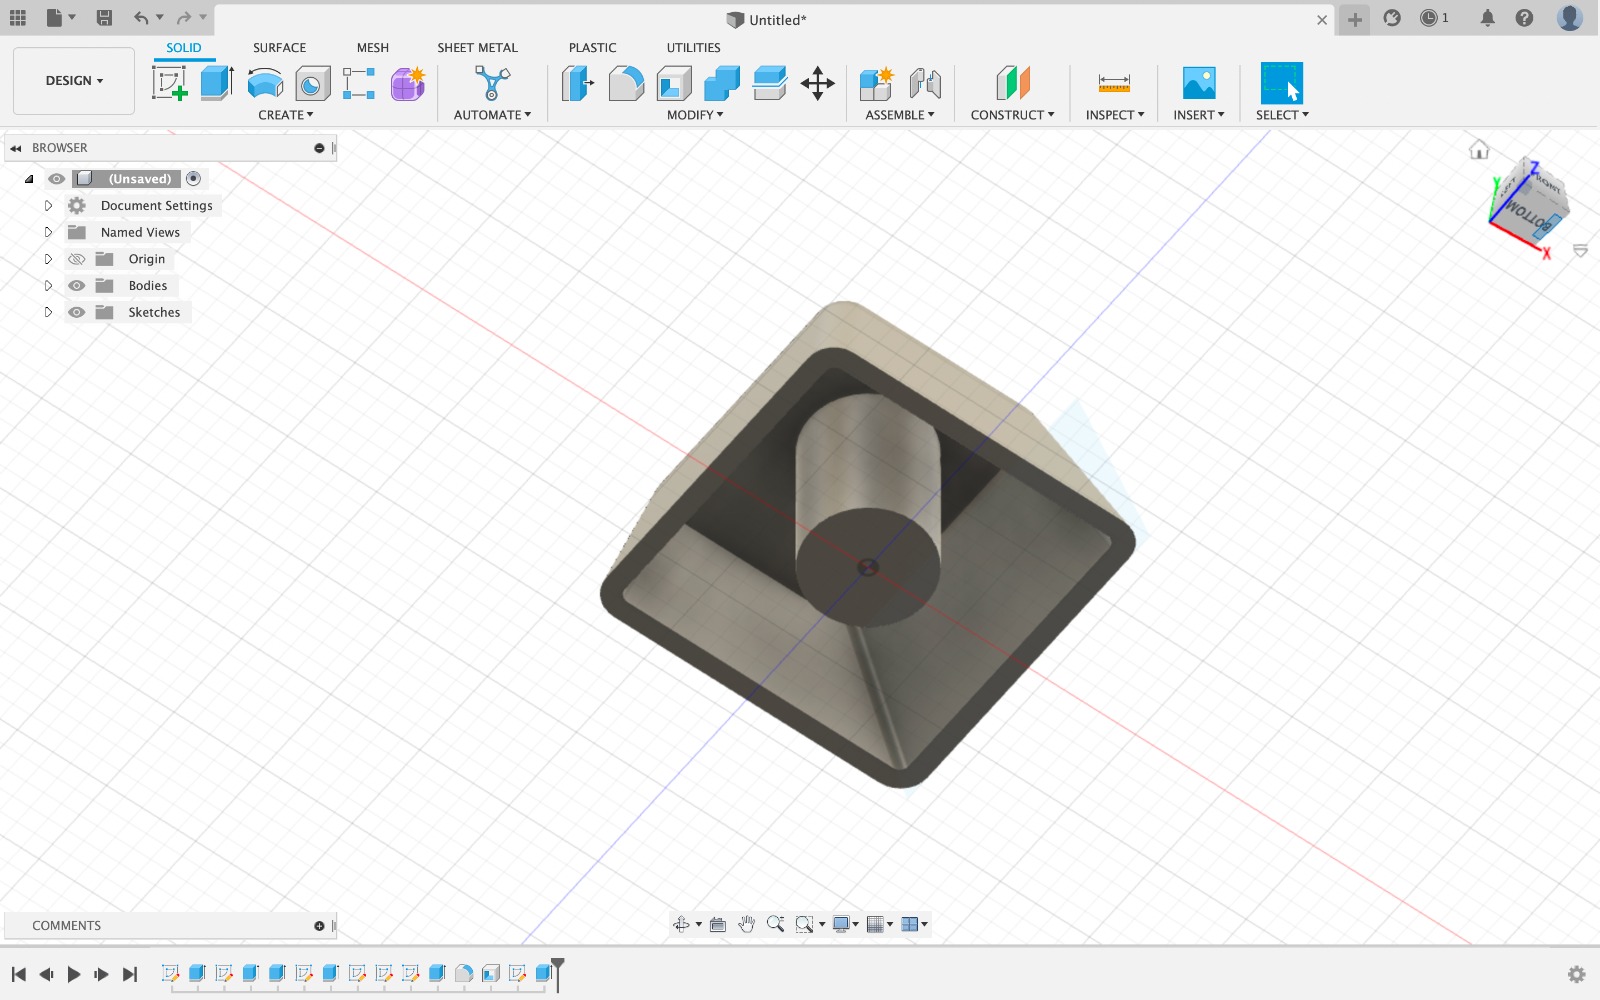
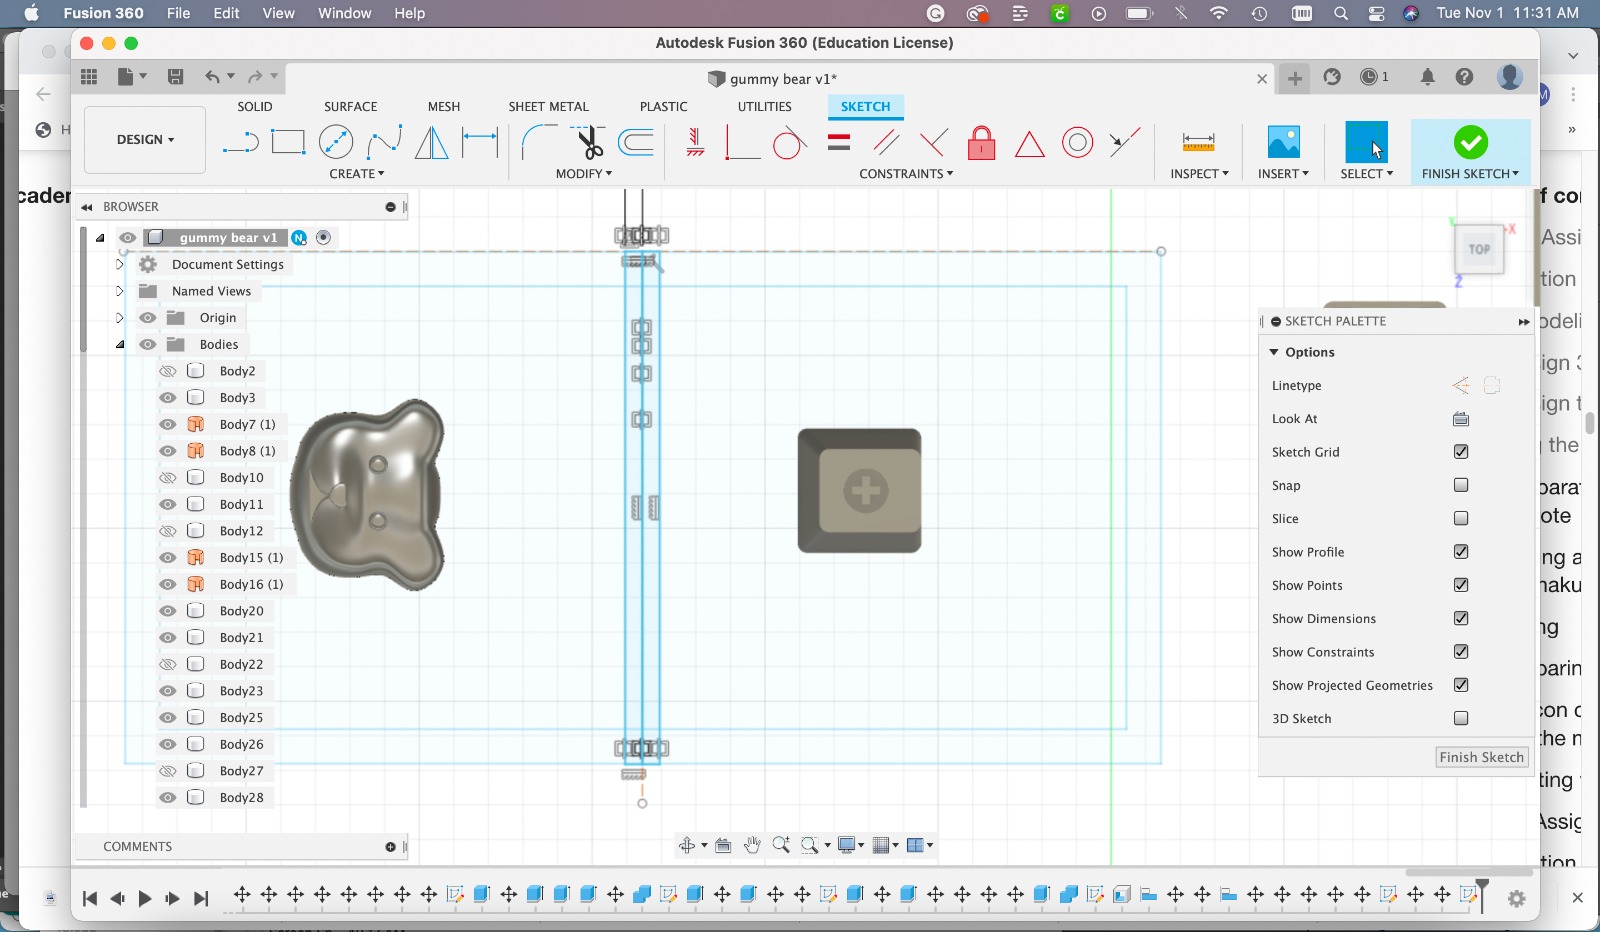
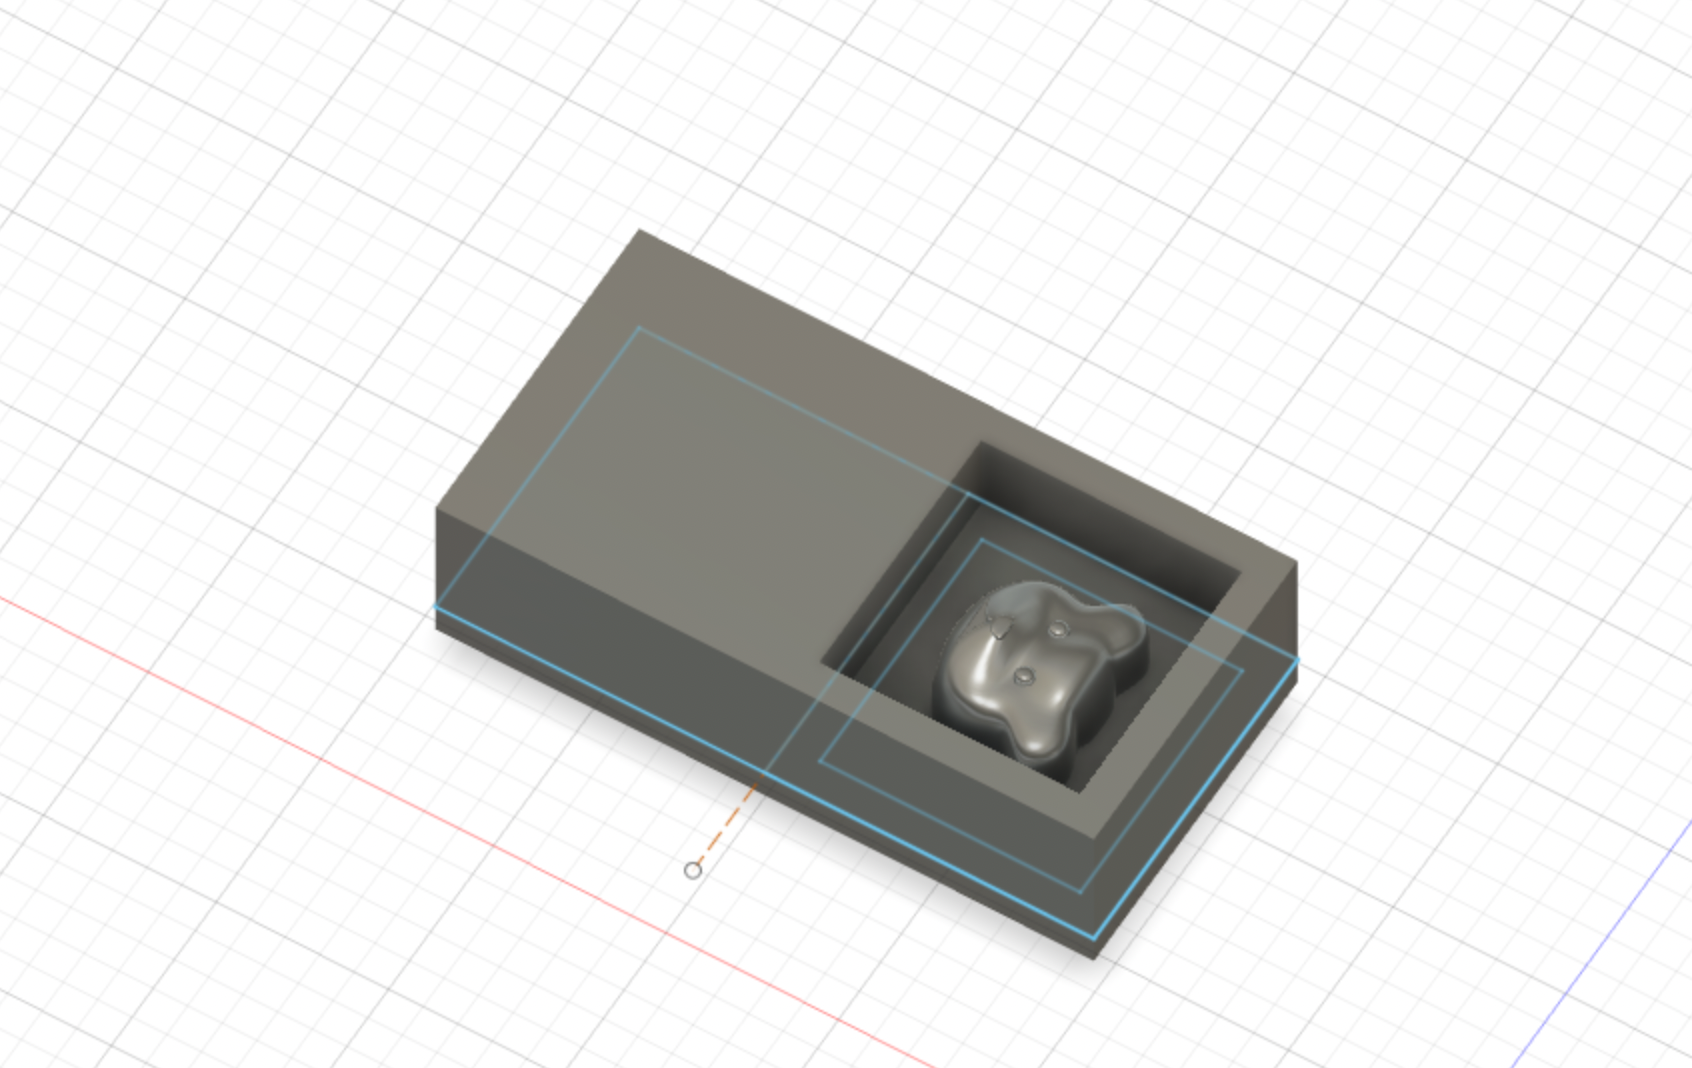
I began by measuring my esc key and modeling it regularly in Fusion360. I did this so I'd have a better grasp of the inverse design of it.
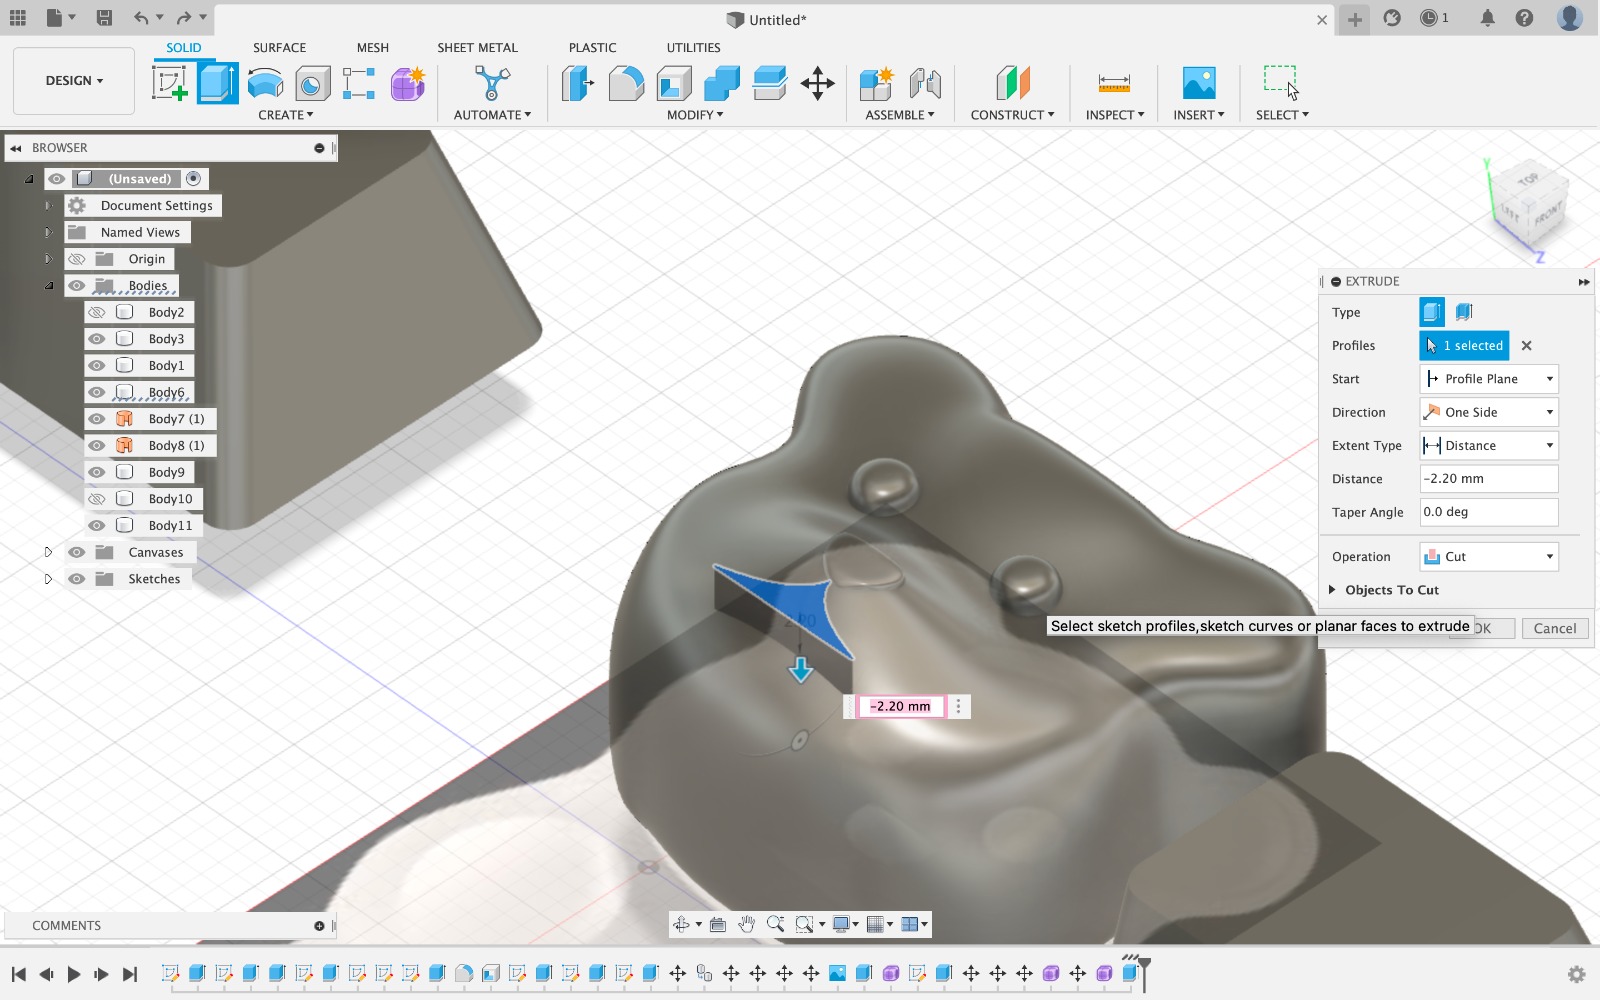
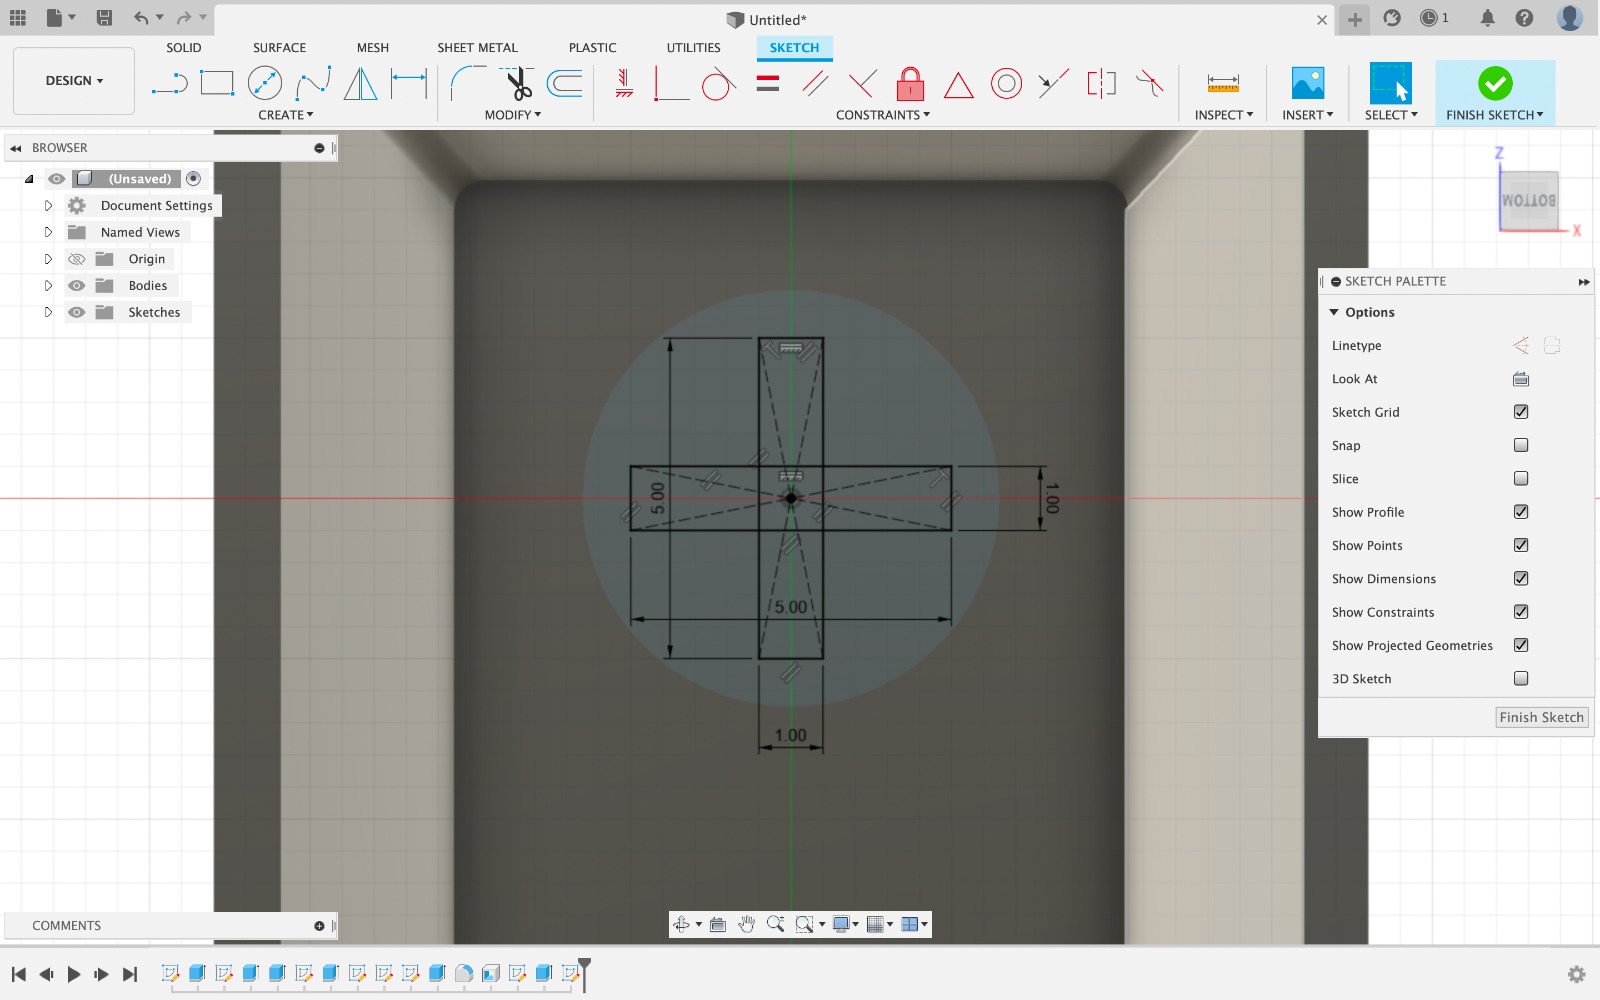
Once I had what I thought would work, I created a bed for the pieces out of the dimensions of my wax block.

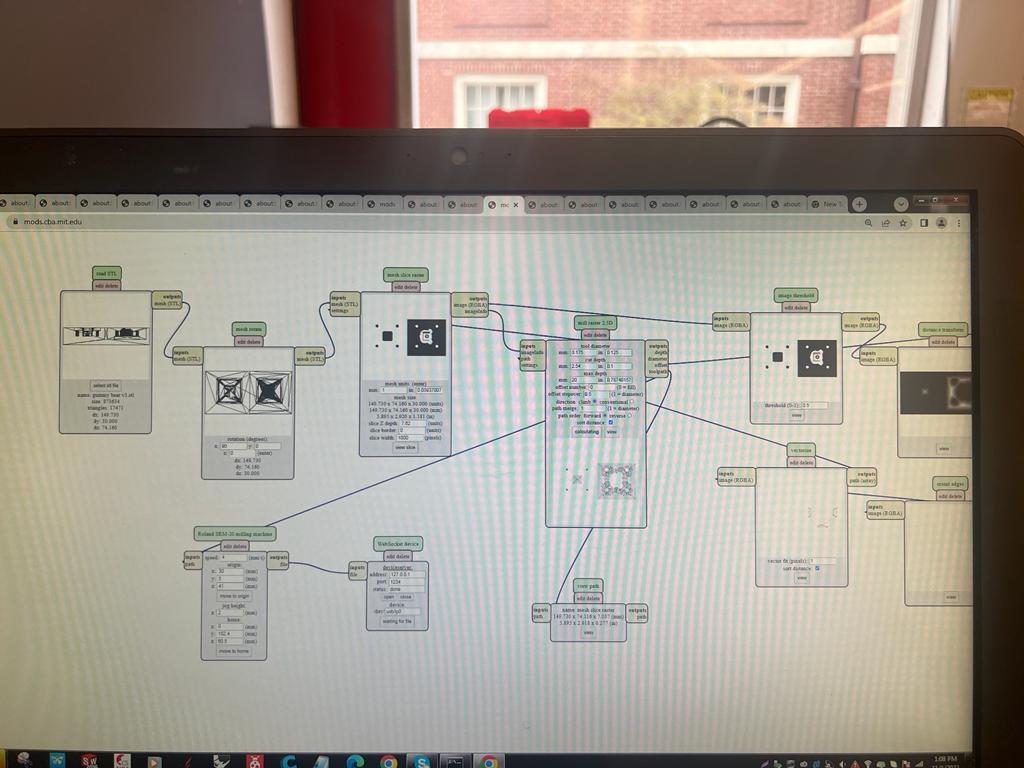
I first tried milling using the SRM-20, however mods wouldn't calculate model. I believed this is because there was some artifact geometry in my model from when I was experimenting in Fusion360. PRO TIP: make sure all your shapes are filled and solid with nothing weird inside because mods will pick up on it (they're not as dumb as you think, i guess). I went ahead and tried the shopbot in hopes Aspire would be dumber than mods. I was cutting pretty deep too at 20mm, so the shopbot was a better choice overall... (or so I thought)
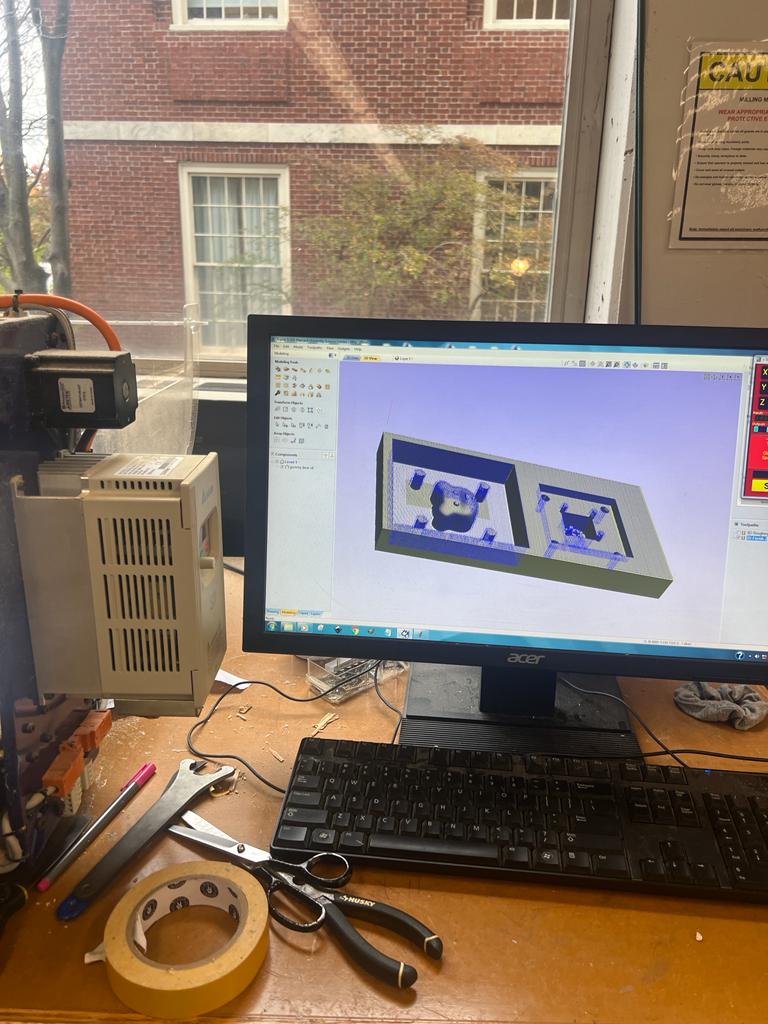
I did the rough cut using the shopbot which went super quickly. It was at the fine cut that I really messed up. I used a 1/32 endmill on the shopbot and the endmill ended up breaking after breaking off all of my register poles. I was genuinely upset at this point. I wasted the only block of wax I had. No more do-overs.
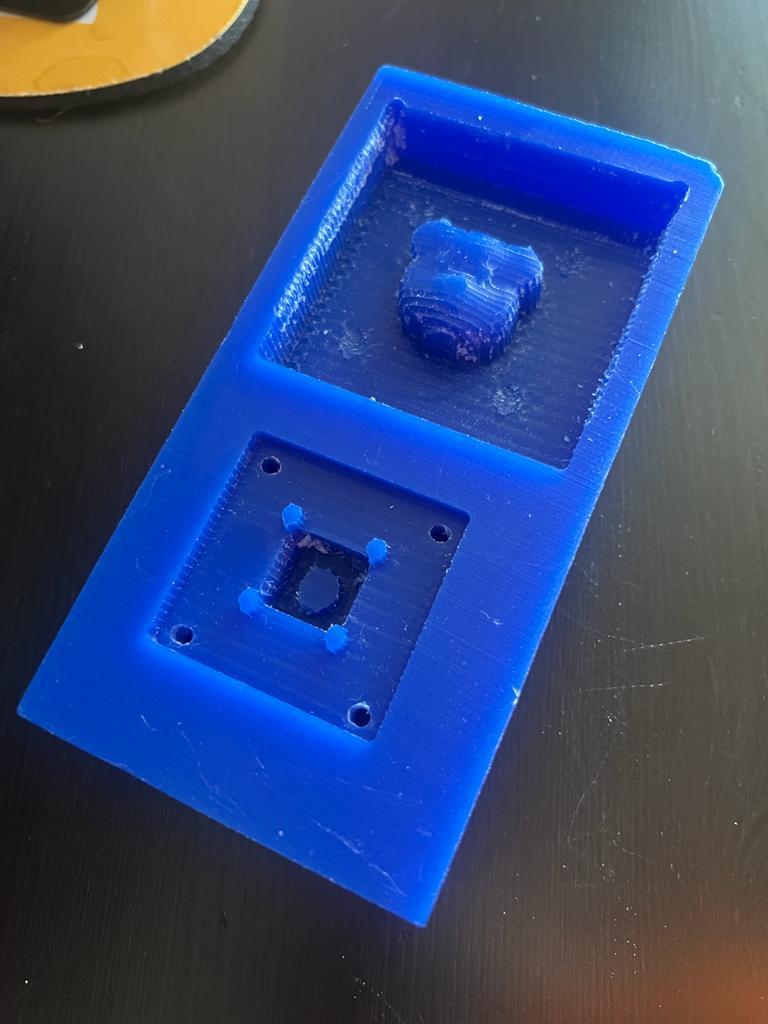
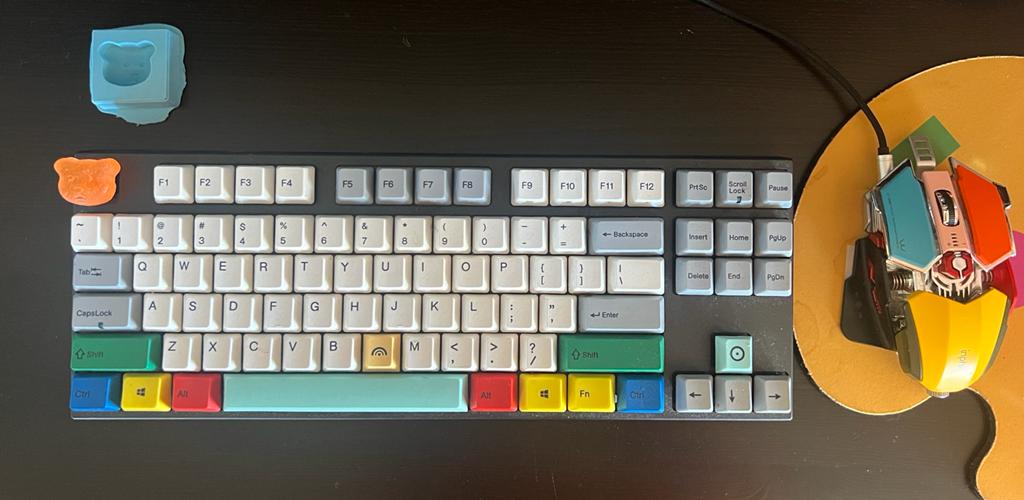
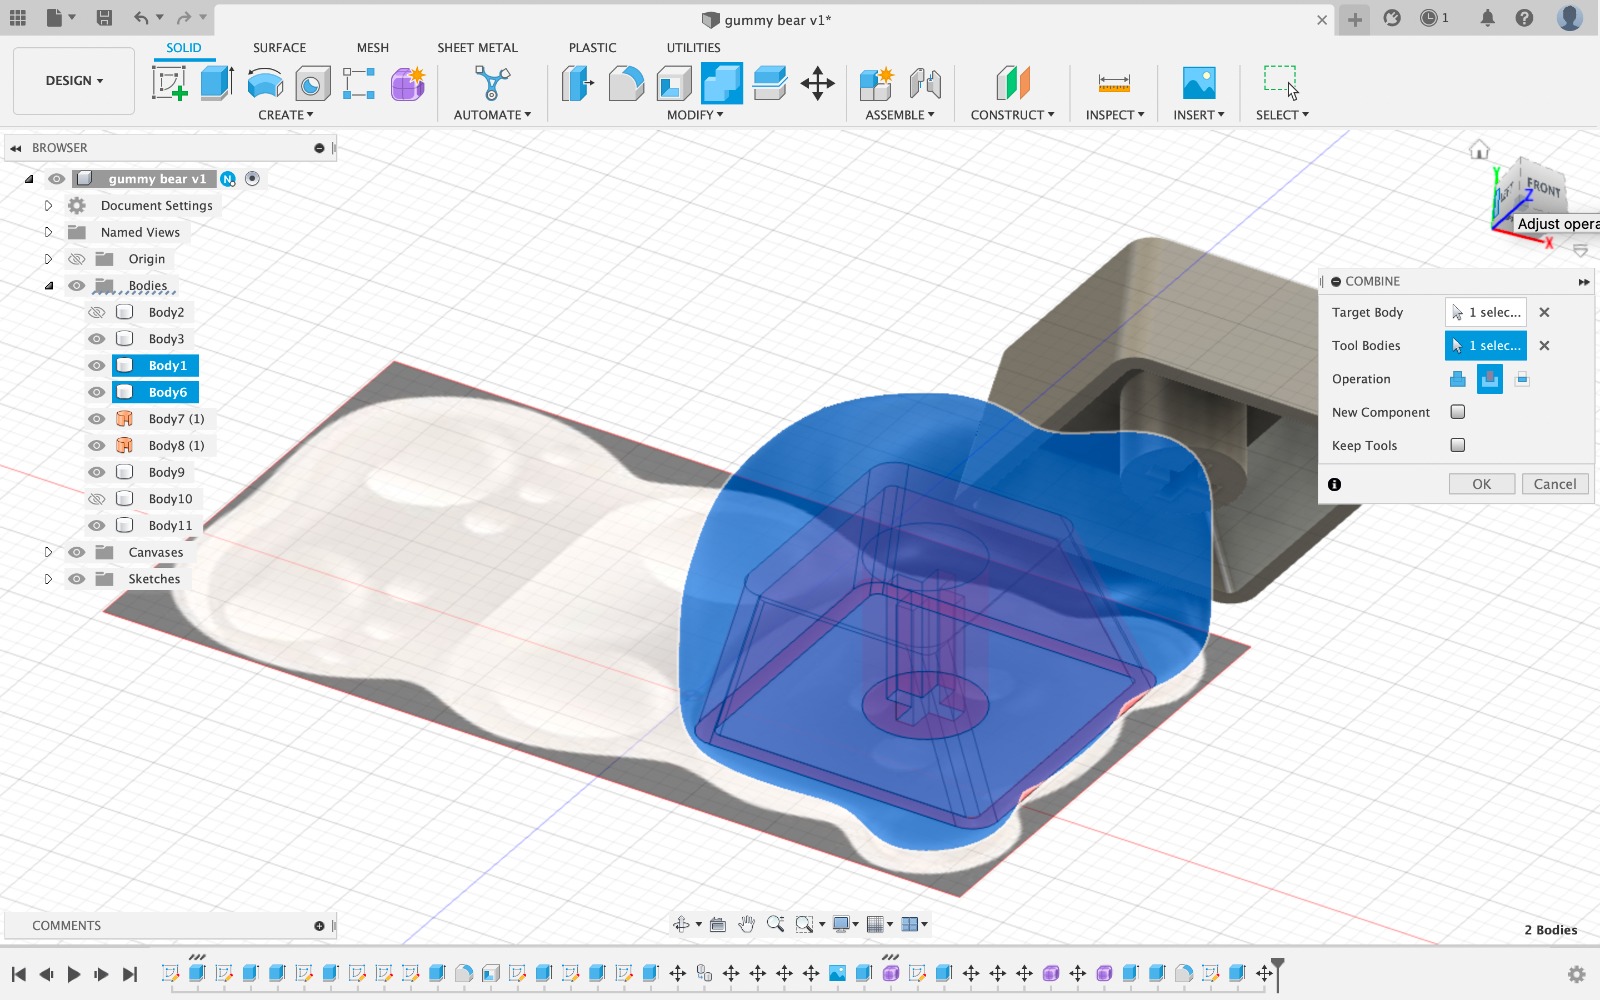
There was a small block of wax left and I thought I could still salvage the situation by just modeling the gummy bear face and embedding a keycap inside. I forgot to mention I planned to cast in resin to get the clear gummy bear texture.
I cut the block using the SRM-20 which worked just fine. I also raised my max depth to 14mm to avoid more broken endmills. I cut the rough cut using an 1/8th endmill and the smooth cut using a 1/32nd end mill.
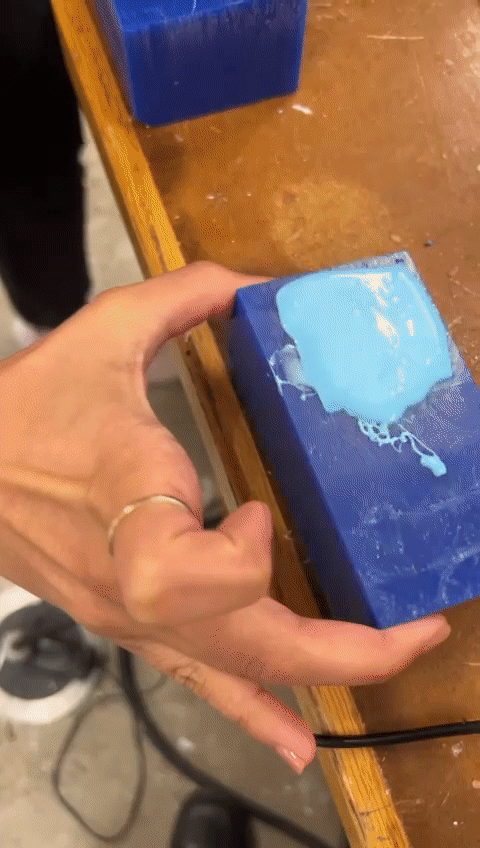
Once I had my wax mold finally milled, I mixed the OOMOO and poured it into the mold using Sondos' expert technique (Sondos is a dentist who makes molds on the daily). The technique comprised of pouring the silicone in from one side and letting it flow into the mold, then repeatedly slamming the wax mold against the table so that all the air bubbles raise up and out of the silicone.
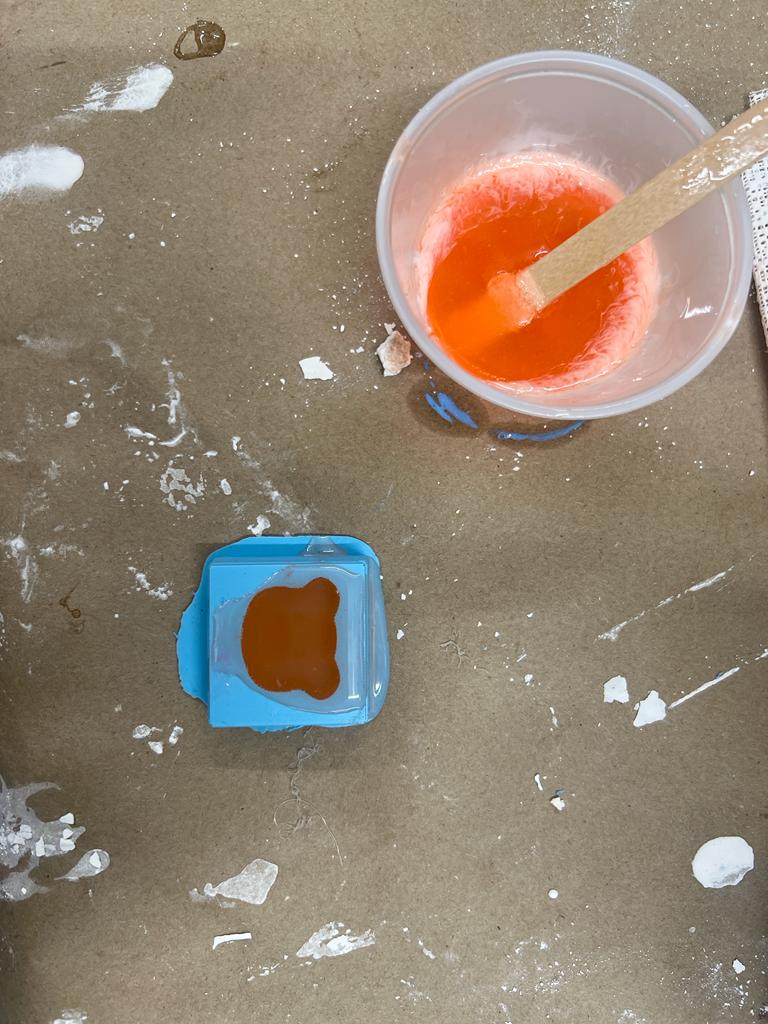
My silicone mold came out pretty perfectly, So I went straight into casting the resin. Side Note: I visited Reynolds Advanced Materials on Halloween to buy the resin. They were super helpful and I had a blast.
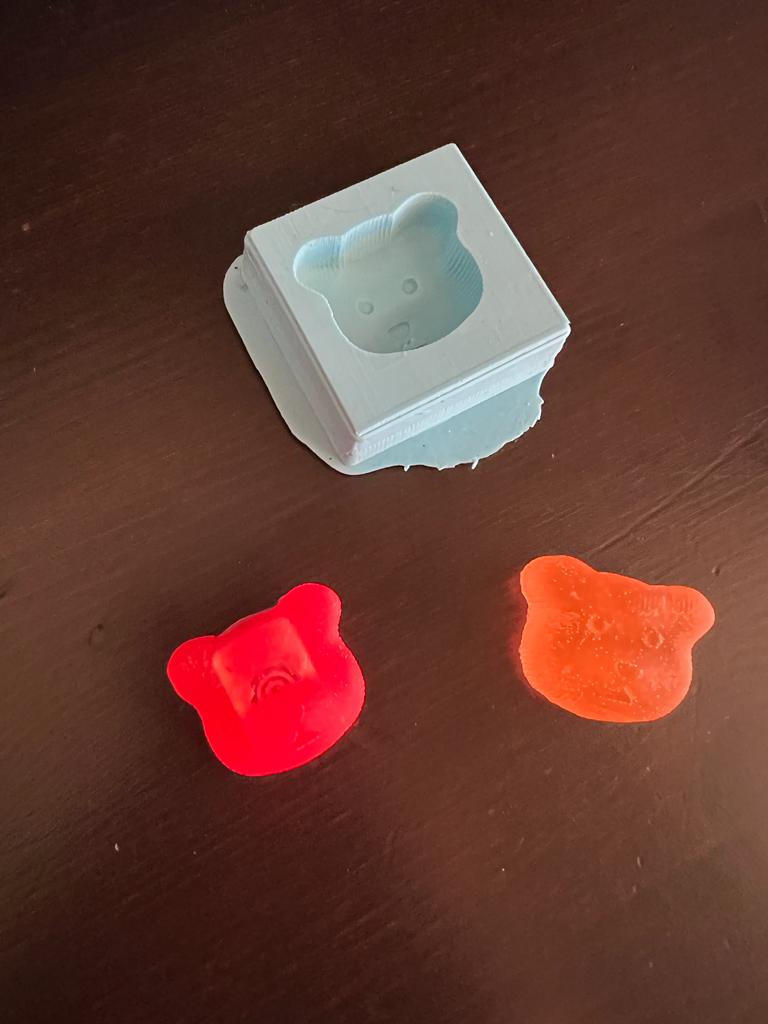
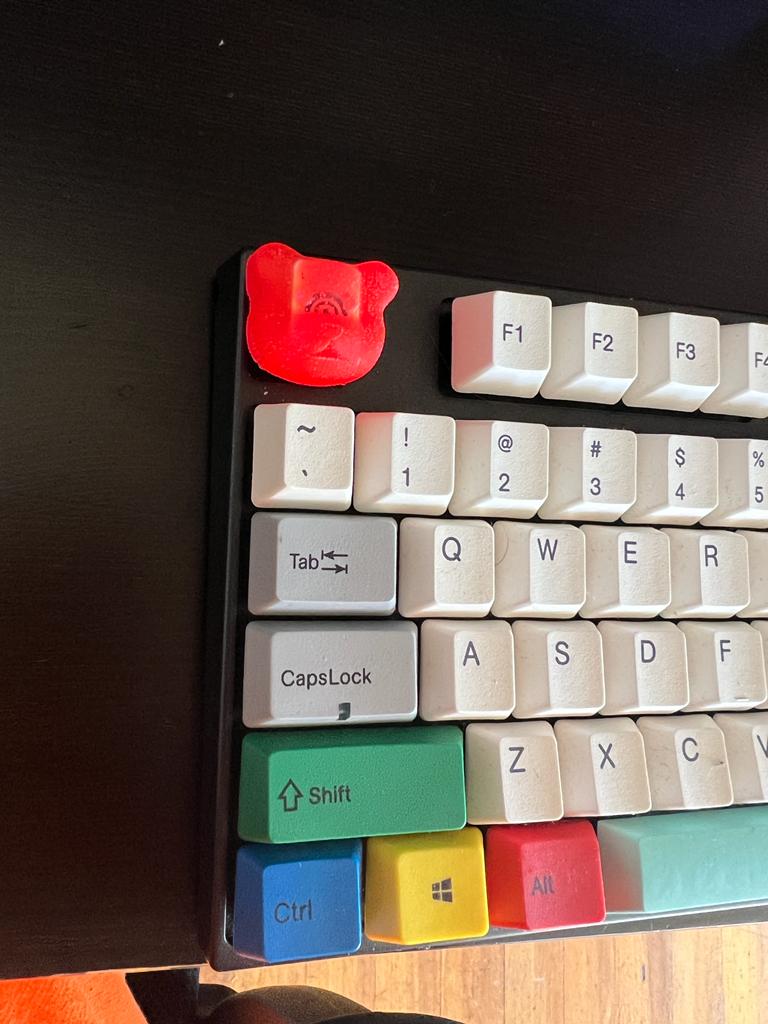
I made another resin cast with a keycap embedded inside (it looks pretty rough). I wouldn't say I succeeded in making what I planned to this week, however, my CAD skills improved a ton through modeling mesh forms.