Computer-Controlled Cutting – Laser Cutter
Laser Car
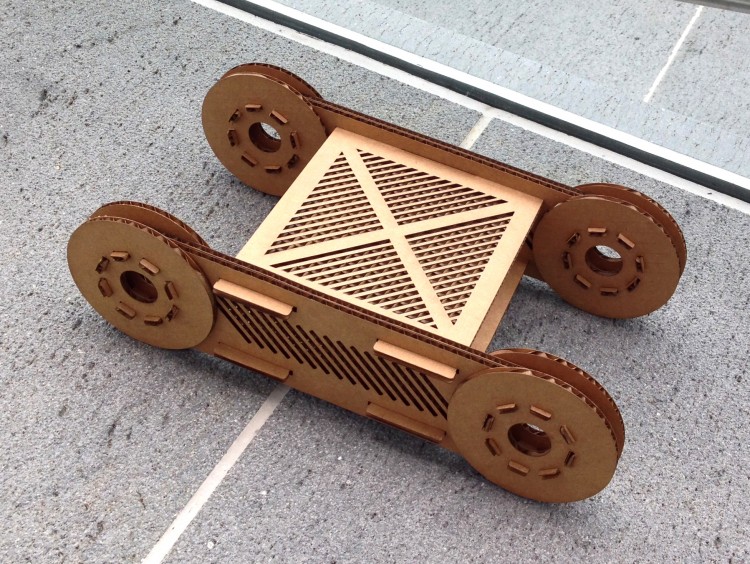
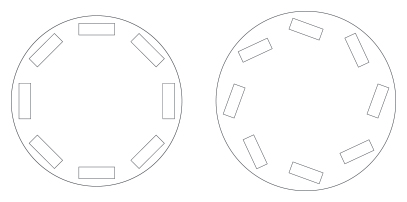
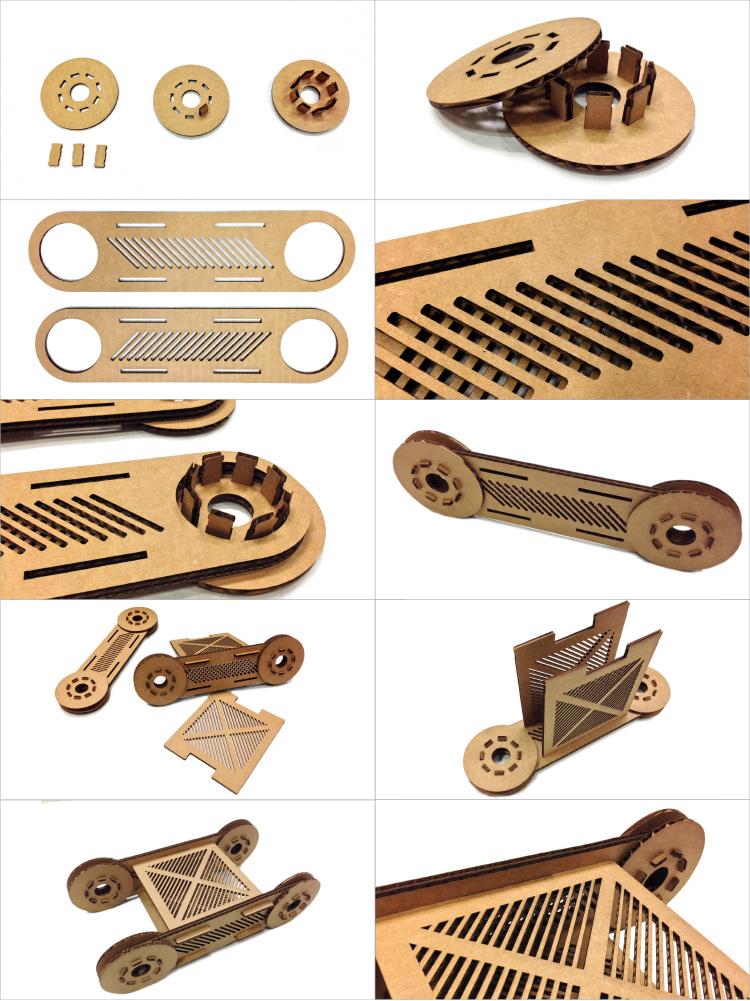
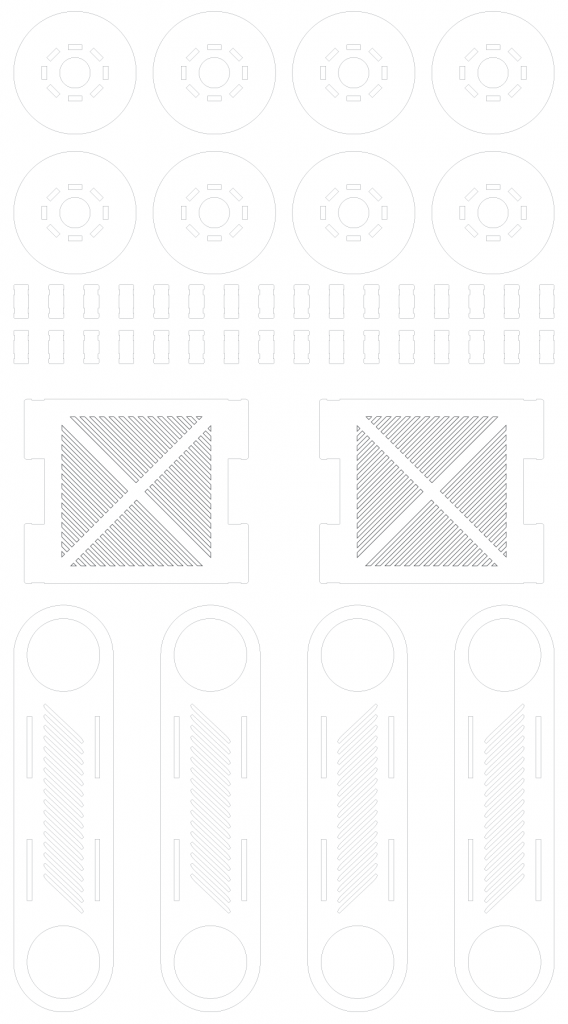
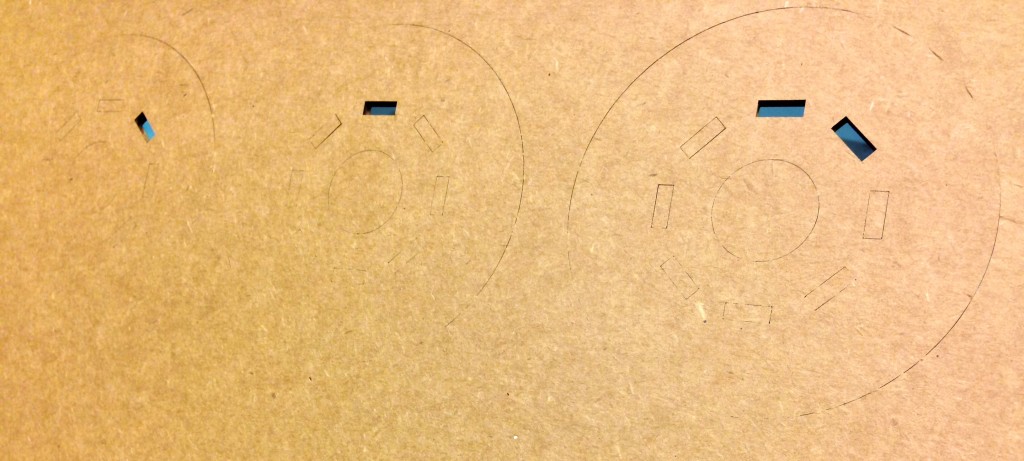
I challenge myself to make a small car that moves with only cardboard. I tried 2 types of bearing configuration, the one on the left seems to work the best. The one on the right gives too much friction and it’s hard to assemble. I did not use any 3D software, I sketched out all the parts and used inDesign to draw all the parts. Similar to illustrator, inDesign has a few functions that helps you align, distribute or duplicate certain parts of the drawing. I was able to use the hash pattern through out the entire car. Adobe InDesign can export the file straight to EPS, and you can have use the page to do the version control or sketching. The hairline setting in coreldraw is 0.216 pt inDesign, so once you import the file, there is no need to tweak the file before cutting.
I also create the locking or click in place key to secure the wheel position, so that when I assemble, I can feel that “click”, then the bearing pass through. The wheel assembly was the hardest part, because I had to fit 2 disks together, and align 8 pieces of inter locking bearing.
Assembly
Final Product
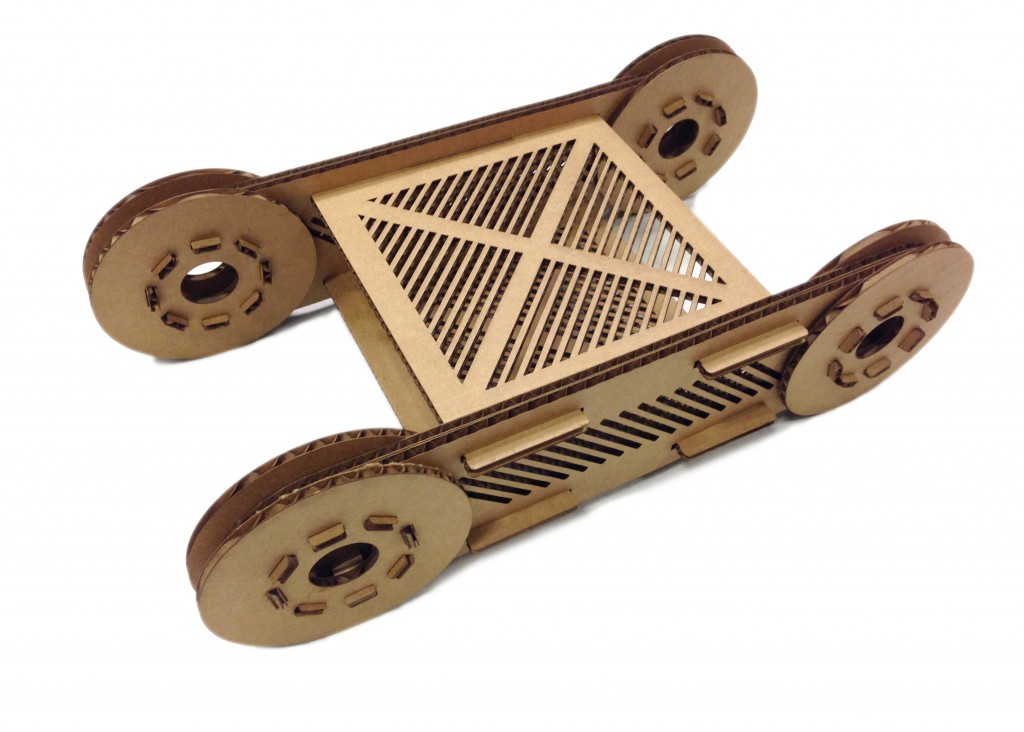
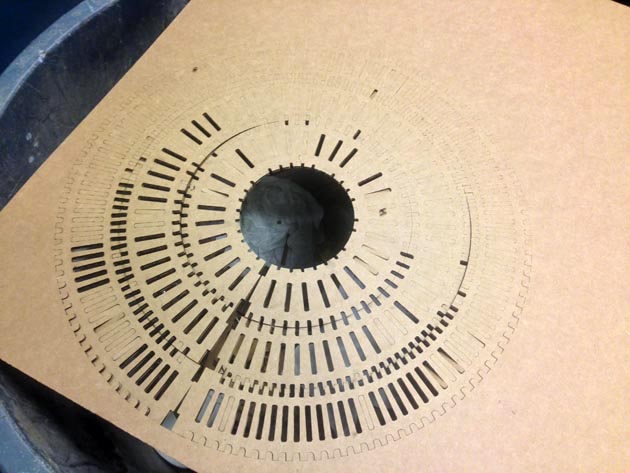
All the Pieces
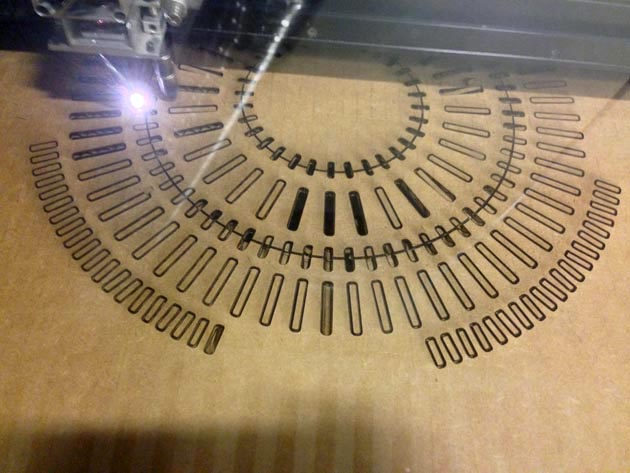
I used adobe inDesign to draw all the lines and I used “object transform again” to repeat the transform.
Tips & Ticks
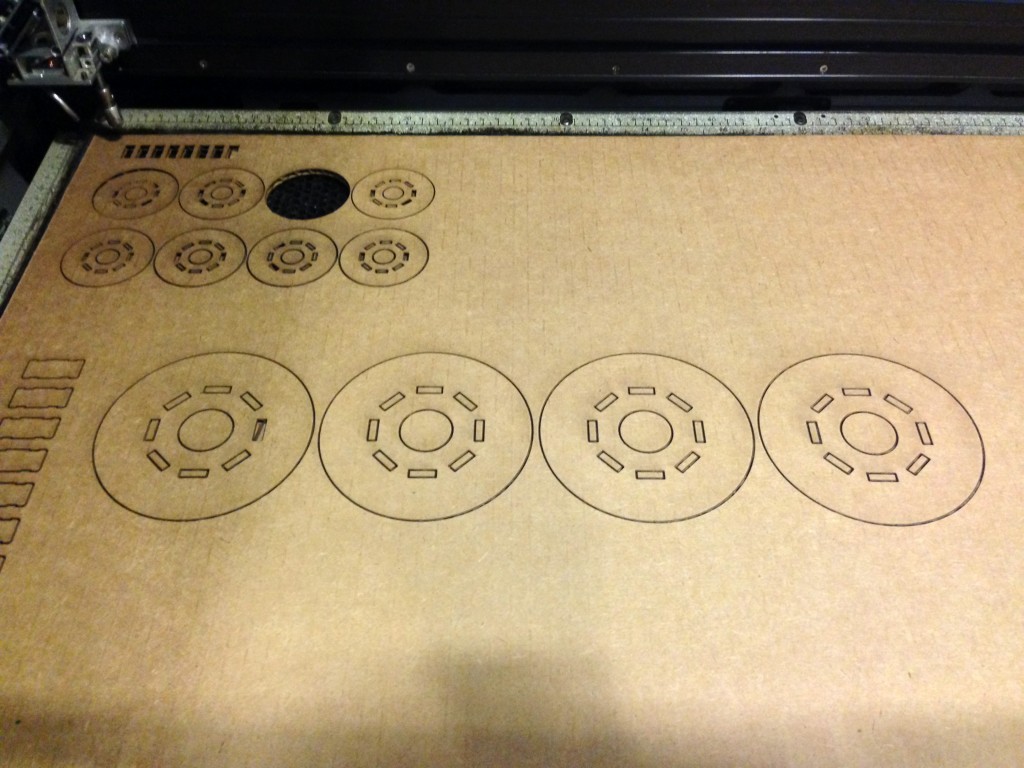
The laser cutter seems to have lesser power going from left to right due the lens alignment. You can manually align it using the align tool.
The cardboard is not flat, it bulges in the middle. I would print your work on the two low sides of the cardboard, or print on upper edge then flip it around. You can also do manual focus, and average out the high and low point. You can also double up the lines, so it will cut twice or increase the power of the laser by 10%.
Settings: I used 89/18 – 35/26/700 for my final setting, that seems to work, but the laser seems to power unevenly, reducing it’s power from left to right.
When the laser left a black dark lines, that means the power setting is too high.
I used the thickness of the cardboard as the opening of the slot, that seems to work very well with the “click lock”.
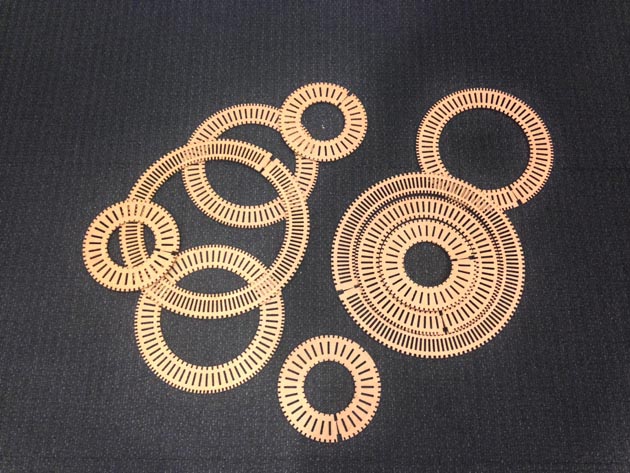
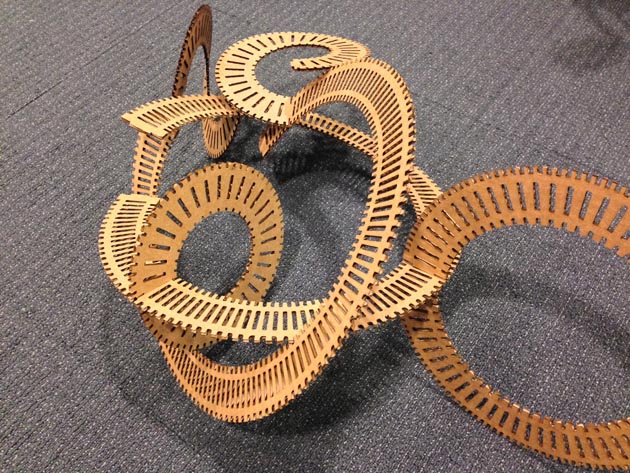
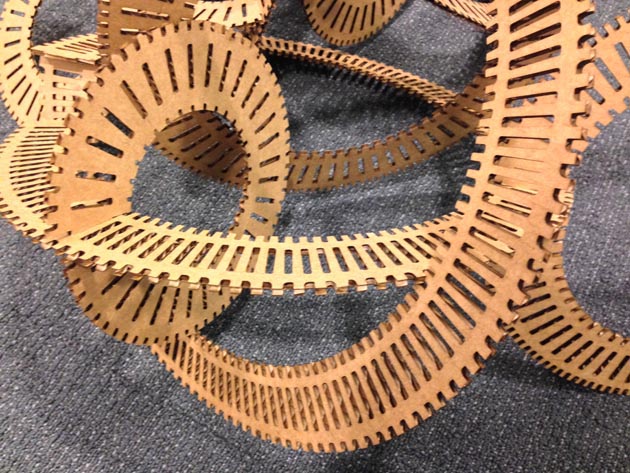
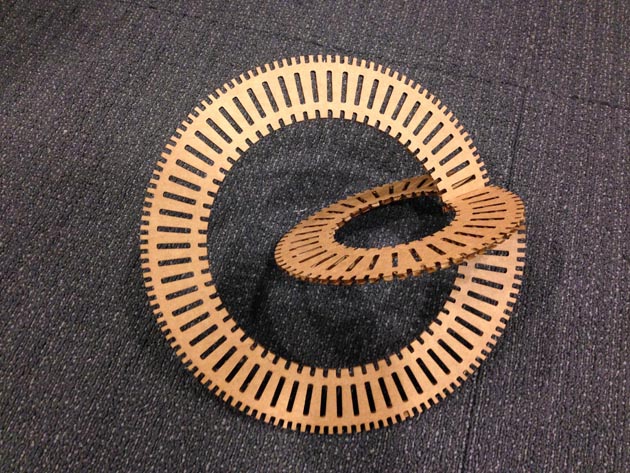
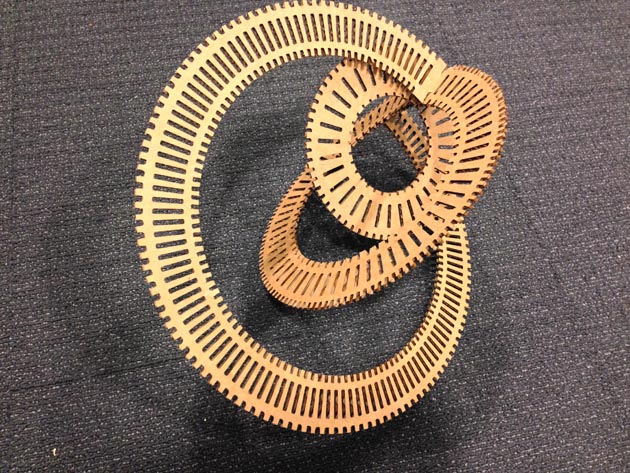
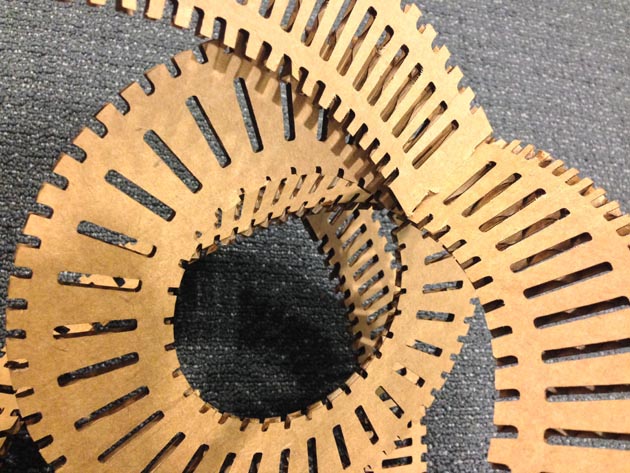
Interlocking Circle
After I made the Laser Car, it felt too predictable to assemble and doesn’t give the user the option to reconfigure to other shapes.
I decided to create a tool kit that is flexible for interlocking the pieces but force the user to create abstract shapes. By putting one circle inside of another circle, I saved some materials and at the same time creates the same pattern through out the design.
The user can interlock any parts of the shape to create a chain, wheel or abstract sculpture.