Electronics Production – Milling the FabISP
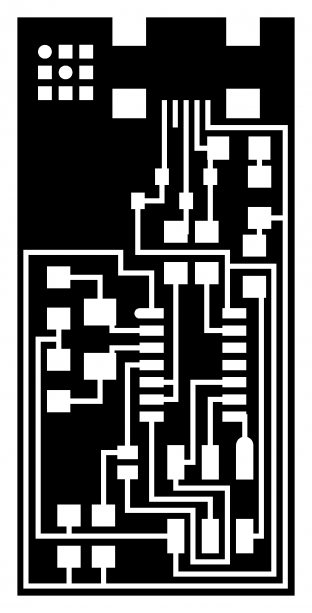
Board Layout
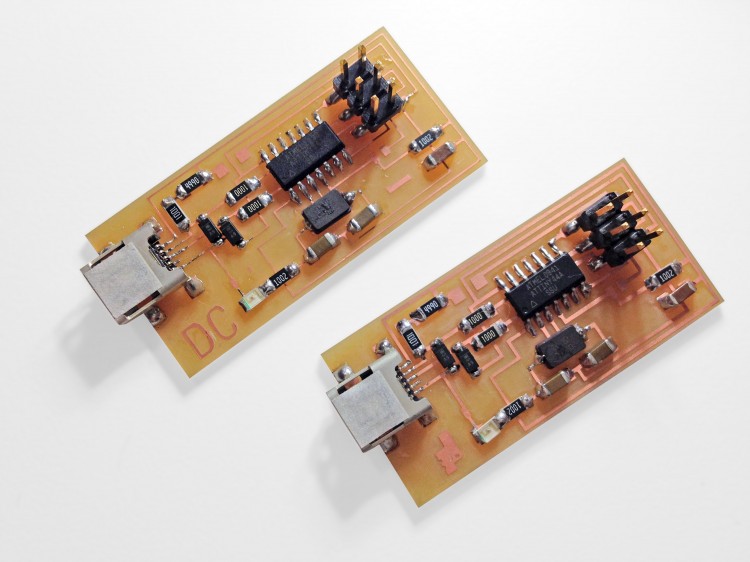
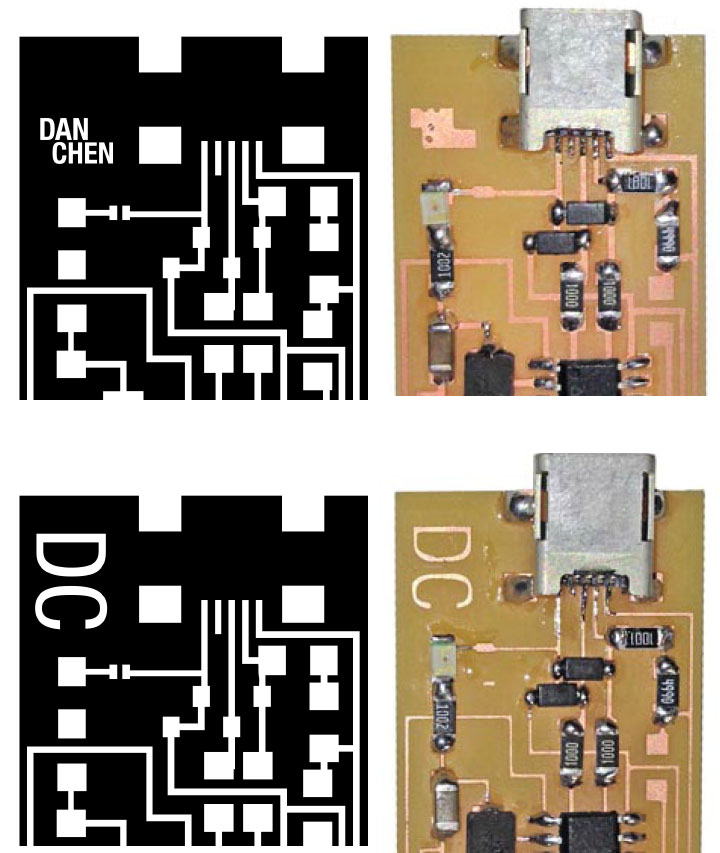
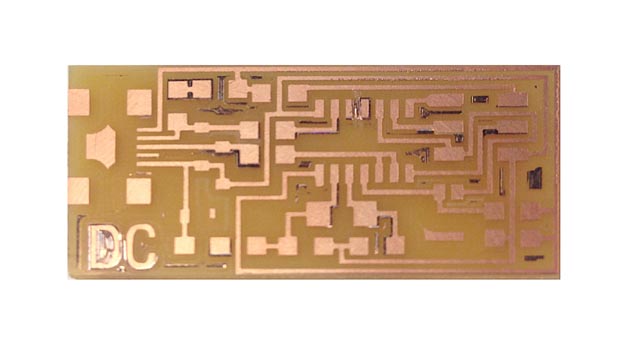
I took the template image and added my name on it using photoshop as my first board milling test. As shown below, the mill wasn’t able to cut small text, so be aware of the size of the wiring and graphics. I used -1 filling to cut the board nice and clean, but it will take you a while.
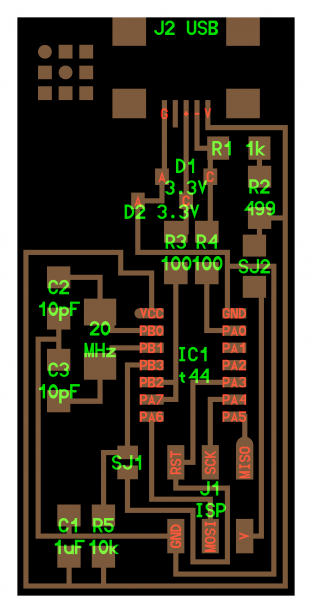
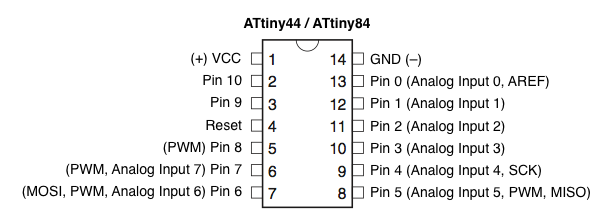
I looked up the data sheet for ATTINY44A-SSU-ND and decided to add a LED on pin 10 for easy on board debugging, thinking that Pin 10 is the digital Pin that I can just write “high”. I added a 10K resistor because I was not sure if they board is 3V or 5v. I figured that if the circuit does not work, I can cut the connection from ground. At the end, I realized that I can not blink Pin 10 like how I can blink pin 13 on Arduino so I needed to disconnect the ground to the LED. Later I realized that this board is for programing other boards, it is not for loaded the program to be run on, like an Arduino.
Issues with the drill bits
If the drill bit is not sharp, the cut out would look shiny or black. There might be parts are still connected but hard to see. Listen to the noise that the mill makes, you can hear the difference between the sharp bits or dull bits.
Soldering
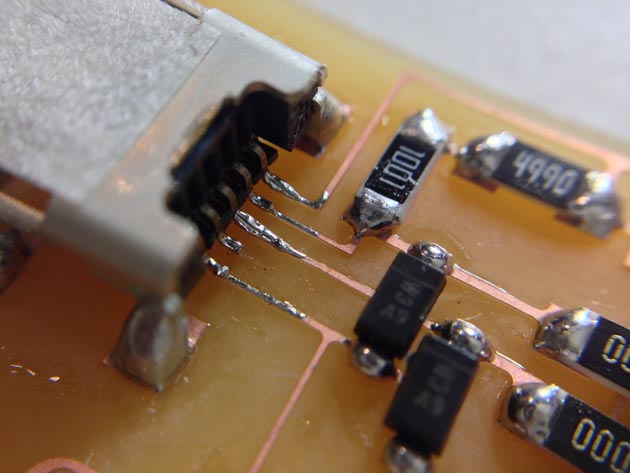
Soldering is the easy part, always keep your tool and work space clean with lots of light and tapes. The hardest part is probably soldering the mini USB port, where you need to over solder it just a little bit, then take the extra solder away.
Tips #1: Secure the parts with tapes, but exposes the part that you are soldering.
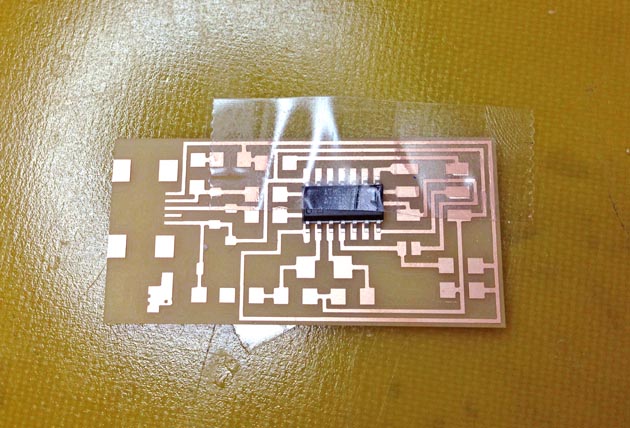
Tip #2: Working from center out, short to tall, small to big parts first. This way, when you are soldering, nothing is in the way. I used the highest temperature setting, and heat the leg of the IC and the copper board at the same time, then I bring in the solder. It take about 3 to 5 seconds to see the smooth and shiny surface, then I let go. Once you are done, clean it with brush and alcohol.
Tip #3: Assembling line. If you have 2 or more boards, it is always faster and easier to assemble one parts at a time for multiples of the same board.
Tip #4: Tape your board down at a comfortable soldering angle, This way, you can see better and reach with the soldering iron better.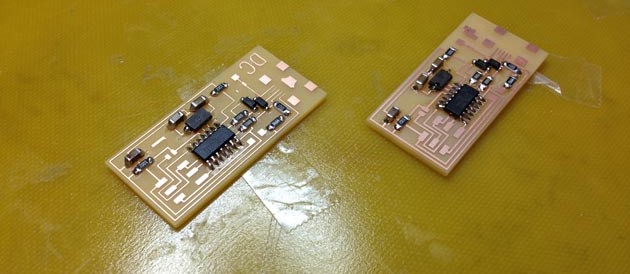
Tip #5: Not too much solder. In general, it is easier to add solder then cleanup solder. For the mini USB connector, you want to over solder it but just by a little bit or you will have a lot to clean up.
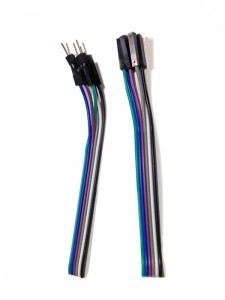
I ordered these jumper cables on amazon, they seem to work fairly well with the press fit connector. I used the desk drawer to clam the wires and it works perfect..
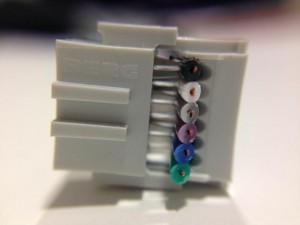
Once I label the connections, it is ready to be hookup and programmed.
Programing
I purchased SainSmart USB ISP Programmer for ATMEL AVR ATMega ATTiny 51 Board
I learned that you can not program the board with FTDI or the BUD from Modern Device, which is how I used to load programs from Arduino IDE to program Atmega328P
I used this tutorial to load the firmware, you only need to do this once.
http://academy.cba.mit.edu/content/tutorials/05_Electronics_Production/Assemble_and_Program_FabISP.html
http://fab.cba.mit.edu/content/projects/fabisp/
[fuse] Error 1
I tried to load the firmware for the first time, however it gave me this error at the end.
avrdude -c avrisp2 -P usb -p attiny44 -U hfuse:w:0xDF:m -U lfuse:w:0xFF:mavrdude: AVR device initialized and ready to accept instructionsReading | ################################################## | 100% 0.01savrdude: Device signature = 0x1e9207
avrdude: reading input file “0xDF”
avrdude: writing hfuse (1 bytes):Writing | ################################################## | 100% 0.00savrdude: 1 bytes of hfuse written
avrdude: verifying hfuse memory against 0xDF:
avrdude: load data hfuse data from input file 0xDF:
avrdude: input file 0xDF contains 1 bytes
avrdude: reading on-chip hfuse data:Reading | ################################################## | 100% 0.00savrdude: verifying …
avrdude: 1 bytes of hfuse verified
avrdude: reading input file “0xFF”
avrdude: writing lfuse (1 bytes):
Writing | ################################################## | 100% 0.01s
avrdude: 1 bytes of lfuse written
avrdude: verifying lfuse memory against 0xFF:
avrdude: load data lfuse data from input file 0xFF:
avrdude: input file 0xFF contains 1 bytes
avrdude: reading on-chip lfuse data:
Reading | ################################################## | 100% 0.00s
avrdude: verifying …
avrdude: 1 bytes of lfuse verified
avrdude: safemode: Fuses OK
avrdude done. Thank you.
ubuntu:fabISP_mac.0.8.2_firmware$ sudo make program
avrdude -c avrisp2 -P usb -p attiny44 -U flash:w:main.hex:i
avrdude: stk500v2_command(): command failed
avrdude: stk500v2_program_enable(): bad AVRISPmkII connection status: Unknown status 0x00
avrdude: initialization failed, rc=-1
Double check connections and try again, or use -F to override
this check.
avrdude done. Thank you.
make: *** [flash] Error 1
ubuntu:fabISP_mac.0.8.2_firmware$ sudo make fuse
avrdude -c avrisp2 -P usb -p attiny44 -U hfuse:w:0xDF:m -U lfuse:w:0xFF:m
avrdude: stk500v2_command(): command failed
avrdude: stk500v2_program_enable(): bad AVRISPmkII connection status: Unknown status 0x00
avrdude: initialization failed, rc=-1
Double check connections and try again, or use -F to override
this check.
avrdude done. Thank you.
make: *** [fuse] Error 1
ubuntu:fabISP_mac.0.8.2_firmware$
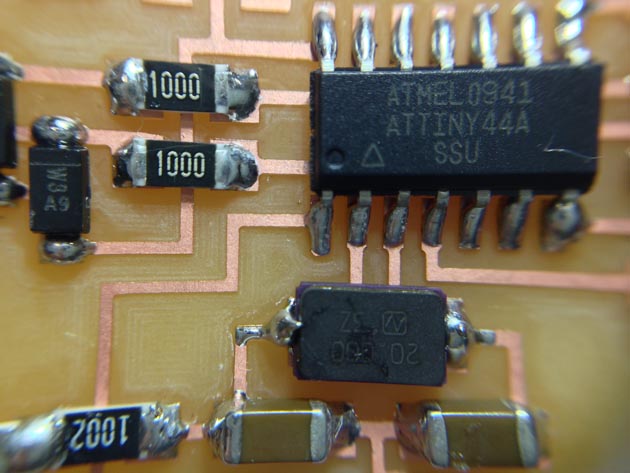
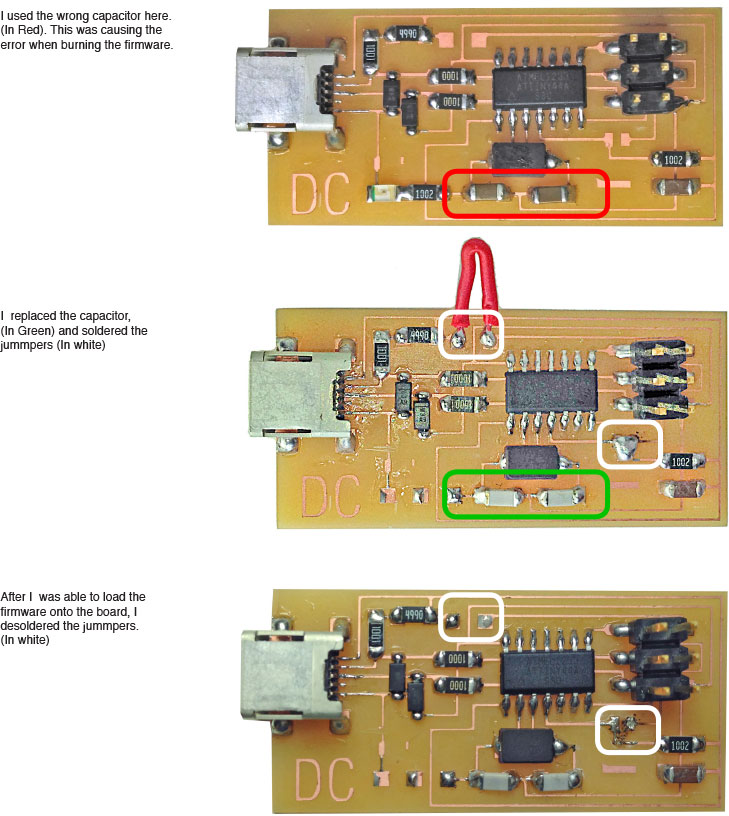
I went back and check my board and realized that I missed placed 10pF with 10uF. I reheat the joint and push the board against the table several time to get the wrong component out.
After replacing the component with the correct one, I was able to get the firmware load successfully.
How I fix the board
Use FabISP to program blank ISP
http://academy.cba.mit.edu/content/tutorials/05_Electronics_Production/Assemble_and_Program_FabISP.html to load the firmware from FabISP to my un-programmed ISP.
Before you do that please make sure
#1 Desolder the new FabISP in 2 spots
#2 If using the USBtiny programmer or another FabISP makefile in firmware folder
– Remove the “#” in front of the line with “usbtiny” in it
– Add a “#” to beginning the line with the “avrisp2″ in it to comment it out.
– save the Makefile